Seashell Nativity Craft Project

Seashell Nativity Craft

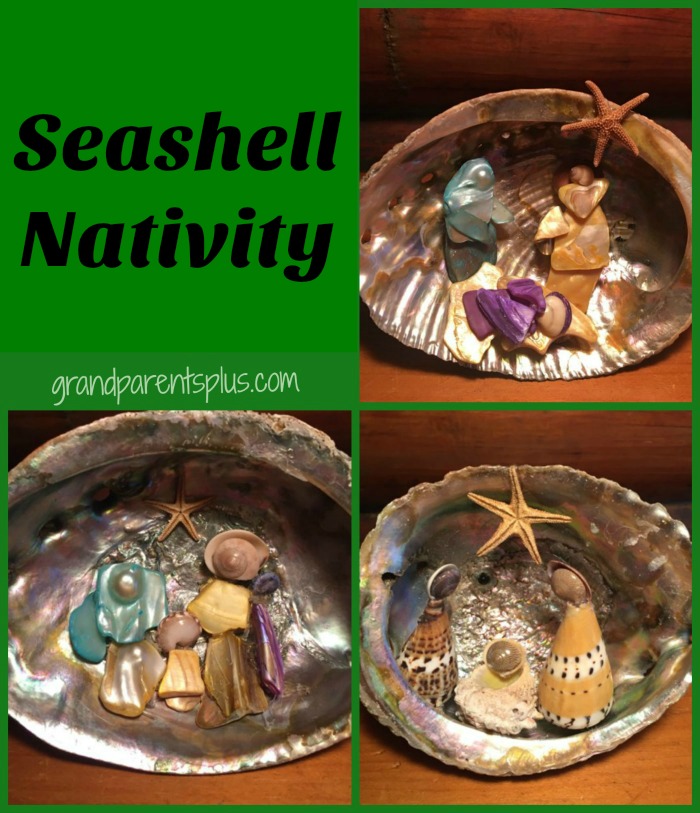
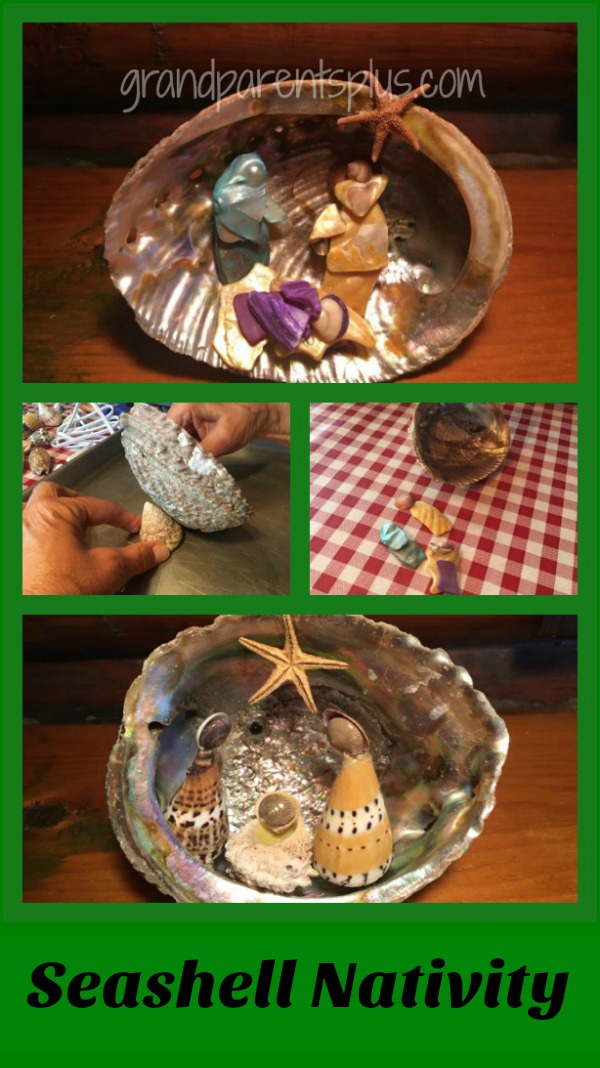
Have you ever taken a vacation by the ocean or gulf and collected seashells at the beach? Then, you wondered how to use them? This Seashell Nativity Craft is a wonderful way to use them and makes a Christmas keepsake!

Seashell Nativity grandparentsplus.com


Of course you can use shells on a mirror, etc., but in Northern climates, they don’t quite fit in. This Seashell Nativity will last for years and provide memories of your trip and of the reason for the Christmas season.

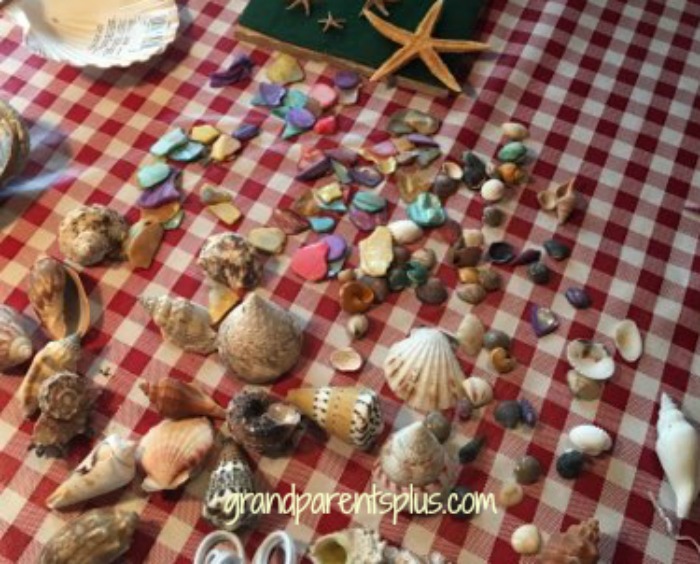
No trip? You can buy a bag of shells at Joann Fabrics that works just fine! That’s what I did! Save the airfare! The Abalone shells are available at the craft stores, too. I suggest using a coupon as they are not cheap!

It’s like a puzzle! Try different shells to create the three Nativity figures. Broken pieces work well, too. Kids will need some help with this project so work along with them as necessary.

Seashell Nativity www.grandparentsplus.com

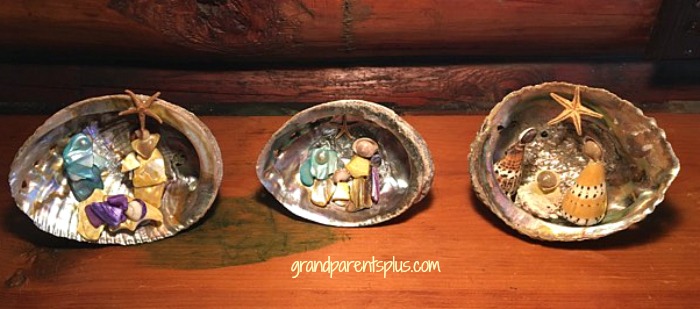
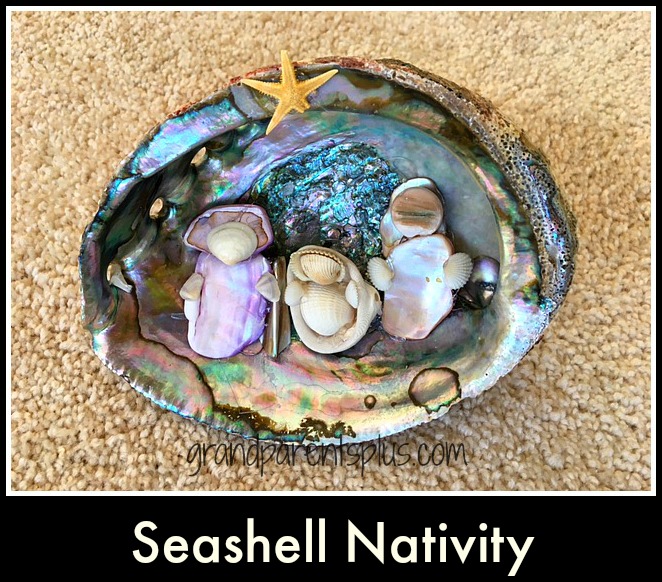
When you have it the way you like, use the hot glue gun to secure the shells and add to the Abalone shell. This Abalone shell works the best because it has depth and the iridescent inside makes a beautiful background.


Seashell Nativity www.grandparentsplus.com


Seashell Nativity Craft www.grandparentsplus.com


When you have it the way you want it, glue a seashell on the back to make it stand up. (see picture below) The star is a small dried starfish. They are available in a packet at Michael’s or any craft store. They are very fragile so be careful handling them. Placing it inside the shell protects it from breaking. Notice how one person tipped the shell a different way to place the star inside. There’s no perfect way, just be creative!


Seashell Nativity grandparentsplus.com


These were made in the summer as a fun cabin project. Don’t wait until Christmas!

Enjoy!

Phyllis

You may want to look for other Nativity projects on my site.

DIY Best Nativity Projects,

Vintage Trunk with a Nativity,

Follow on Pinterest, too!

Posted in Art Project, Christmas, Crafts, Holidays | Tagged , , , , , , , , , , , | Leave a comment

Arizona Chicken – Easy Chicken Dish

Arizona Chicken Recipe –  A Quick and Easy Chicken Dish!

What an absolutely, delicious and easy chicken dish for your family or company. It looks beautiful and tastes fantastic! You can make it mild or as spicy as you like. This Arizona Chicken recipe has only a few ingredients and takes less than 10 minutes to put together. Keep the ingredients on hand for when you’re in a time crunch!

Arizona Chicken - www.grandparentsplus.com

This may become a family favorite. It is for mine!

Arizona Chicken Recipe

1.    1 can Cream of Chicken Soup or Cream of Mushroom Soup

2.    1 small jar of picante sauce ( mild, medium or spicy)

3.     1 can of chicken broth

4.     1/2 c. shredded Mozzarella cheese

5.      1/2 c grated Cheddar cheese

6.      sliced black olives (optional)

7.       Crushed nachos and chopped parsley (optional)

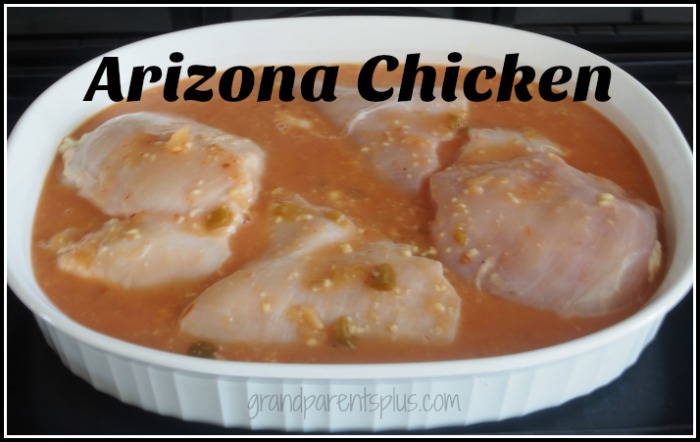
Step 1: Mix the Cream of Chicken or Cream of Mushroom soup, picante sauce, chicken broth, and pour over chicken in a greased pan.

Arizona Chicken www.grandparentsplus.com

Step 2

Bake @ 350 until chicken is done. ( approx. 30-40 minutes) Time depends on the size of the breasts and thickness. Use an oven thermometer to check temp.

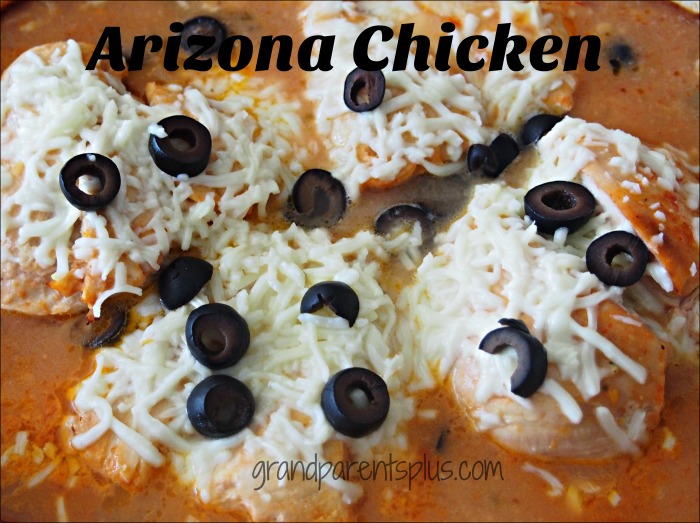
When done, add cheese and olives (optional) and bake until melted.

Arizona Chicken www.grandparentsplus.com

This recipe is also wonderful to use when entertaining a large group. There’s no breading. Merely place the chicken in a pan, pour the sauce over it, and bake. We’ve served Arizona Chicken at our church for over 450 people and they loved it.

For eye appeal, we added crushed nacho chips and chopped parsley on top.

Arizona Chicken - www.grandparentsplus.com

Serve Arizona Chicken with any type of rice, noodles, or quinoa. Add a vegetable of your choice.

This recipe has great eye appeal along with being so delicious!

Arizona Chicken www.grandparentsplus.com

This is a “must try” recipe!

Enjoy!

Phyllis

This post is linked to many of the following parties….

Posted in Main Dishes, Recipes | Tagged , , , , , , , | 2 Comments

Spring Decorating Idea House – Part 2


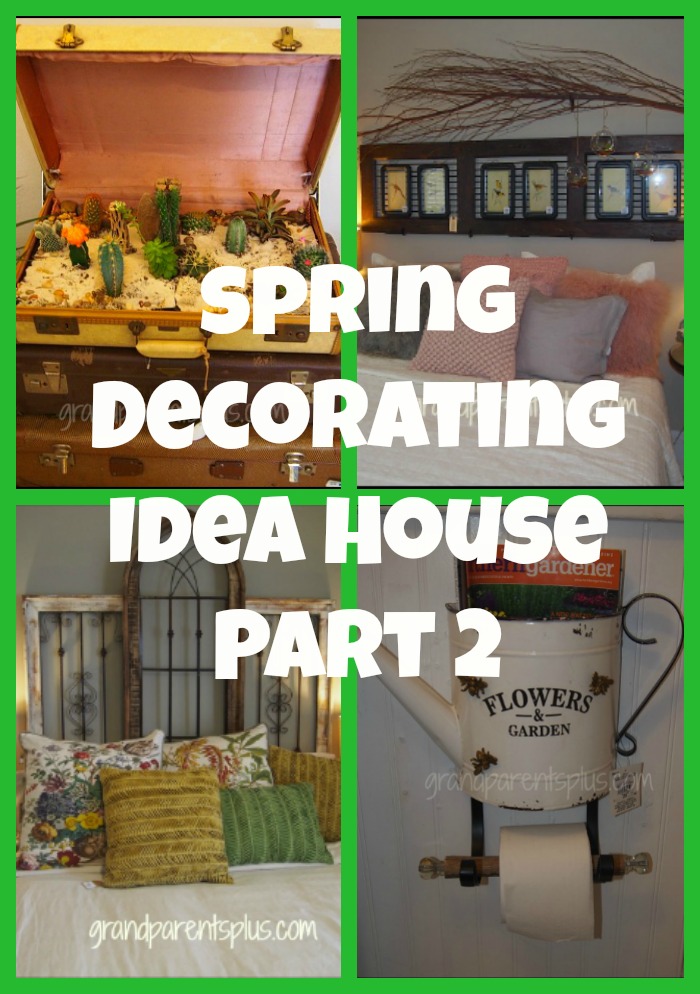
Looking for some stylish decorating ideas to change-up your decor? This is the second part of new trends, repurposed treasures, and unique ideas that come from a Spring Idea House. This house, decorated by a team of decorators, is labeled “Spring”. However,  these ideas will work through any season. Hope you find some inspiration!

Spring Decorating Ideas - Part 2 www.grandparentsplus.com

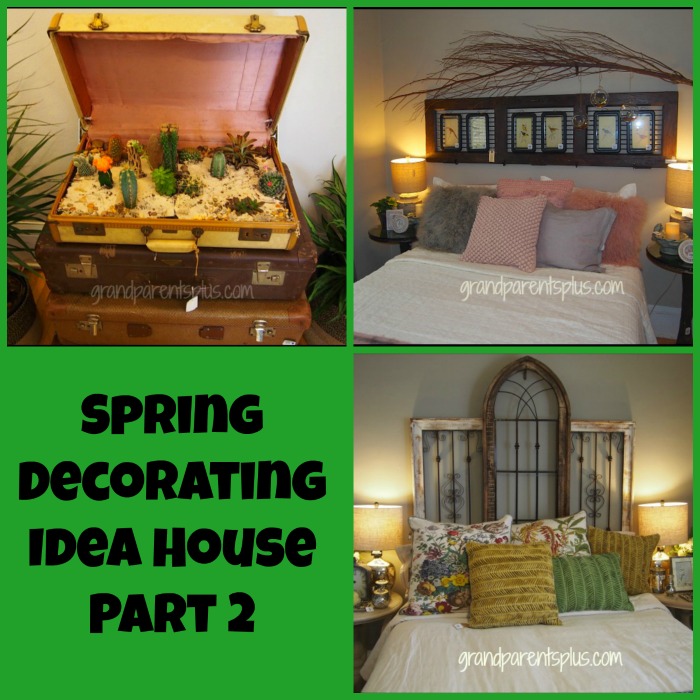
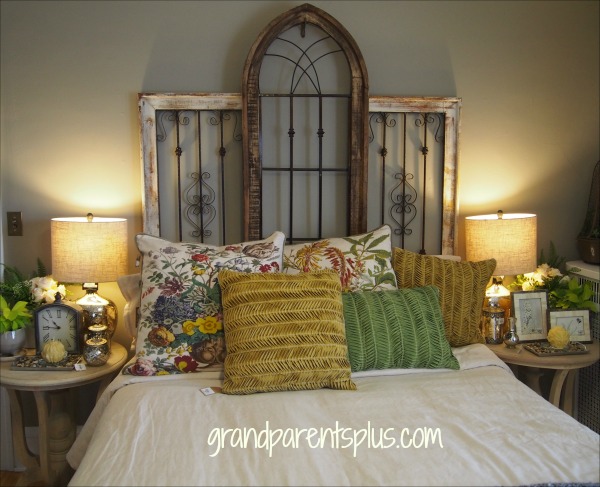
The first of the decorating ideas is a headboard. It’s made out of a combination of wall decor items put together for one unique look. It certainly gives this bedroom a “wow” factor! There’s even a mixture of finishes used, but together they look great.

Spring Decorating Ideas - Part 2 www.grandparentsplus.com

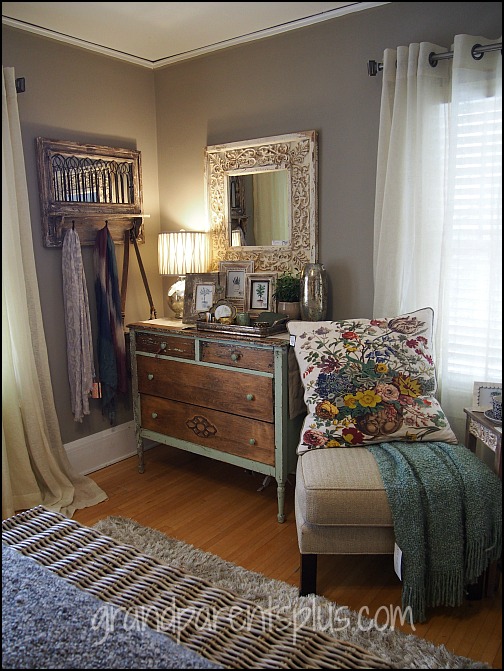
On the opposite wall, the vintage dresser is finished with wood stained drawers and contrasted with a chalk paint exterior. I like the look, don’t you?

Spring Decorating Idea House www. grandparentsplus.com

This next idea works for both this headboard look or use on any long wall. Six bird pictures hang together in black metal frames. The outer frame is constructed from wood and makes look like it is framed all in one piece. Painted black lines highlight and give texture to the area behind the pictures. It is topped off by a large tree branch gracefully hanging over the arrangement. The headboard idea comes together for a very different look.  Spring Decorating Ideas - Part 2 www.grandparentsplus.com

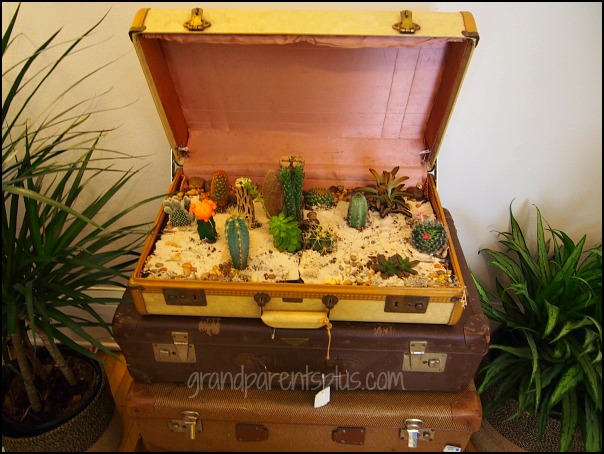
Succulents are very “in” right now. The next room has a unique idea for a succulent garden. Line a vintage suitcase, add sandy soil, and plant the succulents. During those long, cold winter days, stay warm by imagining a hot desert! Guess I’d call it a  “succulent garden-to-go”!

Spring Decorating Idea House www.grandparentsplus.com

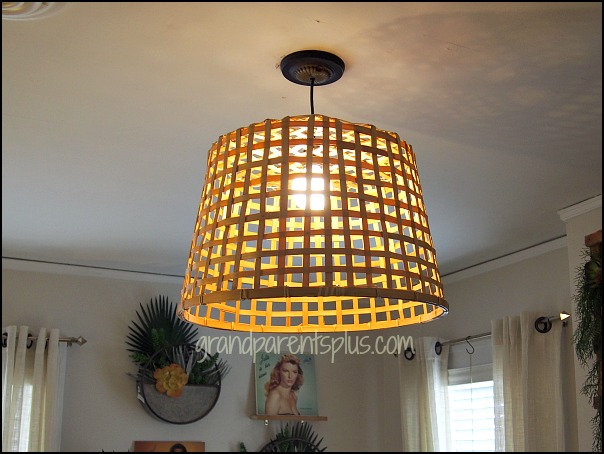
The light in the ceiling is a simple rattan basket with a hole cut for the light fixture. You now have a one-of-a-kind light fixture!

Spring Decorating Idea House www.grandparentsplus.com

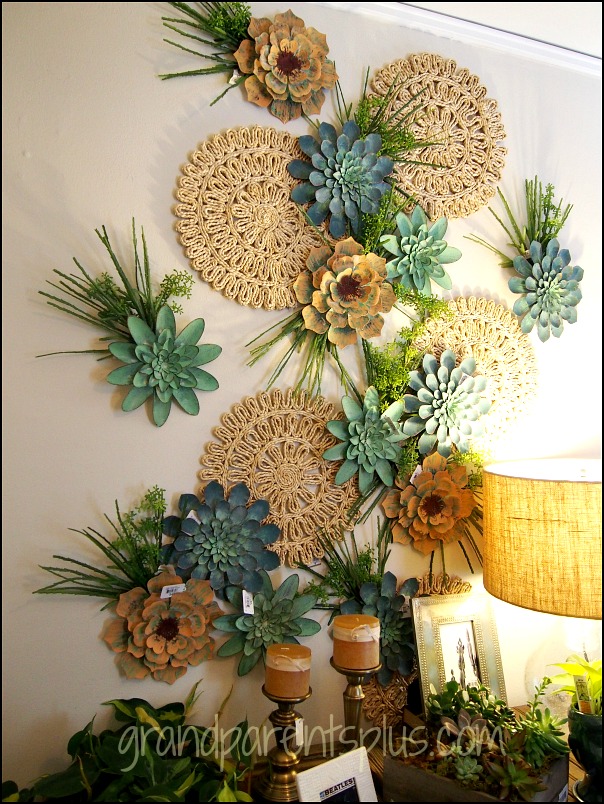
The use of rattan placemats adds a lot of texture and design to this succulent wall arrangement. This is a very large arrangement, but it gives you another idea for using artificial succulents on a wall.  Using just part of this arrangement works in a smaller area.

Spring Decorating Idea House www.grandparentsplus.com

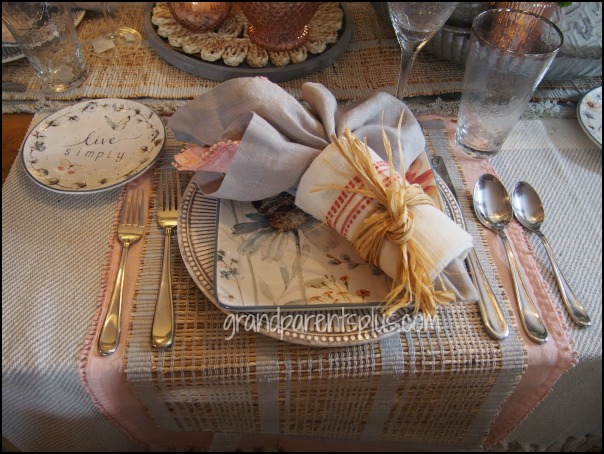
I always like to include a dinner arrangement, too. The napkins are tied with a simple twist of raffia. It looks beautiful, but doesn’t cost much to do.

Spring Decorating Idea House www.grandparentsplus.com

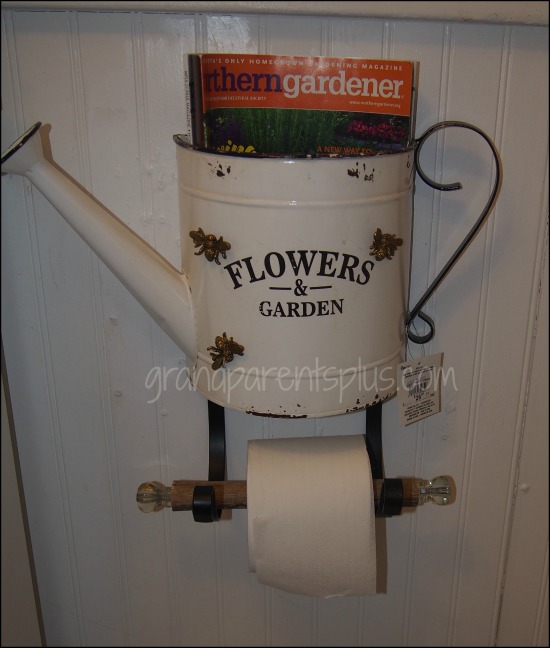
The last idea is to bring the garden into the bathroom. This idea is a totally unexpected use for a watering can!

Spring Decorating Idea House www.grandparentsplus.com

As I said, these ideas are for any season, anytime, and anywhere. I hope you found some inspiration!

Happy Decorating!

Phyllis 

Did you miss Part 1?  Be sure to check it out!

Posted in Decor | Tagged , , , , , , , , , , , , , | Leave a comment

Spring Decorating Idea House – Part 1

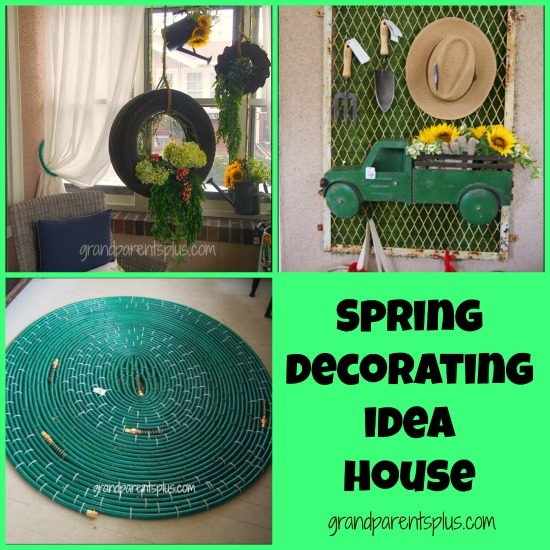
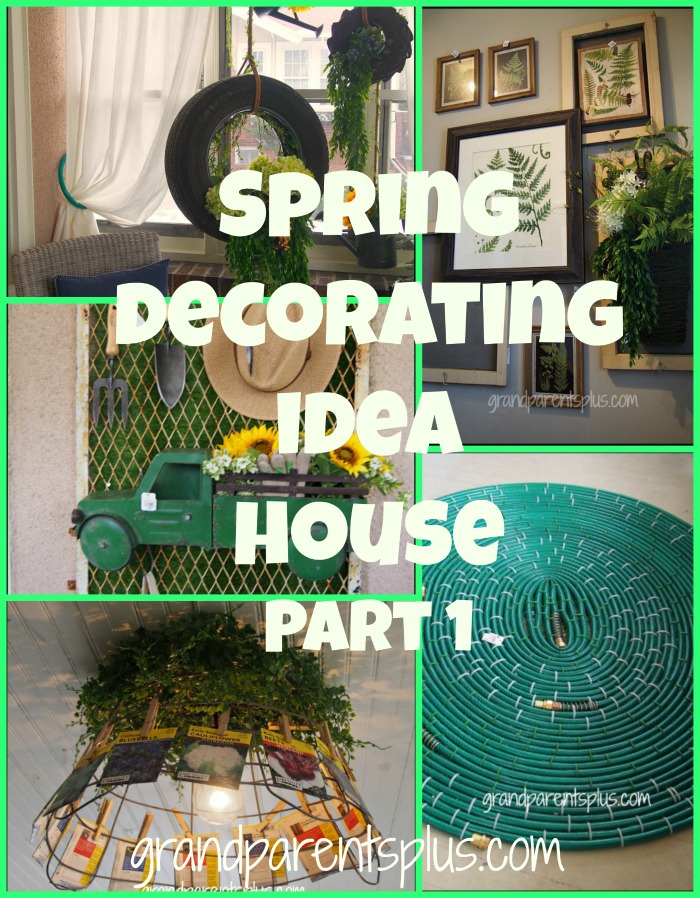
Three seasons a year, this idea house is decorated by a team of designers to highlight trends, re-purposed items, and seasonal ideas. This Spring Decorating post is the first of two posts containing many Spring ideas from this home. Hope you enjoy the ideas I have featured.

Spring Decorating Idea House - Part 1 www.grandparentsplus.com

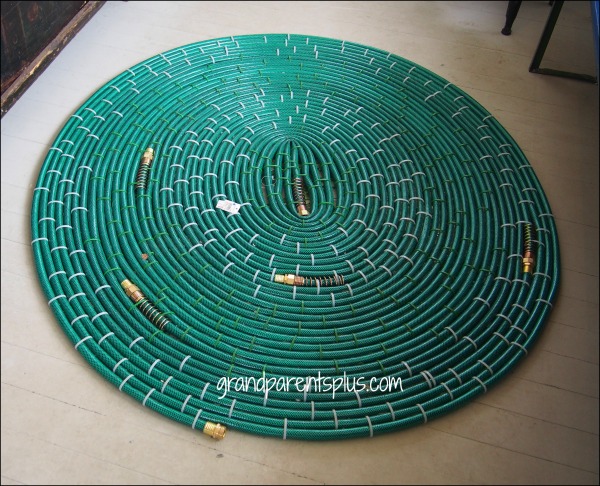
When thinking of Spring Decorating,thoughts of gardening naturally come to mind. Someone thought of this unusual idea! Well, using a garden hose as an area rug is different and really makes a statement. It’s truly an “out of the box” idea for a garden-themed room.

Spring Decorating Idea House - Part 1 www.grandparentsplus.com

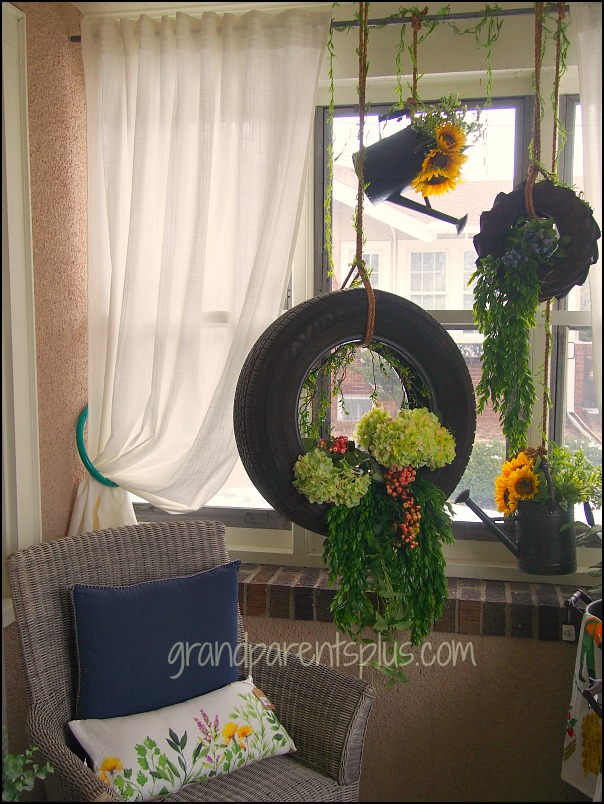
Notice the pieces of garden hose used as curtain tie-backs, too. Old tires filled with floral arrangements become part of the garden display as well.

Spring Decorating Idea House - Part 1 www.grandparentsplus.com

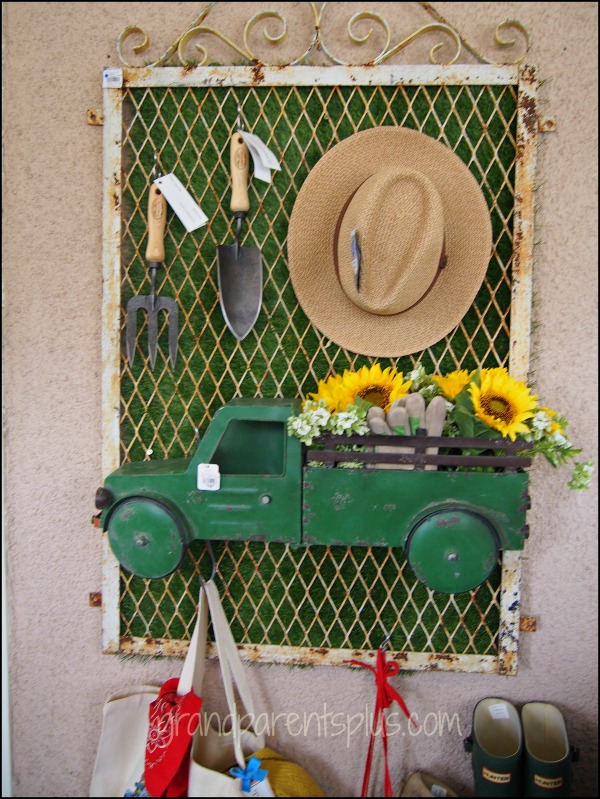
A re-purposed, metal garden gate becomes an interesting backdrop for a wall display. Behind the gate is artificial grass. It gives a nice, textured, color background for the attached items.

Spring Decorating Idea House - Part 1 www.grandparentsplus.com

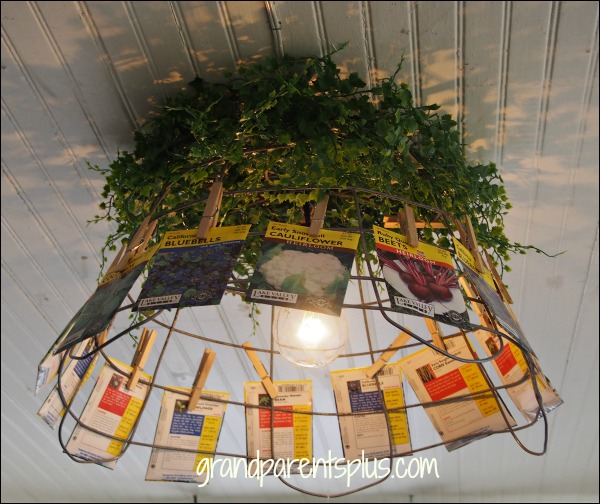
Another Spring Decorating idea with a garden theme is the ceiling light.  An upside down, old metal garden basket surrounds the light.  Artificial greenery is at the top and seed packets decorate the edges.

Spring Decorating Idea House - Part 1 www.grandparentsplus.com

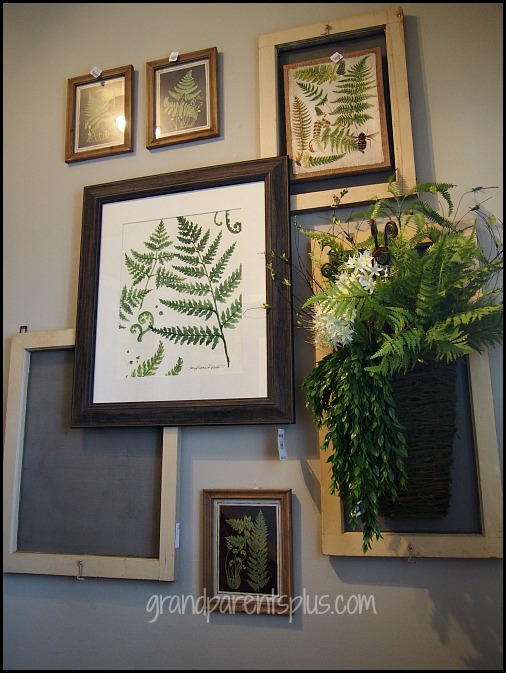
Large display walls in the hallway use old screens as a background accent.

Spring Decorating Idea House - Part 1 www.grandparentsplus.com

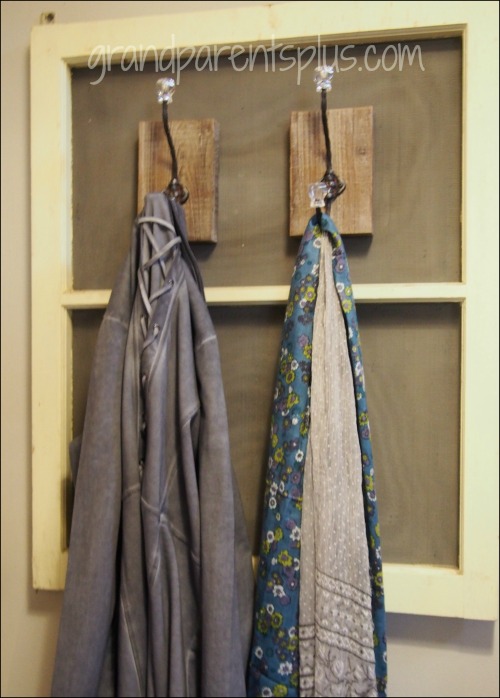
Here they used a small vintage screen and simply accented it with a pair of hooks.

Spring Decorating Idea House - Part 1 www.grandparentsplus.com

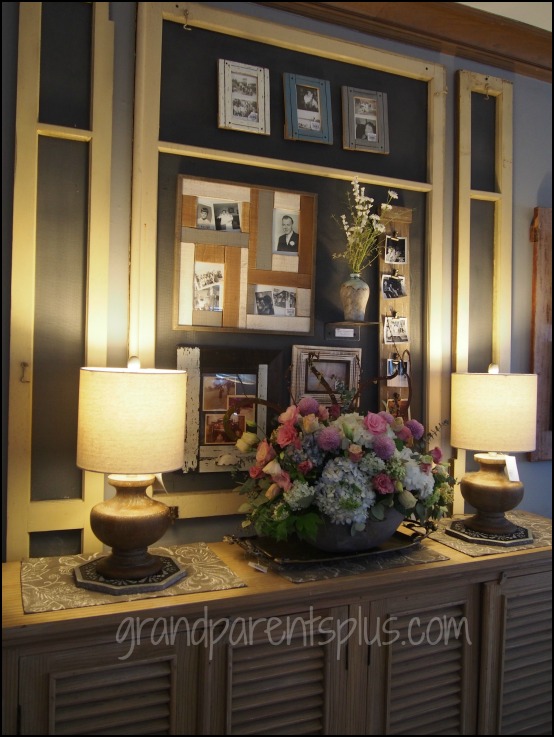
Three vintage screens the same height make a dramatic backdrop for a display of smaller items.

Spring Decorating Idea House - Part 1 www.grandparentsplus.com

Have you used old vintage screens in your decorating?

Spring Decorating Idea House - Part 1 www.grandparentsplus.com

Be sure to check back for Part 2! There’s more Spring Decorating Ideas to come.

Phyllis


This post is linked to many of these parties….


Posted in Decor, Garden | Tagged , , , , , , , , | 3 Comments

The Bleeding Heart Flower and the Cinderella Story

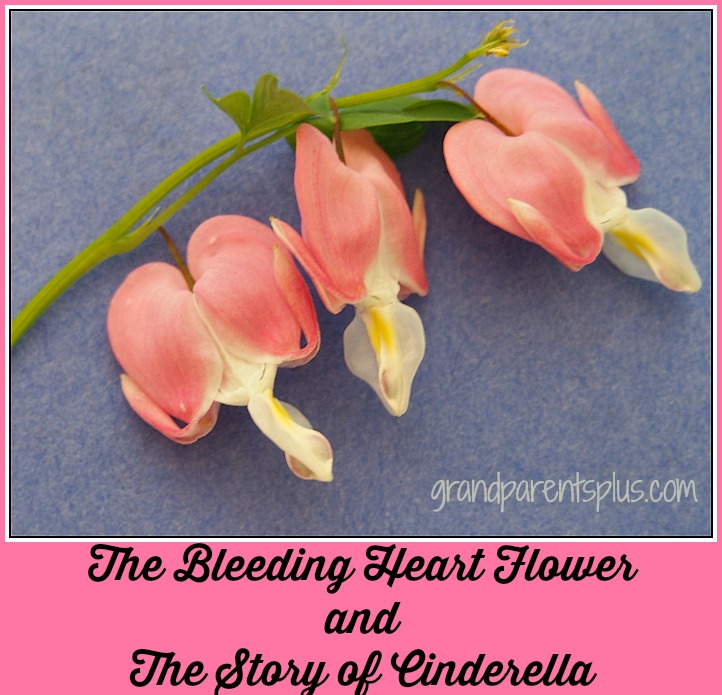
The Pink Bleeding Heart, one of my favorite flowering plants, is one of the first plants to bloom in the spring. It has lovely, heart-shaped flowers that are arrayed along arching stems like a string of pearls. It has a drop at the bottom that makes it seem to be bleeding. Let me tell you “The Story of the Bleeding Heart Flower” and “The Story of Cinderella” that lies within the flower.

The Bleeding Heart Flower and the Story of Cinderella grandparentsplus.com

My mother told this story to me, I told it to my children and grandchildren as well. You may want to tell it to your children, too.

Once upon a time, there was a young girl named Cinderella. She lived with her mean stepmother and step-sisters. They treated her so poorly that she felt like her heart would break from their treatment of her.

One day, a handsome price decided to have a ball and invite all the girls of the land. He wanted to find a beautiful girl to be his bride. Cinderella dreamed of going to the ball, wearing a beautiful ball gown with a puffy top, just like the pink part of the Bleeding Heart Flower.

When we carefully take apart the flower, we see more of the story inside.

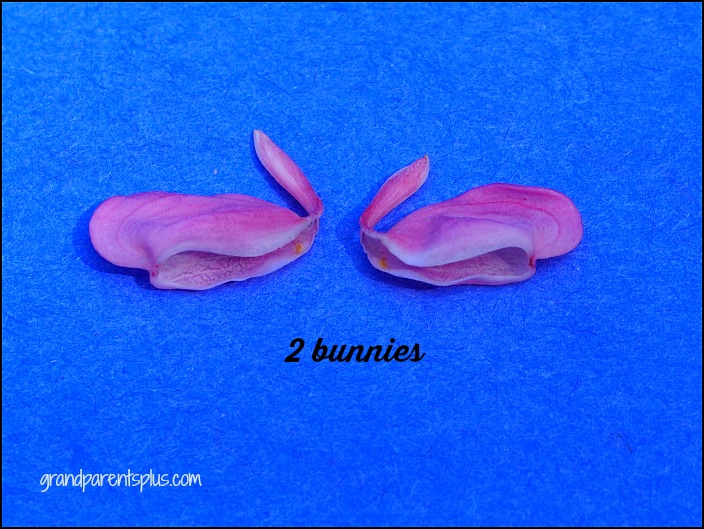
The night of the ball, the stepmother and step-sisters left early, all dress in their party finery. Cinderella stayed home alone. The mice and bunnies kept her company.

The Bleeding Heart Flower and the Story of Cinderella grandparentsplus.com

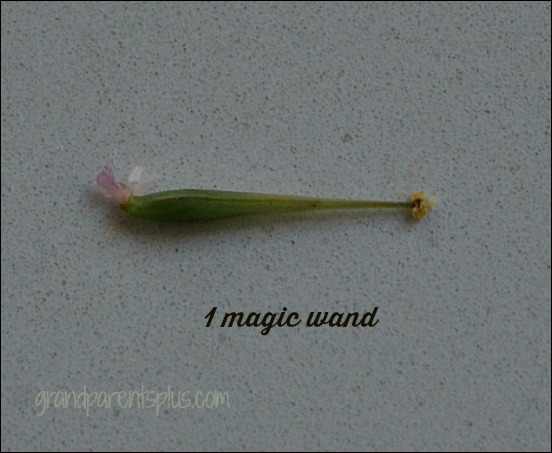
Suddenly, the fairy godmother appeared and with her magic wand and she dressed Cinderella in the beautiful ball gown she had dreamed of wearing.

The Bleeding Heart Flower and the Story of Cinderella grandparentsplus.com

Her two pet bunnies hopped in delight.

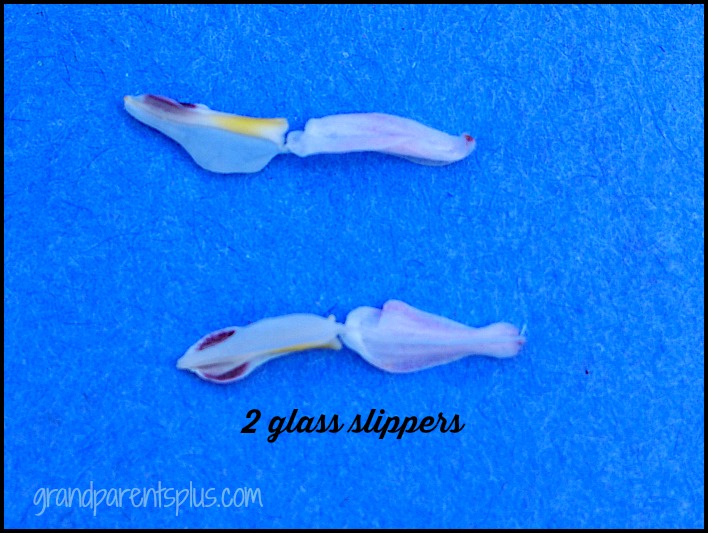
Next, two lovely glass slippers were placed on Cinderella’s feet.

The Bleeding Heart Flower and the Story of Cinderella grandparentsplus.com

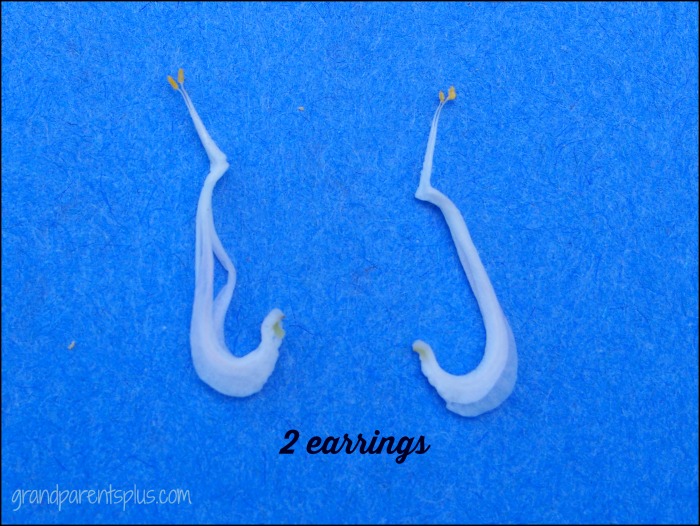
Lastly, a pair of beautiful earrings appeared on her dainty ears.

The Bleeding Heart Flower and the Story of Cinderella grandparentsplus.com

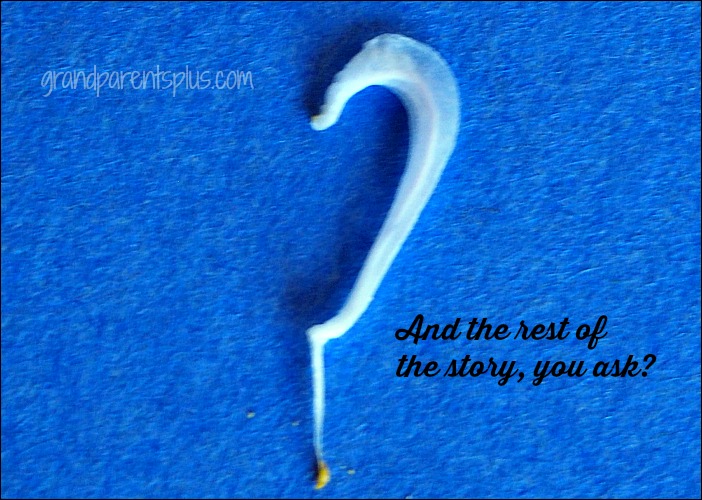
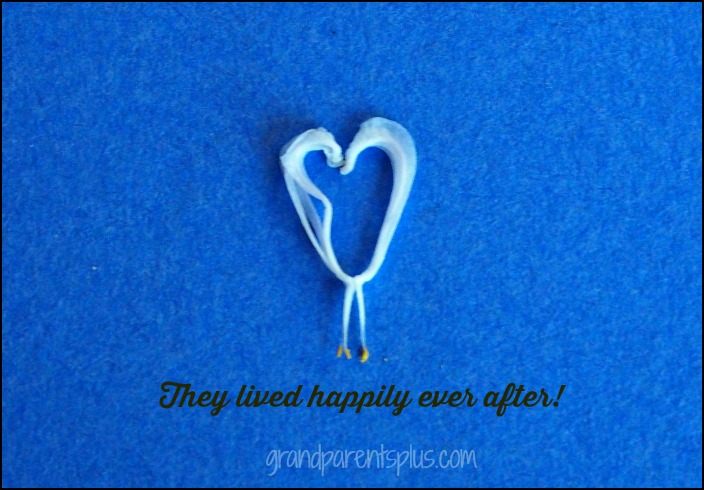
With another wave of the magic want, Cinderella was off to the ball. She met the prince, and they danced until midnight. And the rest of the story you ask?

The Bleeding Heart Flower and the Story of Cinderella grandparentsplus.com

Well, as in all fairy tales, they lived happily ever after!

The Bleeding Heart Flower and the Story of Cinderella grandparentsplus.com


There is a Japanese version of the Bleeding Heart Story, but it has a tragic ending and I prefer the one I pictured to tell to children.

Have fun telling this sweet version to your children.

Enjoy!

Phyllis

Subscribe on the sidebar so you don’t miss a post! Your email is never shared or sold.

Follow on Pinterest, too!

This post is linked to many of the following parties….

Posted in Garden, Misc. posts | Tagged , , , , | Leave a comment

Container Gardening – Thrill, Fill, Spill

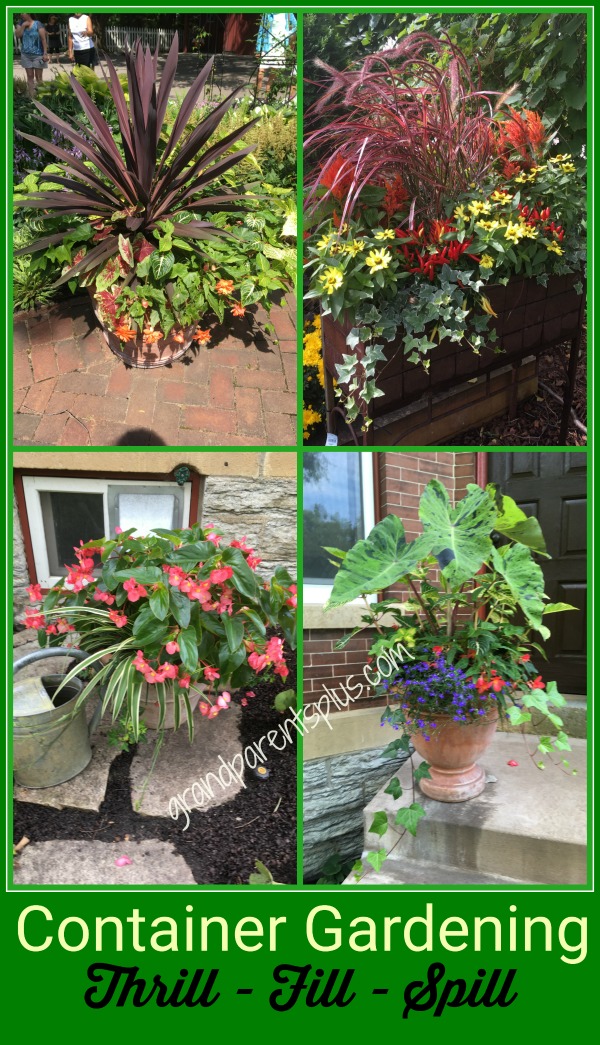
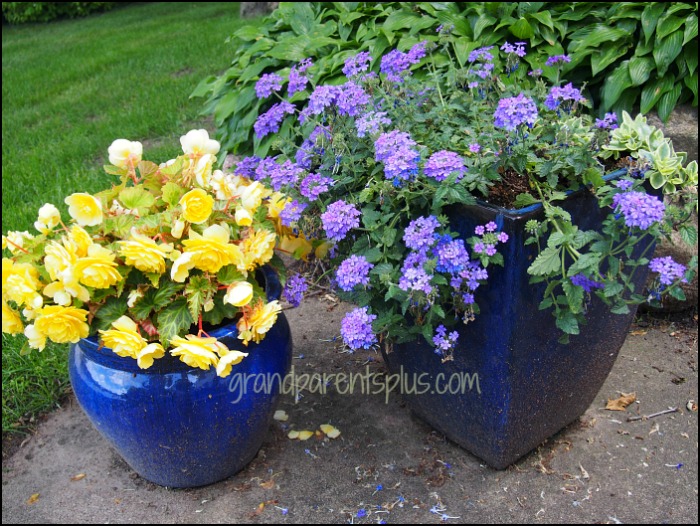
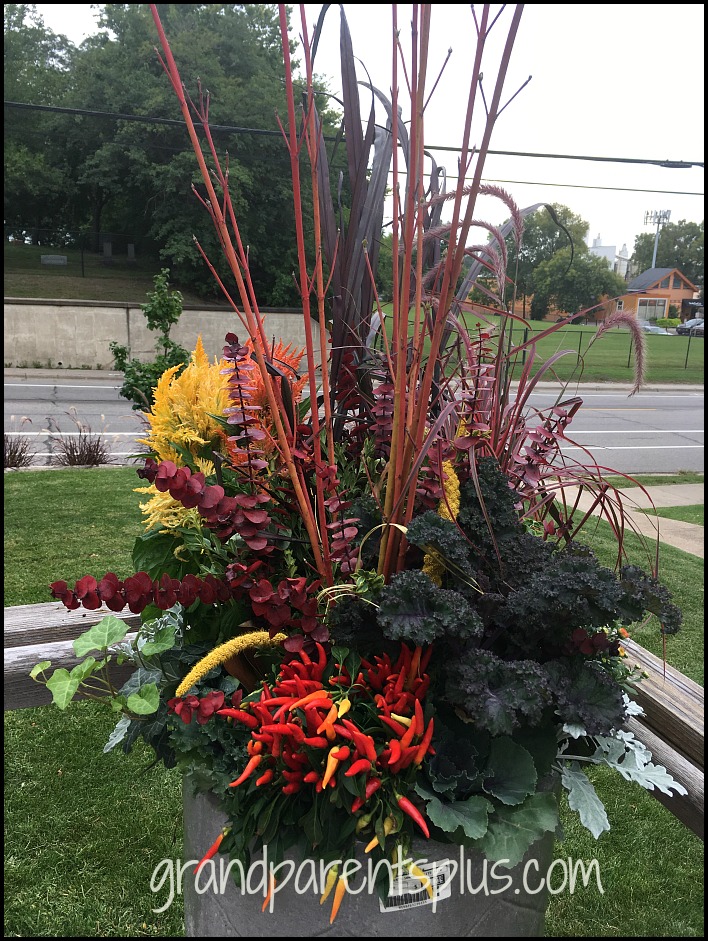
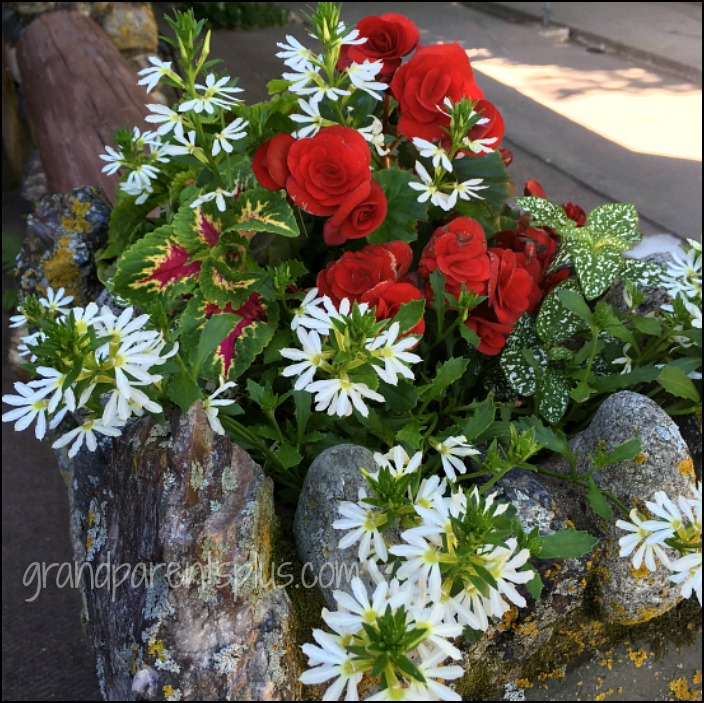
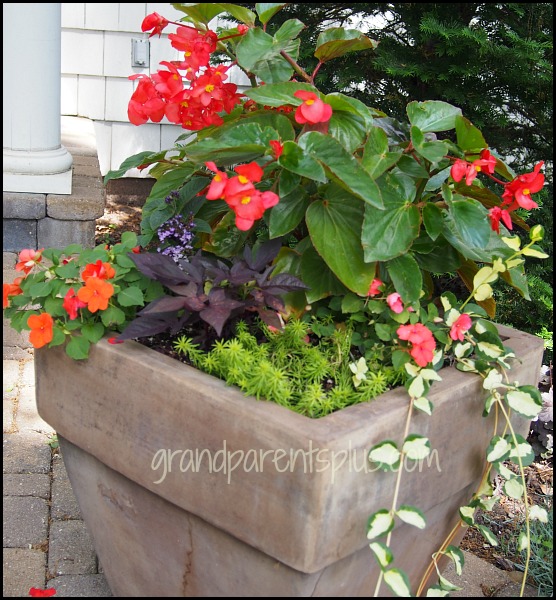
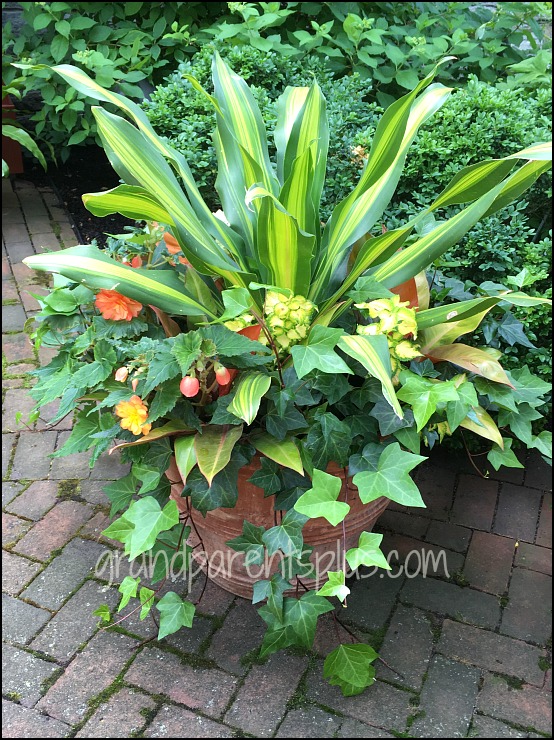
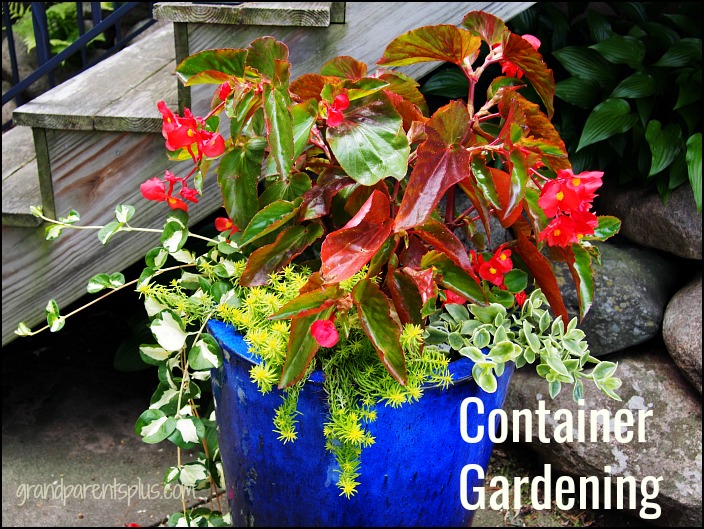
When container gardening, I’ve learned that the “Thrill, Fill, Spill” method really helps in  the planning of what plants to use to create a dramatic look.

Container Gardening thrill-fill-spill grandparentsplus.com

First of all, you want a showy “Thrill” which is your starting point. Decide your color scheme and then choose something that is tall and impressive. Sometimes different shades and textures of just greens can also be impressive. So, don’t always think of color, but of textures and shades as well.

Container Gardening thrill-fill-spill grandparentsplus.com

Sometimes grouping a couple of containers together with complimenting color is attractive, too. Purple and yellow are great together!


Container Gardening thrill-fill-spill grandparentsplus.com

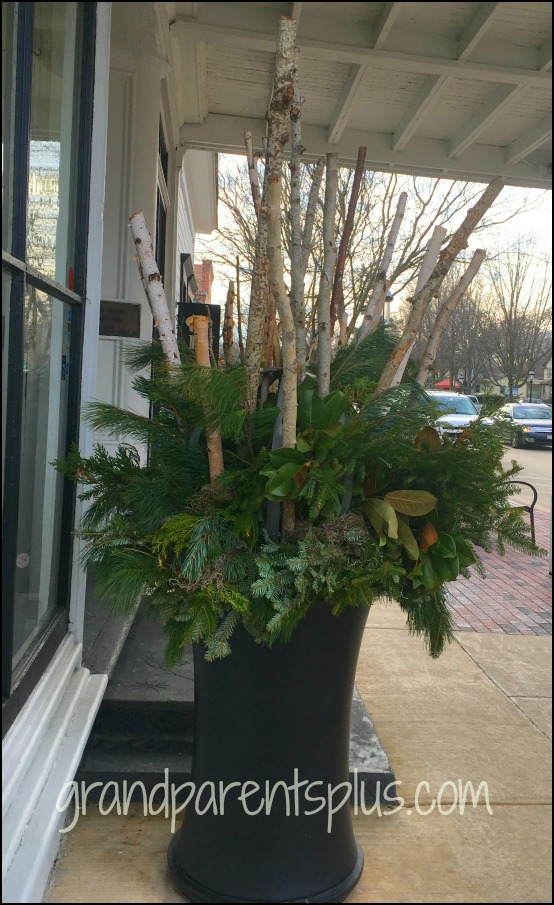
Think of sticks or thin birch logs to add height and drama to your container garden, too.

Container Gardening thrill-fill-spill grandparentsplus.com

Next comes the “fill”.

Use combinations of leaves to add texture and color.

Container Gardening thrill-fill-spill grandparentsplus.com


Container Gardening thrill-fill-spill grandparentsplus.com


A spiky, upright hosta can give drama to your arrangement. Later, plant it in the ground for next year’s arrangement.

Container Gardening thrill-fill-spill grandparentsplus.com

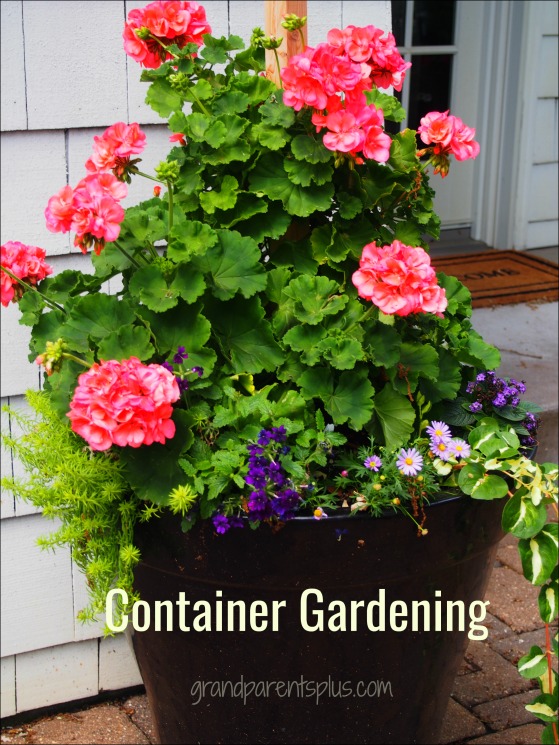
Last, include the “spill”. A vine falling over the edge gives it a great balance.

A pillar geranium looks great with a little “fill” and “spill”.

Container Gardening thrill-fill-spill grandparentsplus.com

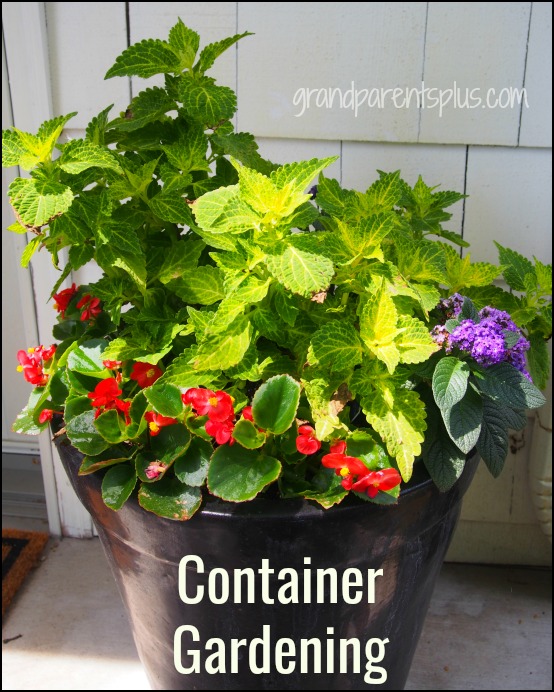
By adding a little “spill”, this next combination would look even better!

Container Gardening thrill-fill-spill grandparentsplus.com

Use this same method for fall and winter arrangements.

Container Gardening thrill-fill-spill grandparentsplus.com

Do you use this method in your container gardens?

I can’t wait for Spring to get mine going!

Happy Container Gardening!

Phyllis

This post is linked to many of the following parties…
Posted in Garden, Misc. | Tagged , , , , , , , , , , , , | 2 Comments

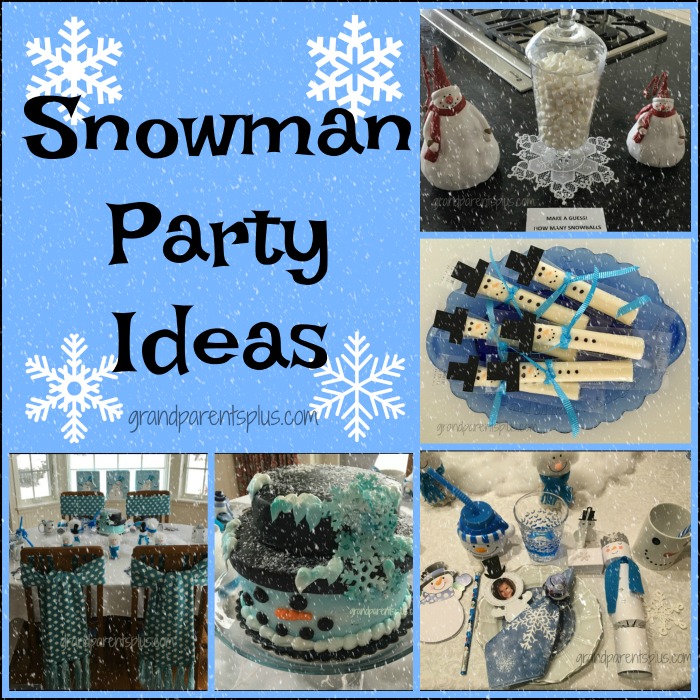
Snowman Party Ideas for Kids

Snowman Party Ideas grandparentsplus.com

Need some Snowman Party Ideas?

“Mid-winter blues” call for some fun! Brighten up the day with a fun-filled Snowman Party. These ideas can be used for a Tea, Birthday Party, Sleep-over, or just any special day.

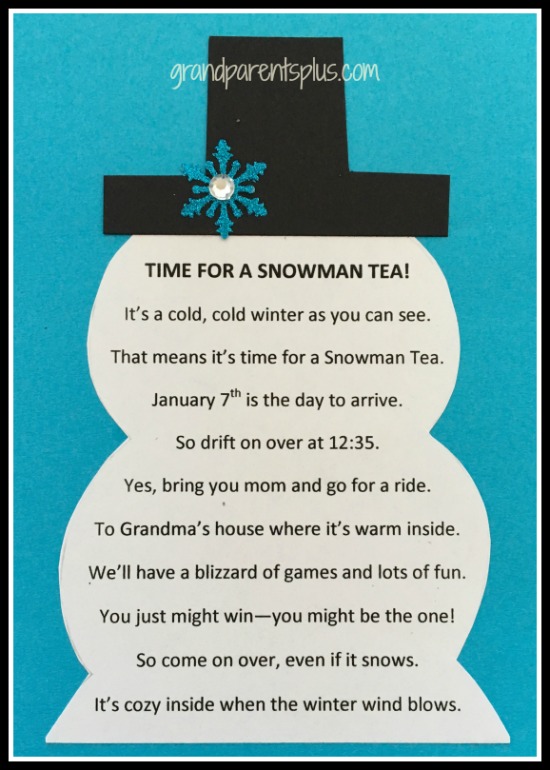
First, start with an invitation. How excited they will be as they wait for this special party!

Here’s a sample invitation…..
Snowman Party Ideas grandparentsplus.com

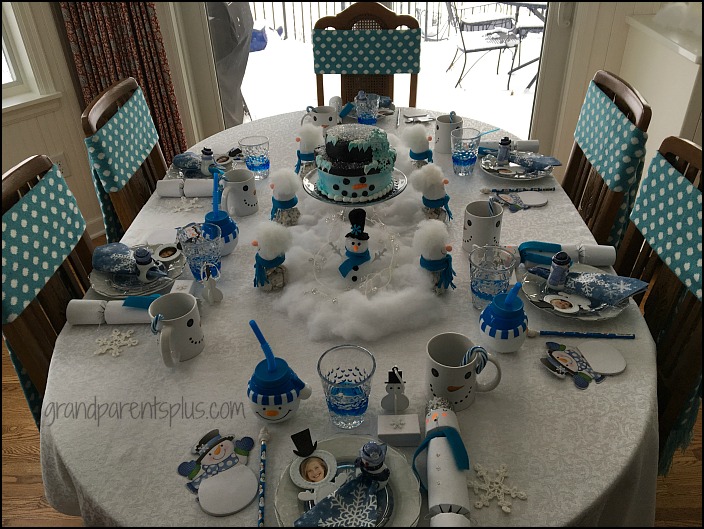
Next, plan a special table. It can be simple or elaborate. Shopping after-Christmas sales is a good time to find lots of items that fit a winter theme.
Snowman Party Ideas grandparentsplus.com

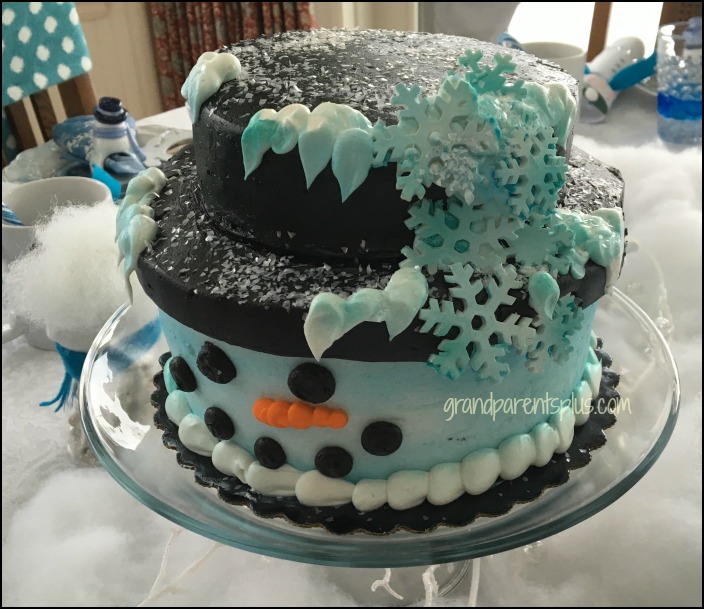
Feature a snowman cake as the centerpiece or use stuffed snowman and lights under the cotton batting.

A local grocery store made this cute snowman cake. It was very reasonably priced. Remember, you don’t have to create everything yourself.
Snowman Party Ideas grandparentsplus.com

Purchase “dollar-store” mugs.  Adding a simple snowman’s face with permanent markers, makes a great snowman accent.
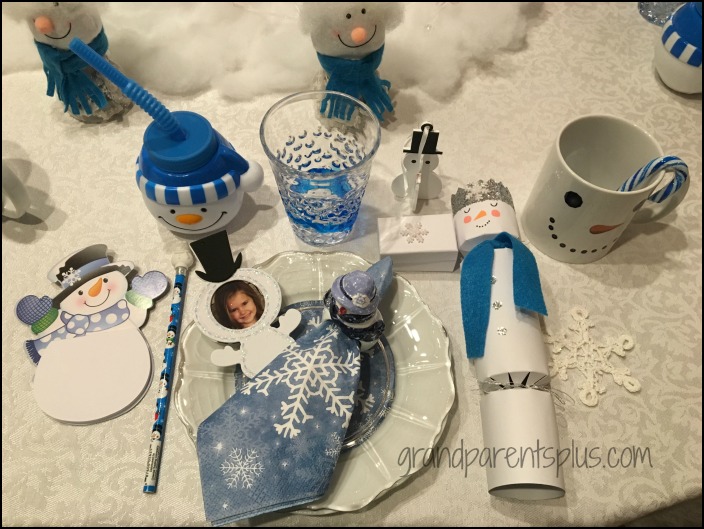
 

Snowman Party Ideas grandparentsplus.com

Go to www.gandparentsplus.com/snowman-placesetting  for more ideas for your table.

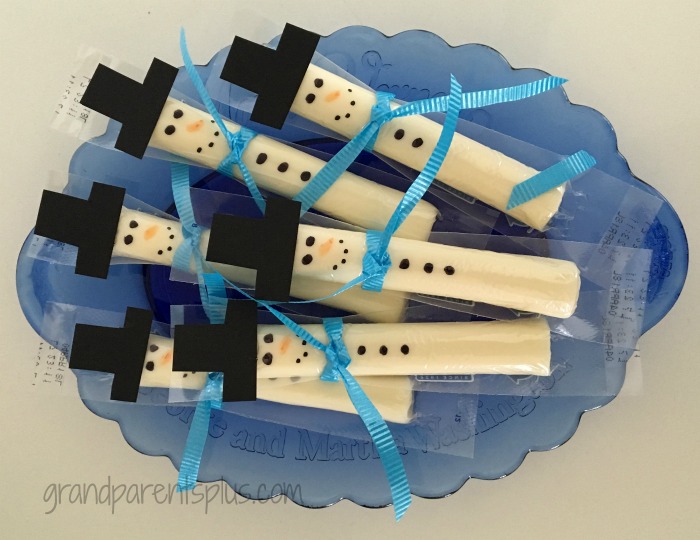
Snowman cheese sticks are quick and easy to make. Using markers, construction paper hats and ribbon, they take very little time to put together. Healthy, too!
Snowman Party Ideas grandparentsplus.com

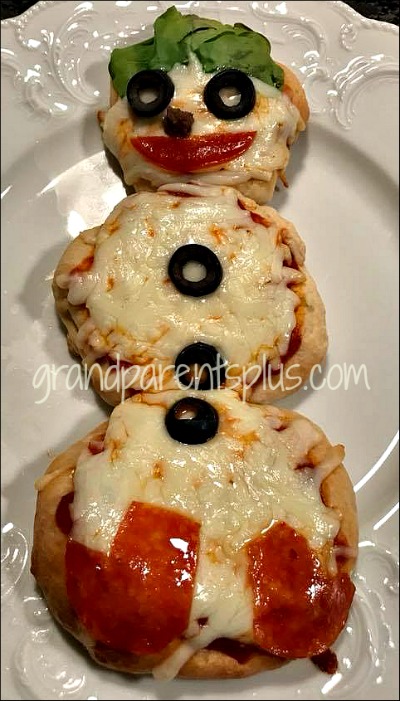
For lunch or dinner, have guests make their own Snowman pizza! Use Pillsbury Refrigerated Pizza Crust Classic Dough. Cut graduated circles from pizza dough, press the edges together and pre-bake according to directions. Place on parchment paper and let kids add the sauce, cheese, and decorations to make it look like a snowman. Use pepperoni for the mouth and boots, sliced black olives for the eyes, nose, and buttons. You can, also, use a small carrot slice or a piece of sausage for the nose. For the top, use spinach leaves. I know lots of kids only like cheese pizza so picky eaters can easily remove items they don’t like.
Snowman Party Ideas grandparentsplus.com

Here are some fun game ideas based around the Snowman theme for you to use.

Game Ideas:

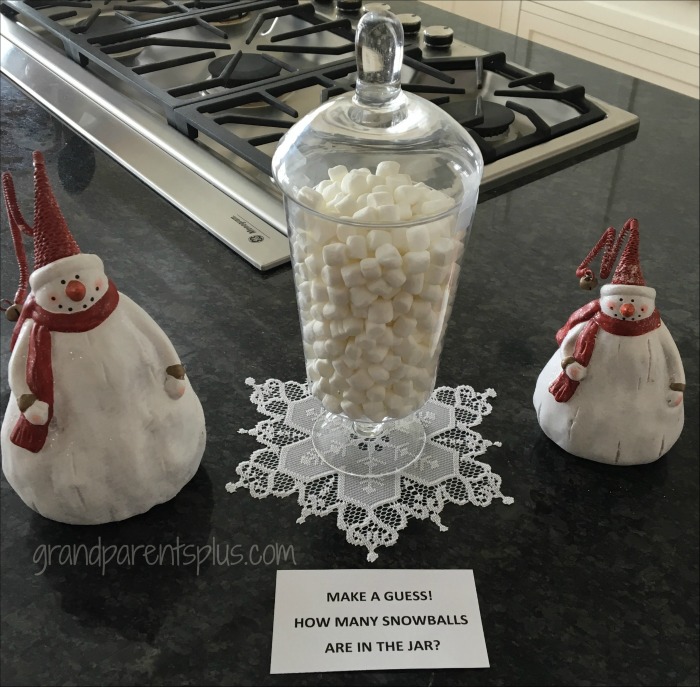
  1. Guess the number of snowballs     (use mini marshmallows)
Snowman Party Ideas grandparentsplus.com


2. Make a Snowman

Using a roll of toilet paper, adults dressed their kids as a snowman. Kids can do this to the adults, too.
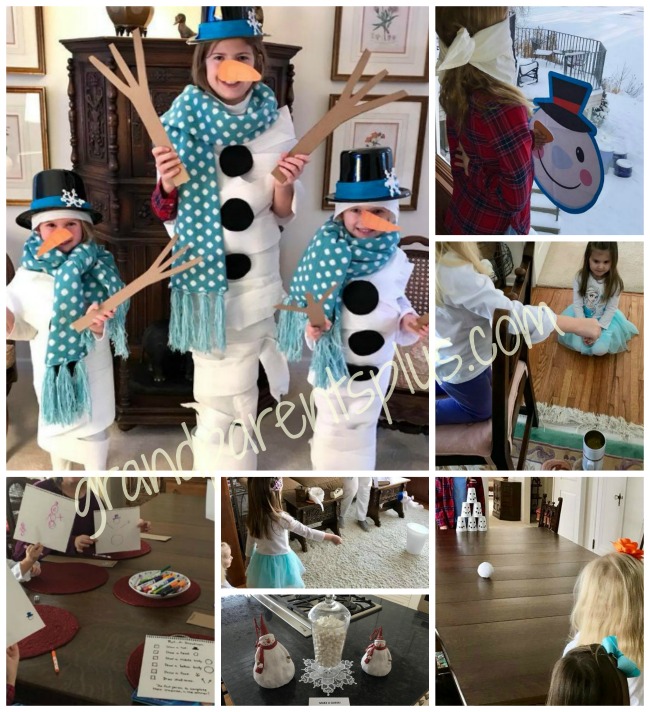
 

Snowman Party Games grandparentsplus.com


3. Toss the Snowman into a snowbanks!

Using a small stuffed snowman, toss it into a container or an area lined with white fiber-fill. Give points for getting into the container or specified area.

4. Pin the Nose on the Snowman. (just like Pin the Tail on the Donkey)

5. Snowball Bowling (see picture above)

6. Snowball Drop

Using cotton balls, see how many you can drop into a can or container.

7. Roll-the-Dice Snowman Directions:

If you roll the following numbers, you can draw what the number represents. You can’t draw the hat or face if you haven’t first rolled a #1 for the head. You can’t draw the arms if you haven’t first rolled a #3 for the middle. #2,#3, and,#4 can be drawn at any time. If you roll the dice and can’t draw it, pass the dice to the next person.

  1.  A Hat
  2.  A Head
  3. The Middle Snowball
  4. The Bottom Snowball
  5. The Snowman’s Face
  6. Draw Stick Arms on the Middle Snowball

The first one to finish their Snowman, is the winner!


Another special treat is Snowman cookies. Send them home as a favor.
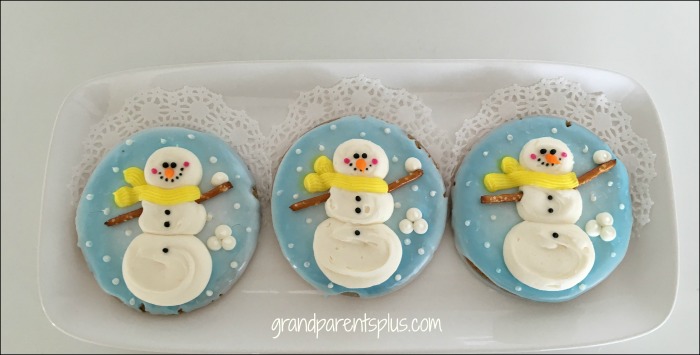
Snowman Party Ideas grandparentsplus.com

Notice the milk, water, and lemonade labeled with fun, “snow” related names! There’s  a saying that you “Don’t eat the yellow snow!”  This time, it’s OK because it is lemonade.
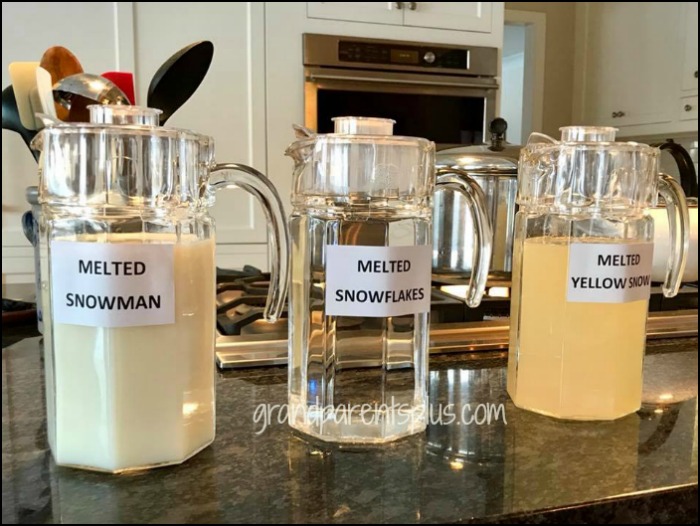
Snowman Party Ideas grandparentsplus.com

Also, add a time for reading a good Snowman book.  I just listed a few.

Snowmen at Night, Snowmen at Play, and Snowmen at Work  by Caralyn Buchner

The Biggest Snowman Ever by Steven Kroll

The Biggest, Best Snowman by Margery Cuyler

All You Need for a Snowman by Alice Schertle


Finally, at the end of the party, there’s a visit from a “SNOWMAN”!  Kids loved this fun snowman!  This costume came from Oriental Trading.  Get into the “snowman role” and have fun with it.
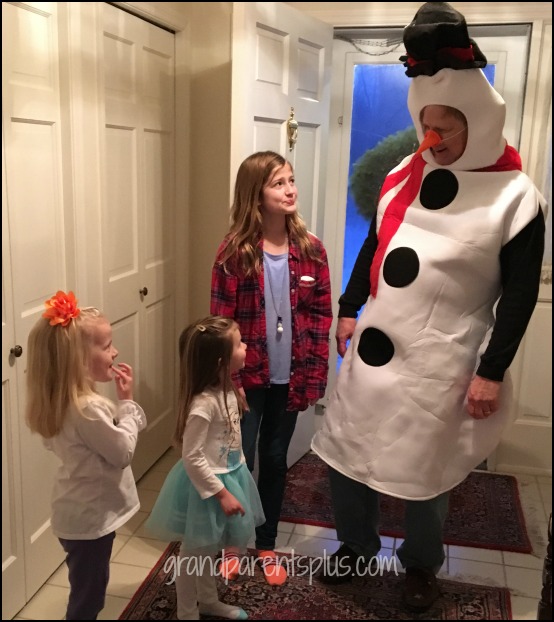
Snowman Party Ideas grandparentsplus.com

Keep memories alive by making a picture book or text some pictures to the families.

I’m sure you can add your own ideas. It’s an easy theme to plan a party around. Have fun!

Enjoy!

Phyllis


This party is linked to many of the following parties…..


Posted in Games, Misc., Misc. posts | Tagged , , , , , , , , , , , , , | Leave a comment

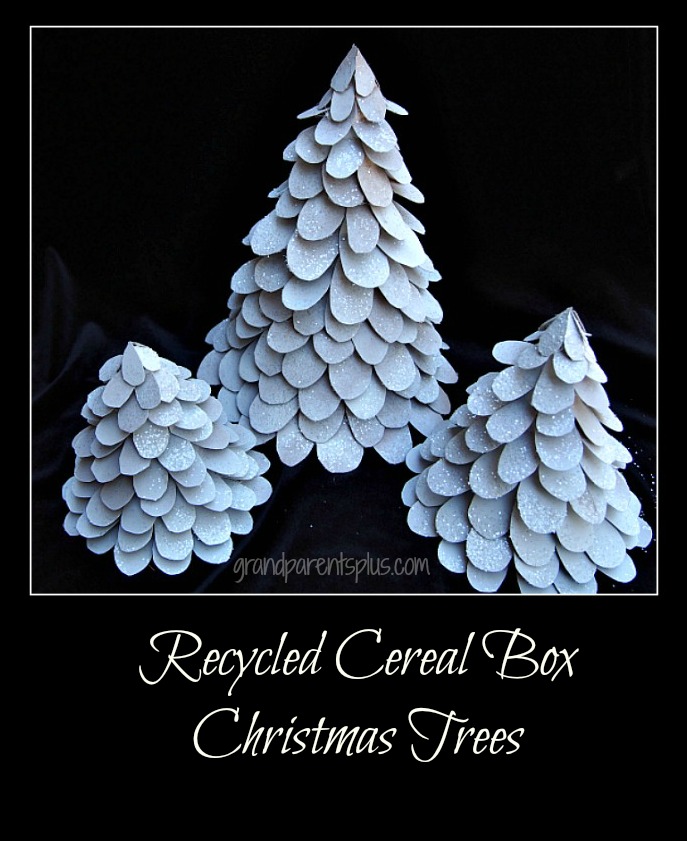
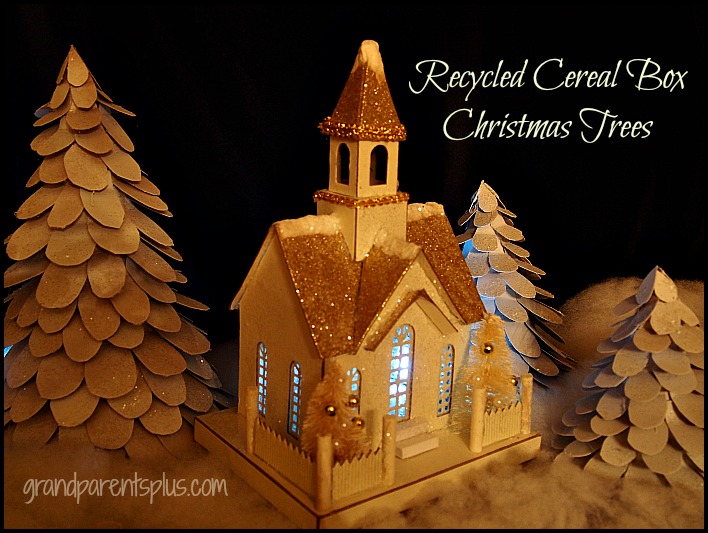
Recycled Cereal Box Christmas Trees

Save those cereal boxes! These Recycled Cereal Box Christmas Trees are completely made from cereal and other small cardboard boxes. (such as crackers and mac & cheese) Turn them into beautiful Christmas decorations that are totally low-cost!

Recycled Cereal Box Christmas Trees grandparentsplus.com

Materials:

Cereal Boxes

Poster Board or large cereal box

Glue Gun

White flat spray paint

Crystal  Glitter

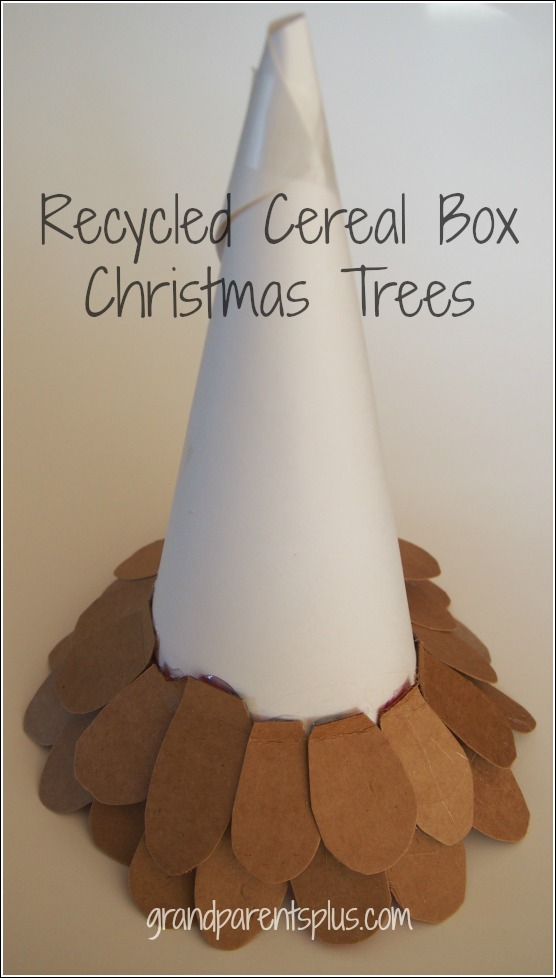
First, make a cone from Poster Board. Go to “Make a Cone” for instructions.

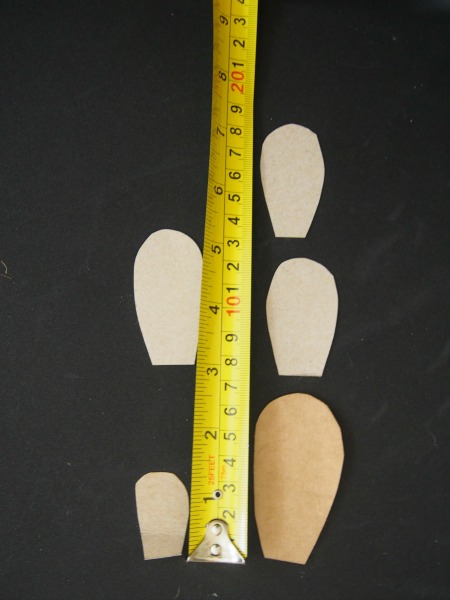
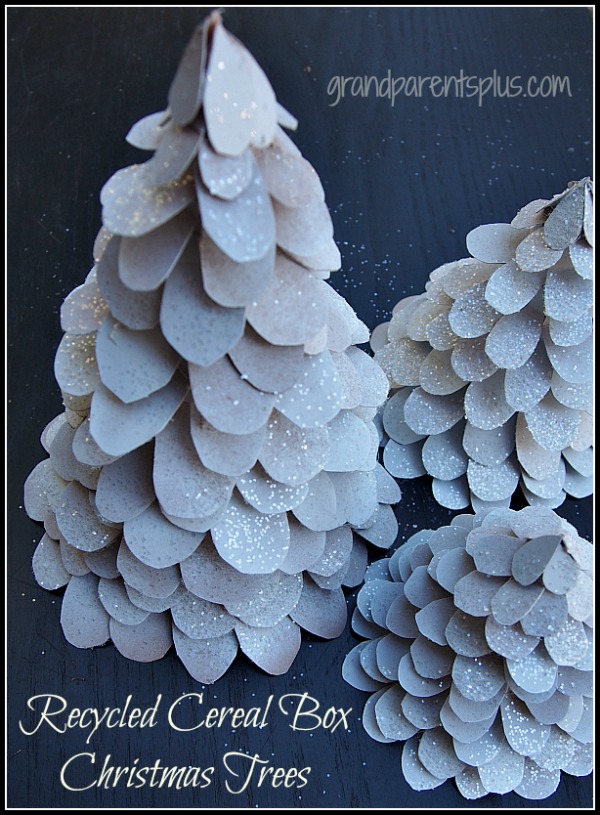
Next, while watching TV, cut out the petal shaped branches. It does take a fair amount of cutting, but it costs nothing except a little time. The picture gives you an idea of the size of petals (branches) I cut. You can make them pointed, too.

Recycled Cereal Box Christmas Trees grandparentsplus.com

DIY Christmas Trees!

The size of the branches depends on the size of the cone you make The large cone is about 11 inches tall and the smaller cones are 5 1/2 – 6 inches tall.

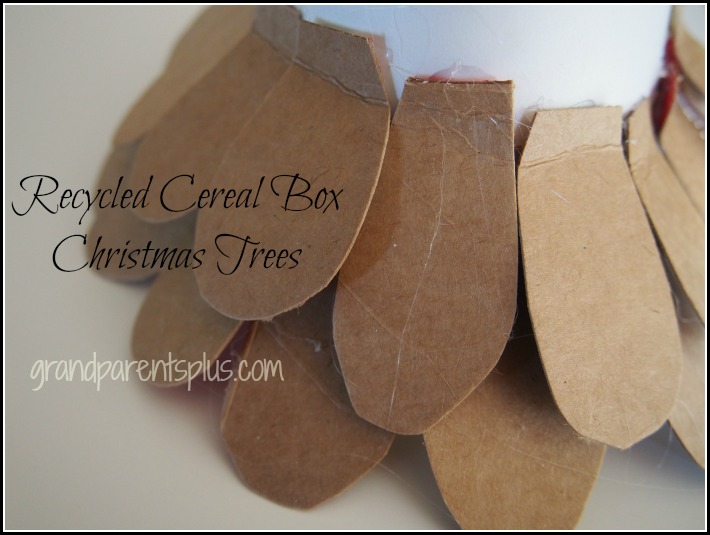
Once you have about 50-100 petals cut, start glueing from the base. I bend the end a bit and adhere it with a glue gun. When you start the second ring, overlap the seams of the first ring.

Recycled Cereal Box Christmas Trees grandparentsplus.com


Here’s a close-up…..

Recycled Cereal Box Christmas Trees grandparentsplus.com


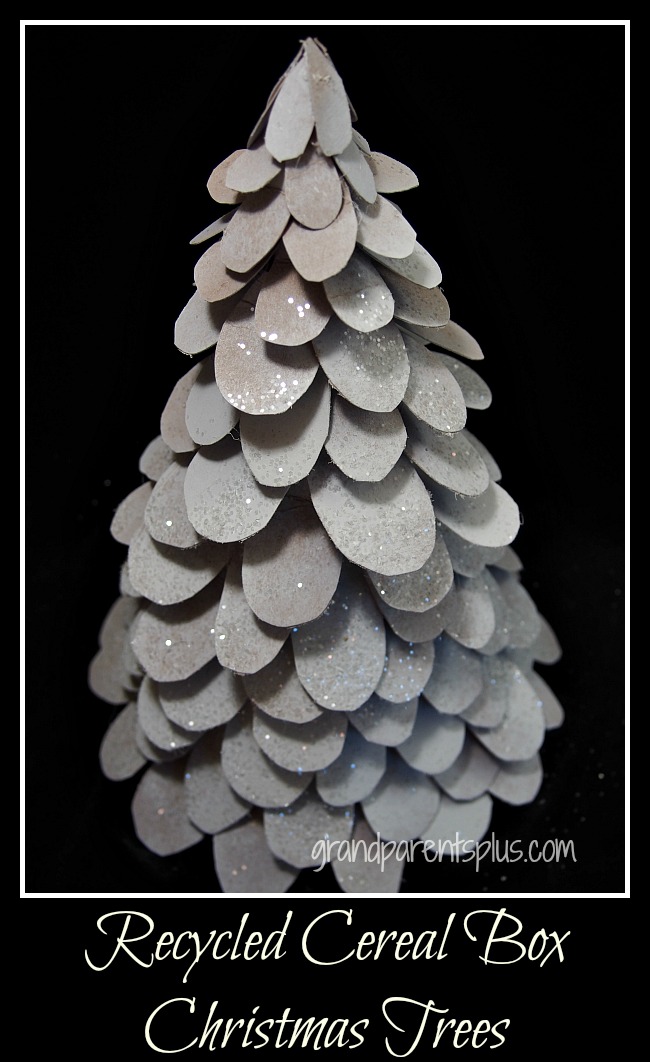
Christmas Trees aren’t perfect so don’t stress out if everything isn’t exactly perfect. After a few rings, I adjust the length of the petals by bending the end a bit more. Another way is to trim them down. At the top, I cut 4-5 narrow petals and glue them to the top.

Finally, spray paint. I start by spraying underneath a bit and then the top. Shake crystal glitter on while the paint is still wet. Let dry and enjoy a totally recycled cereal box Christmas tree!

These work for using them in Christmas villages, too. Make the trees as large or tiny as you wish.

Recycled Cereal Box Christmas Trees grandparentsplus.com


Recycled Cereal Box Christmas Trees grandparentsplus.com

Once you start, you’ll make more than one.

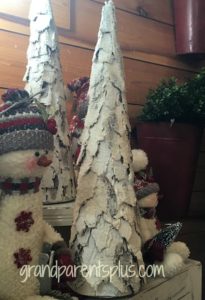
I saw these trees made of corrugated cardboard, but I like the cereal box ones better.

Recycled Cereal Box Christmas Trees grandparentsplus.com

Corrugated Box Trees


Recycled Cereal Box Christmas Trees grandparentsplus.com

Enjoy!


Phyllis

Subscribe on the sidebar knowing your email is never shared or sold!

Follow on Pinterest, too.

linked to many of these parties…


Posted in Christmas, Crafts, Holidays | Tagged , , , , , , , | 2 Comments

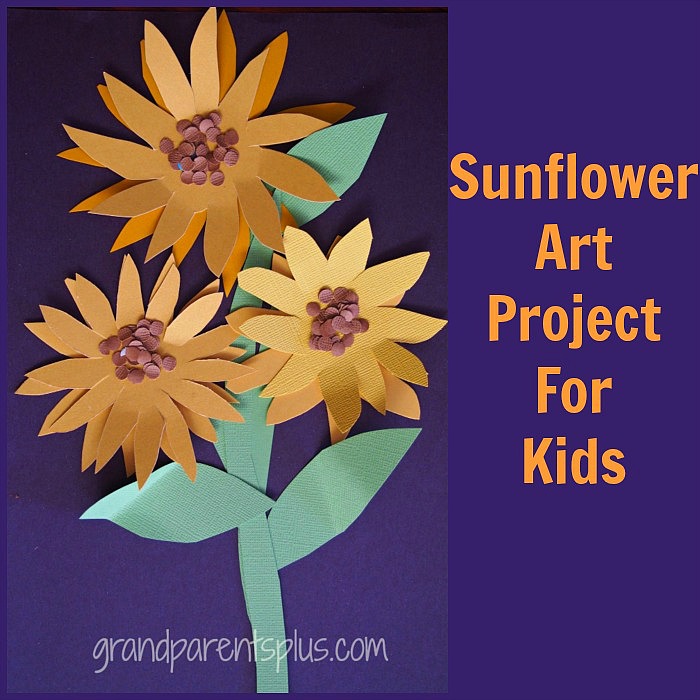
Sunflower Art Project for Kids

A Sunflower Art Project is perfect for 2nd-5th graders to show their creative touch. Just as each flower is unique, each project will be, too. They are beautiful to display or frame.Along with doing a Sunflower Art Project, kids can learn interesting facts about their project as they make it. This art project uses construction paper, pencil, scissors, paper punch, and glue.

Sunflower Art Project for Kids grandparentsplus.com

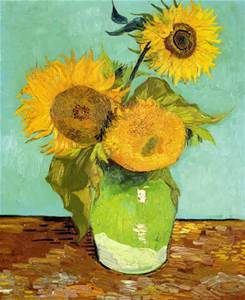
A very famous painting of sunflowers is by the Dutch painter, Vincent van Gogh. Go to Wikipedia to see all these famous sunflower paintings.

Here is one…. Sunflower Art Project grandparentsplus.com

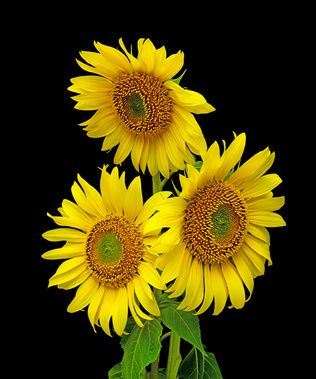
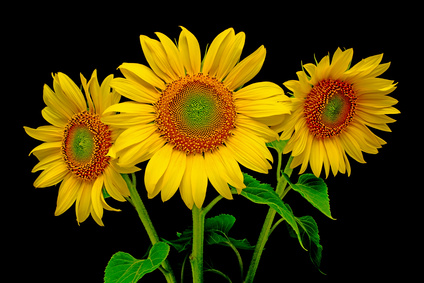
Here are other photographs of sunflowers….


Sunflower Art Project grandparentsplus.com


Sunflower Art Project grandparentsplus.com


Making your own Sunflower Art is easy to do.

Follow these easy steps…..

Materials:

For the Sunflower Art for Kids, you only need 4 colors of construction paper!

Black (or Dark Blue), Yellow (two shades if you want variation), Green, Tan

Black or Dark Blue is the background on which you place the sunflowers.

Directions:

First, cut two- 4 inch squares, and four- 3 inch squares from the yellow.

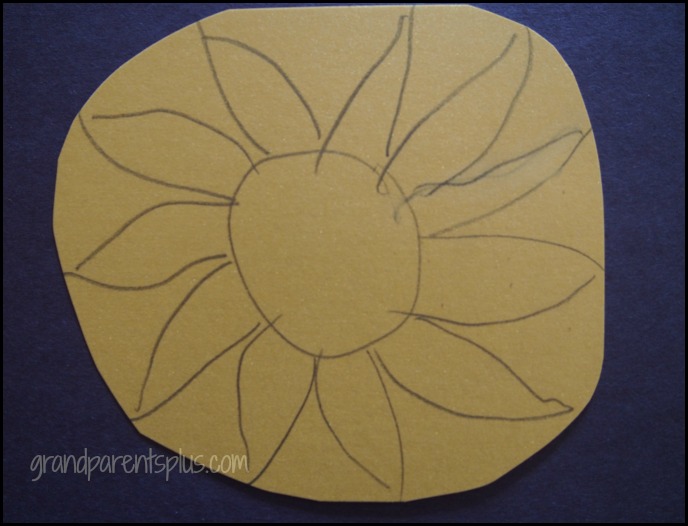
Cut the corners to make a circle, draw a circle in the middle and draw the petals making sure they go out to the edge.

Sunflower Art Project for Kids grandparentsplus.com

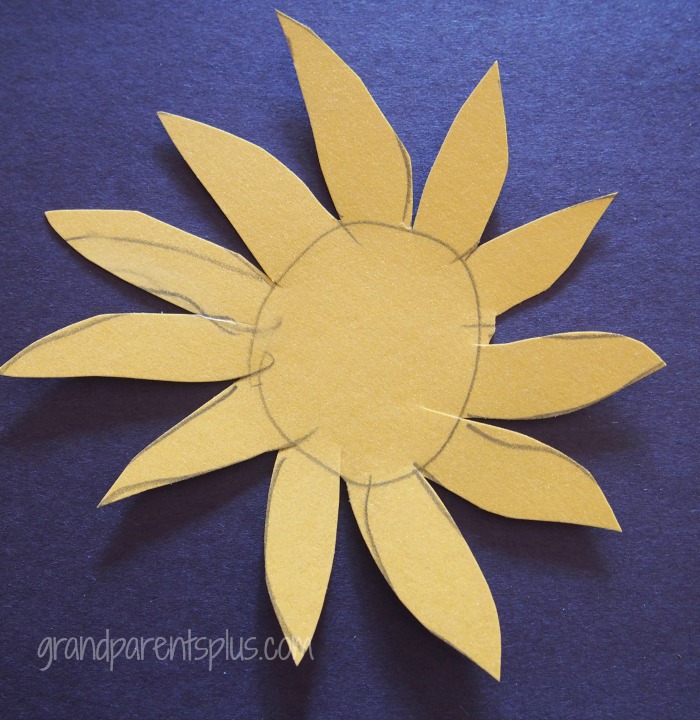
Next, cut out your sunflower. Don’t worry about the pencil lines. Just flip over and none will show.


Sunflower Art Project for Kids grandparentsplus.com


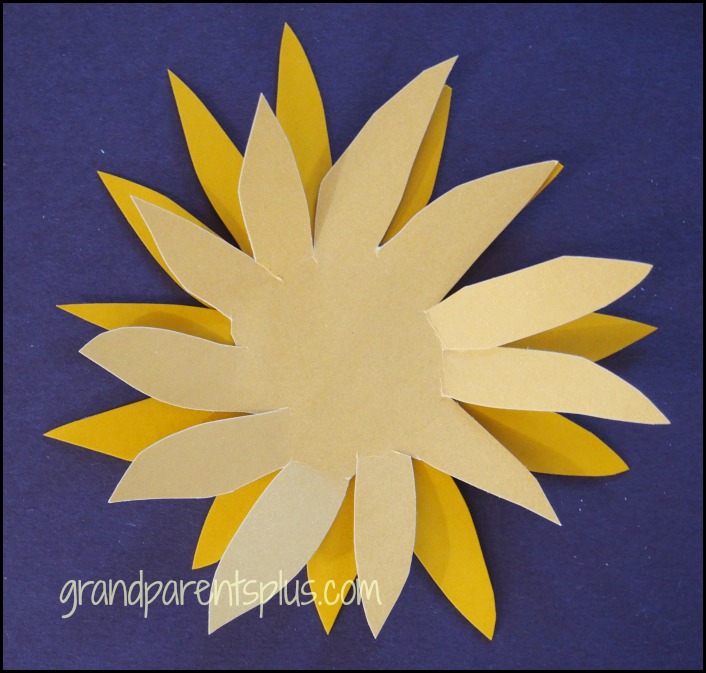
Now, with the two cut-out sunflowers, glue together and bend out the petals to give it some dimension. Using a paper punch, make many tan seeds to glue in the middle. They can be glued on top of each other to give depth.


Sunflower Art Project for Kids grandparentsplus.com

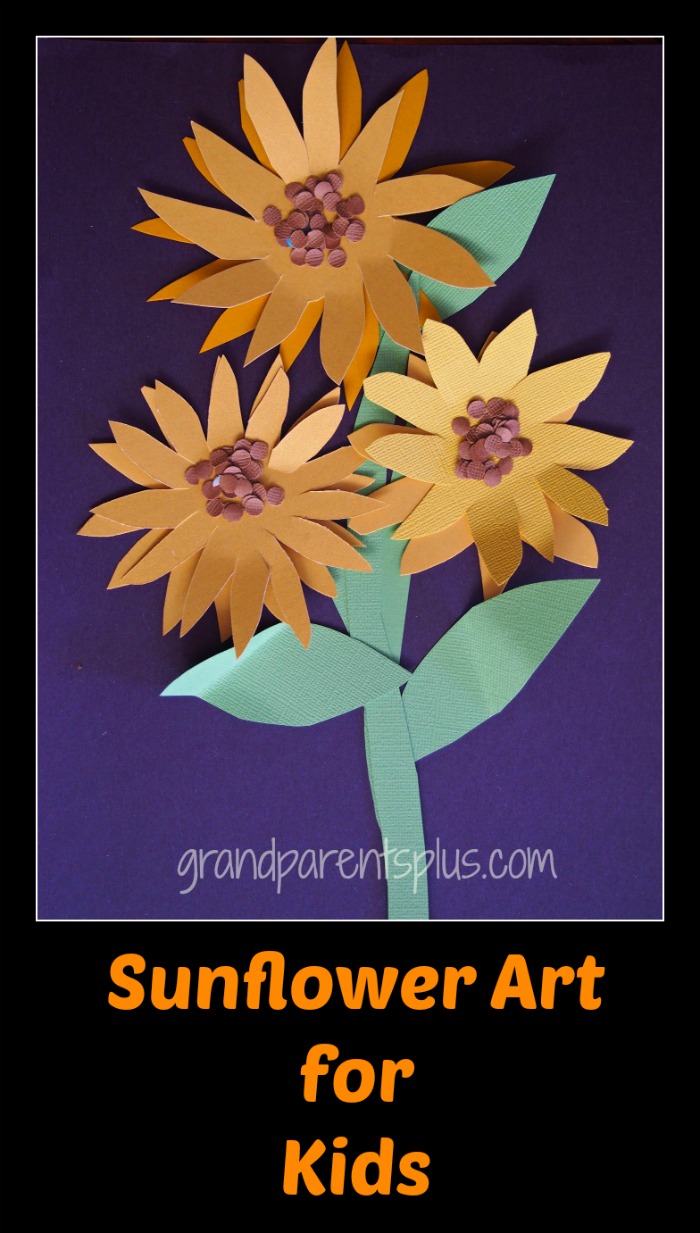
Cut stems and leaves and add to project.

Finally, arrange and glue all in place on your background.

Now, you have your amazing and easy Sunflower project complete!


Sunflower Art Project for Kids grandparentsplus.com


Did you know?

The center of the sunflower is actually made up of tiny individual flowers called florets. Each one produces a seed when pollinated.

The normal stem of a sunflower can grow up to 10 ft. tall and the flower can get to over 11 inches wide.  The tallest sunflower was grown in Germany and it reached 27 ft. tall

There are different varieties of sunflowers. Some produce a black seed that is used to make sunflower oil. The striped seed is used for eating and bird food.

Ok, enough facts! Now, get busy and have fun making Sunflower Art!

Enjoy!

Phyllis

When subscribing on the sidebar, know your email is never shared or sold!

Follow on Pinterest, too!

This post is linked to many of these parties.

Posted in Art Project | Tagged , , , , , , , , | Leave a comment

Easy Blueberry Pie Bars

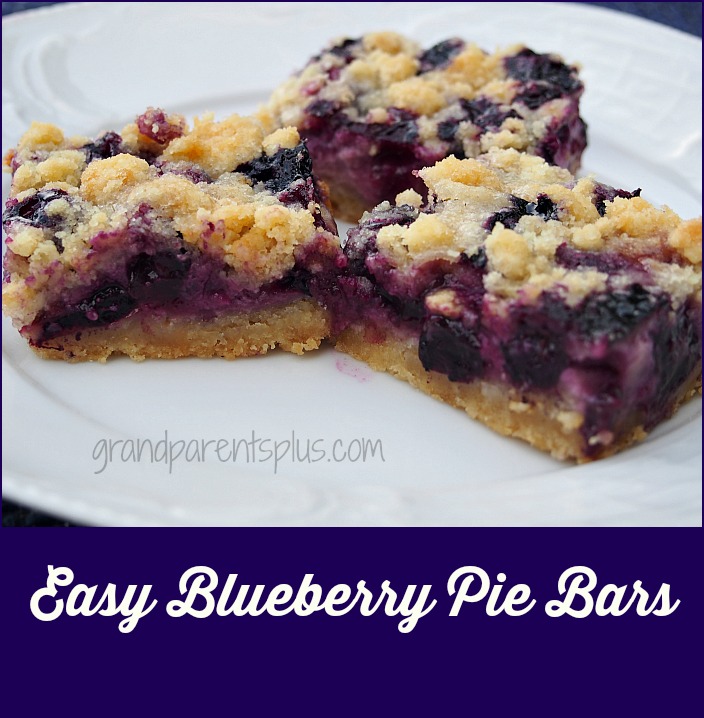
I do love blueberries, but can’t eat a whole pie by myself. When you want the taste of a blueberry pie, but not the work of rolling the crust, these Easy Blueberry Pie Bars will satisfy your craving. You can store them in the refrigerator for a few days or freeze for future indulgence.

Easy Blueberry Pie Bars grandparentsplus.com

I used fresh blueberries, but frozen berries work, too. If you use fresh, rinse the berries and let them dry on a paper towel so you don’t add extra moisture. For frozen, do not thaw; just use them frozen.

Easy Blueberry Pie Bars

Ingredients

  • 3 Parts....
  • CRUST AND CRUMBLE TOPPING
  • 1/2 cup butter, melted
  • 1/2 cup granulated sugar
  • 1/4 cup light brown sugar, packed tight
  • 1 1/2 cups all-purpose flour
  • pinch of salt
  • FILLING
  • 1 large egg
  • 1/2 heaping cup of Greek Yogurt or Sour Cream
  • 1/3 cup granulated sugar
  • 2 tsp.vanilla extract
  • 1 tablespoon flour
  • BLUEBERRY LAYER
  • 12 oz. (2 cups) blueberries (fresh or frozen;( I used fresh) If you use frozen, don't thaw!
  • 1/3 cup granulated sugar
  • 2 tablespoons lemon juice (fresh or bottled)
  • 2 tsp. cornstarch

Instructions

  1. CRUST AND CRUMBLE TOPPING
  2. Preheat oven to 350F. Line an 8 inch pan with foil and spray the foil ( I use the spray with flour) Set aside. If you line the pan, the clean-up is a snap and the bars lift up easier.!
  3. Melt butter, add the white and brown sugars, and whisk together. .
  4. And the flour, salt, and stir together. Mixture will be somewhat dry and form some clumps
  5. Take a heaping 3/4 cup crumble mixture out and set aside for topping.
  6. Put remaining mixture in the 8 inch pan and pack it down to form a smooth and flat crust. Set aside.
  7. FILLING
  8. Add the yogurt, egg, sugar, vanilla and whisk to combine. Combine the flour into the filling mixture Pour filling over the crust and jiggle pan to help even it out over the crust. Set aside.
  9. BLUEBERRY LAYER
  10. In a separate medium mixing bowl, add the filling ingredients combine. Sugar will not completely dissolve, but that's OK!
  11. Place the blueberry mixture evenly over the filling.
  12. Now, sprinkle evenly with the reserved crust mixture over the filling.
  13. Bake for about 60 minutes, or until edges are bubbling and there's a little bubbling in the center. Crumble topping should appear set with a pale golden brown color. Important....Cool at least 1 to 2 hours or overnight before slicing and serving otherwise they will fall apart. Keep in refrigerator in air-tight container for up to 10 days or freeze (up to 6 months). Cut into bar size or cut a larger serving and serve with whip cream for a dessert. (or ice cream)
Schema/Recipe SEO Data Markup by Yummly Rich Recipes
https://grandparentsplus.com/easy-blueberry-pie-bars/

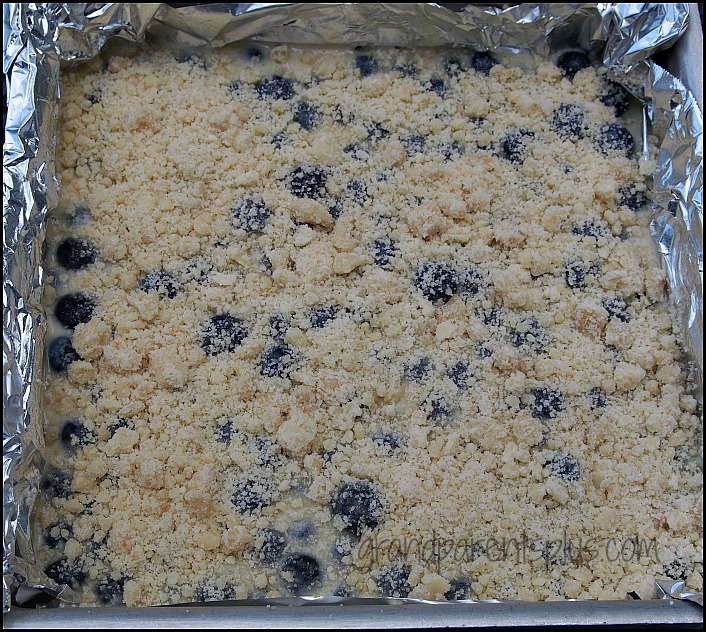
Ready to bake…….

Easy Blueberry Pie Bars grandparentsplus.com

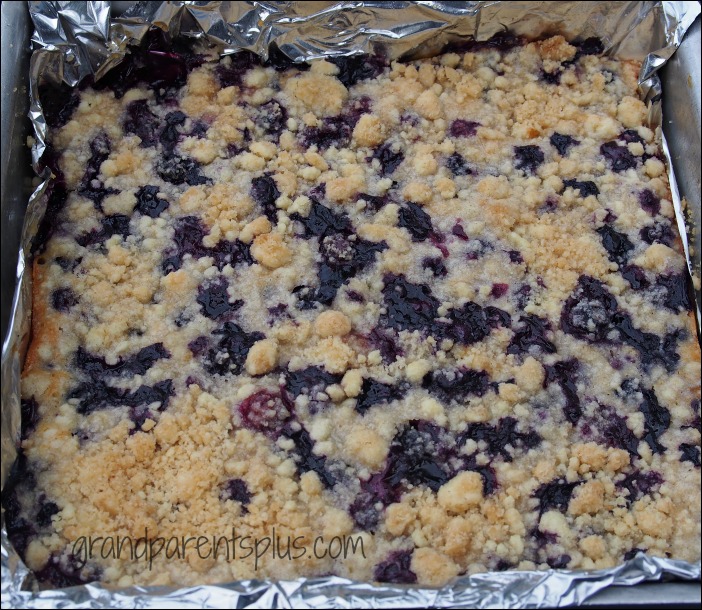
Bake @ 350 for 60 minutes.

Done! Light brown and bubbly.

Easy Blueberry Pie Bars grandparentsplus.com

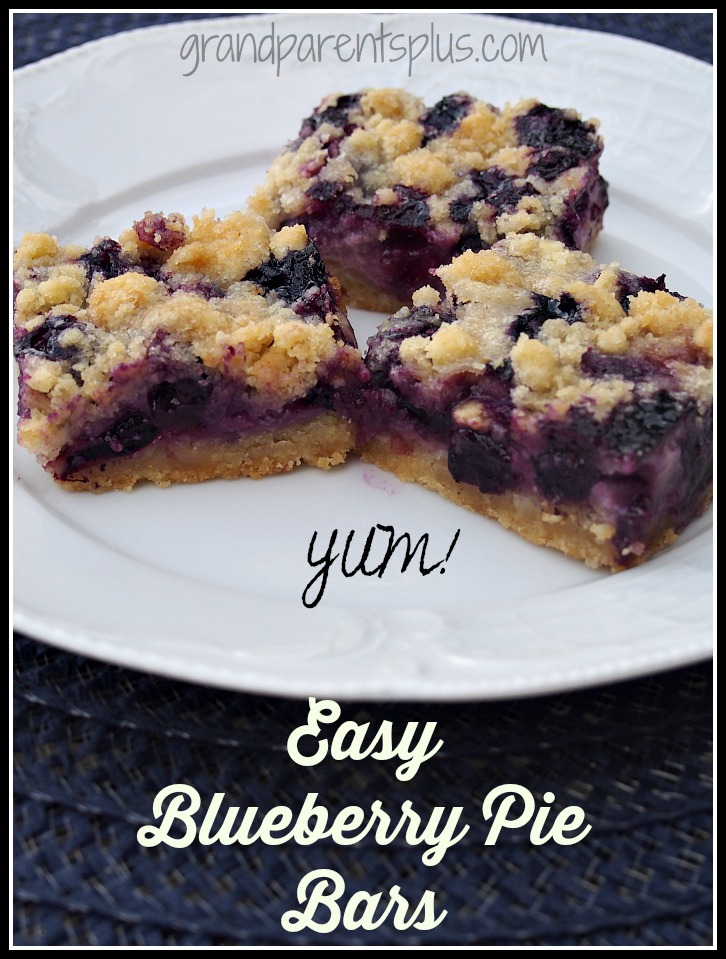
Be sure to let cool for at least 2-3 hours. When set, remove by lifting foil from the pan. Cut and store in an air-tight container in your refrigerator or freeze.

Easy Blueberry Pie Bars grandparentsplus.com

These taste like pie, but no rolling out a crust! Delicious!!!


Enjoy!

Phyllis

Subscribe on the sidebar so you don’t miss a post!

Follow on Pinterest, too.

This post is linked to many of the following parties….


Posted in Desserts, Recipes | Tagged , , , , , , , , , | Leave a comment