There is a saying that “if children are the rainbow in life, grandchildren are the pot of gold!” So true!
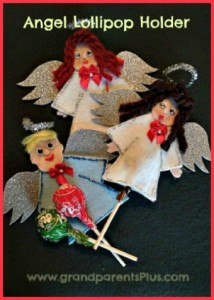
All of my grandchildren are “angels” – so cute and fun to have around for Christmas. They give us much joy! This is a little craft that I’ll be using at their place setting for Christmas.
Shhh! Don’t tell them!
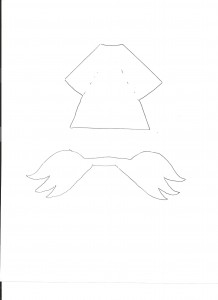
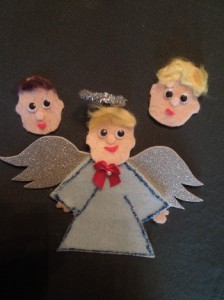
This Angel Lollipop (Tootsie Pop) Holder is a variation of the Turkey Tootsie Pop Holder that I’ve posted earlier. I’m including a pattern for you to use. Again, it is successful in the end product, easy to do, and inexpensive! (I love those 3 things!) Personalize these little angels for your own kids or grandchildren. When the lollipop is gone, hang it as an ornament on the Christmas tree.
Materials:
Felt Sheets:white or blue, red, & skin color (pink , tan, or brown for the skin tone)
(The thinnest felt is the best! Found a pack for $1.oo at Dollar Tree)
1 sheet of Sparkle Stiff Felt or Sparkle Foam Sheet (wings)
Wiggle Eyes (I used 7 mm)
Yarn for hair or buy a cheap hair extension at the Dollar Tree for $1.00
Glitter Glue ( I used blue and silver)
Tacky Glue, Fabric Glue, or needle and thread
Stapler
Sparkle pipe cleaners (halo) Dollar Store
Small red bows or something to put at the neckline
Directions:
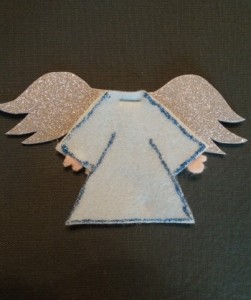
Use pattern for body and wings
Cutting instructions—
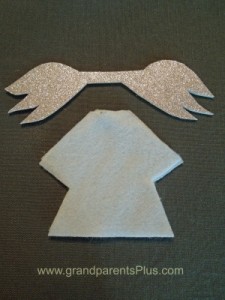
Cut 2 together of felt for robe body. (measures 3 1/2″ by 3 1/2″ at widest part)
- Cut 1 wing from Sparkle felt or Glitter Foam ( wing span measures 6 1/2″ by 1 3/4″)
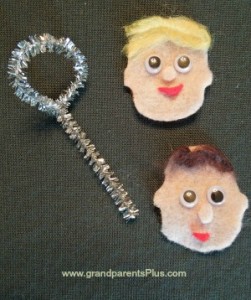
- Cut 1 head (approx. 1- 3/4″ long by 1- 1/2″ wide)
- Cut 1 tiny nose of flesh-colored felt
- Cut 1 tiny mouth of red
Directions:
1. After cutting body, wings, head, and hands, glue hands between the two pieces of robe body.
2. Then glue robe, machine stitch or hand stitch around three sides leaving the bottom open for the lollipop or Tootsie pop. If using glue, be sure to let dry completely! If it isn’t secure, glue again. I found that hand stitching or machine was the best for this.
3. Glue face features and hair to head. Use tweasers to handle the face features. It is much easier!
4. Cut pipe cleaner in half and twist to form a halo with a the extra part extending down (this is what you will staple behind the head to keep it in place)
5. Staple wings at the top of the robe
6. Decorate robe outline with glitter glue and let dry
7. Hold halo behind the head and staple both the halo and head to the body.You can do this separately, too.
8. Hide the staple with a cute bow.
Watch this video tutorial.
For more ideas on a kid’s table place setting for angels, check my other post here!
What do you do to make kid’s place settings cute?
Have a special time celebrating the birth of Jesus!
Merry Christmas!
Posted on these Party Links





http://4.bp.blogspot.com/-vbYjvRLRyu8/UCp8VUCfp8I/AAAAAAAABos/M9RJCGk0GM4/s1600/Wednesdays-party-link-button-1.jpg


 Pin It