Pringles Lid Ornaments

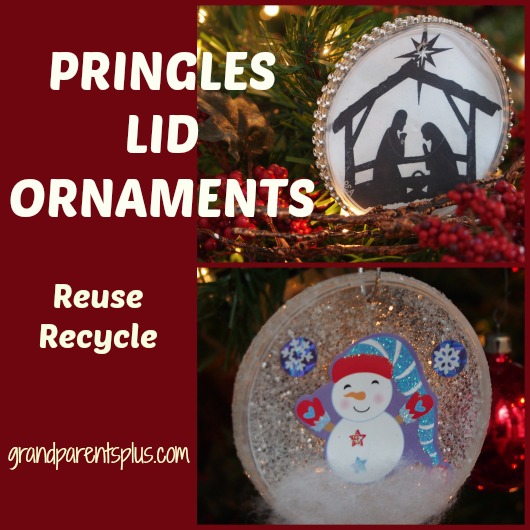
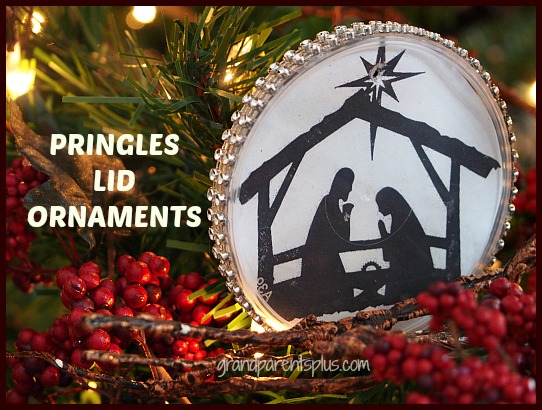
This is not an advertisement for Pringles, but when I saw those clear lids, I knew that they would be perfect recycled as Pringles Lid Ornaments. With kids bringing them for snack time at school, it is not hard to collect a few to try. One idea is a bit more difficult for young kids, but the snowman sticker idea is very easy for them to do. It’s a great way to emphasize reuse and recycle!  These would be perfect for a classroom project, too. I’m posting this early enough to collect those lids.

  Pringles Lid Ornaments grandparentsplus.com

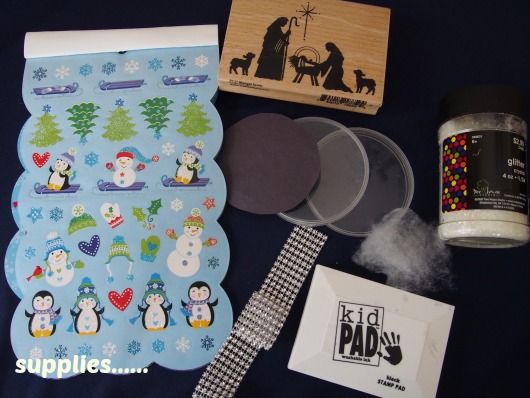
  These are some of the supplies I used…..     Add to this tacky glue (a glue that sticks to plastic) along with string or ribbon for hanging.

Pringles Lid Ornaments grandparentsplus.com


I used lids from a can of Pringles. (With a snack-sized can, they get eaten faster so you have more lids.) Make sure they are clean and wiped dry.

Winter Scene Ornament:

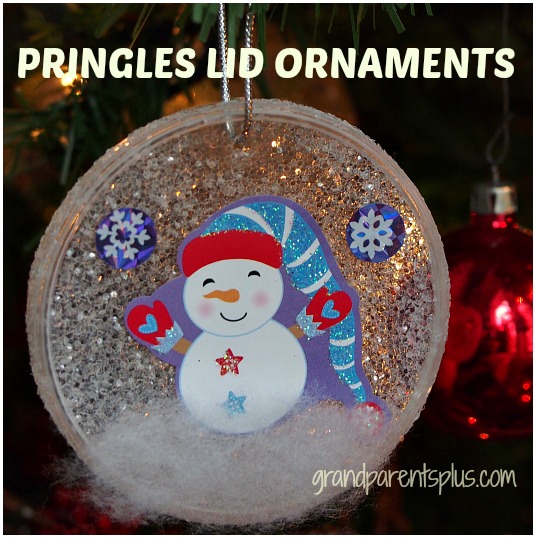
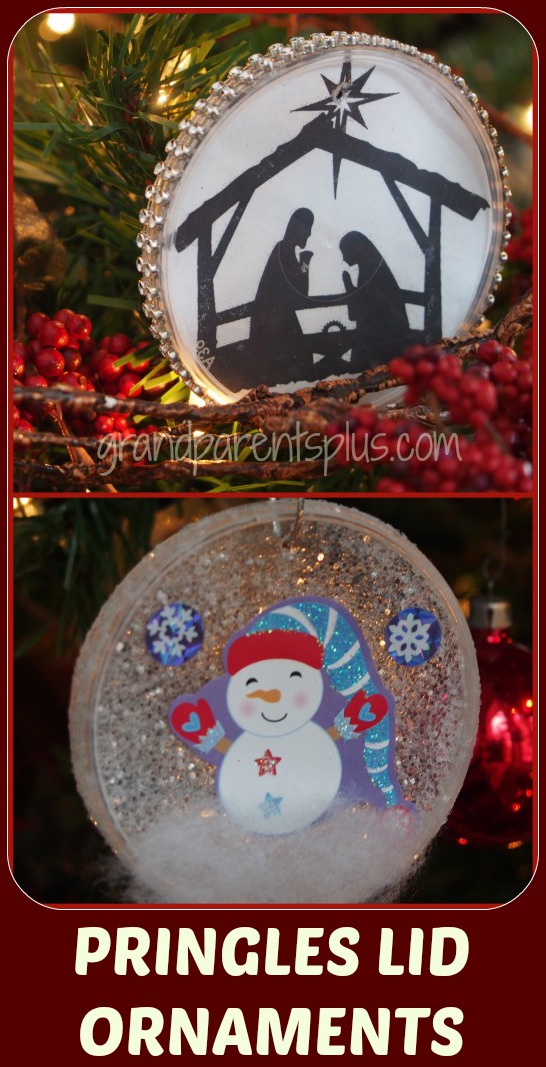
For the sticker version (snowman), Cover the inside of the lid completely with tacky glue. Over a box, sprinkle the glitter into the lid and let dry. (the glitter I used was Crystal)  Make several as kids can easily do more than one.

When dry, cover the edge with tacky glue and roll in the glitter.  Let dry.

Add stickers to the flat front. Add a little “snow”. (cotton)  Hint: cut the stickers out so that kids can see where to place them before removing the backing.

The stickers can be of any Christmas scene. Just make sure they are the right size for the lid.

Punch a small hole on top and add a string or wire hanger.


Pringles Lid Ornaments grandparentsplus.com


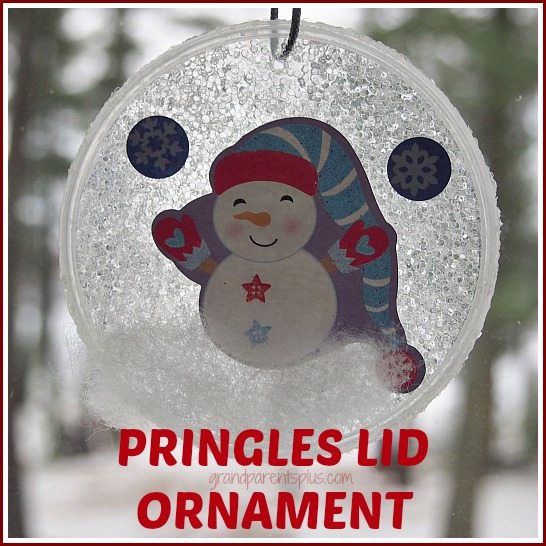
Looks great hanging in a window, too!

Pringles Lid Ornaments grandparentsplus.com

Nativity Ornament:

I made this Pringles Lid Ornament by stamping or downloading a Christmas scene. I had a Nativity stamp, stamped it on a white sheet of paper, and reduced the picture down so it would fit in the Pringles lid. The one pictured is from a free clip art site that I had in my files.

I made copies of the reduced clip art and stamped image so it just needed to be cut out. Older kids can do the stamping themselves on a separate piece of paper as long as the stamp size works for the lid.

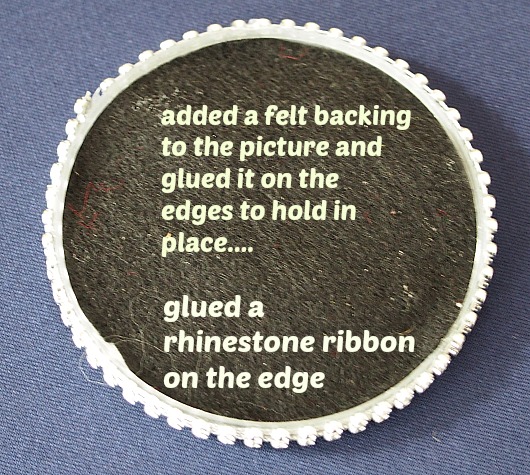
Don’t glue on the inside of this lid. Simply cut out and place the picture inside facing the front. (no glue) Remember, that the inside circle size is different from the outside. Your picture may need some trimming. (approx. 7.5 cm diameter) Cut a piece of felt or other paper and make a backing. After the picture is in place, add the felt backing and glue around the sides to hold it in.  

Pringles Lid Ornaments grandparentsplus.com

Finish the edge with ribbon or a rhinestone ribbon {cut two sections wide) and be sure to use a glue that will hold on plastic. (regular school glue doesn’t work)

Pringles Lid Ornaments grandparentsplus.com


Pringles Lid Ornaments grandparentsplus.com


Pringles Lid Ornaments are a fun, easy, inexpensive, and look fantastic! Kids will want to make more than one! (Adults, too!)

Enjoy!

Phyllis

Don’t miss a post – subscribe!  Your email is never sold or shared!

Follow on Pinterest, too.

This post is linked to many of the following parties…….

Posted in Christmas, Crafts, Holidays | Tagged , , , , , , , , , , , , , , , , , , | 8 Comments

Vintage Jello Molds Re-purposed

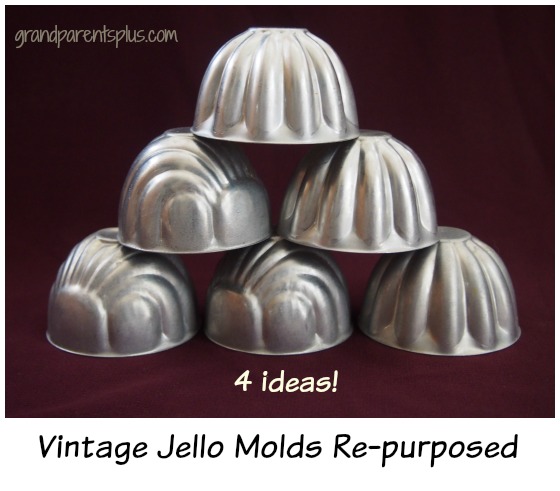
Vintage jello molds go back to the 40’s and 50’s, I believe. Any good cook would make her jello combinations in these molds. Then, you would un-mold them and place them on a plate with iceberg lettuce. A dollop of whipped cream or mayo topped it off. They came in several styles such as plain, swirled, various shapes, and sizes. I remember my mom using them!

Vintage Jello Molds Re-purposed grandparentsplus.com

While they are a thing of the past, I’ll show you several ideas that re-purpose these vintage jello molds for today’s use!

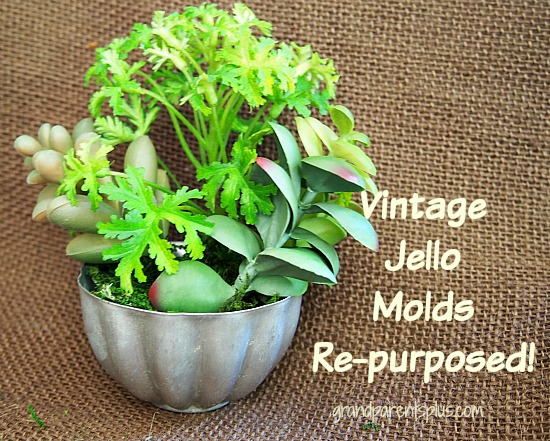
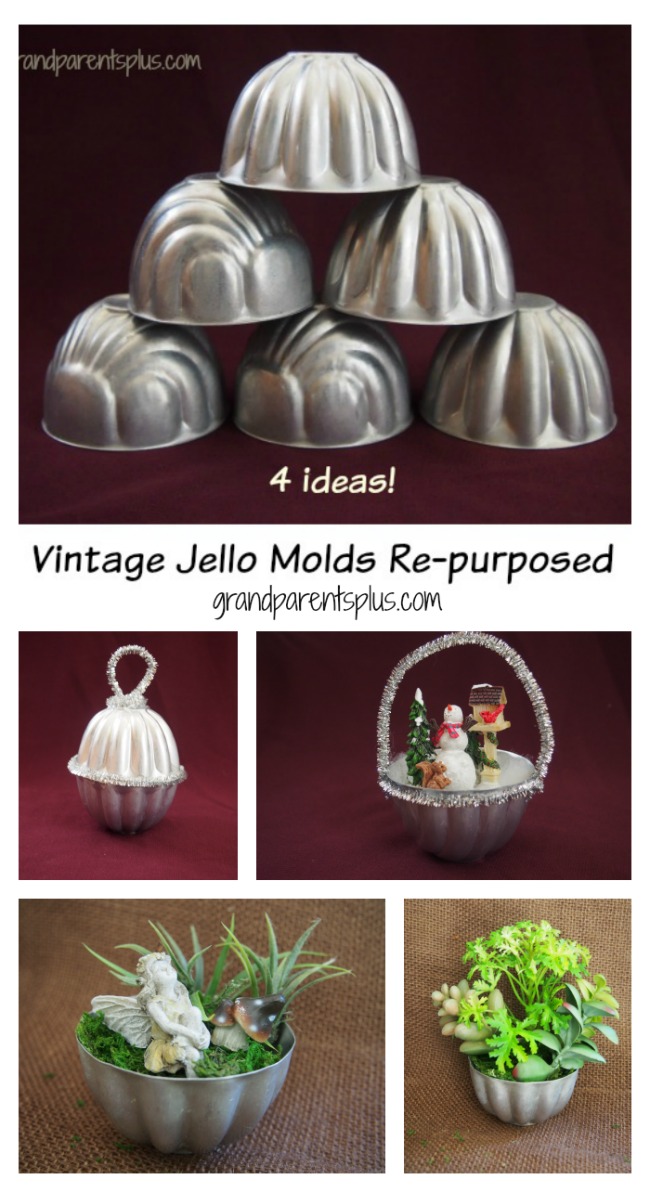
The first idea is using the mold as a planter for artificial succulents. They look great as a little greenery accent on a side table. Put  styrofoam in the bottom and cover with artificial moss. Stick the artificial succulents down into the styrofoam and you’re done! No watering, either!

Vintage Jello Molds Re-purposed grandparentsplus.com


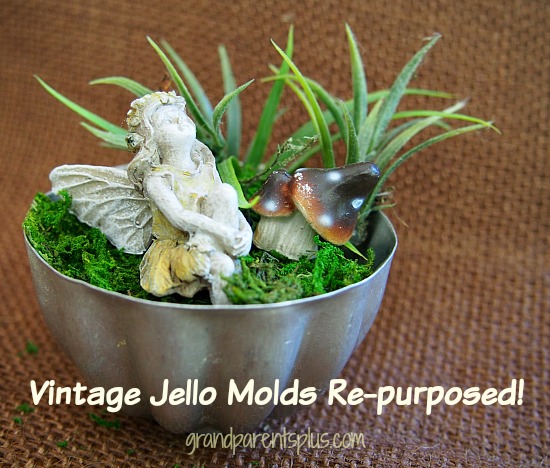
Next, they are perfect for a miniature garden display. You don’t need many items, but it certainly something eye-catching and cute. Once again, use styrofoam or floral foam, artificial sheet moss, and a few items to make the garden look great.

Vintage Jello Molds Re-purposed


Finally, here a two ideas for Christmas…..

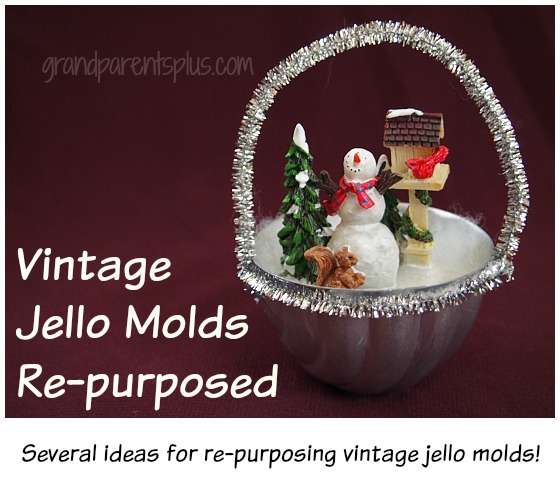
The first one is a snow scene. I merely used some cotton batting, a small winter figure, and silver pipe cleaners. Just hot glue everything in place. Use as a small Christmas accent on a shelf or hang on your tree. Change the scene for another season.


Vintage Jello Molds Re-purposed grandparentsplus.com

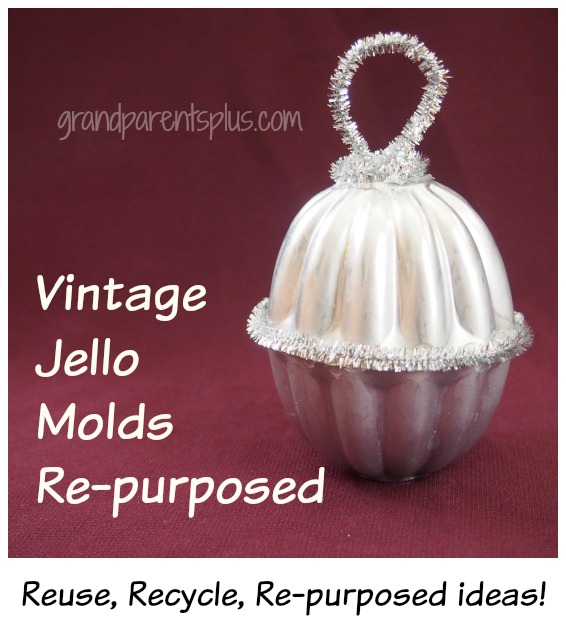
Another ornament idea is to hot glue two together and finish off the edge with silver tinsel pipe cleaners.  Glue another circle of the silver on top and finish with a loop to hang it. 


Vintage Jello Molds Re-purposed grandparentsplus.com


Vintage Jello Molds Re-purposed grandparentsplus.com

Other ideas for re-purposing include using them as popsicle molds or individual serving dishes for mayo, condiments, pudding, etc. 

OK, do you remember these jello molds? Kind of reveals our age, right?

Thanks for stopping by, 

Phyllis  

Subscribe so you don’t miss a post! Your email is never shared or sold.

Follow on Pinterest, too.

stopping by the following parties…..

Posted in Crafts, Decor | Tagged , , , , , | 23 Comments

Orange Candied Sweet Potatoes

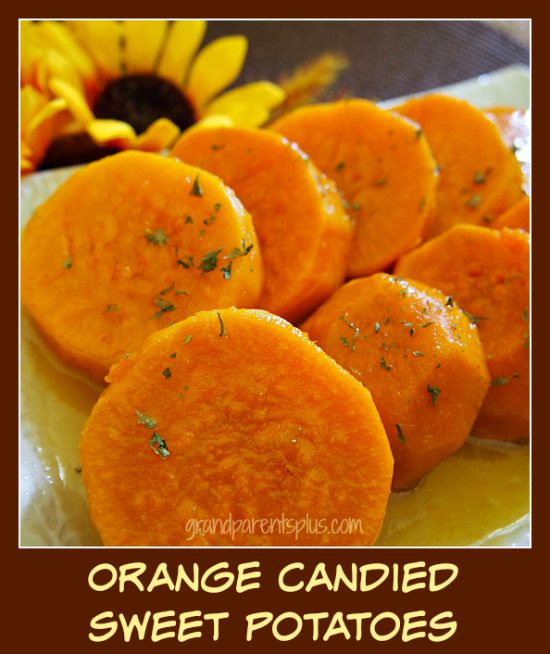
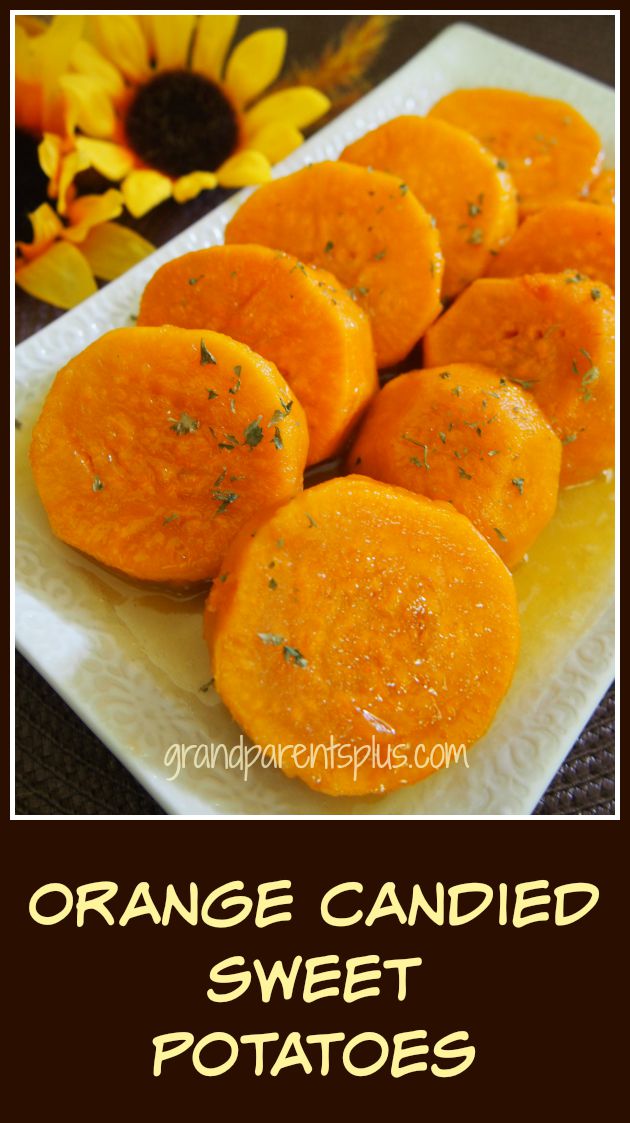
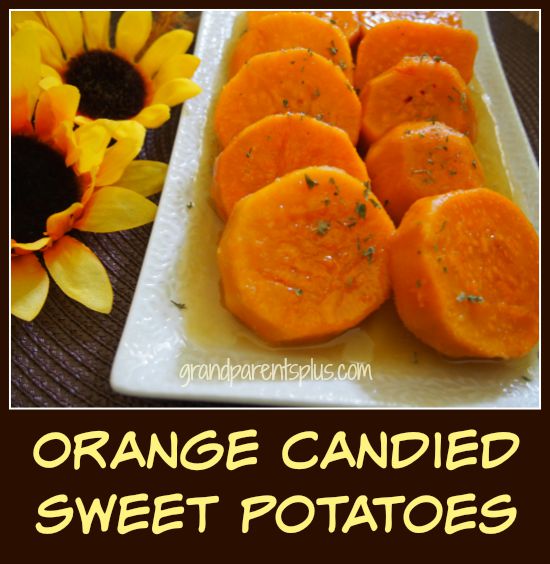
I always think of sweet potatoes in the fall. They taste so good with a meal. At Thanksgiving, many people serve it with lots of marshmallows on top. This recipe for Orange Candied Sweet Potatoes gives a different taste to the same old sweet potatoes. It is delicious, colorful, and very pretty to serve. A friend served it in slices with the glaze spooned over it and I thought it was such a lovely way that I do it, too!

Orange Candied Sweet Potatoes grandparentsplus.com


I have varied the original recipe from Cooks.com just a bit. I wanted more orange flavor so I used 2 Tbsp. of orange concentrate instead of the juice. If you like it with a more subtle orange flavor, just use the orange juice. 


Orange Candied Sweet Potatoes
Recipe Type: Side Dish
Author: Cooks.com
Prep time:
Cook time:
Total time:
Serves: 8-10 servings
Ingredients
  • from Cooks.com
  • ORANGE CANDIED SWEET POTATOES
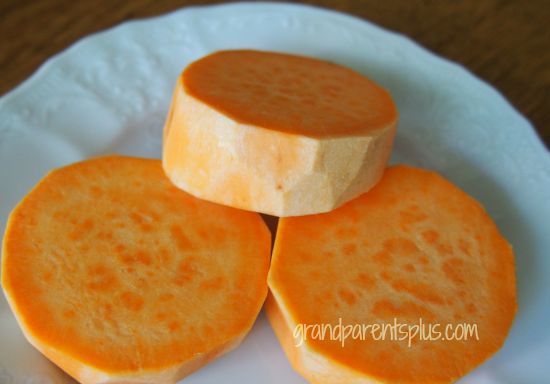
  • 6 sweet potatoes, halved (I like to peel them and slice them in 3/4 – 1 inch thick slices.)
  • 2 tsp. salt
  • 3 tbsp. butter
  • 2 tbsp. orange juice concentrate
  • 3/4 c. corn syrup
  • 1/4 c. brown sugar
Instructions
  1. Combine sweet potatoes, salt and 1/2 cup boiling water in saucepan. Simmer covered for 15 minutes or until tender. Pour off all but 1/4 cup stock dot with butter. Combine orange juice, corn syrup and brown sugar. Blend well. Pour over sweet potatoes. Simmer basting frequently for 15 minutes.

First cut the slices about 3/4 – 1 inch thick.. Orange Candied Sweet Potatoes grandparentsplus.com

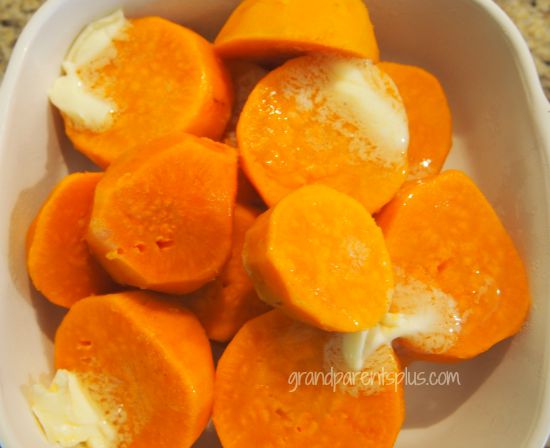
Boil.  When tender, dot with butter reserving 1/4 cup stock from the potatoes.

Orange Candied Sweet Potatoes grandparentsplus.com


Make the orange candied syrup and pour over the potatoes. Baste with sauce.  

Orange Candied Sweet Potatoes grandparentsplus.com


Other than the usual baking and dotting the sweet potato with butter and brown sugar, this is my favorite way to serve sweet potatoes.

Try them! 

Orange Candied Sweet Potatoes grandparentsplus.com


Thanks for visiting! 

Phyllis

Subscribe so you don’t miss future posts! Your email is never shared or sold!

Follow on Pinterest, too!

Linked to these parties…

Posted in Recipes, Side Dish | Tagged , , , , , , , | 21 Comments

Elegant Harvest Tablescape

An Elegant Harvest Tablescape….

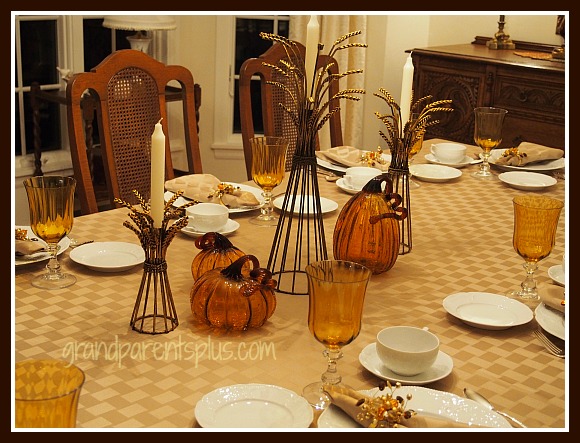
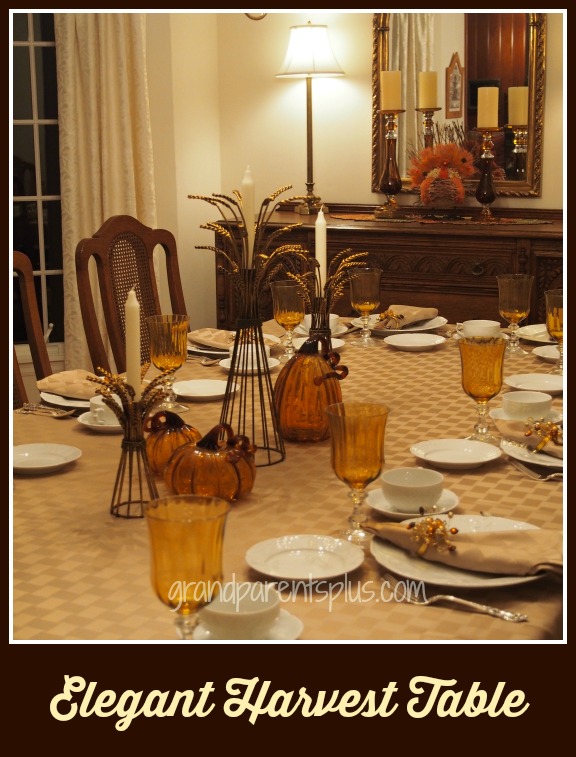
I stopped by my sister’s house and she had her table set for a dinner she was hosting. It was so pretty that I had to share it. This elegant harvest tablescape was rich in shades of taupe, amber, brown, and gold. It’s perfect for any fall or Thanksgiving dinner table-setting.

Elegant Harvest Tablescape grandparentsplus.com

I love the textures of the tablecloth. The tone on tone pattern adds another dimension to the table.

Elegant Harvest Tablescape grandparentsplus.com


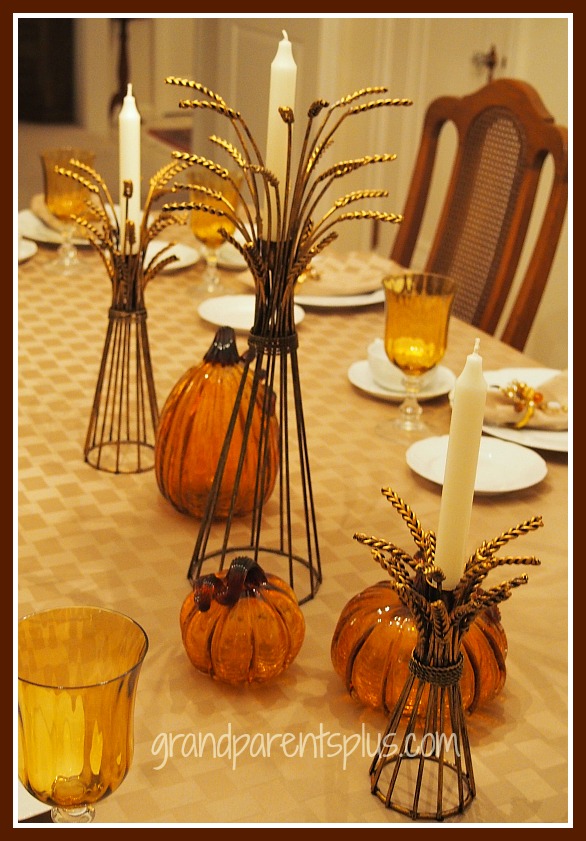
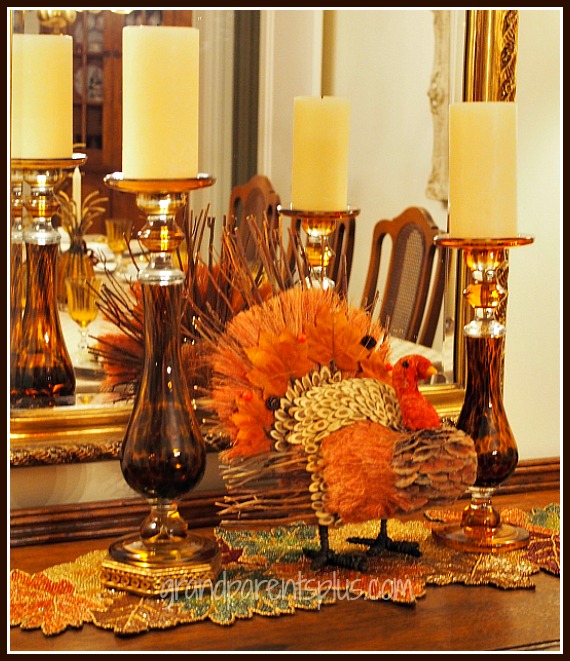
On the buffet, the same tones were repeated in the candle and turkey display.


Elegant Harvest Tablescape grandparentsplus.com


Elegant Harvest Tablescape grandparentsplus.com


I’m sure the guests will be delighted with not only the food, but with this beautiful tablescape. It makes food taste even better when served in such a beautiful way.

Thanks for stopping by!

Phyllis

By subscribing, you won’t miss a future post and your e-mail is never shared or sold!

Follow on Pinterest, too.
linked to these parties…..


Posted in Decor | Tagged , , , , , | 18 Comments

Pumpkin Bread Pudding

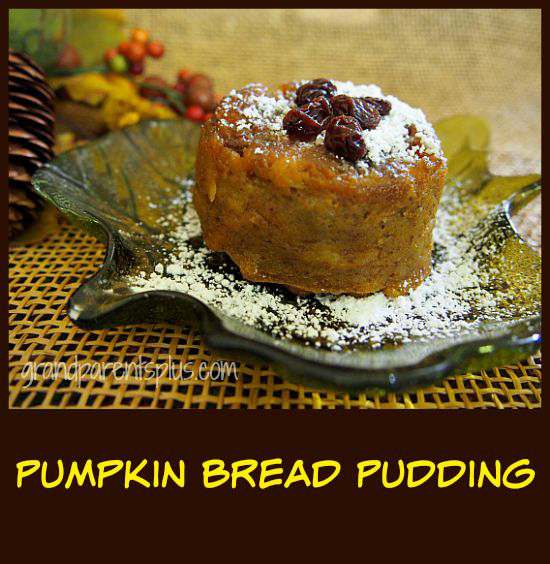
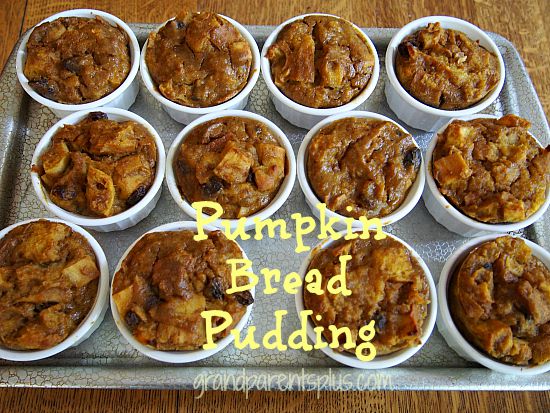
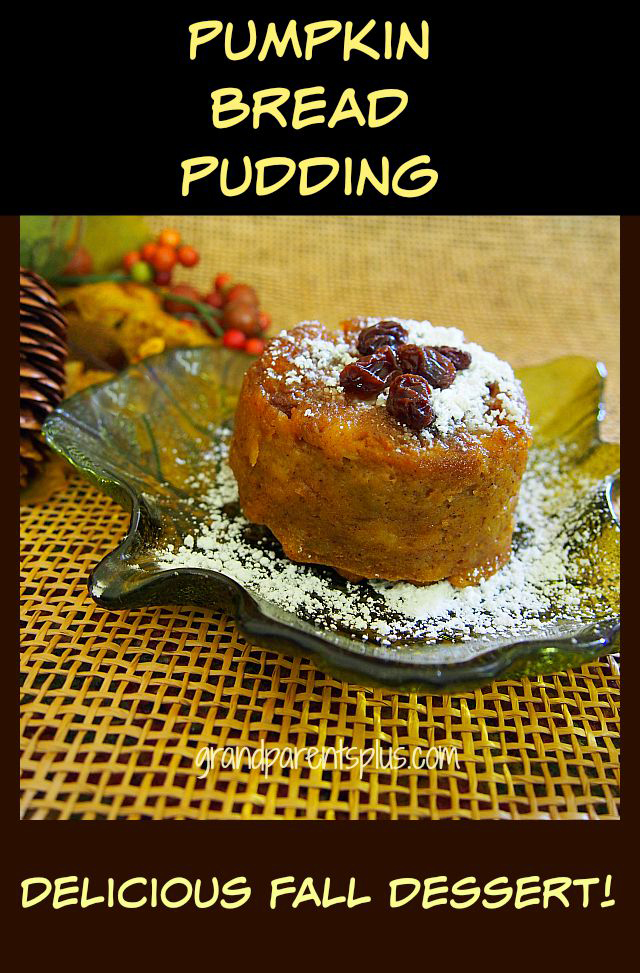
Do you want something new,  festive, and fun to serve for dessert this fall? Try this Pumpkin Bread Pudding recipe! It satisfies the longing for the pumpkin flavor and is so pretty to serve. This recipe certainly has a “wow” factor, but it is easy to make! This recipe comes from a friend who is a terrific cook.

Pumpkin Bread Pudding grandparentsplus.com


Pumpkin Bread Pudding
Recipe Type: Dessert
Prep time:
Cook time:
Total time:
Serves: <span class=”mceItemHidden” data-mce-bogus=”1″><span></span>12 – 4 oz. <span class=”mceItemHidden” data-mce-bogus=”1″><span class=”hiddenSpellError” pre=”” data-mce-bogus=”1″>ramikens</span></span></span>
<span class=”mceItemHidden” data-mce-bogus=”1″><span></span>Served in <span class=”mceItemHidden” data-mce-bogus=”1″><span class=”hiddenSuggestion” pre=”in ” data-mce-bogus=”1″>individual ramikens</span></span> or custard cups, this recipe is beautiful to serve and delicious to eat!</span>
Ingredients
  • 6 Tbsp. dark brown sugar
  • 1 c. raisins (optional)
  • 1/3 c. bourbon (or hot water)
  • <span class=”mceItemHidden” data-mce-bogus=”1″><span></span>1 (15 <span class=”mceItemHidden” data-mce-bogus=”1″><span class=”hiddenSpellError” pre=”15 ” data-mce-bogus=”1″>0z</span></span>. ) can pumpkin <span class=”hiddenSuggestion” pre=”pumpkin ” data-mce-bogus=”1″>puree</span></span>
  • 4 large eggs
  • 1 cup granulated sugar 1 1/2 c. milk
  • 2 tsp pur vanilla extract
  • 1 tsp ground cinnamon
  • 1 tsp ground ginger
  • 1 tsp ground allspice
  • <span class=”mceItemHidden” data-mce-bogus=”1″><span></span>Pinch of salt 1 (12 oz.) day old brioche or <span class=”mceItemHidden” data-mce-bogus=”1″><span class=”hiddenSpellError” pre=”or ” data-mce-bogus=”1″>challah</span></span> bread, cut 3/4 inch. cubes</span>
  • Confectioners sugar for dusting
  • Butter to coat ramekins or custard cups
Instructions
  1. <span class=”mceItemHidden” data-mce-bogus=”1″><span></span>Coat bottom and sides of <span class=”mceItemHidden” data-mce-bogus=”1″><span class=”hiddenSuggestion” pre=”of ” data-mce-bogus=”1″>individual ramekins</span></span> or custard cups with butter and sprinkle each with 1 tablespoon brown sugar and set aside.</span>
  2. Place raisins in and small bowl and cover with bourbon (if using) or hot water to soak 20 minutes or until plump. Drain and set aside.
  3. In a large bowl, whisk together pumpkin, eggs, granulated sugar, milk, vanilla, spices, and salt.
  4. Toss in bread cubes; stir gently to coat and let stand a few minutes. Fold in raisins. Divide among prepared dishes, pressing down to make slightly even.
  5. Bake until center sets and top is golden – 40 minutes.
  6. <span class=”mceItemHidden” data-mce-bogus=”1″><span></span>Remove from oven to slightly cool before <span class=”mceItemHidden” data-mce-bogus=”1″><span class=”hiddenSpellError” pre=”before ” data-mce-bogus=”1″>unmolding</span></span> onto plates and <span class=”hiddenSpellError” pre=”and ” data-mce-bogus=”1″>dus</span> with confectioners sugar.</span>

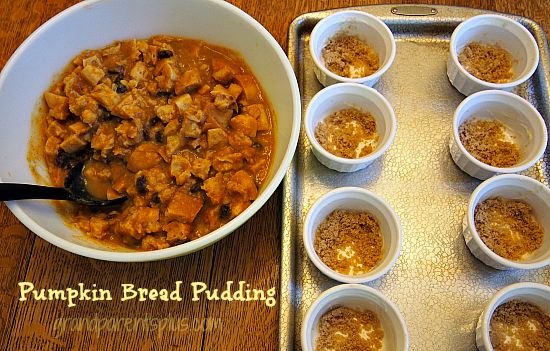
Pumpkin, eggs, sugar, milk, vanilla, spices, and raisins all ready to go into prepared dishes….

Pumpkin Bread Pudding grandparentsplus.com

I used 12 – 4 oz. ramekins.  Baked for 45 minutes.  Let sit for 5-10 minutes before inverting onto a plate.

If you don’t have ramekins, use a large-size muffin tin. You may have to vary the baking time. 

Pumpkin Bread Pudding grandparentsplus.com

Sprinkle powdered sugar over the individual servings.

Pumpkin Bread Pudding grandparentsplus.com


I know you’ll enjoy this dessert! 

Phyllis

Subscribe so you don’t miss future posts. You email is never shared or sold!

Follow on Pinterest, too!

Post linked to these parties…

Posted in Desserts, Recipes | Tagged , , , , , , | 22 Comments

Black Cat Art Project for Kids

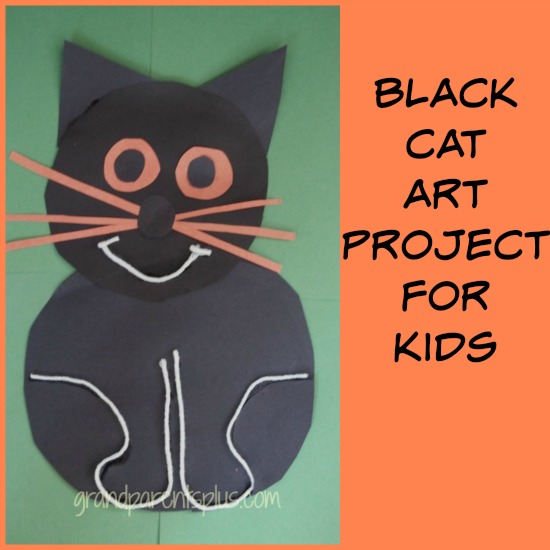
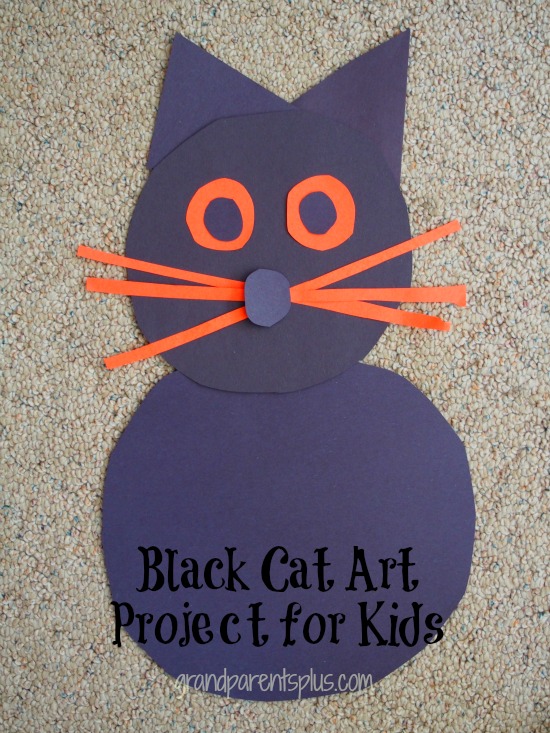
If you need an easy art project for early elementary kids, this Black Cat Art Project is a fun one to do for the month of October. The supplies are simple and each one turns out a bit different, but cute!

Black Cat Art Project for Kids grandparentsplus.com


Supplies:

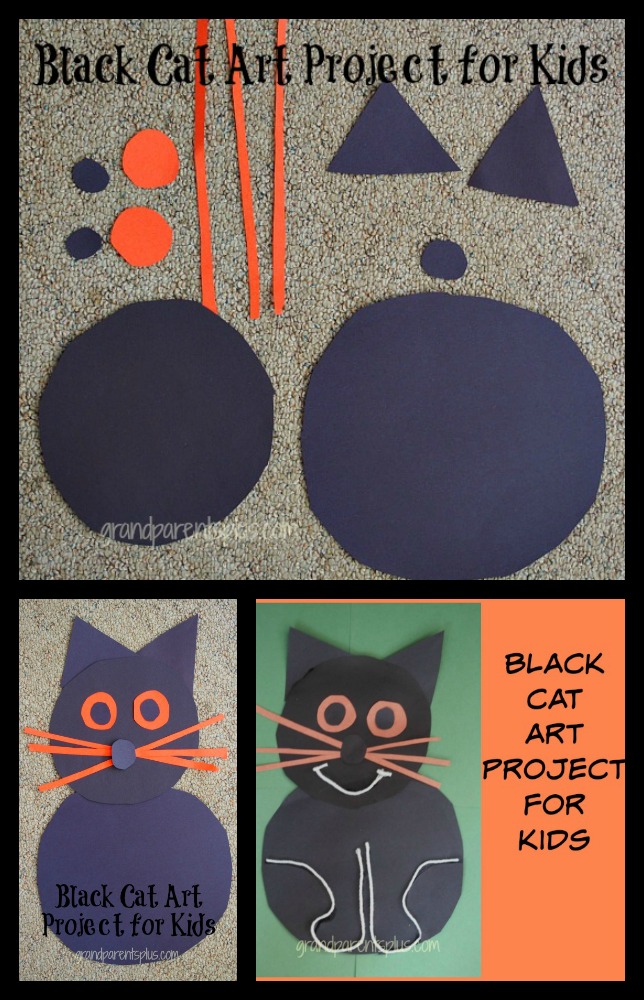
1  1/2 pieces of black construction paper

1/3  piece of orange construction paper

string or yarn

glue  (school glue works best, especially for the string or yarn)

Directions:

From the black construction paper….

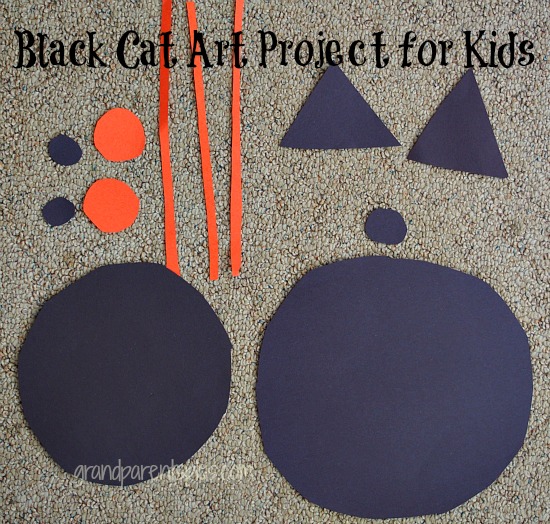
1.Cut a black circle (as large as you can) from both the large black piece of construction paper and the          1/2 piece of black construction paper. (save scraps for ears, eyes, and nose.)

2. Cut two black triangles for the ears

3. Cut two quarter-sized black circles for inside the orange eyes

Black Cat Art Project for Kids grandparentsplus.com


From the orange construction paper….

1. Cut 3 narrow strips from the long length of the paper

2. Cut two large, round orange eyes


Put the black cat together….

Black Cat Art Project for kids grandparentsplus.com

Lay yarn on for mouth and outline of the legs 

Glue with school glue

For and easier way to outline the front paws, make a template that kids can trace with pencil. This way, they know where to put the glue and yarn.  Let kids make their own expression for the mouth with the yarn. Some can be mad or funny looking. Let kids decide how they want it to look.

Black Cat Art Project for Kids grandparentsplus.com

Some kids may ask about a tail. Let them add one. This cat’s tail is behind him! 

Have fun!

Phyllis

Don’t miss future posts. Subscribe knowing your email is safe and secure!

Follow on Pinterest, too.
linked to these parties….


Posted in Art Project | Tagged , , , , , , , , | 12 Comments

Redo a Damaged Frame


Redo a Damaged Frame grandparentsplus.com


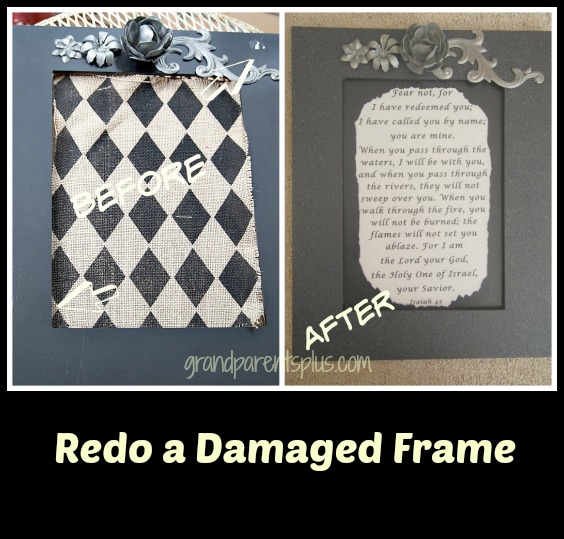
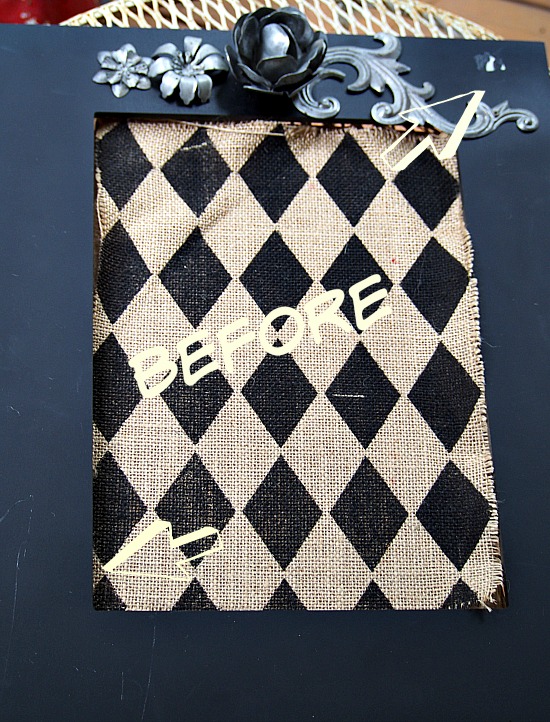
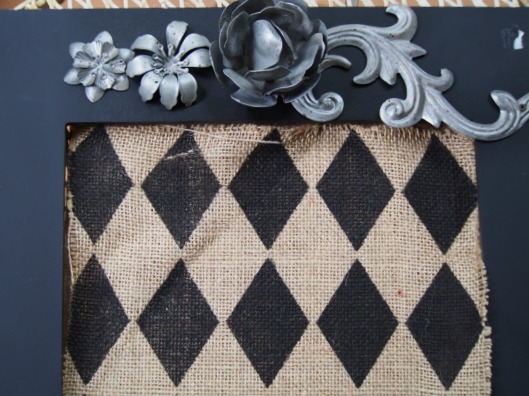
This frame was a bargain for $4.00 at Hobby Lobby! Yes, a real find, but I needed to “Redo a Damaged Frame”  on this one. The frame was unique with some metal work on it, however, the front of the frame was badly damaged along with the ugly burlap for a picture!

Redo a Damaged frame grandparentsplus.com

First, it was deeply scratched in several places. Because it is black, it is a bit hard to see. Also, there was a gouge in it where the sticky price tag had been. (along with some residue remaining). Lastly, the ugly printed burlap just didn’t do anything for it. 

Redo a Damaged Frame grandparentsplus.com

I removed the inside board. The burlap was glued on and tore off quite easily. I sanded it down and spray painted it black. That was easy, so I thought I could do the same with the frame. No problem, right?

Wrong!

After using goo-gone on the sticky stuff, sanding it down, and painting it. I still could see the flaw in the corner. Also, the scratches were very noticeable. I did it a second time and it still wasn’t perfect. 

If it wasn’t going to get perfect, I thought I’d try to camouflage it by doing a little sponge painting in a slightly lighter shade, but that looked bad! It looked like I was trying to hide something which is just what I was doing.

Finally, I got some black Textured Spray Paint. When I started to cover the metal with tin foil to protect it from the spray, I discovered some little screws and easily took the metal off the frame. That made it so easy to spray it. Just one nice coat of that spray and everything was taken care of. No scrapes, gouges, or mistakes showed through! Yea! Finally, the finish was textured and looked great! 

I decoupaged a verse on the inside board, mounted it, and now it is off to a fundraiser for the Children’s Shelter of Cebu. It took a few tries, but now I know how to redo a damaged frame! Next time, I won’t need to go through all those steps! Now, after reading this post, you know how to redo a damaged frame, easily, too!

Redo a Damaged Frame grandparentsplus.com

Thanks for stopping by!

Phyllis

So you don’t miss a post, subscribe knowing that your email is never shared or sold!

Follow on Pinterest, too.
post linked to these parties…


Posted in Crafts, Decor | Tagged , , , , , , , , , , , | 13 Comments

Owl Art Project for Kids

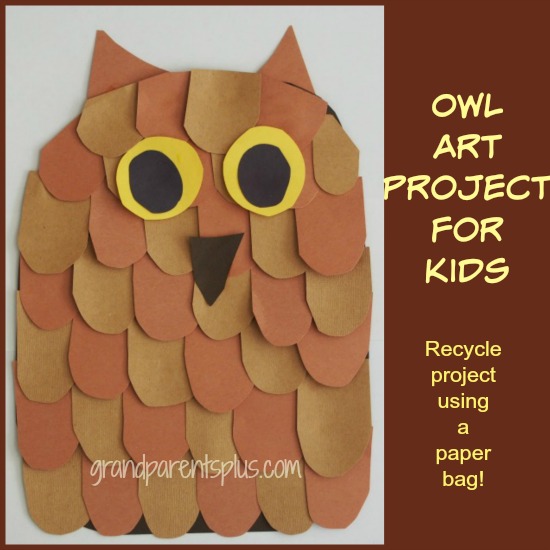
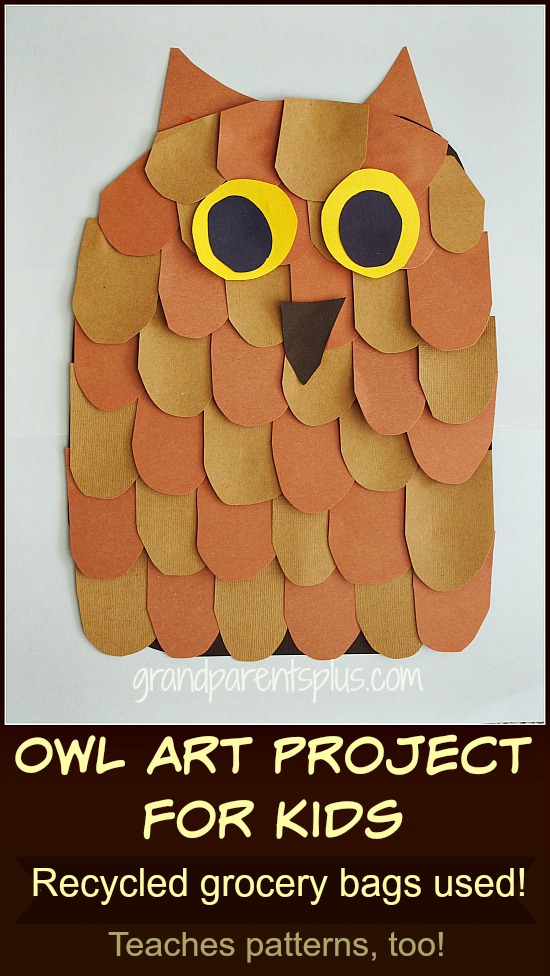
This cute Owl Art Project for Kids is not only an art project, but one that recycles and reuses brown grocery bags along with teaching patterns. It is appropriate for early elementary age kids. They need to be able to cut out simple shapes and glue a pattern. 

Owl Art Project for Kids grandparentsplus.com

If you have different shades of paper bags, you don’t need any construction paper. My grocery bags were all the same shade so I added a piece of light brown construction paper to make the pattern. 

Materials Needed: 

1  9 x 12 piece of dark brown construction paper (you can use a grocery bag for this part, too, but for younger elementary kids, it is easier to see where to glue rather than using the same color bag as the feathers)

Brown grocery bag cut into many 1  1/2 inch by 2  1/2 inch rectangles.  

1  9 x 12 piece of light brown construction paper cut into 1  1/2 inch by 2  1/2 inch rectangles.

1 –  2  1/2 inch squares for the ear- tufts (Cut in half to make 2 triangles)

Yellow construction paper – cut into 2 inch squares for the outer part of the eye

Black construction paper – cut into 1  1/2 inch squares for the inside of the eye and an extra piece to use for the beak


Directions: 

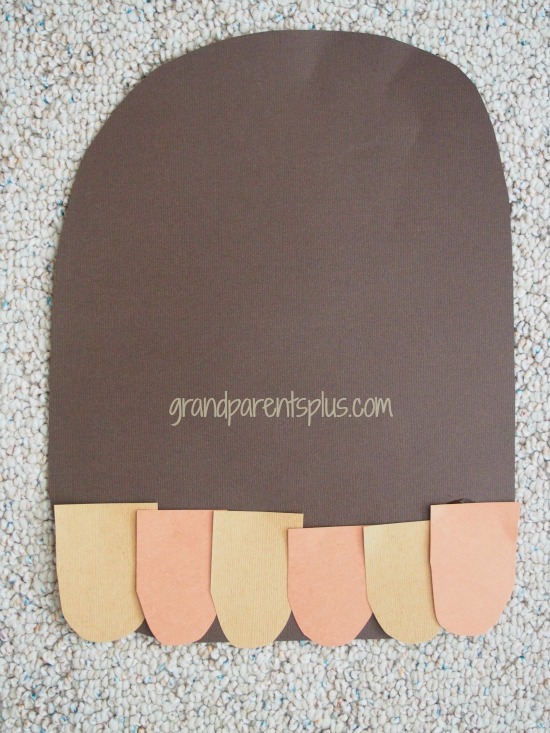
Take the large dark brown construction paper and round off each corner on the top. (as shown) You do not need to do this on the bottom.

Starting with either the grocery bag rectangles or the light brown rectangles, round out one end on each rectangle. Glue to the dark brown base using a pattern. (You can decide if it is ABAB, AABBAABB, ABBABBABB, or kids can decide which to do.) See, it fits into math, too!

Starting at the bottom, complete one row. 

Owl Art Project for Kids grandparentsplus.com

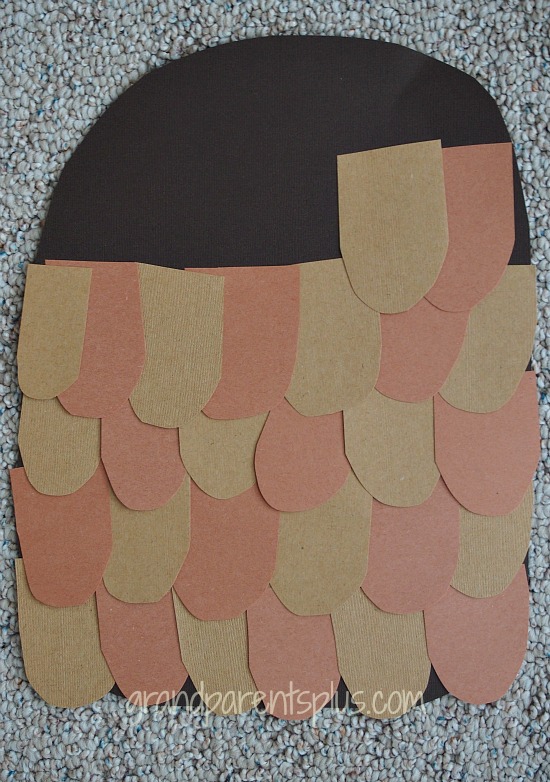
On each of the following rows, overlap 1/3 of the row below! Continue the pattern.

Owl Art Project for Kids grandparentsplus.com

When you reach the top, keep going and then trim from the back, to the edge of the owl shape.  

Cut the ear-tufts from the triangles and glue on the owl.

Add eyes, beak and feet, if you choose. I think it’s  just as cute without bothering with the feet. Besides, the feathers cover their feet!

Owl Art Project for Kids grandparentsplus.com


Isn’t he or she cute? It’s a nice project for art and math combined. Display in a window or a room display titled, “WHOooo knows how to make a pattern?” Fun for both home or school. 

Enjoy!

Phyllis

By subscribing, you won’t miss posts and your email is never shared or sold.

Follow on Pinterest, too.
linked to the following parties….
Posted in Art Project | Tagged , , , , , , , , , , | 20 Comments

Fall Decor Idea House Part 4

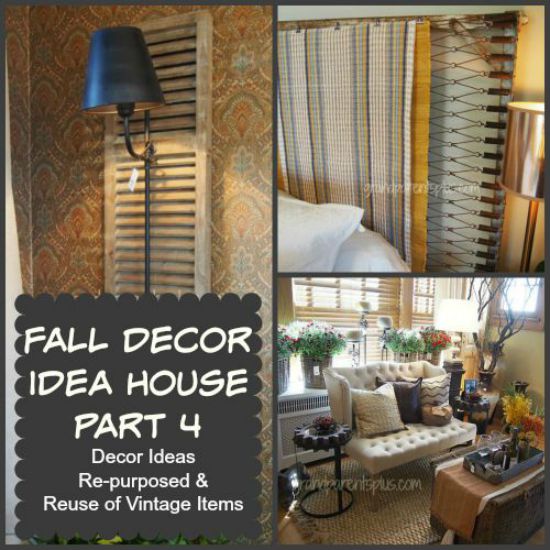
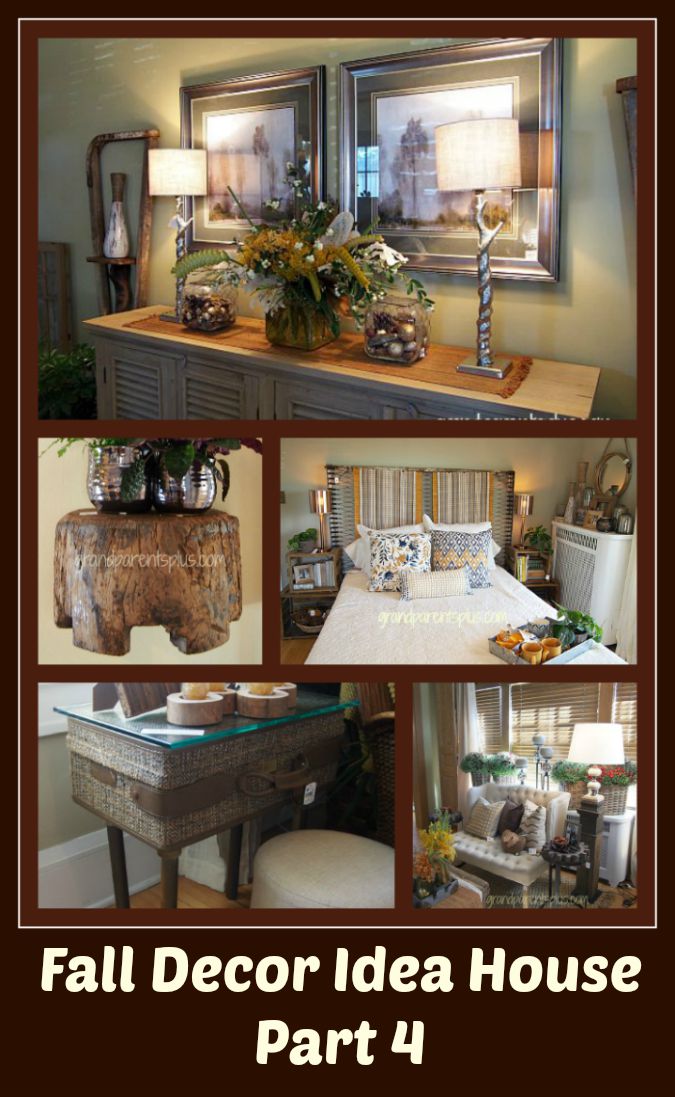
We’ve covered a lot of ideas in the three posts prior to this last one. The Fall Decor Idea House Part 4 probably has the most unusual re-purposed ideas I’ve seen in a long time. While interior designers have totally decorated for fall, many of these ideas work for any season. The two rooms left are the master bedroom and living room. Just wait…..as I’m saving the most unusual until last! Stick with me.

Fall Decor Idea House part 4 grandparentsplus.com


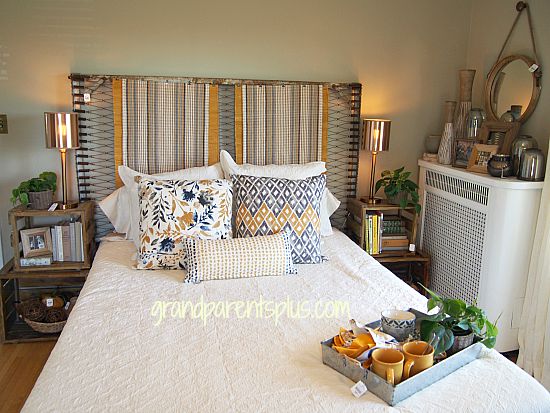
First a look at the master bedroom…..

They used a spring from a crib for the headboard, but they dressed it up with a decorative runner and colorful rugs. (closer look below) You’ll find those same colors picked up in the pillows on the bed. Notice more of the same color accents throughout the room.

Along side the bed, stacked crates create the bedside tables.

Fall Decor Idea House Part 4 grandparentsplus.com


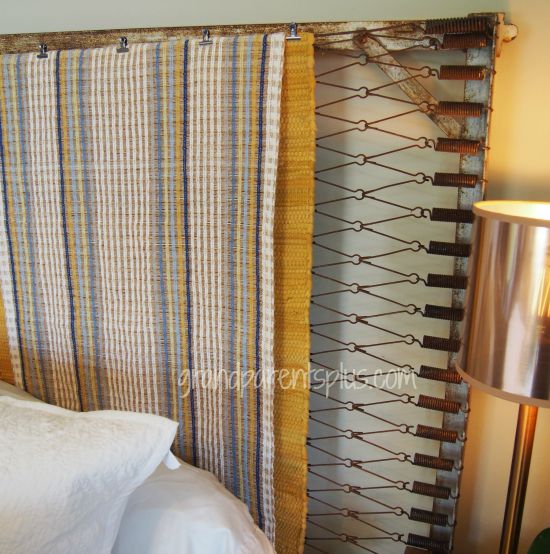
With a closer view, you can see how they secured the rugs and runner. Regular office clips hold everything in place.

Fall Decor Idea House Part 4 grandparentsplus.com

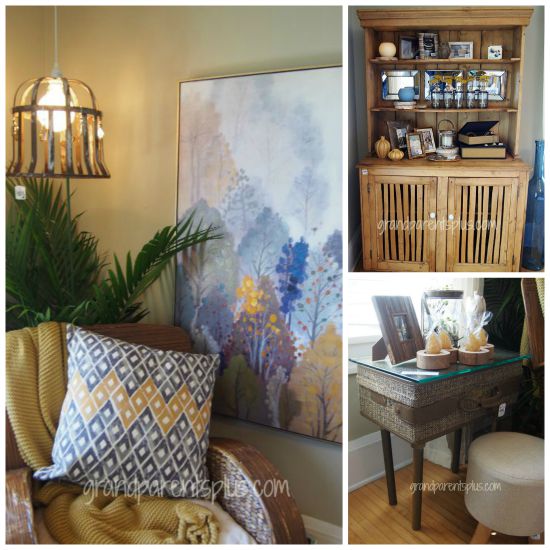
Opposite the bed, a vintage Scandinavian buffet serves as the dresser.

In the corner of the master bedroom, a suitcase outfitted with legs and glass top, serves as a side table. A metal basket, turned upside down, becomes a pendant light while decorative key rings, hanging around it, give it sparkle!

Fall Decor Idea House Part 4 grandparensplus.com

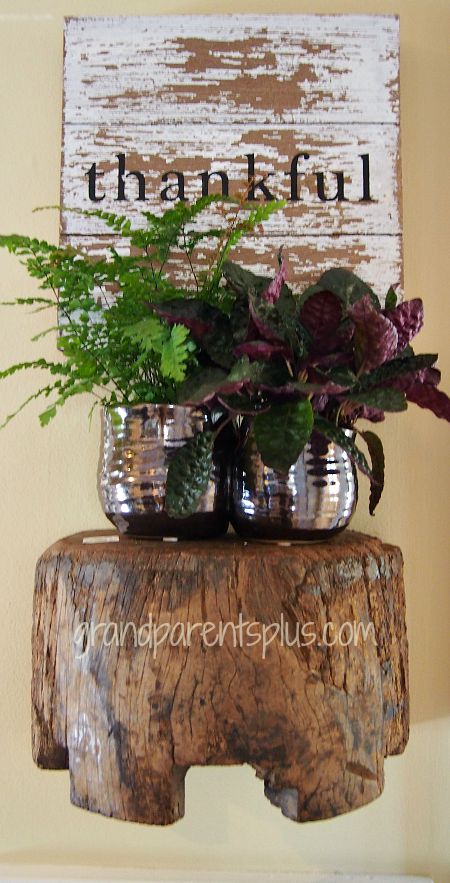
On the way down to the living room, there’s one unique item I forgot to include. Don’t ever toss a stool with a leg missing or a part destroyed. Instead, turn it into a wall shelf using the good parts that are left. Above the shelf, is a salvaged wood piece with “thankful” stenciled on it. 

Fall Decor Idea House Part 4 grandparentsplus.com


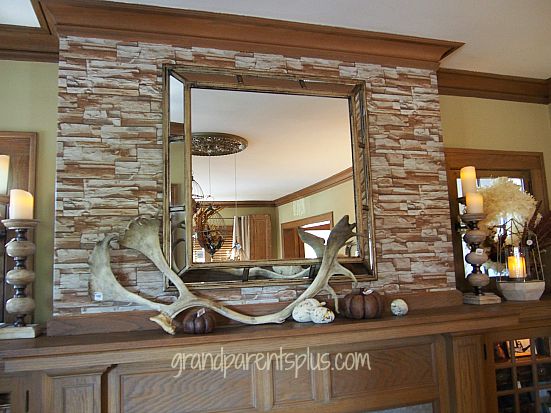
Walking into the living room, you quickly focus on the fireplace. An ornamental elk horn decorates the mantel with pumpkins displayed around it. The top part of the fireplace looks like stacked stone, but it really is wallpaper!

Fall Decor Idea House part 4 grandparentsplus.com

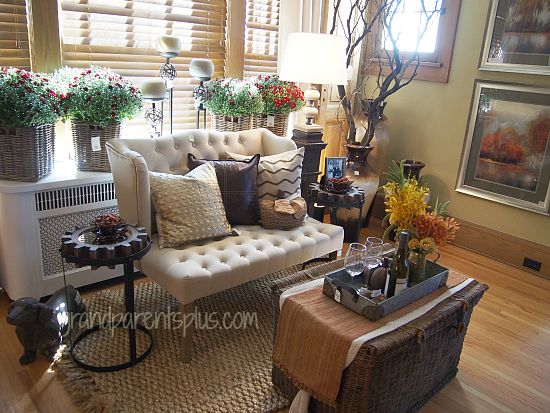
In a sitting area of the living room, there’s a wicker chest, draped in two runners, that serves as a coffee table. Beside the loveseat, is a floor lamp made from a vintage stair newel and a large candleholder.

Fall Decor Idea House Part 4 grandparentsplus.com

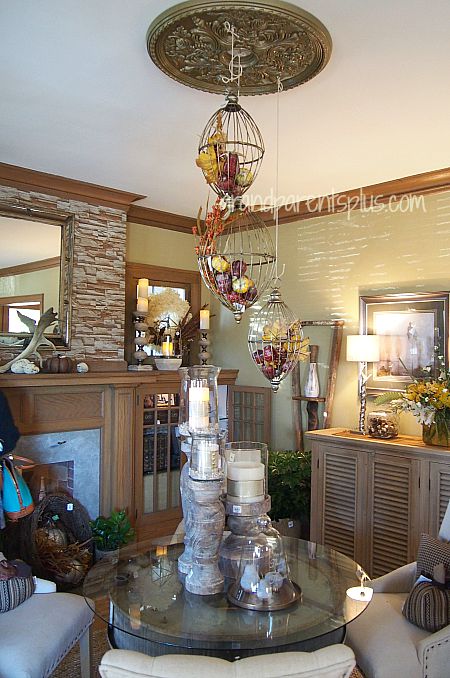
Hanging from the medallion in the center of the living room are wire cages filled with artificial stems and pumpkins. The table underneath is a re-purposed, circular greenhouse heater. A glass top turns it into a “one of a kind” table.

Fall Decor Idea House Part 4 grandparentsplus.com

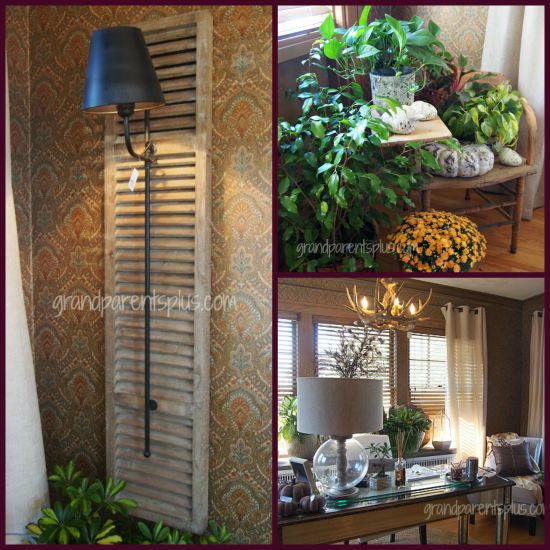
In the sun-room extension of the living room, an old school desk becomes a plant stand. Also, on a narrow wall, a lamp is mounted on a long vintage shutter.

Fall Decor Idea House Part 4 grandparenstplus.com

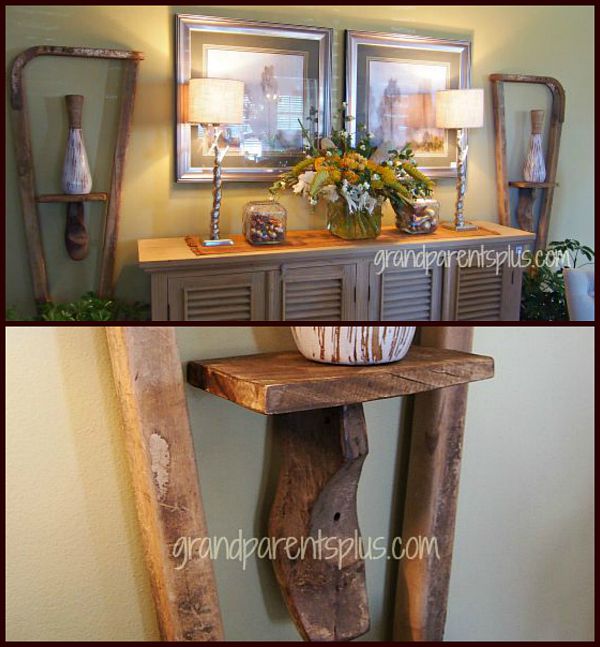
Back into the living room, look closely to find the most unusual item that is re-purposed. If you were raised in the city, you may not know about these items.

Fall Decor Idea House part 4 grandparentsplus.com

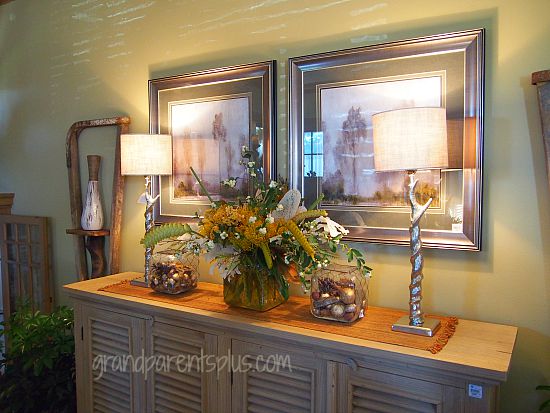
Did you find the unusual items? On either side of the buffet, there are vintage, wooden cow stanchions. A stanchion is used to lock cows in place while being milked. Who would ever think to use them as decor in a beautiful living room? They certainly are a conversation piece! Do you agree?

Within the stanchion, a re-purposed wooden shoe form braces the added shelf.

Fall Decor Idea House Part 4 grandparentsplus.com

Have you ever seen a stanchion used in this way? Being a city girl, I had to be told what they were and certainly could not have imagined them used in a formal living room arrangement! How fun! Seeing the entire area tied together with the colors of taupe, white, and silver used in the art work, frames, arrangements, and lamps, makes everything work. It’s a great look!

Fall Decor Idea House Part 4 grandparentsplus.com


This is the last look at the Fall Decor Idea House! I hope you have found some fun, new ways to decorate. This house certainly has an abundance of ideas for both fall decor along with vintage re-purposed items. Now, be on the look-out for those stanchions and let me know how you use them!

If you missed the posts on the Fall Decor Idea House Part 1, Part 2, or Part 3, you’ll want to check them out!

Coming up soon is the Christmas Decor Idea House so be sure to stop back!

Thanks for stopping by and hope you enjoyed the fun ideas! 

Phyllis

By subscribing, you won’t miss future posts and your email is safe and secure.

Follow on Pinterest, too!

linked to these parties….


Posted in Decor | Tagged , , , , , , , , , , , , , , , , | 19 Comments

Double Chocolate Banana Bread

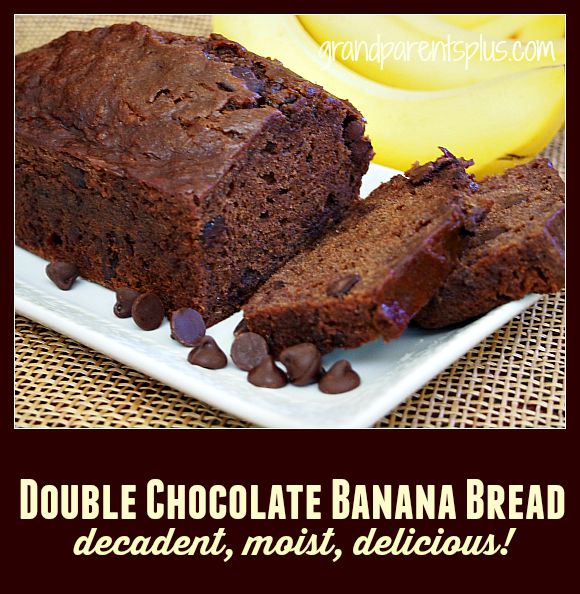
Can’t get enough chocolate? This Double Chocolate Banana Bread satisfies that craving!  It is such a moist and delicious bread. You can vary this recipe and make it just regular Banana Bread, too! Nice to have two options in one recipe. 

Double Chocolate Banana Bread grandparentsplus.com


This recipe makes two small loaves or one large loaf. I like the two small loaves as the pieces are just right for serving. Eat one and freeze the other for later.

Double Chocolate Banana Bread or Regular Banana Bread
Recipe Type: Bread
Prep time:
Cook time:
Total time:
Serves: 2 small loaves or 1 large loaf
Chocolate flavor, chocolate chips, and bananas all go into this Double Chocolate Banana Bread! So moist and delicious!
Ingredients
  • 1/2 cup butter
  • 1 cup sugar
  • 2 eggs
  • 3-4 bananas mashed
  • 1 tsp. vanilla
  • 2 cups flour – If you’re making the Double Chocolate version, add 1 3/4 cup flour and 1/4 cup cocoa powder.
  • 1 tsp soda
  • 1/2 – 3/4 cup chocolate chips
Instructions
  1. Combine first 5 ingredients mixing together.
  2. Add flour and soda or the flour, soda, and cocoa powder.
  3. Fold in chocolate chips at the end.
  4. Put into two greased and floured small loaf pans or one large loaf pan (9×5)
  5. Bake at 350 degrees for 50-55 minutes until toothpick comes out clean.
  6. Cool 15 minutes in the pan.
  7. Invert and remove bread from the pan.

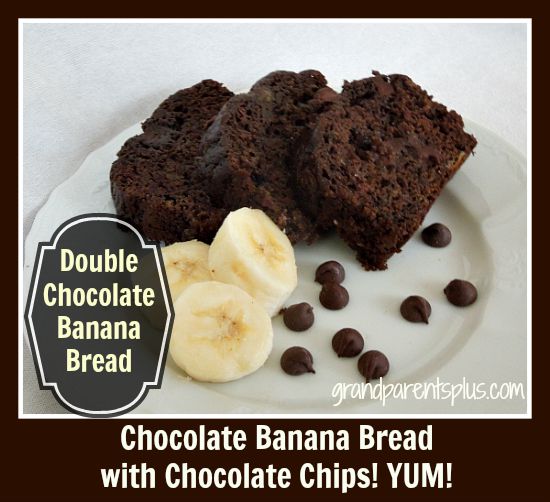
Double Chocolate Banana Bread grandparentsplus.com


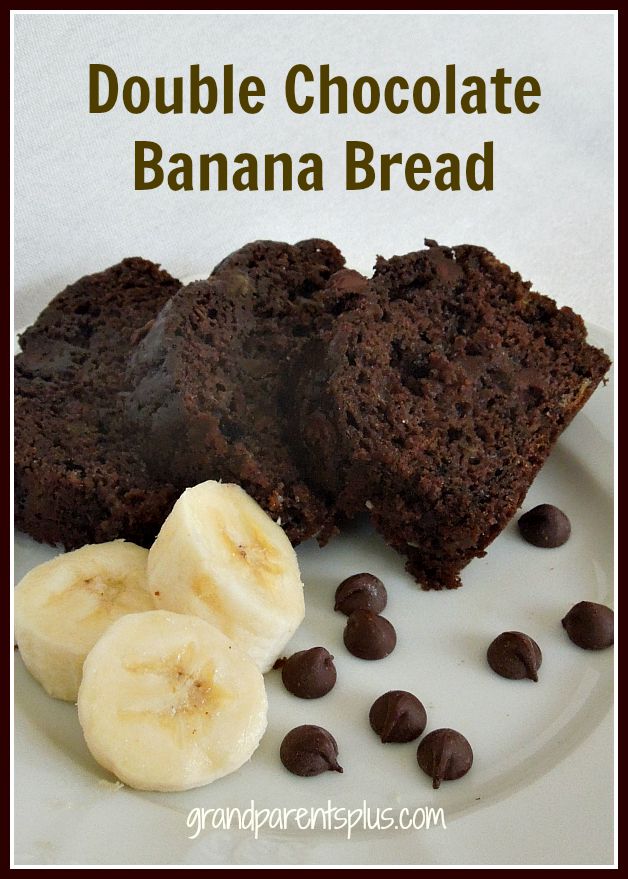
Are you a chocolate lover? I am and I absolutely love this Double Chocolate Banana Bread! I think you will, too!

Double Chocolate Banana Bread grandparentsplus.com

Enjoy!

Phyllis

You might want to try the Chocolate Zucchini Cake, too!

Subscribe on the sidebar so you don’t miss future posts! Your email is never sold or shared!

Follow on Pinterest, too!

Post linked to these parties…

Posted in Bread/Muffins, Easter, Recipes | Tagged , , , , , | 18 Comments