Fall Tablesetting

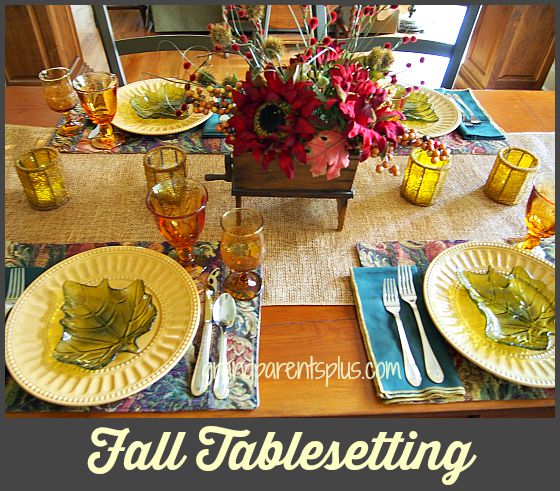
The calendar and the weather all say that fall is here. Using the colors of burgundy, gold, and green together certainly look like fall, too! Combining these colors in the centerpiece, placemats, dishes, goblets, and napkins, it all comes together to make a fall tablesetting.

Fall Tablesetting grandparentsplus.com


Setting a lovely table is what I enjoy most about entertaining. (Oh, I like the guests, too!) This Fall Tablesetting is a mix of various dishes and styles put together. I like that everything doesn’t need to match.

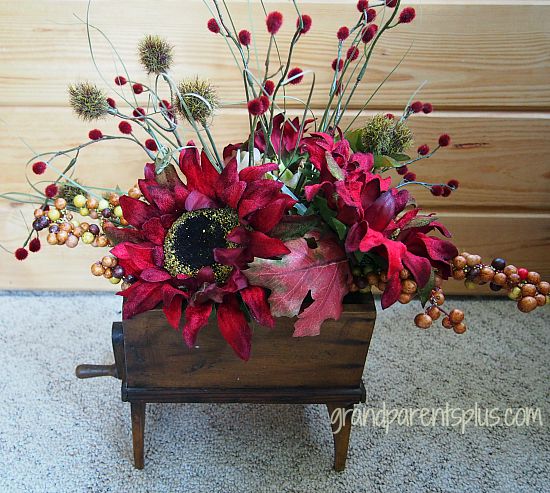
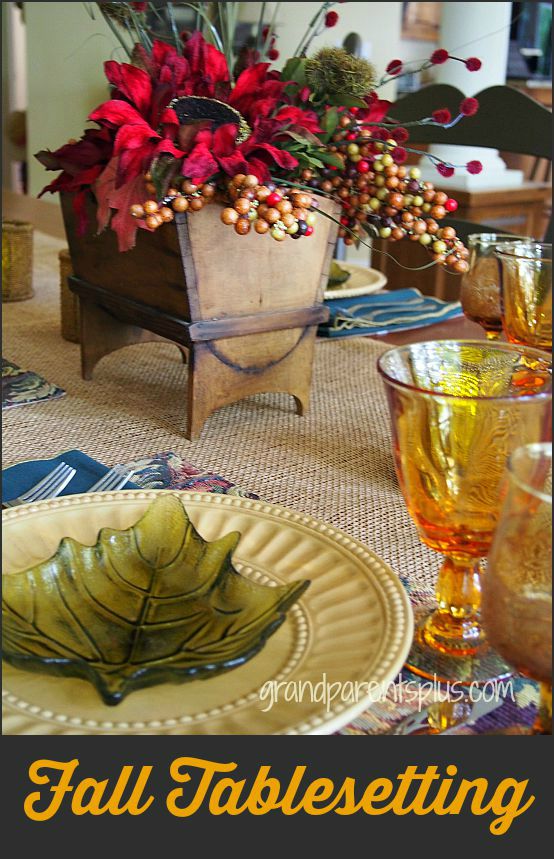
I started with the centerpiece. It is in an antique flour sifter that I found in Europe many years ago. I love the patina of the old wood and it works perfectly for a fall centerpiece. The three gorgeous burgundy sunflowers with fall berries were found this year at Hobby Lobby. The extra fill of burgundy berries and green foliage is from the Dollar Tree. They came as many stems on a bush. I bought them last year and knew that I’d make use of them somehow. ($2.00) Not bad! All in all, it’s a pretty inexpensive centerpiece.

Fall Tablesetting grandparentsplus.com


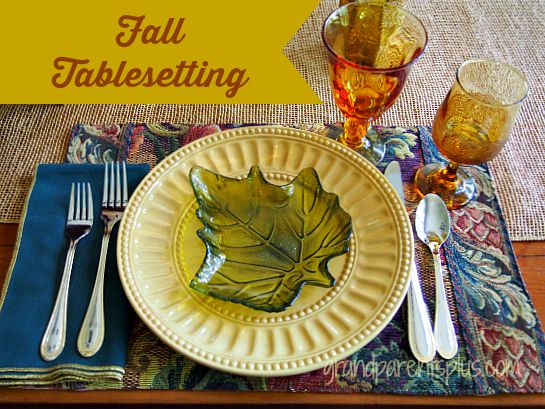
I bought the green leaf plates at Walmart two years ago. Wish they had them again as I could use more! All I have seen lately is plastic and that won’t do for me. I don’t remember what I paid, but they were inexpensive.

Fall Tablesetting grandparentsplus.com


The two sets of glasses are old (antique?). I like to use them for fall.

Fall Tablesetting Grandparentsplus.com


Now, I need to invite some friends for dinner. The table is ready!

Hope this gave you some inspiration for your fall tablesetting.

Thanks for stopping by,

Phyllis

Subscribe on the sidebar for future posts. Your email is never shared or sold.

Follow on Pinterest, too.

Post linked to these parties…


Posted in Decor, Holidays, Thanksgiving | Tagged , , , , , , | 28 Comments

Spaghetti Salad

This Spaghetti Salad recipe makes a huge amount. So, if you’re making it just for your family, you may want to cut the recipe in half. It is a hearty salad and one which you can add just about anything to it. I’ll give lots of optional additions, but you can pick and choose the ones your family will like.

You do need to plan ahead and make this the day before. It needs to be in the refrigerator overnight to soak up all the flavors!

Spaghetti Salad grandparentsplus.com


Spaghetti Salad
Recipe Type: Salad
Prep time:
Cook time:
Total time:
This Spaghetti Salad is hearty and delicious. Lots of ingredients with a zest of Salad Supreme spice.
Ingredients
  • 1 -1 lb. box Spaghetti (regular or whole wheat)
  • 1 16 oz. bottle of Italian Dressing
  • Red onion chopped fine
  • 2-3 tomatoes, seeded and chopped
  • McCormick’s Salad Supreme seasoning
  • Cheese (Colby or Cheddar)
  • pepperoni or salami, cut into small pieces
  • Celery – diced
  • Optional items:
  • Cucumber, seeded and diced
  • Sliced black olives
  • green pepper, diced
  • marinated artichoke hearts
Instructions
  1. Prepare Spaghetti according to package directions
  2. Drain and run under cold water.
  3. Place spaghetti in a large bowl.
  4. Pour Italian Dressing over the spaghetti
  5. Add 1/2 jar of McCormick’s Salad Seasoning ( I add just a little more)
  6. Mix with spaghetti
  7. Add onion, celery, pepperoni or salami, and tomatoes
  8. Add optional ingredients of choice
  9. Combine all ingredients, cover, and refrigerate overnight.

This recipe never had amounts of each ingredient so I just add according to what I like. Toss well before serving to get all the goodies from the bottom of the bowl. This salad keeps well for a couple of days in the refrigerator.

Spaghetti Salad grandparentsplus.com


Enjoy!

Phyllis

By subscribing, your email is never shared or sold!

Follow on Pinterest, too!

Post is linked to these parties…..


Posted in Recipes, Salads | Tagged , , , , , , | 28 Comments

Salsa Goddess Dressing Recipe

Salsa-Goddess Dressing for Taco Salad grandparentsplus.com

Here’s a recipe for a great taco dressing that I call Salsa Goddess Dressing! It is easily mixed together from four ingredients. Three of the ingredients are easily found. One is my secret ingredient I use for my Guacamole. It  adds wonderful flavor to this Salsa-Goddess dressing. Check out the Best Guacamole Recipe, too!


Salsa-Goddess Dressing for Taco Salad
Recipe Type: Salad Dressing
Cuisine: Mexican
Author: Phyllis Van Rossum
Prep time:
Total time:
Serves: 2 1/2 cups approx.
A wonderful dressing for your Taco Salads.
Ingredients
  • 1 cup mayo
  • 2/3 cup Green Goddess Salad Dressing
  • 1/2 – 3/4 cup Salsa (your choice of mild, medium, or hot)
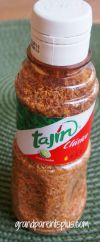
  • Tajin
Instructions
  1. Thin mayo with milk or cream
  2. Add Green Goddess Salad Dressing
  3. Add Salsa
  4. Mix together
  5. Season to taste with Tajin -add shakes of Tajin until you reach desired spice flavor
  6. (Tajin, pronounced “Ta-Heen” is found in the Hispanic aisle of your grocery store or in a Hispanic grocery store.


Tajin looks like this….. Salsa Goddess Dressing


Put dressing in  bowl or pitcher and let each person add the dressing on their Taco Salad.

Sprinkle chips on top. (optional)

Salsa-Goddess Dressing for Taco Salad


Enjoy! 

Phyllis ihyllis

When you subscribe, you email is safe and never shared or sold!

Follow on Pinterest, too!

Post linked to these parties…. 


Posted in Recipes, Salads | Tagged , , , , | 14 Comments

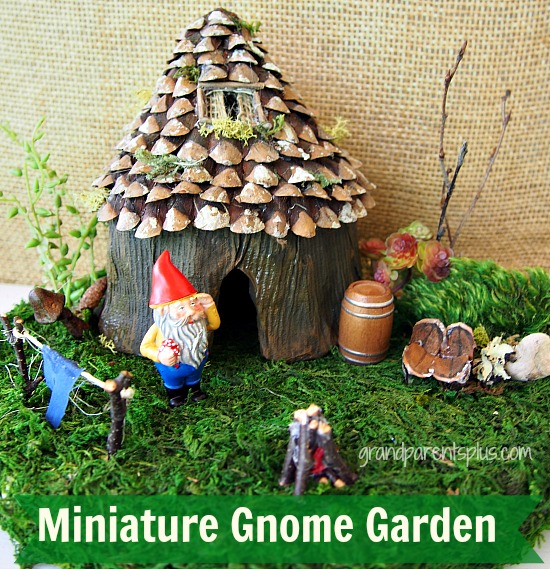
Miniature Gnome Garden

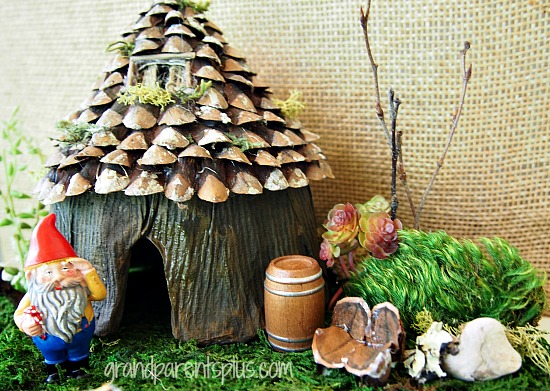
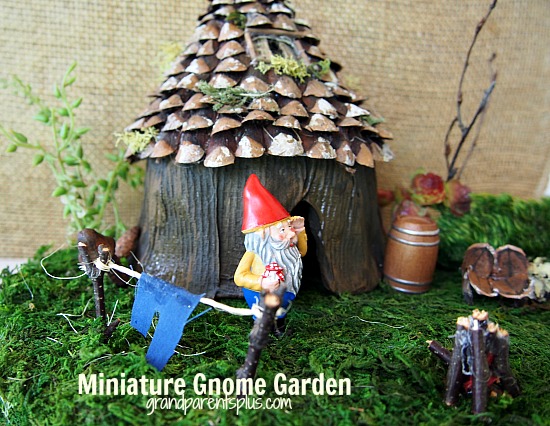
I have done a couple posts on miniature gardens lately and that started me on creating this Miniature Gnome Garden. At first, I thought this idea was way too much work, but when I got into it, I saw lots of possibilities. It became fun, too. Living near a wooded area, gave me ample supplies to make this. Besides items from nature, I used a plastic whipped topping container for the main base so it’s a bit of a reuse and recycle project, too. A post from Sharon Ojala. was my inspiration.

Miniature Gnome Garden grandparentsplus.com

Materials I used…

Whipped topping plastic container or any other container….  Pringles can, styrofoam take-home containers, boxes, etc.

Tin Foil

Wide Masking Tape

Paper Towel

Tacky Glue

Glue Gun

Sticks, Pine Cones or other materials for a roof

Sheet Moss

12 inch Styrofoam Base

2 shades of Brown Acrylic Paint (or add black to one shade)

Paint Brush

Tag Board or Paper Plate

Scrap Burlap

Directions:

1. Decide on a container to use. Cut a door opening and windows, if desired.

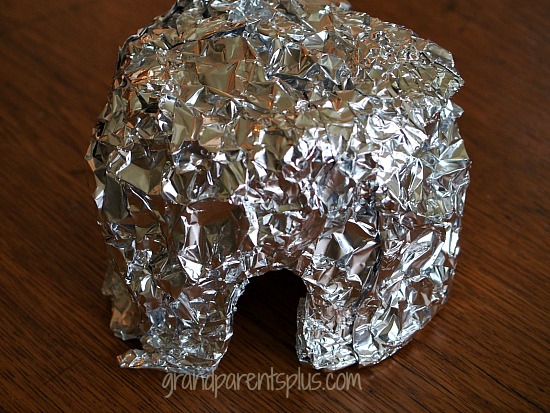
2. Cover container with crumpled or straight tin foil so that it has texture. This step doesn’t have to be perfect. Use strips of tin foil and keep adding.Hot glue in place. With the foil, you are able to crumple it up so it looks like a tree or any type of texture you like.

Miniature Gnome Garden grandparentsplus.com

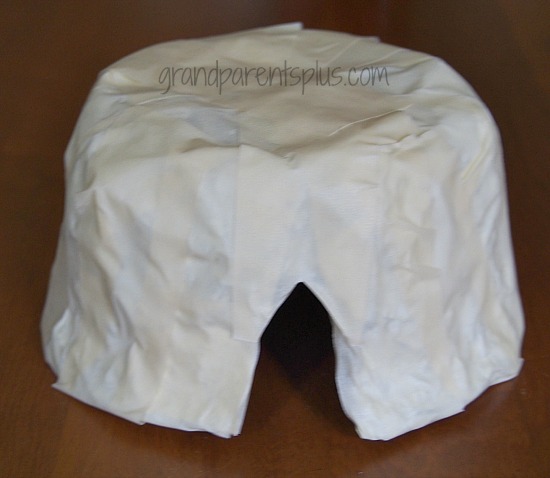
3. Cover tin foil with wide masking tape. You need this step as the paper towel doesn’t stick to the foil.

Miniature Gnome Garden grandparentsplus.com

4. Make a mixture of tacky glue and water. Dip paper towel strips into glue mixture and place over masking tape.

Miniature Gnome Garden grandparentsplus.com

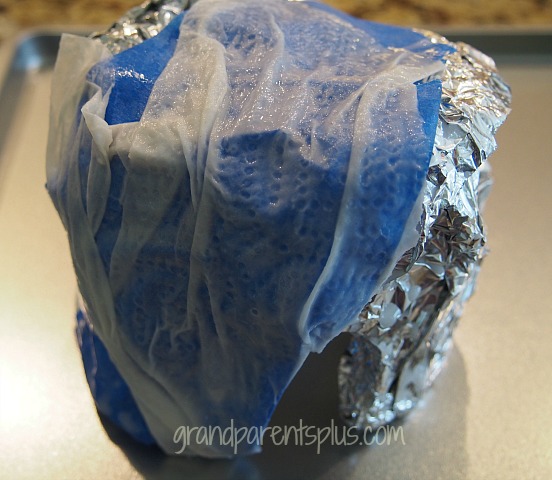
This shows the three steps of tin foil, tape (blue), and paper towel. I used blue for this sample so you could see it better. You really can’t go wrong as it will all be painted anyway.

5. When dry, paint. Use two tones of brown to give some shading to the Gnome home.

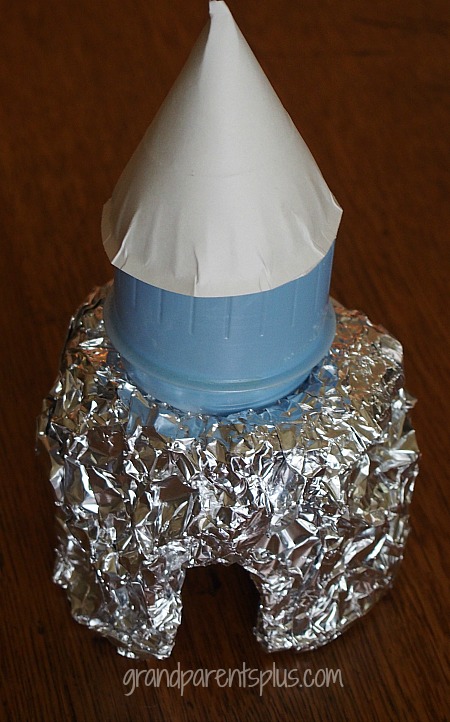
There are so many possibilities of items to reuse….   Make a castle by using a detergent cap and cone top.

Miniature Gnome Garden grandparentsplus.com

Back to the Miniature Gnome Garden…..

6. Roof:

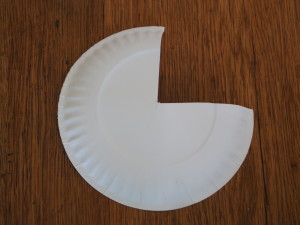
Cut a circle (don’t worry about size and you can cut it down to fit). Now, cut out 1/4 of the circle and bend around to form a cone and staple it together. Now, fit it to your project and cut it down to size. For this circle, I used a paper salad plate. Tag board works as well, too! If you want a window, cut it out with an exacto knife before putting the roof material on.


Miniature Gnome Garden grandparentsplus.com

If you are going to use pine cones or sticks for the roof, then cover it with brown burlap. This way, the white tag-board won’t show. When you cover it with burlap, don’t worry about how it looks. Just use scraps and hot glue anywhere in place on the tag-board. Cut off excess along the bottom. Other possibilities are using moss, birch bark, or simply painting the roof. Do not glue the roof to your project, yet!

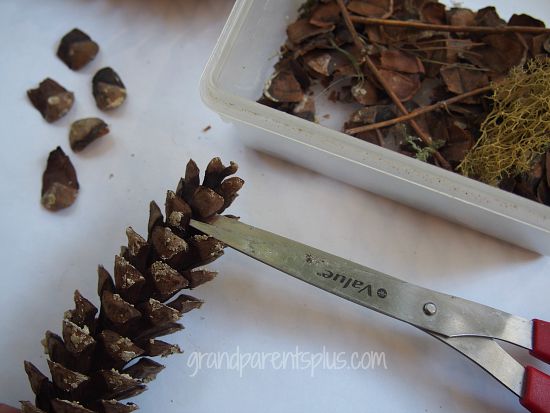
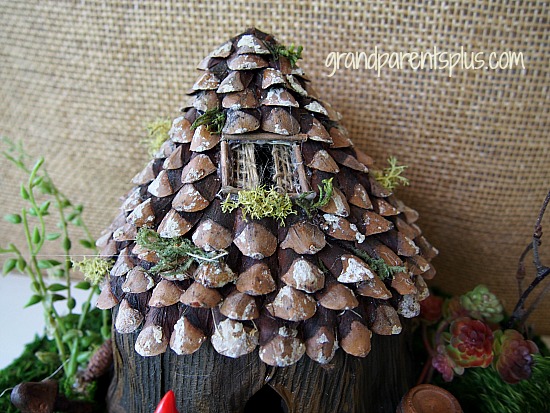
On my roof, I used pine cones and cut the scales off with a scissor. The pinecone scales were open. I didn’t need to dry them in the oven to get them to open. My pinecones had sap on the ends so after cutting the scales, I used hand sanitizer to remove the sap from my hands.  I highly recommend doing this stage outside. The scales sometimes go flying and with the sap, you don’t want this in your home.

Miniature Gnome House grandparentsplus.com

I didn’t worry about how straight the ends were as only the tips show on the roof. For my roof, I used about 6-7 pinecones.

7. Next step is to edge the window, if you have one. I used thin sticks to make the edges finished before I added the scales for the roof. I , also, glued burlap inside to look like curtains.

8. Now you are ready to add the scales. With a glue gun, place a line of glue starting at the bottom of the roof and going about 5 scales wide. Place the scales so they overlap the roof just a little. Add more glue and keep going around. One the second round, start by placing the scales in-between the ones on the first row. This won’t come out exactly even as you can see on my roof, but it looks fine anyway.

Miniature Gnome Garden grandparentsplus.com

9. When you’re completely done, hot-glue the roof onto the painted base. Add some moss or lichens here and there, if desired.

10. For the base, I used a 12″ round styrofoam piece. Do not use hot-glue on the styrofoam! I used a piece of sheet moss on the base and glued it with tacky glue. Then, I attached the house with hot-glue and  used some pins in places that wouldn’t be noticed after adding artificial succulents. You can use any type base for this project.

11. Add pieces of your choice to this Miniature Gnome Garden. I bought two items and then made some pieces by hand. Go to elowezil and see some unique items you can make for your garden.

Miniature Gnome Garden grandparentsplus.com

I made a little fire pit with sticks and added a piece of red tissue paper for a flame.

Miniature Gnome Garden grandparentsplus.com


This is a great project to involve your elementary age child. Let them help and think of things to add to your Miniature Gnome Garden. Remember, this is  a garden to display inside; not outside.

Don’t like gnomes? Change it to a fairy garden! Have fun and use your imagination!

Enjoy!

Phyllis

By subscribing on the sidebar, your email is never shared or sold!

Follow on Pinterest, too.

Posted in Crafts | Tagged , , , , , , , , , , , , | 34 Comments

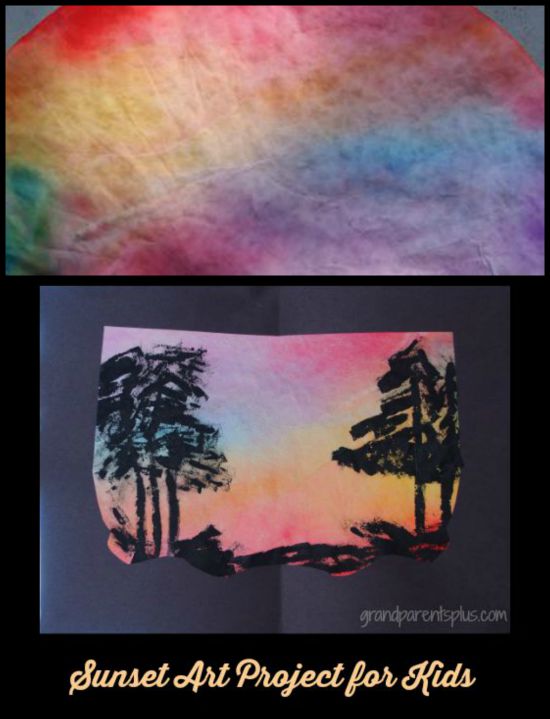
Sunset Art Project for Kids

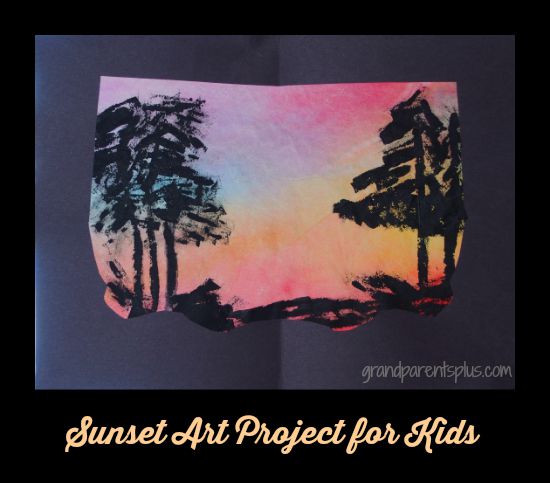
I was inspired to do this Sunset Art Project for Kids because we enjoy such beautiful, colorful sunsets at our home. There are never two just alike. It is like an original painting by God!

Sunset Art Project for Kids

We live among a grove of tall White Pines on a small lake. The pines are beautiful, stately trees that frame the sunsets. Whether you live in the woods, mountains or desert, you can make the shadowed parts similar to the area where you live.

Here are some of the sunset pictures that inspired this project….

Sunset Art Project for Kids grandparentsplus.com


Sunset Art Project for Kids grandparentsplus.com

This Sunset Art Project is easy enough for elementary kids.

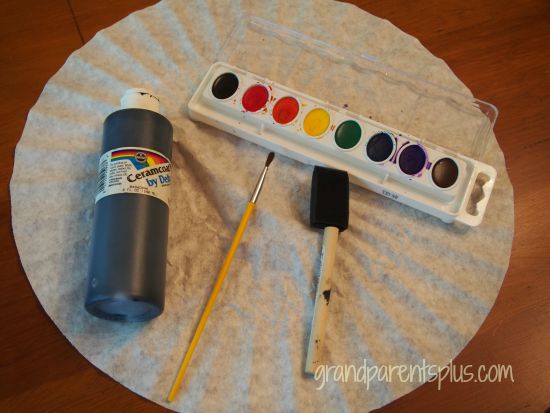
Materials:

Black Construction Paper  8 1/2 x 11

Water Colors

Brushes – one water-color brush and one small foam brush

Large Coffee Filters (commercial size)  I bought a few from our church which has a commercial coffee maker.

Black Acrylic Paint

Sunset Art Project for Kids grandparentsplus.com

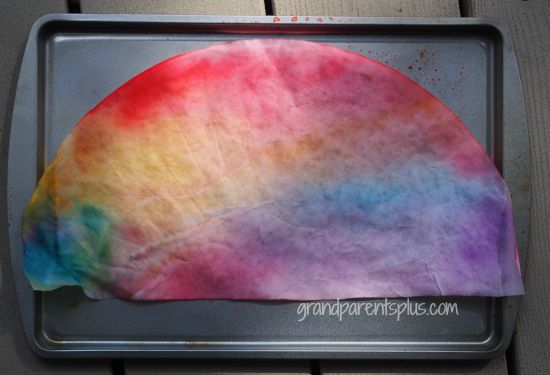
Cut the large coffee filter in half. Let each child make two and they can decide which one they want to use or make two projects.

Wet coffee filter completely. This allows the colors to flow together easily. Place filter on a cookie pan and add color using lots of water!

Use colors of yellow, red, orange, purple and some blue.  Again, remember to use lots of water on the small brush and have fun!

Sunset Art Project for Kids grandparentsplus.com

Let dry in the shade so the sun doesn’t lighten the colors.

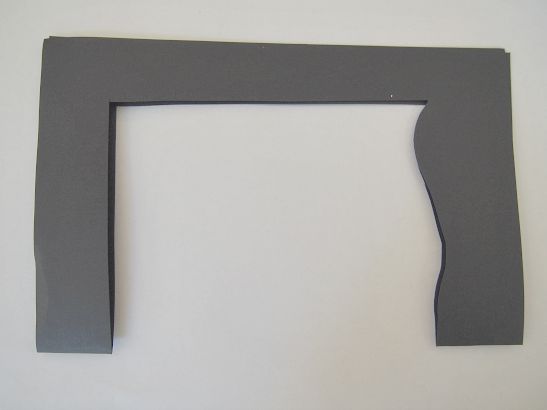
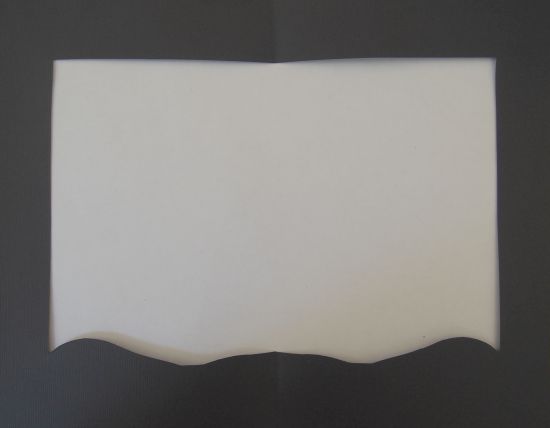
When dry, cut an opening out of black construction paper that fits the filter. Make the bottom look like ground with a hill or bump here and there. Trace the bottom line of the cut-out on the filter so kids know where to ground their trees.

Sunset Art Project grandparentsplus.com


Sunset Art Project grandparentsplus.com


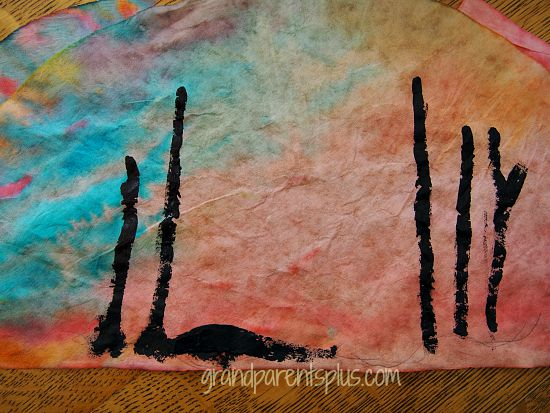
On the dry filter,  use the thin water-color brush to paint the trunks of the trees with black acrylic paint. Talk about perspective and how trees in the distance look smaller and those up close look larger. Be sure to ground the trees so they are not floating in the air.

Sunset Art for Kids grandparentsplus.com


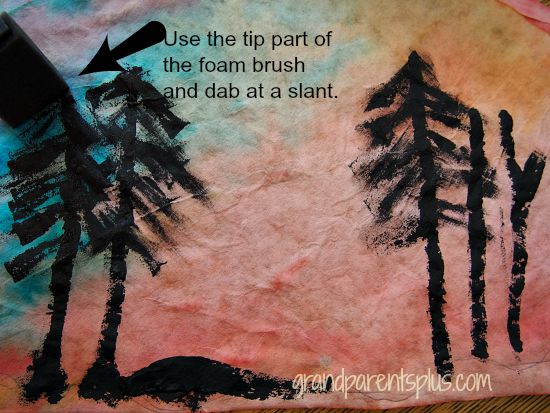
After the trunks are painted, use the small foam brush tilted on end to make the tops of the trees. Dab on each side of the trunk to look like the branches with leaves.

Sunset Art for Kids grandparentsplus.com

Add more trees, if needed, or perhaps some low bushes.

When dry, attach the coffee filter to the black frame with glue or scotch tape.

Sunset Art for Kids grandparentsplus.com


Have fun! 

Phyllis

By subscribing, you won’t miss a post. Your email is never sold or shared!

Follow on Pinterest, too!

Post linked to these parties….


Posted in Art Project | Tagged , , , , , , | 11 Comments

Pickled Beets (no canning)

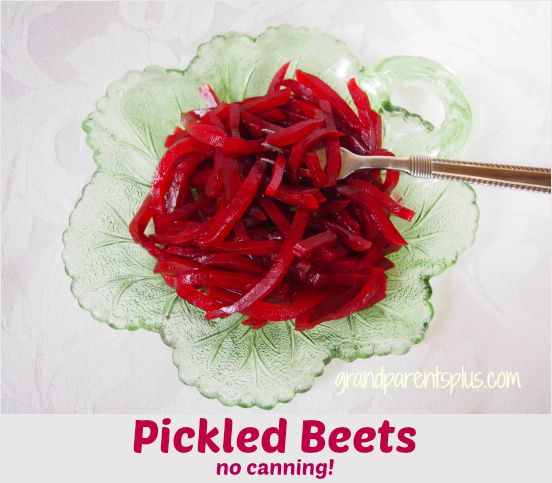
Are you a fan of pickled beets? I really enjoy them on a tossed salad or used as a side dish for dinner. Since I don’t grow beets and I’m not a person that does canning, I rely on donations of pickled beets from friends. UNTIL NOW! 

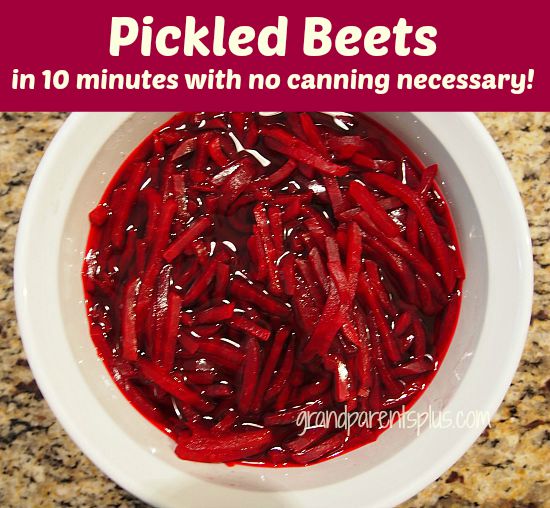
Pickled Beets - no canning grandparentsplus.com

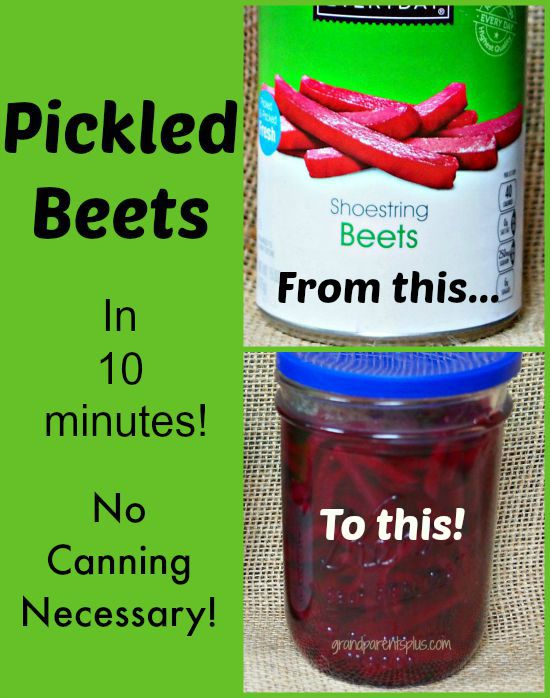
A friend of mine gave me this old family recipe for Pickled Beets where you use canned beets from the grocery store, make them into pickled beets and store them in the refrigerator! The recipe makes quite a bit and since I’m the only one in my immediate family that likes them, I make 1/3 of the recipe at a time! It takes only 10 minutes and they’re done! I used shoestring beets, but you can used whole or sliced, too. 

Pickled Beets - no canning grandparentsplus.com

Pickled Beets (no canning)
Recipe Type: Pickles – side dish
Author: Sherrill Port
Prep time:
Cook time:
Total time:
Serves: 6 jars
Wonderful Pickled Beets in 10 minutes with no canning necessary!
Ingredients
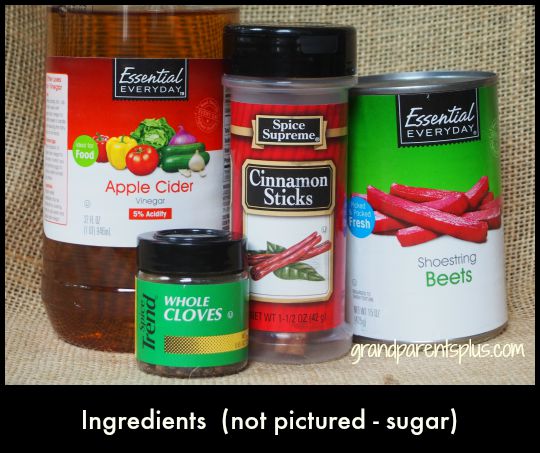
  • 3 cups sugar
  • 3 cups apple cider vinegar
  • 1 1/2 tsp. whole cloves
  • 1 cinnamon stick
  • 1 1/2 cups beet juice (drain from can)
  • 6 cans beets (whole, sliced or shoestring)
Instructions
  1. Combine all ingredients except for beets.
  2. Bring to boil and boil for 10 minutes.
  3. Remove cinnamon stick and cloves.
  4. Add drained beets.
  5. Pour into jars or a glass container and cover
  6. Keeps in refrigerator for a long time!
  7. If you use fresh beets – peel and cook until tender.
  8. Use beet juice in above recipe.
  9. Follow remainder of recipe.
  10. If canning, wash and scald jars and lids. Place beets in hot jars and cover with liquid. Process.

Pickled Beets - no canning grandparentsplus.com


These are delicious and now I can have them anytime!

Pickled Beets - no canning grandparentsplus.com


Now, isn’t that the easiest recipe for Pickled Beets? It’s the best! I’m so thankful to my friend, Sherrill, for sharing this delicious recipe. By the way, the beets are ready to serve when cooled. No waiting, either! 

Enjoy! 

Phyllis

Subscribe on the sidebar so you won’t miss future posts! Your email is never shared or sold!

Follow on Pinterest, too.

Post linked to these parties….

Posted in Recipes, Salads | Tagged , , , , , , , , , , | 42 Comments

Daylillies – Easy Centerpiece

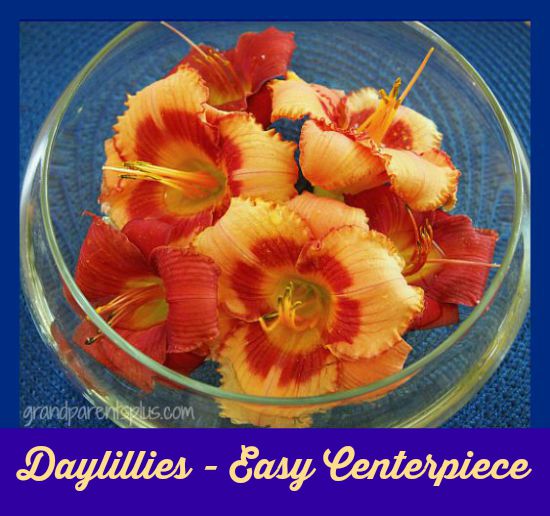
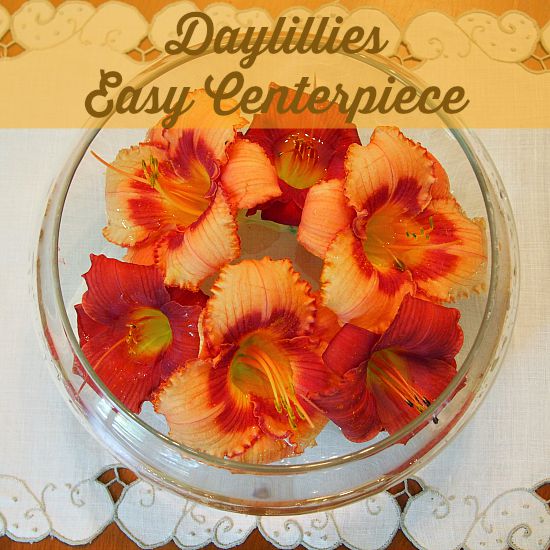
It is always nice to have fresh flowers in your home. They add such a special touch. Well, I have Daylillies in my garden. The blooms don’t last long (hence the name Daylilly), but they are beautiful in a low glass bowl. So what if they don’t last long. You can easily replace them the next day with fresh blooms.

Daylillies - Easy Centerpiece grandparentsplus.com

There really is no arranging skill required to use Daylillies in a low bowl.  Just add water, cut the Daylillies, and combine the blooms in a bowl. Next day, bring fresh ones in and start again.

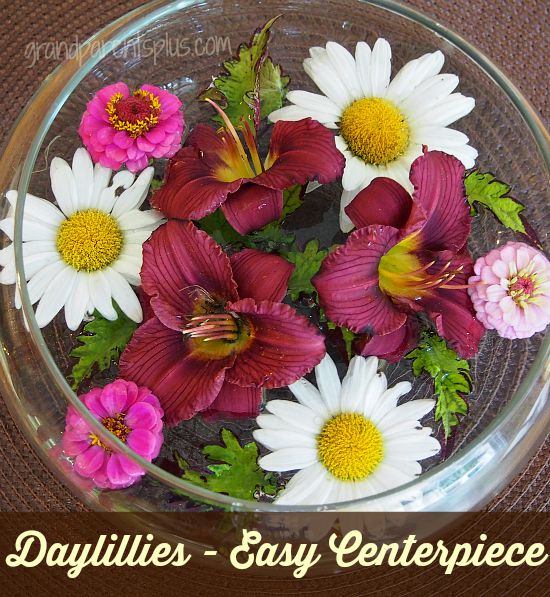
Daylillies - Easy Centerpiece grandparentsplus.com


Add other flowers along with the Daylillies. For some green, cut leaves off of a coleus plant.

Daylillies - Easy Centerpiece grandparentsplus.com

The low arrangements look great on a coffee table or as a small table centerpiece. 

It’s a quick and easy centerpiece that anyone can make!  Try it!

Phyllis

If you subscribe, you won’t miss a post and I keep your email safe and secure – never sold or shared!

Follow on Pinterest, too!

This post is linked to many of these parties…..


Posted in Decor, Uncategorized | Tagged , , , , , | Leave a comment

Dutch Windmill Craft

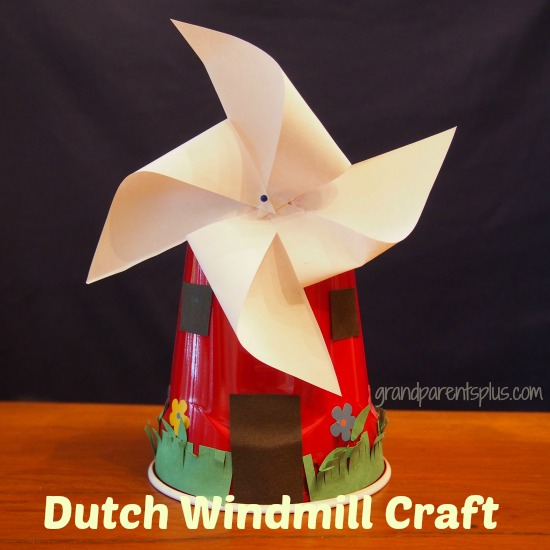
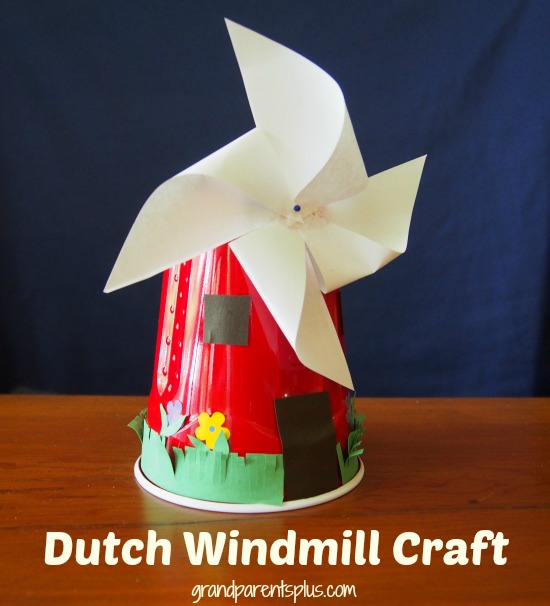
Dutch Windmill Craft grandparentsplus.com

Wouldn’t this Dutch Windmill Craft would be fun to make when studying about other countries around the world?  We’ve been to Holland several times and love the windmills. By getting off the beaten path and touring the small towns and fishing villages, you’ll find unique places and some old windmills, too. On our visit, we looked up relatives that we had there. They lived in a small town and had an old windmill located right behind their house. It was used for grinding grain years ago, but was still in great shape.

Well, this Windmill Craft is one that I am using for our family reunion in Washington state. (by the way, we are from a Dutch heritage, if you didn’t already get that) I was asked to come up with a craft for the elementary kids, so here it is!

I got the idea for using a Solo drink cup from the Dltk-Kids site, but the origami fins of the windmill were a little confusing, so I opted for a simpler version and added a few extra details. I felt kids would be able to do this on their own without too much help. After all, I may have several kids. 

Materials: 

Red or Blue Solo cups  18 oz.

Construction paper: green, black

White copy paper

Glue sticks, scissors

Small flower stickers (if you can find tulips, great, otherwise opt for any small flower) I found these at Walmart!

Straight pin with a round head or brads

Tape

Directions: 

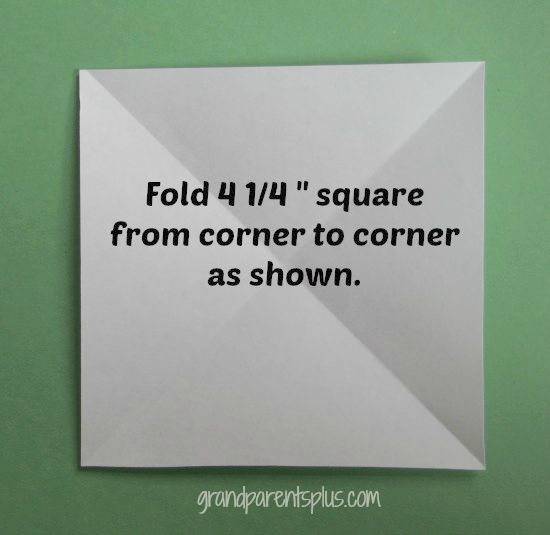
Cut 4 1/4 inch square from white copy paper and fold as shown.

Dutch Windmill Craft grandparentsplus.com


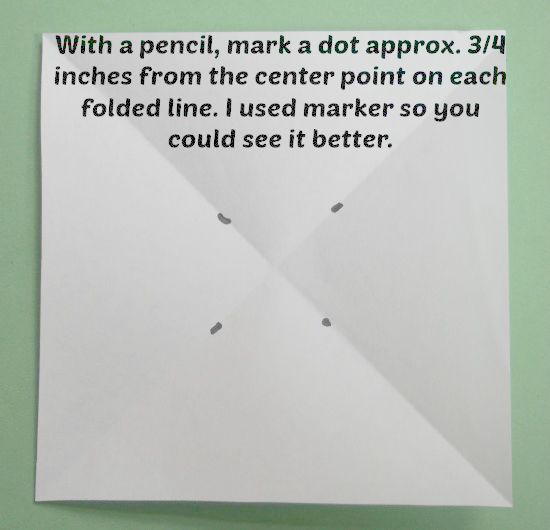
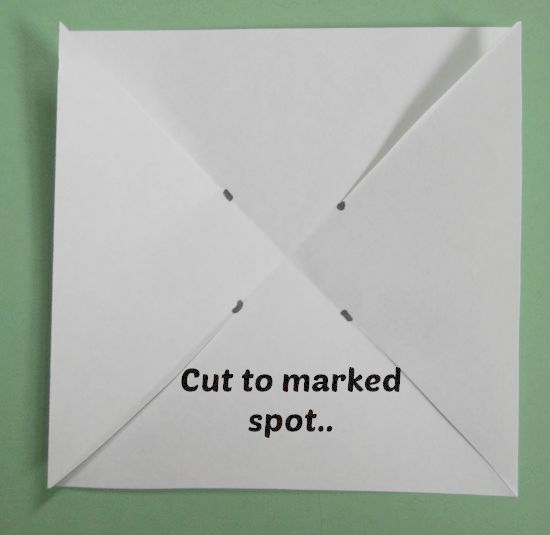
Mark a stopping point on each folded crease approx. 1/2 -3/4 inches from the center point. Use a pencil so the mark doesn’t show later.

Dutch Windmill Craft grandparentsplus.com


Cut all four fold lines as shown……

Dutch Windmill Craft grandparentsplus.com


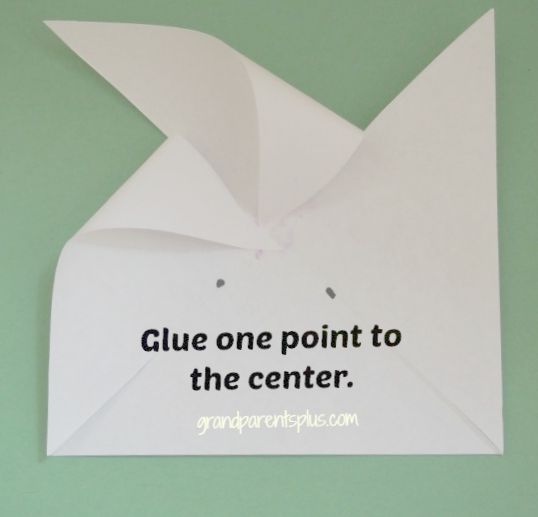
Fold one point to the center and glue. Go over the center just a bit so all points will be on top of each other.

Dutch Windmill Craft grandparentsplus.com


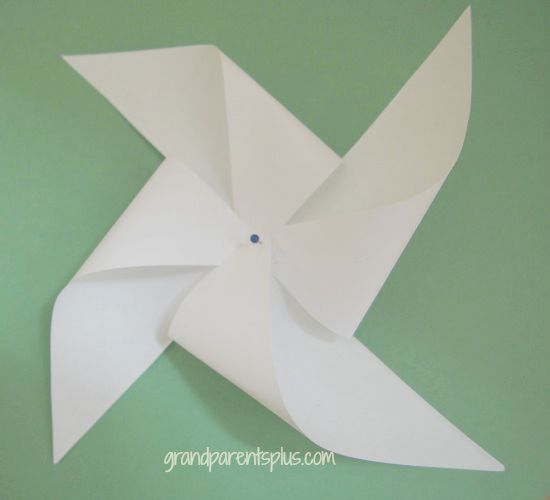
Be sure to glue the same side point of each triangle to the center. Use a pin with a ball head and push it through all the points. (or use a brad) Set pinwheel aside and work on the cup.

Dutch Windmill Craft grandparentsplus.com


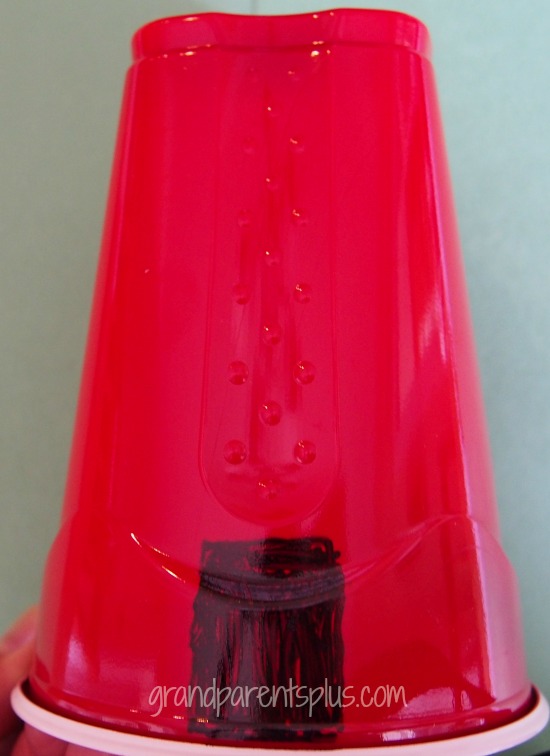
Take the Solo cup and mark a door with either a permanent marker or cut a door from black construction paper.  After drawing a doorway, I covered it with black construction paper. I thought it was easier and looked better. Add windows if you like. Use a small square or rectangles of black construction paper, too! I, also, found that the glue stick works better than school glue. 


Dutch Windmill Craft grandparentsplus.com

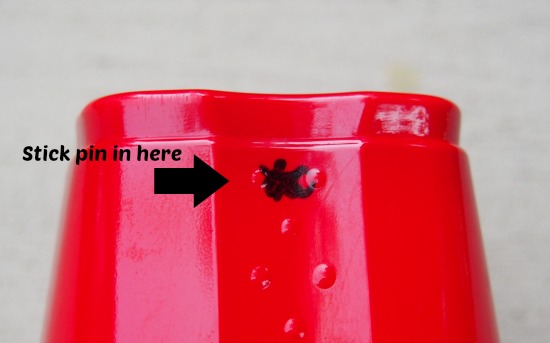
Cut a 3/4 inch strip from the length of a piece of green construction paper. Fringe it to look like grass. Glue it to the bottom edge of the cup. Add flower stickers and leaves, if desired. When you finish the decorating, stick the pin through the cup as shown. An adult should do this part…. Reach in the cup and bend the pin down 90 degrees. Use tape to hold it inside. This will allow the windmill to spin. For younger kids, use a brad.

Dutch Windmill Craft grandparentsplus.com


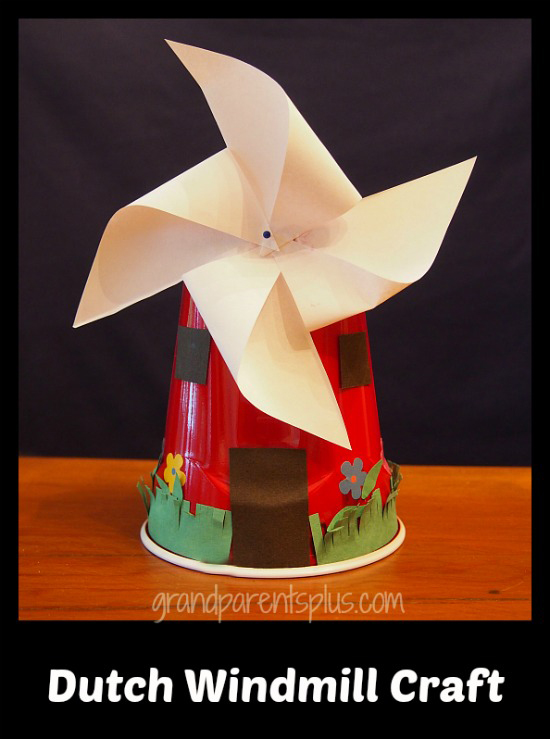
Side view so you can see the flowers….


Dutch Windmill Craft grandparentsplus.com


Dutch Windmill Craft grandparentsplus.com


That’s it! 

These little windmills would make cute centerpieces, too!

Have you been to the Netherlands? Did you see the windmills? Hope you got to see the beautiful countryside other than visiting just Amsterdam! 

Enjoy! 

Phyllis

By subscribing, I keep your email safe and secure. There’s no sharing or selling of it!

Follow on Pinterest, too!

Post linked to many of these parties….


Posted in Art Project, Crafts | Tagged , , , , , , , , , , , , , | 29 Comments

Vintage Finds Reused

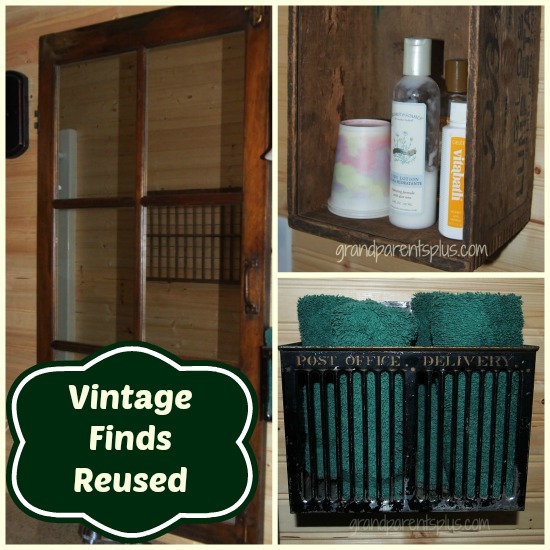
Vintage Finds Reused grandparentsplus.com


I love the look of vintage items. Of course, you need to use your vintage finds in unique and often different ways from what they were originally intended. The fun part is not only finding them, but also putting them in just the right place. I think it gives a room lots of character and interest.

Up in my husband’s office, a bonus room above the garage, we have a small bathroom. The bonus room is converted into a guest room when married kids come home to visit. It serves a dual purpose.

The bathroom is decorated with vintage pieces. I’ll show three of them in this post.  Another vintage piece was highlighted in Vintage Washboard Wall Cabinet.  You might want to check it out, too.
Vintage Finds Reused grandparentsplus.com

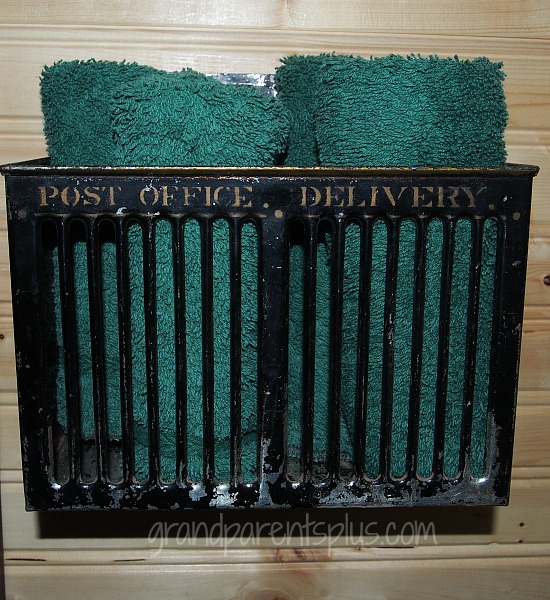
Now, where I found this Post Office Delivery Box is beyond me. I can’t remember just where or when it was. Anyway, I roll washcloths inside it for the guests. I’d like to know the history of this piece and where it came from, wouldn’t you? Any ideas?

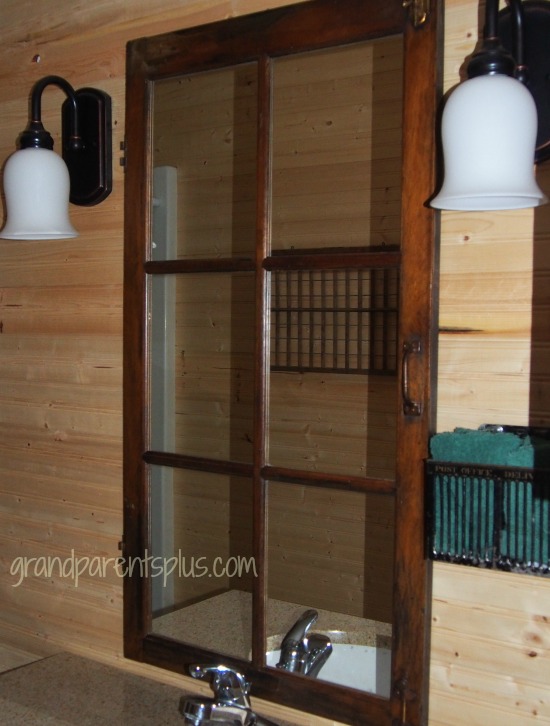
The mirror above the sink is a vintage window from the old cabin we took down on our property. I kept the handle on it and put mirrors in the broken window sections. It was an easy and inexpensive redo. 

Vintage Finds Reused grandparentsplus.com

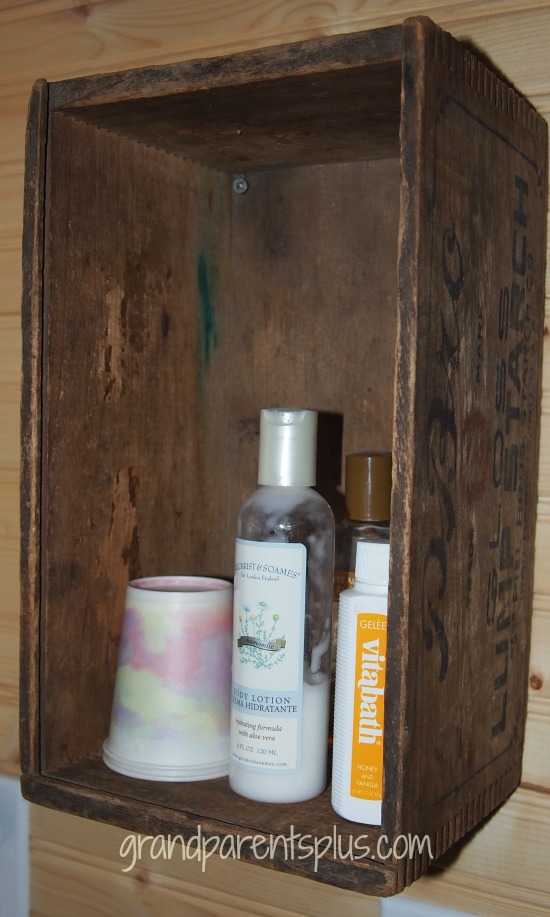
To the right of the sink, I have an old Starch box mounted on the wall. It is for cups, lotion, and any extra items that guests might need.

Vintage Finds Reused grandparentsplus.com

So that’s my small guest bathroom with several vintage finds reused! What have you reused from days gone by?

Thanks for stopping by, 

Phyllis

By subscribing, you won’t miss a post and your email is never shared or sold.

Follow on Pinterest, too!

Post linked to these parties….


Posted in Decor | Tagged , , , , , , , , , , , , , , | 30 Comments

20 Crumb Crusts

20 Crumb Crusts

When you want a different twist on a dessert, try some of these tasty crumb crusts. Some of these I’m sure you’ve  heard of before, but many are very different. Pair these crusts with a complimentary flavor of ice cream, pudding, or pie mixture for a unique switch on your favorite recipe. It’s handy to have these all in one place so it’s easy to find when needed. Most are crumb crusts with some baked and some chilled. Two are roll-out crusts.  The crusts work well in either a pie pan, 8 x 8 pan, or spring-form pan.

Graham Cracker:

1  1/2 cup graham cracker crumbs, 3 T. sugar, and 1/3 to 1/2 c. melted butter. Press into pan. Bake at 350 degrees for 10 minutes. Try cinnamon or chocolate graham crackers, too.

Gingersnap:

1 cup finely chopped pecans, 1/2 c. crushed gingersnaps, 1/4 c. sugar, 1/4 c. soft butter. Bake at 450 degrees for 5-7 min.

Oreo:

Combine 18 crushed chocolate Oreos with 1/3 c. melted butter. Press into pan and chill. Try other Oreo flavors, too.

Chocolate Wafer:  (these are found in the baking section; not in the cookie aisle)

Combine 18 crushed chocolate wafers with 1/2 C melted butter. Chill.

Almond-Graham:

Combine 2/3 c. finely ground almonds and 1/2 c. graham cracker crumbs. Slowly add 2 T. oil or melted butter. Press firmly into spring-form or pie pan. Bake at 350 degrees for 8-10 minutes.

Try it in this recipe…. Blueberry Cheesecake Dessert

Blueberry Cheesecake Dessert grandparentsplus.com

Kahlua:

Combine 16 crushed graham cracker squares (approx. 1  1/2. cup) or 20 crushed chocolate wafers with 1/4 c. melted butter and 2 T. Kahlua. Press into pan and chill.

Add ice cream and you’ll have a delicious dessert pie!

Vanilla Wafers:

Combine 1  1/2 c.  crushed vanilla wafers with 1/4 c. melted butter. Chill or bake a few minutes.

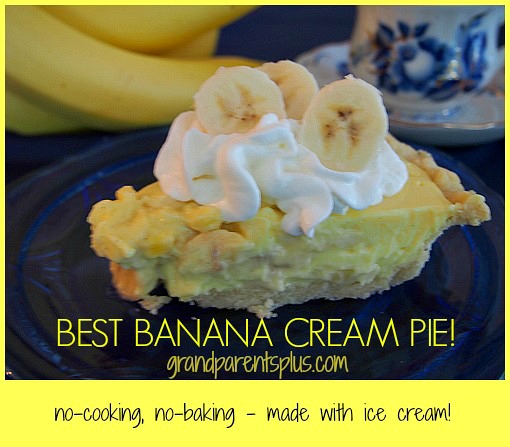
Try using this in Best Banana Cream Pie
Best Banana Cream Pie grandparentsplus.com

Pretzel Crumb:

Combine 1 c. pretzel crumbs with 1/3 c. melted butter and 2 T. sugar. Chill.

Zwieback:

Mix 1 c. zwieback crumbs, 1/4 c. powdered sugar, and 2 T. melted butter. Press into pan. Chill.

Corn Flake:

Combine 1 c. crushed corn flakes, 1/4 c. sugar and 1/3 c. melted butter. Press into pan and chill.

Peanut Butter:

Make graham cracker crust, except, in place of butter, use 1/4 c. butter and 1/4 c. creamy-style peanut butter. melt together and add to crumb mixture.

Rice Krispy:

Combine 1 c. rice krispies, 1/4 cup sugar and 1/3 c.  melted butter. Press into pan and chill.

Butter Crunch:

Combine 1/4 c. brown sugar, 1 c. flour, and 1/2 c. butter. Add 1/2 c. chopped pecans or coconut. Mix with hands. Spread in 9 x 13 pan and bake at 400 degrees for 15 minutes. Take from oven and stir with spoon. Save 3/4 c. for topping and immediately press rest of mixture into 9 inch pie pan. Chill.

Try this one with your favorite Coconut Cream Pie recipe!

Chocolate Krispy:

Melt 1/3 c butter with 1 (6 0z.) pkg. chocolate chips. Add 2  1/2 c. crushed Rice Krispies. Press into pie plate and chill.

Vary this recipe….  Buster Bar Dessert

Buster Bar Dessert (copycat) grandparentsplus.com


Sour-Cream pastry: (Roll-out)

Cute 2/3 c. butter into 2 c. flour, until coarse and crumbly. Beat 1 egg with 1/3 c. sour cream and stir into flour mixture. Shape into a ball and wrap in plastic wrap. Chill 30-40 minutes. Roll out and bake in a 9 inch pie pan.  Bake for 8-10 minutes.

Try this with  Lemon Blueberry Pie
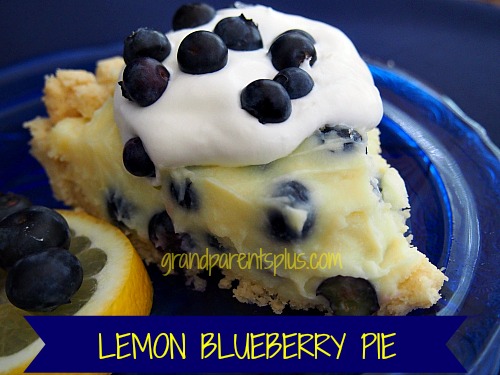
Lemon Blueberry Pie grandparentsplus.com

Cocoa Pie Crust:

Combine 1/4 c. cocoa, 1 c. Bisquick and 2T. sugar. Cut in 1/4 c. butter and add 3 T. boiling water. Mix until dough forms a ball and sides of bowl are clean. Pat into 9 in. pie pan. Bake 8-10 minutes.
Chip and Chex Pie Crust:

Combine 1/3 C. chocolate chips, 1 1/4 crushed Rice Chex cereal, 1/4 c. brown sugar, and 1/3 c. melted butter. Press evenly onto bottom and sides of buttered 9 inch pie pan. Bake at 350 degrees for 8-10 minutes.

Add: Your favorite ice cream! (mint chocolate chip, chocolate chip, or any flavor with a bit of chocolate in it!)

Chocolate-Coconut Crust:

Melt 4 oz. chocolate chips and 2 T butter over low heat. Stir in 2 c. flaked coconut. Mix well and press on bottom and sides of a 9 in. pie plate. Freeze.

Toasted Coconut Pie Crust:

Combine 7 oz.  pkg coconut which has been toasted in the oven, with 3 T. butter and 1 T. cinnamon. Press into 9 in. pie pan. Freeze 15 minutes.

Cream Cheese pastry:  (Roll-out)

Beat together 8 oz cream cheese, softened, with 8 oz. softened butter. Then beat in 1/2 c. heavy cream. Add a pinch of salt to 2  1/2 c. flour and add slowly to cheese mixture, forming dough. Wrap dough in plastic wrap. Refrigerate 1 hour before rolling out. Bake crust, according to specific recipe used.

Enough pie crusts for you? Now, try using them on some of the recipes you have and combine them with a new crust to give your dessert  or pie a different flavor!

Enjoy!

Phyllis

When you subscribe on the sidebar, know that your email is never sold or shared!

Follow on Pinterest, too!

Post linked to these parties…


Posted in Pies, Recipes | Tagged , , , , , , , , , , , , , , , , , , , , , | 30 Comments