Spring Idea House Tour 2015 (Part 1)

Spring Idea House Tour (Part 1) grandparentsplus.com

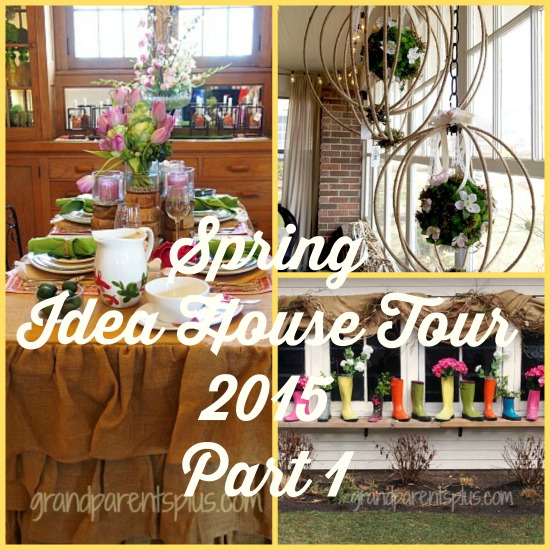
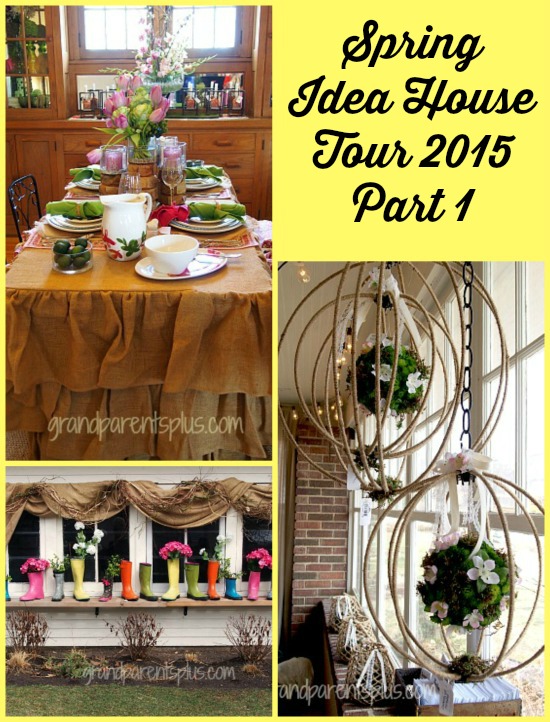
It’s Spring! (at least that’s what the calendar says) Time for another Spring Idea House Tour 2015 (Part 1)! This house is decorated by designers three times a year to highlight repurposed items, decorating trends, new items for sale, along with loads of inspiration for spring! I’m sure you’ll find many ideas for your own home.

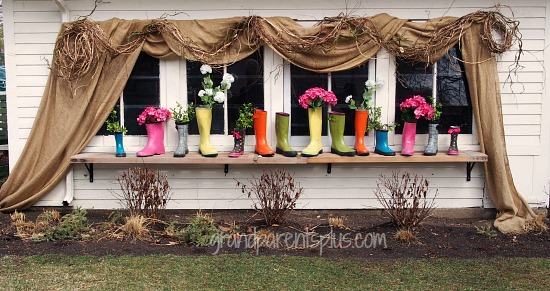
Nothing is left undecorated! Even the garage windows are hung with burlap and twine roping. An array of colorful rain boots all lined up, with some used as vases, look so spring-like! Now, this makes a fun entrance! Perhaps, it would be great as an early spring accent on your flower boxes or near your front door or do you decorate your garage, too?


Spring Idea House Tour (Part 1)   grandparentsplus.com

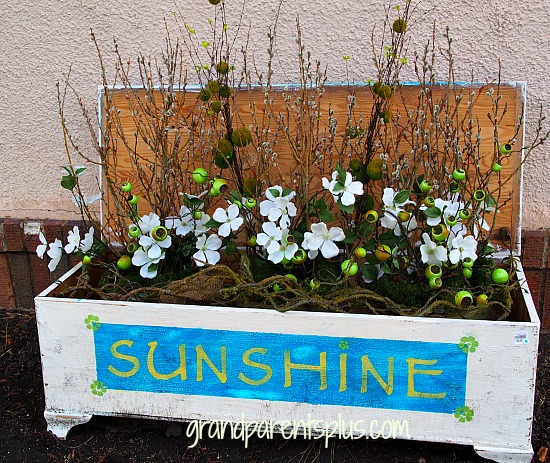
This old wooden painted trunk is stenciled with “Sunshine” and filled with an artificial spring arrangement. I can visualize this using a small wooden box with a similar arrangement used indoors. Can’t you?

Spring Idea House Tour 2015 (Part 1)  grandparentsplus.com

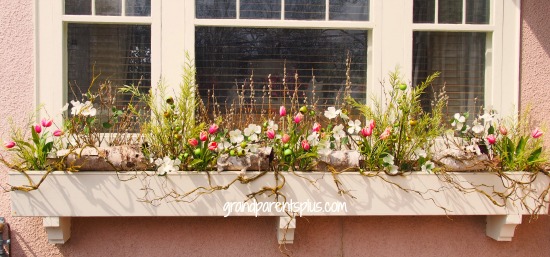
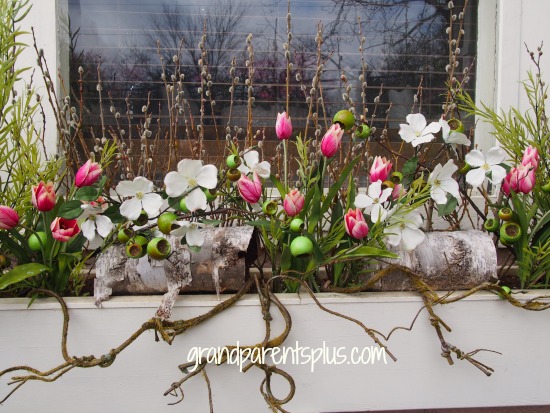
The window boxes are filled with a spring arrangement as well! Notice that they use rolled birch bark, too.

Spring Idea House Tour 2015 (Part 1)  grandparentsplus.com

Spring Idea House 2015 (Part 1)  grandparentsplus.com

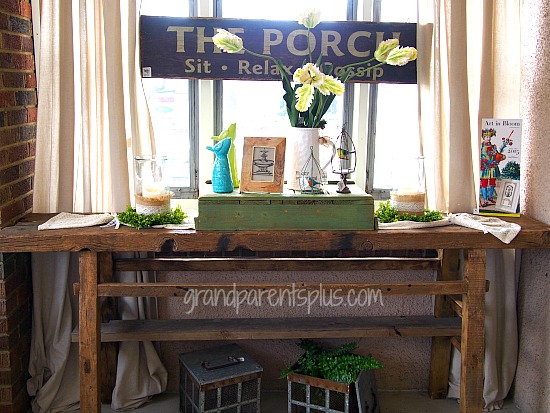
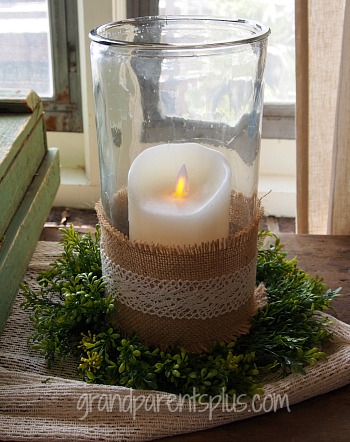
As you enter the front porch, a vintage workbench with candles in a glass cylinder are wrapped with burlap and lace.

Spring Idea House 2015 (Part 1)  grandparentsplus.com

This candle idea would work for Christmas by just adding a red bow or red berries.

Spring Idea House Tour 2015 (Part 1)  grandparentsplus.co

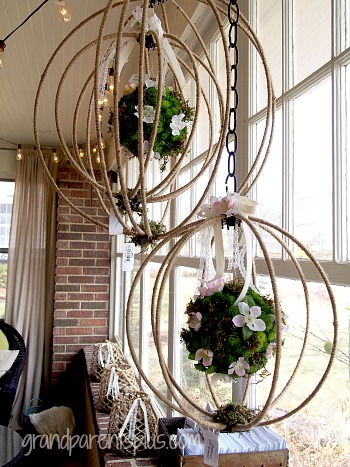
Also on the porch, the hanging wire spheres are accented with moss balls and decorated with spring floral buds. Wouldn’t this be pretty for a wedding, too!

Spring Idea House Tour 2015 (Part 1) grandparentsplus.co

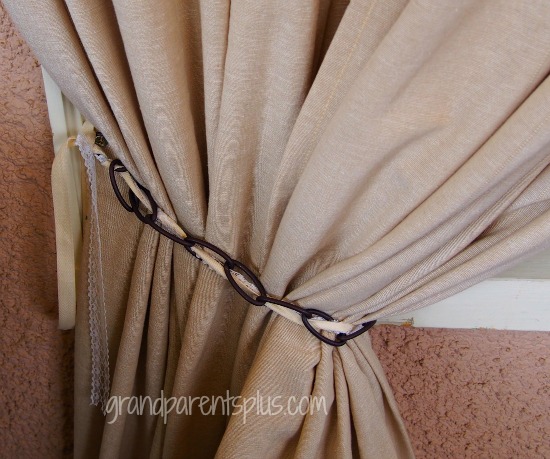
Here’s another unique idea……   Use chain entwined with decorative ribbon as curtain tie-backs!

Spring Idea House Tour 2015 (Part 1)  grandparentsplus.co

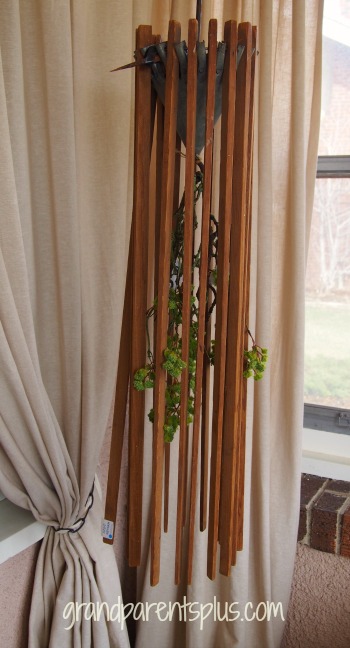
This is a re-purposed antique item. Do you know what it is? It is a laundry drying rack hung in the corner of the porch and used as a plant accent! I actually have one of these in the garage somewhere. Got to find it, now. I think I’ll try using it in my laundry room.

Spring Idea House Tour 2015 (Part 1)  grandparentsplus.co

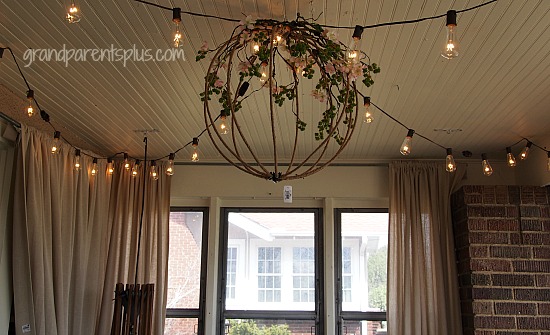
Lights are strung out from this sphere in the center of the ceiling. Artificial greenery sets it off.

Spring Idea House Tour 2015 (Part 1)  grandparentsplus.co


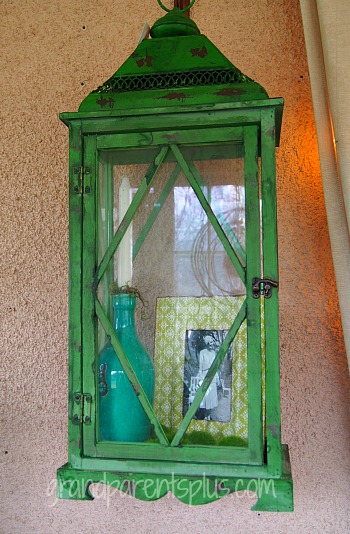
A large lantern is hung on the wall and filled with a vintage picture and a bottle used as a candle holder.

Spring Idea House Tour 2015 (Part 1)  grandparentsplus.co

The dining room is next……

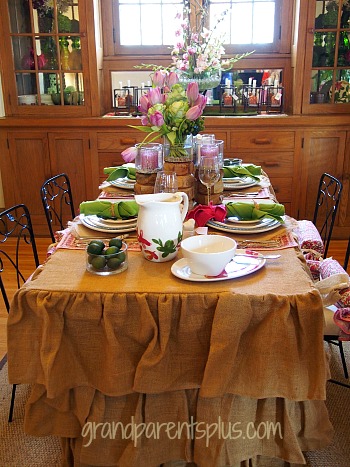
Notice the tablecloth is made of burlap. Tiers of ruffles finish off the look.

Spring Idea House Tour 2015 (Part 1)  grandparentsplus.co

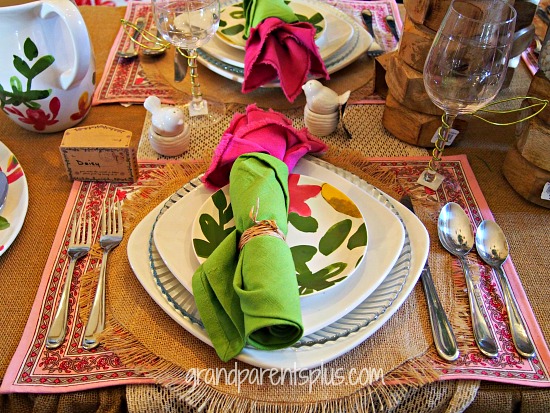
You see lots of textured layers used for this table.  Burlap tablecloth, textured fabric runner, pink floral placemat, and a circle burlap placemat make an interesting tablesetting. The napkins are simply tied with twine.  Look carefully as the napkins actually look like a pink flower! On the stem of the wine glass, decorative colored wire is wrapped around the stem and shaped into a leaf.

Spring Idea House Tour 2015 (Part 1)  grandparentsplus.co

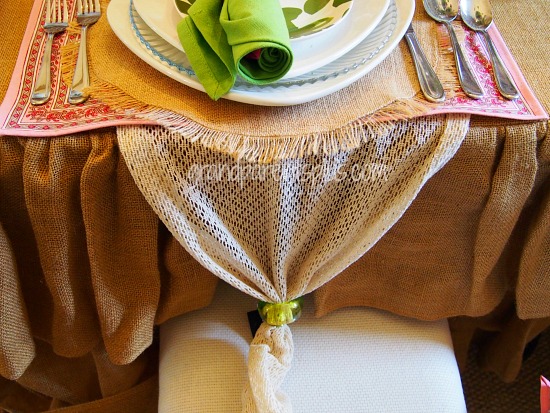
A green napkin ring finishes off the textured runner.

Spring Idea House Tour 2015 (Part 1)  grandparentsplus.co

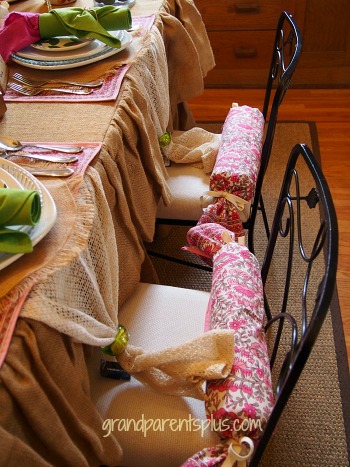
Back pillows for the chairs are made from kitchen towels.

Spring Idea House Tour 2015 (Part 1)  grandparentsplus.co

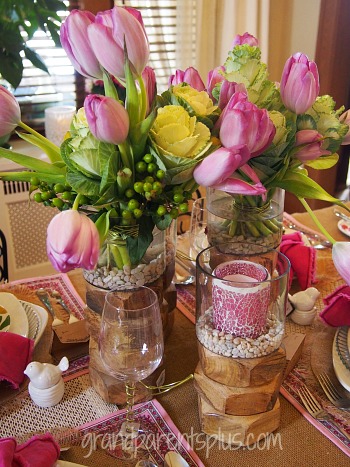
On the center of the table, the flower arrangements and candles are at varied heights. Stacked, finished chunks of wood make it easy to alter the heights.

Spring Idea House Tour 2015 (Part 1)  grandparentsplus.co

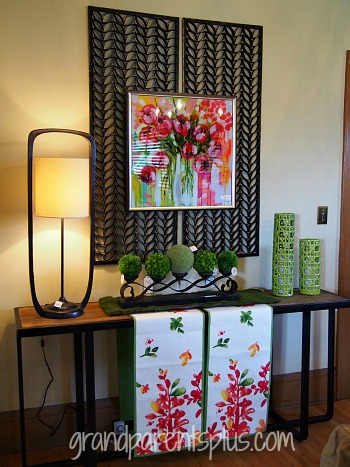
Above the sideboard, metal art is layered with colorful artwork. Moss balls are placed on the candle-holder instead of using candles.

Spring Idea House Tour 2015 (Part 1)  grandparentsplus.co

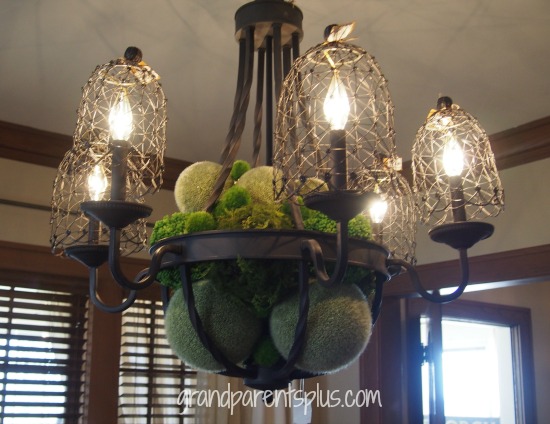
The chandelier is  accented with several green balls.

Spring Idea House Tour 2015 (Part 1)  grandparentsplus.co

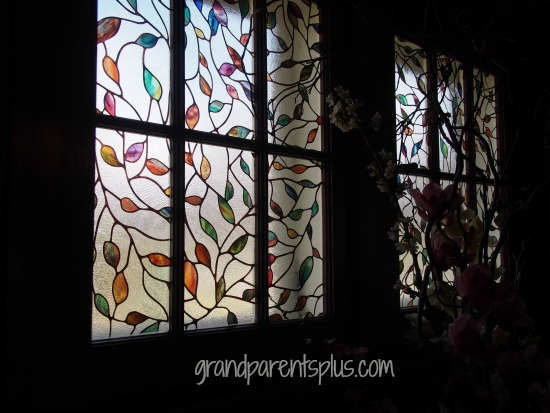
The stained-glass window above the buffet is decorated with vinyl window cling. It sure looks real and gives nice color to that area.

Spring Idea House Tour 2015 (Part 1)  grandparentsplus.co

The tour is not done! More coming….   Spring Idea House 2015 (Part 2) and Spring Idea House 2015 (Part 3) posts with more spring decorating ideas.

Did you find some fun ideas to incorporate in your own home?

Spring Idea House Tour 2015 (Part 1)  grandparentsplus.co

You may want to check out the Spring Idea House 2014 -Part 1

Spring Idea House 2014 – Part 2

Spring Idea House 2014 – Part 3

Spring Idea House 2014 – Part 4

Thanks for stopping by,

Phyllis

Follow this post by subscribing on the sidebar.

This post is linked to many of the following parties…..

Posted in Decor | Tagged , , , , , , , , , , , , | 14 Comments

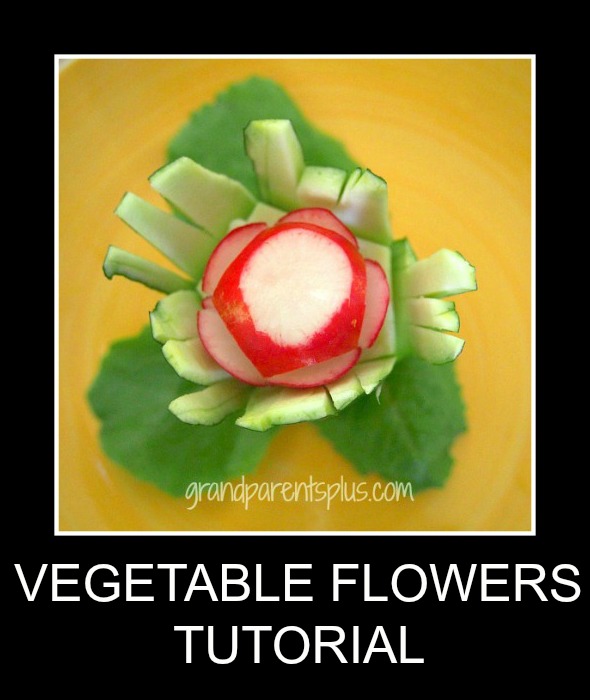
Vegetable Flowers Tutorial

Want a wonderful accent for your salads and vegetable plates? Try these simple vegetable flowers to add that extra special touch. They don’t take long to make. Adding the vegetable flowers as a garnish, makes a plain vegetable tray or salad look fabulous!

Vegetable Flowers Tutorial  grandparentsplus.com

Veggies Needed:  green zucchini or yellow squash, radish, carrots, spinach or lettuce leaves

Materials Needed: Sharp small knife, round toothpicks

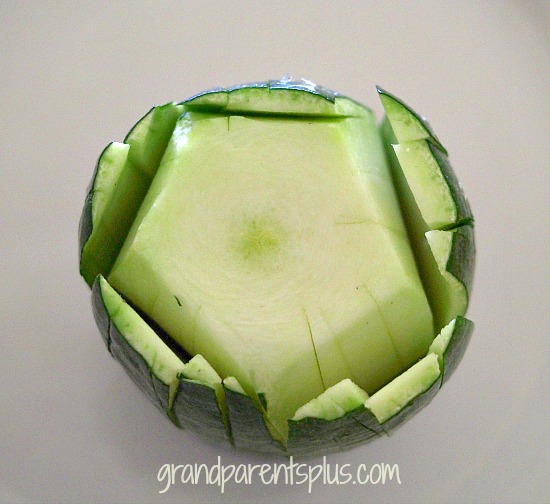
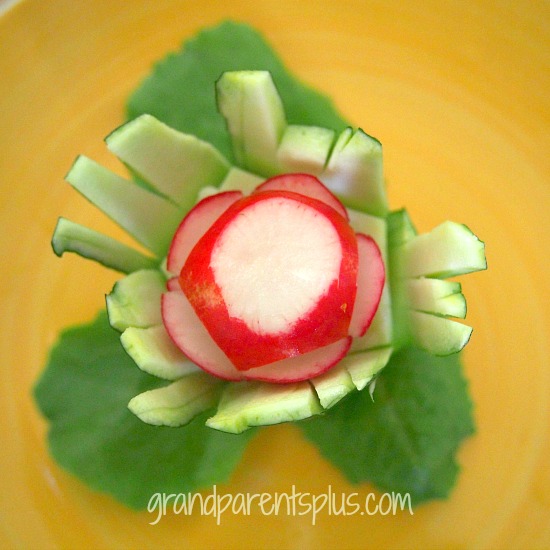
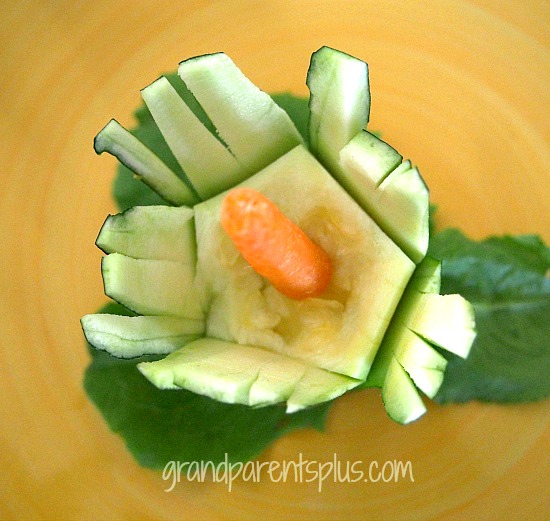
First, cut small zucchini in half and cut 4 or 5 petals down.  You’ll be able to make two flowers out of one small zucchini.

Vegetable Flower Tutorial  grandparentsplus.com

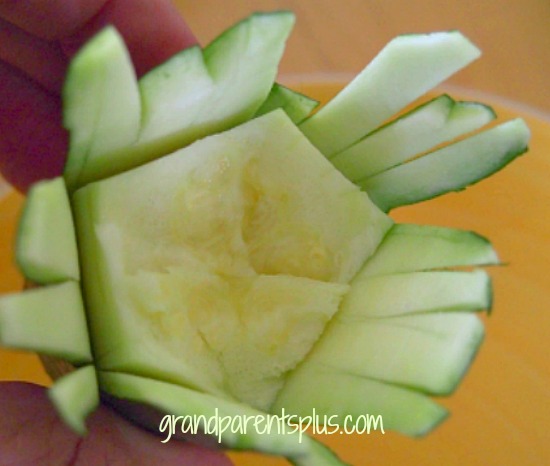
Next, make vertical slits with your knife on each petal to give it a fringed look.

Carve down the inside of the zucchini.  (I scored it with the knife and used a spoon for this step)

Vegetable Flower Tutorial  grandparentsplus.com

Place in ice water.

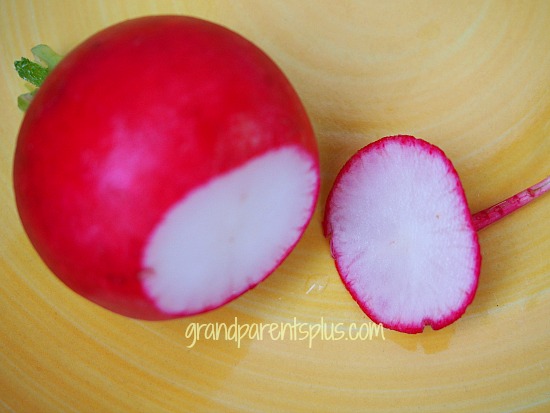
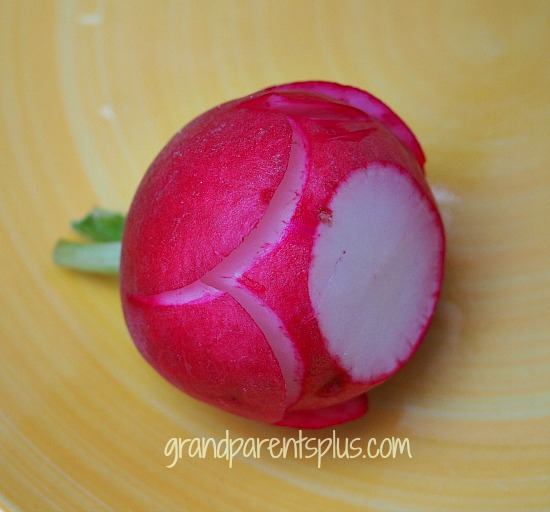
To make the radish flower, cut a slice off the bottom.

Vegetable Flowers Tutorial  grandparentsplus.com

Leaving just a ring of red at the top, cut petals with a knife.

Vegetable Flowers Tutorial  grandparentsplus.com

Place in ice water and leave it there for the petals to open up. When ready, stick a toothpick in the bottom of the radish flower to secure it in the zucchini. These vegetable flowers may be made the day ahead and kept in ice-cold water until ready to use.

Vegetable Flower Tutorial   grandparentsplus.com

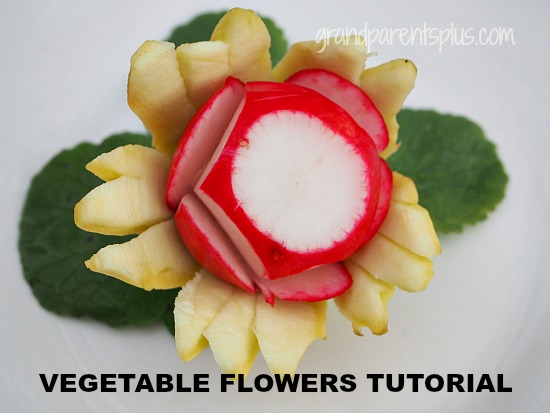
Using a yellow squash, your vegetable flowers will look like this.

Vegetable Flowers Tutorial   grandparentsplus.com

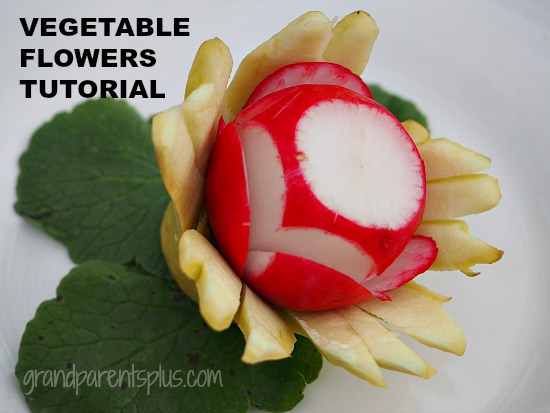
Cut the base straight or at a slant to show it off.

Vegetable Flowers Tutorial  grandparentsplus.com

Another way is to use a carrot for the middle.

Vegetable Flowers Tutorial  grandparentsplus.com

Vegetable Flowers Tutorial   grandparentsplus.com

Be sure to check out the Tomato Flower, too!

Have fun and enjoy!

Phyllis

Subscribe on the sidebar so you don’t miss future posts!

Follow on Pinterest and Bloglovin’ , too!

This post is linked to many of the following sites…….

Posted in Recipes, Salads | Tagged , , , , , , , , , , , , , | 17 Comments

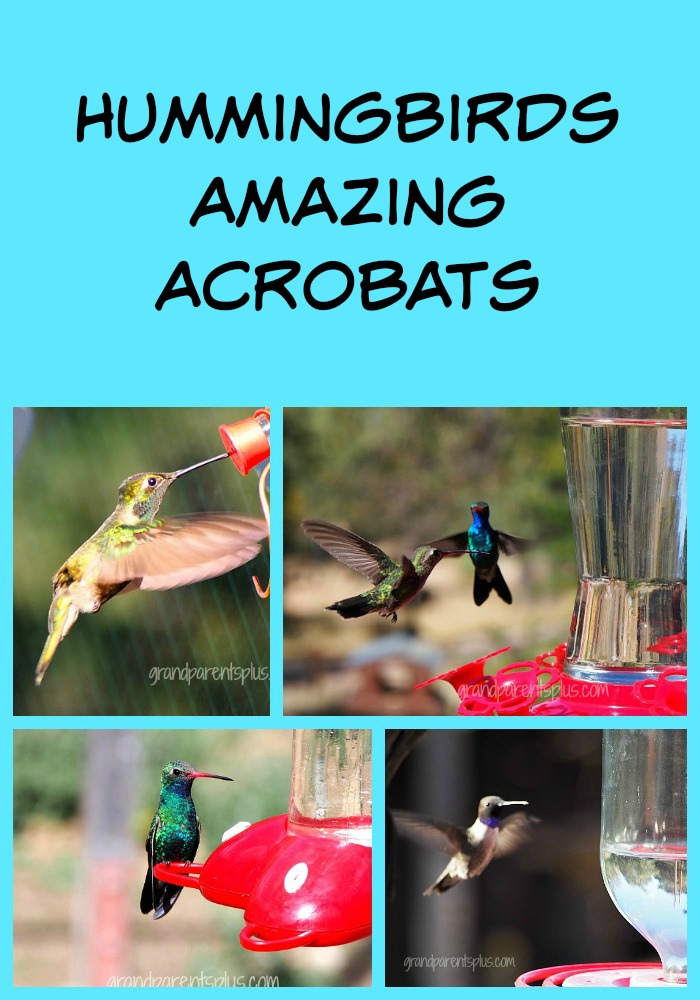
Hummingbirds – Amazing Acrobats

I have a passion for hummingbirds. At home, in my flower garden, I have many feeders and enjoy the Ruby-Throated Hummingbirds that come and visit. This past winter, we spent some time in Arizona where many varieties of Hummingbirds live or migrate through in the Spring. While visiting the Madera Canyon near Tucson, I was able to photograph many of God’s beauties. I hope you enjoy this pictorial view of these amazing creatures. How could you not believe in a Divine Creator after seeing these amazing, colorful acrobats in the air?

Hummingbirds- Amazing Acrobats grandparentsplus.com


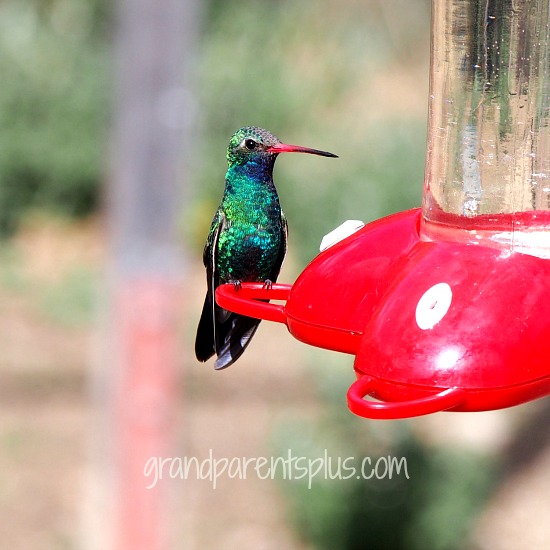
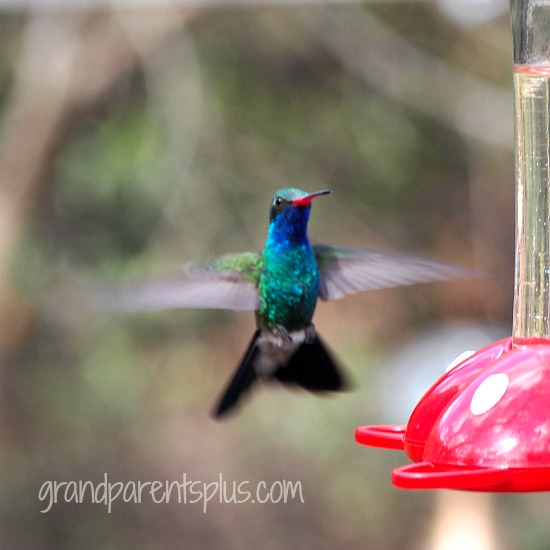
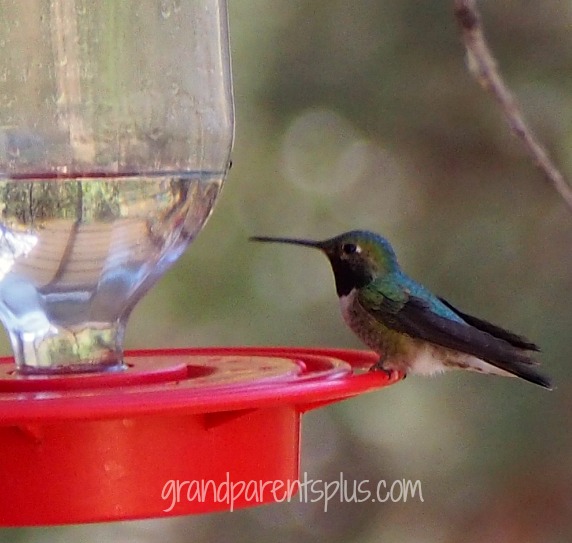
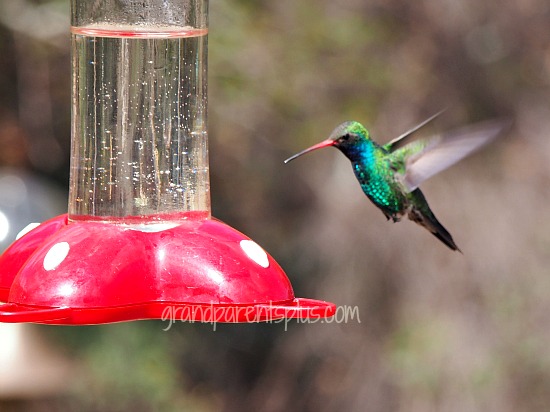
Broad-billed Hummingbird

Hummingbirds - Amazing Acrobats  grandparentsplus.com

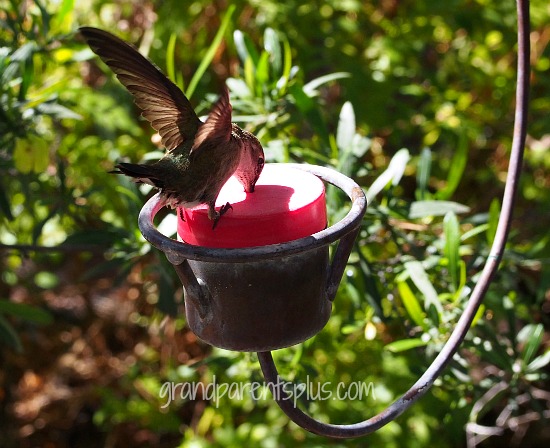
Hummingbirds, especially the males, are very aggressive and defend their territories of flower patches and feeders.

Hummingbirds - Amazing Acrobats   grandparentsplus.com

Hummingbirds- Amazing Acrobats  grandparentsplus.com

Their metabolism is very high. Each minute, while at rest, their heart beats 600 times while taking 250-300 breaths. While flying, their heart beats increase to 1,260 times a minute. They also have the largest heart of any animal in relation to their body size.

Hummingbirds - Amazing Acrobats  grandparentsplus.com

Hummingbirds’ feathers have only have shades of brown, rufous (rusty color) and black pigment. It is the tiny prism-like structures in the feather that reflect the light and produce the different iridescent colors.

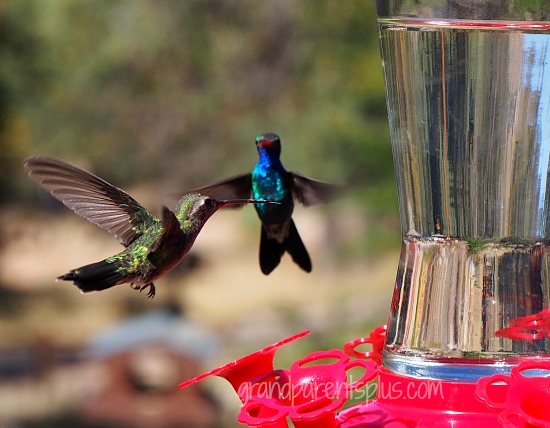
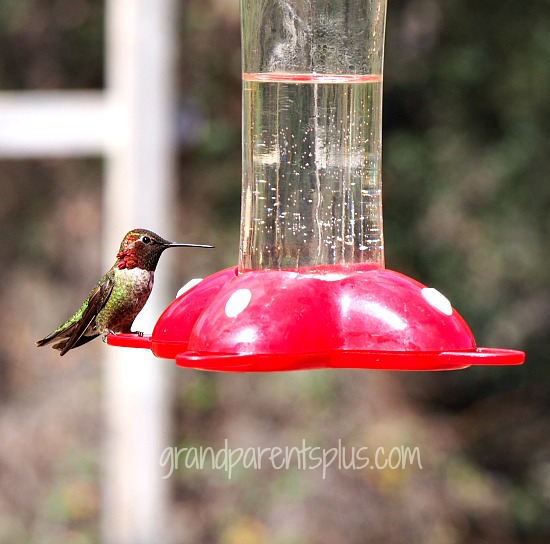
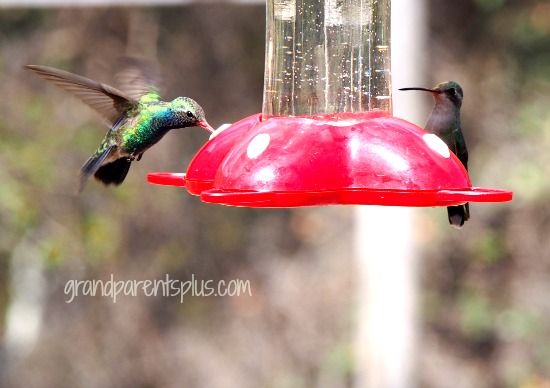
Male and Female Broad-billed

Hummingbirds-Amazing Acrobats  grandparentsplus.com


Hummingbirds - Amazing Acrobats   grandparentsplus.com

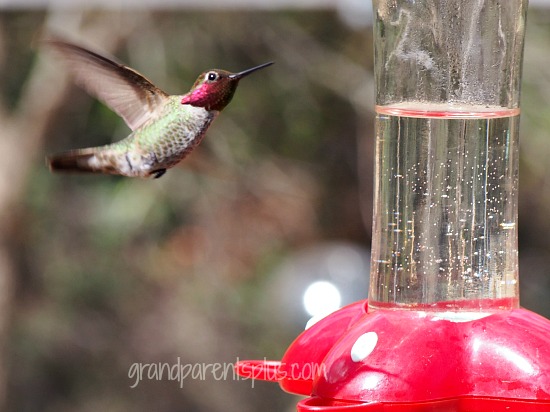
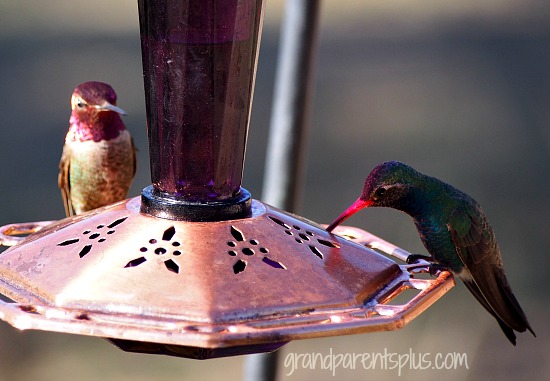
 Anna

  Hummingbirds  - Amazing Acrobats   grandparentsplus.com

A male hummingbird needs to eat about 60 times a day.

Hummingbirds - Amazing Acrobats   grandparentsplus.com

Hummingbirds breast muscles are powerful and make up about 30% of their body. These muscles, which control the wings, enable them to do somersaults, fly backward, straight up, down, and sideways. They are able to maneuver so quickly because they do not just flap their wings up and down, but move them in a circular motion. They can change direction in an instant! This is why they are so hard to photograph!

Hummingbirds - Amazing Acrobats  grandparentsplus.com

The female builds the nest, lays two eggs, and raises the young birds by herself. The baby birds are raisin-like when born, but quickly transform and leave the nest in about three weeks.

Hummingbirds - Amazing Acrobats  grandparentsplus.com


Hummingbirds - Amazing Acrobats grandparentsplus.com


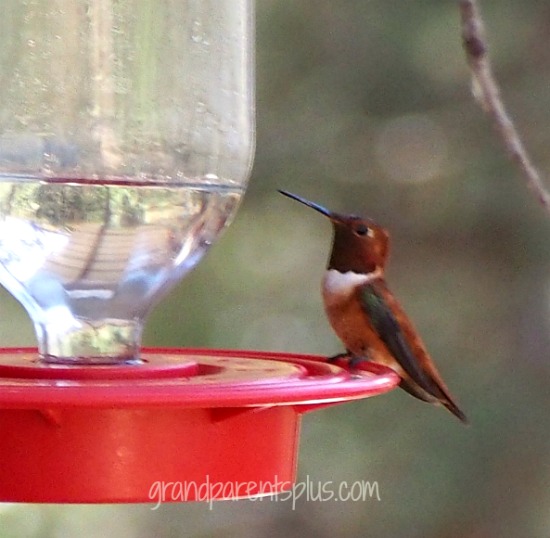
 Roufus Hummingbird

Hummingbirds - Amazing Acrobats   grandparentsplus.com

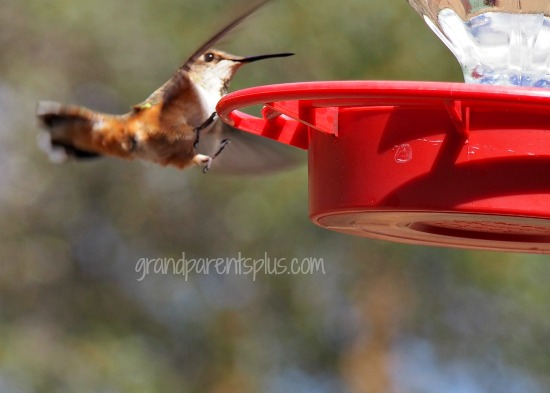
This Roufus was coming in for a landing and then quickly made a 180 and flew away! These tiny birds make the longest migration with some heading to Alaska for the summer and then to central Mexico in the winter – a distance of over 2,000 miles!

Hummingbirds - Amazing Acrobats  grandparentsplus.com

A Roufus with a Broad-Billed

Hummingbirds - Amazing Acrobats  grandparentsplus.com

 Broad-Tailed

This one makes an unusual sound when they fly due to their tail feather structure.

Hummingbirds - Amazing Acrobats  grandparentsplus.com

Magnificent

Hummingbirds - Amazing Acrobats   grandparentsplus.com

Hummingbird - Amazing Acrobats grandparentsplus.com

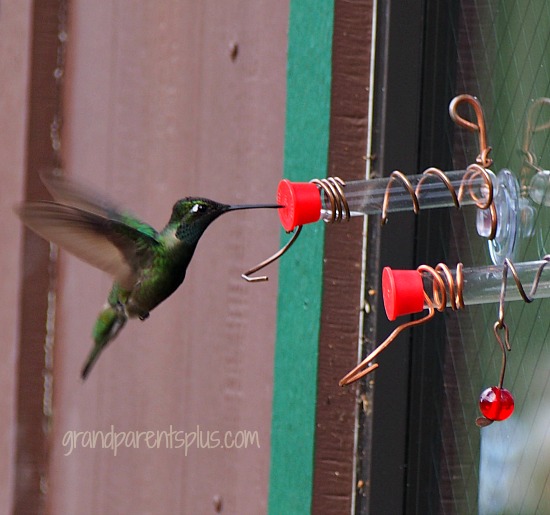
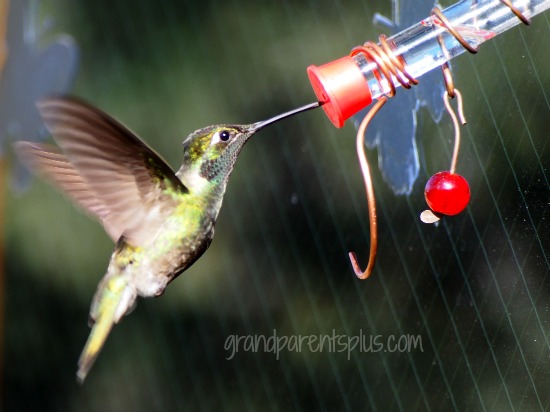
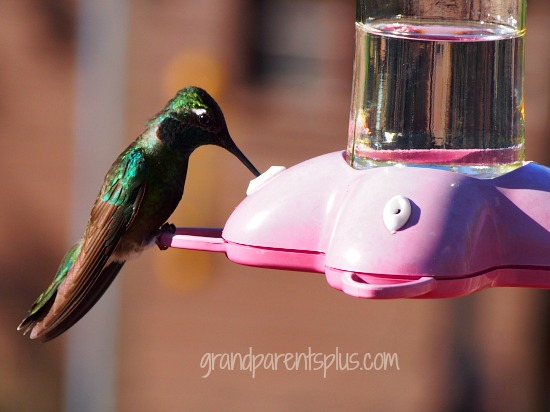
 This Magnificent is a much larger hummingbird than most species. The colors reflected are mainly green and brown. The colors will vary depending on the reflection of the sun on their feathers.

Hummingbirds - Amazing Acrobats  grandparentsplus.com

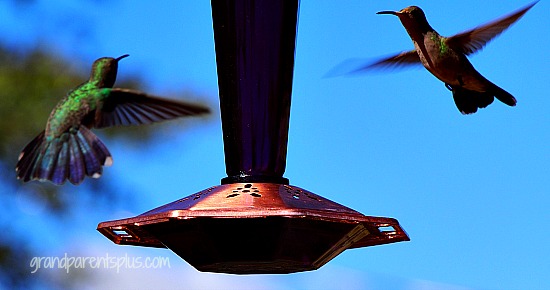
Two hummers staking claim to a feeder. Which one will win?

Hummingbirds - Amazing Acrobats grandparentsplus.com

Researches have found that hummingbirds have great memories and often return to the same flower patches each year. I can attest to this finding as my hummingbirds will come back in the Spring and if the nectar is not out and ready for them, they will fly to a window and flutter there so I see them. They also do this if a feeder happens to be empty.
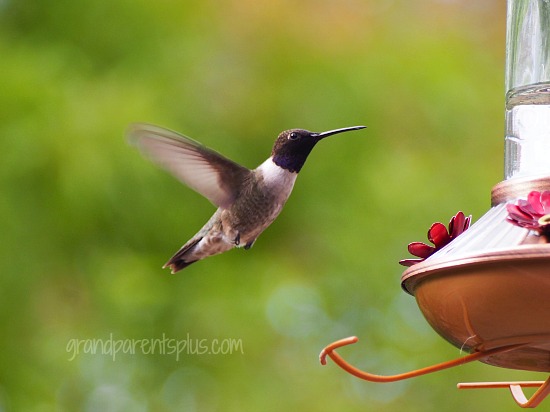
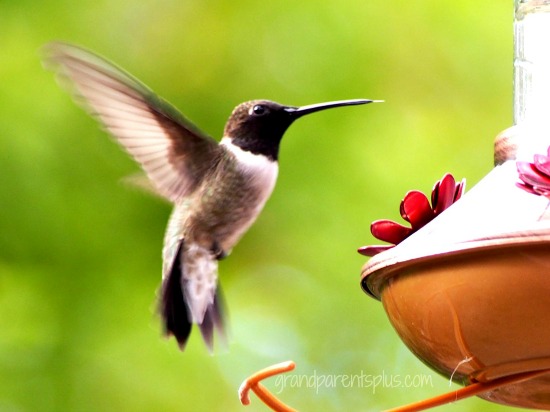
Black-Chinned

Hummingbirds - Amazing Acrobats- grandparentsplus.com

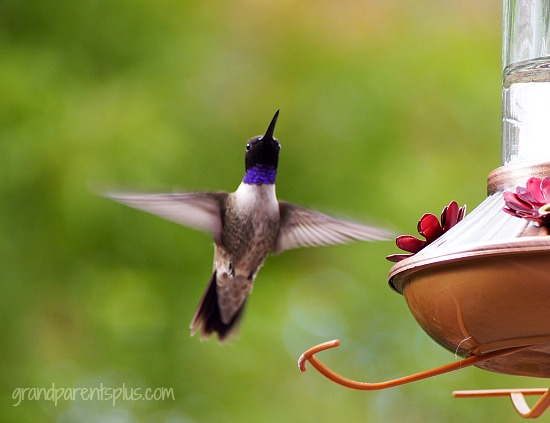
Only when the sun hits their chin, do you see this beautiful purple marking.

Hummingbirds - Amazing Acrobats  grandparentsplus.com

You can even see his little tongue all ready to get the nectar!

Hummingbirds - Amazing Acrobats  grandparentsplus.com


Costa

Hummingbirds - Amazing Acrobats   grandparentsplus.com

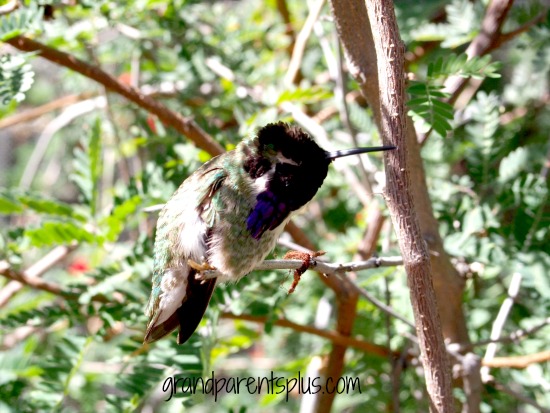
This Costa was not very cooperative and wouldn’t face the sun. The dark patch under his beak glows iridescent purple when in the sunlight.

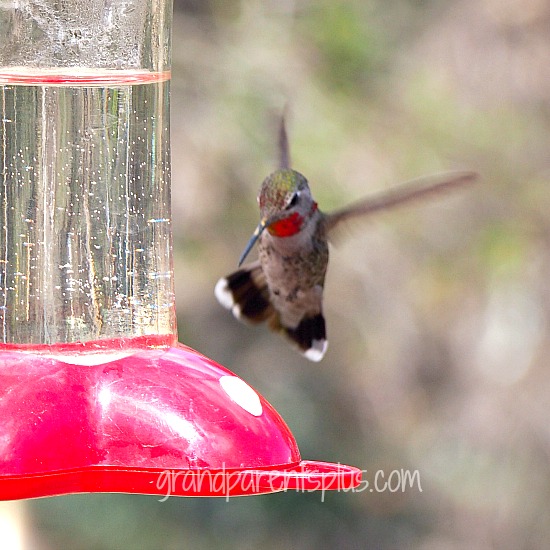
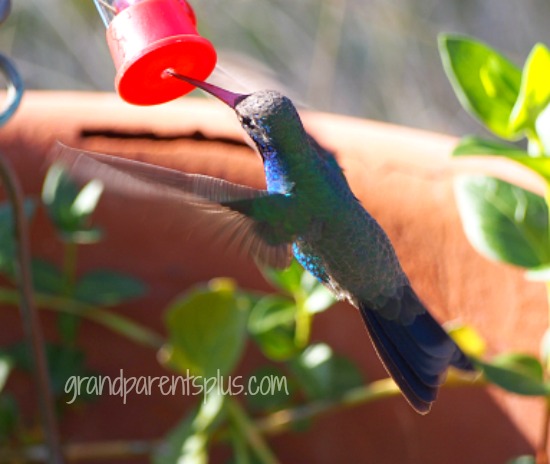
No one could identify this little hummer! It may be a juvenile which makes it hard to determine.

Hummingbirds - Amazing Acrobats   grandparentsplus.com

Hummingbirds mainly eat the nectar from flowers, but they also need protein. They get it by eating small insects on plants and catching them in the air.
Now, what’s not to love about these acrobats? I can’t wait until they come back to my garden!

Do you get many hummingbird varieties? Which one is your favorite?


Hummingbirds- Amazing Acrobats  grandparentsplus.com

 Hope you enjoyed learning more about these amazing acrobats!

Thanks for stopping by,

Phyllis

It would be great to have you subscribe on the sidebar!

Follow on Pinterest or Bloglovin’, too.
This post is linked to many of the following parties….


Posted in Garden, Misc. | Tagged , , , , , , , , , , , , | 28 Comments

Gazing Ball in a Container Garden

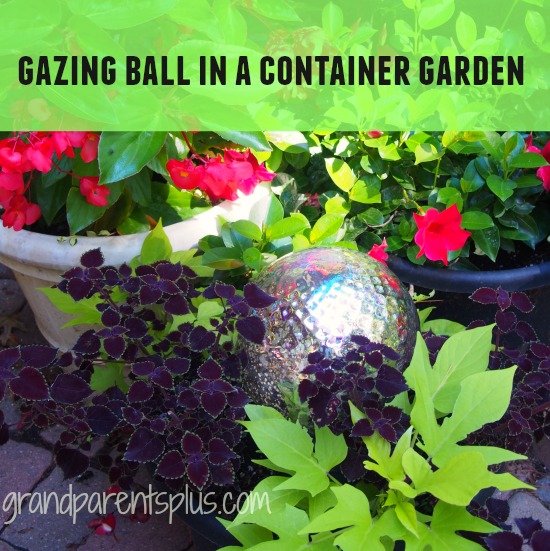
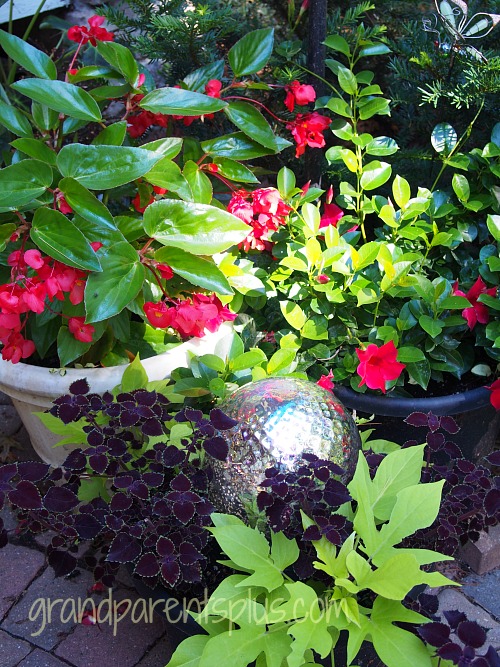
Ready to do some planting? Consider a gazing ball for something different within your container gardens. Often you see a gazing ball in the middle of a garden as a focal point. It usually stands alone on a pedestal. A different approach to using a gazing ball is to place it as a focal point in your container gardens or pots! Why not? It reflects the colors of the plants around it and makes a great accent.

Gazing Ball in a Container Garden

I looked for a gazing ball that was a bit mirror-like so that it didn’t set the tone for the colors, but would reflect them. By placing a tall cup in the middle of a large planting pot, the ball is secure and stays in place. Plant low trailing plants around it. If they get too big, just keep trimming them back. I used two different trailing vines that contrast in color and texture. I placed it among a grouping of several taller pots. I liked the way it looks, don’t you?

Just another way of mixing something different in your plantings!

Gazing Ball in a Container Garden

Happy Gardening!

Phyllis

Subscribe on the sidebar so you don’t miss out on future posts!

Follow on Pinterest and Bloglovin’, too!

This post is linked to many of the following parties….

Posted in Decor, Garden, Misc. | Tagged , , , , , , | 9 Comments

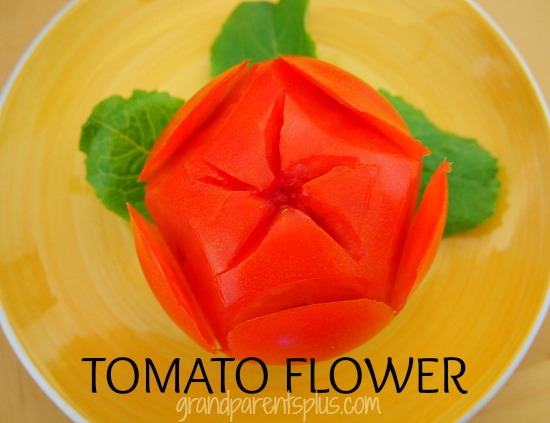
Tomato Flower Tutorial

Sometimes you want something special to garnish a salad that you’ve made. This tomato flower is an easy one to make and looks spectacular on a potato salad or any fresh vegetable salad. It only takes about 3 minutes to make. Let me show you how easy it is. Tomato Flower   grandparentsplus.com

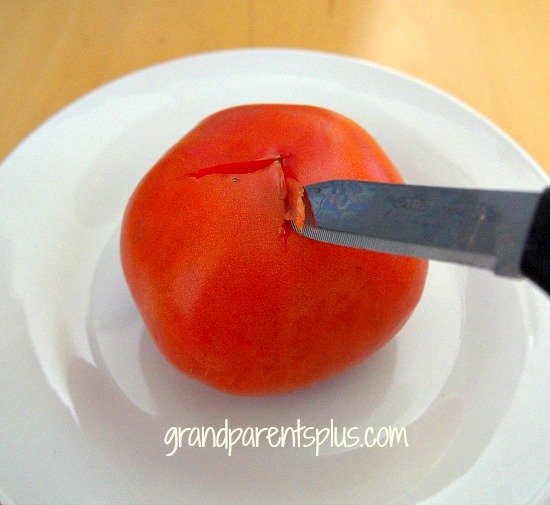
First, using a sharp knife, cut a 5 or 6 point star on the bottom of the tomato. Slice just a bit off of the cut to make it show up more.

Tomato Flower grandparentspus.com


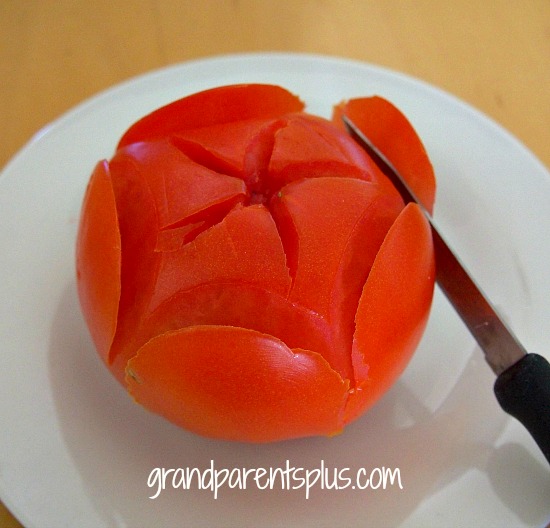
Next, between each of the five points, slice down the side just slicing the skin with a little of the tomato meat.

Tomato Flower   grandparentsplus.com


Finally, press each petal out gently. Add a few greens for leaves and you are done!

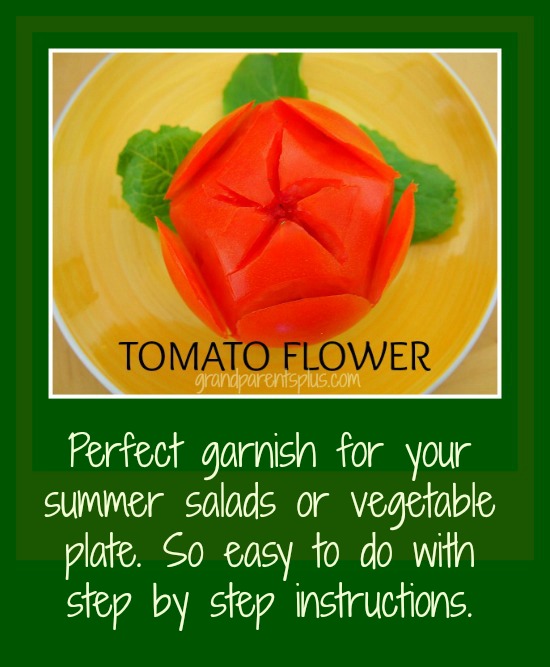
Wasn’t that quick and easy?  Won’t this tomato flower look lovely on a vegetable plate or on top of a fresh veggie salad?

Tomato Flower Tutorial  grandparentsplus.com

Try it!

Phyllis

Love to have you subscribe on the sidebar so you don’t miss future posts!

Follow on Pinterest or Bloglovin’ , too.

This post is linked to many of the following parties….

Posted in Recipes, Salads | Tagged , , , | Leave a comment

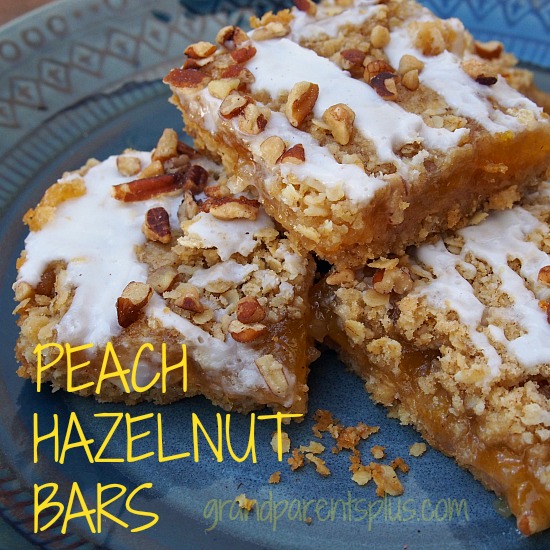
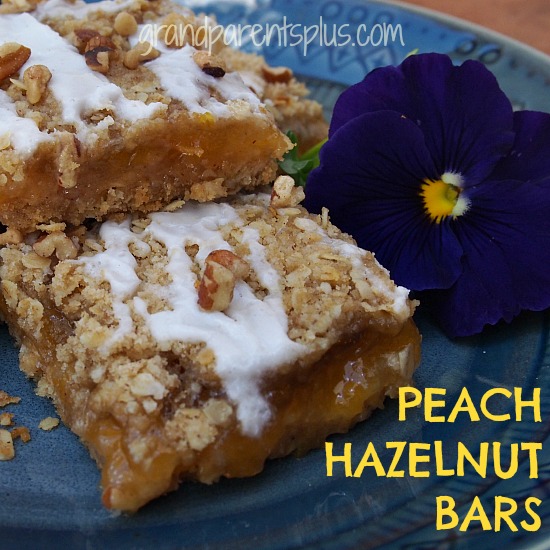
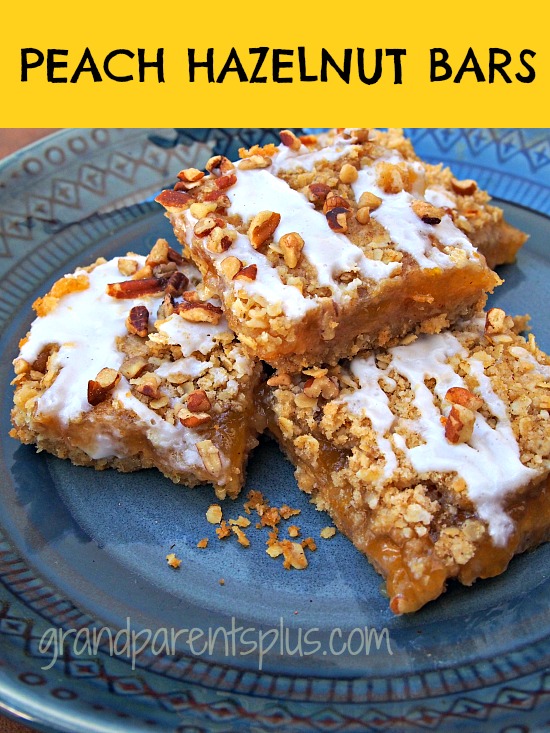
Peach Hazelnut Bars

Take a crunchy oatmeal crust along with a peach-hazelnut flavored center and you have  wonderful Peach Hazelnut Bars that you’ll absolutely love! They are light and very flavorful along with quick and easy to prepare. It takes only 20 min. of prep to make these bars.  Now, if you happen to have any leftover, they freeze well, too!

Peach Hazelnut Bars grandparentsplus.com

Ingredients:

1 1/2 cups all-purpose flour

1 tsp. baking powder

1/2 t. salt

1 cup brown sugar

1 1/2 cups quick-cooking rolled oats

1/2 tsp cinnamon

3/4 cup butter

18 oz. jar of peach preserves (or approx. 2 cups)

3-4 tablespoons hazelnut syrup (coffee flavoring)

Chopped hazelnuts or pecans (optional)

Glaze:

1 1/2 c. confectioner’s sugar

3-5 tablespoons hazelnut coffee creamer

Chopped pecans

Directions:

Mix dry ingredients together and stir in oats, sugar and cinnamon.

Cut in butter until crumbly

Pat 2/3 of crumbs in a 9×13 cake pan

Spread Peach Preserves mixed with hazelnut flavoring over the crust

Sprinkle with remaining crumbs

Bake in oven at 375 degrees for 30-35 min

Cool slightly and mix glaze together

Drizzle glaze over slightly warm bars and top with chopped pecans or hazelnuts (if desired)

Cool completely and cut into bars –  Approx 2 1/2 dozen bars

Peach Hazelnut Bars   grandparentsplus.com

I know you’ll love these bars!

Peach Hazelnut Bars  grandparentsplus.com

Enjoy!

Phyllis

You won’t miss a post if you subscribe on the sidebar!

Follow on bloglovin and Pinterest, too!

Posted in Desserts, Recipes | Tagged , , , , , , , | 4 Comments

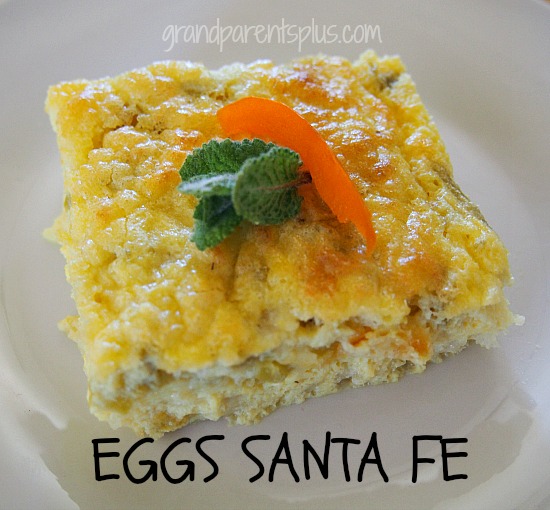
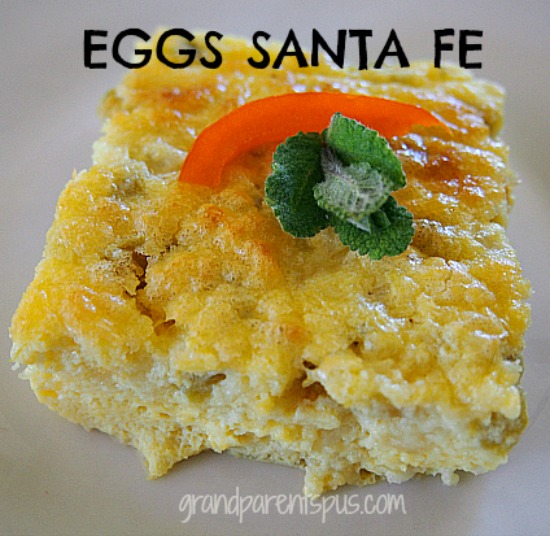
Eggs Santa Fe

Don’t like soggy bread? Then, this recipe is just right for you. Eggs Santa Fe is another non-bread  brunch recipe that is awesome. This one uses cottage cheese in the recipe! It results in making Eggs Santa Fe light and fluffy.

Eggs Santa Fe   grandparentsplus.com

Ingredients:

10 eggs

1/2 cup flour

1 tsp baking powder

1/8 tsp salt

2 cups cottage cheese (16 oz.)

2 cups shredded Monterey Jack cheese

1/4 cup butter melted

2 cans (4 oz.) chopped green chilies (your choice on how “hot” you want)


Directions:

Grease a 9×13 pan.

Beat eggs, combine flour, baking powder, salt, and stir in eggs. Add cheese, butter and chilies. Pour into greased  pan and bake uncovered at 350 degrees for 40 minutes. Bake until knife inserted in center comes out clean. Serve with salsa.

Eggs Santa Fe  grandparentsplus.com

No need to keep this in the refrigerator overnight. It is very quick to put together in the morning. Make it as spicy as you like by using mild or hot green chilies.

Leftovers freeze well. Microwave individually for a quick breakfast.

Keep this recipe for Eggs Santa Fe in your file under “great egg bakes”!

Other great egg bakes are Amish Egg Bake and Eggs Ortega

Enjoy!

Phyllis

Subscribe on the sidebar, so you don’t miss new posts.

Follow on Pinterest and Bloglovin’, too!

This post is linked to many of the following parties….

Posted in Easter, Holidays, Main Dishes, Recipes | Tagged , , , , , | Leave a comment

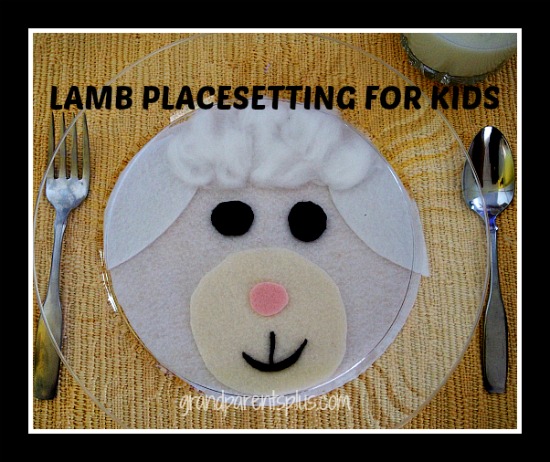
Lamb Placesetting for Kids

I’m always trying to make kid’s placesettings on holidays extra special. This Lamb Placesetting for Kids is one that can be used at Easter or perhaps a shower or birthday party with a lamb theme. It is fast and easy to put together. Kids won’t ruin it as you use a clear plastic plate over it! If you want to adhere it to the back of the plate, make it out of paper. Using felt, however, gives it some depth and dimension.

Lamb Placesetting for Kids  grandparentsplus.com


Here are the basic materials for one lamb placesetting…..

1 white sheet of felt- approx 8 x 11   – you are able to get both the circle and ears out of one sheet

1 light flesh-tone sheet of felt

small bits of black felt  (you may have this in your scrap box)

small bit of pink felt

3 cotton balls


Directions:

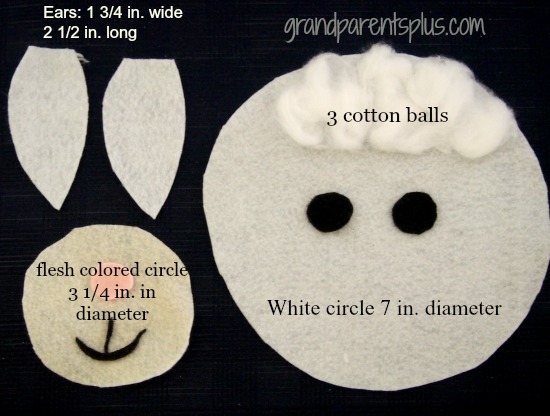
Using the inside of the  plate as a template, cut a round piece of white felt.  Mine was 7 inches in diameter.

Cut ears from the leftover scraps.

Lamb Placesetting for Kids

Add the pink nose, eyes and mouth. (eyes and mouth are approximately  3/4 in. circles)

Separate the cotton balls and spread over the top of the head.

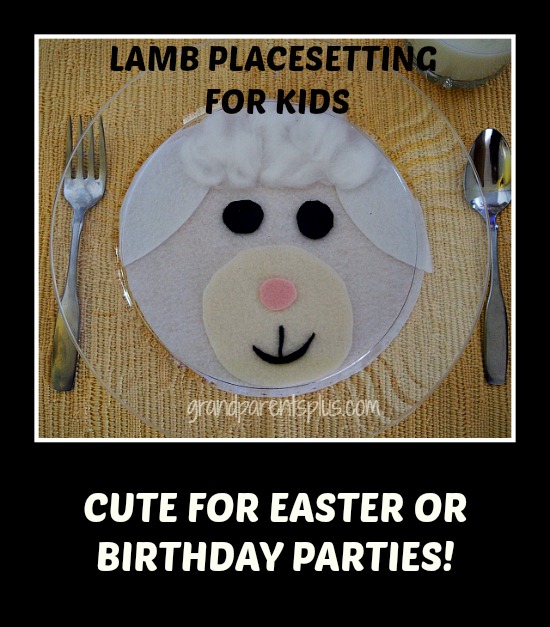
Place the clear plastic plate over the lamb face. What fun for kids to find this lamb placesetting at the table!

Lamb Placesetting for Kids  grandparentsplus.com

 Do you make a special placesetting for the kids at your table? 

Have fun!

Phyllis

Don’t want to miss any ideas? Subscribe on the sidebar!

Follow on Pinterest and Bloglovin’, too!

This post is liked to many of the following parties…..


Posted in Crafts, Easter, Holidays | Tagged , , , , , , , | 12 Comments

Why Cruise?

Just recently my husband and I took  a Caribbean Cruise. This winter has been so cold that we needed a warm getaway. The only compensation I was given for this post was Internet time.  We paid for the cruise on our own and all opinions are completely mine based on our experience.

Why Cruise? grandparentsplus.com

We chose Norwegian Cruise Line because we had been on another cruise with them and enjoyed it very much. We cruised for a week on the Norwegian Jewel that left out of the Houston, TX port.  The ship went to Cozumel, Belize, and Trujillo, Honduras. If you’re looking for a wonderful vacation, a cruise may be  perfect for you and your family. Here is why you might want to cruise and what to expect on Norwegian Cruise Lines.

First, it is like an all-inclusive vacation. You have several restaurants with 5 star menus available to choose from each day. If you want to go more casual, there’s a Garden Cafe Buffet with more choices than you can imagine. Not enough? Well, there’s  good old  hamburgers and hotdogs with all the fixings at poolside. Also, there are specialty restaurants that are also available for an additional charge. Other additional charges are for alcohol and soft drinks. Milk, tea, coffee, lemonade and flavored waters are free. Norwegian does allow you to bring on cans of soft drinks as long as they are unopened.

Why Cruise? grandparentsplus.com

The Garden Cafe had specialty nights, too. Mexican, Caribbean, and Asian were some of the evening specials. Pictured above is only one small section of the Garden Cafe.

Why Cruise?  grandparentsplus.com

At the back of the Garden Cafe, they have an open area for dining. In the morning, this was our favorite place to have breakfast! There were so many choices for breakfast! There was made-to-order omelets, eggs benedict, eggs any way you choose, bacon, sausage, juice, breads, rolls, sliced cold cuts, fruit, yogurt, along with cereals (hot and cold).

Now, in the evening, we liked to dine at the Tzar restaurant. It was beautiful! Norwegian Cruise Lines has a policy of what they call “Freestyle”. This means you choose what to do and when you want to do it. This includes dining! You are not assigned to a certain time to eat, but can choose when and where you want to eat. You are not assigned to a certain table, either. The dress code was merely wearing long pants (including jeans) for the men. No shorts for women, but capris were fine or many chose to dress up, too! Again, it is your choice!

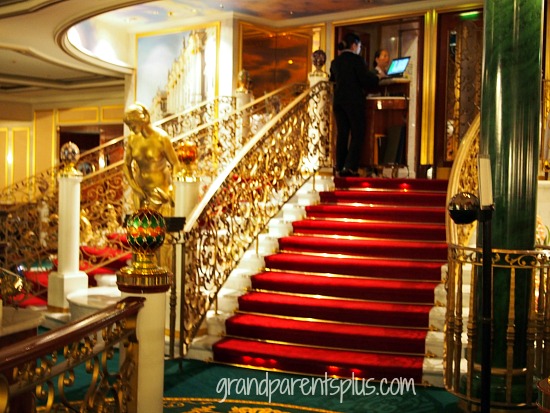
Why Cruise? grandparentsplus.com

Grand entrance to the Tzar Restaurant

We have been on other cruise lines where you’re assigned to a late 8:30 dinner. For us, that is way too late for a big meal so we liked that we could choose when to eat.

Now, on to the second point…..   If you cruise as a family, there are lots of kid’s activities, too. There’s a club for young kids so adults can enjoy some free time as well as a teen area. Everyone can find something to do on the ship or you can just relax and chill out at the pool. Because there are so many directions of where to go, it makes it easier to keep track of everyone by bringing walkie-talkies.  Texting will cost you extra as you need to sign up for Wi-Fi minutes.

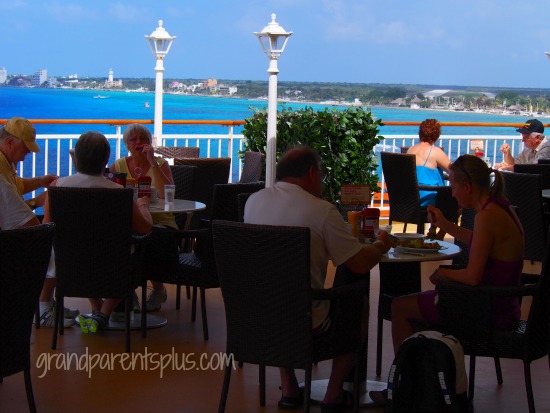
Why Cruise?  grandparentsplus.com

The ship’s ammenties are great! Above is only one of the pool areas on a port stop day. If you choose to stay on ship, you can enjoy the pool without many people there.

Why Cruise?  grandparentsplus.com

Cozumel

Why Cruise?  grandparentspus.com

Another reason to cruise is that you go to different destinations. If you choose the cruise by the ports of call, you’ll find different attractions and things to see at each location. We had visited two of the destinations before so our criteria for the cruise wasn’t necessarily the destinations, but the dates that fit our schedule. Cozumel, pictured above, is great for snorkeling. Another attraction is the Mayan ruins. Belize, another cruise stop, is where you can tube on a river through caves. We did this on our last trip and it was very fun. There are many other options as well.

Why Cruise?  grandparentsplus.com

Honduras

Our stop at Honduras (Trujillo) was very picturesque from the ship. This is a new developing port. The natives met those coming ashore with music and dancing. We enjoyed the shopping area here. I found a native nativity set here to add to my collection. It was very hot that day so we opted for a short visit and returned to enjoy the ship. Other people who went ashore said there was great snorkeling here.

Why Cruise? grandparentsplus.com

Here’s more reasons to cruise….You’ll have great entertainment day and night. There are live bands at the pool during the day. During the evening, there’s dancing and wonderful shows to attend. We found the evening shows in the main theater were very good. Throughout the evening, more live music is at the various lounges on the ship.

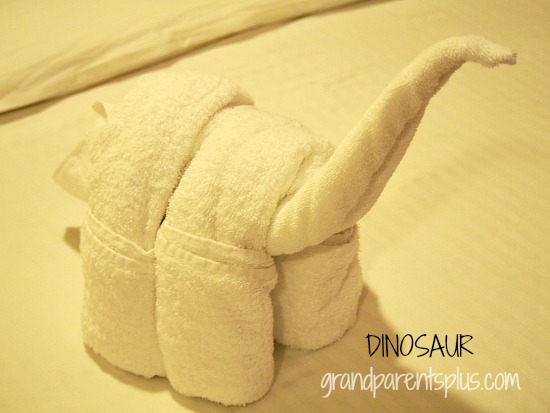
While on your cruise, you can expect incredible service from the staff. From the stewards that make up your room twice a day, to your waiter or any staff member, they are friendly and accommodating. Even the captains are approachable with a friendly smile and greeting. In your stateroom, each night,  you’ll find a cute creature sitting on your bed.

Why Cruise?  grandparentsplus.com

You have so many choices of things to do on the ship. Besides what has been mentioned, there’s a Fitness Club to work off all that wonderful food, along with a Spa, Casino, Library, and Card Room.

Final reason to cruise is that it is a very relaxing vacation. You can be as busy as you want or just take it easy!

Why cruise? The answer is, “Why not?”

I recommend to “cruise like a Norwegian” on Norwegian Cruise Lines! We loved it!

Why Cruise? grandparentsplus.com

Thanks for stopping by!

Phyllis

This post is linked to many of the following parties….


Posted in Misc., Uncategorized | Tagged , , , , , | 5 Comments

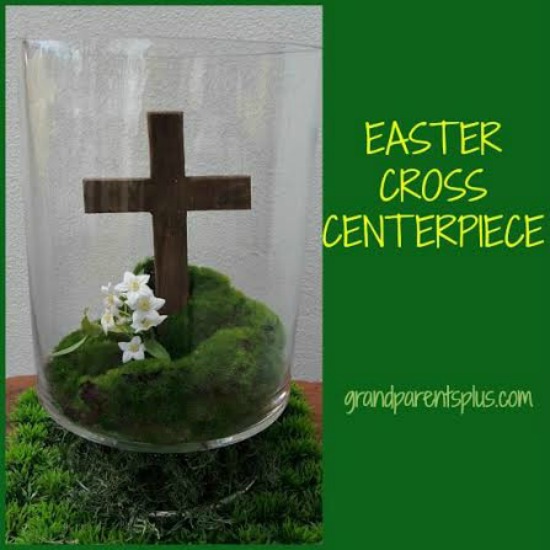
Easter Cross Centerpiece

Here’s an easy to make, meaningful Easter Cross Centerpiece.  By displaying it in your home, it is  a daily reminder of what Easter is really about to your family and guests in your home.  Now, I’m not against bunnies (they’re so cute) or chicks, etc., but I do try to have some decorations that focus on the real meaning of Easter. This is a simple one to do.

Easter Cross Centerpiece   grandparentsplus.com

The Easter Cross Centerpiece is easily varied to whatever size glass cylinder you have. You just need to  get your hand down in it to arrange properly. My glass cylinder measured 9 1/2 inches high and 7 1/4 inches diameter. I found the wooden cross at Michael’s. It was the right size for this glass cylinder. Making a cross out of twigs or  small pieces of wood works, too, if you’re doing a smaller version.

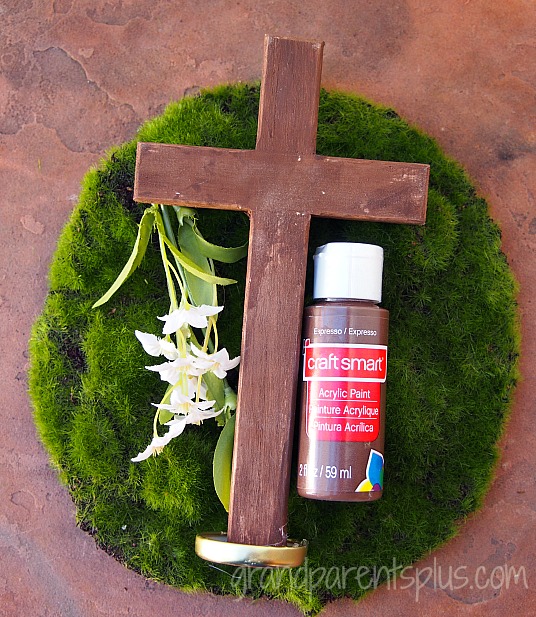
Materials:

Glass cylinder ( this could be rectangle, too)

Moss circle 8 inches in diameter (found at Michael’s)   Substitute any other moss or grass

Small white lily-like flowers

Bottle Cap

Wooden Cross – mine measured 8 x 4 1/2

Brown Acrylic Paint or stain

Easter Cross Centerpiece  grandparentsplus.com


The cross is something that kids can help to make. Let them paint or rub on the brown color. I didn’t want the cross to look so perfect so I rubbed the acrylic paint on it to make it look distressed.

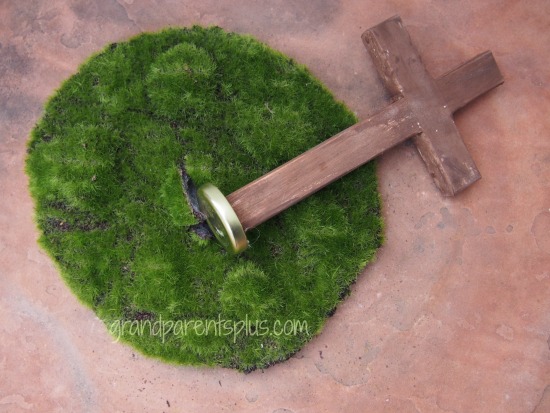
Because I use this cylinder at for other arrangements, I didn’t want the cross to be permanently glued to the glass. Instead, I found a small lid and hot-glued the cross to the flat lid.  This would enable it to stand up.

Easter Cross Centerpiece   grandparentsplus.com

Make an “X” cut in the middle of the moss circle. Fit the bottom of the cross through the “x”.

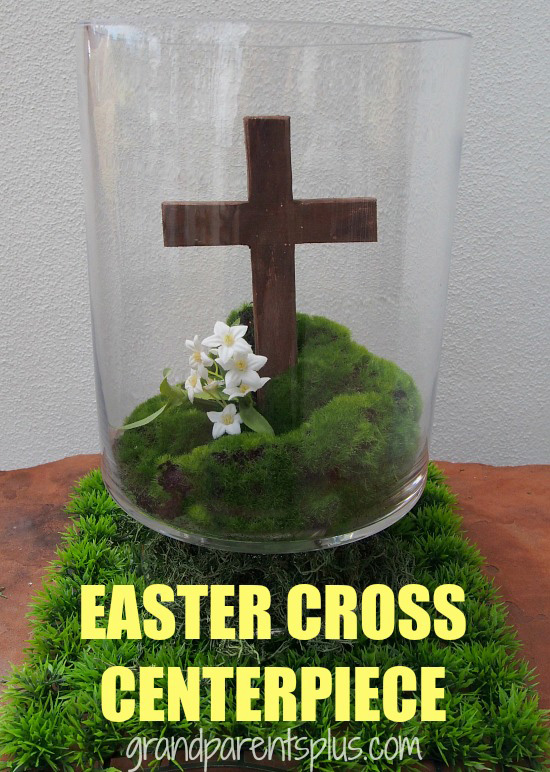
Now the glass cylinder is 7 1/4 inches in diameter and the moss circle is 8 inches in diameter. I didn’t want to cut it down and liked that it bunched up in the middle and  made it look like a hill. It supported the cross as well.  Fit the moss with the cross into the cylinder.

It fit so nice and tight that I didn’t have to attach it in any way. When you have it arranged, place the small white flowers at the base of the cross.

That’s it! You’re ready to display your centerpiece in the middle of your Easter table with candles on either side or use as a coffee table display.

Easter Cross Centerpiece  grandparentsplus.com

Remember, Easter is about Jesus!

“For God so loved the world that he gave his one and only Son, that whoever believes in him shall not perish but have  eternal life.” John 3:16 NIV

“Salvation is found in no one else, for there is no other name under heaven given to mankind by which we must be saved.” Acts 4:12 NIV


Have a Blessed Easter!

Phyllis

Subscribe on the sidebar so you don’t miss future posts!

Follow on Pinterest and Bloglovin, too!

This post is linked to many of the following parties…….

Posted in Crafts, Decor, Easter, Holidays | Tagged , , , , , , | 19 Comments