Duck Dynasty Tablescape (for Christmas)

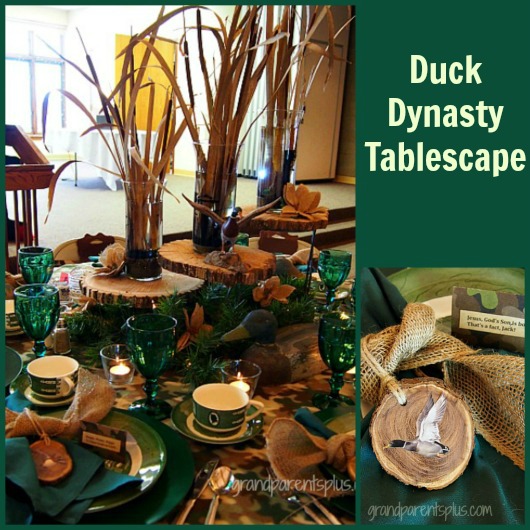
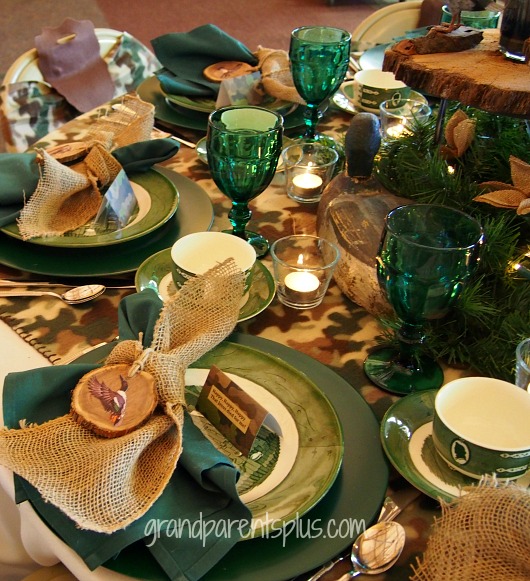
Just for something fun and different, I made a Duck Dynasty Tablescape for a women’s Christmas event. The women at my table were great sports with this unusual Christmas setting. I’ll tell you about how I made the details of the tablescape. It would also work for Thanksgiving if you have hunters or Duck Dynasty fans in your family. I used the green camo as it seemed to go better with the Christmas decor.

Duck Dynasty Tablescape  grandparentsplus.com


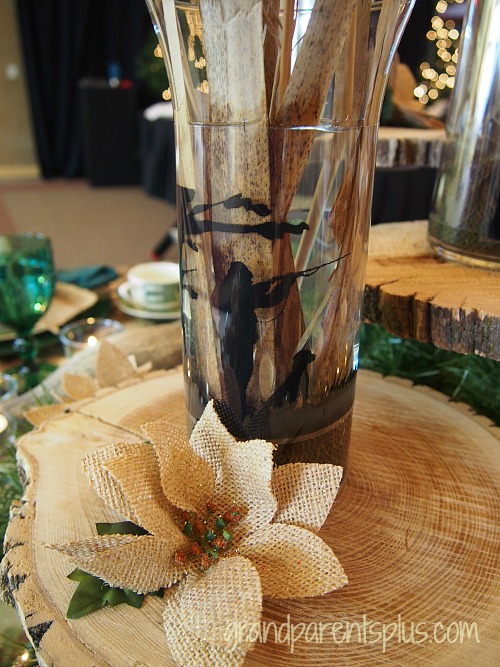
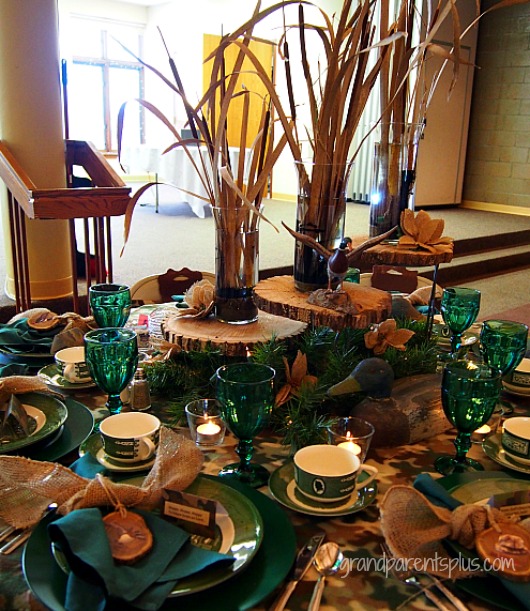
I wanted to have a hunting scene so I downloaded a silhouette of a man hunting ducks. Then, I copied it through a copy machine on an overhead projector transparency. It fit perfectly around the dollar store vases. Just before our first snowfall, I went into a swamp area and cut some cattail leaves. At a local floral shop, I found pencil thin cattails for 10 cents each! I expected that I could just add water and stick the cattail leaves in the vase, but when I tried it, the cattail leaves floated up! (Guess that’s why they stand up so good in the wet swamp) So, I used floral foam covered with a square of burlap and secured them down in the vase. I used submersible LED lights down in the water to illuminate it.

Duck Dynasty Tablescape   grandparentsplus.com


The burlap poinsettias were on a pick from the Dollar Tree. There were five blooms on the pick for $1.00! The chargers were $.38 on a closeout at Michael’s because they were shiny orange! I painted them green. (Be sure to use spray paint that adheres to plastic.)
Duck Dynasty Tablescape  grandparentsplus.com

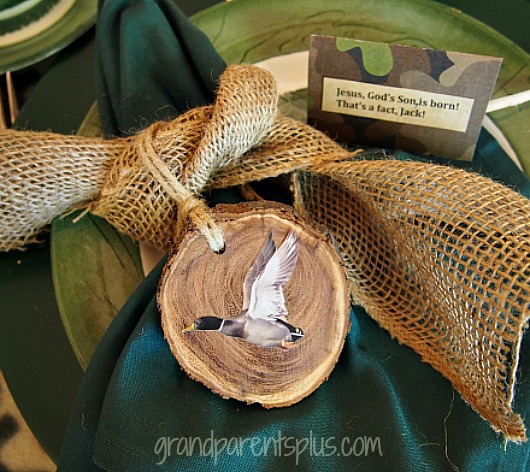
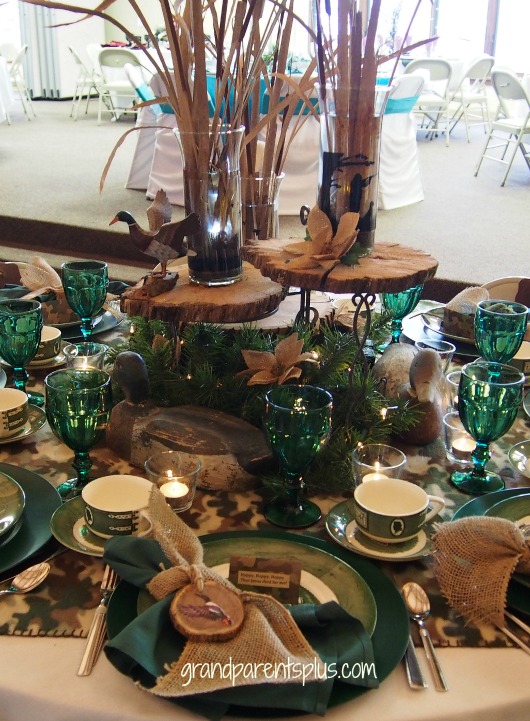
 Christmas greenery,  battery operated lights, along with a few antique duck decoys, decorated the center of the table. At each placesetting, I used burlap ribbon along with wood slices to compliment the napkins. I found duck stickers and just adhered them to the wood slices which my husband had cut for me. I made Duck Dynasty phrases and placed them at each placesetting.  The phrases were:  “Jesus, God’s Son, is born! – That’s a fact, Jack! “, “Happy, Happy, Happy, to know Jesus!” – “Jesus came to save us! That’s a fact, Jack!”, “Jesus – God’s plan for Salvation”, “Happy, Happy, Happy – That Jesus died for me!”


Duck Dynasty Tablescape   grandparentsplus.com

Another view of the table……

Duck Dynasty Tablescape  grandparentsplus.com


Duck Dynasty Tablescape  grandparentsplus.com

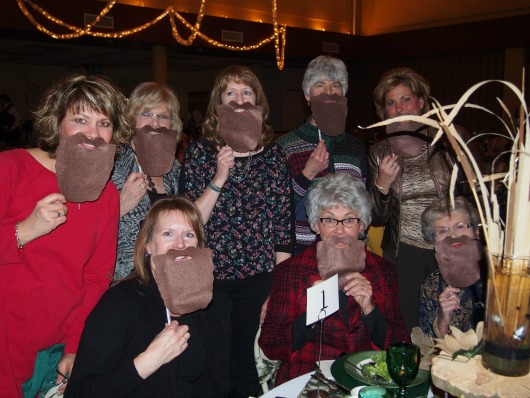
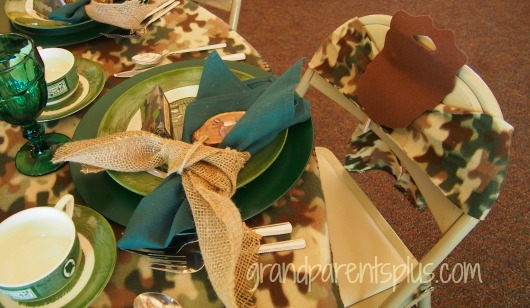
I tied the chairs with camo cloth. I found a thin fleece blanket at Walmart for $2.88. I bought two of them. One I used as a tablecloth and the other I cut into 6 inch strips and tied them on the chairs. I made felt beards, glued a straw on the side and stuck them on each chair. The felt was too floppy so I backed it with cardstock. Duck Dynasty Tablescape   grandparentsplus.com
Here’s my table guests…..

Duck Dynasty Tablescape   grandparentsplus.com


For a hostess gift, I wrapped a box of  party “Quackers”  (crackers)  for each guest (in Duck Dynasty paper, of course)!

We had a great evening!


Are you a Duck Dynasty fan?

Hope you enjoyed the Duck Dynasty Tablescape! I had fun coming up with ideas and arranging it.  

Here’s a link to Duck Dynasty shows…


Phyllis


This post is linked to many of the following parties….


Posted in Christmas, Decor, Holidays | Tagged , , , , , , | 14 Comments

DIY Olaf Gift Bag

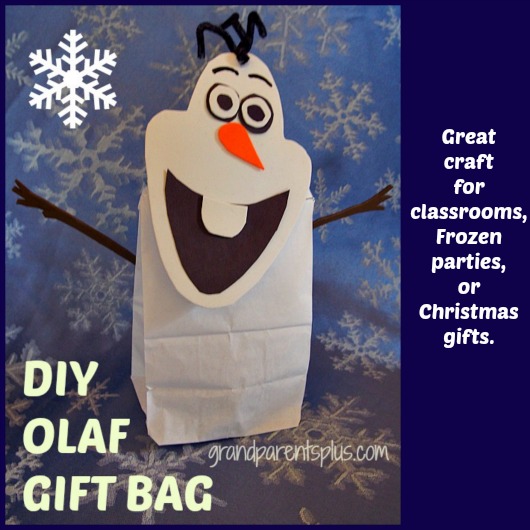
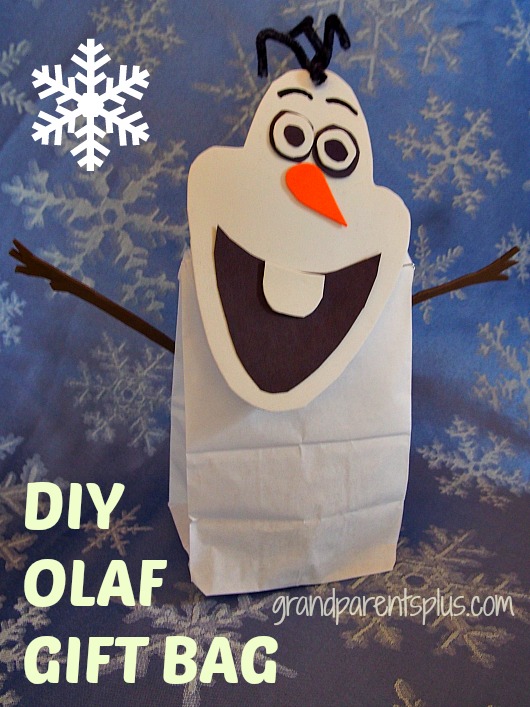
The movie “Frozen” is a big hit with kids. I even like it (just a kid at heart)! This Olaf Gift Bag makes a cute craft for kids to do at a Frozen party! If the kids are too small to handle the small pieces, just make the bags ahead of time to hand out as treat bags. If using as a craft, simplify it by cutting the small pieces out ahead of time and let the kids put them together! Whatever you decide, I know kids will be delighted with this Olaf Gift Bag! Patterns are included below.

DIY Olaf Gift Bag  grandparentsplus.com


Materials:

White fun foam for the face and teeth (this makes it sturdy for the pipe cleaners) If you use white construction paper, use black curly ribbon instead of the pipe cleaners.

Black, brown, and orange fun foam or construction paper – either works   The brown for the arms works better with fun foam or cardstock paper.

Black pipe cleaners

White lunch bags  -( I got mine at Walmart next to the regular brown lunch bags in the grocery section)

Glue that works with fun foam

Hint: some of the pieces are easier to cut out of construction paper. It is cheaper, too!

I used a combination of foam and construction paper.

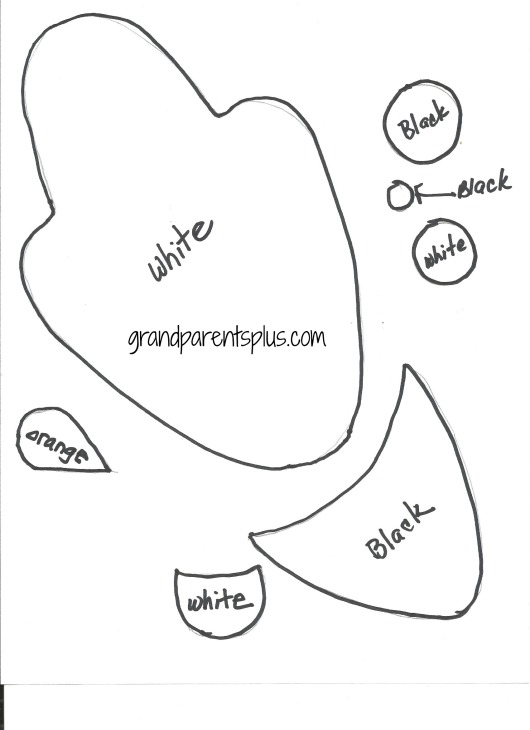
Patterns…..


Olaf Gift Bag Pattern grandparentsplus.com


Directions:

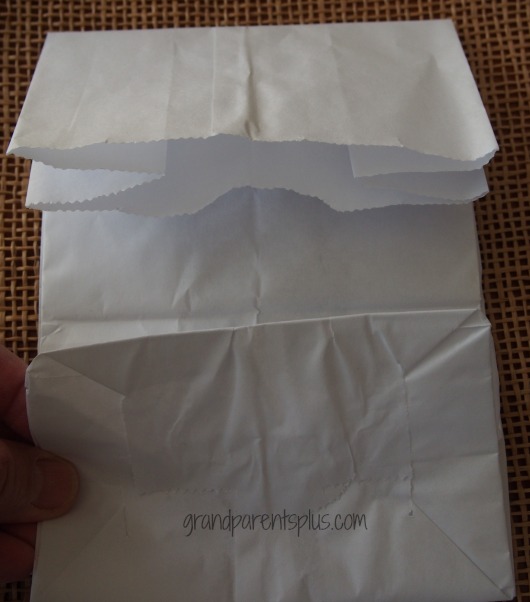
Fold down the top of the lunch bag 3 inches


DIY Olaf Gift Bag grandparentsplus.com


Cut the face from white fun foam or construction paper.

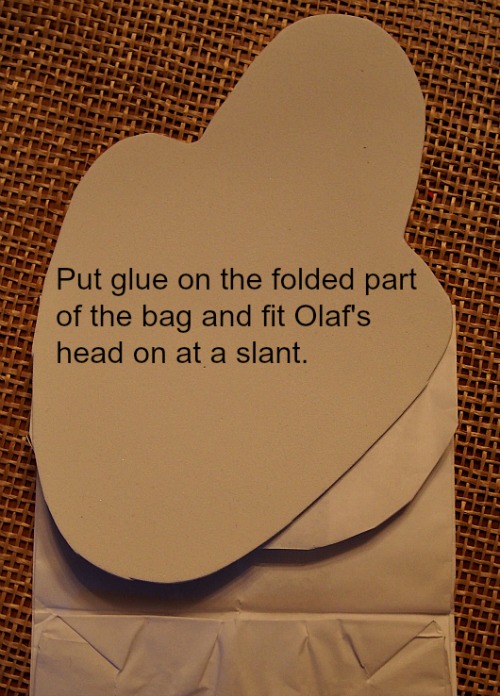
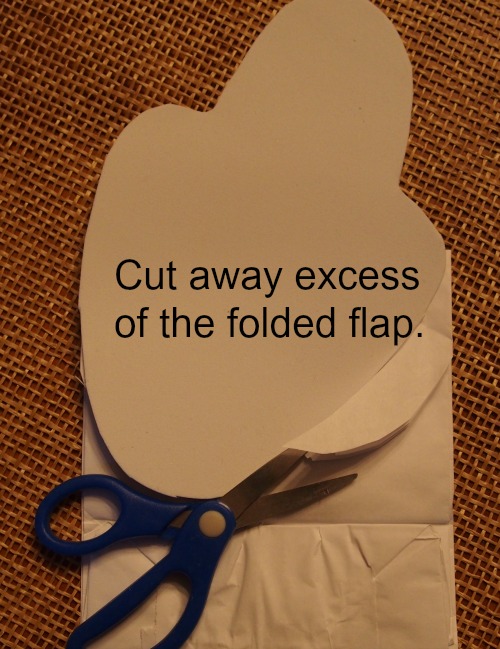
Tilt and glue on white lunch bag and trim the folded down part of the bag to fit the fun foam face.

DIY Olaf Gift Bag  grandparentsplus.com


DIY Olaf Gift Bag   grandparentsplus.com

Cut and glue face pieces.  The black centers for the eyes are hard to cut for kids. Use a black permanent marker for the small eye circles, if you wish.

Make the eye brows with a black marker

Cut sticks out of brown fun foam for the arms

Cut pipe cleaner into thirds. Twist together and stick through the top of the foam face or glue on the back of the head. If you used construction paper, use black curling ribbon and glue on top of the head. Thin black strips of black construction paper works, too!

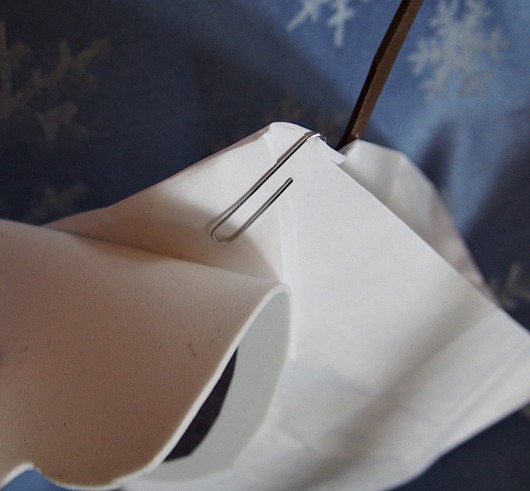
Because the fun foam has more weight than the construction paper, secure by sides with a paper clip or tape so that Olaf stands up straight.


DIY Olaf Gift Bag  grandparentsplus.com

What a fun gift bag for under the tree or favors at a Frozen party!

DIY Olaf Gift Bag  grandparentsplus.com


Enjoy!

Phyllis


This post is linked to many of the following parties…….. 

Posted in Christmas, Crafts, Holidays | Tagged , , , , , , , , , | 7 Comments

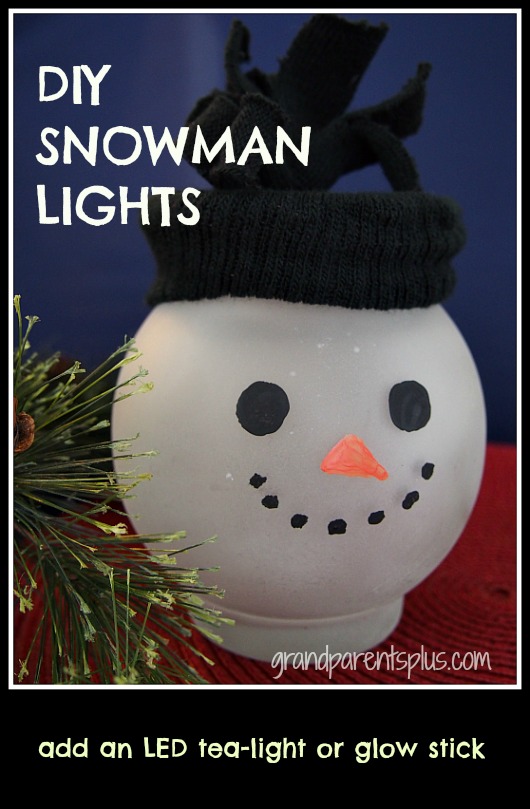
DIY Snowman Lights

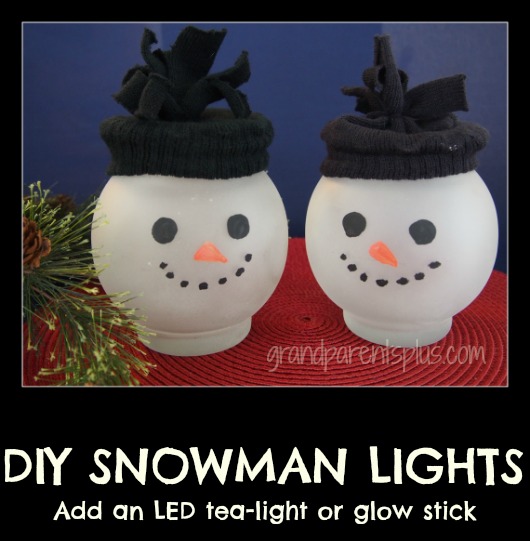
Here’s an easy project for Christmas! The DIY Snowman Lights are so cute when lit at night. They make a great night-light for a kid’s room or a decoration anywhere. Because they are snowmen, you can keep them out through the winter. They don’t take long to make, either!


DIY Snowman Lights  grandparentsplus.com

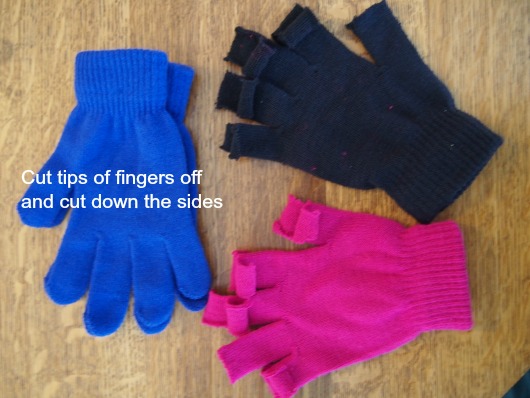
I found this idea on Craftsforallseasons.  They used wire mesh for hats, but when I found the material at a craft store, it was very expensive! Instead, I used those cheap one-size-fits-all gloves. I ,also, just painted the faces with acrylic paints. I will use these at our grandchildren’s place-settings at the Christmas table. Afterwards, they’ll become a night-light in their room.

DIY Snowman Lights Materials:

Small clear glass “fish bowls”    (The small “fish bowls” are found at the dollar store. ) aka “rose bowls”

“One-size-fits-all”  gloves

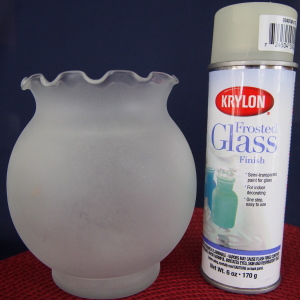
Krylon Frosted Glass Spray Paint (use a coupon on this if you can)  Be sure to read directions and follow closely!

Acrylic Black and Orange Paint or Glass paints

Acrylic Spray Sealer – optional


DIY Snowman Lights grandparentsplus.com

Directions: 

Spray clear glass bowls lightly – let dry and repeat with several coats

Apply faces with paint (glass paint may also be used, but it is more expensive)


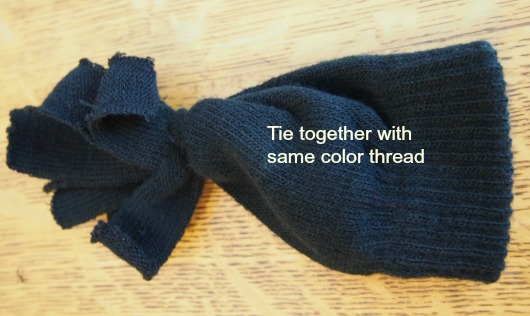
Make hats as shown…… DIY SNowman Globes   grandparentsplus.com


Next……


DIY Snowman Globes   grandparentsplus.com


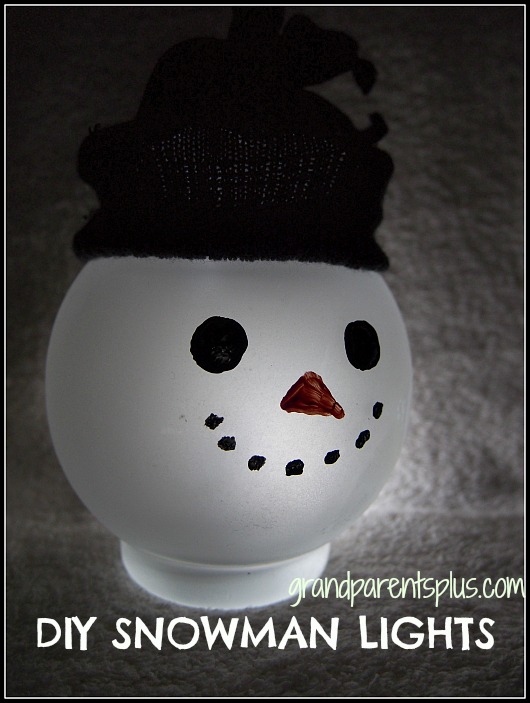
Now, fit the hat over the top of the vase or fishbowl…..   An LED tea-light or glow stick is easily placed inside by removing the hat.  Do not use a regular candle tea-light!

DIY Snowman Lights  grandparentsplus.com

I like the white light of the LED tea-lights…..

DIT Snowman Lights grandparentsplus.com

Wasn’t that easy? 

Enjoy!

Phyllis


This post is linked to many of the following parties…..

Posted in Christmas, Crafts, Holidays | Tagged , , , , , , , , , , , | 7 Comments

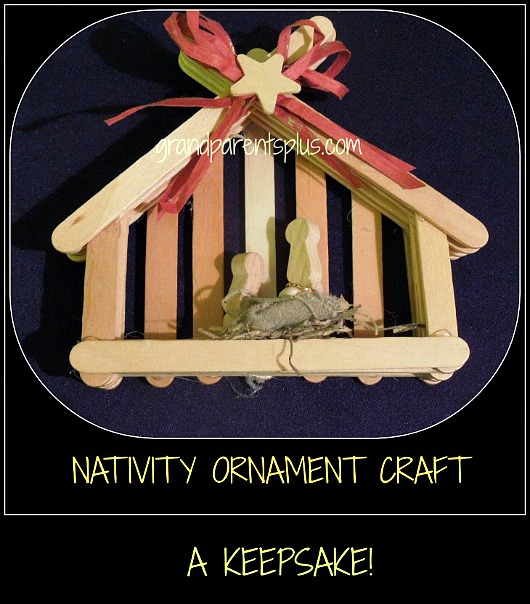
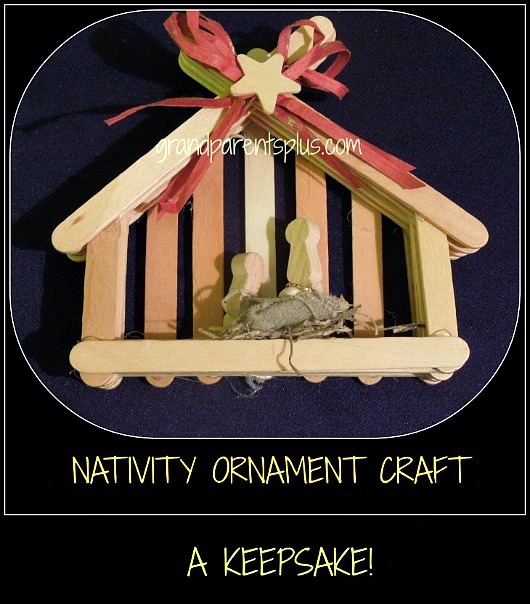
Nativity Ornament Craft

Nativity Ornament Craft  grandparentsplus.com

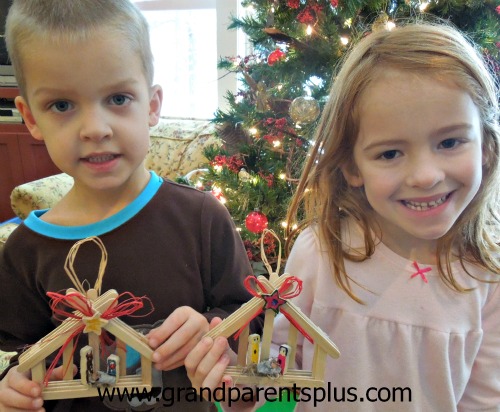
Christmas crafts are not only fun to make , but also create memories! I especially like Christmas crafts that relate to the real meaning of Christmas. This Nativity Ornament Craft is one of my favorites! It is easy to make, too, with some adult supervision!! Not only is it great for a tree ornament, but it stands on its own for a nativity display!

Supplies:

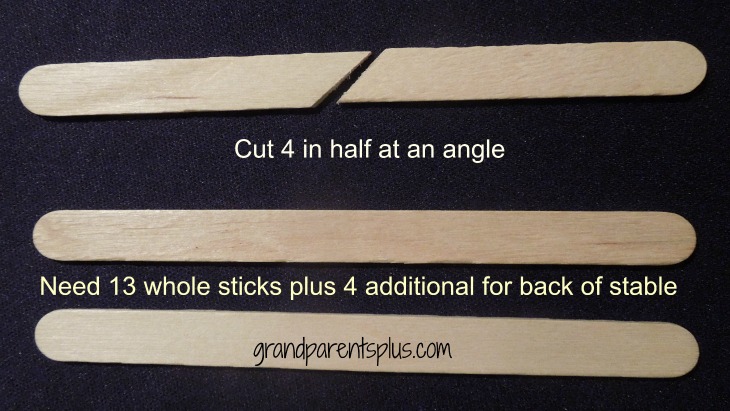
Total of 17 whole wooden popsicle sticks.

2 flat wooden clothespins

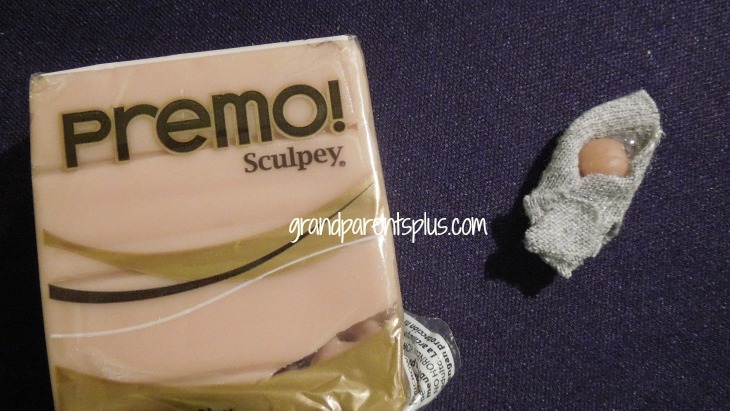
small wooden ball (1/8″ diameter) or Sculpey to make your own ball

small piece of cloth

thin gold string or thread

Raffia

wooden star

moss or hay(cut up raffia)

Glue gun

Directions:

Cut 4  popsicle sticks in half at a slant.

Nativity Ornament Craft  grandparentsplus.com

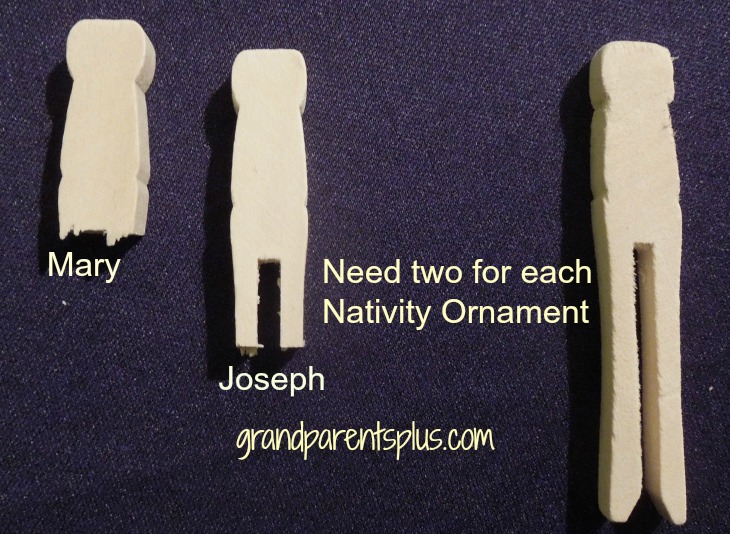
You need 2 Flat Wooden Clothespins for each Nativity. (2  1/2 inch size)

Cut as shown…


Nativity Ornament Craft  grandparentsplus.com

Nativity Ornament Craft  grandparentsplus.com

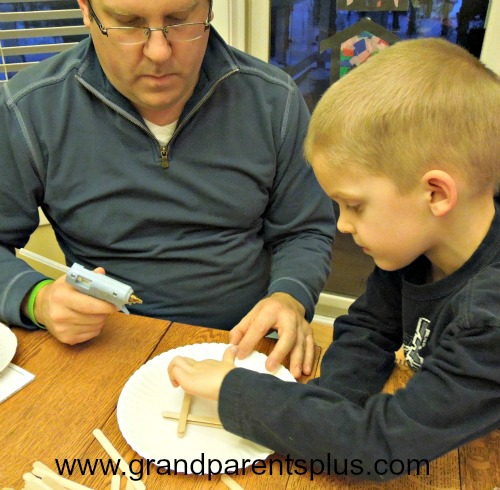
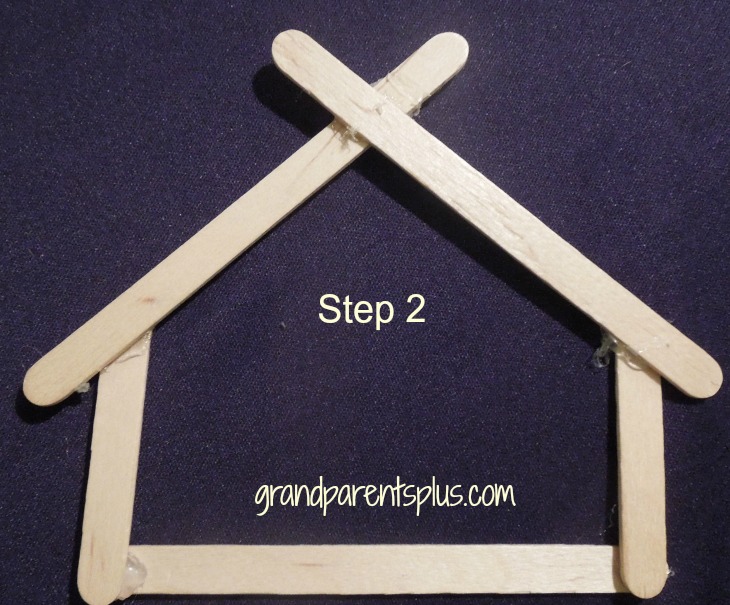
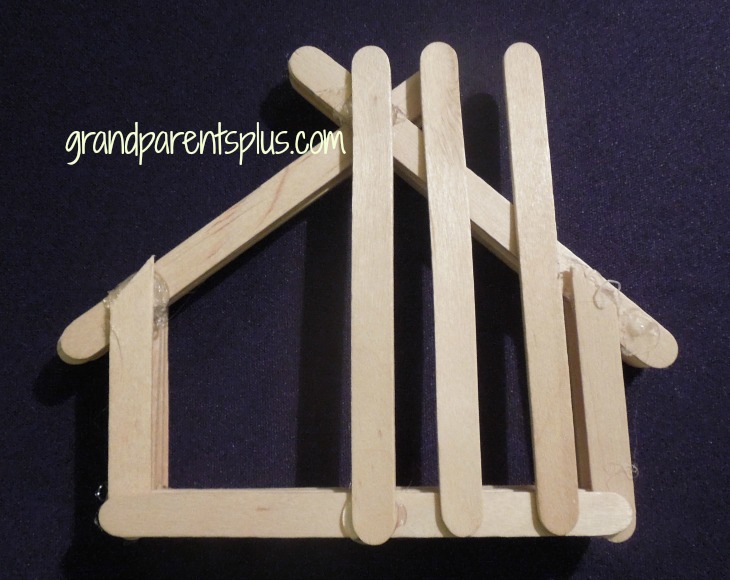
Start by laying one stick across the bottom and gluing two half sticks at each end. Be sure the angles are as shown.


Nativity Ornament Craft grandparentsplus.com


Glue two sticks at the top, crossing in the middle…


Nativity Ornament Craft  grandparentsplus.com

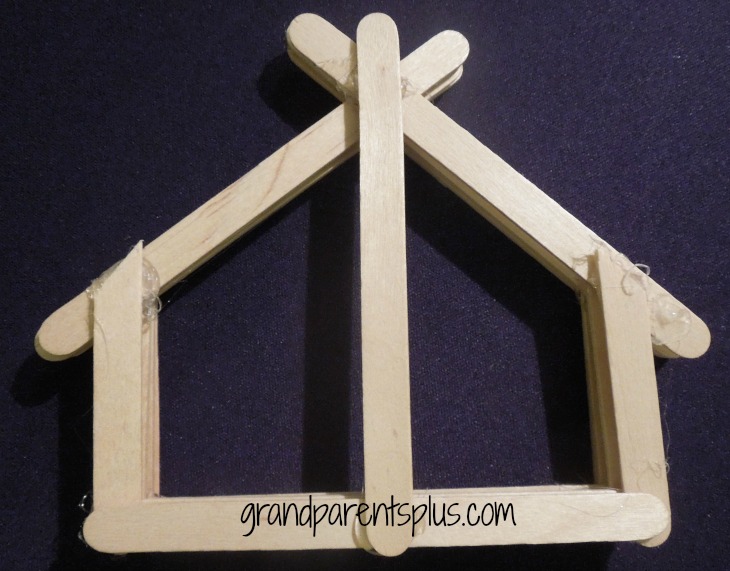
Repeat 4 times.  (more if you want your stable deeper)

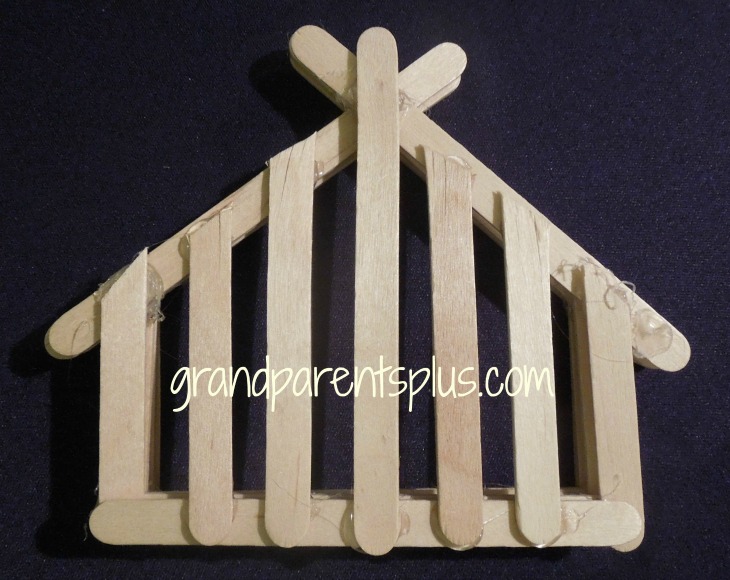
On the back, glue one stick in the middle as shown….


Nativity Ornament Craft  grandparentsplus.com

Lay two other sticks along side to measure proper height. Mark with a pencil and cut with heavy scissors or small saw.


Nativity Ornament Craft  grandparentsplus.com

Glue in place on the back…..


Nativity Ornament Craft   grandparentsplus.com

For the baby Jesus, use a small square of material (I cut-up an old t-shirt ).

Since I couldn’t find any small wooden beads, I made them using Sculpey. I baked several sizes to get the right one. The bead was approximately 1/8-1/4 inch in diameter. I made these ahead of time as they were so tiny that it was hard for kids to manage. I cut a piece of gold thread and glued it on for the halo. Now, fold the material corner to corner and then the bottom corner up (like folding a baby in a blanket). Glue together and glue the head sticking out. The kids just had to glue baby Jesus on the nativity scene with a little “hay” underneath.


Nativity Ornament Craft grandparentsplus.com

 Glue Mary, Joseph and baby Jesus in the manger.

Add a raffia bow and wooden star.

  Nativity Ornament Craft grandparentsplus.com


My grandchildren wanted to add faces to their nativity ornament craft! They made the details before gluing them on. Cute! I love that they added their special touches. Besides, kids don’t like faceless people!


Nativity Ornament Craft  grandparentsplus.com


Nativity Ornament Craft  grandparentsplus.com


Now this is the reason for the season!


Phyllis


If you haven’t subscribed, I invite you to do so you don’t miss future posts!

This post is linked to the following parties….


Posted in Christmas, Crafts, Holidays | Tagged , , , , , , , , , , , , , | 23 Comments

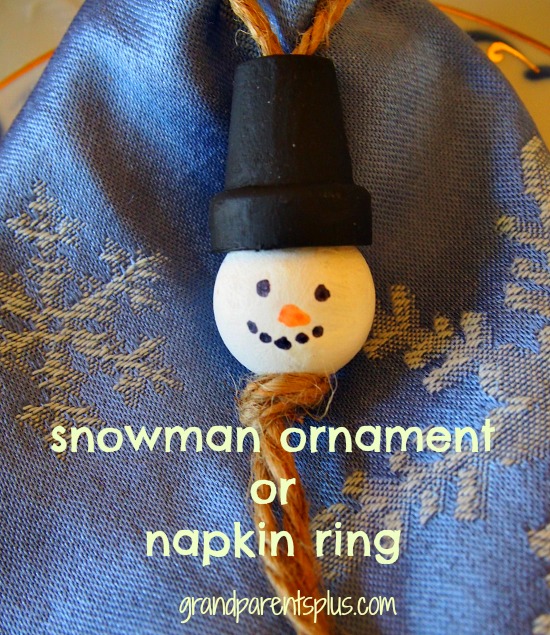
Snowman Ornament or Napkin Ring

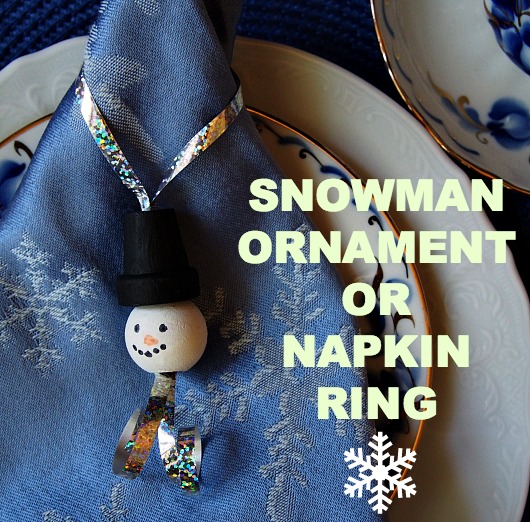
This Snowman Ornament or Napkin Ring is an easy craft that either kids or adults can do. I made these and used them for napkin rings one Christmas. Later, we used them as ornaments on the tree.

Snowman Ornament or Napkin Ring   grandparentsplus.com


Supplies:

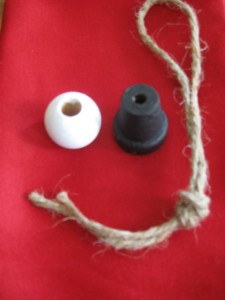
1″ wooden ball with hole*     

1″ tall wooden flower-pot with hole

Black  & White acrylic paint

Permanent Marker – 1 black and 1 orange (or use a dab of orange paint)

12″ of raffia for each ornament or ribbon    (be sure to use a ribbon that will make a knot big enough so the ball doesn’t slide through)

 *To use a larger ball, adjust the size of the wooden pot accordingly. It should just rest on top of the ball. Use a thicker and longer piece of raffia, too.

Snowman Ornament or Napkin Ring  grandparentsplus.com


Directions:

Fold raffia in half and tie a knot approx. 2/3 of the way down from the loop

Paint the flower-pot black

Paint the ball white

Add face by making little dots with a permanent marker

Add eyes and an orange nose  (Color the end of a toothpick orange and then cut off and glue on for the nose.  It is easier, however,  to use an orange marker and draw a triangle)

Push the loop end through the ball from bottom to top

Push through the pot the same way. 

Push the ball and flower-pot down to the knot and you’re done! So easy! You can use this as a napkin ring and then hang on your tree.

Snowman Ornament or Napkin Ring   grandparentsplus.com


Your guests will be delighted to find these at their place!

Enjoy! 

Phyllis

This post is linked to many of the following parties……

Posted in Christmas, Crafts, Holidays | Tagged , , , , , , , , , , , , , | 10 Comments

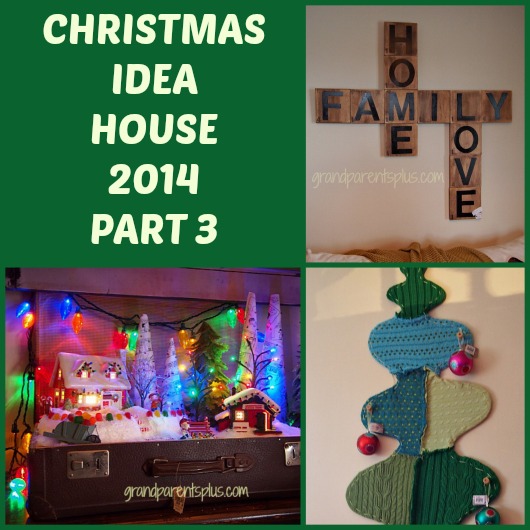
Christmas Idea House 2014 Part 3

Thank you for stopping by to look at Christmas Idea House Part 3! If you missed the first two posts, you can check them out at the end.

Again, this is a tour through an Idea House decorated entirely for Christmas by several decorators  It is open by ticket reservation to tour and see all the decor ideas. I am sharing them with you to see the creative and beautiful ways the rooms are decorated. You’ll find many ideas that you can do in your own home. Christmas Idea House 2014  Part 3  grandparentsplus.com

Today we’ll tour 3 bedrooms, hallway and a game room. Here we go……


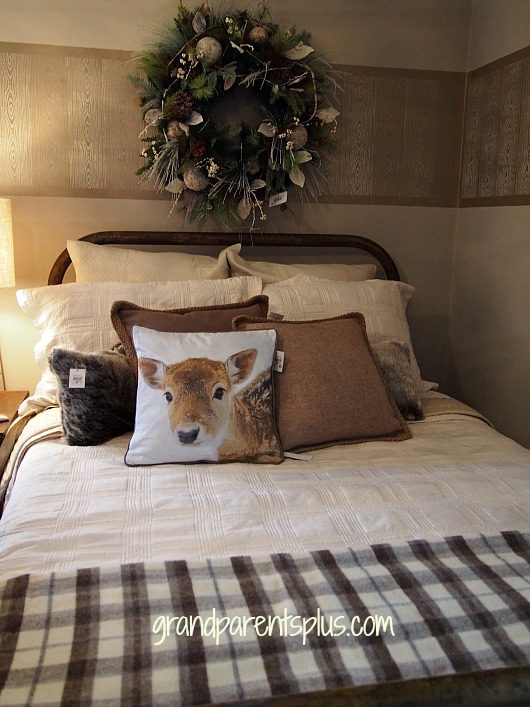
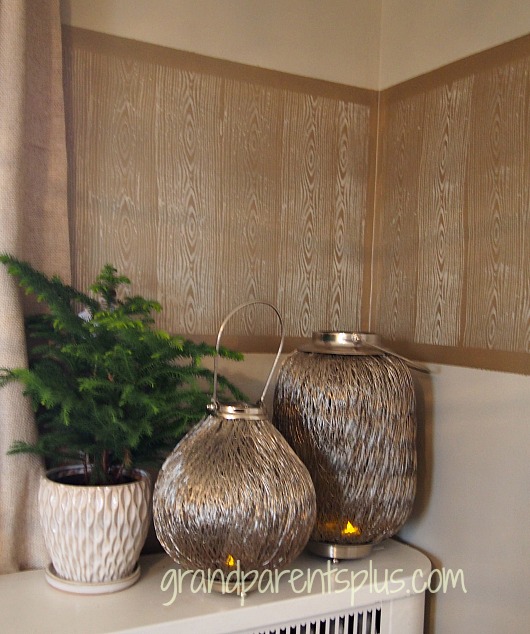
First stop is a bedroom done in a rustic, woodsy feel. Notice the painted border that surrounds the room!  It is placed at eye level so you see the detail. Christmas decorations showcase silver with a bit of woodsy, natural accents.,

Christmas Idea House 2014 Part 3  grandparentsplus.com


Christmas Idea House 2014  Part 3  grandparentsplus.com


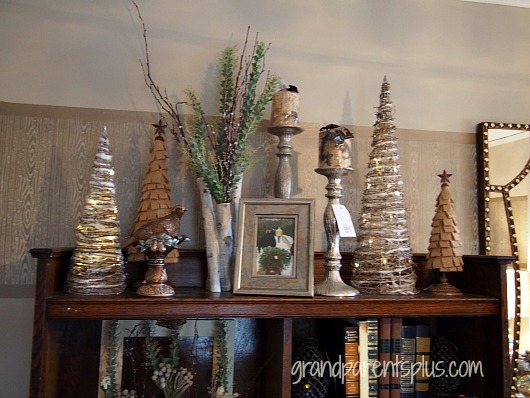
On top of the desk are silver, burlap and birch bark decorations. 

Christmas Idea House 2014 Part 3  grandparentsplus.com


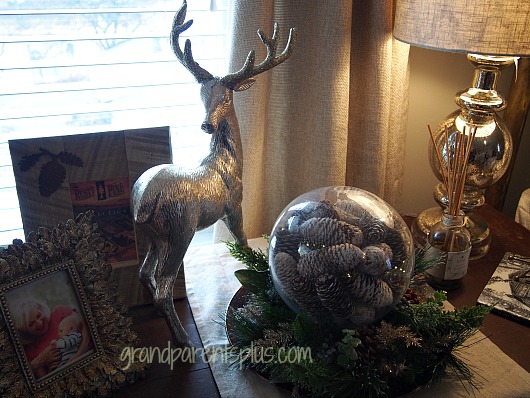
A stately silver buck stands next to a sphere filled with pinecones. As a diy alternative, fill a fishbowl with pinecones and small lights!


Christmas Idea House 2014  Part 3  grandparentsplus.com


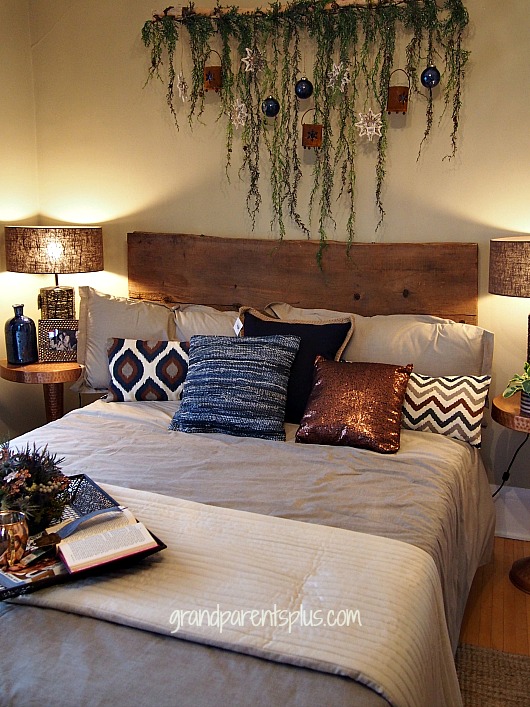
In the second bedroom, a rod holds coordinating Christmas decorations above the bed. 


Christmas Idea House 2014 Part 3  grandparentsplus.com


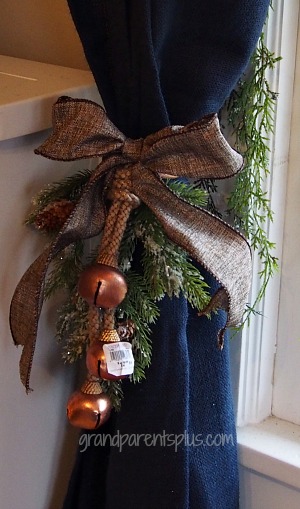
I like the nice rustic detail used for tiebacks on the curtains….
 

Christmas Idea House 2014  Part 3  grandparentsplus.com

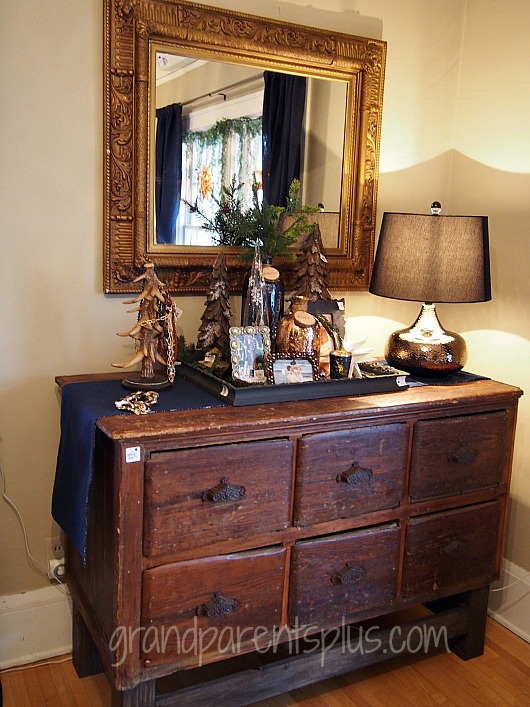
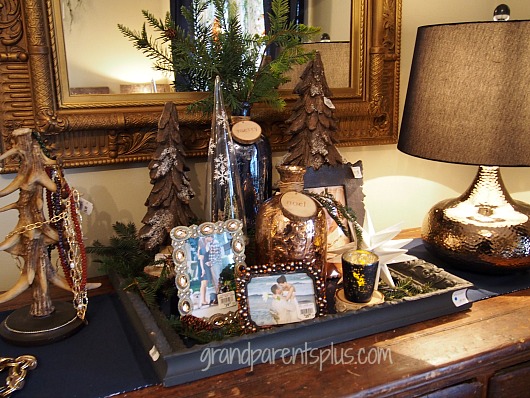
 An antler tree acts as a jewelry holder. Copper and wood decorative items mix nicely together on this distressed vintage dresser.


Christmas Idea House 2014 Part 3   grandparentsplus.com


Christmas Idea House 2014  Part 3  grandparentsplus.com

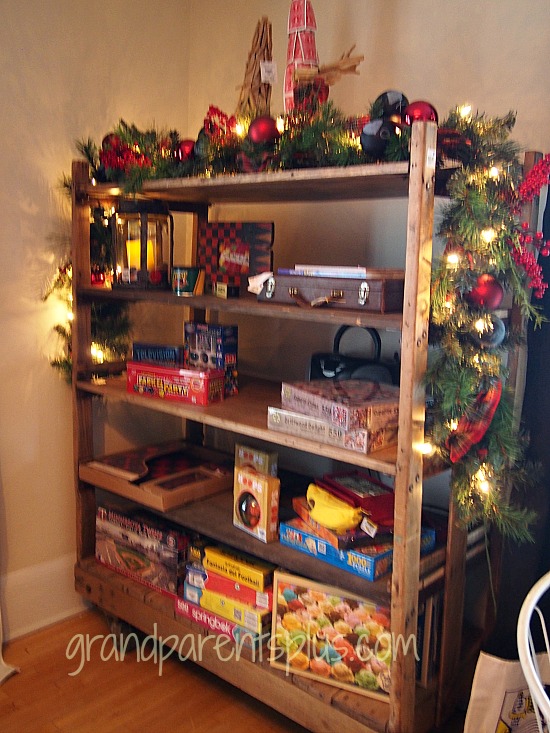
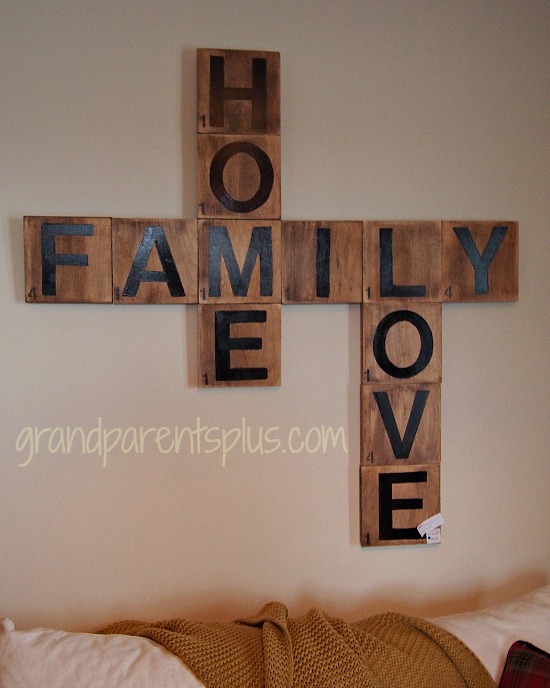
 Here’s the game room! A large baker’s pie shelf holds many game choices. Christmas Idea House 2014  Part 3  grandparentsplus.com

 In keeping with the game motif, large painted wooden squares are made to look like scrabble pieces and hung as wall art.

Christmas Idea House 2014 Part 3   grandparentsplus.com


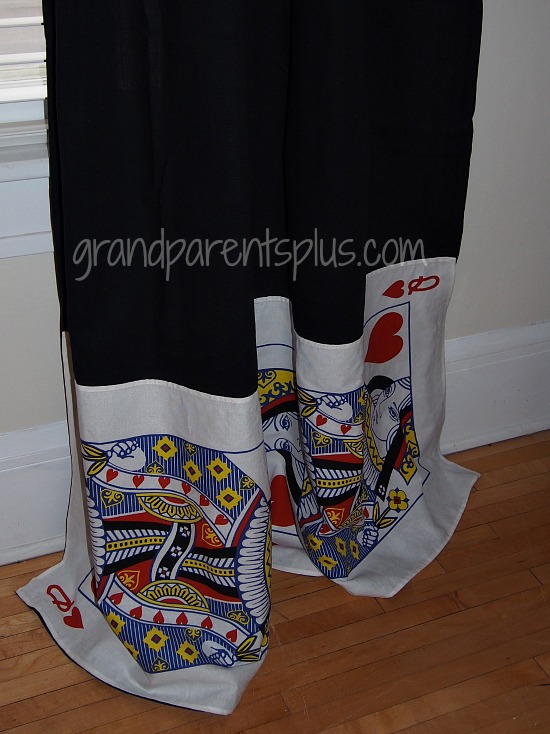
The bottom of the curtains have “playing card fabric” attached! Nice touch, don’t you think?

Christmas Idea House 2014  Part 3  grandparentsplus.com


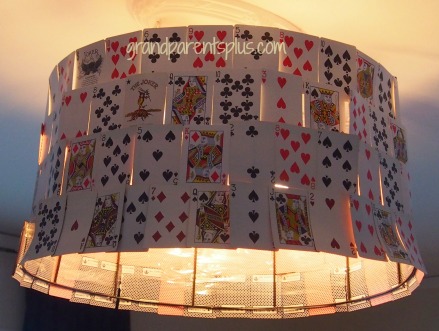
Now, this is what you call “playing your cards right”! What a great conversation piece for a game room!


Christmas Idea House 2014  Part 3  grandparentsplus.com


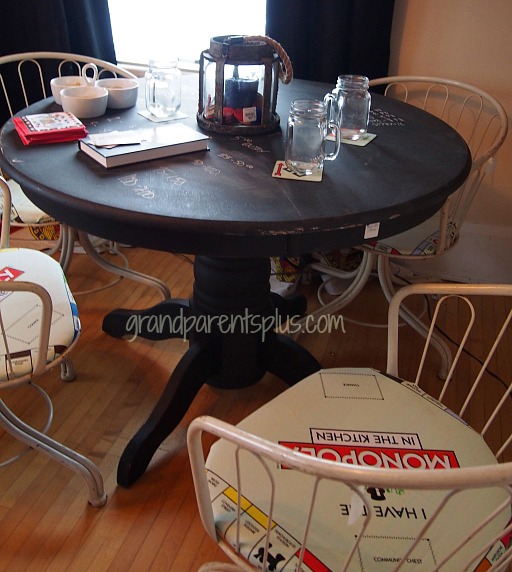
The game table chairs are vintage outdoor pieces, but notice the seat covers. The attention to every detail in this room is so fun! 


Christmas Idea House 2014  Part 3  grandparentsplus.com


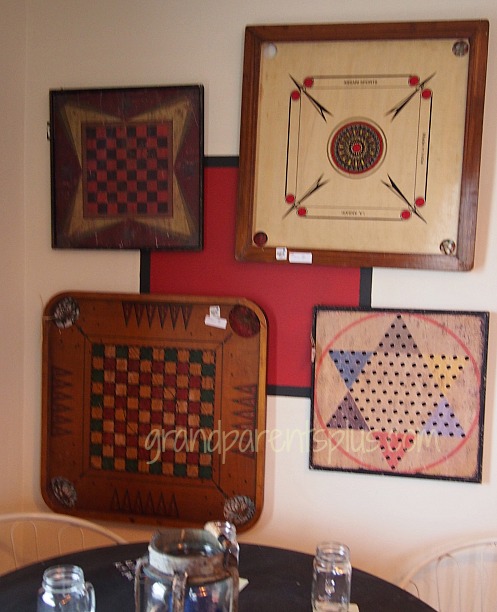
On the wall is a display of old game boards. Christmas Idea House 2014  Part 3  grandparentsplus.com

Stepping into the hall…..

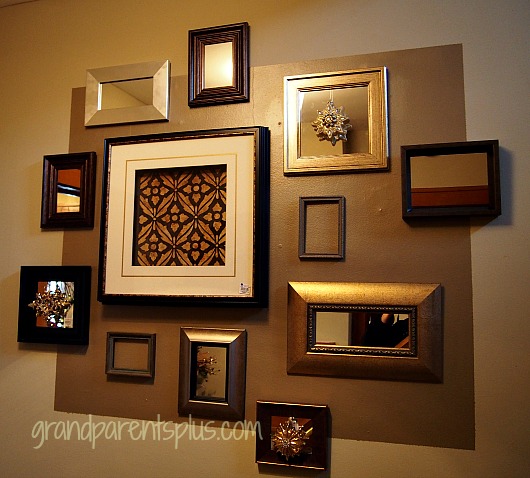
The same concept of anchoring wall hangings with a painted square makes a grouping much more interesting and cohesive.

Christmas Idea House 2014  Part 3  grandparentsplus.com

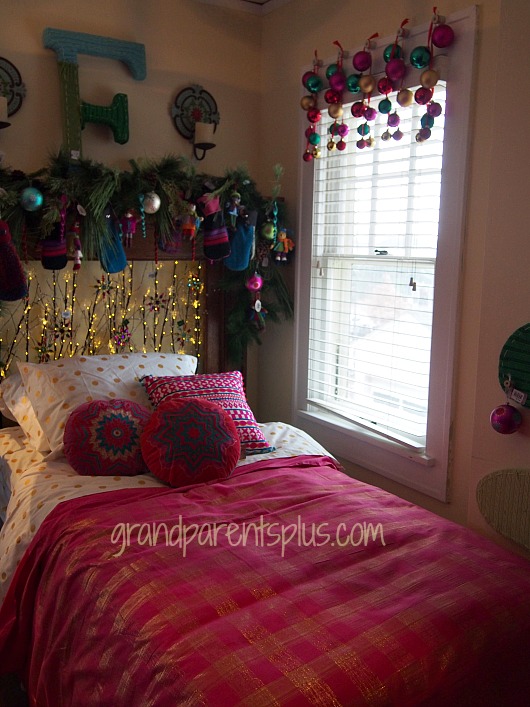
 A teen’s bedroom is the last peek into this Idea House.

Christmas Idea House 2014  Part 3   grandparentsplus.com


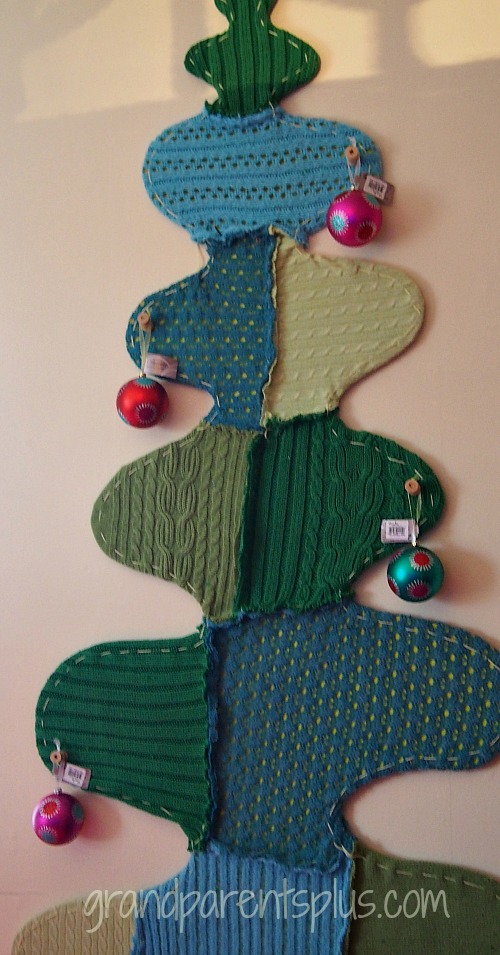
Have any sweaters that you’re ready to give away? Instead, stitch up a whimsical Christmas Tree! 

Christmas Idea House 2014  Part 3  grandparentsplus.com


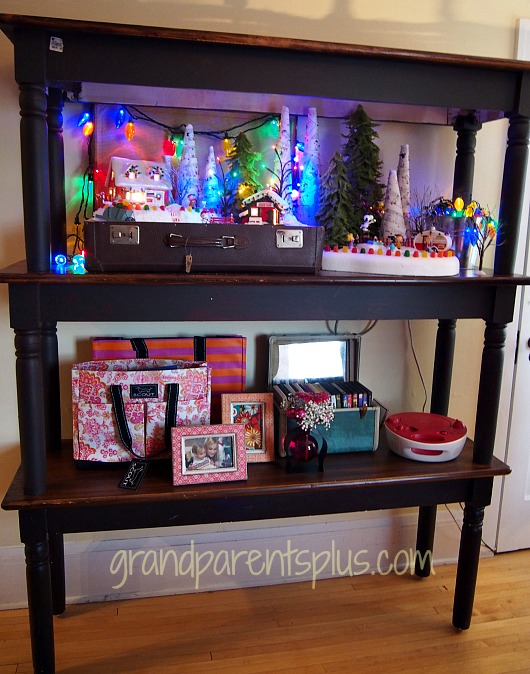
Three of the same tables stacked together become interesting shelving!   The highlight for me is the Christmas display in a vintage suitcase! 

Christmas Idea House 2014  Part 3  grandparentsplus.com

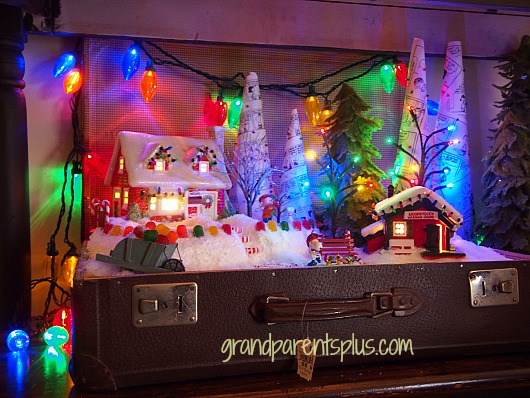
Take a closer look at this winter village all lit up!  Now, this is one of my favorite ideas! I’ll be looking for a cute vintage suitcase. How about you? 

Christmas Idea House 2014  Part 3  grandparentsplus.com


Sad to say, this is the last post of the Christmas Idea House 2014! Here are the first two posts in case you missed them….
Christmas Idea House 2014

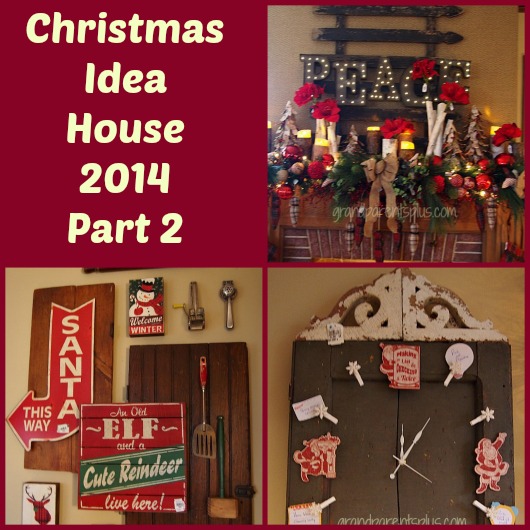
Christmas Idea House 2014 Part 2

Thanks for stopping by! 

Phyllis

Don’t miss any future posts…..subscribe!


This post is linked to many of the following parties…..


coastalcharm.blogspot.com


Posted in Christmas, Decor, Holidays | Tagged , , , , , | 6 Comments

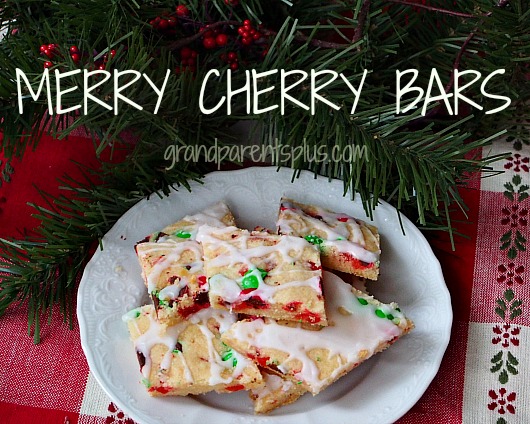
Merry Cherry Bars

If you want a quick, easy, colorful and delicious cookie bar, this is for you! The Merry Cherry Bars are an old recipe of my mom’s that I changed a bit. They look so colorful on a Christmas cookie plate! No need to drop or roll cookies, but simply bake them in a pan, ice, and cut!

Merry Cherry Bars   grandparentsplus.com


These bars are crisp like a cookie, but you bake them like a bar.They are so simple!

Ingredients:

1 cup sugar

1 cup margarine

1 tsp almond extract

1 egg

2 cups flour

1/4 tsp salt

Generous 1/2  cup chopped red candied cherries  (you buy these in the baking aisle) You can also use maraschino cherries. Be sure to pat completely dry with a paper towel before adding to your dough…

Generous 2/3 cup chopped red and green M&M’s


Glaze: 1 cup powdered sugar, 1/4 tsp. almond extract, and 5-6 tsp. warm water


Directions:

Mix sugar, margarine, almond extract, and egg.

Stir in flour and salt

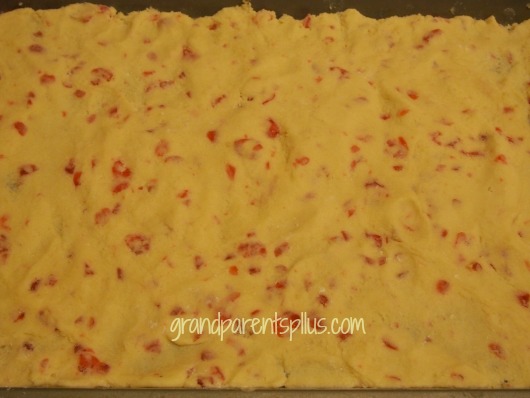
Add chopped Candied Cherries to the batter

Press into an ungreased jelly pan. (a bit of flour on your hands keeps the dough from sticking to you)


Merry Cherry Bars  grandparentsplus.com

Press dough into ungreased pan.


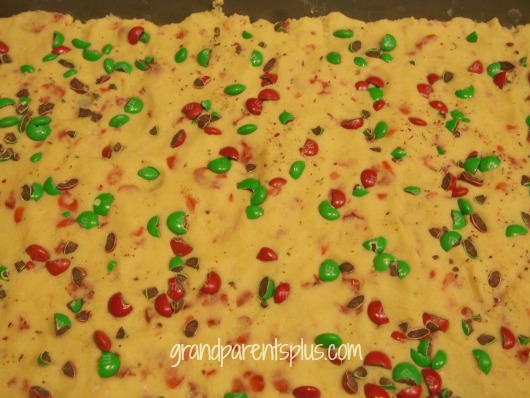
Chop M&M’s and sprinkle over the top and press into dough.

Merry Cherry Bars  grandparentsplus.com

Press chopped M&M’s into the dough.


Bake at 300 degrees for 27-30 minutes.

Cool slightly. While warm, cut the bars, but do not remove. Cool completely in the pan.

When completely cooled, drizzle with glaze consisting of 1 cup powdered sugar, 1/4 tsp. almond extract and 5-6 tsp. of warm water. Glaze should be runny enough to drizzle over the bars.

When frosting is set, remove bars.

Using a spatula, lift bars from pan.

I cut the bars on a diagonal. This looks pretty, but you do lose some small triangles along the edges. My family, however, gobbles those up and I serve the pretty diamond shapes to guests!

Merry Cherry Bars  grandparentsplus.com

Now, I need to share a story about my baking Christmas cookies when my kids were in Jr. High and High school. I would always bake cookies early and freeze them for Christmas time. My kids would find them in the freezer (whenever I left the house) and soon they were gone! One year, they couldn’t find them. At Christmas, I brought out the full containers of cookies and they asked, “where were the cookies? We couldn’t find them!”

My secret was to place the containers in the trunk of my car. When I left home, I smiled to myself as the cookies were safely with me. I could just imagine my kids hunting all over. We live in a northern climate so they stayed frozen the entire time. We had a good laugh at Christmas when I brought them out! I was able to outsmart my teenage kids!


Merry Cherry Bars  grandparentsplus.com


These Merry Cherry Bars freeze well, too! (you might want to place them in the trunk of your car – HA!)

Enjoy! 

Phyllis


This post is linked to many of the following parties……


coastalcharm.blogspot.com

Posted in Christmas, Desserts, Holidays, Recipes | Tagged , , , , , , , , | 31 Comments

Christmas Idea House 2014 Part 2

I’m back with more Christmas inspiration from the Christmas Idea House 2014 Part 2. Hope you’re ready for more Christmas decorating ideas! There are lots of vintage finds used throughout the house by the decorators. You’ll see how some are used in the kitchen, living room, and bathroom in unique ways. Decorators collaborate on the designs throughout the house to make a cohesive look from room to room. If you missed the first post, be sure to check it out, too!  Go to…..  Christmas Idea House 2014

Christmas Idea House 2014 Part 2  grandparentsplus.com


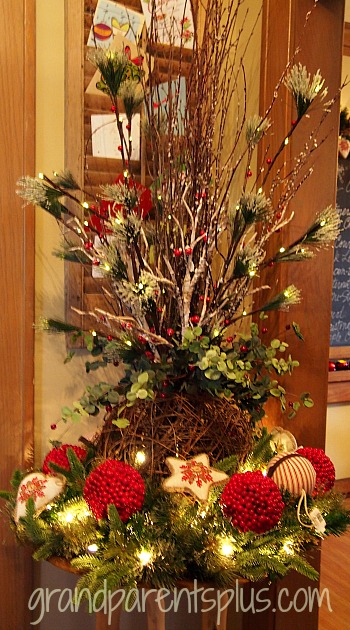
Walking in from the porch, your eyes quickly notice this beautiful arrangement.

Christmas Idea House 2014  part 2   grandparentsplus.com


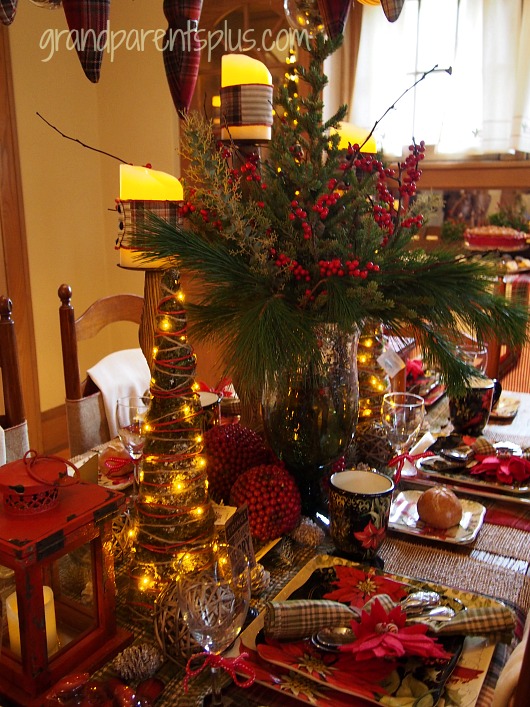
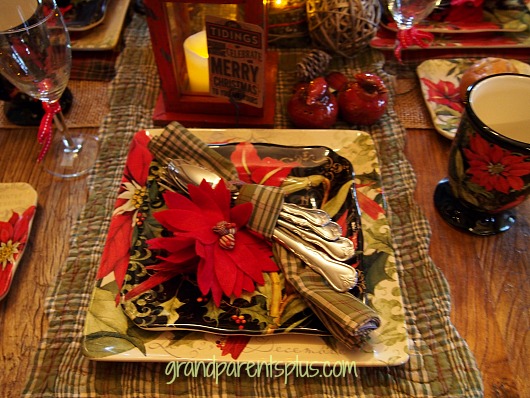
Next, the dining room is visibly all decked out for entertaining. The candles are wrapped with ribbon and embellished with upholstery tacks. On the tabletop is a burlap runner along with a muted green plaid one.  Trees are decorated with red twine and lights.


Christmas Idea House 2014  Part 2   grandparentsplus.com

 A green plaid runner sits on top of the burlap and matching napkins accent the place-setting.

Christmas Idea House 2014  Part 2  grandparentsplus.com


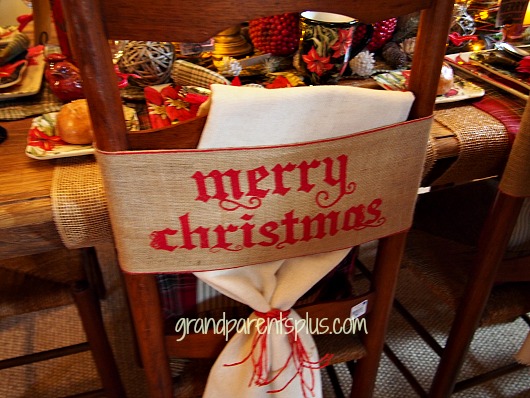
Pillow- wrap in burlap with”Merry Christmas” circles the dining room chairs and greets each guest. 

Christmas Idea House 2014 Part 2  grandparentsplus.com

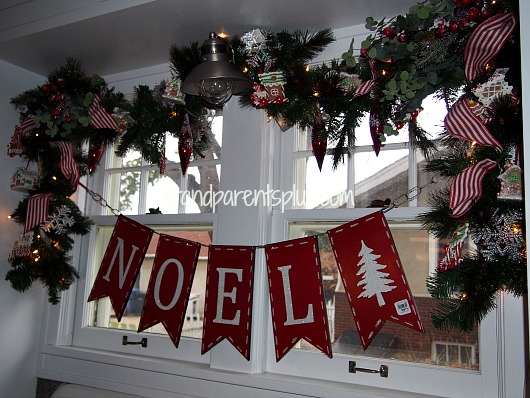
  In the kitchen, the windows are decorated with a lit garland, red and white striped ribbon and special ornaments. Did you know that  NOEL  “is a French name meaning “Christmas”. It is actually derived from the Latin word natalis, a word which refers to Nativity, or the birth of Christ. ” according to answers.com
Christmas Idea House 2014 grandparentsplus.com

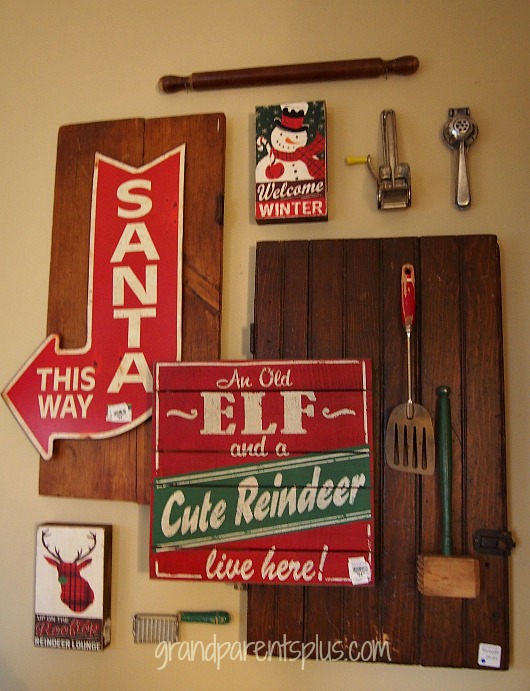
  Isn’t this an eye-catching arrangement using lots of vintage pieces? The sign is so fun!

Christmas Idea House 2014  Part 2  grandparentsplus.com


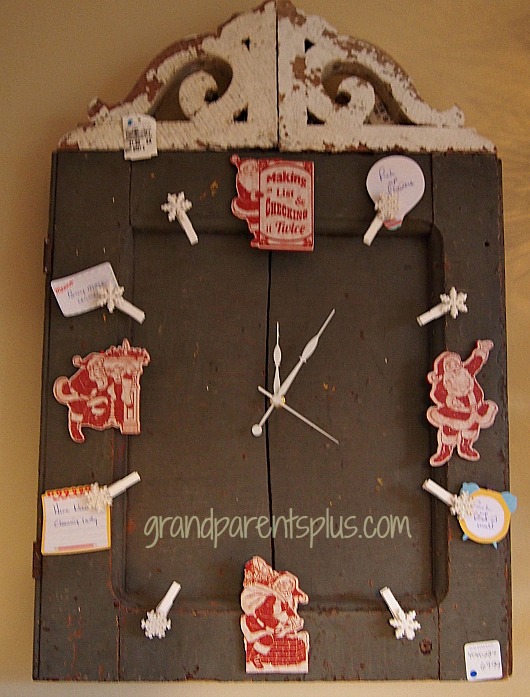
 Here’s another idea using a small vintage cupboard door . Turn it into a clock! Make the hour pieces changeable with the season.

Christmas Idea House 2014  Part 2   grandparentsplus.com


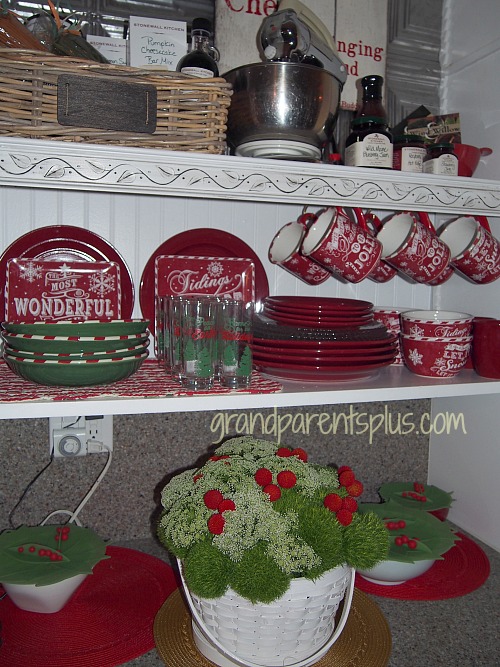
By using red, white, and green dishes, no other decorations are needed with this colorful display! 


Christmas Idea House 2014  Part 2  grandparentsplus.com

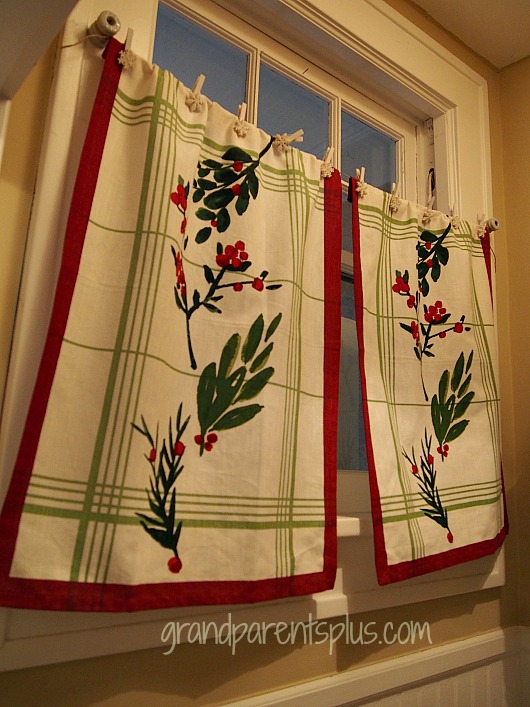
 Bathroom curtains made from kitchen towels are clipped to a wire with snowflake-tipped clothespins. 

Christmas Idea House 2014 Part 2   grandparentsplus.com


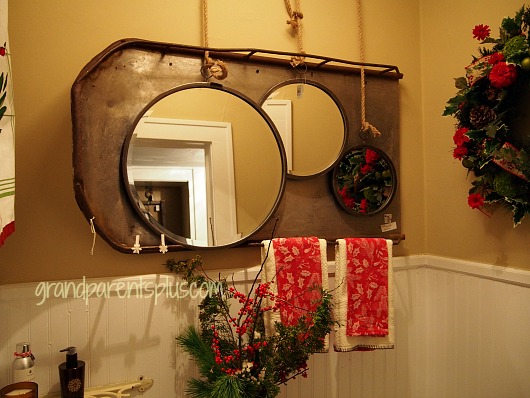
I’ve never seen a vintage metal sled before, but this looks so good accented with mirrors! 


Christmas Idea House 2014  Part 2  grandparentsplus.com


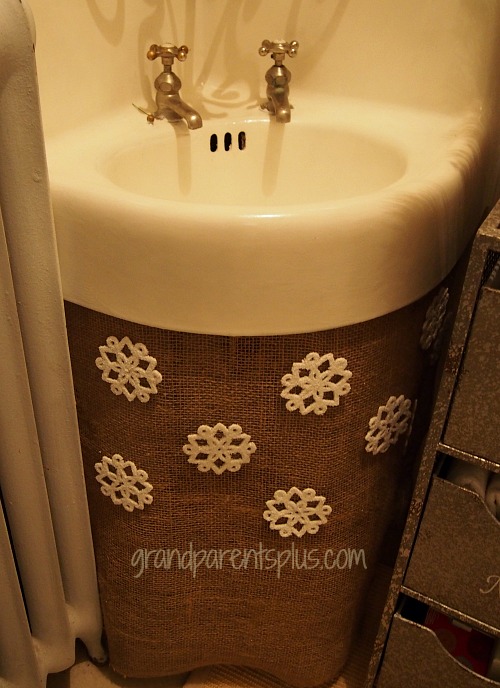
Hide those ugly pipes with a burlap skirt adorned with snowflakes.

Christmas Idea House 2014  Part 2  grandparentsplus.com


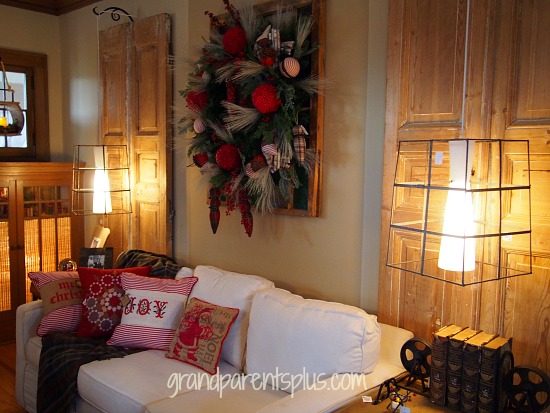
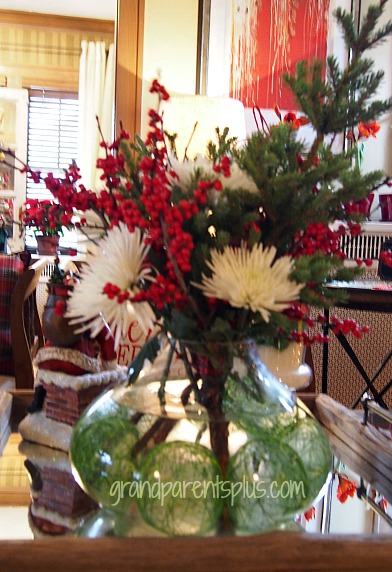
In the living room, above the couch, a wreath is layered on top of a vintage stained glass window. Along side of the couch, salvaged metal frames make unique hanging lamps. The white sofa with red and white pillows brings lots of Christmas cheer into the living room.

Christmas Idea House Part 2  grandparentsplus.com


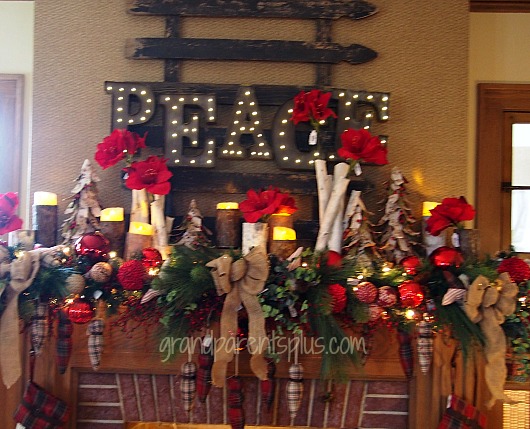
The fireplace mantel is filled with birch wrapped candles, colorful balls, greenery and birch bark Christmas trees. Above the mantel, the light-up “Peace” sign is layered on top of an old weathered picket fence. Did you know that “Peace” on earth refers not to wars, etc., but only to the Peace that knowing Jesus as Savior  gives to each of us. Jesus is the Prince of Peace!


Christmas Idea House 2014  Part 2  grandparentsplus.com


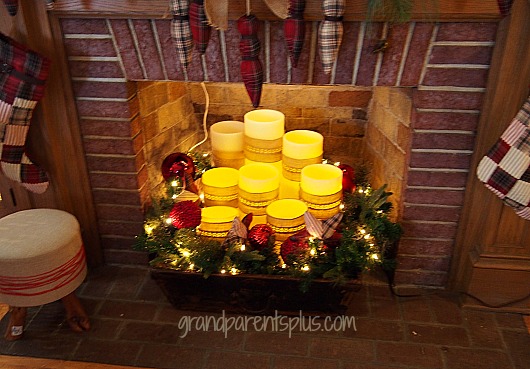
 A multitude of LED candles light up the fireplace!


Christmas Idea House 2014  Part 2  grandparentsplus.com


 Another lovely arrangement sits on top of the coffee table.


Christmas Idea House 2014  Part 2  grandparentsplus.com

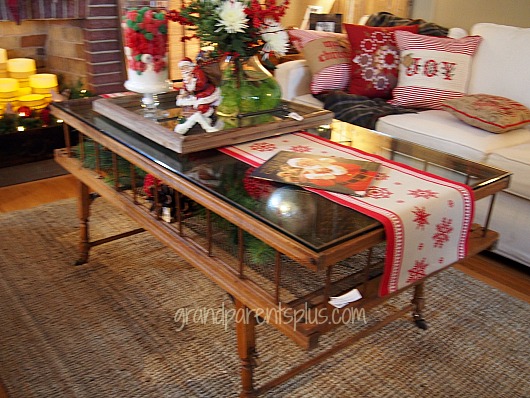
 This is not your normal coffee table. Instead, it is a vintage child’s bed covered with a piece of glass. Inside, ornaments and greenery add additional interest and color.


Christmas Idea House 2014  Part 2   grandparentsplus.com


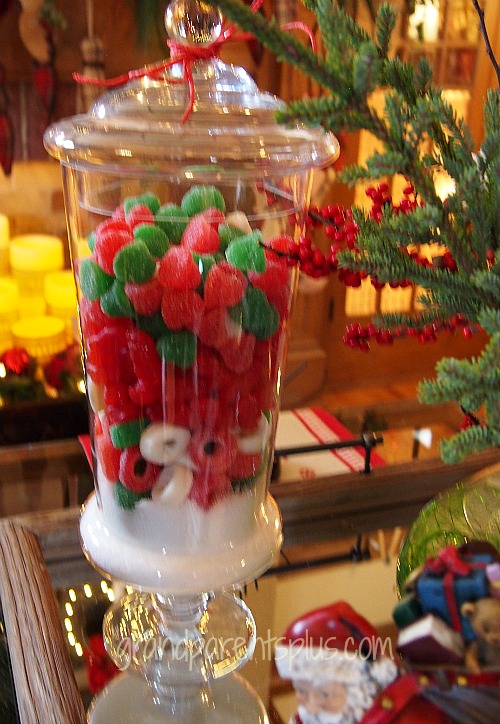
This covered glass dish filled with candy adds more color!  

Christmas Idea House 2014  Part 2  grandparentsplus.com


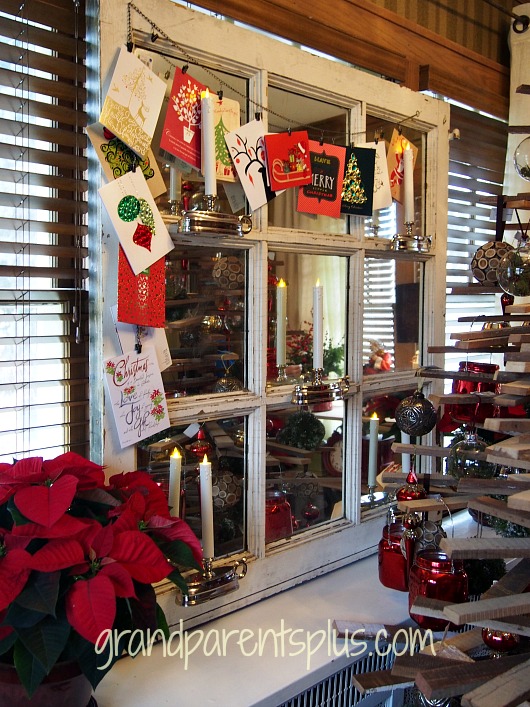
Another vintage window… The glass is replaced with mirrors and reflects the candles and colorful ornaments on the tree.


Christmas Idea House 2014 Part 2   grandparenstplus.com

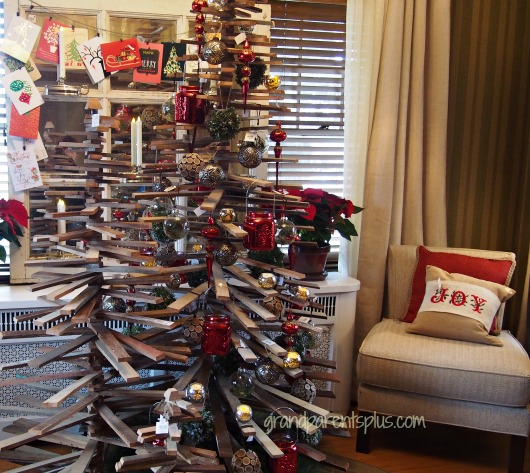
 This is an unusual tree made from narrow graduated-sized wood pieces all connected together. 


Christmas Idea House 2014  Part 2  grandparentsplus.com


Which idea did you like the best?  

Again, there are more ideas to come so don’t miss the next post  – Part 3! 

Happy Decorating! 

Phyllis


This post is linked to many of the following parties…..


Posted in Christmas, Decor, Holidays | Tagged , , , , , , , , , , | 14 Comments

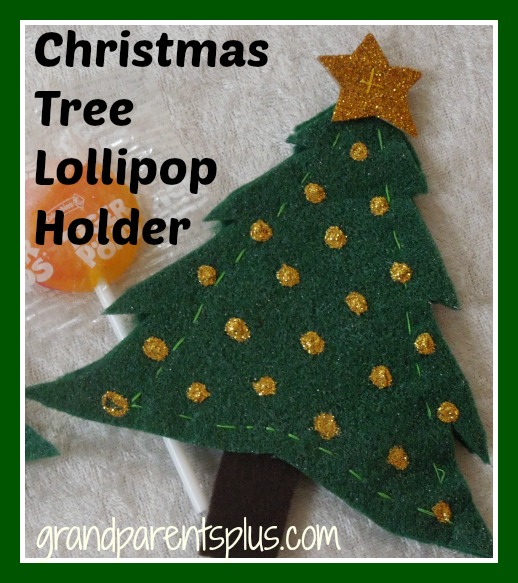
Christmas Tree Lollipop Holder


Christmas Tree Lollipop Holder   grandparentsplus.com

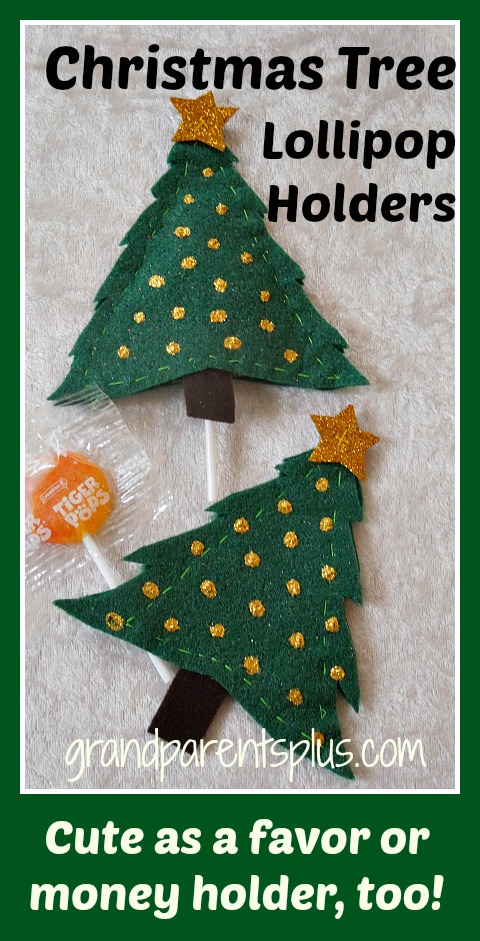
For my grandchildren at the Christmas table, I like to have something special at their place-setting. This Christmas Tree Lollipop Holder is a cute and easy detail to add to your Christmas table. Slip a lollipop into it and set it along side of their place. You might want to add a little more “greenery” by placing a dollar inside along with the lollipop! In fact, use this as a money holder for an adult gift, too! Either way, it will delight the recipient.

Materials for the Christmas Tree Lollipop Holder:

Felt ( the stiffer, the better) sparkle felt, if you like

Gold and green thread

Gold glitter paint writer

1 sheet of gold glitter fun-foam (or pre-cut gold glittery stars)

Brown felt (for trunk)


Directions:

Start with Two triangles 4 1/2 inches across the base and 4 1/2 inches in height. (keep pinned together)

Cut the sides to look like branches.

Cut a trunk from brown felt  1 -1/4 inch by 3/4 inch

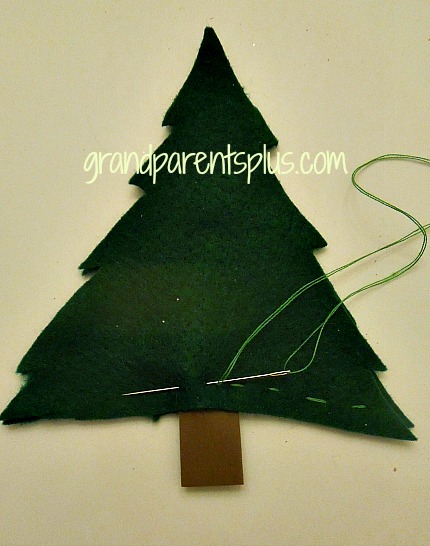
Start by stitching across the bottom of the Christmas Tree to include the trunk piece. Stitch only the front piece!

  Christmas Tree Lollipop Holder   grandparentsplus.com


 When you get to the left corner, add the back piece and stitch them together around to the beginning.

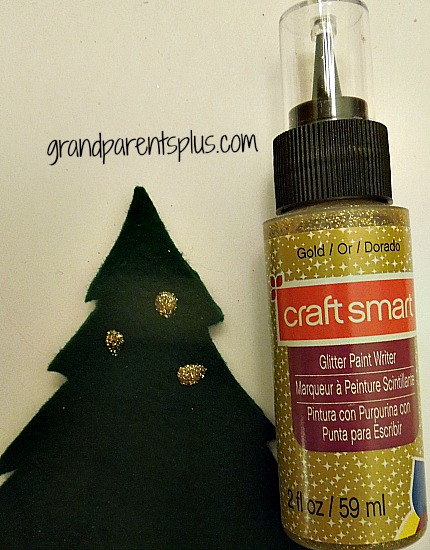
Use the Glitter Paint Writer to add the tree balls. Let dry overnight!

Christmas Tree Lollipop Holder   grandparentsplus.com

Add a foam glitter star on top!


Christmas Tree Lollipop Holder  grandparentsplus.com

This Christmas Tree Lollipop Holder is easy, isn’t it?


Enjoy!

Phyllis

Be sure to subscribe for future posts!

This post is linked to the following parties…..

Posted in Christmas, Crafts, Holidays | Tagged , , , , , , , | 12 Comments

Christmas Idea House 2014

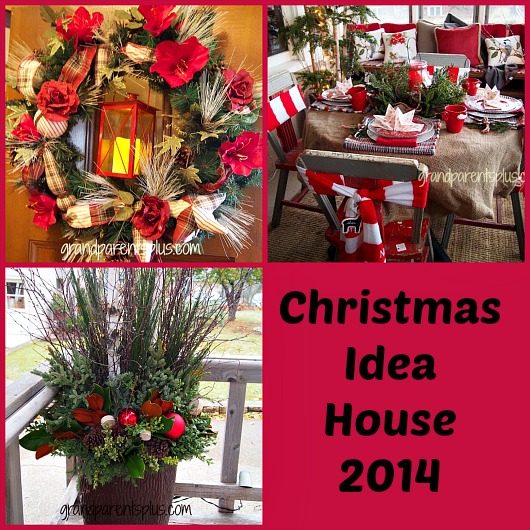
The Christmas Idea House 2014 is ready! The question is, are you ready for tons of decorating ideas for the Christmas season? As usual, there are vintage finds used as well as new items.  You’ll see a lot of natural outdoor accents like salvaged wood, pinecones, birch sleeves, decorative birds throughout the home.

Christmas Idea House 2014   grandparentsplus.com


I enjoy decorating for Christmas! While I do some of the same things each year, I always try to update and incorporate something new! The inspiration for new ideas is unlimited in this Christmas Idea House 2014! I found some new ideas to add and so will you!

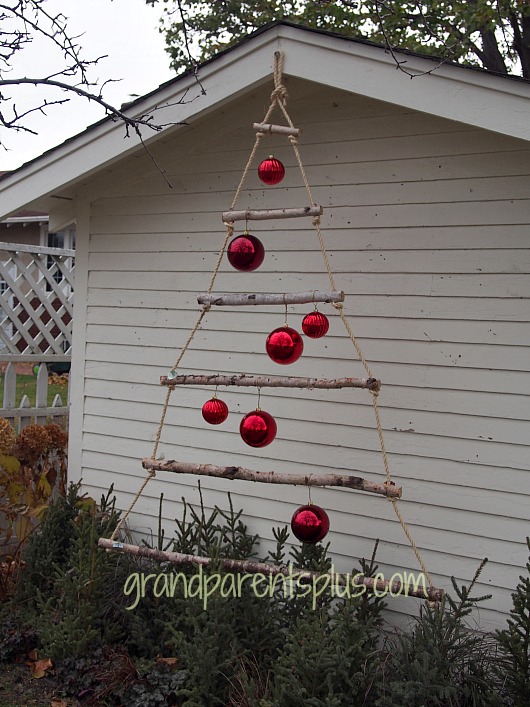
This is a fun idea for the outside of your home! Six branches of varying sizes and some rope is all it takes! Add a spotlight and you’ve got an eye-catching show-piece! If you have access to a wooded area, you’ve got most of the materials for free!


Christmas Idea House 2014   grandparentsplus.com


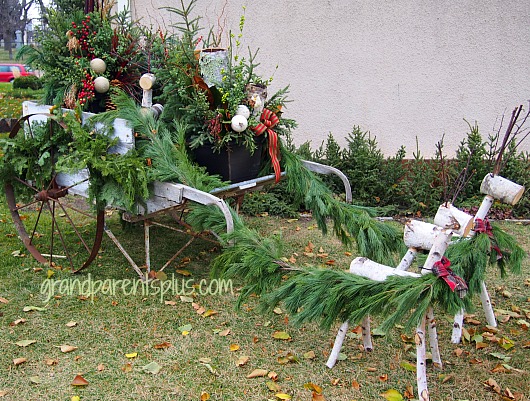
If you have a sleigh or cart, this is a fun idea…….
 

Christmas Idea House 2014    grandparentsplus.com


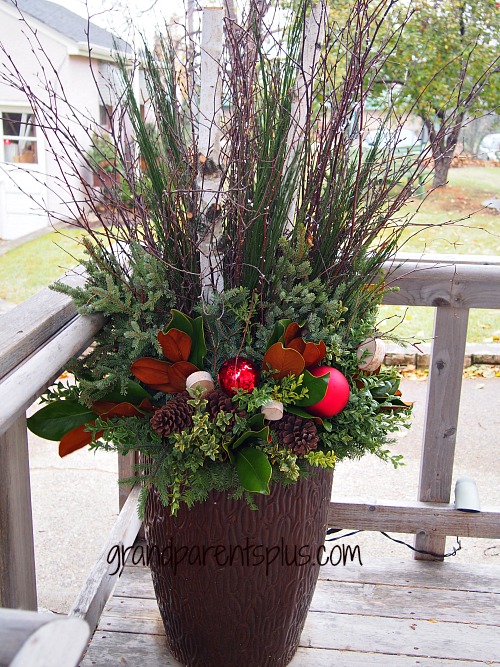
A beautiful container display for Christmas!  More materials from the woods with some additional decorations make this outstanding!


Christmas Idea House 2014   grandparentsplus.com


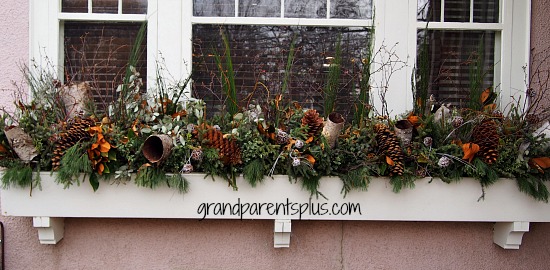
Beautiful window boxes with rolled birch bark and pine cones.
Christmas Idea House 2014  grandparentsplus.com


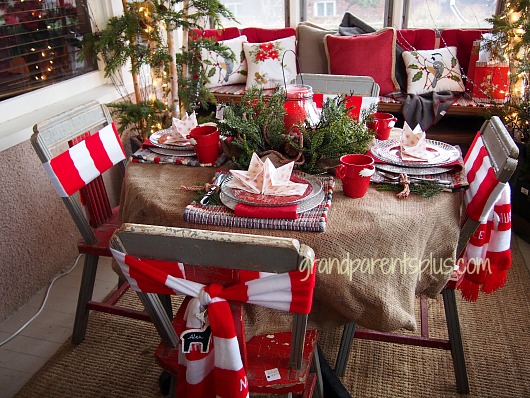
This old house has a front porch. It is all decorated in red and white! The vintage table is covered with burlap. Small textured rugs become placemats. The chairs are tied with red and white winter scarves!  Easy ideas to do on your own!

Christmas Idea House 2014   grandparentsplus.com


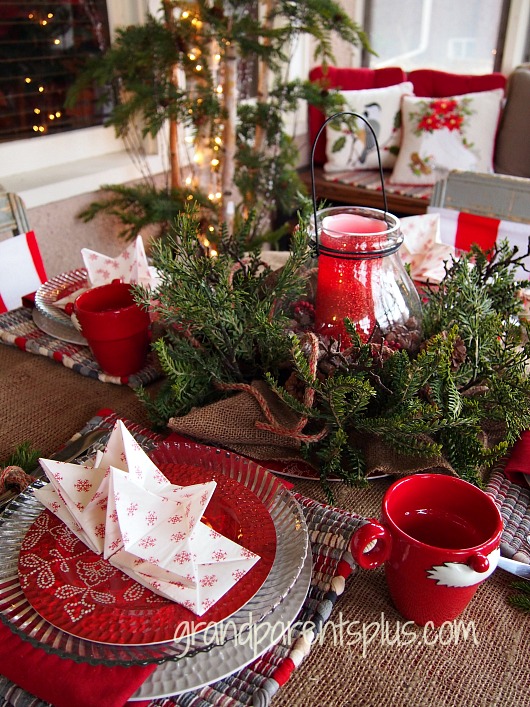
The centerpiece is a red globe lantern with an artificial candle. The globe is circled with evergreen and red and white roping wraps in and out of the greenery.

Christmas Idea House 2014   grandparentsplus.com

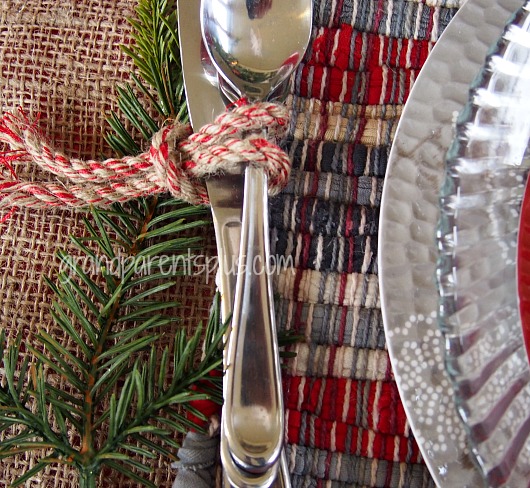
The same red and white roping wraps around the silverware in a slip knot along with a fresh spring of pine. Simple to do!


Christmas Idea House 2014   grandparentsplus.com


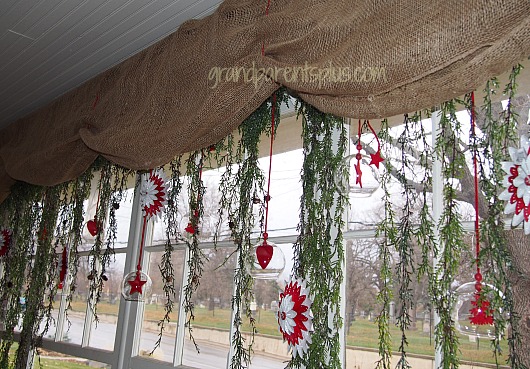
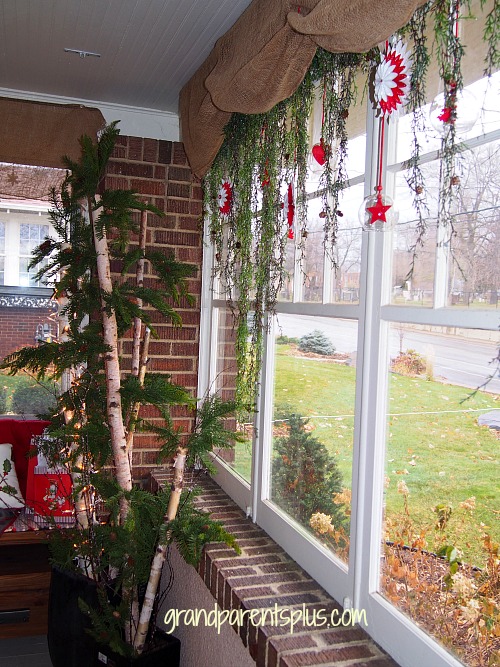
The porch window valance is burlap tied up with red twine. Artificial greenery hangs down with red decorative ornaments interspersed at different levels.


Christmas Idea House 2014   grandparentsplus.com


In the corner are birch branches at different heights decorated with artificial pines and tiny lights. It goes with the woodland theme nicely. 

Christmas Idea House  2014  grandparentsplus.com


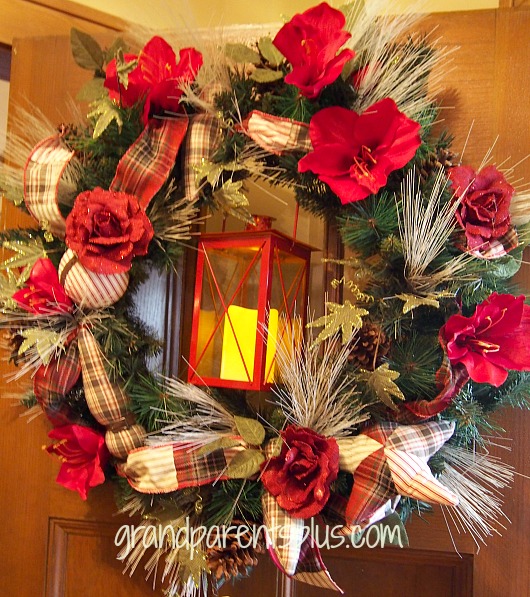
A wreath with red flowers, plaid ribbon, and highlighted with dried wheat tuffs circles the small lit lantern. It gives a cozy welcome to the home. 

Christmas Idea House 2014   grandparentsplus.com


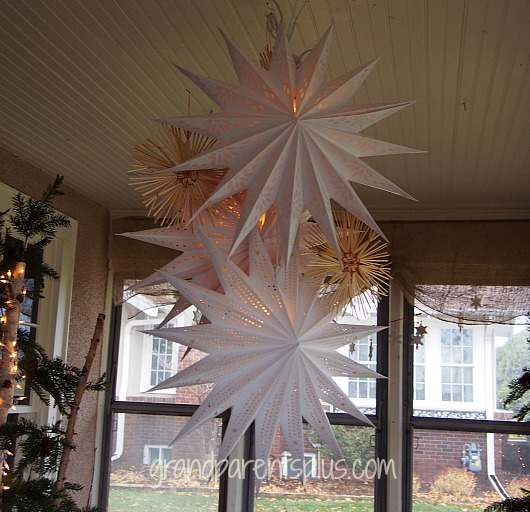
Around the light hangs 3- dimensional paper lanterns clustered together. 

Christmas Idea House 2014  grandparentsplus.com

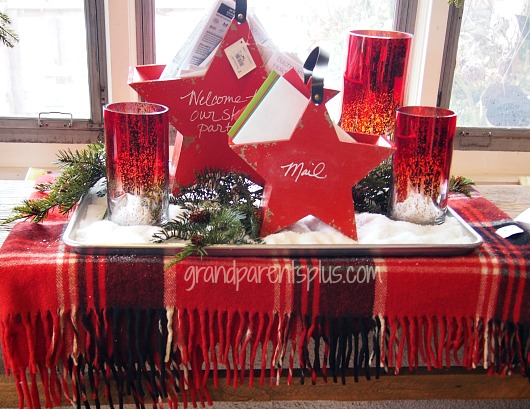
On the other side of the porch is a simple, but beautiful display. Notice it is all contained in a commercial aluminum baking tray!  The fringed, red plaid blanket works perfectly to set everything off. 

Christmas Idea House 2014   grandparentsplus.com

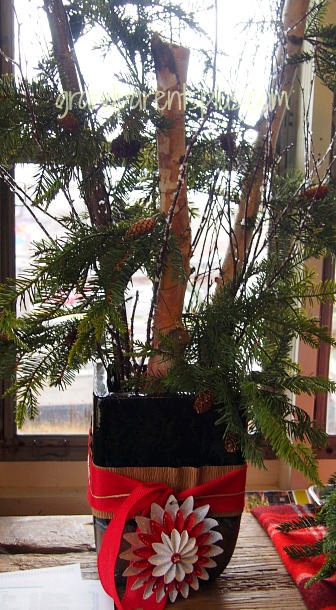
Another small birch tree in a pot is accented with a red and white paper medallion.


Christmas Idea House 2014   grandparentsplus.com


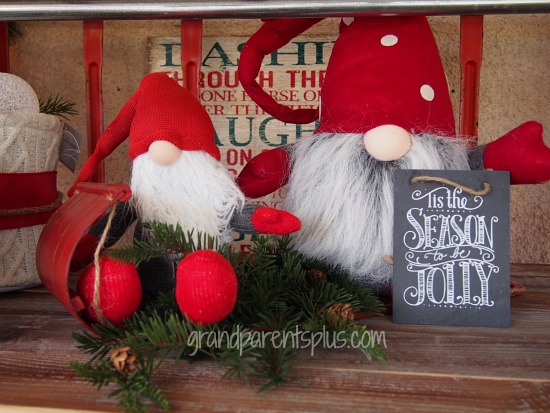
Of course, there’s a bit of whimsy added with these cute red and white trolls on the little toboggan.


Christmas Idea House 2014   grandparentsplus.com

Did you find some new ideas to add to your decorating scheme this Christmas? Perhaps, it’s just a new way of displaying what you already have on hand.

Next time we’ll step into the main rooms for more inspiration!  Stay tuned ……

Hope you enjoyed the tour! 

Phyllis


This post is linked to many of the following parties…..

Posted in Christmas, Crafts, Decor, Holidays | Tagged , , , , , , , , , , , | 23 Comments