Snowman Gift Bag

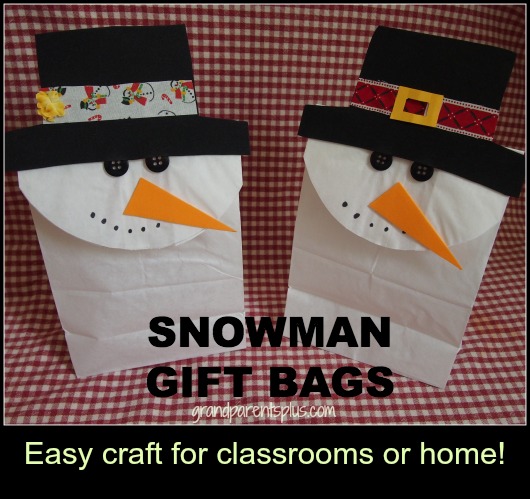
This Snowman Gift Bag is a unique way of wrapping any small present. It’s a gift that will get noticed for sure! This DIY project is simple enough for kids to make, too! Use it as an art project in the classroom or a fun craft to do at home.

Snowman Gift Bag grandparentsplus.com

Do you give friends homemade candy at Christmas time? No need to buy those tins! Use these cute Snowman Gift Bags instead!

The materials are inexpensive and easy to find.

Materials:

White bakery bags or white lunch bags (I found these at Walmart next to the brown lunch bags – 50 bags for under $2.00)  The white lunch bags are slightly smaller than the bakery bags, but I’ll give you the adjusted sizes for each bag.

Orange and Black Fun Foam or Construction Paper (Fun Foam looks better, but either works)

2 black buttons

1  or 1  1/4 inch wide ribbon any color

1 small flower or yellow construction paper for a buckle (optional)

Permanent Marker or black crayon


Directions:

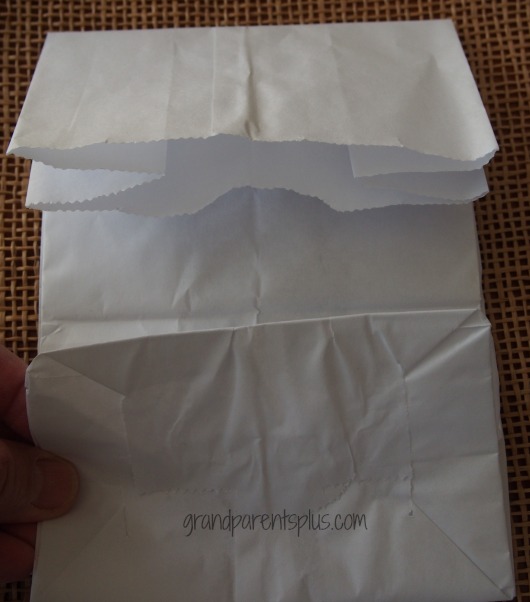
Fold the bakery bag down 3 1/2 inches. (Lunch bag size – fold down 3 inches) The top of the bag has one side that has a notch in it. Fold that notched side down so it is on the under side of the fold.

Snowman Gift Bag  grandparentsplus.com

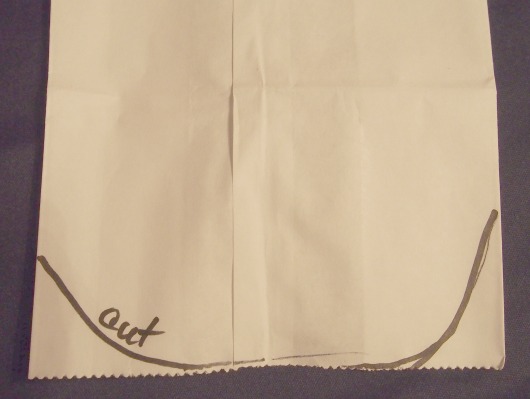
Curve the folded bottom edge to look like the bottom half of a circle.

Snowman Gift Bag  grandparentsplus.com

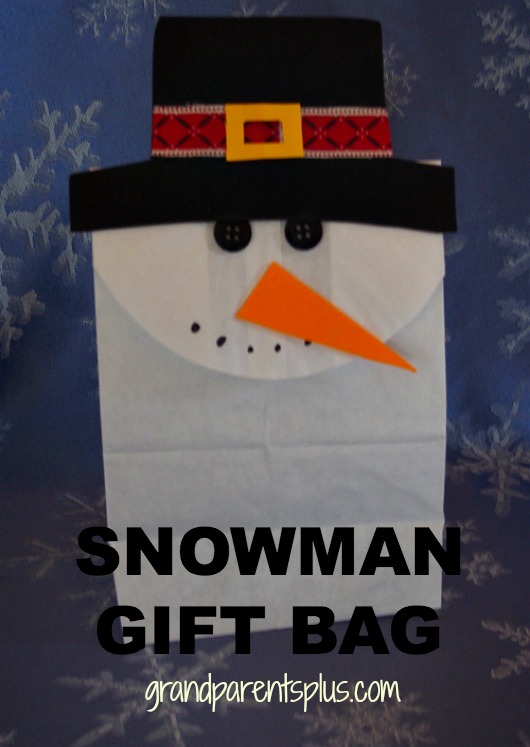
For the hat, cut a black rectangle about 6  3/4 inches wide and  3  1/2 inches tall. (for the bakery bag)  For the lunch bag, make the rectangle about  5  3/4 inches by 3  1/2 inches.

Leave a brim of about 1  1/4 inch.  Cut in about an inch or so to form the top of the hat.

Add ribbon to the hat along with a flower or buckle.

Glue hat on top of the folded part of the bag.

Glue buttons on for eyes or draw black circles.

Add black dots with a permanent marker for the mouth.

Cut an orange triangle for a nose and add last.

Your bag is done!

Snowman Gift Bag  grandparentsplus.com


By making templates for the hat and nose, kids can easily handle this craft!  If using for a classroom project, drawing black circles for eyes cuts down on the cost of buttons.

Now, bag your homemade goodies in this cute Snowman Gift Bag and take to a neighbor or relative! These cute bags make great treat bags for a winter party or place a gift in it for a special child.  Whoever receives it, will be delighted!

Enjoy! 

Phyllis


This post is linked to the many of the following parties…..


Posted in Christmas, Crafts, Holidays | Tagged , , , , , , , , , , , , , | 25 Comments

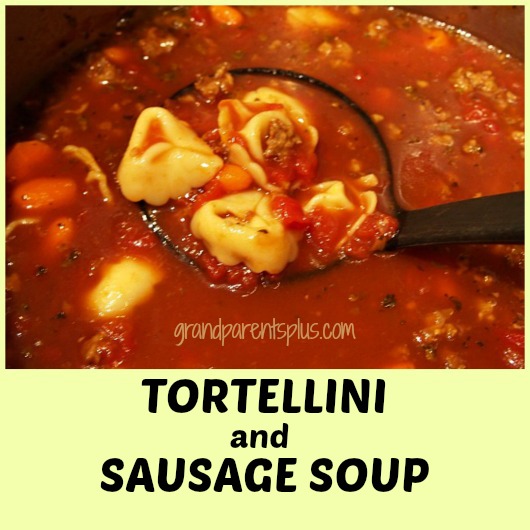
Tortellini and Sausage Soup

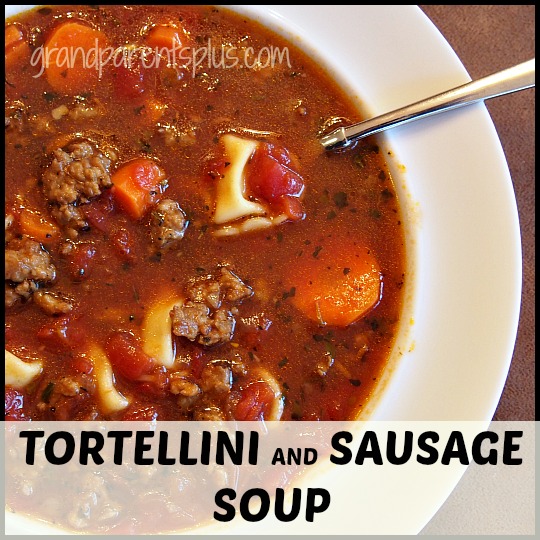
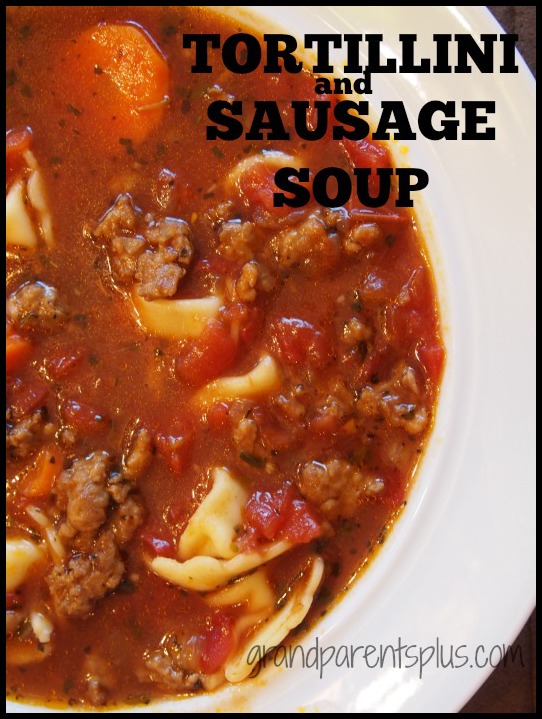
Sad to say, summer is gone and cold, chilly nights are upon us. This Tortellini and Sausage Soup really “hits the spot” and tastes so good on those dark, wintry nights. It’s quick and easy to put together, too. Leftovers, if you have any, freeze well for another time. This is one of my favorites!


Tortellini and Sausage Soup grandparentsplus.com

Tortellini and Sausage Soup
Recipe Type: Lunch or Dinner
Cuisine: Italian
Prep time:
Cook time:
Total time:
Serves: Serves 6
Wonderful combination of tortellini and sausage flavors in a tomato base.
Ingredients
  • 1 lb. mild bulk Italian Sausage (or hot, if you like)
  • 1 cup onion, chopped
  • 3 cloves garlic, minced
  • 5-6 cups beef broth
  • 1 qt. (28 oz. can) diced tomatoes
  • 1 can of tomato soup
  • 1 tsp. basil
  • 1 tsp. oregano
  • 3 carrots, slices
  • 1 pkg. cheese tortellini (9 oz.)
Instructions
  1. Brown sausage, onion and garlic together and drain.
  2. Add remaining ingredients and cook until carrots are semi-tender.
  3. Add tortellini and boil gently 4-6 minutes


Tortellini and Sausage Soup grandparentsplus.com


I’m sure this will become one of your favorites, too!

Tortellini and Sausage Soup

 Enjoy!


Phyllis


This post is linked to many of these parties…..


Featured on ...http://www.dianarambles.com/2014/11/pin-me-linky-party-111.html

Posted in Recipes, Soups & Stews | Tagged , , , , , , , | 32 Comments

Cereal Cookies

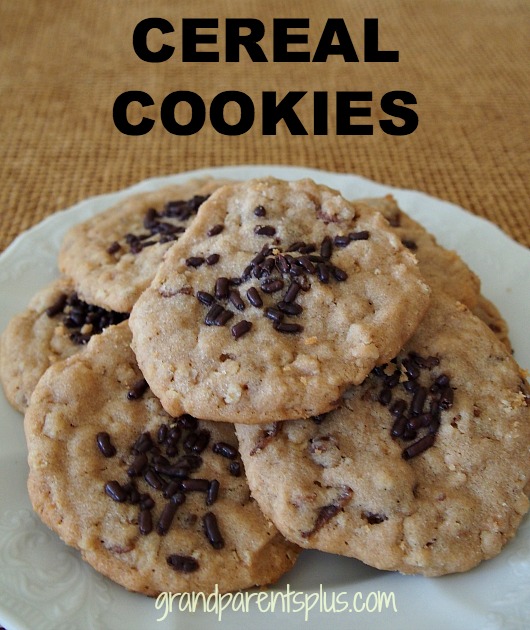
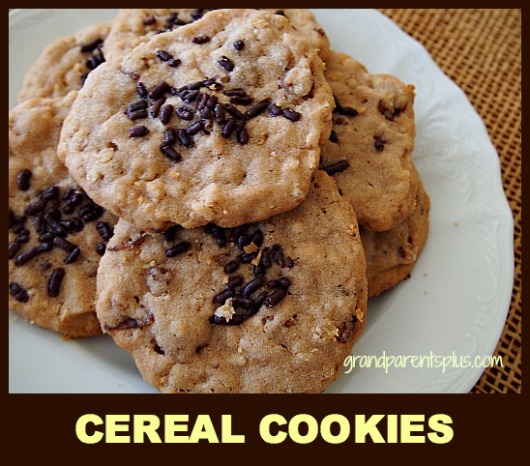
This recipe for Cereal Cookies is an easy one. It’s one way to use up any left over crispy rice cereal you may have on hand. It’s the cereal that gives it a crunch while the coconut gives it a chewiness. There are two variations for this recipe. One uses plain crispy rice cereal and the second variation uses cocoa crispy rice. Pictured is the second variation. 

Cereal Cookies   grandparentsplus.com


This is an “anytime cookie” as you can use any color sprinkles or none at all. Vary the colors for the season, or plain is good, too! 


Ingredients: 


1 cup white sugar

1 cup brown sugar

1 cup margarine

1 cup oil

1 egg

1 tsp. vanilla

1 tsp. cream of tartar

1 tsp. soda

1 tsp. salt

1 cup quick cooking oatmeal

1 cup coconut

1 cup rice crispy cereal

3 1/2 cups flour


Directions:

Mix all ingredients and drop dough (small walnut size) on greased cookie sheet.  Add sprinkles if you wish. Press down with glass dipped in sugar. 

Bake 7-9 minutes at 350 degrees

When done, let cookies set on tray for a couple of minutes before placing on rack.

Recipe makes 60+ cookies!


If making a chocolate variation (as in picture), use a cocoa crispy cereal and add 2 tablespoons cocoa powder.

Cereal Cookies   grandparentsplus.com


Enjoy!

Phyllis


This post is linked to the following parties…….


Posted in Desserts, Recipes | Tagged , , , , , | 9 Comments

God Used a Penny

“God Used a Penny”   a true account …….

God Used a Penny  grandparentsplus.com

 Four years ago in October……

“Mommy! I swallowed a penny! I don’t know why, it just went down!”

Our 4-year-old granddaughter ran to her mother shouting those words. Now, this sweet, precocious little girl never put things in her mouth, even as a young baby, so this was very unusual.  After a quick call to the doctor, he advised just to watch to see that it passed through.

A few days later after not finding the penny, they made another call to the doctor.

“Well, we don’t routinely do an x-ray, but bring her in and we’ll do one just to make sure it isn’t lodged in the intestines somewhere.”

The x-ray did not show a penny, but it did reveal a fuzzy image of something attached to the spine. Strange! What could it be? After further tests, it was determined that it was a tumor on the spine suspected as Ganglio Neuroblastoma, an aggressive children’s cancer. They couldn’t be sure until they did surgery. The medical plan was to do surgery to biopsy it, place a chemo port into the tumor to shrink it, and then on a second surgery, try to remove the tumor.

Doctor’s told the parents not to go on the internet, but I did!  What I found, I didn’t like! There had been no symptoms at that point, but until they could decide through surgery just what they were up against, the future was unknown.  The phone calls to friends and their church prayer chains along with all the grandparents’ churches and friends’ connections made a difference knowing that so many people were praying for our granddaughter.!

Parents going through tough health issues with kids have a hard time emotionally, physically and mentally.  You wish you could trade places with the child so they didn’t have to suffer. I , now, have a new empathy for those parents and grandparents. It is only your faith in the Lord that gets you through these trials along with the prayers of other believers.

I don’t want to leave you hanging on for the results, but I do need to go back to just a couple of months before this happened. You may know, if you have followed my blog, that I hold an Oma and Opa Camp for my grandkids. We do crafts, field trips, songs, games and  have a wonderful time with the kids – no parents! This granddaughter’s favorite song that year was “Our God is a Great, Big God and He Holds Us in His Hand”! She sang it over and over at camp and she would sing it to the top of her lungs with her beautiful voice.  OK, now back to the story…….

Surgery began and instead of putting the port in, the doctor thought he could remove the tumor and began to peel it off . He was able to remove it completely! After testing, it was truly determined to be Ganglio Neuroblastoma. Had it gone any longer, the fingers would have wrapped around the spine completely making it nearly impossible to remove.  No chemo was required! Praise God!

In the Intensive Care room, our granddaughter sang, “Our God is a Great, Big God and He Holds us in His Hand!” She may have been to young to fully realize what God had done in her life through a “penny”, but we will remind her of the “God Penny”! God has something special planned for this little girl. Now, she is 8 years old and has had no reoccurrence! She loves Jesus and continues to sing songs of praise to Him!


We know that not everything always turns out the way we want, but we are thankful for this “God intervention” through a simple penny!  Everytime we see her, that song runs through my mind. By the way, the penny is engraved with “In God We Trust”

Just wanted to close with this verse…. 

 “We will tell the next generation the praiseworthy deeds of The Lord.”  Psalm 78:46

At this Thanksgiving season, we hear the phrase,” Give Thanks! ”  I’m always frustrated that it doesn’t end with Give Thanks to God! Be thankful for all that God has done in your life this Thanksgiving season. Direct your thanks and praise to Him!

Continuing to Praise God! 

Phyllis

This post is linked to many of the following parties…..


Posted in Misc., Uncategorized | Tagged , , , | 26 Comments

Leaf Art for Kids

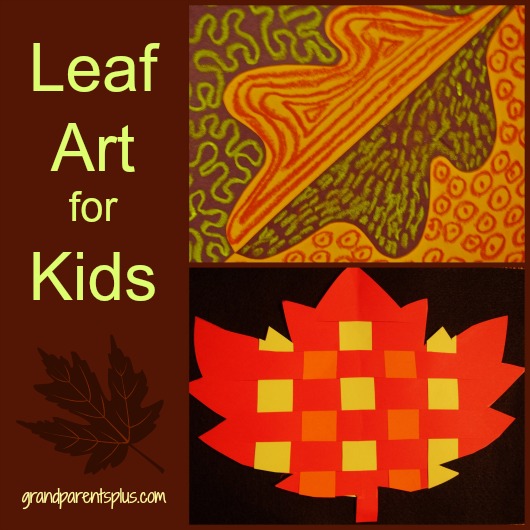
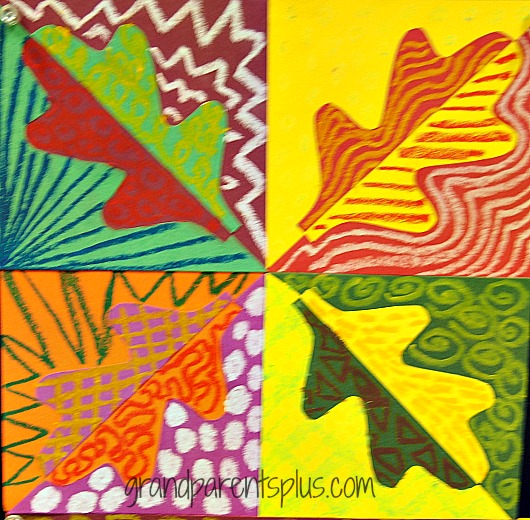
 Celebrate fall with these two colorful ideas of Leaf Art for Kids. I would consider these middle elementary projects as they need to trace and cut well. This art not only looks great on a wall as a fall decoration, but also looks beautiful used as placemats. Each project uses construction paper which you probably have on hand! Other art tools used are scissors, crayons or markers and glue. 

Leaf Art for Kids  grandparentsplus.com


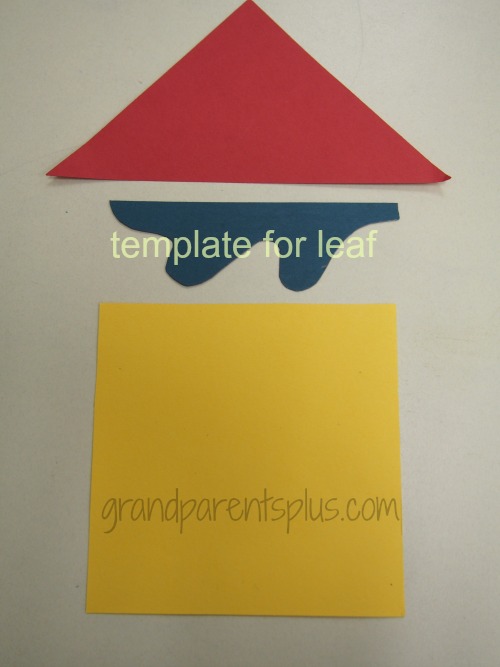
The first project is  a negative/positive leaf art. You need a square of construction paper (I used an 8 inch square. ) and a triangle of a different color. (Cut an 8 inch square diagonally) It looks best to do a light color and a dark color for contrast.  Make the squares small or large. Any size will work according to your leaf template size.

Make a leaf template (1/2 of leaf)  

Leaf Art for Kids  grandparentsplus.com

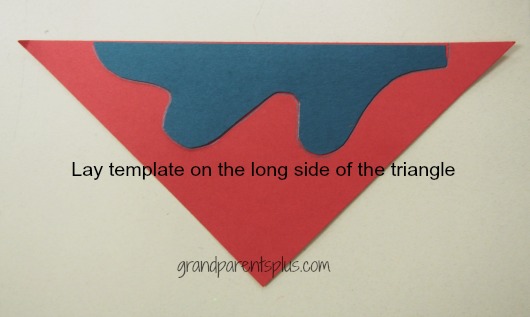
On the triangle, trace the leaf template. 

Leaf Art for kids   grandparentsplus.com


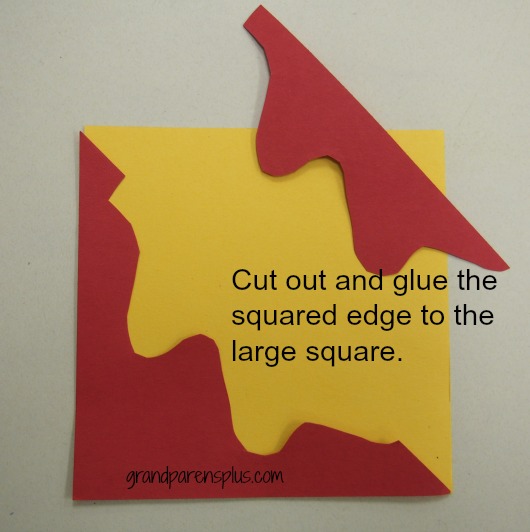
Cut the 1/2 leaf out. Save the piece that you just cut.

Glue the right-angled piece to the square by lining up the corners.

Leaf Art for Kids  grandparentsplus.com


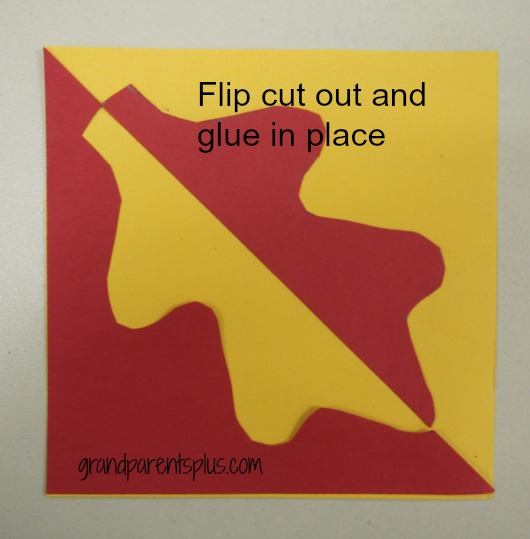
Glue the cut-out leaf by lining it up to the other half.

Leaf art for Kids  grandparentsplus.com

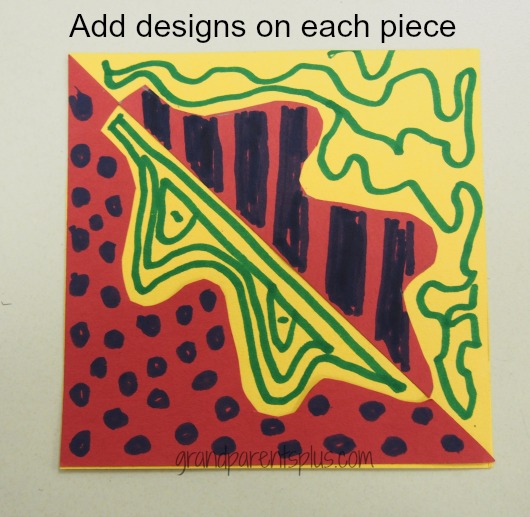
Once the two pieces are glued, you can start the designs. Using a marker, make intricate designs on each piece. Make intricate designs by sectioning off parts of the leaf or background.  Now, make a different design in each area as simple or complicated as you like.

Leaf Art for Kids grandparentsplus.com

Leaf Art for Kids grandparentsplus.com


Do four and arrange like a quilt pattern.


Leaf Art for Kids  grandparentsplus.com

 Another idea is to make 4 inch ones and use as place-cards for your Thanksgiving dinner. Label with the name of each guest.


The second Leaf Art for Kids project is a bit shorter. 

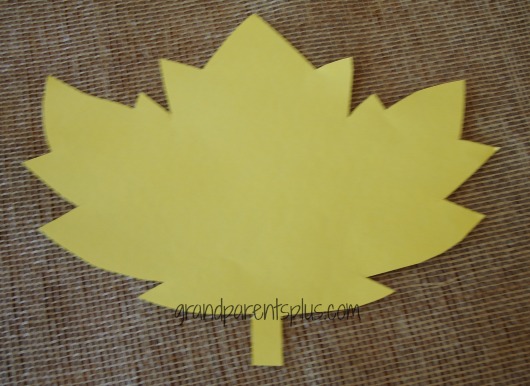
Fold a sheet of construction paper in half and cut out a half leaf. Unfold to a full leaf. 

Leaf Art for Kids  grandparetnsplus.com


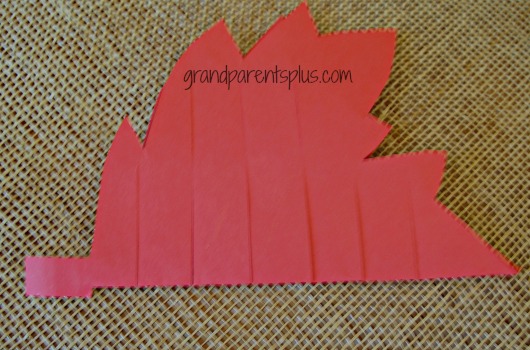
Fold leaf back in half.

Cut slots in the leaf every inch stopping before you come to the edge of the leaf.

Leaf Art for Kids  grandparentsplus.com

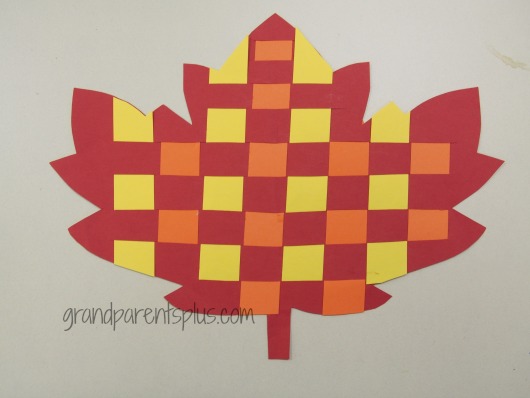
Using one inch strips of construction paper, weave strips through the leaf. Trim at the edges of the leaf. 

Leaf Art for Kids   grandparentsplus.com


Fall is so beautiful with the different colors and textures of the leaves. These Leaf Art Projects capture some of the color and texture of the season. I hope you have fun making these with your elementary kids. 


Enjoy!

Phyllis


For more upcoming projects and idea filled posts, I invite you to subscribe on the sidebar so you don’t miss out…

This post is linked to many of the following parties……


Posted in Art Project, Crafts, Thanksgiving | Tagged , , , , , , , , , , , , , , , , | 29 Comments

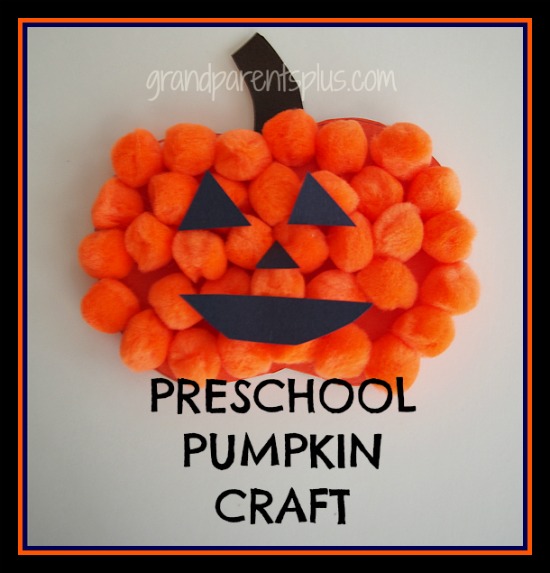
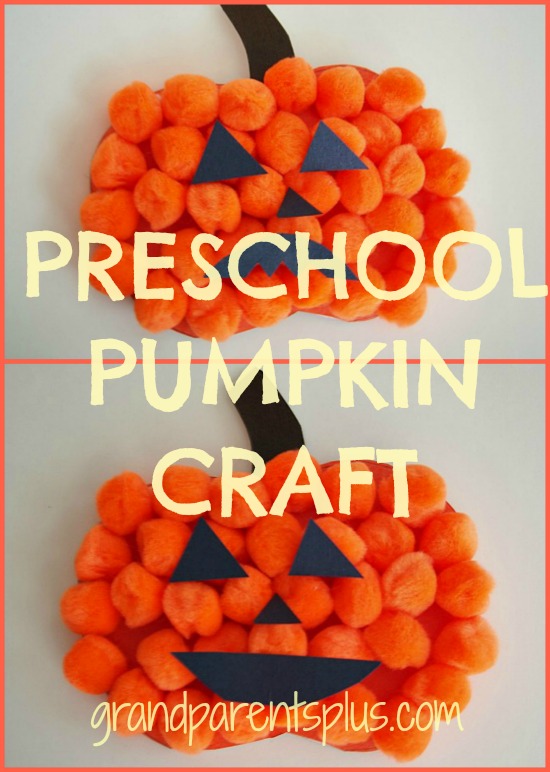
Preschool Pumpkin Craft

Here’s a quick,  easy, and fun preschool pumpkin craft. It looks great, too! Just a little prep by an adult and your preschooler can handle the rest! I always try to come up with something that fits the short attention span of a preschooler.

Preschool Pumpkin Craft grandparentsplus.com

Materials:

Tag board (if you are going to hang this up)

Orange and Black  Construction Paper

Glue, scissors

Brown Crayon

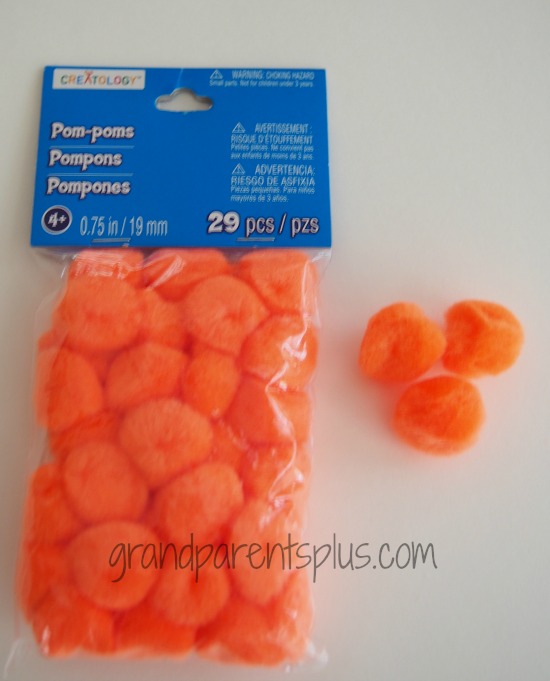
Orange pompoms –  1  1/2 bags for one side.


Preschool Pumpkin Craft  grandparentsplus.com

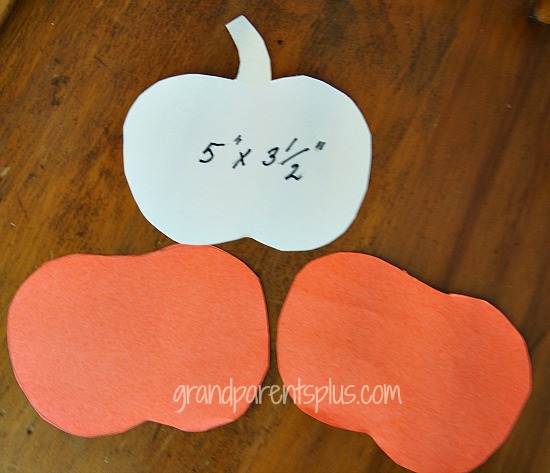
First, cut a pumpkin shape out of the tagboard. This pumpkin pictured is approximately 5 1/2 by 3 1/2 inches. Cut the same shapes for both the front and back out of the orange construction paper and glue on the tagboard. Color the stem brown.


Preschool Pumpkin Craft grandparentsplus.com

The orange construction paper will prevent the white showing through while the tagboard gives it strength for hanging.  If you don’t intend on hanging the pumpkin,  the construction paper alone will work.

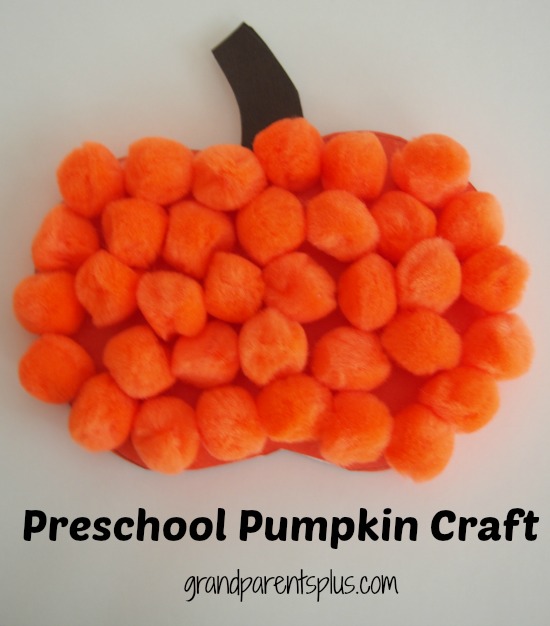
Prepare a shallow dish of glue so that the pom-poms can be dipped. It is so much easier for kids to do it that way. Start by gluing the pom-poms around the outer edge and then fill in.


Preschool Pumpkin Craft   grandparentsplus.com

Add black triangles for eyes and nose.  Cut a black mouth and glue on top of the pom-poms.  If you wish, do the same to the other side.

Preschool Pumpkin Craft  grandparentsplus.com

Looks cute to hang on a window or from a chandelier.

Have fun!

Phyllis

Looking for more ideas? Subscribe on the sidebar or follow on Pinterest or Bloglovin.

This post is linked to the following parties…..

Posted in Crafts, Halloween | Tagged , , , , , , , , , | 21 Comments

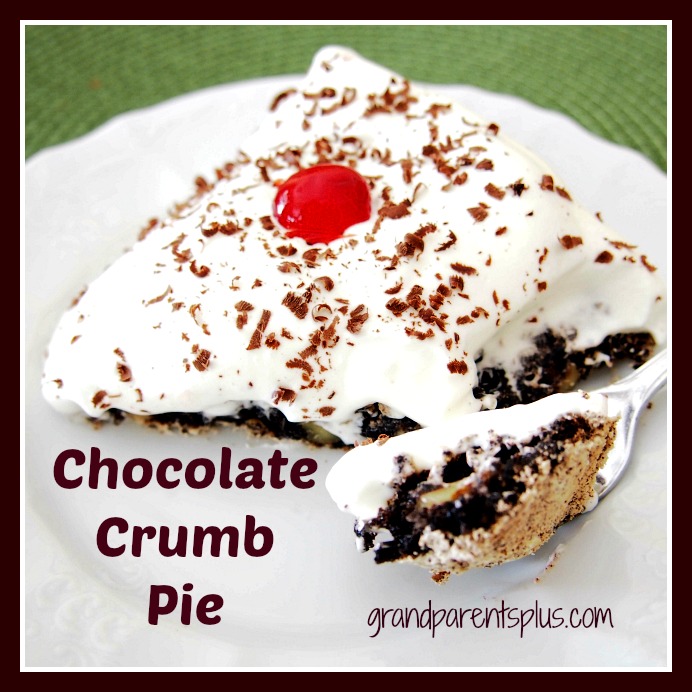
Chocolate Crumb Pie

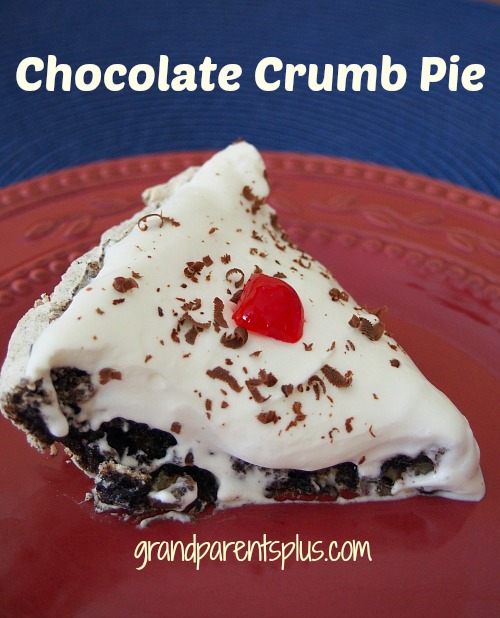
Chocolate Crumb Pie   grandparentsplus.com

This delicious Chocolate Crumb Pie is another one of my mother’s recipes. I remember big Sunday dinners after church and my mom would serve this for dessert.  What makes this Chocolate Crumb Pie so easy is that you make it the day before, add the whipped cream the next day, let sit in the refrigerator, and it is ready to serve. You can make a couple of them, freeze one after cooling , and have it ready for another time.

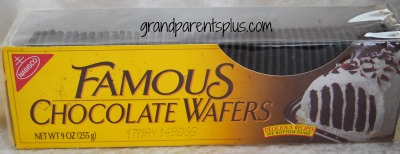
The chocolate crumbs come from the Nabisco Chocolate Wafers. Look for them in the baking section and not the cookie section of your grocery store.

Chocolate Crumb Pie grandparentsplus.com

You need very few ingredients  for this Chocolate Crumb Pie! One package of the Chocolate Wafers makes at least three pies.

Chocolate Crumb Pie

3 egg whites (large eggs) – add a dash of salt (room temp for the egg white is best)

3/4 cup of sugar

3/4 cup of chocolate wafer crumbs (approx. 10-11 wafers)

1/2 cup nuts

1/2 tsp. vanilla

1 pint of whipped cream – slightly sweetened to taste (use regular sugar; not powdered). Add 1 tsp vanilla.

Directions:

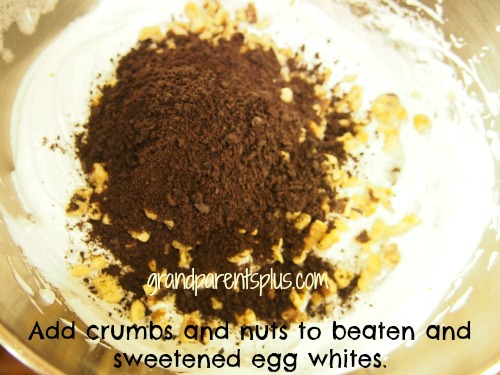
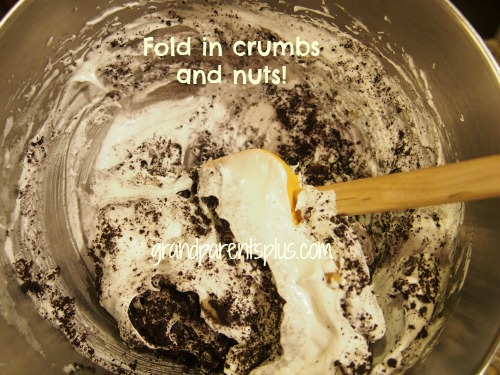
Beat egg whites until stiff and peaks form. Don’t underbeat!  Add sugar slowly. Add vanilla. Fold in chocolate wafer crumbs and nuts.

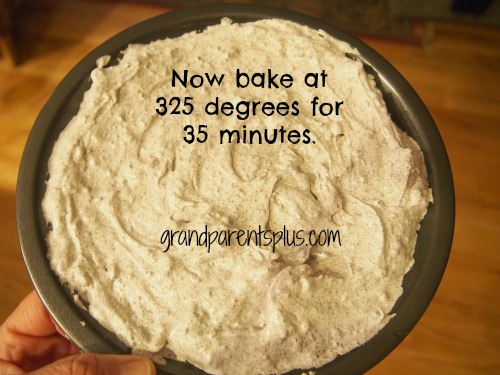
Place in a slightly greased pie tin. (Normally I use glass for pies, but not for this pie – use a 9 inch tin pie pan)

Bake @ 325 degrees for 35 minutes until lightly browned

Cool

(Once cooled, you can wrap in foil and freeze for future use. This freezes well.)

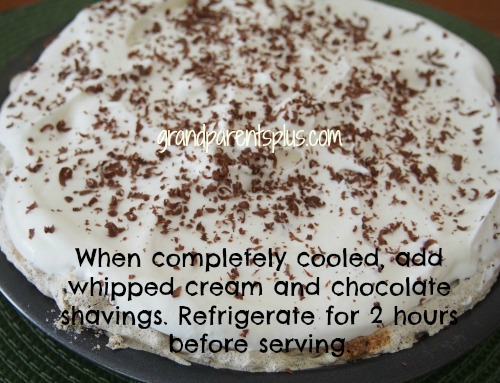
Take cooled pie ( it will be a crusty meringue-like look) and top with slightly sweetened whipped cream.

Decorate with a little  grated unsweetened dark chocolate baking square

Place in refrigerator for at least 2-3 hours before serving.

Cut and serve.

These visual steps might help……

Chocolate Crumb Pie   grandparentsplus.com

Chocolate Crumb Pie   grandparentsplus.com


Chocolate Crumb Pie   grandparentsplus.com


Chocolate Crumb Pie   grandparentsplus.com

This pie is like a meringue. The whip cream softens the meringue while sitting in the refrigerator. It gets similar to a moist brownie texture. Delicious!

For me, it brings back lots of memories of those Sunday dinners.

Life is different today and I don’t know of anyone that still does big Sunday dinners, do you?

Chocolate Crumb Pie  grandparentsplus.com


Enjoy!

Phyllis

So you don’t miss future posts, you might want to subscribe on the sidebar.

You can also follow on Pinterest, Bloglovin and Facebook.


This post is linked to many of the following parties…..


Posted in Pies, Recipes | Tagged , , , , , , , , | 10 Comments

#4 Fall Idea House

This #4 post of the Fall Idea House has more unique and fun decorating ideas. Remember, they’re not just for fall, but adaptable for anytime of the year. As always, I  like to show you one simple idea that I have used in my home from this tour. I’m sure you’ll find several ideas that you will want to use, too, both now and later.

#4 Fall Idea House   grandparentsplus.com

There were two bedrooms in this Fall Idea House that showcased many unique ideas. This is the master bedroom…..

#4 Fall Idea House  grandparentsplus.com

Notice the headboard? It’s an old wooden tabletop! Here’s a closer view…..

Fall Idea House #4   grandparentsplus.com

Another re-purposed item is the salvaged metal gate behind the mirror!  Under the table are vintage suitcases used for extra blanket storage. Look at that colorful table runner! It’s a dish towel!

Fall Idea House #4   grandparentsplus.com

The unique twine pattern, added to a wooden room divider, has lots of texture and repeats the design in the pillow. Now, there’s a DIY project for you!

Fall Idea House #4   grandparentsplus.com

A peek into the second bedroom…..

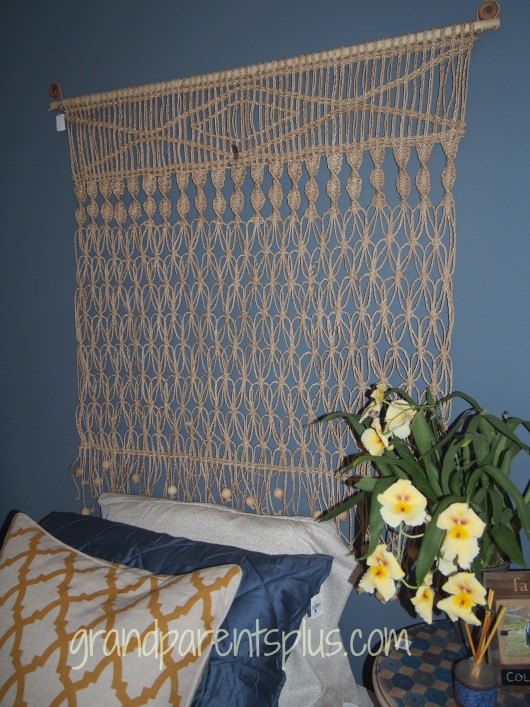
Remember these macrame’ wall hangings? (You may be too young to remember these. Oops! Showing my age!) Well, they’re now “new” again when used as a headboard.

Fall Idea House #4   grandparentsplus.com

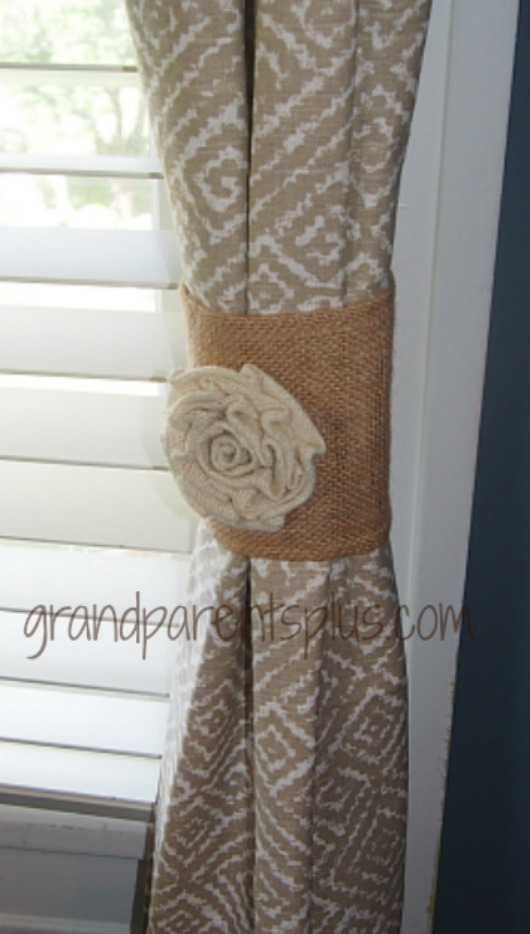
Curtain tie-backs made of wide burlap candle wraps and accented with a textured flower compliments the tan and cream curtains.

Fall Idea House #4  grandparentsplus.com

Cream, blue and beige work nicely together in this bedroom. Notice the wire basket table beside the chair.

Fall Idea House #4  grandparentsplus.com

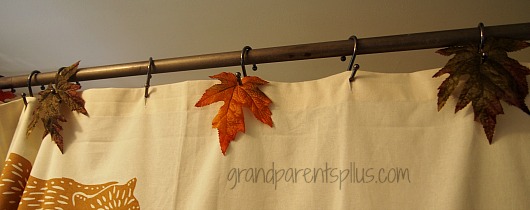
Don’t forget the bathroom when decorating for fall. What could be easier than punching a whole in an artificial leaf and putting it in the ring?

Fall Idea House #4  grandparentsplus.com

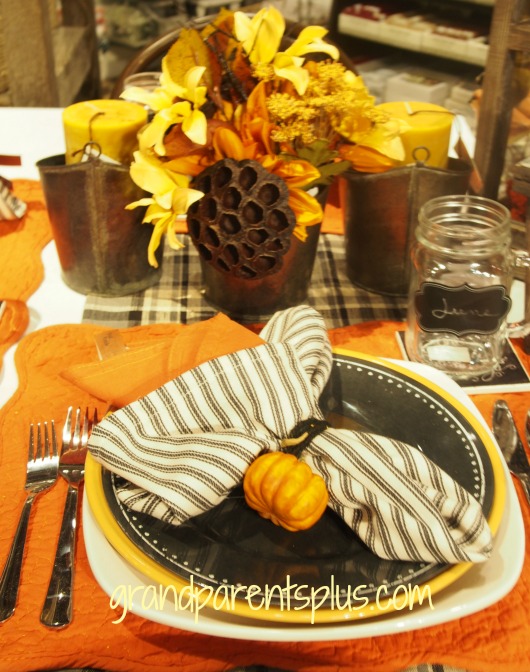
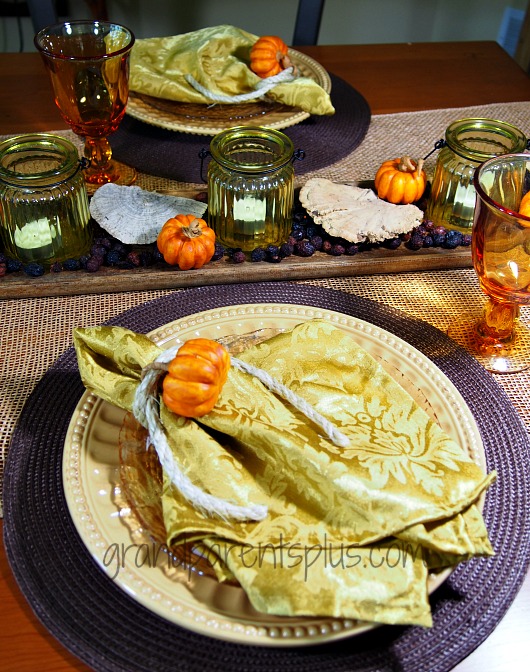
Another tablescape caught my eye  in the retail center.  I love the little pumpkins that they used as part of the napkin ring. The ring itself is black yarn wrapped around the napkin and the pumpkin is just attached to the yarn. Simple!


#4 FAll Idea House  grandparentsplus.com

I couldn’t pass up those little pumpkins and use them myself. I didn’t have any chunky yarn so I just used rope and attached the pumpkins to the rope. Twine or ribbon works, too!

I, also, used the little pumpkins in this easy centerpiece. Along with the pumpkins, there’s dried fungi (purchased), dried rose-hips, and amber votives all arranged on a long, wooden, french bread board.


#4 Fall Idea House   grandparentsplus.com

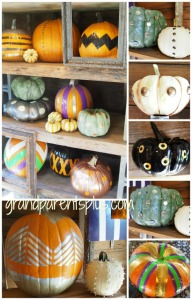
Back in a shed, they set up an idea for a pumpkin decorating party. On the table was Duck tape, Washi tape, sequins, paint, buttons, brads, mini-mirrors, tacks. and more.  This is a great party idea! Offer prizes for the cutest, weirdest, most artistic, fanciest, funniest, etc. Guests get to bring home their creations! I’ve got to do this next year!

#4 Fall Idea House grandparentsplus.com

Sorry to say, this is the last post of the Fall Idea House Ideas for 2014!  What ideas did you like the best?

But wait!!  It won’t be long and there will be the Christmas Idea House!! You might want to subscribe so you don’t miss all the Christmas ideas to come!

If you missed the earlier posts for the Fall Idea House, here they are……  Fall Idea House 2014,  Fall Idea House #2,  #3 Fall Idea House Tour

Thanks for stopping by, 

Phyllis

This post is linked to many of the following parties…..
 

Posted in Decor | Tagged , , , , , , , , | 11 Comments

Halloween-Harvest Games

Looking for some fun ideas for your Halloween – Harvest Parties? I’ve created and compiled many Halloween-Harvest games for both adults and children. The best fun is laughter and good times together. Make some memories with these games and activity ideas.

  Halloween-Harvest Games grandparentsplus.com


Pumpkin Bowling:

Halloween-Harvest Games grandparentsplus.com

Use a small mini pumpkin. Participants “roll” the pumpkin towards plastic bottles set up in bowling fashion. Each person gets two tries. With small groups, you may repeat and add the score from earlier tries.  Judge the distance by the age of your participants.


Gather the Pumpkins:

Using small candy pumpkins, set them behind lamps, books, and in various places around the house. Use a disposable cup and kids need to gather and find as many as they can in  3 -5 minutes.


Pumpkin Decorating Contest:

Set out duct tape, Washi tape, markers, self-stick foam, acrylic paints, pom-poms, stickers, buttons, eyes, yarn, ribbon, raffia, etc. and let them decorate a pumpkin. Have prizes for funniest, craziest, sweetest, scariest, cutest, most artistic……you get the idea.  Give a time limit  – 30 – 60 minutes.

Halloween-Harvest Games grandparentsplus.com


Leaf Relay:

Halloween-Harvest Games grandparentsplus.com

Contestants move artificial or pressed fall leaves from one area to another by sucking them up with a straw.   Give a time limit for each contest or use as a relay.


Leaf  or Pumpkin Match:

Each person has an envelope with twelve different pairs of cut-out leaves. On a given signal, each opens up the envelope and matches the pairs. This works with pumpkins, too. Just make them slightly different shapes.


Pin the Tail on the Donkey Variation:

Pin the nose on  the Pumpkin, Pin the Tail on the Cat, Pin the nose on the Witch, etc……..


Guess the number of Pumpkin Seeds!

Take a pumpkin and have kids guess the number of seeds there will be in it.  Cut it, clean it, and count the seeds!


Pumpkin Toss:

Halloween-Harvest Games grandparentsplus.com

Take a pumpkin, small, medium or large (size depends on age of participants) and see how far they can toss it. (outside)


Corn Hunt:

Fill a bin or large container (it needs to be deep) with dried corn (buy at a feed store).  Add pennies or nickels in with the dried corn. Kids have a certain time to find all the coins they can.


Corn Scatter:

Throw dried corn out on your yard. Kids have 3-5 minutes to find as many kernels as possible. Left over corn will be appreciated by the wildlife!


What is IT?:

Have several covered boxes with bowls inside. Put various items in each bowl that need to be identified by just feeling.  Contestants are blindfolded and need to say what it is before removing their hand. Give them 10 seconds.  Examples….mashed bananas, peeled grapes, spaghetti, cut-up tomatoes, baked beans, oatmeal, cottage cheese…….  Who identified the most?


Since Halloween and Harvest Parties are often about candy, here’s a few candy games…..  (They work for other holidays, too!)

The Candy Game:

Go to  GuesstheCandy.com   There are twenty pictures of candy bars. It is a multiple choice game to name each one.  A different variation is to buy several candy bards,  number them, and place on separate dishes to pass around the group.  Participants need to write the name of the candy bar down. The one who identifies the most wins! Be sure to break them in half so it shows the inside.


The Candy Bar Match Game:

Go to FamilyReunionHelper for this game


Roll the Dice Candy Game:

Go to IceBreakerCandyGame


Pumpkin Throw:

Halloween-Harvest Games grandparentsplus.com Have several buckets or containers labeled with point values. From a starting line, Individuals or teams take part by throwing mini-pumpkin into one of the containers. Count the points toward the team or person’s score.  Determine the number of tries for each team or person.

Variation: Try dropping candy pumpkins into a small container by kneeling over the back of the chair. (similar to dropping clothespins in a bottle)


Eyeball Bounce:

Halloween-Harvest Games grandparentsplus.com  

Draw an eyeball on a ping-pong ball.  The object is to bounce the eyeball into a plastic pumpkin (with a large opening).

 Decide distance depending on the age of the participants.


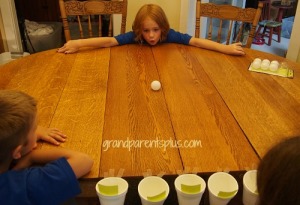
Eyeball Roll:

In this version, roll the eyeballs across the table into numbered cups. Give 5 chances and add up the score.

Halloween - Harvest Games grandparentsplus.com


Pumpkin Hockey


This needs a large outside area to play. Players move the pumpkin around obstacles to a finish line using a hockey stick, broom, or long stick. Time each participant. Shortest time wins. Using as a relay, divide into two teams and move to a marked area in a gym or outside and come back again. Hand off to the next person.Variation: for indoors, use a broom and move around a marked area (around furniture, chairs, etc.) One person plays at a time. 


Free Printable Game Sites:


familycrafts.about.com

partysupplieshut.com

halloween-party-fun.com

dltk-holidays.com

thekidzpage.com

printactivities.com


For another activity, try these Pumpkin Carols! 

Pumpkin Carols at Night.net

Also…. Peanuts Pumpkin Carols


Hope you enjoy these Halloween – Harvest Games!

Have fun!

Enjoy!

Phyllis

You may want to check out other holiday games that I have posted….

Be sure to subscribe so you don’t miss future posts!

This post is linked to many of the following parties……


Posted in Games, Halloween | Tagged , , , , , , , , , | 42 Comments

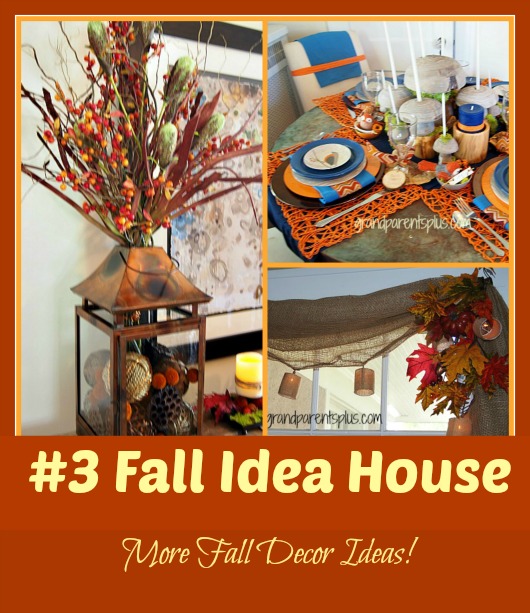
#3 Fall Idea House Tour

Here’s more inspiration and ideas from the Fall Idea House 2014!  Some ideas are simple and quick to do to perk up your decor for fall. Others are more involved so that you’ll want to save them for future inspiration and use.

#3 Fall Idea House  grandparentsplus.com

Let’s start in the kitchen with some inexpensive ideas for curtains.

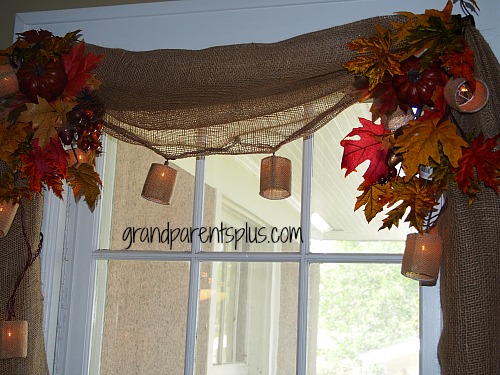
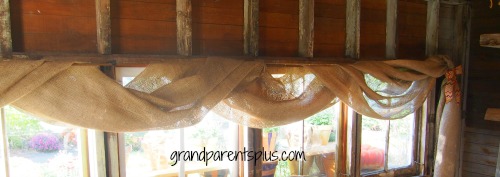
I see burlap used for just about everything these days. In the other two posts, burlap was used on the tables in several different ways. In the kitchen, burlap is draped as a window treatment. Artificial stemmed leaves and lights are used as an accents. With a change of season, simply change the corner accents to update the look!

OLYMPUS DIGITAL CAMERA

Another burlap curtain was used in an outdoor building. It is simply looped over a metal rod and accented on the sides with a bow.

Fall Idea House Tour #3  grandparentsplus.com

Back to the kitchen….

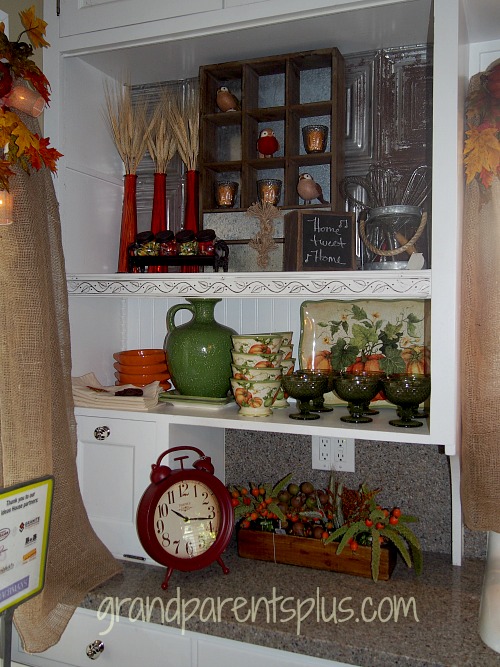
The open shelving coordinates with the color scheme and makes a big impact!

Idea House Tour #3  grandparentsplus.com

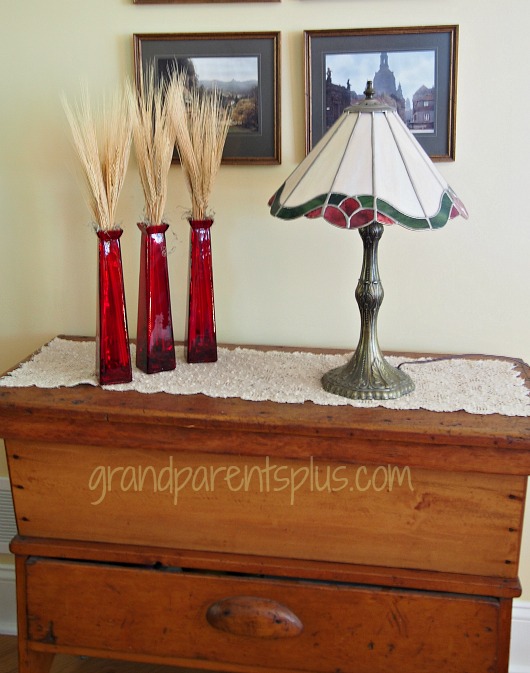
Did you see the simple bouquets of wheat in the red vases?

Here’s my version using Dollar Tree vases and wheat…..   Use in a group, as a centerpiece, or as repetition on a long table with other fall items. This is a quick and easy idea!

 

#3 Fall Idea House   grandparentsplus.com

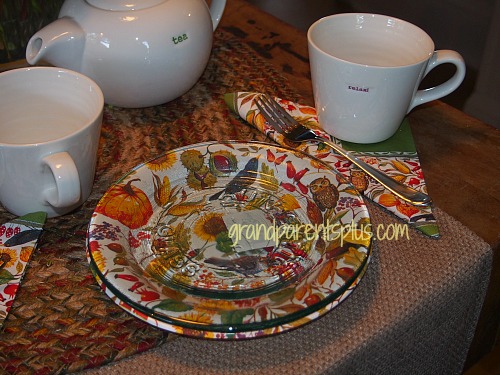
On the butcher block in the kitchen there’s a casual place-setting idea. The unique part is that the plate is clear glass, but they used a patterned paper plate underneath. Under the place-setting is a rustic colored, small woven rug. The texture and warmth of the fall colors blend with the color scheme. Who says rugs are just for the floor?

Fall Idea House Tour #3  grandparentsplus.com

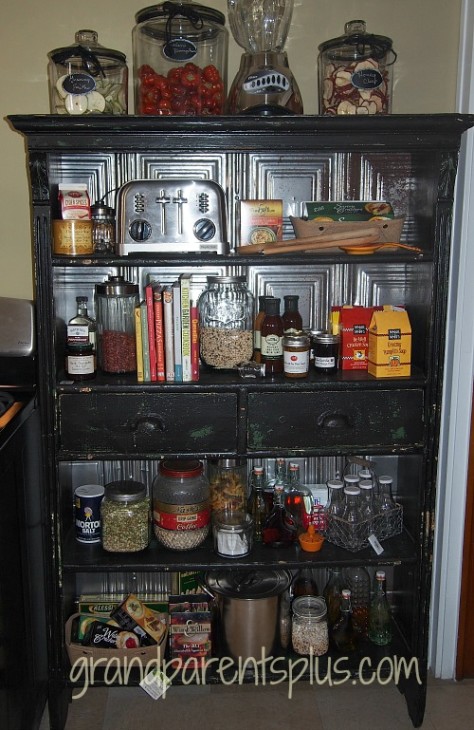
I love the idea of using an old bookshelf and lining the back with vintage ceiling tile! It certainly makes this piece a show stopper! Don’t you agree?

Fall Idea House 2014 Part 3   grandparentsplus.com

Into the Dining Room…..

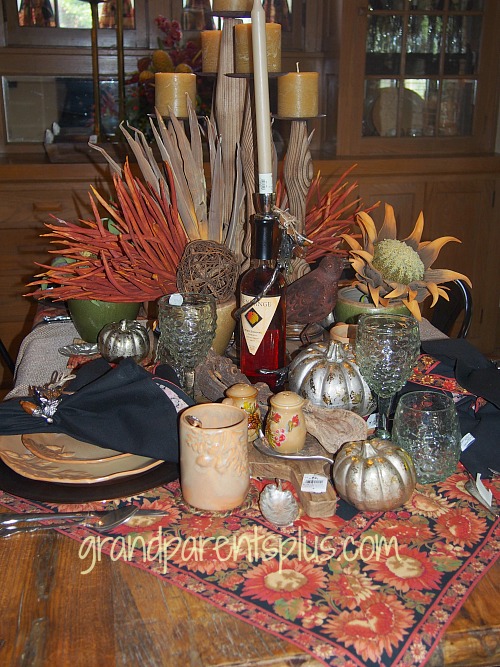
The dining room table has an “over-the-top” display! I don’t think one more thing would fit! On a practical note, no one would see another person at the table! HA!  Notice the beautiful fall sunflower patterned tablecloth!

#3 Fall Idea House Tour grandparentsplus.com

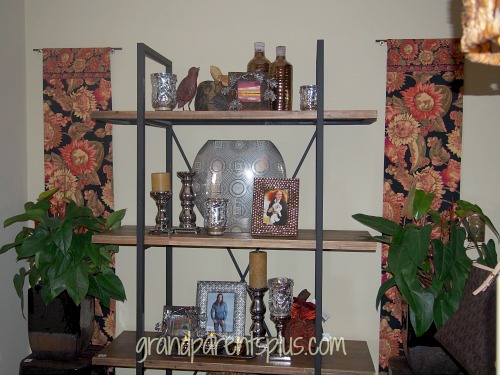
Table runners, in the same pattern, are hung as wall art on either side of the shelf unit.

#3 Fall Idea House  grandparentsplus.com

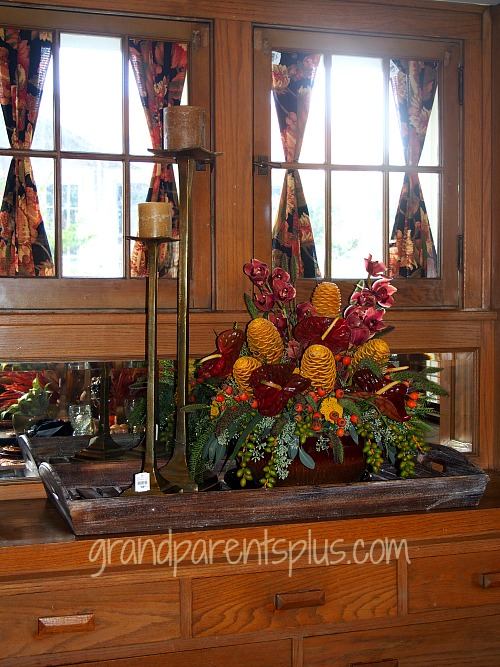
…..A beautiful arrangement on the buffet!

#3 Fall Idea House  grandparentsplus.com

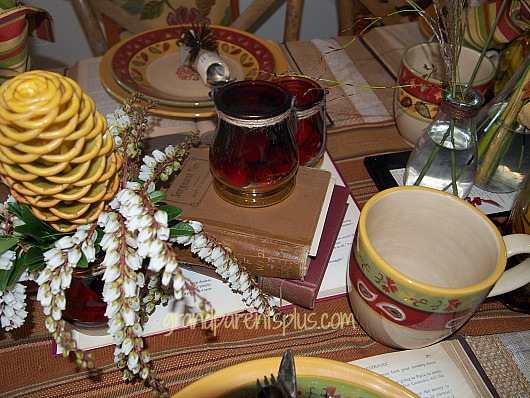
One of the bedrooms in the Idea House was set up as a tablescape idea room.  The first tablescape was for a Book Club dinner.


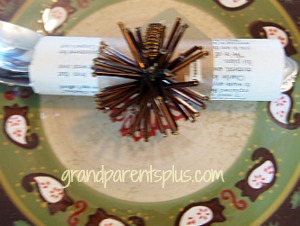
Instead of placemats, open books are used to hold the plates. Silverware is wrapped in book pages along with a decorative napkin ring. Candle holders are on different levels of stacked books. Both candle holders and vases have twine wrapped around them.

Fall Idea House tablescape   grandparentsplus.com


#3 Fall Idea House  grandparentsplus.com

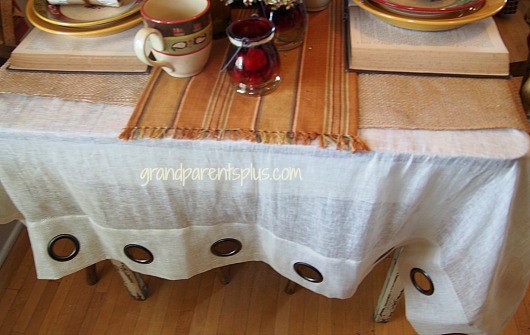
Don’t have a tablecloth to fit? Try this idea….. Use a curtain and simply layer with burlap and a decorative runner.


#3 Fall Idea House   grandparentsplus.com

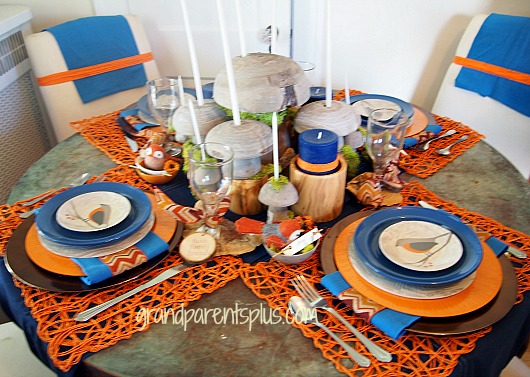
 A second tablescape uses bright orange and blue! Wooden mushrooms are used as candleholders.  A small bird sitting in a dish at each place is used as a place card holder. Bright blue napkins are placed on the back of each chair and held by colored twine.

#3 Fall Idea House  grandparentsplus.com

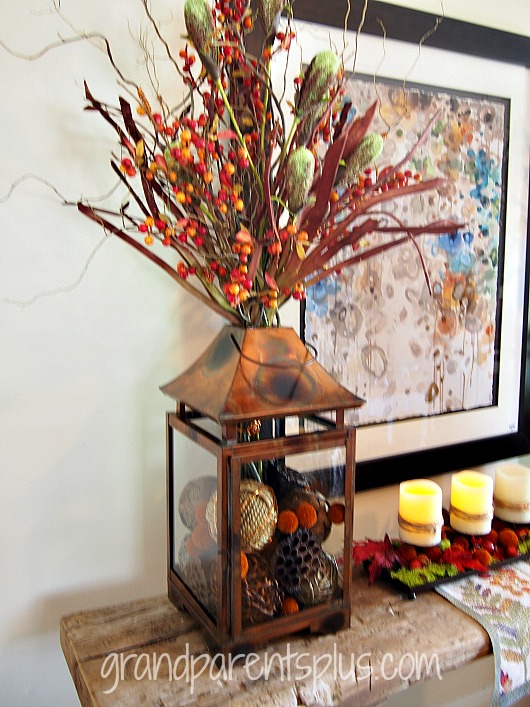
 Also, in the room….

a lantern filled with many fall accents.

#3 Fall Idea House   grandparentsplus.com

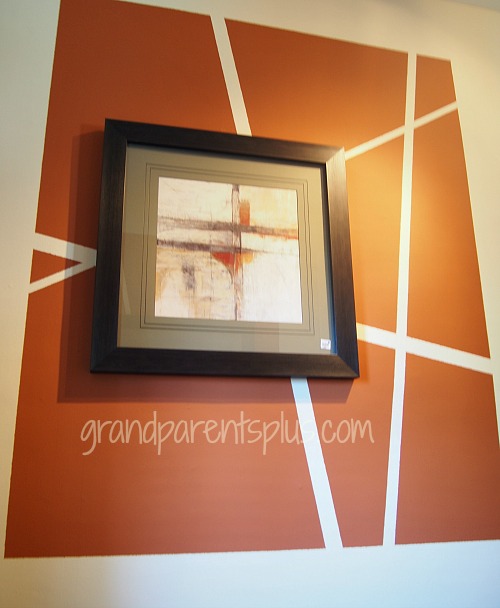
In the hallway…..

This artwork has all the right colors, but not the right size. By painting a large graphic square that highlights the artwork, it makes it appear larger and fills the space with color and added interest.

Fall Idea House #3 grandparentsplus.com

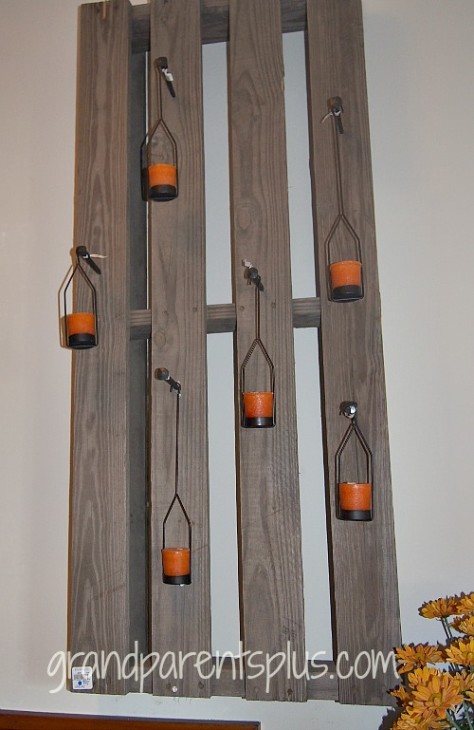
Another pallet idea! This is one I could do myself!

Fall Idea House #3  grandparentsplus.com


 So many great ideas! I’ll bet you found something that would work in your own home! There’s just one post left to share for the Fall Idea House.

Be sure to subscribe so you don’t miss it!

Thanks for stopping by,

Phyllis


Follow on Pinterest and Bloglovin, too.

This post is linked to many of the following parties……


Posted in Decor, Thanksgiving | Tagged , , , , , , , | 12 Comments