Hydrangea and Wheat Centerpieces

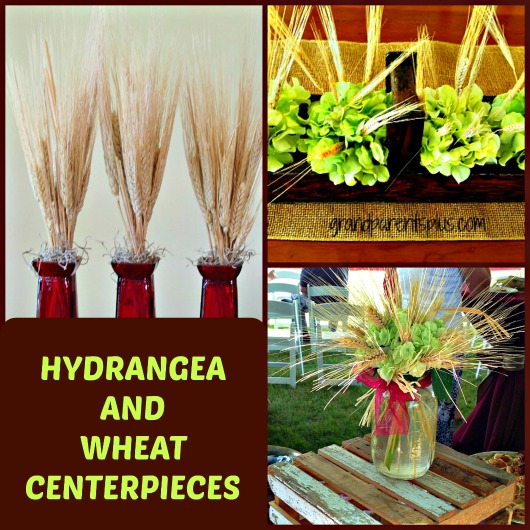
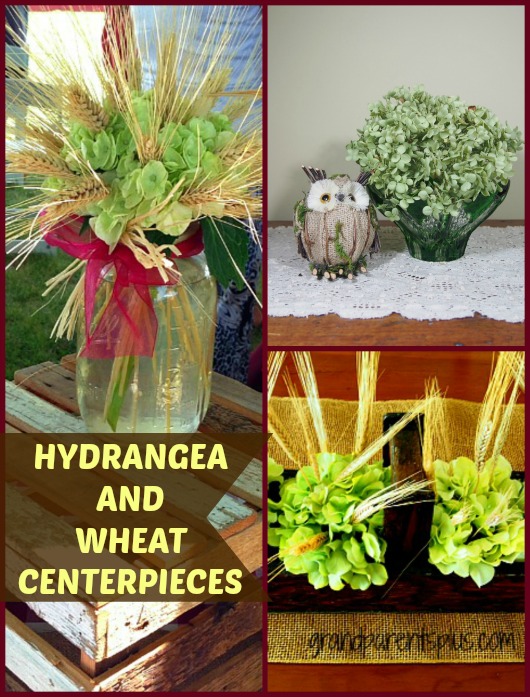
Hydrangea and Wheat Centerpieces are easy to make! Whether you use dried hydrangeas or silk ones depends on the durability and cost you want for your arrangements. By using a silk hydrangea,  it will stay in tact longer, but it is more expensive. Drying your own hydrangeas is easy and they’re free, but the arrangements are very fragile.  I’ll show you combinations of hydrangea and wheat along with simply using them alone.

Hydrangea and Wheat Centerpieces   grandparetnsplus.com


Materials Needed:

Floral Foam for Dried Arrangements

Wheat

Dried or Artificial Hydrangeas

Container

Directions:

Everything stays better if you have a piece of floral foam in the container. The stalks of wheat are thin and will stay in place when secured in the floral foam. Place this in first.

Place the artificial or dried hydrangeas in your container.

Add stems of wheat until you get the desired look.


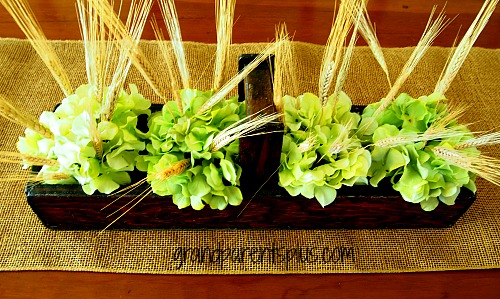
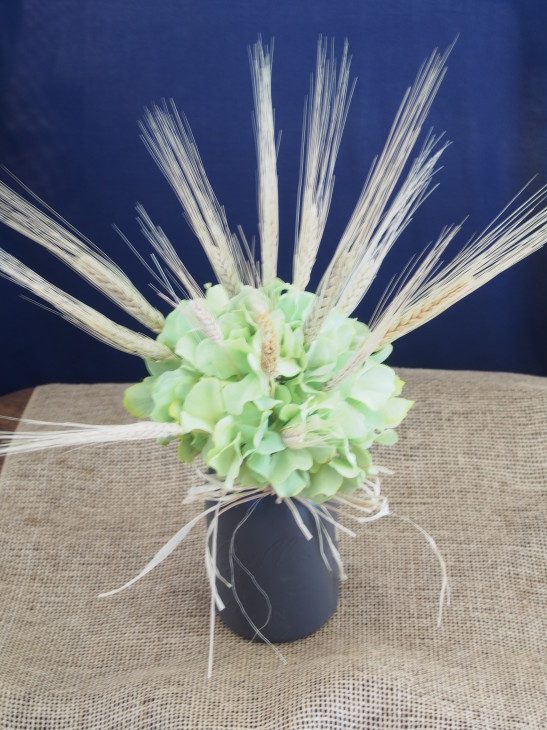
This arrangement uses artificial hydrangeas and wheat…


Hydrangea and Wheat Centerpieces   grandparentsplus.com

Paint a mayo or canning jar, add your arrangement, and complete with a raffia bow.  Very simple to do!

Hydrangea and Wheat Centerpieces  grandparentsplus.com

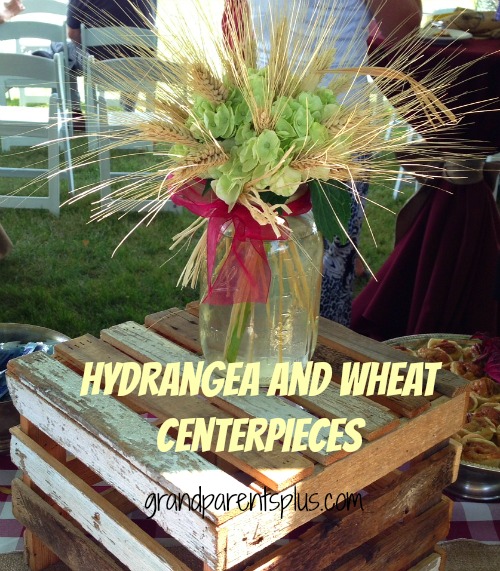
Or add a colored bow and set on a rustic crate…..


Hydrangea and Wheat Centerpieces  grandparentsplus.com

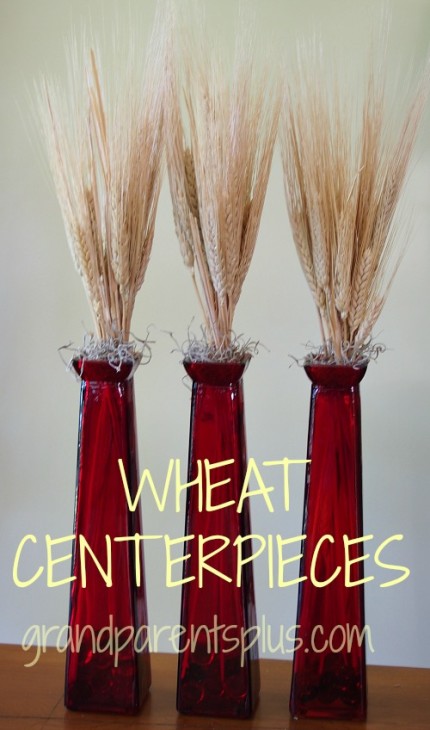
Simply use the wheat by itself. Three slim vases filled with wheat make a great impact of texture and color. The red vases are from the Dollar Tree so this look is very inexpensive!

Hydrangea and Wheat Centerpieces  grandparentsplus.com


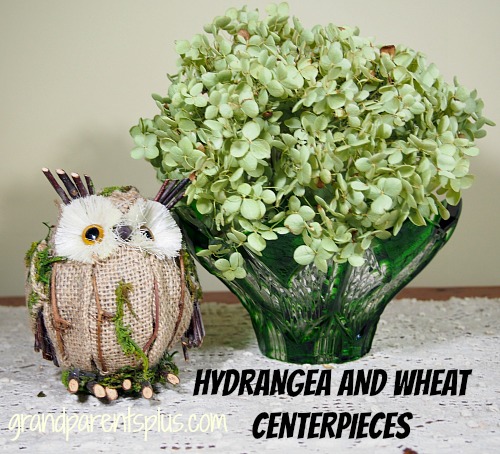
I dry my own hydrangeas to use in arrangements. This single hydrangea is simply stuck in an interesting glass bowl. A whimsical owl sits nearby. Not hard to do and only takes a couple of seconds!

Hydrangea and Wheat Centerpieces  grandparentsplus.com

OK, now it’s your turn to try it! These arrangements will fit right into the Thanksgiving season, too! For very little money, they make a big impression!


Hydrangea and Wheat Centerpieces   grandparentsplus.com

Thanks for stopping by,

Phyllis

You can subscribe on the sidebar so you don’t miss future posts….

Or follow on Pinterest and Bloglovin, too!


This post is linked to many of the following parties……


Posted in Crafts, Decor, Thanksgiving | Tagged , , , , , , | 22 Comments

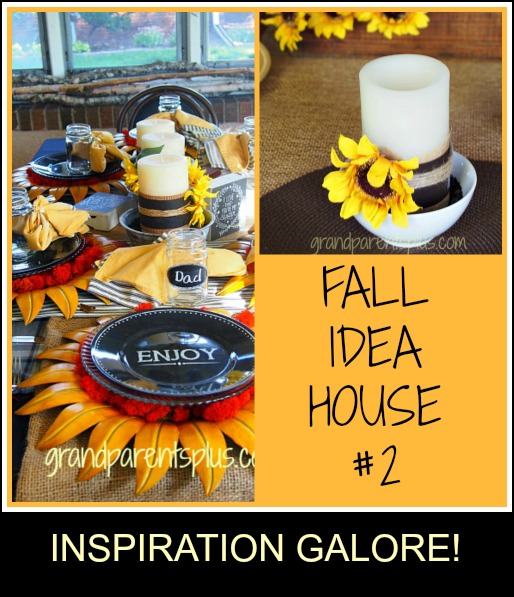
Fall Idea House #2


Ready for another Fall Idea House tour? Well, let’s continue into the porch and living area. Lots of inspiration here! Many ideas are easy to do and I’ll show you how to use materials you may already have on hand to duplicate a couple of ideas. Because the sun was out full force, I apologize that some pictures reflect that bright light. I always like a cloudy day to shoot photos, but this day was really sunny! Probably fitting with all the sunflower motif on the front porch.

Fall Idea House #2 grandparentsplus.com

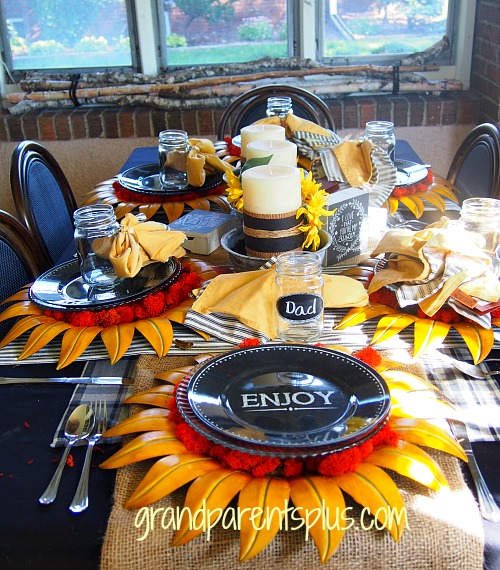
Immediately as you walked into the porch, the theme was very evident with the table setting. They used sunflower wall art as the chargers. Burlap along with black & white ticking table runners gave pattern and texture.

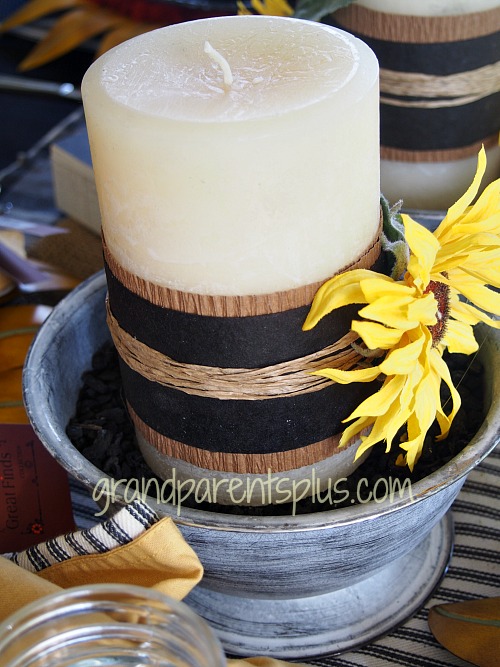
They wrapped candles  in tree wrap (brown), roofing paper (black), twine, and added a sunflower accent.  The candles rested on top of charcoal bits in a bowl.


Fall Idea House #2 grandparentsplus.com

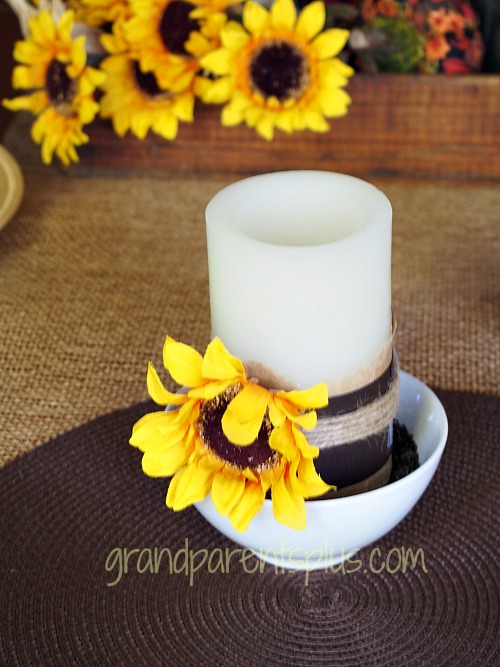
While I didn’t have tree wrap,  roofing paper or charcoal, I did have other materials that I substituted for my candles. My simple version uses brown paper bag instead of tree wrap. I tore it instead of cutting with a scissors. It gave it an uneven textured edge.

Instead of black roofing paper, I used brown textured cardstock and wrapped it with twine. Instead of black accents, I used brown as an accent color. I happened to have a sunflower on hand and used birdseed as a filler for the bowl instead of charcoal bits.  So that’s my copycat version! Easy, simple and inexpensive. I’ll bet you have most of the same materials on hand.


Fall Idea House #2 grandparentsplus.com

Theirs……

Fall Idea House #2 grandparentsplus.com

Mine……..

Fall Idea House #2 grandparentsplus.com

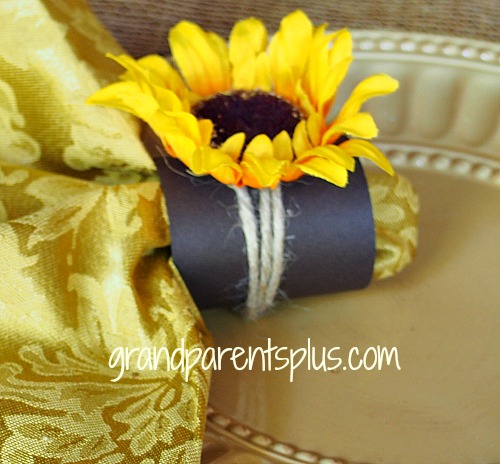
I also made a matching napkin ring out of cardboard tubing, brown cardstock, twine, and a sunflower! I often make my napkin rings for various occasions. For complete directions and ideas, go to DIY Napkin Rings.

Fall Idea House #2 grandparentsplus.com

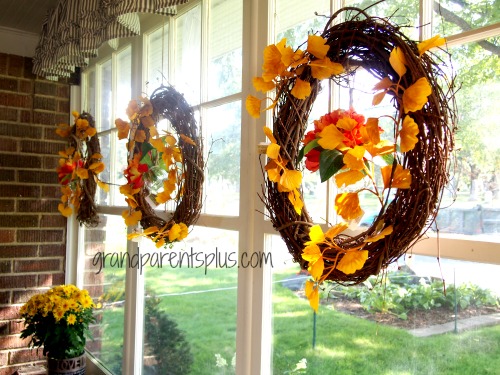
Colorful fall wreaths adorned the porch windows.

OLYMPUS DIGITAL CAMERA

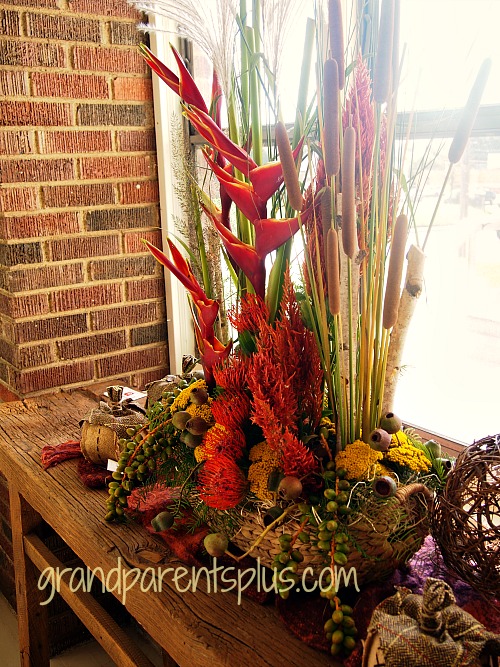
Here’s a look at the beautiful arrangement on the side table of the porch….

Fall Idea House #2 grandparentsplus.com

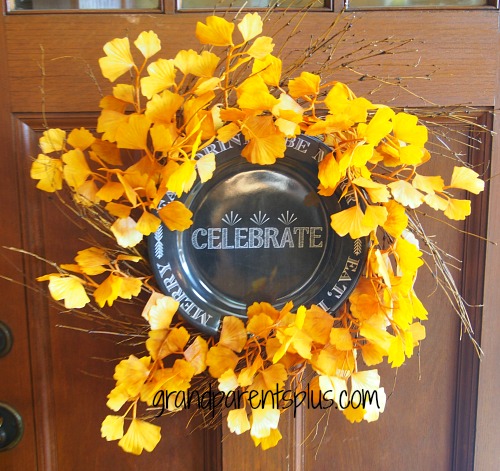
Entering the house, the door had a wreath with one of the black plates used in the center.

Fall Idea House #2 grandparentsplus.com

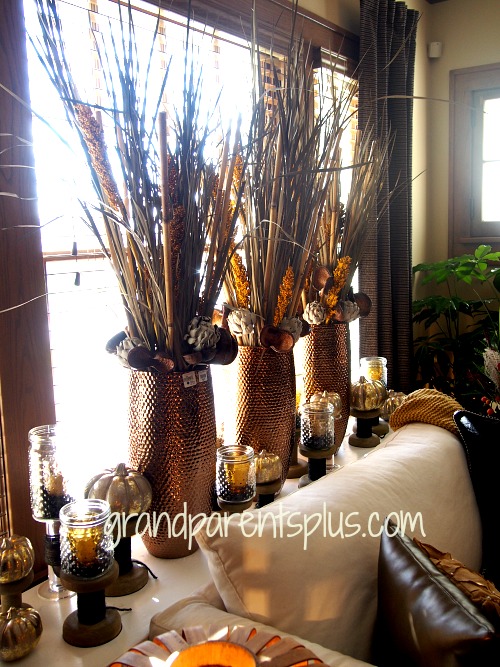
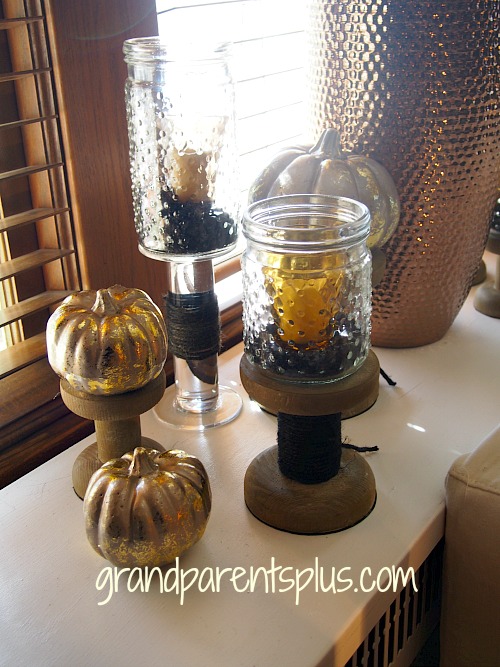
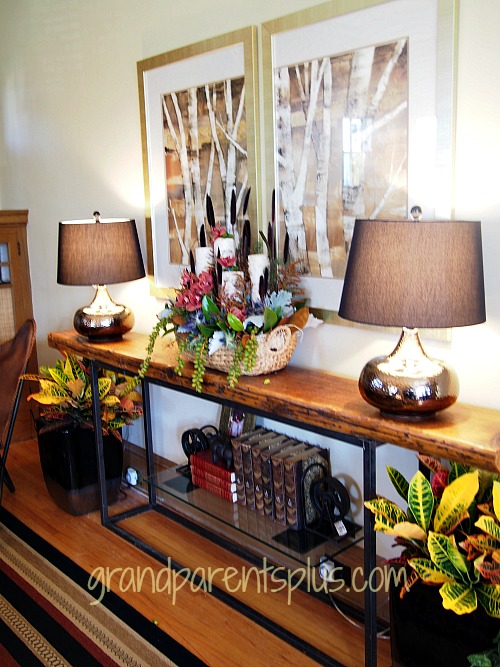
In the living room area, three large dried arrangements catch your eye. Notice the mixing of finishes. There’s copper, gold and silver at varying heights and used all together.

Fall Idea House #2 grandparentsplus.com


Fall Idea House #2 grandparentsplus.com

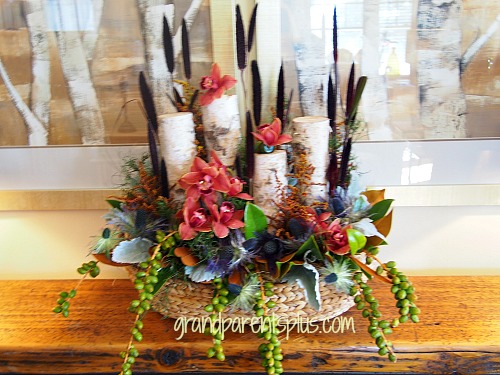
This combination of birch tree art along with the birch log dried arrangement really caught my eye! I love how it echoed the artwork.

Fall Idea House #2 grandparentsplus.com

A closer look…..

Fall Idea House #2 grandparentsplus.com

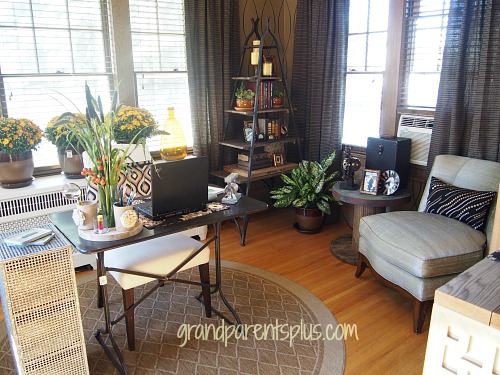
In a small room off the living room,  was a computer area.

Fall Idea House #2 grandparentplus.com

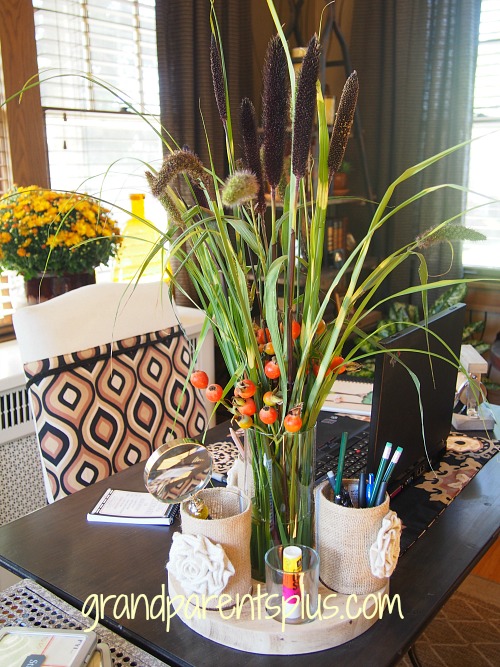
I wanted to give you a closer look at the dried arrangement on the desk.

Fall Idea House #2 grandparentsplus.com

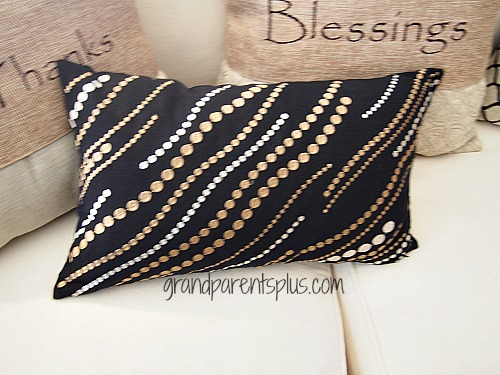
I also thought the black pillow on the chair was stunning. If you have a lot of shirt buttons, this might be the DIY project for you! Notice the pillows wrapped in burlap with “Thanks” and “Blessings” on them. (another DIY project)

Fall Idea House #2 grandparentsplus.com

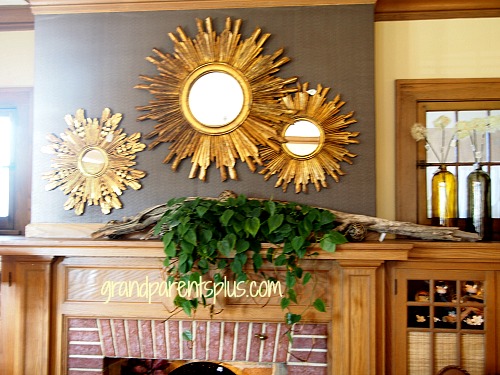
I liked the three mirrors over the fireplace! Across the mantle they placed a natural piece of driftwood and added live greenery in front.

  Fall Idea House #2 grandparentsplus.com

This is not the end of the Fall Idea House!

There’s more to show you so please subscribe on the sidebar so you don’t miss the next post.

Did you get some inspiration? Which idea did you like the best?

Have fun decorating for fall!

Phyllis

Follow on Pinterest and Bloglovin, too!


This post is linked to many of the following parties. …


Posted in Decor, Thanksgiving | Tagged , , , , , , , , , , , , , , | 12 Comments

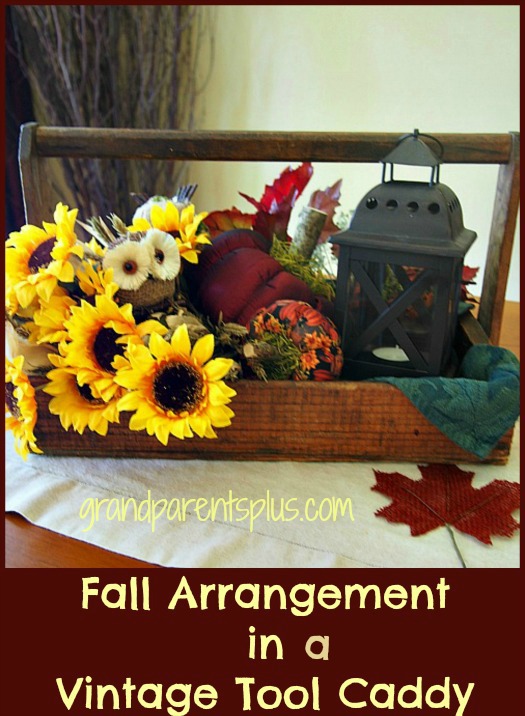
Fall Arrangement in a Vintage Caddy

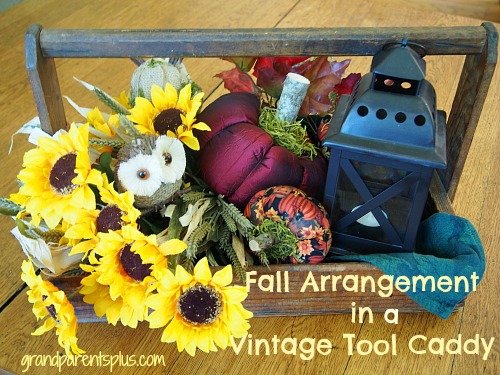
Fall Arrangement in a Vintage Caddy….

Fall Arrangment in a Vintage Tool Caddy   grandparentsplus.com

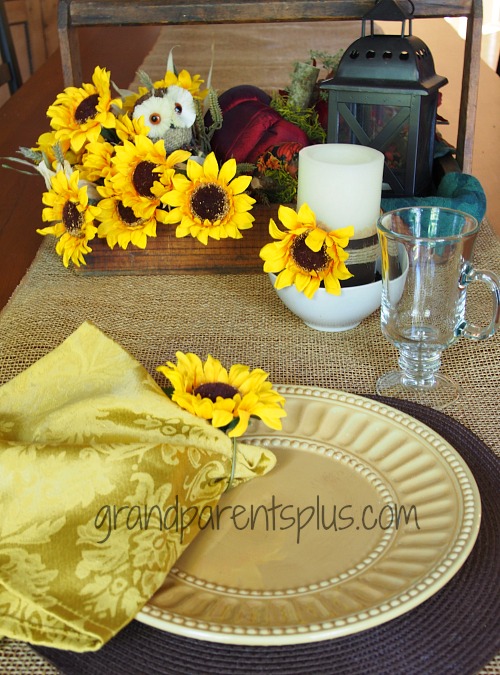
The patina and worn look of an old wooden piece is very appealing to me.  I like to use wooden items in arrangements throughout the year and change them with the seasons. I don’t think I ever do the same thing twice. At the end of the season, I find little things marked way down to add to next year’s arrangement to make it a little different.

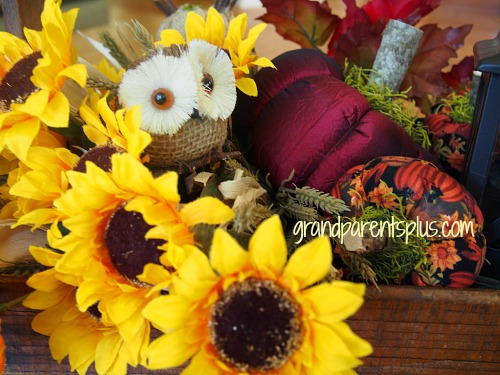
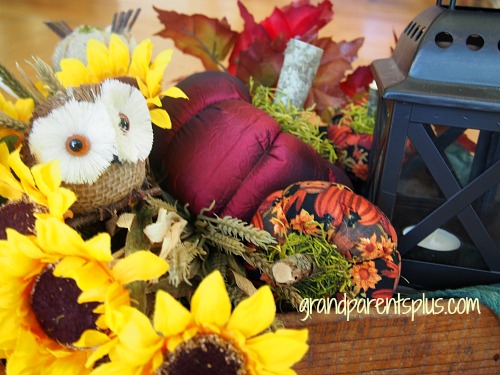
My color scheme in the great room is burgundy, green and yellow so I wanted to blend those colors in the arrangement. I bought three fabric pumpkins from a woman who exhibits at Silver Dollar City. They were so well done and I loved the wooden stems! The little pumpkins had sunflowers in the fabric so I stuck some silk sunflowers in for the yellow color.

Remember I said that I always find something on sale for the next year? Well, this little burlap owl was on sale for 75% off. Such a deal! So, in the arrangement he went!

Fall Arrangement in Vintage Tool Caddy   grandparentsplus.com

Last year the Fall Arrangement in the Vintage Tool Caddy looked like this….

Idea House grandparentsplus.com

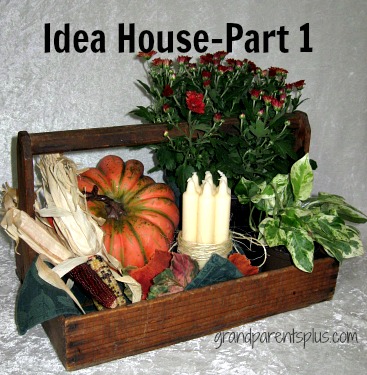
Go to Idea House – Part 1 for more fall decorating ideas.


The lantern on the right of the picture, balances it with weight and height. Lots of texture and pattern makes this arrangement interesting.

  Fall Arrangment in Vintage Tool Caddy  grandparentsplus.com


This is now on my coffee table for the fall. Hope you’re inspired to try a fall arrangement  in a vintage wooden piece. Why, even a small crate would make a wonderful wooden base.


Fall Arrangement in a Vintage Tool Caddy  grandparentsplus.comol Ca

Happy Fall Decorating!

Phyllis

Don’t miss a post, subscribe on the sidebar!

Follow on Pinterest and Bloglovin, too!


This post is linked to the following parties…...

Posted in Decor | Tagged , , , , , , , , , | 18 Comments

Fall Color 2014

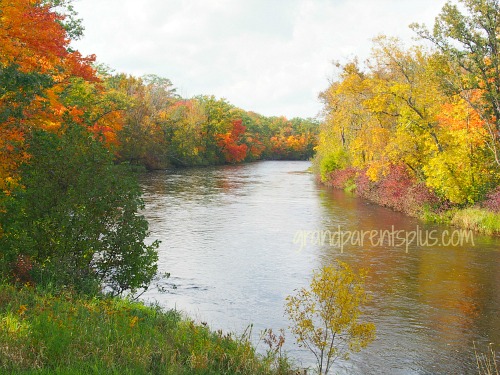
Just a quick post to say Happy Fall 2014 and show a couple pictures of the color in our area. It is just starting, but love the mixes of green, red, orange, and yellow!

Enjoy!

OLYMPUS DIGITAL CAMERA

Fall Color 2014  grandparentsplus.com

Beautiful fall color!


Fall Color 2014  grandparentsplus.com


Fall Color 2014  grandparentsplus.com


Thanks for stopping by!

Happy Fall!

Phyllis

Posted in Uncategorized | 27 Comments

Fall Idea House 2014

The Fall Idea House 2014 has oodles of inspiration for you. It’s time to take you on another tour of this special place. Several decorators come together to plan the entire house. The visitors are left with wonderful ideas showcasing  new products and re-purposed items. Many of these ideas are easily blended into your own home decorating. I don’t know about you, but when I see these ideas, it spurs my imagination and the creative juices run wild in my own mind! I think of ways to incorporate ideas in various ways in my own home. I’ll specify what I have done to use these ideas.

Fall Idea House 2014  grandparentsplus.com

So were off on the first part of the tour….  Fall Wedding Dinner Table and Outside Containers and Planters

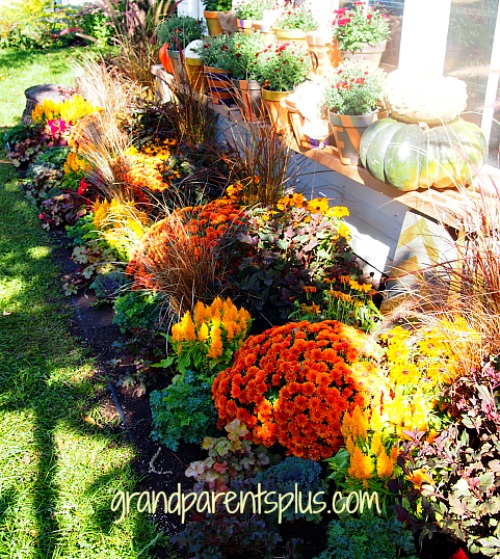
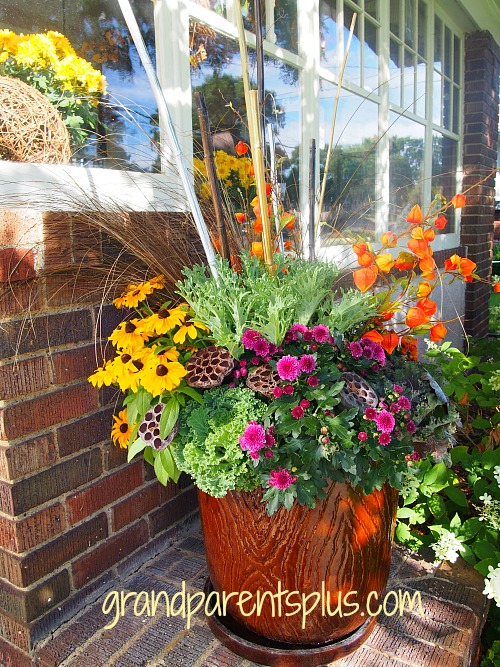
The outside plantings are always beautiful. As you walk toward the house the gardens are rich with fall color and texture.

Fall Idea House 2014  grandparentsplus.com

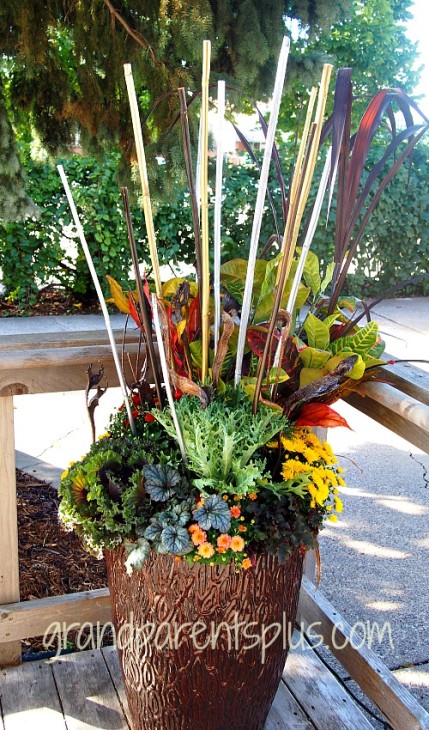
Think of adding height to your container gardens!

Fall Idea House 2014   grandparentsplus.com


Fall Idea House Tour 2014   grandparentsplus.com

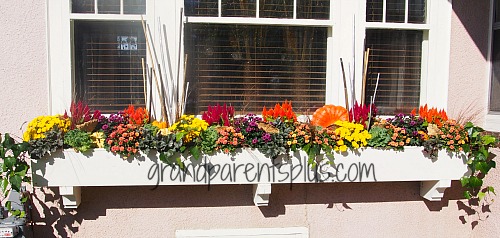
Window Boxes:

Fall Idea House 2014   grandparentsplus.com


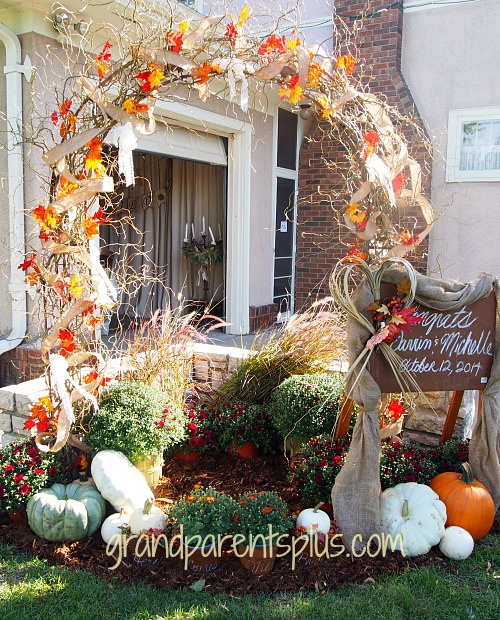
Wedding Dinner: (In a Garage) This beautiful fall archway announced the special dinner awaiting the guests. Fall leaves with lace bows, white pumpkins all give a hint of the decor inside.

Fall Idea House Tour 2014  grandparentsplus.com

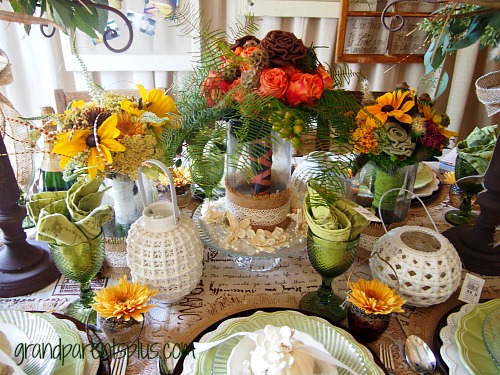
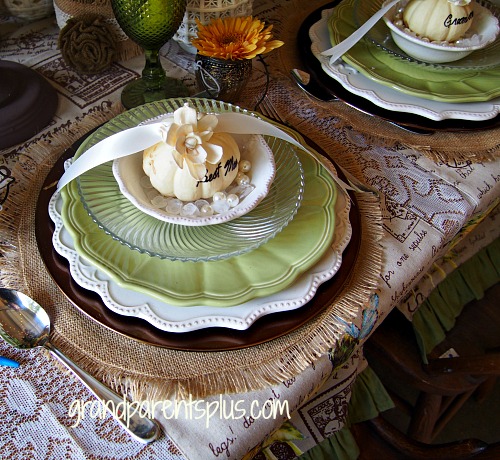
In the garage, a wedding dinner table awaited the guests. While a garage is an unusual setting,  the decor made it special by incorporating lace, burlap, vintage pieces and new items! The table was absolutely lovely! The same ideas are useable in any fall table setting.

Table centerpiece…..

Fall Idea House Tour 2014   grandparentsplus.comTour


Lace tablecloth with burlap placemats! Great texture combination!


Fall Idea House 2014  grandparentsplus.com

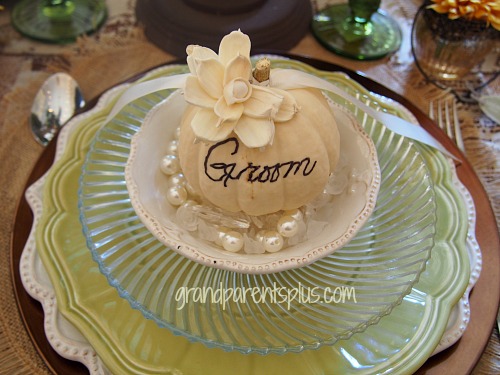
The place-cards are painted white pumpkins adorned with a white dried flower and personalized with each person’s name.

Fall Idea House 2014   grandparentsplus.com

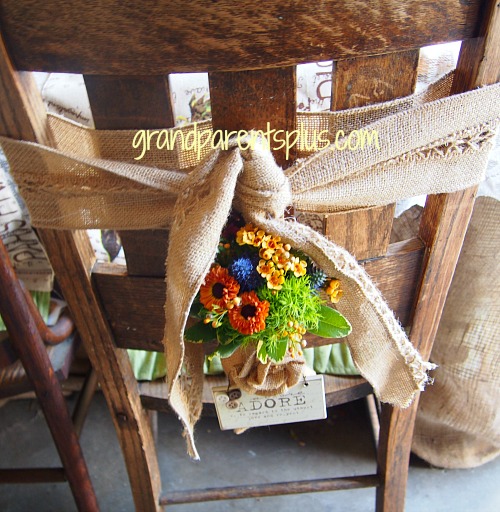
Chair tie decorations…..


Fall Idea House 2014   grandparentsplus.com


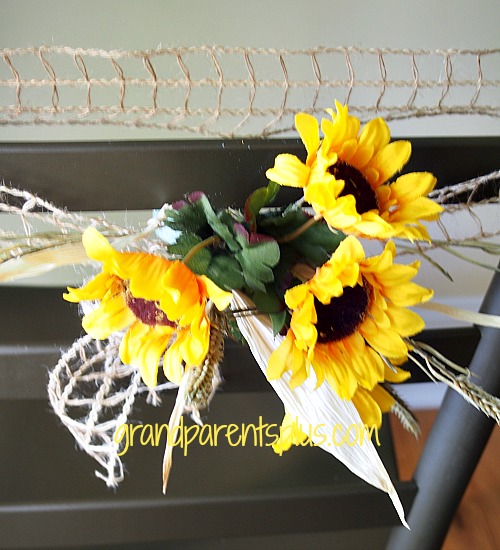
My version using what I had on hand! This is an easy chair decoration to do!

Fall Idea House 2014  grandparentsplus.com


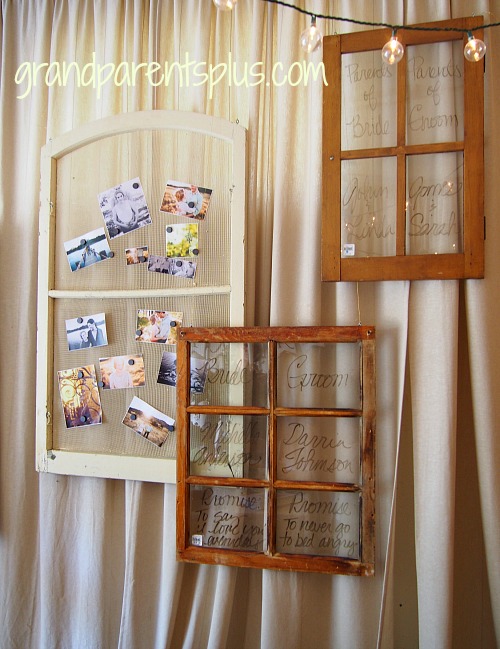
Isn’t this a super idea for the wall?   The vintage screen has pictures attached by magnets and the windows have all the names of the guests and wedding party!


Fall Idea House 2014   grandparentsplus.com


This is just the start! There’s so many more ideas to come in the next post. Hope this has inspired you!  Be sure to subscribe so you don’t miss the next posts.


Phyllis

Follow on Pinterest and Bloglovin on the sidebar, too!


This post is linked to many of the following parties……


Posted in Decor, Thanksgiving | Tagged , , , , , , , , , , | 10 Comments

Best Banana Cream Pie

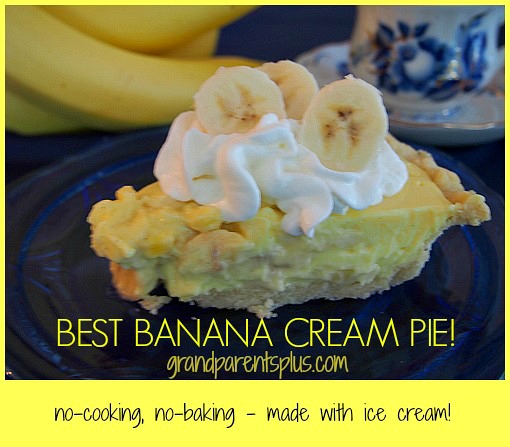
Best Banana Cream Pie (made with ice cream!)

You may have had Banana Cream Pie, but this recipe is by far the best I’ve tasted!  It is so easy with no cooking involved; just mixing! It is absolutely delicious! You Banana Cream Pie fans need to try this one for sure! I know you’re going to love this!
Best Banana Cream Pie   grandparentsplus.com

I guarantee you’ll be asked for the recipe when you serve this pie. My cousin served this recipe and everyone thought it was the best! It is now a huge favorite at our house. I like that it is so quick to make!


Ingredients:

1 Oil Crust or Graham Cracker  Crust  ( I prefer an Oil Crust) Go to Fresh Blueberry Pie post for the Oil Crust Recipe and directions. (it’s easy, too)

1 large package of Instant Vanilla Pudding (5.1 oz. size) Don’t substitute 2 small pkgs.

1  3/4 cup of vanilla ice cream, softened

1 1/2 cup milk

2-3 bananas (depending on size)


Directions:

Mix dry vanilla pudding with softened ice cream and milk.

Add bananas (I always put 1 large banana on the crust, first, and then add another to the pudding. Add the rest to the top before serving)

Pour into a baked crust and refrigerate until set.

Serve with whipped cream and garnish with banana slices.

That’s it! Don’t you love how easy this is?

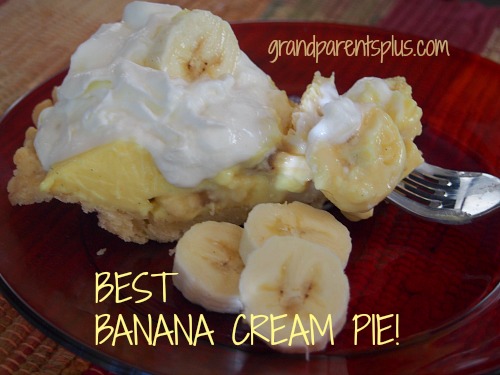
The Best Banana Cream Pie recipe is so GOOD!


Best Banana Cream Pie   grandparentsplus.com


Enjoy!

Phyllis

Be sure to subscribe on the sidebar so you don’t miss a post!

Follow on Bloglovin and Pinterest, too!

This post is linked to many of these parties……


Posted in Pies, Recipes | Tagged , , , , , , , , , , , , | 20 Comments

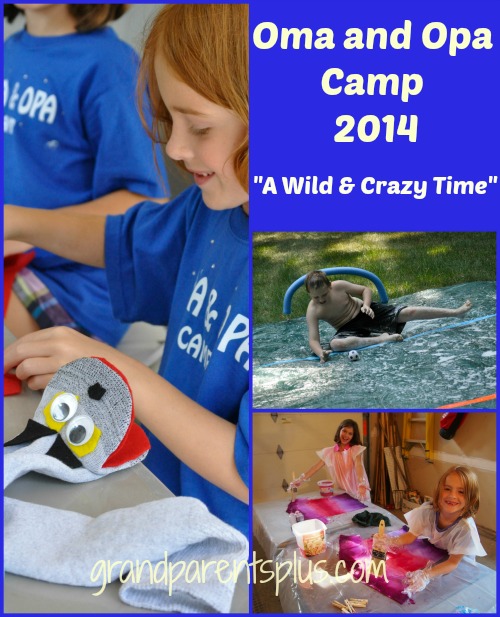
Oma and Opa Camp 2014

Oma and Opa Camp 2014 grandparentsplus.com

 Oma and Opa Camp 2014 was held at the end July. It was our sixth year of doing a camp for our grandchildren. As usual, it was a busy time. Seven excited grandkids, ages 5-10, came to spend three solid days with us. We meet them half-way from where six of them live and then drive them back again at the end, but there are three full days at our house. My theme this year was “A Wild and Crazy Time”! We did field trips, games, crafts, songs, food, and kid devotions.

In case you don’t know, Oma and Opa are Dutch and German words for grandma and grandpa. Other grandparents that do these camps call them Cousin’s Camp, Lake Camp, Grandma Camp, Grandma and Grandpa Camp, and Cabin Camp just to name a few! It’s a bit of work (to say the least), but worth the great memories!

Here’s a recap of what we did this year. Greater detail is given on some of the items by going to the link for those events.

Field Trips:

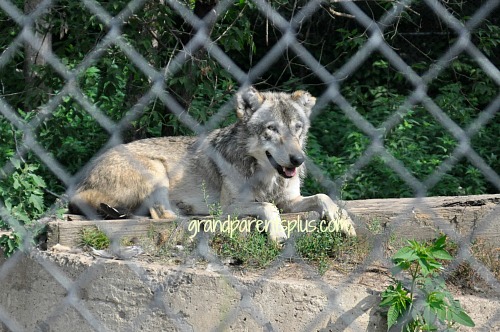
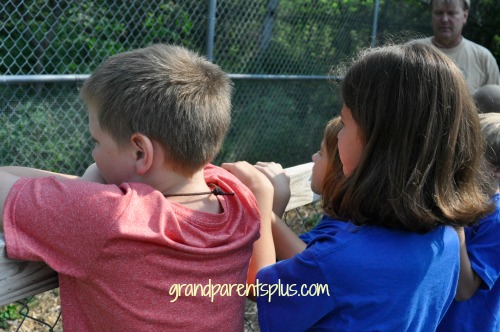
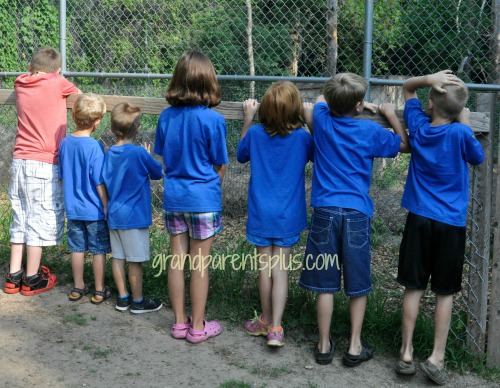
The theme “A Wild and Crazy Time” went with the two field trips that we took. The first one was to a Science Wildlife Center that had many different kinds of wolves. We had a private tour with just our group and they told us interesting things about the different animals that we saw. As we arrived, the wolves were all howling! Quite an eery sound. They had other animals there, too. We saw porcupines, puma, bobcat, bear, coyote, and fox. The grandkids were completely involved in learning about the animals. They  could see them so clearly as they were very close, yet in a very large fenced area. Our guide told great stories and facts about each animal!  So that was part of the “WILD” time.
Oma and Opa Camp 2014 grandparentsplus.com

Oma and Opa Camp 2014 grandparentsplus.com


Oma and Opa Camp 2014 grandparentsplus.com

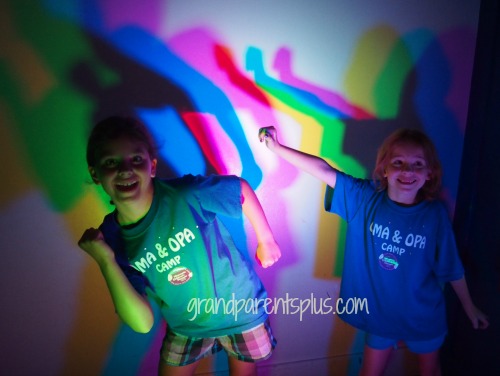
The “CRAZY” part of the field trips was to a Children’s Museum with so many hand-on things to do! They had been there a few years before and had requested that we do that again as they all loved it!
 

Oma and Opa Camp 2014 grandparentsplus.com

Experimenting with colors!


Games:

An easy indoor game that the kids had fun doing was the Crazy Ping Pong Ball Game! They stopped and played it when they wanted. It was a game where even the little kids were successful. In fact, the youngest had the highest score!
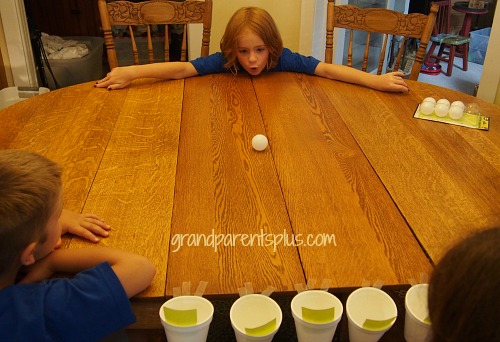
Oma and Opa Camp 2014 grandparentsplus.com

The game that was so much fun was the Summer Hockey Game! They loved it! They played it for 2 days. I had some other games planned, but this was enjoyed by all so I just saved the other games for another year.
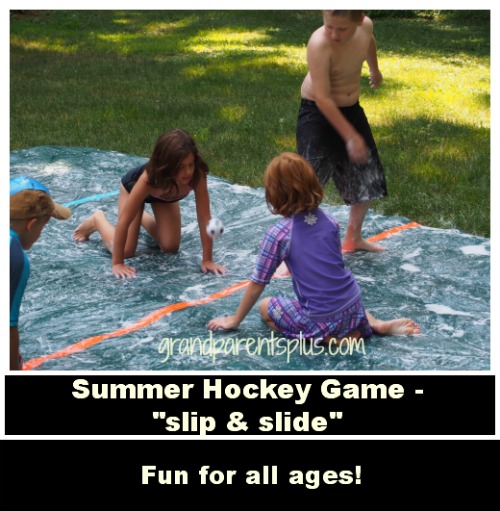
Oma and Opa Camp 2014 grandparentsplus.com

Go to Summer Hockey Game for complete instructions and rules!
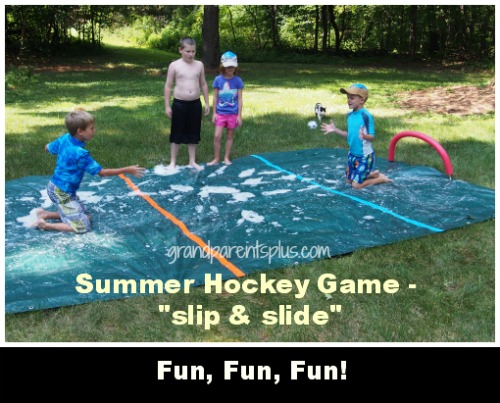
Oma and Opa Camp 2014 grandparentsplus.com

Food:

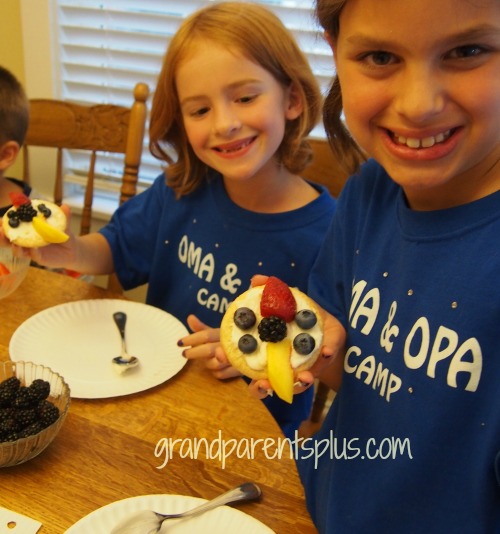
I asked the kids to choose one food that we had made at any other Oma and Opa Camp that they wanted to repeat. There were three things they wanted to do again: omelets in a bag, cactus juice and campfire sandwiches. We had all three requests and then had a fun, “crazy pizza night”! This included three pizzas that they made themselves. One was a pizza from a Grand Biscuit, a veggie pizza from a Crescent Roll (topped with their favorite veggies), and a dessert pizza from a sugar cookie.

For the Grand Biscuit pizza, just roll or pat the biscuit flat into a 5-6 inch circle. Do this on a piece of parchment marked with their name. That way, they can tell which one is their pizza! Add toppings of their choice. Bake on a pan according to the Grand Biscuit directions.
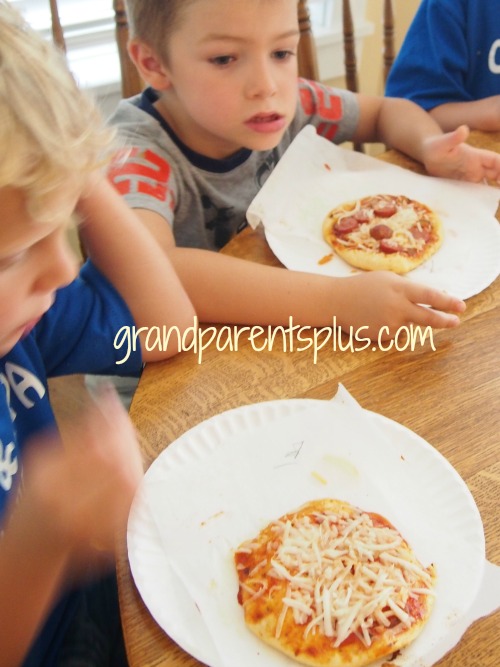
Oma and Opa Camp 2014 grandparentsplus.com

Waiting for the pizza to cool down! Grand biscuit pizzas!

They also made veggie pizzas out of crescent rolls. They patted the rolls into a circle. We baked them and then put Ranch dressing on top and covered it with grated carrots, chopped broccoli, and cauliflower for the vegetable course!

Dessert pizza was made with sugar cookies iced with a sweetened cream cheese and topped with all sorts of fresh fruit!
Oma and Opa Camp 2014 grandparentsplus.com


Crafts:

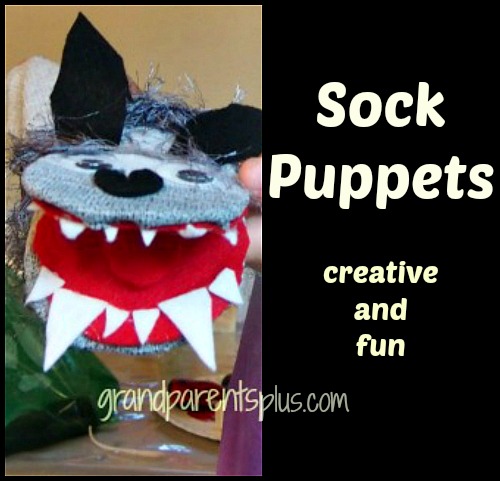
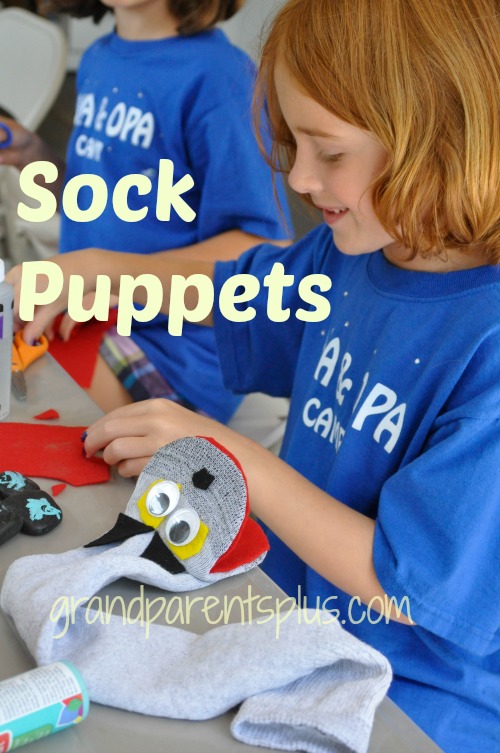
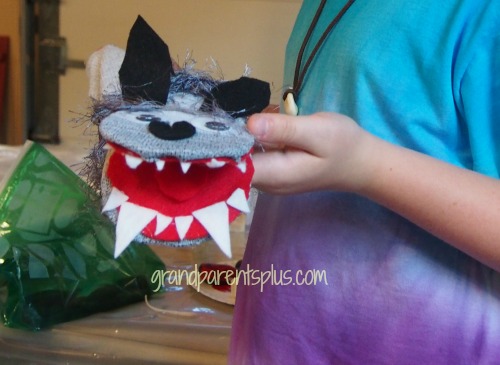
To go along with the “Wild” theme, the kids made wolf sock puppets. Complete directions are found on the sock puppets post. All ages enjoyed making them. They were very creative in putting them together!
Sock Puppets grandparentsplus.com


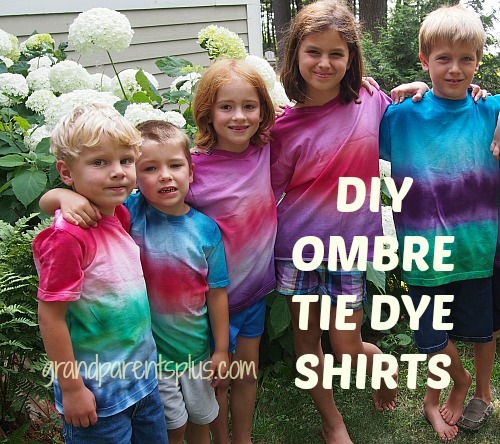
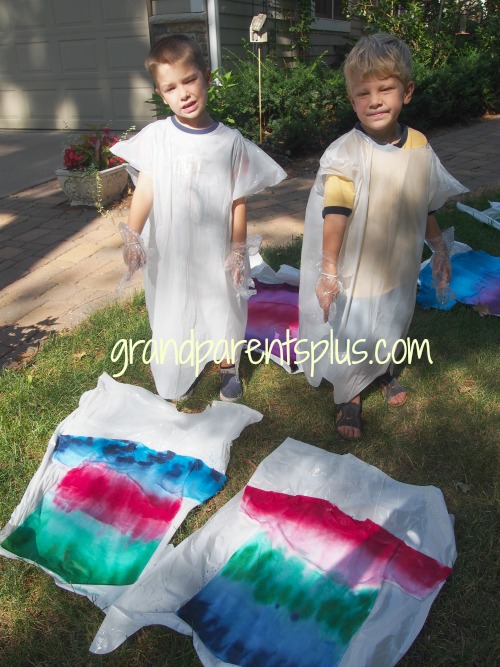
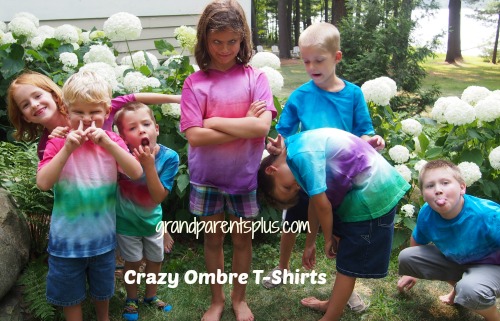
The “Crazy Craft” was the T-Shirts. They chose three colors and we made DIY Ombre Tie Dye Shirts! Wow!  They turned out great! I would buy one of these in the store! It was “crazy” how each color blended into the other! They loved them!

They are modeling their t-shirts in a “crazy” way!
Oma and Opa Camp 2014 grandparentsplus.com

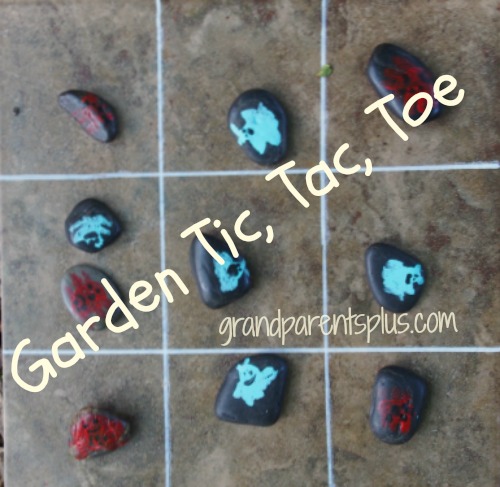
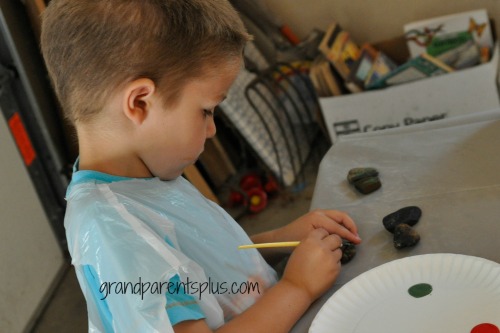
The last craft we made was the Outdoor Garden Tic-Tac-Toe Game. This was so inexpensive to make. Rocks are free or almost if you buy a bag at the Dollar Tree. The paint and spray I had on hand and the tiles were 99 cents! When they brought them home, they placed them in the landscape or play area somewhere in their yard. They’re always ready for a quick, crazy game! Go to Outdoor Garden Tic-Tac-Toe Game for complete directions.
Garden Tic, Tac, Toe Game grandparentsplus.com


Songs:

I used the CD from Standard’s Jungle Safari VBS. The song they liked the best was “I Can Count on God”.


Devotions:

The books called, “Character Sketches” give great lessons on wild animals and their characteristics. The author takes those characteristics of the animals to illustrate Christian characteristics that God wants for our own lives.  Scripture is used to highlight Bible stories that illustrate that particular Christian character. The books are out of print, but available if you search online. They are great for ages 6-12.

I focused on two characteristics.  The first was FOCUS! The wolf and opossum were the wild creatures and we used the phrase “Don’t let others sway you from doing what God wants you to do- stay focused!” The second characteristic was LOYALTY! “God wants us to be loyal to our friends and family”! The two wild creatures that illustrated this were the goose and Great Horned Owl.

The books are very detailed so I paraphrased much of the lesson rather than read it. They loved learning about the animals and  it was helpful to bring home the main theme of the lesson.

Picture Books:

After camp, I make an online picture book as a memory of Oma and Opa Camp 2014. It takes some time to put together, but it is worth it. About a month after Oma and Opa Camp, the books are done and sent to them. I always use a certain company as they give out coupons to make the cost affordable for 7 books! Here’s the reference code to register…http://www.artscow.com/?Ref=500841

While it is a lot of planning, I enjoy seeing the relationships grow with cousins. We have a lot of fun with them, but it does take a couple of days to rest and recover afterwards. Now, on to planning for next year!

Making special memories with grandchildren is important. Perhaps you can’t do a camp, but can do a day with some events. Your grandkids will love it!

Make memories and have fun!

Phyllis

You’re invited to subscribe on the sidebar so you don’t miss future posts!

Follow on Bloglovin and Pinterest, too!


This post is linked to many of the following parties…..


Posted in Kid's Camp, Oma and Opa Camp 2014 | Tagged , , , , , , , , , , , , , , , , , , , , , , | 7 Comments

DIY Ombre Tie Dye Shirts

I was wondering if kids ages 5-10 could handle doing DIY Ombre Tie Dye Shirts. I had a bit of apprehension about doing this with younger kids, but it was highly successful! I’ll show you some tricks about how to organize it and do it without a huge mess! There still is time to do this before the nice weather ends!
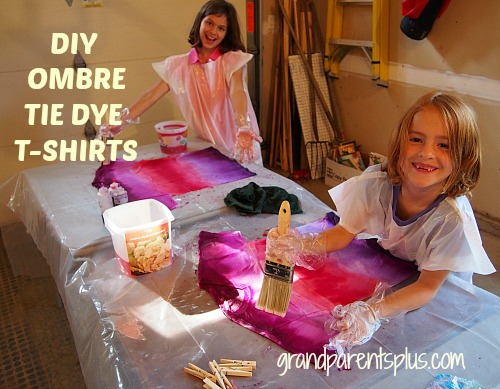
DIY Ombre Tie Dye T-Shirts  grandparentsplus.com

It is possible to do it outside, but I didn’t want to chance the wind, possible rain and bug factor. I set up the garage as our workshop. On the floor, I put a tarp. On top of the tarp went three card tables which I covered in plastic. I had three work areas and placed a plastic kitchen garbage bag at each place. On top of the bags went the damp t-shirts.

With more kitchen-sized garbage bags, I cut a hole for their head and two arm holes and pulled it over them so dye didn’t get on them or their clothes. It worked great! Between the work areas went a plastic container for the water and brushes.

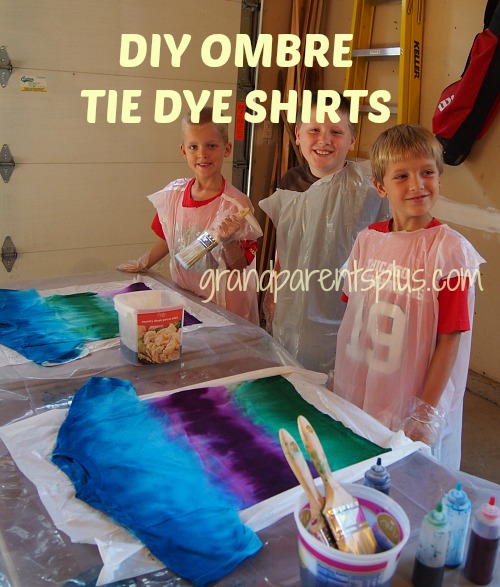
DIY Ombre Tie Dye T-Shirts  grandparentsplus.com

With the kits came plastic gloves, rubber bands, and the dye. I used the Tulip brand dye. (I am not compensated for this post) The gloves were huge for the kids so I put a rubber band around the wrist of the gloves to hold them on. It worked well! I watched the video on  ILovetoCreate   for instructions on just what to do for making the DIY Ombre Tie Dye Shirts. I  had the kids watch it before they started so they could see just what to do, too. The girls picked 3 colors and the boys picked 3 colors. In that way, I wasn’t wasting a color for just one shirt.

Once the dye was mixed according to directions, the fun began. I applied the dye for the younger kids and they spread it with the wet brushes. The older kids were able to do more for themselves.  Just remember to hold the opened end closed with one finger until you get to the area that you want the dye. It tends to leak out quickly when it is slightly tilted.

DIY Ombre Tie Dye Shirts  grandparentsplus.com

When they finished the shirts, it was easy to transfer to a drying area. By two people each taking an end of the garbage bag with the shirt on it, it was easy to move outside or to a special drying area.  No need to do the back side as both sides absorb the dye. Remember, the shirt is very wet with dye and it takes a while to dry. The wait is worth it!

DIY Ombre Tie Dye Shirts  grandparentsplus.com

 Yes, with some organization, younger kids can do this project.  They were so proud of how it turned out! It was as nice as any shirt you would buy at a store.

Summer is ending, but tuck this idea away for future use or quickly do it on a nice fall day! This is one of the crafts that we did at our Oma and Opa Camp 2014. Watch for the entire camp post coming soon!

Have fun!

Phyllis

You may want to subscribe so you don’t miss future posts…..

Follow on Pinterest and Bloglovin, too! (see sidebar)


This post linked to many of the following parties……


Posted in Crafts, T-Shirt Ideas | Tagged , , , , , | 11 Comments

Garden Tic-Tac-Toe Game

On the spur of the moment, stop to play a Garden Tic-Tac-Toe Game! Placed in an outdoor space,  you’ve got a moment of fun ready anytime. This craft is easy, inexpensive, and kids enjoy making and playing it!

Garden Tic, Tac, Toe grandparentsplus.com

Materials Needed:

1 – 12  inch tile (I bought them at Menards for $.99!)

10 rocks per game (You can collect them or buy a bag at the Dollar Tree)

Acrylic Paint, small brushes, spray varnish or acrylic sealer

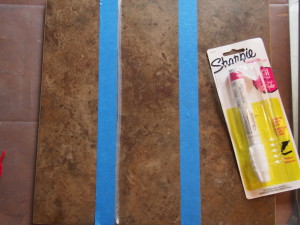
Sharpie – oil based paint – purchased at Home Depot or use acrylic paint and seal it.

Blue Painter’s Tape


First, tape the 12 inch tile into three 4 inch sections.  Do one direction at a time.(I taped this ahead of time.) Make it so they always paint with the Sharpie on the same side of the tape. It is less confusing!

Garden Tic, Tac, Toe Game  grandparentsplus.com

When dry, move the tape to the other direction and paint again following the taped line.

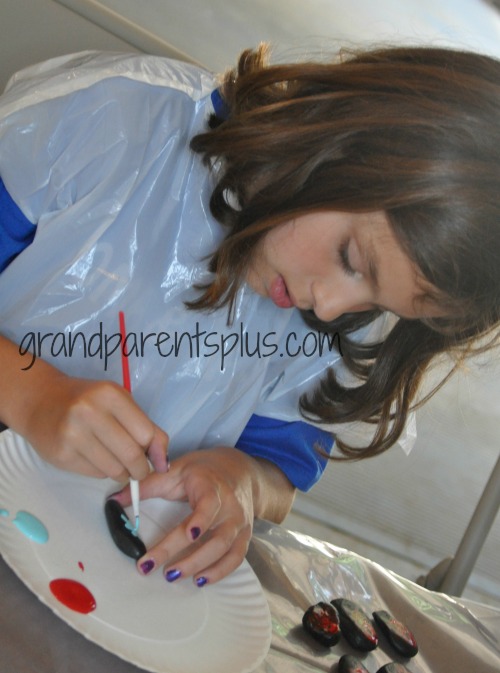
Next, while waiting for the lines to dry, paint the rocks. They can paint an image, make a face, flower,bee, etc. or just paint them any color. Five rocks are one image or color and the other five are another image or color.

Garden Tic, Tac, Toe Game   grandparentsplus.com


Garden Tic, Tac, Toe Game  grandparentsplus.com

Seal rocks with an acrylic sealer. An adult needs to do this part in a well ventilated area.

Place in a garden or part of a landscaped area where you can stop and play a quick game!

This Garden Tic-Tac-Toe Game was one of the crafts that we made at our Oma and Opa Camp 2014. Watch for the complete Oma and Opa Camp post coming soon.

Enjoy!

Phyllis

For this and more ideas, you may want to subscribe on the sidebar!

Follow on Pinterest and Bloglovin, too!


This post is linked to many of the following parties…….


Posted in Crafts, Games | Tagged , , , , , , , , , | 6 Comments

Sock Puppets

Sock puppets are fun and easy to make. Kids get to express their creativity with unique features. The puppets can look like an animal, alien, person or whatever! It is anything they want it to be. After making them, they can create a puppet show using their creations. The creativity doesn’t stop!

Sock Puppets  grandparentsplus.com

You know the socks that get eaten by the dryer? This is a good use for those orphan socks left over. I wanted grey ones (for wolves), but any color or size will do.

Materials for Sock Puppets:

Socks (any kind or color)

Scissors

Tacky Glue or Glue Gun

Felt – various colors

Tag Board or cardboard from a cereal box

Google Eyes

Yarn – for fur, hair, etc.

Plus any additional items you may have for fun creations!  (pipe cleaners?)


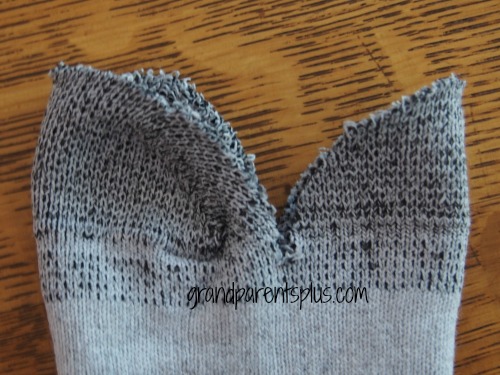
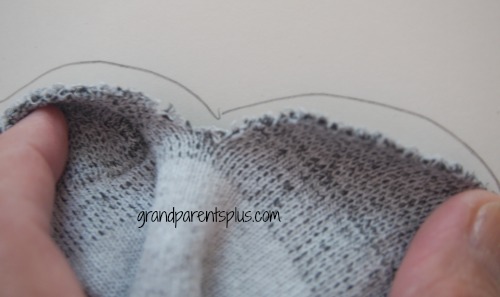
 First, fold the sock sideways and cut a mouth opening.


sock puppets  grandparentsplus.com


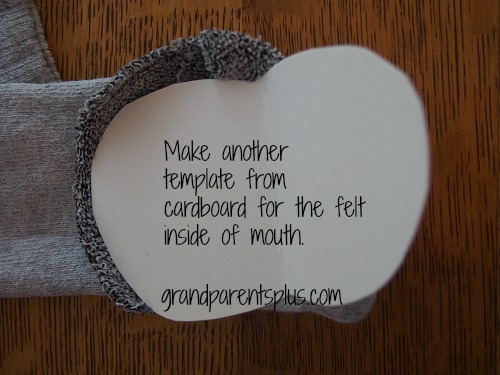
Next, trace the mouth opening on a piece of tag board and fold in half so that it opens like a mouth. If the socks are all the same size, just use the same pattern. Save the pattern for cutting out the felt mouth.

Sock Puppets  grandparentsplus.com


Sock Puppets   grandparentsplus.com


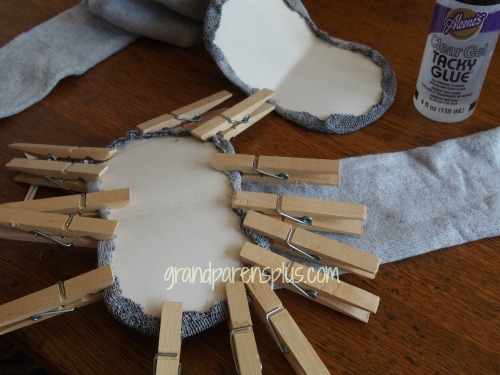
Glue the tag board to the sock. If using tacky glue, you’ll need to use clothespins to hold in place to dry. I did the tacky glue first and then found it was quicker to just use the glue gun.

Sock Puppets   grandparentsplus.com

I did the first  steps ahead of time for my grandkids and they took it from this point to adding the rest.

Now, use the pattern for the mouth opening to trace the inside of the mouth out of felt.  (Let kids choose which color they want for the inside of the mouth.)

Glue the felt cut-out inside the mouth. Trim any overlapping edges.

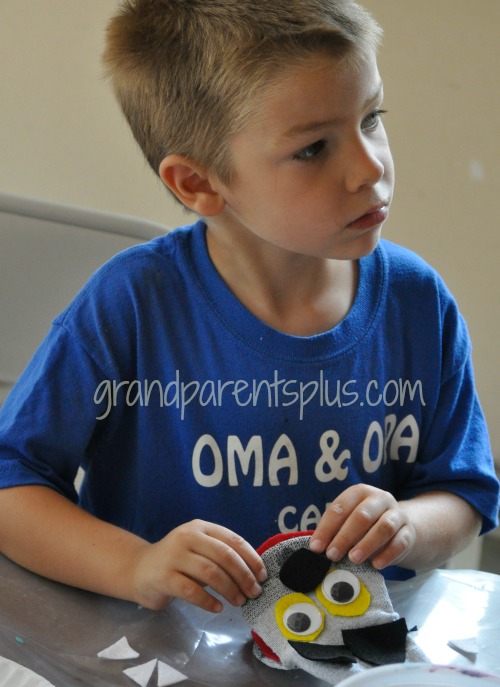
Add tongue, teeth, eyes, nose, ears, hair, fur, hats or whatever they come up with to make it their own.

Sock Puppets  grandparentsplus.com

Sock Puppets   grandparentsplus.com

They loved making them and  each one turned out great!

Sock Puppets   grandparentsplus.com

Hint: The cheaper and thinner the felt, the easier it is to cut! Also, it helps to have a few cardboard templates of circles for them to trace for eyes, etc.

While we made wolves, which went with our Oma and Opa Camp theme, this project is adaptable for any character, insect, or animal.

Read a children’s book and then create the sock puppet characters in that story. Now, you get the idea so let kids go with their own creative ideas!

Watch for the entire post of Oma and Opa Camp with all our activities coming soon!

Enjoy!

Phyllis

Subscribe on the sidebar so you don’t miss future posts!

Follow on Pinterest and Bloglovin, too!

This post is linked to many of the following parties…..


Posted in Art Project, Crafts | Tagged , , , , , , , , | 18 Comments