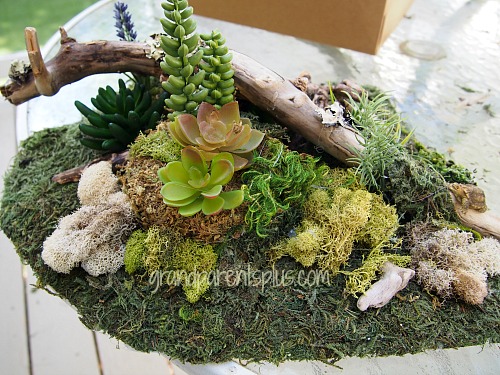
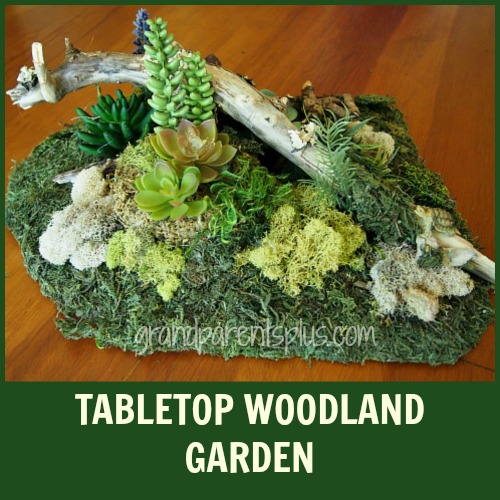
Tabletop Woodland Garden (no maintenance)

When I saw the article on a Tabletop Woodland Garden in the May 2004 of my Country Gardens magazine, I knew this was something I wanted to try making. There’s one difference, however. Their garden needed watering and mine doesn’t! I didn’t want to mess with watering little miniature plants and besides the artificial succulents look real anyway. I figured I would try to make mine no-maintenance! Then, when we go on vacation, I don’t have to worry about watering these little plants!

Tabletop Woodland Garden   grandparentsplus.com

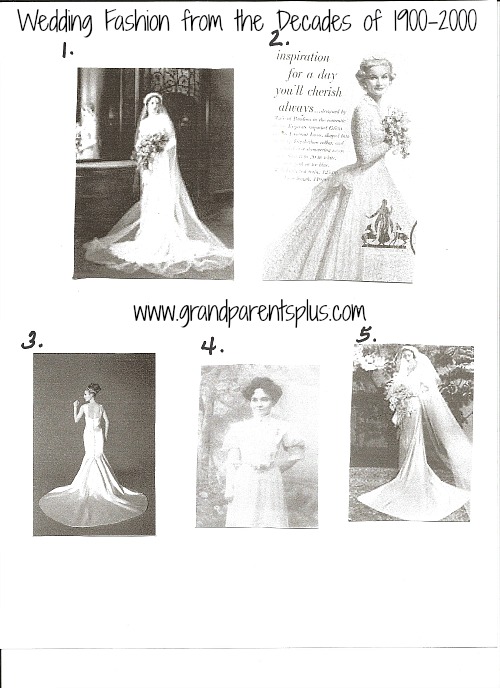
Here’s my inspiration article from Country Gardens (May) 2004

Tabletop Woodland Garden  grandparentsplus.com


The Tabletop Woodland Garden looks like a miniature peek into the deep woods. It’s fun to discover lichen covered wood, various types of moss, and small plants tucked into little nooks and crannies. The interesting nature display invites close-up looks for sure!

Materials Needed:

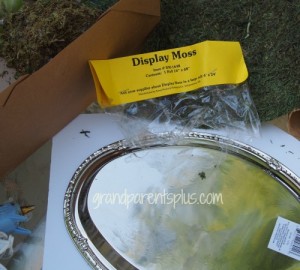
Tray ( This was their suggestion, but I found this wasn’t needed as you can duplicate various heights with layers of cardboard or poster board. Because my version didn’t need watering, the tray wasn’t necessary for protection. The tray pictured was from the Dollar Tree. Because I had it, I used it anyway for a layer of height.)

Poster Board, scrap wood pieces, styrofoam balls, etc.

Moss Collection  (found at Michael’s) this had various kinds of moss and lichens

Decor Naturals (found at Dollar Tree)

Spanish Moss ( found at Dollar Tree)

Miniature accessories – turtle, small pinecones, seedpods, pieces of wood, rocks, etc.

Glue Gun

Small artificial plants…   succulents, ferns, etc.  Small pieces of artificial plants cut from larger ones.

With these supplies, you have more than enough for more than one Tabletop Woodland Garden.

Tabletop Woodland Garden  grandparentsplus.com

OLYMPUS DIGITAL CAMERA

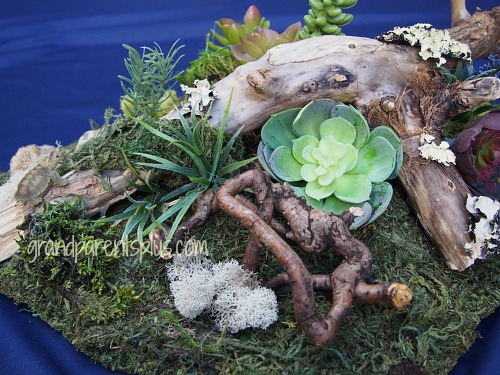
When I first thought of doing this project, I asked my grandson to search for some interesting pieces of wood that I might be able to use. He found my main piece of driftwood. Besides the driftwood, he found the interesting tangle of wood or roots. How excited I was that he found them! They were perfect!

Directions:

Work on this project outside. You’ll have lots of debris so make it easy by working outdoors on a picnic table and let the wind clean it up!

Step 1

I covered the base (included the upside down tray) with the display moss and glued it to the items. Cover a piece of styrofoam or small cardboard box for a  small  “hill” to vary the different levels of the base.


Step 2

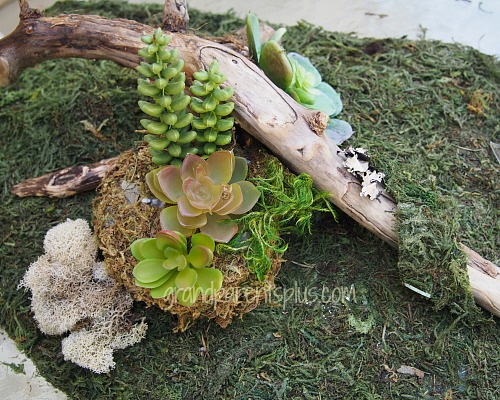
Next, I started placing the various items on the base. I didn’t glue them until I  liked  their placement. Add lichens on the wood and a moss strip on the wood piece (cut from the sheet of display moss). Notice the  piece of styrofoam with Spanish moss to make a small mound to vary heights. Keep building and adding until you like the finished product….

Tabletop Woodland Garden  grandparentsplus.com

OLYMPUS DIGITAL CAMERA OLYMPUS DIGITAL CAMERA OLYMPUS DIGITAL CAMERA

Step 3

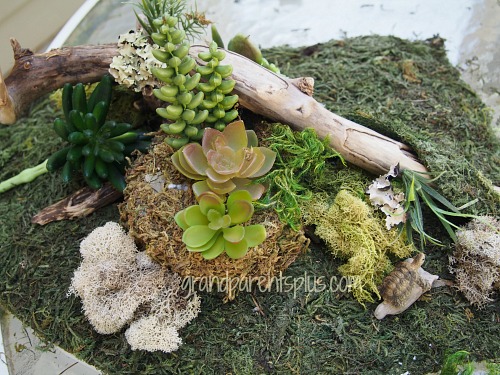
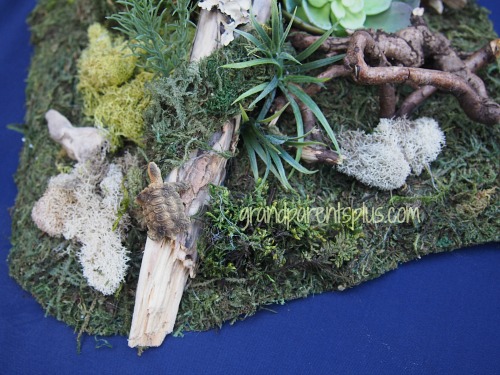
Add miniature cones, seeds, etc. and a cute turtle or mushroom. (still looking for a small mushroom)  Now, one last check just to see if it looks interesting from all angles! Notice the little turtle climbing up the driftwood?


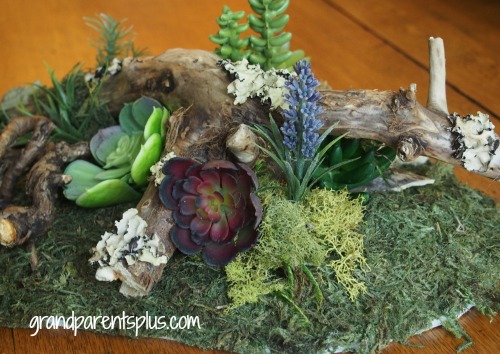
When satisfied, check all views from front, side and back.

Back view……

Tabletop Woodland Garden  grandparentsplus.com

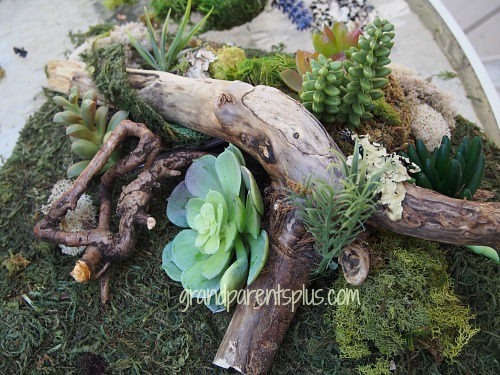
Side view……. Tabletop Woodland Garden   grandparentsplus.com


Interesting from all sides!

Tabletop Woodland Garden  grandparentsplus.com

This craft is nature inspired for indoor enjoyment. It will last a long time with no upkeep or watering!  Each one you make will be entirely different.

Tabletop Woodland Garden   grandparentsplus.com

Now, I’m still on the hunt for some small artificial mushrooms! I’ll add them later.

Start collecting those interesting driftwood pieces and other nature finds!

Enjoy and have fun creating!

Phyllis

Be sure to subscribe on the sidebar so you don’t miss future posts!

Follow on Pinterest and Bloglovin, too!

This post is linked to many of the following parties…..


Posted in Art Project, Crafts, Decor | Tagged , , , , , , , , , , | 26 Comments

Hosta Haven

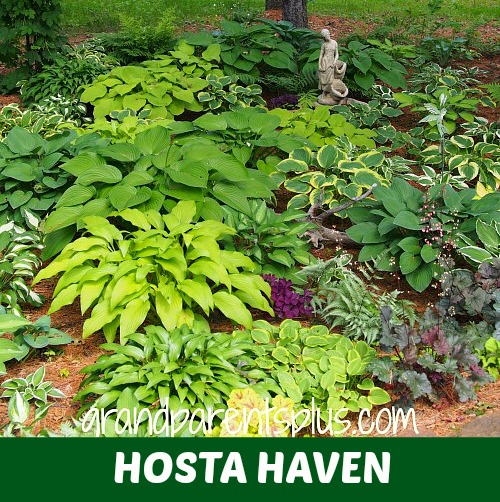
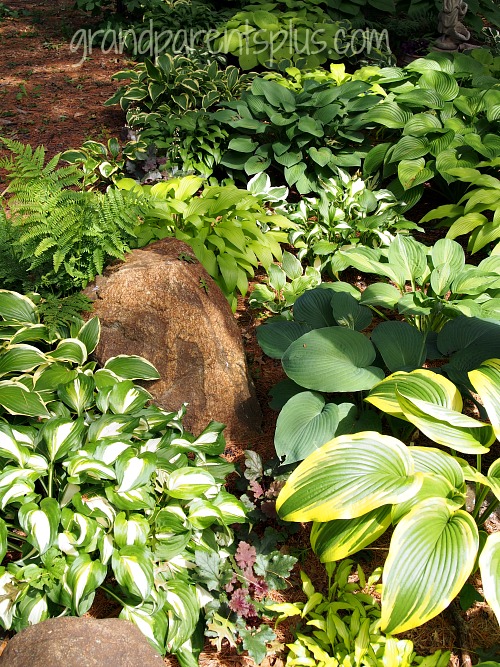
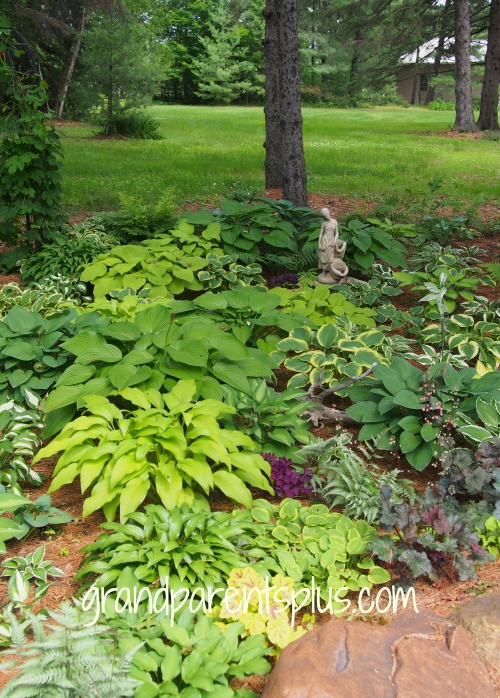
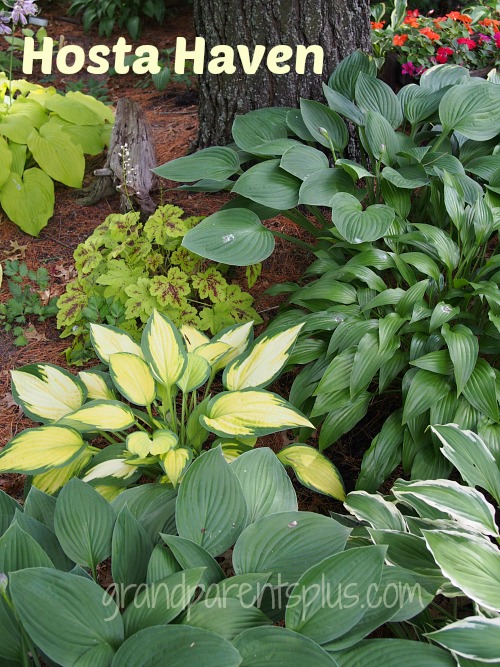
I enjoy sitting on my front porch in the morning gazing at my Hosta garden. I call it my little “Hosta Haven” as it is so relaxing with the multitude of textures and shades of green! There’s not much else I can grow in this spot between the pine trees. It is very shaded with lots of roots from all the trees. Pine needles, from the White Pines, create a needle bed under the plants. At first, I thought they would never grow in such soil, but they find a spot and thrive among all those gnarly roots! They’re tough and seem to like the acid pine needles!


Hosta Haven   grandparentsplus.com

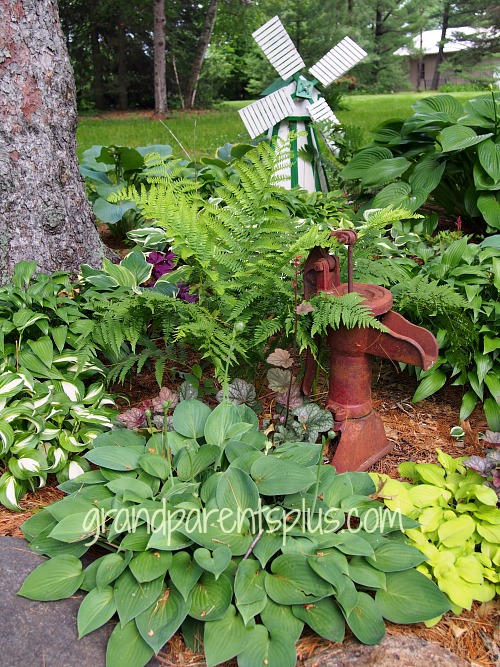
Scattered through the hosta are a few little pieces I’ve found to highlight the garden.  Of course, I have a windmill. Found it at a yard sale! Being of Dutch heritage, it fits perfectly!

My Hosta Haven grandparentsplus.com

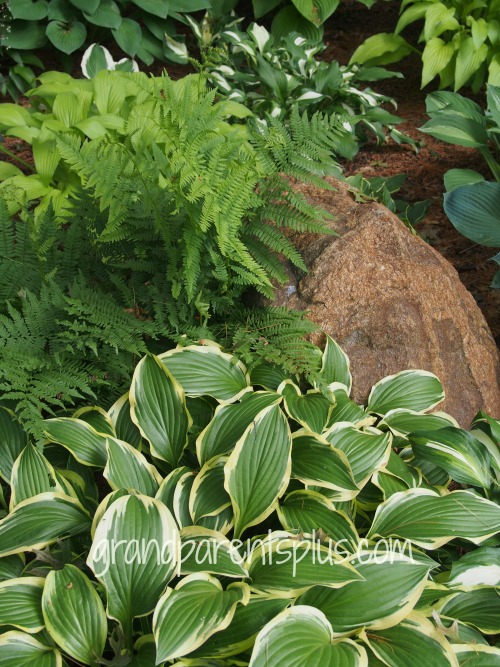
A few large rocks for interest….


My Hosta Haven   grandparentsplus.com


My Hosta Haven   grandparentsplus.com

The different shades of green change with the sun throughout the day.


My Hosta Haven   grandparentsplus.com

Each year it gets better and better as they mature and fill in little open spaces. Sprinkled in are Huchera, ferns, and a few other shade loving plants. I try to mix color, texture and size.

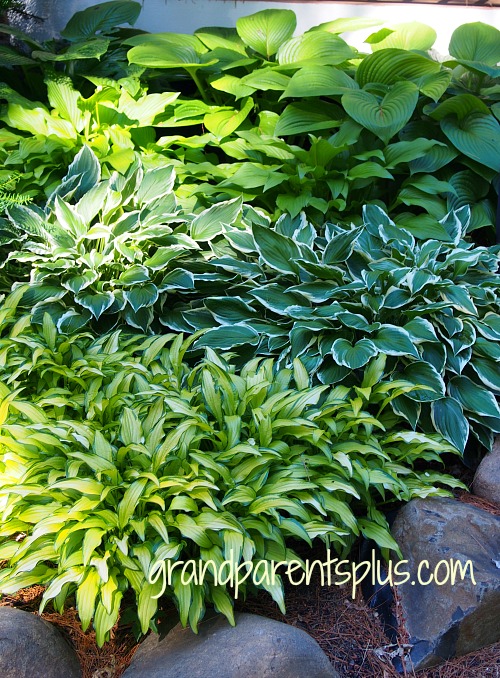
This grouping is right next to my front porch. I like the gradual decrease of sizes. The large hosta in back are Montana, next is Chiquita, Christmas Tree and finally Kabitan.

Hosta Haven   grandparentsplus.com

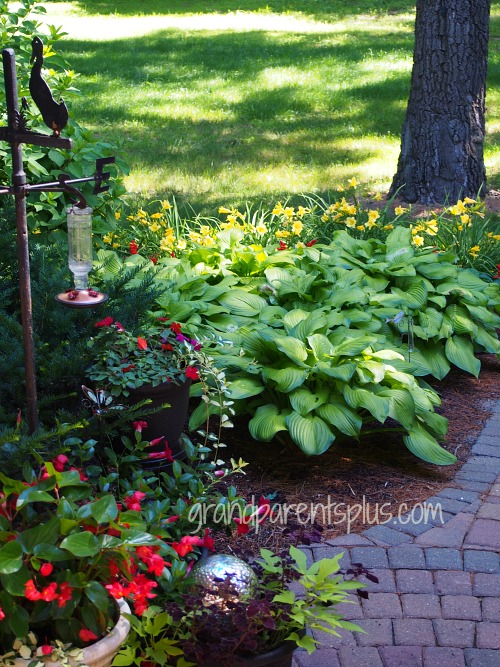
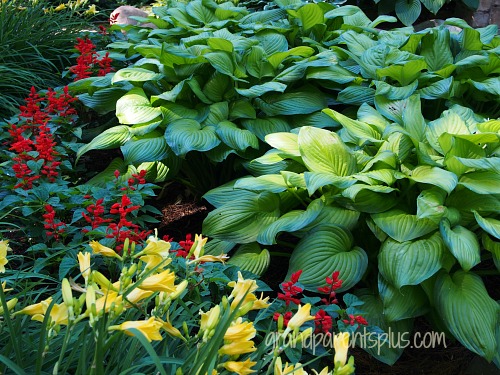
From the front porch, there are Guacamole Hosta, Red Salvia and Stella-de-Oro Daylillies .


Hosta Haven   grandparentsplus.com

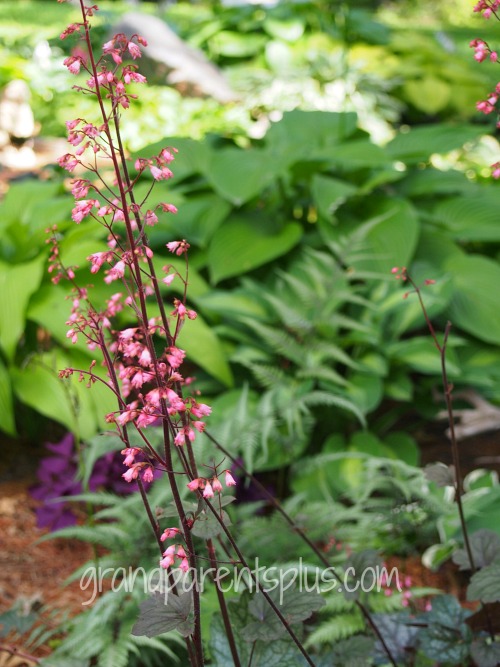
Coral bells, so delicate, against the hosta.

Hosta Haven   grandparentsplus.com

Hosta Haven   grandparentsplus.com


Hosta Haven  grandparentsplus.com


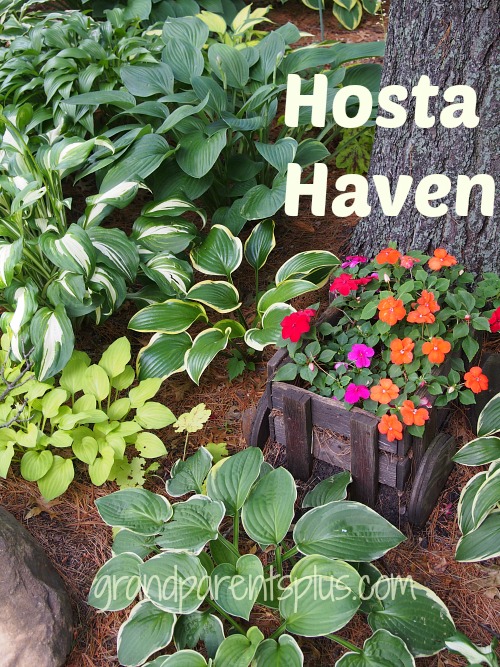
Throwing in a bit of color, with Impatients planted in a little cart, gives a striking contrast. Hosta Haven   grandparentsplus.com

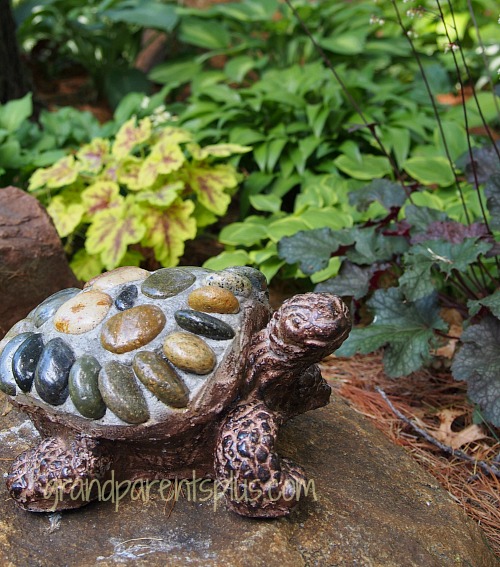
Even my little turtle enjoys the view!


Hosta Haven   grandparentsplus.com

I like to divide my plants in the Spring just as they are coming up. That way, they never look like they’ve been touched. It is hard to distinguish one from another so in the fall, I place a red plastic knife beside the plants I intend to divide and write the name of the plant on the knife (both top and bottom). In the spring, I know exactly which ones to divide and what variety I have!

Hope you enjoyed my “Hosta Haven” tour. I have some hosta around a tree in the back, but this year the deer ate them all! I didn’t get my Coyote Urine ( yes, gross!) deterrent on fast enough! Ugh!

How is your garden growing?

Phyllis

By subscribing on the sidebar, you won’t miss future posts! Thanks!

Follow on Pinterest and Bloglovin, too!


This post is linked to many of the following parties…..



Posted in Decor, Misc. | Tagged , , , , , , , , , | 37 Comments

Flower Arranging Using Hosta Leaves


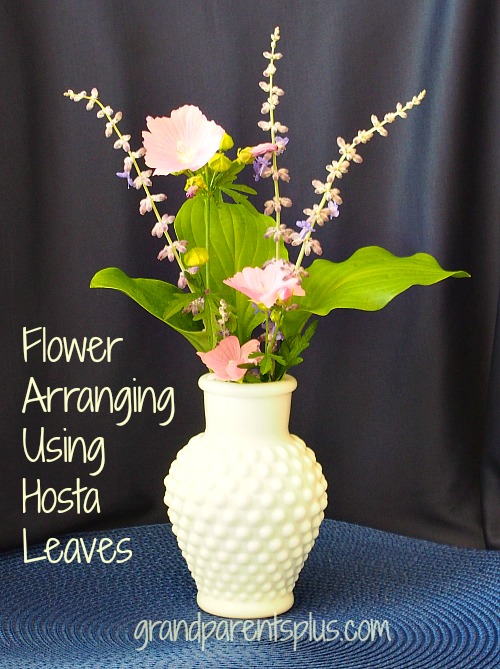
With an abundance of garden flowers this time of year, think of using hosta leaves along with your fresh flower arrangements to give more dimension, color, and texture. Fresh flowers from the garden sometimes don’t have enough leaves to compliment them in an arrangement (especially Asiatic Lilies). Combining them with hosta leaves gives you lots of dramatic possibilities.

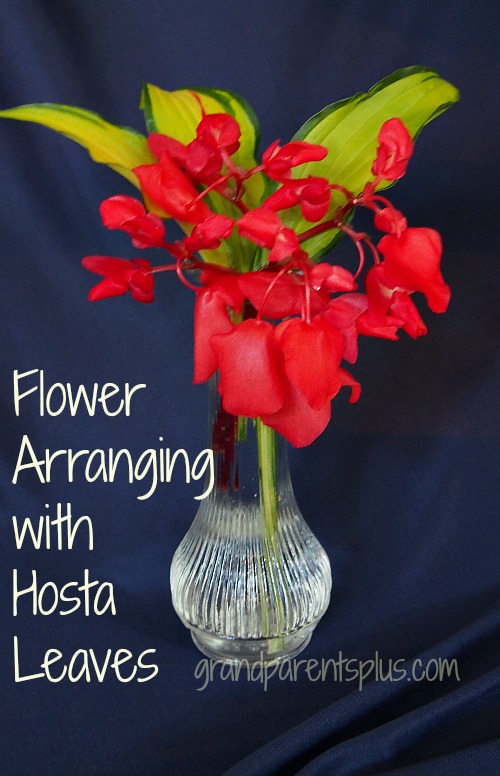
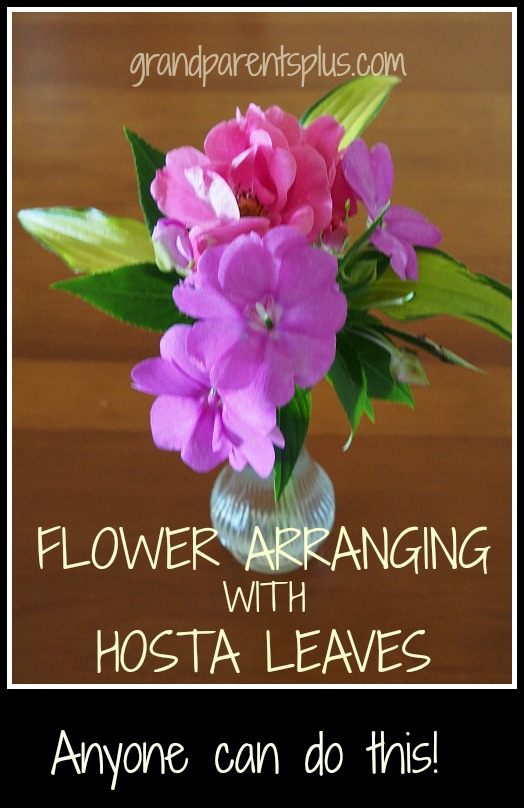
This little vase has Angel Winged Red Begonia along with Kabitan Hosta Leaves. It makes a striking color combination.

Flower Arranging using Hosta Leaves   grandparentsplus.com

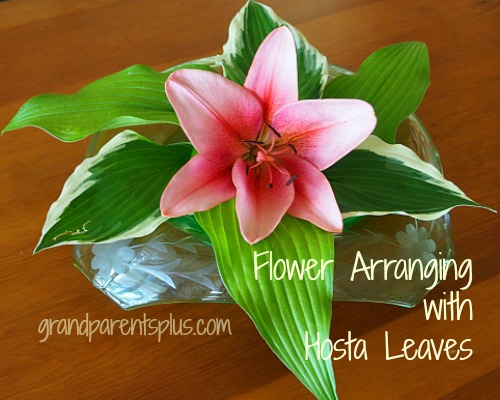
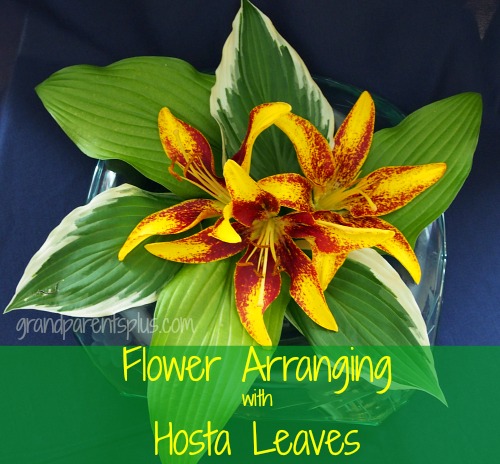
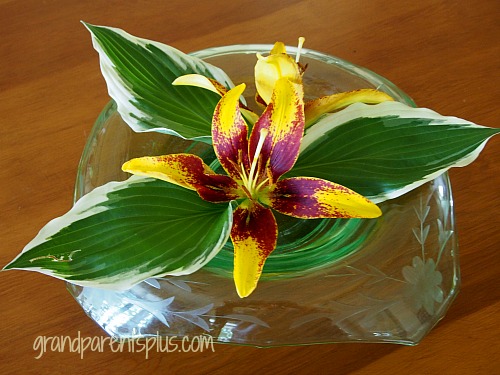
Another idea is using a shallow glass bowl and adding water. Now, float lilies on top of hosta.  Asiatic lilies have spike leaves that don’t work in an arrangement, but these leaves look beautiful with the lilies! I used a combination of Christmas Tree and Chiquita Hosta.

Flower Arranging with Hosta Leaves   grandparentsplus.com


Flower Arranging with Hosta Leaves   grandparentsplus.com

I happen to have a green depression glass dish that I like to use to display flowers. This is such an easy arrangement to do!

Flower Arranging with Hosta Leaves   grandparentsplus.com

Try some climbing roses with Fanfare Impatients  – and, of course, some dramatic leaves!

Flower Arranging with Hosta Leaves  grandparentsplus.coml

This little arrangement uses Dark Victory leaves….

Flower Arranging Using Hosta Leaves   grandparentsplus.com


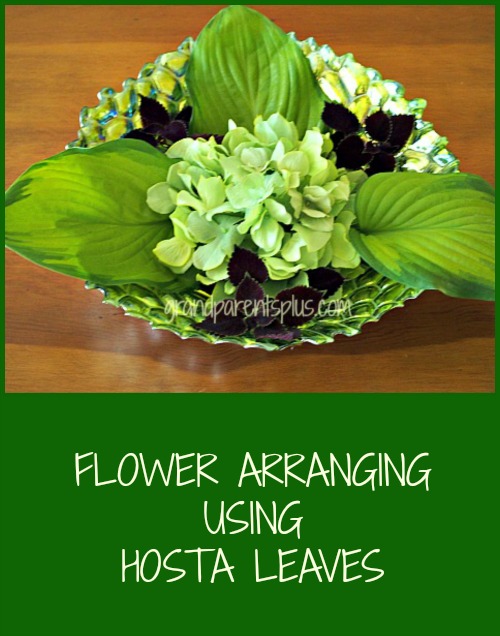
 These are Guacamole  leaves….

Flower Arranging Using Hosta Leaves   grandparentsplus.com

Don’t you think the hosta leaves add a great dimension to these arrangements? Have you used them in your flower arrangements? If not, try it!

Thanks for stopping by!

Enjoy!

Phyllis

Subscribe on the sidebar so you don’t miss future posts!

Follow on Bloglovin and Pinterest, too!

This post is linked to many of the following parties……


Posted in Decor | Tagged , , , , , , , , , , , | 9 Comments

Vintage Wrought Iron Table and Chairs Redo

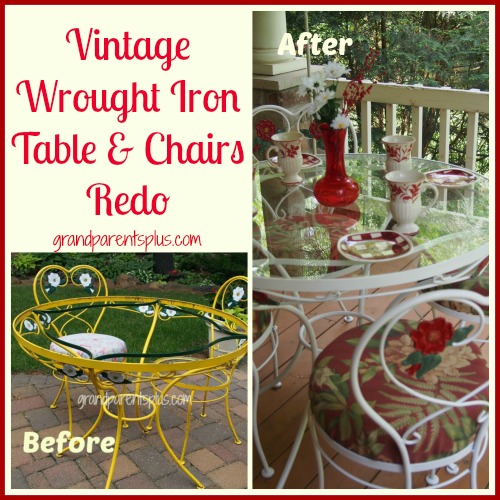
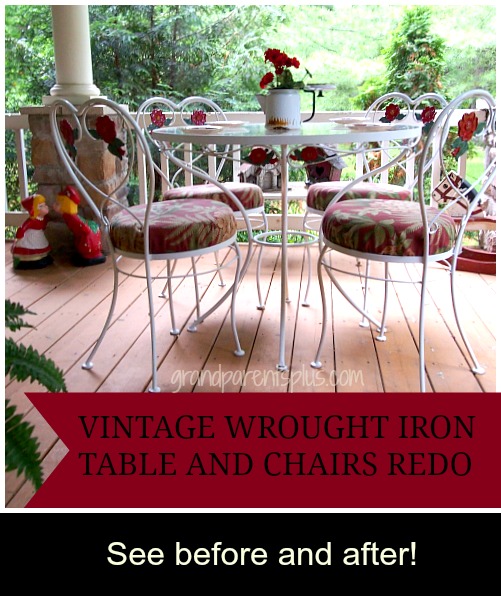
My Vintage Wrought Iron Table and Chairs Redo!

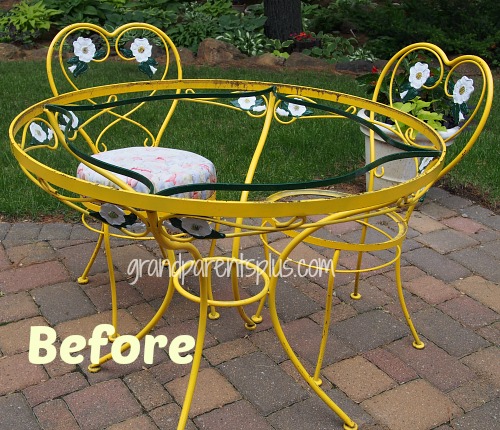
Last fall, the squirrels  (maybe raccoons – never caught the critters) chewed my white wicker set to pieces. I needed to find something to replace it for the front porch. I was on the hunt and found a unique set and decided to do a Vintage Wrought Iron Table and Chairs Redo to match the color scheme on the front porch.

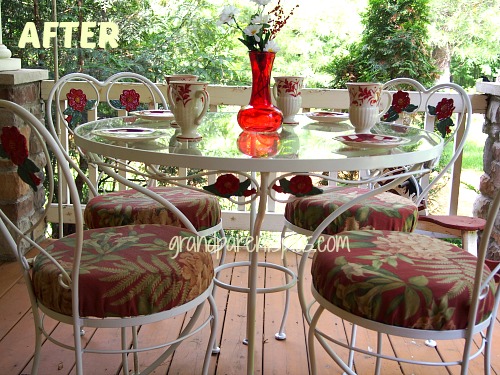
I knew that changing the colors was only a matter of paint. So after some effort, I now have a cute table & chairs set on my porch in red and white. It’s perfect for a lovely breakfast, snack, or just a glass of lemonade while watching the hummingbirds in my garden.

Vintage Wrought Iron Table and Chairs Redo grandparentsplus.com

Vintage Wrought Iron Table and Chairs Redo

Vintage Wrought Iron Table and Chairs Redo grandparentsplus.com

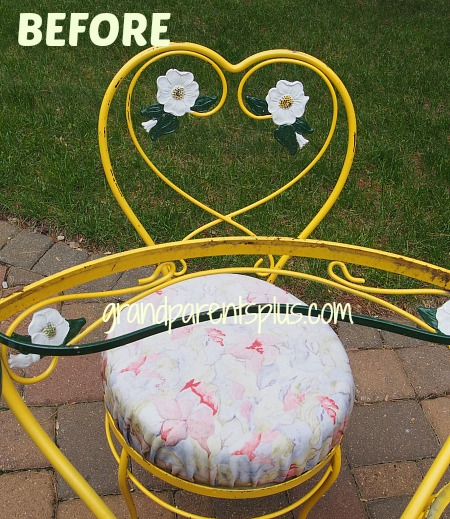
With spray paint in hand, the redo began! The yellow just didn’t go on my porch! I re-used the cushion fabric from the old wicker set to recover the chair pads.

Vintage Wrought Iron Table and Chairs…….. AFTER!

Vintage Wrought Iron Table and Chairs Redo grandparentsplus.com

Vintage Wrought Iron Table and Chairs Redo grandparentsplus.com

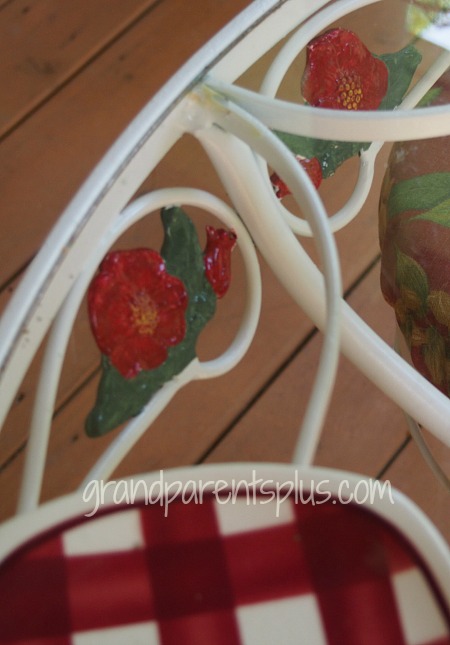
I love the detail that you see through the glass top!

Vintage Wrought Iron Table and Chairs Redo grandparentsplus.com


Vintage Wrought Iron Table and Chairs Redo grandparentsplus.com

I love my Red and White Vintage Wrought Iron Table and Chairs!

Vintage Wrought Iron Table and Chairs Redo grandparentsplus.com

 OK critters! Now, try to chew this one!

Thanks for stopping by and seeing my Vintage Wrought Iron Table and Chairs Redo project. My husband and I had dinner there the other night! Nice!

Phyllis

Subscribe on the sidebar for notifications of  future posts.

Follow on Pinterest or Bloglovin, too!


This post is linked to many of the following parties….


 Mod Vintage Life

Posted in Decor, Misc. | Tagged , , , , , | 39 Comments

Lemon Blueberry Pie

Perhaps my two favorite flavors are lemons and blueberries! This delightful Lemon Blueberry Pie combines those flavors so well that this pie pleases everyone!  With fresh blueberries in season, this pie is easy and delicious and perfect for a summer dessert! No need to heat up the oven on a hot day as this is a no-bake pie! I use an Oil Crust on my no-bake pies.  If you haven’t tried an Oil Crust, it is also a “no-brainer” as far as pie making goes! So don’t be afraid to try it! It’s very simple with no rolling the crust out! The crust is like working with Play-Doh! A graham cracker crust works, too, but I prefer the Oil Crust! Lemon Blueberry Pie grandparentsplus.com

Lemon Blueberry Pie:


Lemon Blueberry Pie
Recipe Type: Dessert
Prep time:
Total time:
Serves: 6
A wonderful light and delicious pie combining the flavors of lemon and blueberry.
Ingredients
  • 1 Oil crust (see below)
  • 1 cup sugar
  • 3 1/2 Tbsp. cornstarch
  • 1 cup milk
  • 3 beaten egg yolks
  • 1/4 cup butter
  • Zest of one lemon
  • 1/4 cup lemon juice
  • 8 oz. sour cream
  • 2 cups fresh blueberries
  • Heavy whipping cream for topping
Instructions
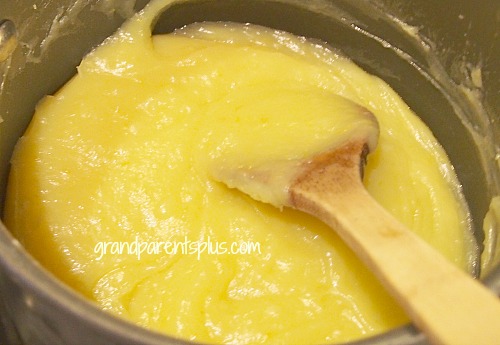
  1. In a saucepan, add sugar, cornstarch, milk, egg yolks, butter, and lemon zest.
  2. Cook and stir over medium heat until thick and bubbly.
  3. Cook and stir for 2 minutes more after it starts to get bubbly.
  4. Remove from heat and stir in lemon juice
  5. Cover and chill.
  6. When cooled, fold in sour cream and blueberries.
  7. Put in cooled crust and cover lightly with foil.
  8. Refrigerate for at least 3 hours.
  9. Serve with whip cream for topping.

Yum

Recipe for oil crust can be found on my post of Fresh Strawberry or Blueberry Pie (no-bake)

Remove from heat and stir in 1/4 c. fresh lemon juice. Cover and chill. Lemon Blueberry Pie grandparentsplus.com

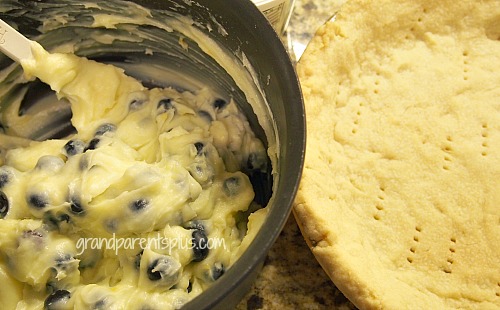
When  cooled, fold in 8 oz. sour cream and 2 cups blueberries Lemon Blueberry Pie grandparentsplus.com Put in cooled crust.  Cover lightly with foil.  Refrigerate for 3 hours. Lemon Blueberry Pie grandparentsplus.com Whip cream and serve on top with additional blueberries. Now, that’s a scrumptious pie!     Lemon Blueberry Pie grandparentsplus.com I know you’ll enjoy this Lemon Blueberry Pie recipe! My husband thought it was a real winner! Thanks to my cousin in Washington state that sent me this wonderful recipe! For the Oil Crust recipe go to: Fresh Blueberry and Strawberry Pie (no-bake)  

Enjoy!

Phyllis

Subscribe on the sidebar so you don’t miss future posts! Also, follow on Bloglovin and Pinterest! This post is linked to many of the following parties…..  

Posted in Pies, Recipes | Tagged , , , , , , , , , | 69 Comments

Corn Relish Dip – 1 minute recipe

Got a minute? Then you have enough time to make this delicious Corn Relish Dip! It makes a great appetizer for a party or just for a snack at home. You can make a little or a lot depending on how many you’re serving.  The ingredients are easy to have on hand, too!  The corn relish is usually zesty so this dip has a little bite to it! I’m not one for really spicy things, but I do like this dip! It will vary, a little, according to the product you find on your local grocery shelves.


Corn Relish Dip - 1 minute recipe!

I am in no way compensated for this post. The products I have pictured are ones that I’ve found available in my area. One is from a specialty shop and the other is available at my local grocery store.  Here are the ingredients…..


Corn Reish Dip - 1 minute recipe!


Ingredients:

Jar of Corn Relish (16 oz.)

8 oz. Sour Cream (regular, light, or fat-free)

Yup! That’s it!

Directions for the Corn Relish Dip:

For a complete jar (16 oz.), add 1 cup of sour cream and mix well.  If you want to make a small amount, just add the sour cream until it is a desired consistency that you like.  I told you this was quick and easy! See, it’s less than a minute!


Corn Relish Dip - 1 minute recipe!  grandparentsplus.com


Corn Relish Dip - 1 minute recipe   grandparentsplus.com

If the Corn Relish you are using is a little juicy, strain some of the liquid and add later, if needed. Both of the jars that I used were thick.  Now, enjoy a wonderful Corn Relish Dip and when your guests ask for the recipe, just send them my way! Tell them it is too complicated to remember! HA!

Enjoy!

Phyllis

It would be great to have you on board as a subscriber (sidebar of this post) so you don’t miss future posts!

This post is linked to many of the following parties……..

Posted in Recipes | Tagged , , , , , , , , , , , , , , | Leave a comment

Duck Themed Baby Shower

Duck Themed Baby Shower   grandparentsplus.com

Just recently, my sister and I hosted both a double baby shower and a bridal shower in one day. It is a tradition that we give each of our nieces a wedding shower and with their first baby, a baby shower. Not every family member lives in town. So with lots of family coming in town on one weekend, we decided to do a double baby shower and a wedding shower. We did everything on one day so people didn’t have to travel great distances again.  It was sort of a mini-reunion with baby shower, wedding shower and a big get-together that same night! WHEW! My sister was in charge of the first event and did a cute Duck Themed Baby Shower. I’ve posted the wedding shower that I was in change of doing. You may want to check it out, too!

The darling duck cake became the centerpiece for the table. It was a double baby shower for two of our nieces. One niece had a boy and one had a girl.

Duck Themed Baby Shower   grandparentsplus.com

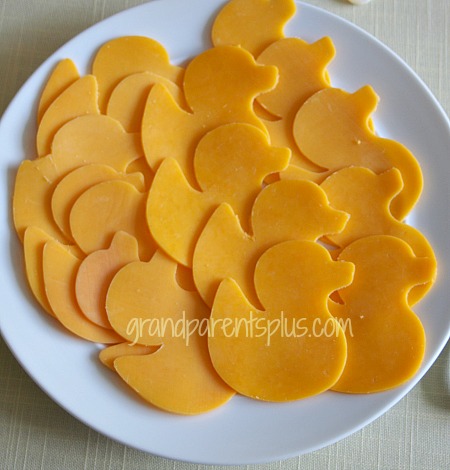
The Duck Themed Baby Shower was carried out in all different ways. Cheese slices cut with a cookie cutter looked cute on a plate! Very simple and easy to do.

Duck Themed Baby Shower  grandparentsplus.com

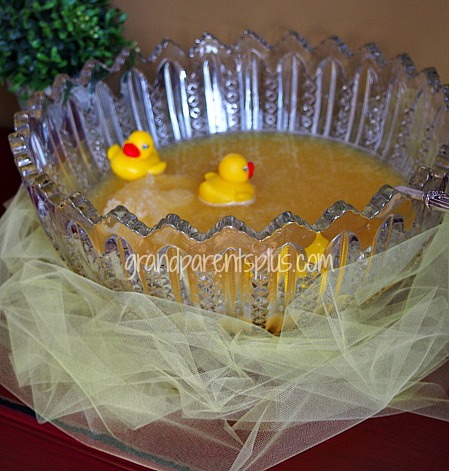
Ducks floated in the punch bowl…….

Duck Themed Baby Shower  grandparentsplus.com

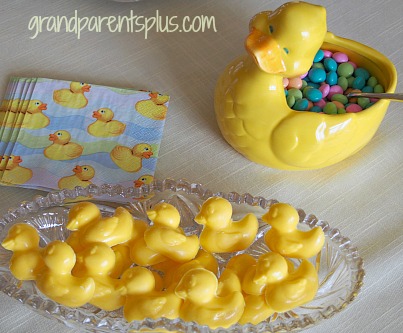
Yellow duck mints made from a mold, duck napkins and a whimsical duck with candies added to the theme!

Duck Themed Baby Shower

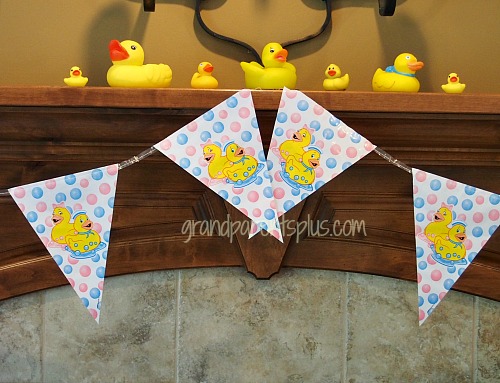
More duck themed decor…..


Duck Themed Baby Shower  grandparentsplus.com

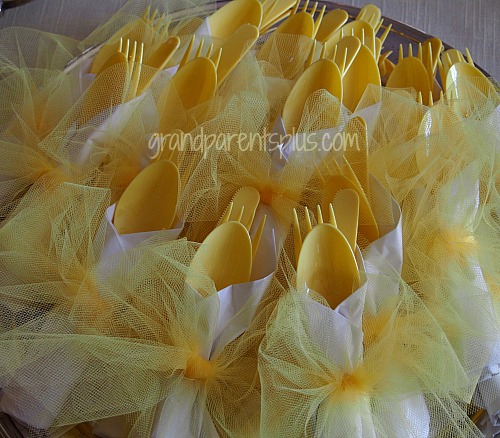
Knife, fork and spoon wrapped in the napkin and tied with yellow tulle added another decorative touch to the table.

Duck Themed Baby Shower grandparentsplus.com


Along with cake served, guests picked up a scoop of orange sherbet decorated with a little duck pick!


Duck Themed Baby Shower  grandparentsplu.coms

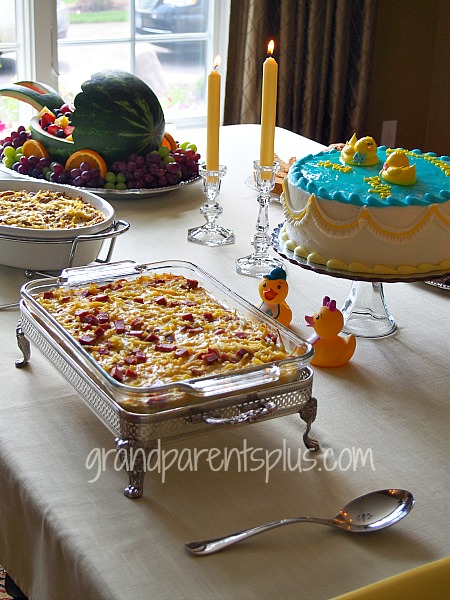
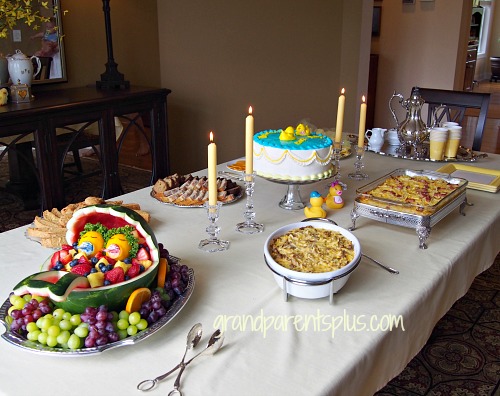
The serving table for the Duck Themed Baby Shower Brunch……

My sister made  two Amish Egg Bakes. One had Sausage and Mushrooms and the other was with ham!

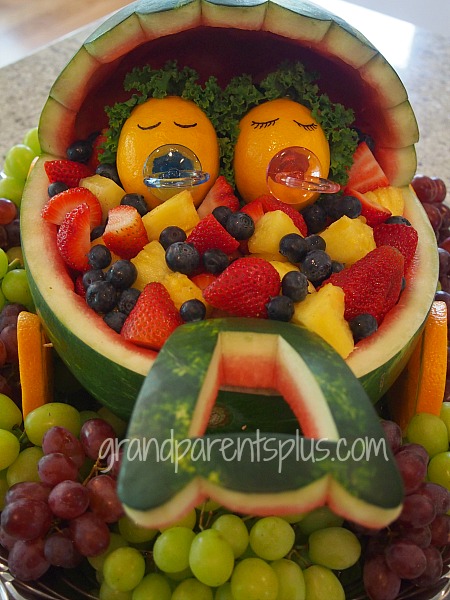
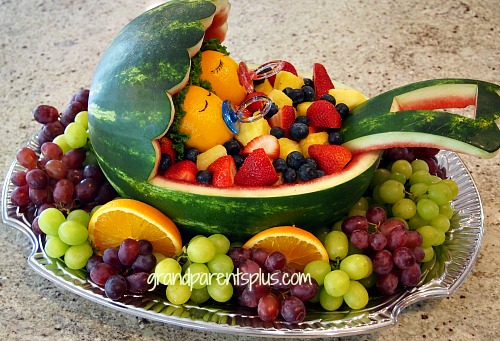
Notice the baby buggy with fruit?


Duck Themed Baby Shower  grandparentsplus.com

The complete menu included Amish Egg Bake (it was “yellow like a duck”), fresh fruit, Swedish Almond Rusks, assorted quick breads, cheese, cake, sherbet, duck candies, punch and coffee.

Duck Themed Baby Shower   grandparentsplus.com

I’m sure you’ve seen this idea for the baby buggy before, but I think my niece did an excellent job making this one. The babies are lemons with curly lettuce hair.

Duck Themed Baby Shower   grandparentsplus.com

Did you notice the difference between the boy and the girl? One has curly lashes and the other one doesn’t! So cute!

Duck Themed Baby Shower  grandparentsplus.com


We played a “Duck Game” using facts about ducks and their ducklings! The winner won a little duck flashlight key chain and a ” duck tape-measure”.  It is pretty easy to find lots of little duck themed items in stores.

 Many of these ideas certainly are adaptable for a young child’s birthday party, too!

Hope this gets your creative juices flowing!! Now, wasn’t this post just “ducky”?

Thanks for stopping by,


Phyllis

You may subscribe on the sidebar so you don’t miss future posts!

Follow on Pinterest and Bloglovin, too!


This post is linked to many of these parties……


Posted in Misc. | Tagged , , , , , , , , | Leave a comment

Wild Rice Chicken Salad

Wild Rice Chicken Salad is so healthy and good for you! Make this salad with all wild rice; not a combination. Wild rice is available canned, but I prefer to cook my own. It does take more time to cook than regular rice, but it’s worth the wait.

Wild Rice Chicken Salad grandparentsplus.com

In the Midwest, finding wild rice is easy. It comes in 1 pound bags. If you live elsewhere, it may be harder to find. If you have a friend in the Midwest, have them  send you some as this salad is so good! It is gluten-free, too!

There are two kinds of Wild Rice. One is a cultivated Wild Rice, grown in paddies, and has a dark color. There is , also, a wild rice that is naturally found growing in lakes. The Native Americans harvest it. It is lighter in color, takes less time to cook, and is fluffier. The real wild rice is harder to find.  I use the cultivated type of Wild Rice.

Wild Rice Chicken Salad Recipe:

Ahead of time, cook chicken and cube (enough for 3 cups or more) If you boil the chicken, add lots of spices to the water. Grilled chicken is also great!

Cook Wild Rice  – enough to make 3 cups

Combine the following…..

2/3 cup Mayo

1/3 cup milk

1 Tablespoon  lemon juice

1/4 tsp. crushed tarragon leaves

Mix and set aside


In a large bowl, combine:

3 cups of cubed, cooked chicken

3 cups of cooked, wild rice

1 (8 oz.) can of water chestnuts (sliced)

1/3  cup chopped green onions

1/8 tsp pepper

1/2 tsp salt

Blend in the mayo mixture and refrigerate for 3 hours or more.

Before serving, add 1/2 pound of sliced, green grapes and 1 cup of salted cashews.

If you like more crunch, you can add some chopped celery, too! However, the water chestnuts and cashews are enough for me! Wild Rice Chicken Salad   grandparentsplus.com


I served this Wild Rice Chicken Salad at a Bridal Shower recently. The guests loved it!


  Wild Rice Chicken Salad  grandparentsplus.com


Wild Rice Chicken Salad  grandparentsplus.com

This is one of my favorite salads! It’s so good!

Enjoy!

Phyllis


Love to have you subscribe to future posts on the sidebar…..

Follow on Pinterest and Bloglovin, too!

This post is linked to many of the following parties……

Posted in Recipes, Salads | Tagged , , , , , , , , , | 22 Comments

Bridal Shower Ideas

Planning a Bridal Shower is always a special time for honoring the Bride-to-Be! Our family tradition is to have a family bridal shower for the nieces and niece-in-laws. That amounts to 12 showers so far! Giving a Bridal Shower involves a lot of preparation and planning. There’s food, games, gifts, and we always include a devotional (encouragement and challenge from God’s Word).

Bridal Shower Ideas   grandparentsplus.com

 For each Bridal Shower we do a color theme  or a theme that especially fits the new bride. The shower I just did had a “fashion” theme. The bride worked in a major department store chain and was in charge of the women’s departments in several stores.  Knowing this, we decided to tie into the  “fashion” theme and carry it through the game, food and devotional.

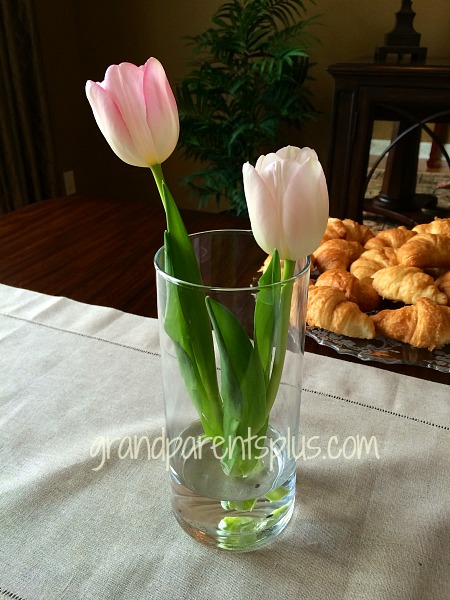
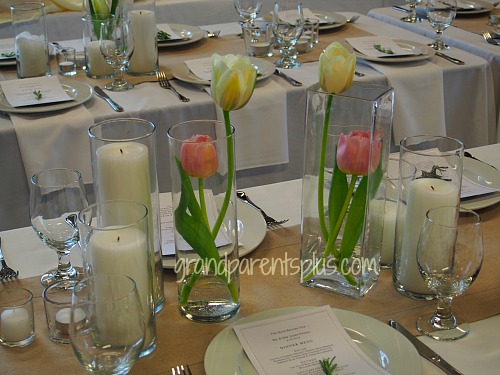
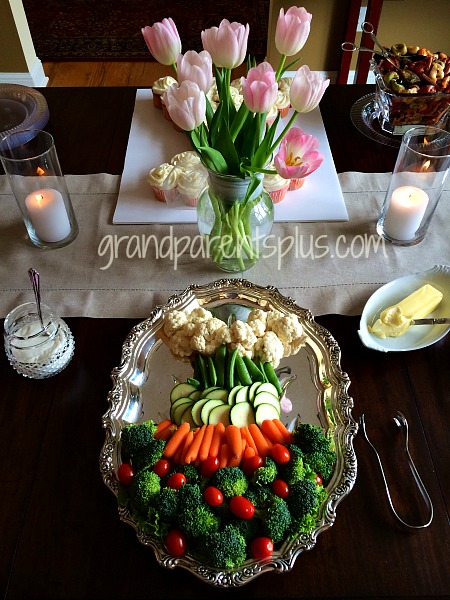
The wedding was in Washington State during the tulip season. This shower was scheduled after the wedding due to the bride’s work schedule and traveling to the Midwest. We used a similar theme for the center of the table as they had for the reception tables at the wedding. She used a beige linen runner and pink and white tulips and candles in cylinder vases for the long reception tables. They were very simple, but elegant!

Here’s our copy version….

Bridal Shower Ideas  grandparentsplus.com

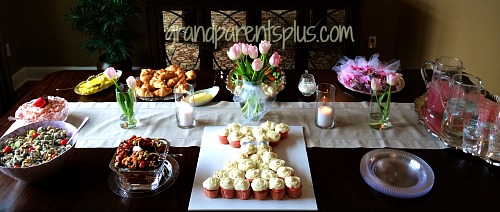
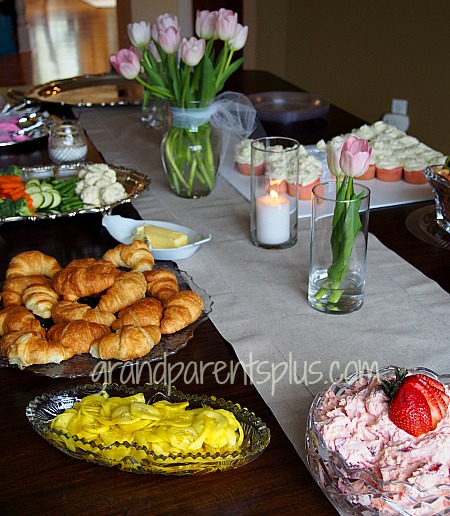
A look at the entire Bridal Shower table setting…..

Bridal Shower Table  grandparentsplus.com

These are the tables at the wedding reception…..

Wedding Shower Ideas  grandparentsplus.com

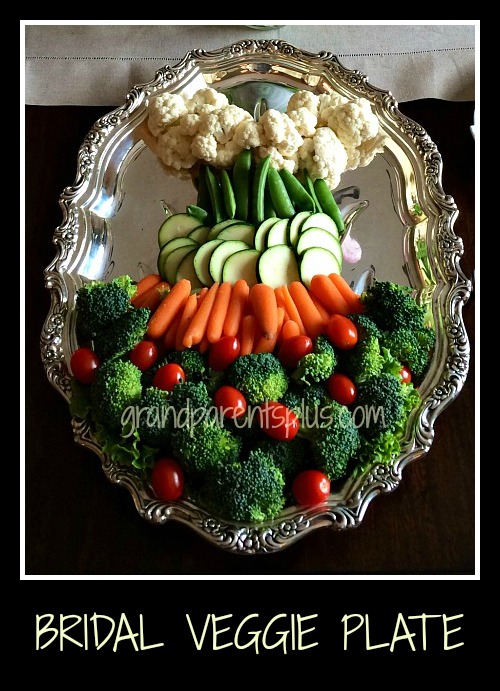
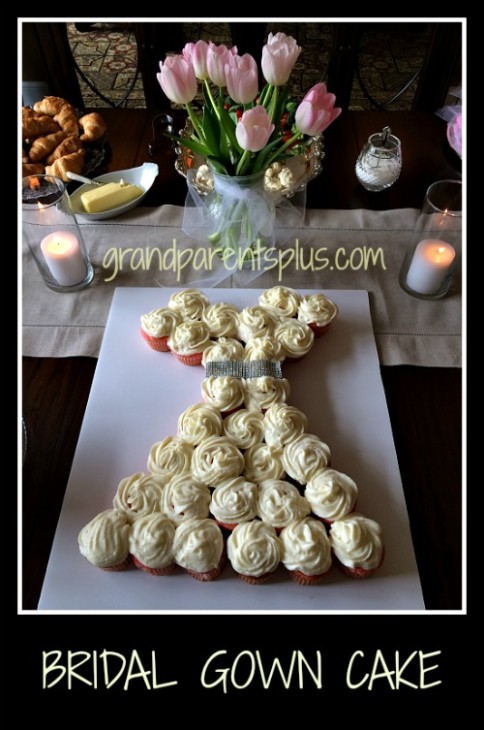
Along with the bridal gown cake, I decided to do a bridal gown veggie plate! It turned out pretty well! Perhaps it is a “bridesmaid dress”! It all fit with the “fashion” them for the Bridal Shower!

Bridal Shower Ideas   grandparentsplus.com


Bridal Shower Ideas   grandparentsplus.com

Another view of the table….

The menu included Wild Rice Chicken Salad, Tortellini Salad, Fruit Fling, Croissants, Pickles, Veggie Plate & Dip,  and Pink Lemonade. I made the Fruit Fling pink by adding just a drop of red food coloring. Bridal Shower Ideas   grandparentsplus.com


Bridal Shower Ideas   grandparentsplus.com

The bridal gown cake…..

Bridal Shower Ideas   grandparentsplus.com

For the game, I downloaded pictures of bridal gowns from each decade 1900’s – 2000. Guests wrote  the decade they guessed under each picture.  I tried to get ones that looked particularly like that era.

Wedding Shower Ideas   grandparentsplus.com

Can you guess the decade that these gowns were worn?


Wedding Shower Ideas  grandparentsplus.com

How many can you get correct?

The answers are at the bottom……

The devotional was on the theme of “What we wear as a Christian” . It included thoughts on the fruits of the spirit from Galatians 5:22.

Each shower is special! This one was no exception. Everyone had a great time together!

Hope you enjoyed these ideas!

Phyllis

To keep up with this post, please subscribe on the sidebar!

Follow on Pinterest and Bloglovin, too!


This post is linked to many of the following parties…..
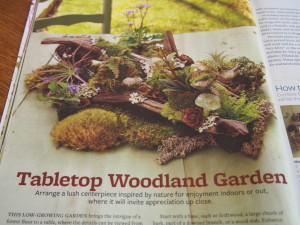
Answers: 1.1940, 2. 1950, 3. 2000, 4. 1900, 5. 1930, 6.1960, 7. 1910, 8. 1980, 9. 1970, 10.1990, 11. 1920

Posted in Decor, Misc. | Tagged , , , , , , , , , , , , , , , , , , , , , | 5 Comments

Oriental Coleslaw

I’ve always loved Oriental Coleslaw, but when you make the regular recipe, it is certainly lacking in color! I think color makes food so much more appealing, don’t you? In this Oriental Coleslaw recipe, I’ve added lots of color and it doesn’t take away the wonderful flavor of the original salad recipe. In fact, it adds more flavor and certainly a lot more eye appeal.

Oriental Coleslaw grandparentsplus.com

A colorful Oriental Coleslaw salad with wonderful flavor!

!

Here’s the recipe I usually use….    If you have a different recipe variation that you like, just add the extra color to it!

Oriental Coleslaw Recipe

Dressing

1/3 cup cider vinegar
1/2 cup sugar
1 cup oil
Salt and pepper
2 Flavor packets from 2  Ramen noodle packages (chicken flavor)
Mix together and set aside.


Salad

1 pkg. coleslaw (chopped or shredded cabbage)
1/2 c. toasted almonds
1/2 c. green onions
1/3  cup sesame seeds – or substitute sunflower seeds
1 pkg. dry  Ramen noodles, crushed – add last!
1/8 cup shredded carrots
red, yellow, and orange peppers chopped – approx 1/2 cup altogether or to your liking
Optional: shredded carrots and small amount of chopped or shredded red cabbage for extra color
Put this salad together at the very last-minute to keep everything crunchy.
First, toss the salad ingredients together. Next, mix the dressing well. (I place it in a jar a shake vigorously to mix well.)
Finally, pour dressing on the salad ingredients and mix. Top with crushed Ramen noodles.
Serve immediately.
Oriental Coleslaw  www.grandparentsplus.com

This is the colorful version!


Oriental Coleslaw - the colorful version!  www.grandparentsplus.com

Have a bite!


Now, don’t you think that looks colorful and more appealing? 

If you haven’t tried Oriental Coleslaw, you’re missing a great salad! 

Thanks for stopping by, 

Enjoy!


Phyllis

You can always subscribe so you don’t miss future posts…..
Also, follow on Pinterest or Bloglovin!


This post is linked to many of the following parties….
 

Posted in Recipes | Tagged , , , , , , , , | 5 Comments