Red, White, and Blue Patriotic Centerpiece

Red, White, and Blue Patriotic Centerpiece  grandparentsplus.com

Great for any patriotic occasion! Very inexpensive and easy to do!


Thinking of both Memorial Day and 4th of July coming up, I made a trip to the Dollar Tree store and came across these fabulous red and blue vases! What I like about them is that they are different heights and shapes so they look great used together just as well as separately!  It was easy to create a Red, White, and Blue Patriotic Centerpiece without spending lots of money. The white hobnail vase is one that I already had in my cupboard. It you don’t have a white one,  use any small vase and paint it white.

Red, White, and Blue Patriotic Centerpiece  grandparentsplus.com

The red and blue vases are from Dollar Tree. Love the colors! Only $1.00!


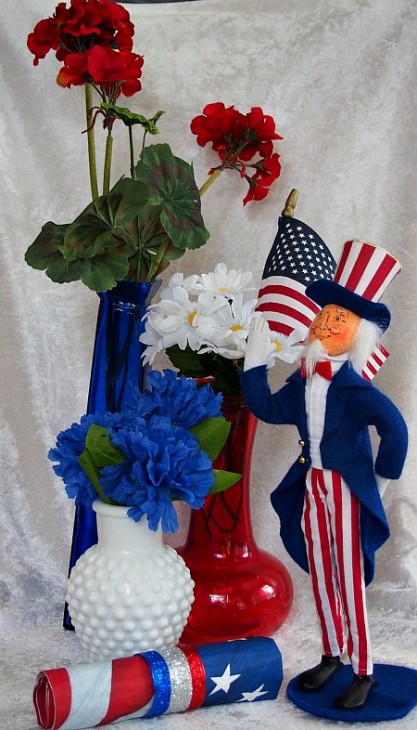
I added a few flowers that I had on hand along with a bit of whimsy. My Uncle Sam is a figure that I’ve had for several years. He is made by Analee.

Red, White, and Blue Patriotic Centerpiece grandparentsplus.com

Using Dollar Tree vases for a Patriotic Centerpiece, makes it quick, easy and inexpensive!

The napkin rings are easy to make and add a lot of patriotic color, too! Go to my post on DIY Napkin Rings.

Here’s a closer look at Uncle Sam.


Red, White and Blue Patriotic Centerpiece  grandparentsplus.com

Uncle Sam always makes an appearance on patriotic occasions!


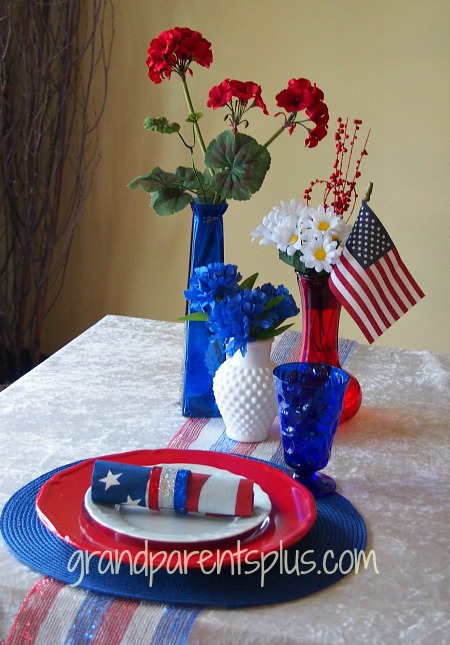
Create your red, white, and blue patriotic centerpiece to use in your tablesetting or use as a coffee table arrangement!


Red, White and Blue Patriotic Centerpiece grandparentsplus.com

A red, white and blue tablesetting!


OK, I’ll bet you have the Dollar Tree vases on your list, right! You can’t go wrong for a $1.00!

Red, White and Blue Patriotic Centerpiece   grandparentsplus.com

I hope all your patriotic occasions are wonderful get-togethers with friends and family celebrating our freedoms that we enjoy in this country. Don’t forget to honor those that served our country to  protect our freedoms, too!


Phyllis


You’re invited to subscribe on the sidebar so you don’t miss future posts!

Follow on Pinterest and Bloglovin, too!

This post is linked to many of the following party sites…..

Posted in 4th of July, Holidays | Tagged , , , , , , , , , , , , , , | 7 Comments

Teriyaki Salmon

Teriyaki Salmon   grandparentsplus.com

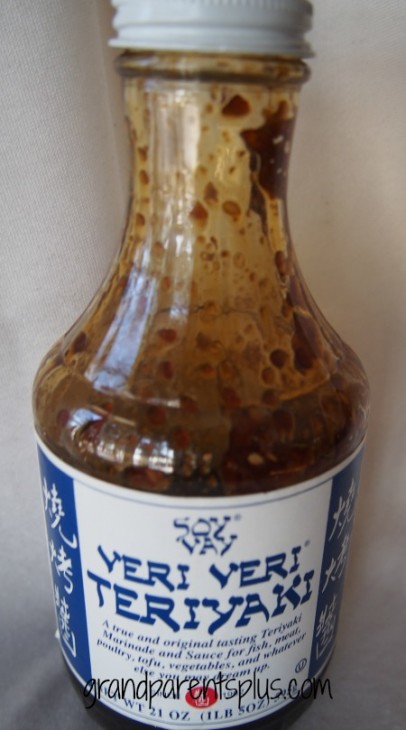
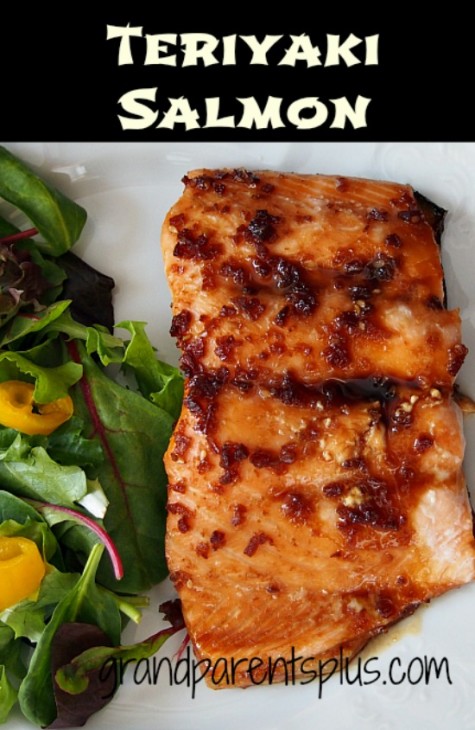
Want a quick and easy dinner? Teriyaki Salmon is not only that, but truly delicious! A special sauce makes the salmon absolutely outstanding! The teriyaki sauce is called Soy Vay, Veri Veri Teriyaki! My grocery store carries it and so does Trader Joe’s. It is all preservative free and contains fresh garlic along with sesame seeds. On the back of the label, it tells about how a Jewish boy and a Chinese girl combined their families’ cooking secrets and formed this company. Hence the name Soy Vay!

Here is what you do…..

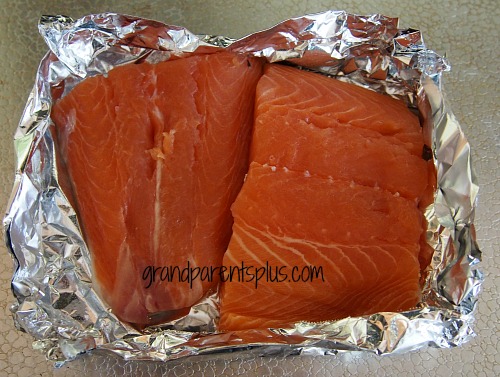
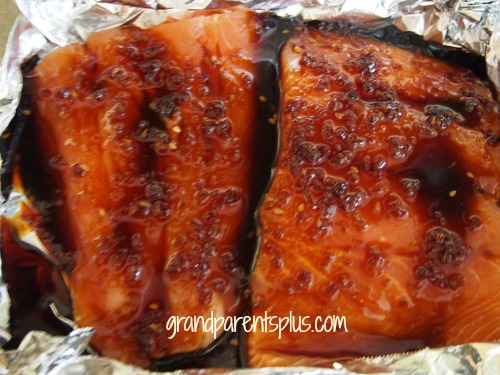
First, using heavy-duty tin foil, spray the foil with a non-stick spray. Place salmon on the foil (skin side down). Bring the sides up and seal together to make a shallow dish. (this will keep the sauce in)  Place on a cooking sheet. Pour a generous amount of Veri Veri Teriyaki on top of the salmon. Make sure it is contained in the foil dish.

Teriyaki Salmon  grandparentsplus.com

This is the Soy Vay Veri Veri Teriyaki bottle. Mine is half empty!

Teriyaki Salmon  grandparentsplus.com


Teriyaki Salmon  grandparentsplus.com

Bake at 400 degrees for approx. 15 minutes. Salmon will flake when done.

Remove from foil onto a plate and spoon a little juice over the top of the Teriyaki Salmon.

Teriyaki Salmon  grandparentsplus.com

As far as cleaning up goes, merely throw away the foil cooking dish and you’re done!

By the way, don’t expect such great results with just any teriyaki sauce. This one is different!

Enjoy!

Phyllis

 Consider subscribing on the sidebar so you don’t miss future posts!

Follow on Pinterestand Bloglovin, too!


This post is linked to some of the following sites….


Posted in Recipes | Tagged , , , , , , , | 8 Comments

S’mores – 7 Recipe Variations!


S'mores - 7 recipe variations   grandparentsplus.com

Make a S’more even better!


Spring was late in arriving, but in the grocery stores they featured all the makings for S’mores! They knew it was time to stock up on the ingredients. It seems that summer campfires and S’mores go together. I’m sure you have lots of memories sitting around a campfire on a beautiful evening, roasting marshmallows, and making S’mores! Well, try a twist on some new flavors and combinations this summer. Perhaps even offer a” S’mores Bar” where guests choose their own makings for one. Here are some ideas I’ve tried and love!

#1

Red, White & Blue S’more

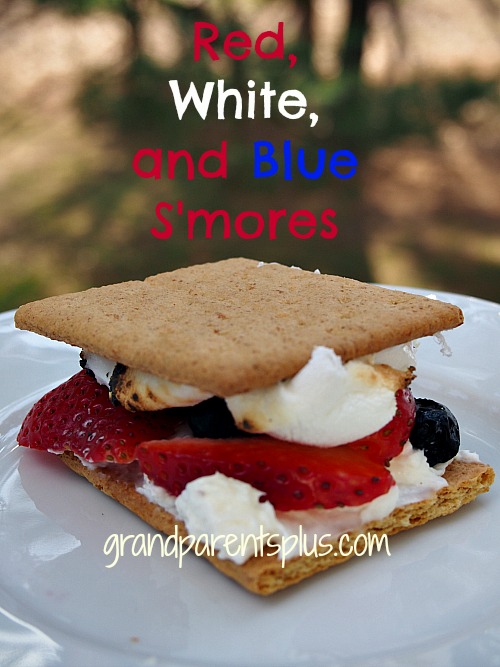
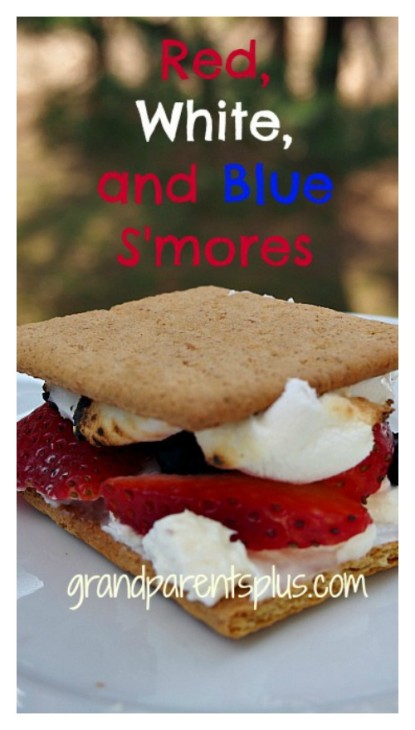
Just in time for Memorial Day is the Red, White, and Blue S’more! Now, that’s patriotic!
Red, White, and Blue S'more   grandparentsplus.com

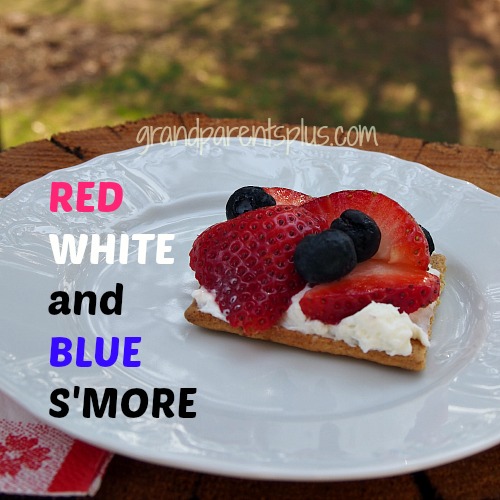
First add a nice, thick layer of sweetened, spreadable cream cheese.  Now, place strawberries and blueberries on top.  Of course, add a toasted marshmallow and eat! YUM!

Here’s a better look at the inside ingredients…..
Red, White, and Blue S'more   grandparentsplus.com

#2

Double Strawberry S’more

Now try a Double Strawberry S’more!  Add strawberry, spreadable cream cheese with fresh strawberries and top it off with a gooey marshmallow.  If you like a bit of chocolate, add a piece of chocolate bar and spread the cream cheese and strawberries on top of that! WOW!
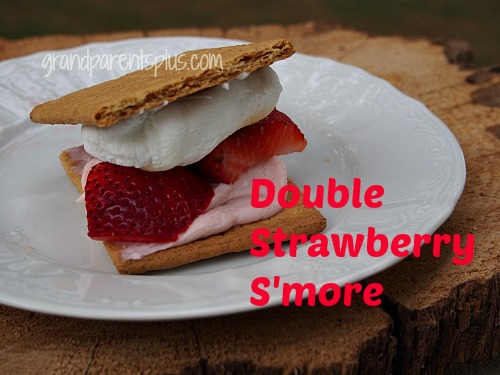
Double Strawberry S'more   grandparentsplus.com

Fresh strawberries and strawberry cream cheese!


#3

Pecan Pie S’more

If you love Pecan Pie, you’ll love this combination.   Spread honey pecan flavored cream cheese on the bottom of the graham cracker. Sprinkle pecan pieces over it. Now, drizzle caramel ice cream topping and add a toasted marshmallow. Enjoy!
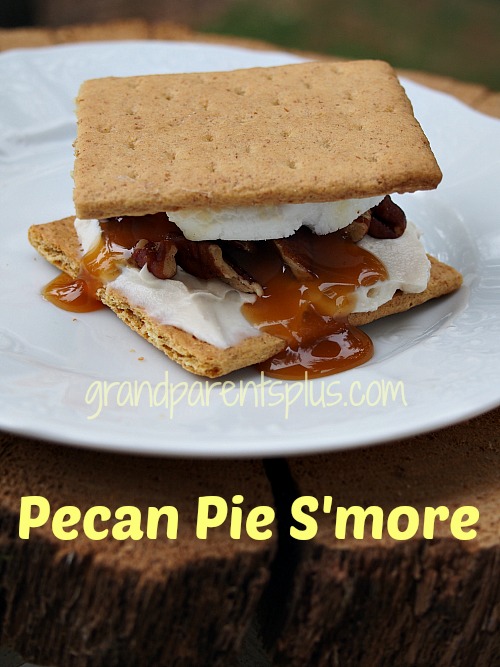
Pecan Pie S'more   grandparentsplus.com

All the flavors of Pecan Pie!

Pecan Pie S'more   grandparentsplus.com

The taste of Pecan Pie without the work!

#4

Peanut Butter and Jelly S’more

Make it just like the sandwich and top it off with a marshmallow.   Another variation is to spread one side with Nutella and the other side with peanut butter and place the marshmallow in the middle!  Of course, you can put the jelly in there, too! Cold you consider this lunch?
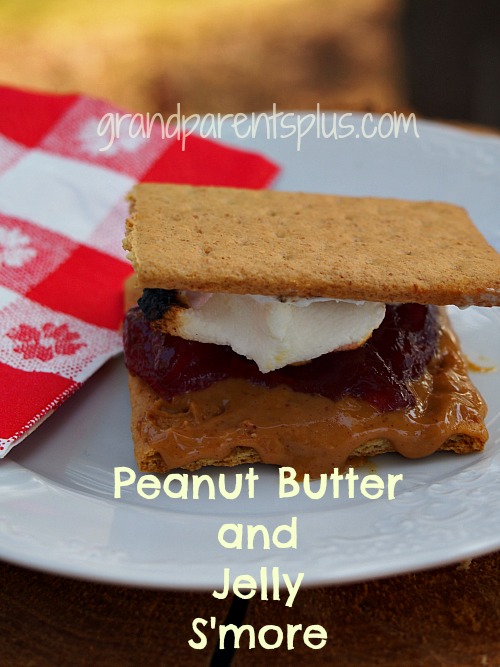
Peanut Butter and Jelly S'more   grandparentsplus.com

Better than a sandwich!

#5

Peanut Butter and Banana S’more

Layer peanut butter, banana and marshmallow. Add Nutella, too!

Peanut Butter and Banana S'more   grandparentsplus.com

#6

Butter-Brickle Toffee S’more

Instead of a plain chocolate bar, use butter-brickle or toffee pieces. Put a layer of Nutella and add the toffee pieces or just use a toffee candy bar whole. The whole toffee bar is a bit hard for the kids to bite so breaking up the bar makes it easier for them to eat.

Butter Brickle Toffee S'more   grandparentsplus.cm

#7.

Nutella and Peanut S’more

I love the flavors of sweet and salty together especially chocolate and peanuts! For this variation, I used Nutella for the chocolate part.  I needed a spread that would secure the crushed peanuts. Altogether, this really satisfied my taste buds! Try it!

 

A great combination of sweet and salty!

A great combination of sweet and salty!

#8

Chocolate and Bacon S’more
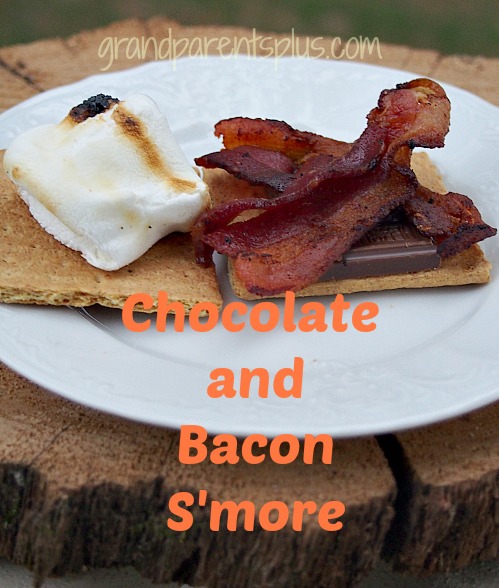
Chocolate and Bacon S'more   grandparentsplus.com

Don’t knock it until you’ve tried it. You might be surprised how good it is!

Now, don’t scoff until you’ve tried it. At our state fair they sell bacon dipped in chocolate so why not include it in a S’more?

For the picture, I put the chocolate on the bottom, but by placing the chocolate in the middle, it melts on the bacon better! Yes, it is GOOD! It’s another sweet and salty flavor combination.


You may notice this is more than seven. Yes, once I got started on this idea, my grandson and daughter got in on the ideas and came up with more.

Here are more combinations for you to try…

#9

Cookies and Cream S’mores

Spread sweetened cream cheese on a graham cracker and top with broken Oreos. Of course, add a roasted marshmallow.


#10.

Chocolate Chip Cookie Dough S’mores

Spread pasteurized cookie dough on a graham cracker. Top it with a chocolate bar and marshmallow.


M-m-m-m-m- Good! I’ll have some more, please!
S'mores - 7 recipe variations for Summer Fun   grandparentsplus.com

Lots of ideas for delicious, mouth-watering S’more recipes!


Is this enough ideas for your summer campfires? Perhaps try a different one each week! You almost have enough variations for the entire summer! Now, you add the fun and sing some favorite songs, too!

Enjoy and make memories!

Phyllis

Don’t want to miss future posts? Subscribe on the sidebar.

Follow on Pinterest, Bloglovin and Facebook, too!


This post is linked to many of these parties…….


Posted in 4th of July, Holidays, Recipes | Tagged , , , , , , , , , , , , , | 58 Comments

Asian Style Asparagus

Asian-Style Asparagus  grandparentsplus.com

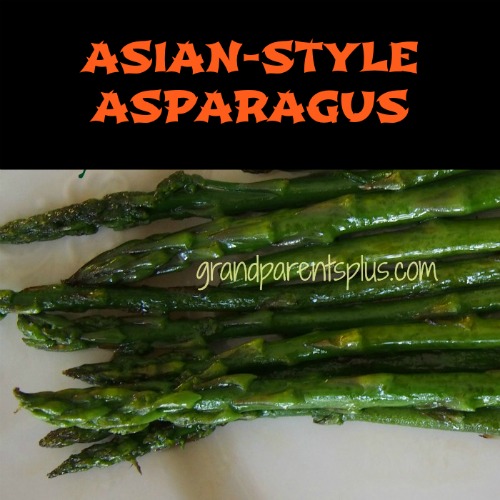
Asparagus is a favorite vegetable of mine and a favorite way to prepare it is Asian-Style! It is quick, simple and has great flavor. Try it and I think you’ll love Asian-Style Asparagus, too!

First wash and snap the ends of the asparagus.

Now, place them in a large skillet with a little olive oil and sauté for 2-3 minutes.

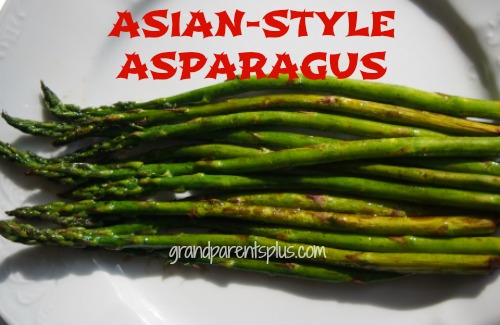
 When just about tender , sprinkle with soy sauce to taste and continue to sauté until done.  Do not overcook. Asparagus is best with a little crunch.

I use light soy sauce, but regular is fine, too. Light soy sauce is less salty.

Asian-Style Asparagus   grandparentsplus.com

Ok, isn’t that quick and easy?

Now serve and enjoy Asian Style Asparagus!

Phyllis

You’re invited to subscribe on the sidebar to future posts!

You, also,  can follow on Pinterest, Bloglovin, and Facebook!

This post is linked to many of the following parties….

Posted in Recipes | Tagged , , , , , | 19 Comments

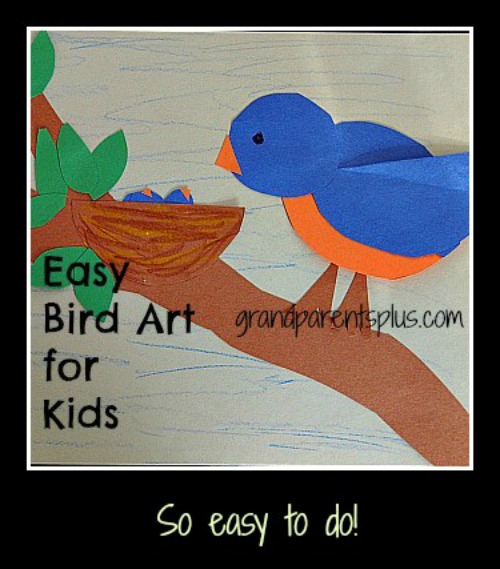
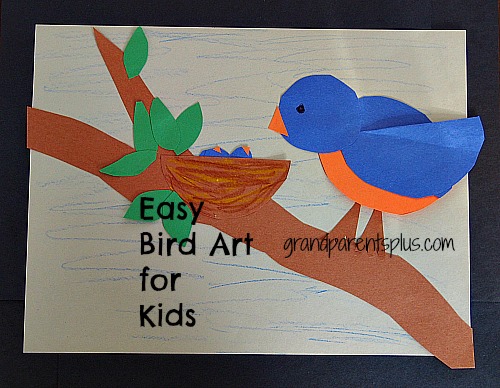
Easy Bird Art for Kids

Easy Bird Art for Kids   grandparentsplus.com


This may look difficult, but “Easy Bird Art for Kids” is actually doable for many  preschool through primary age kids with some adult direction. It gives practice with both cutting and math skills. For measurements, we used the Safe-T-Compass. If you’re not familiar with it, you may want to  view the post of the Best Art and Craft Tool. I couldn’t be without this tool as it makes circles with such ease.

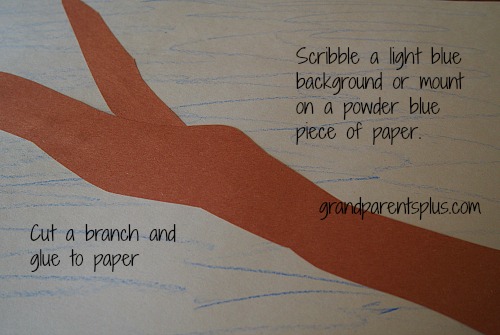
First, have the child draw the background on a white piece of paper. Let kids scribble with a light blue crayon to make it look like the sky.  Cut an uneven long piece of brown paper for the branch. Add another small branch to make a “V”.

Easy Bird Art for Kids  grandparentsplus.com

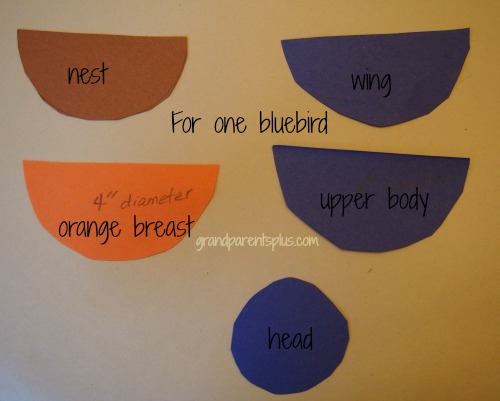
Directions are for two birds…….

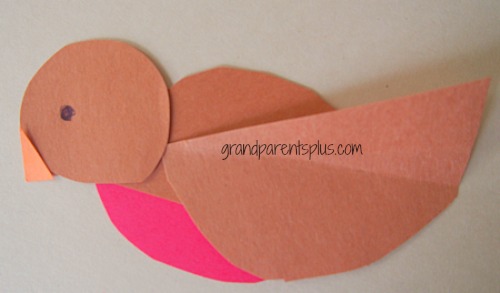
Next, draw two  blue, one light orange, and one brown, 4 inch diameter circle.  Cut circles out. This will make two bluebirds.

Remember to talk about the diameter measurement. This is a math skill they can learn while doing this project.

Draw and cut out ( 2) – 2  1/4 inch circles of blue for the heads. Let the kids cut them out as they don’t have to be perfect!

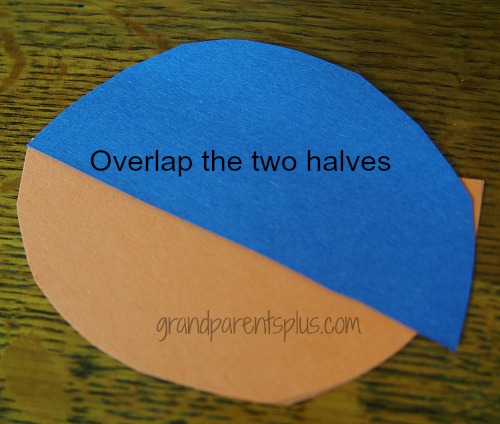
Easy  Bird Art for Kids   grandparentsplus.com


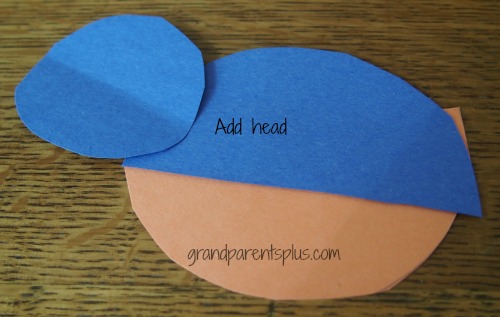
Now, overlap the two half circles of blue and orange and glue.

Easy Bird Art for Kids   grandparentsplus.com

Add the small circle for the head, glue and color in the eye with a crayon.

Easy Bird Art for Kids  grandparentsplus.com

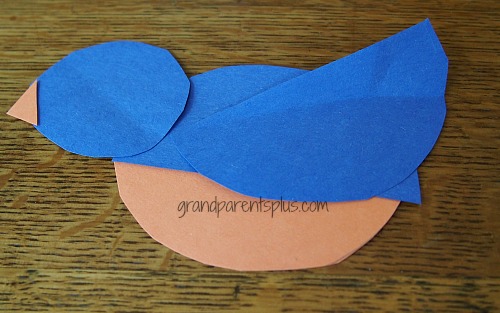
Bend the second half-circle for the wing and add a small triangle for the beak.

Easy Bird Art for Kids  grandparentsplus.com

Color the nest with a brown crayon to add some depth.  A few scribbles will do.

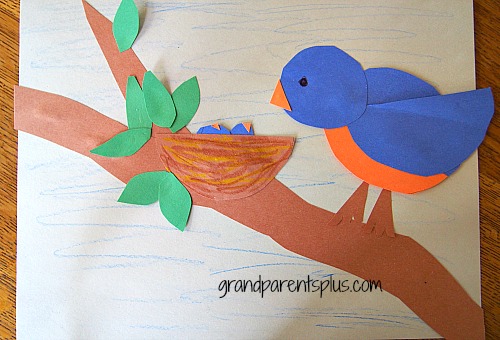
Place nest near the “V” on the branch and place the bird to the right of the nest just elevated a bit to leave room for the feet.

Easy Bird Art for Kids grandparentsplus.com

Add the eye,  feet, leaves,  and little birds in the nest (just a little circle with a small beak). Now, you have a wonderful work of art for Spring.

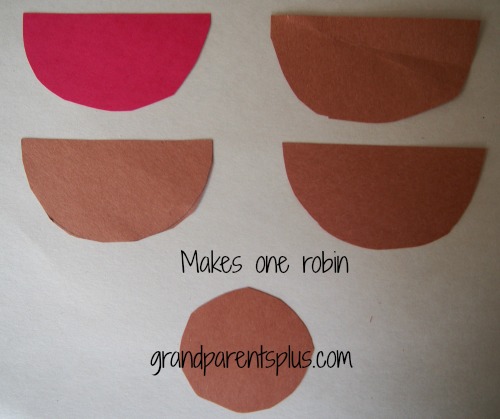
By using the colors of brown and red, it changes to a robin!

Easy Bird Art for Kids   grandparentsplus.com


Easy Bird Art for Kids  grandparentsplus.com

Put a worm in the robin’s mouth and place the robin down in the grass.  Birds can be anywhere!

Easy, isn’t it? Have fun with your children and grandchildren as you do this art project! Let them be creative as to where they want to place the bird.

This Easy Bird Art for Kids’ Project is one that you will want to display!

Talk about the birds migrating back in the Spring. How do they know how to do that? God created them to do that!

Easy Bird Art for Kids   grandparentsplus.com

Thanks for taking the time to stop by,

Phyllis

Don’t want to miss an idea? Subscribe to future posts on the sidebar!

Follow on Pinterest, Bloglovin and Facebook!


This post is linked to many of these parties…..


Posted in Art Project | Tagged , , , , , , , , , , | 9 Comments

Tiptoe Through the Tulips!

Tiptoe Through the Tulips   grandparentsplus.com


You probably have heard of the song ” Tiptoe Through the Tulips” Well, over Easter, we did just that! We traveled to my nephew’s wedding and it happened to be at the time of the Skagit Valley Tulip Festival in Mount Vernon, Washington.  I had never heard of this before so we decided to take it in while we were in the area.

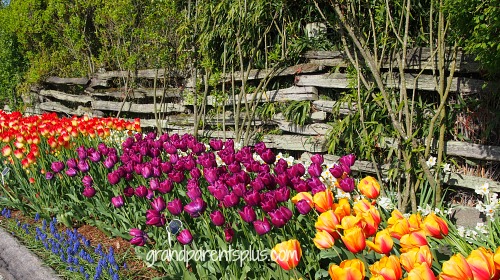
What a gorgeous sight! All those tulip fields, with brilliant colors in a row, looked just like a rainbow! The day was sunny and clear so the colors were spectacular! Every turn drew an “Ooh! and Aah”!  While this is quite different from my normal posts, I thought I’d share with you the beautiful sights. Put this place on a list of “must see someday”!

The gardens I photographed are at RoozenGaarde. They were started by the Roozen family and now have more than 1,000 acres of field blooms. They maintain a 3 1/2 acre display garden with a quarter million spring-flowering bulbs. The pictures are of the display garden.

Enjoy!

Tiptoe through the Tulips  grandparentsplus.com


Tiptoe Through the Tulips   grandparentsplus.com


Tiptoe Through the Tulips   grandparentsplus.com


Tiptoe Through the Tulips  grandparentsplus.com


Tiptoe Through the Tulips  grandparentsplus.com


Tiptoe Through the Tulips   grandparentsplus.com


Tiptoe Through the Tulips  grandparentsplus.com


Tiptoe Through the Tulips  grandparentsplus.com

Tiptoe Through the Tulips  grandparentsplus.com


Tiptoe Through the Tulips  grandparentsplus.com


Tiptoe Through the Tulips   grandparentsplus.com


Tiptoe Through the Tulips  grandparentsplus.com

Tiptoe Through the Tulips grandparentsplus.com

Now, that was just a taste! You need to experience it in person someday!  I  was blown away by the beauty!

If you can make a trip there sometime, check out the website of Tulips. You can order tulip bulbs directly from them, too!

Please note that I am not compensated for this post in any way. I have been to Kuukenhoff Gardens in Holland, too. While this is not as big, it is easier to get to and still so beautiful! It is well worth the trip!

Thanks for stopping by and “tiptoeing through the tulips” with me!

Phyllis

For future posts, please subscribe on the sidebar. Follow on Pinterest, Bloglovin and Facebook, too! Thanks!


 This post is linked to many of the following parties……


Posted in Misc. | Tagged , , , , , , , , , , , , | 22 Comments

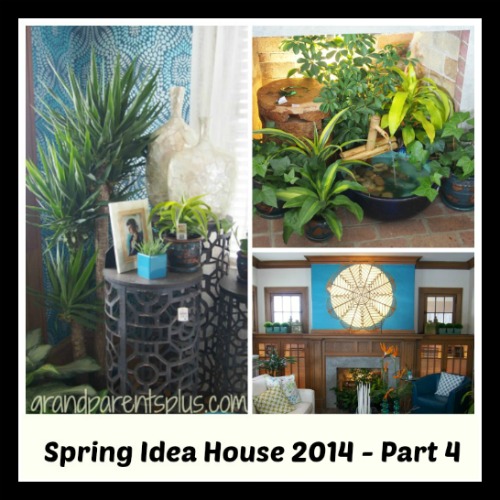
Spring Idea House 2014 – Part 4

  Spring Idea House 2014 Part 4   grandparentsplus.com


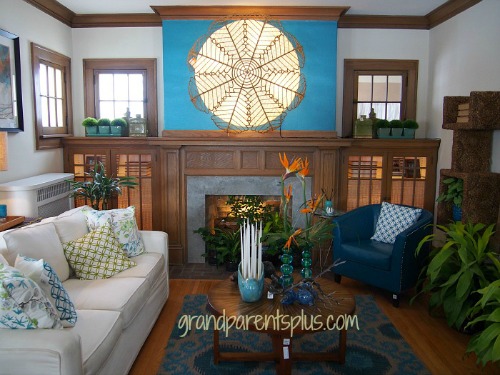
 The living room and sunroom, from the Spring Idea House 2014, provide more interesting decorating ideas! While these ideas are done by a team of decorators,  perhaps you’ll be inspired by some of their unique designs to try something similar in your own home.

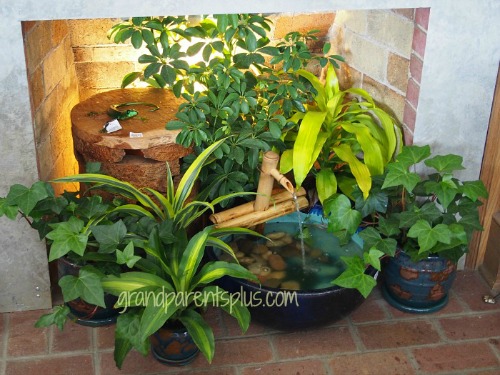
As you enter the living room, you are immediately struck by the blue color scheme and the focal point of the fireplace.  The soothing  sound of water from the fountain makes it such a relaxing and inviting place. Backlighting  the plant arrangement give lots of drama, too!  It makes me wish that I had a non-working fireplace to decorate.

The wall art above the fireplace is a wall mount light fixture! Very striking when lit.

Spring Idea House 2014 part 4  grandparentsplus.com

What a beautiful arrangement in the fireplace!

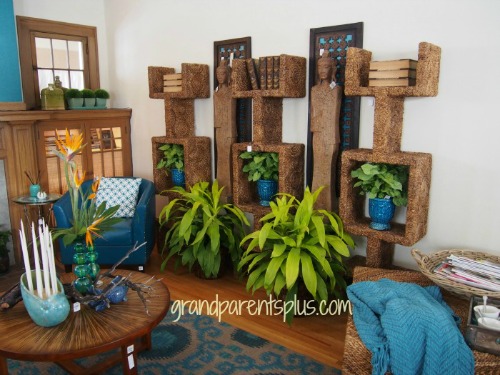
Spring Idea House 2014 part 4  grandparentsplus.com

To the right of the fireplace……..
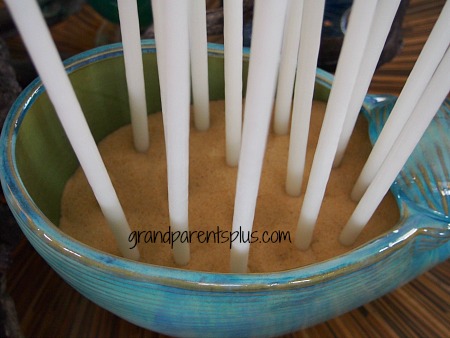
Spring Idea House 2014 Part 4  grandparentsplus.com

Notice the candles in the blue shell? Here’s a closer look…..   just stuck in sand!
Spring Idea House 2014 Part 4  grandparentsplus.com

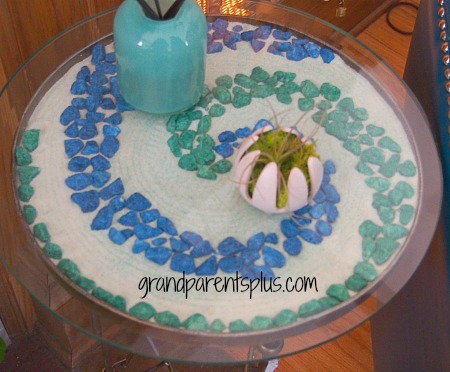
The small table to the left of the blue chair had an interesting detail. At the top of the table, it had about an inch depth to it. White sand along with colored rocks, that matched the color scheme, made a interesting design. Glass covers the top!  Now, with little kids, this may not be the perfect idea for you! I can just see this getting tipped over, ugh! It is a beautiful detail, however.

Spring Idea House 2014 Part 4  grandparentsplus.com

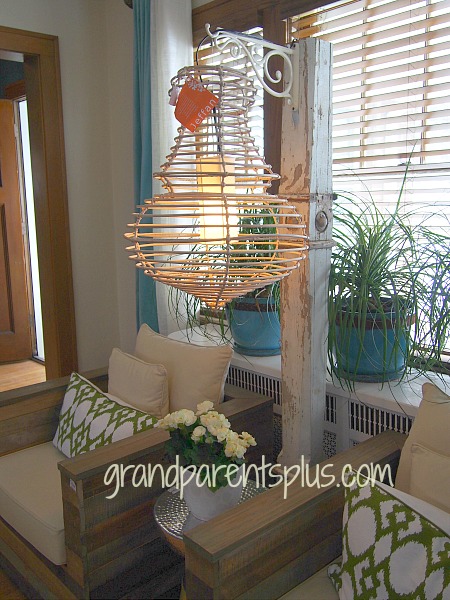
Opposite the fireplace is another seating arrangement. Notice the unusual light idea using a re-purposed vintage post.

Spring Idea House 2014  Part 4  grandparentsplus.com

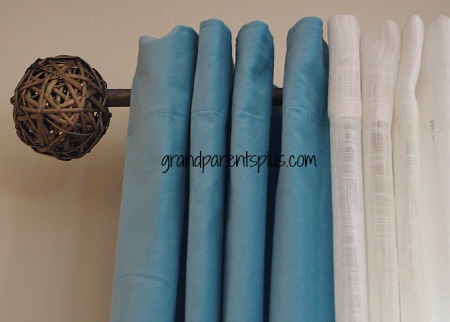
I thought the drape detail was beautiful! Instead of one color of drapes, they used a blue and white combination. The finial at the end is a wicker-type ball.

spring Idea House 2014 Part 4  grandparentsplus.com

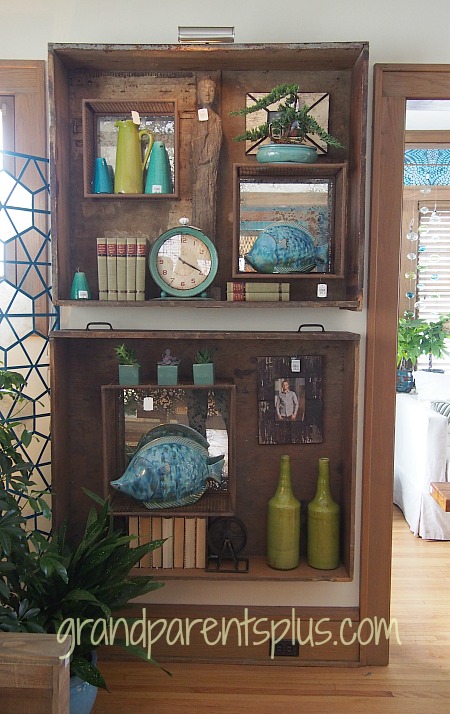
  Hung on the wall are two huge industrial drawers showcasing beautiful items to highlight the colors of the room.  The smaller boxes inside add more dimension and display areas.

Spring Idea House 2014 Part 4  grandparentsplus.com

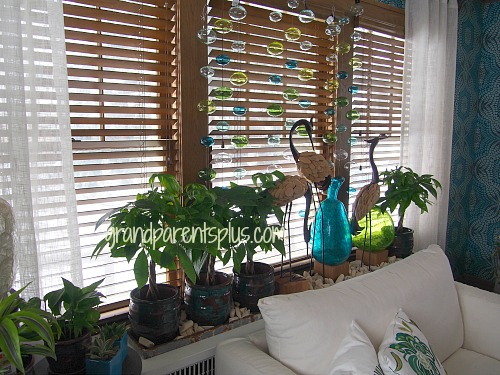
Upon entering the sunroom, so bright and cheery, a white loveseat sits in the middle highlighted by plants and colored glass. Spring Idea House 2014 Part 4   grandparentsplus.com

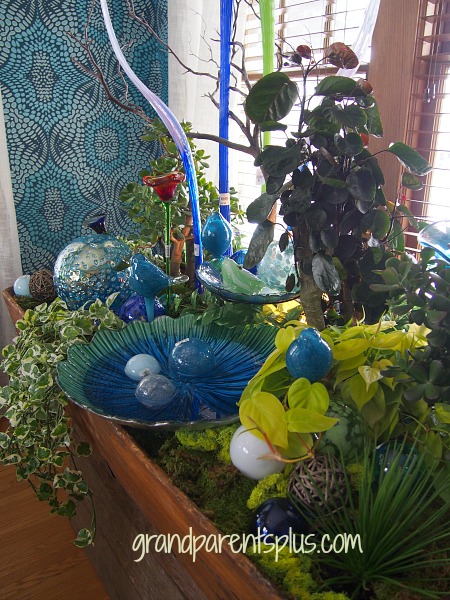
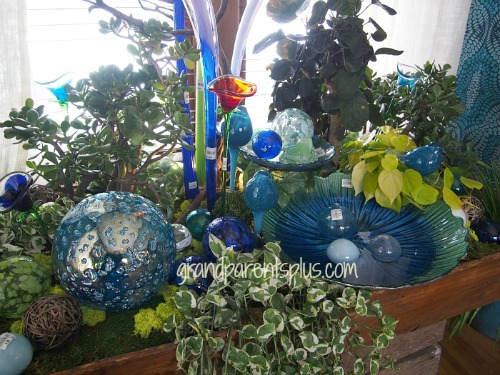
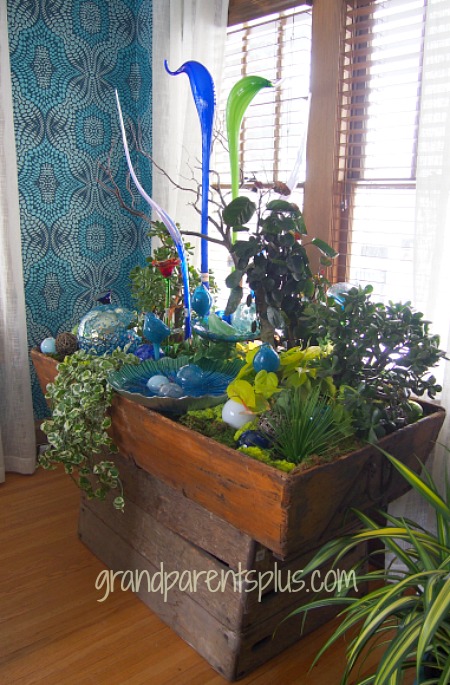
To the right of the loveseat is  an indoor garden. This garden reminds me of the Chihuly glass exhibit that we visited in Arizona. Everything is arranged in an old water trough. The gazing ball, glass bowl and orbs give lots of color against the various greens of the plants. I thought this was spectacular!

Spring Idea House 2014 Part 4  grandparentsplus.com

  Spring Idea House 2014 Part 4 grandparentsplus.com  

This picture shows the trough and how it is elevated on top of an old wooden box.

Spring Idea House 2014 Part 4  grandparentsplus.com

Across the sunroom on the opposite corner, the Spring Idea House decorators added another beautiful grouping.

Spring Idea House 2014 part 4 grandparentsplus.com


Wow! Enough decorating ideas for you? I certainly will be on the prowl for some of those vintage items. How about you?  Did it generate new ideas for your own place?


Thanks for stopping in and Happy Decorating!

Phyllis

You’re invited to subscribe to future posts. Wouldn’t want you to miss out!

Follow on Pinterest, Bloglovin, and Facebook, too!


Posted in Decor | Tagged , , , , , , , , , , , , | 13 Comments

Spring Idea House 2014 – Part 3

Spring Idea House 2014  Part 3

Come with me for a peek into the Spring Idea House Part 3, where we enter a bedroom, den/reading room, hallway, and small bathroom. Many of the ideas, the decorators used, have the ability to be incorporated into your own home.  I know you’ll be inspired by their beautiful rooms.

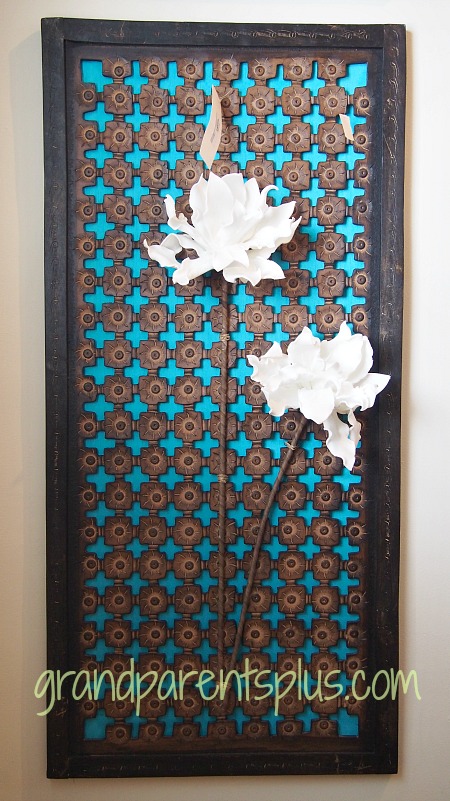
Walking up the stairs to the bedrooms and den, the decorators  hung  framed wall panels backed with teal colored fabric and embellished with large artificial flowers. Very striking, don’t you think?

Spring Idea House 2014 Part 3


At the top of the stairs is the Reading Room/Den with many re-purposed vintage items.

Spring Idea House 2014 part 3  grandparensplus.com

The shelving is made from re-purposed gym benches.

Spring Idea House 2014 Part 3  grandparensplus.com

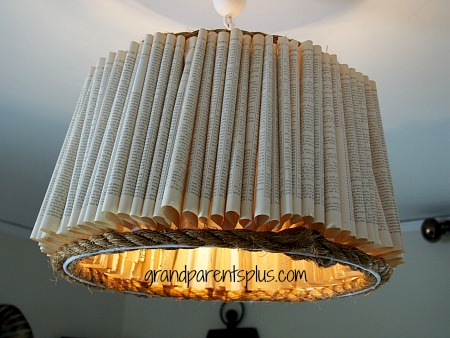
This lighting fixture was one of the most unusual ideas. They took a plastic lampshade and cut slits all around the outside. At each slit, they pushed in a folded book page. Perfect for the “reading” room!

Spring Idea House 2014  Part 3  grandparentsplus.com

Here’s a better look at the inside….

Spring Idea House 2014 Part 3  grandparentsplus.com

You need to make sure the bulb is a safe distance from the pages!

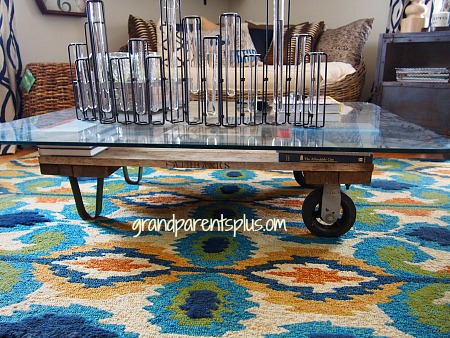
The coffee table in the room is a re-purposed industrial cart!


Spring Idea house Part 3  grandparentsplus.com

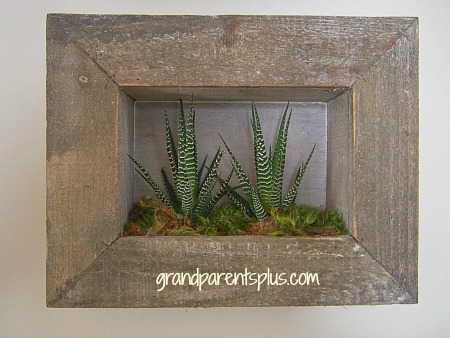
Have a shadow box that you don’t know what to do with? Fill with artificial succulents! Succulents look artificial anyway, so no one will really know! This makes an  interesting wall accent!

spring Idea House 2014 Part 3

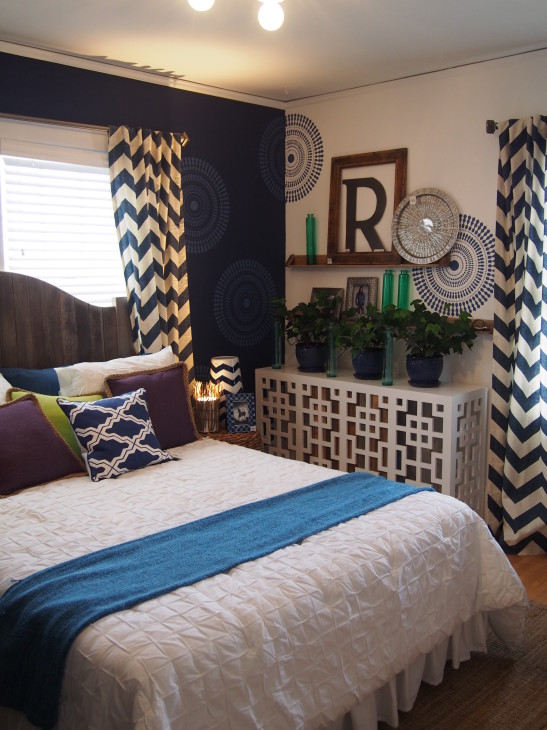
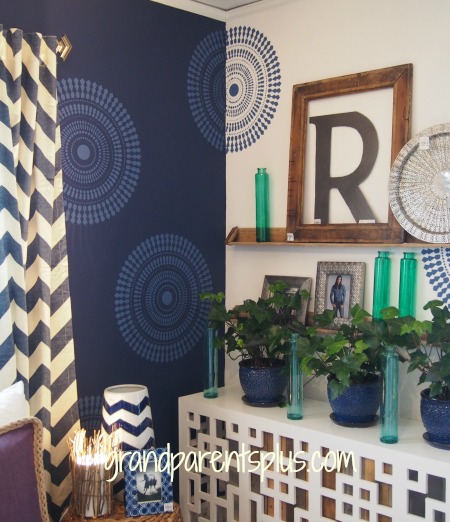
The master bedroom color scheme is navy blue, white, teal, with an accent of the bright green! The main wall is dramatic when painted navy blue. The stencil  goes right around the corner. Half of the stencil is painted as a blue shadow against the navy background. Great look!

Spring Idea House 2014 Part 3

Here’s a closer picture showing the stenciling. Love the chevron drapes, too!


Spring Idea House 2014 Part 3  grandparentsplus.com

Next, is the spare bedroom……

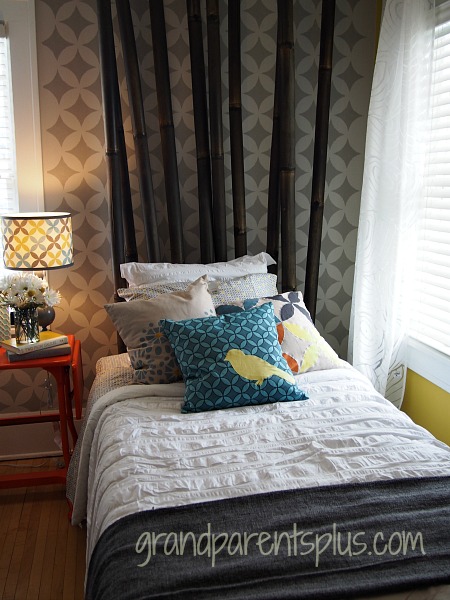
The wall pattern is repeated many different ways in this room. Look for the repetition.

I may be showing my age, but before computers, we used these metal stands for typewriters. It now serves as a night stand.

Spring Idea House 2014 Part 3   grandparentsplus.com


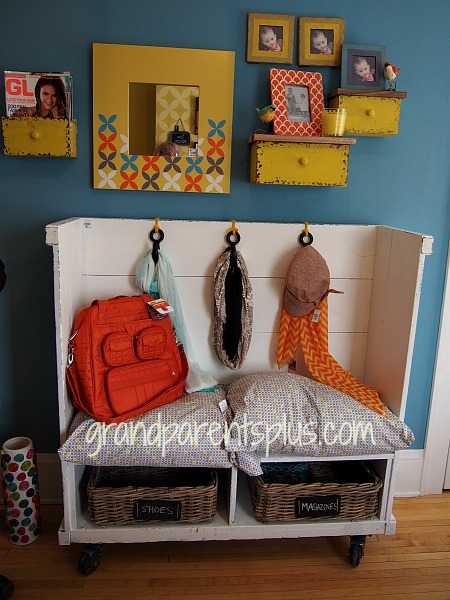
Look at how a vintage luggage or mail cart is re-purposed as a bench/coat rack with storage below.

Spring Idea House 2014 part 3 grandparentsplus.com


Because of this house being very old, there isn’t a large master bath. However, the small bathroom always has some unique ideas.

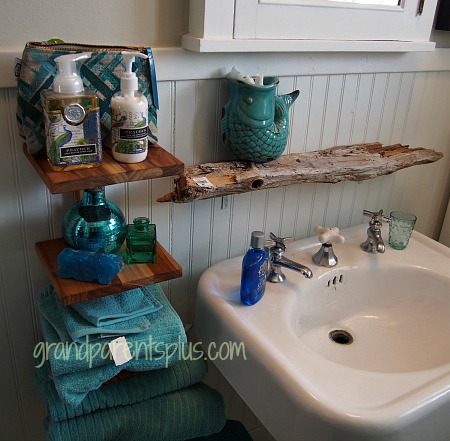
The decorators used a bookshelf as storage for towels and various bathroom items. Also, a piece of driftwood makes a “one of a kind” wall shelf!

When the ice is off the lakes, I’ll be looking for that perfect piece of driftwood to use in my home, too! 

Spring Idea House 2014 Part 3  grandparentsplus.com

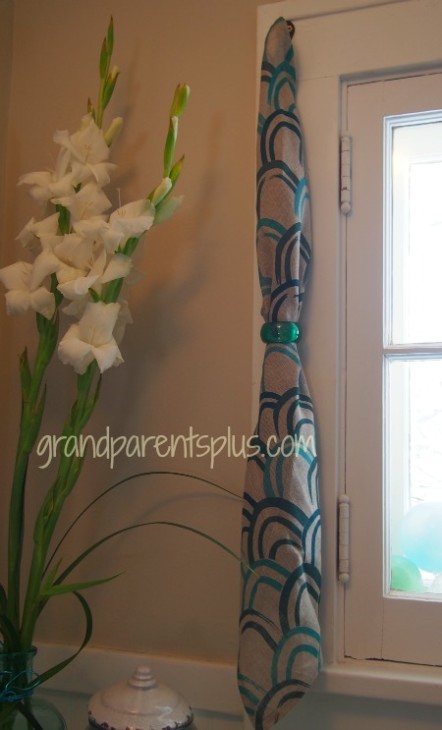
A dish towel with a napkin ring highlights the small bathroom window.

Spring Idea House 2014 Part 3   grandparentsplus.com

Now, that’s easy to do for a small window! Do you remember the kitchen windows in Part 1? This is a variation of that  idea.

I have a small kitchen window in our cabin where this treatment would look great! Just need to wait for warmer weather to get there. Until then, I’ll be looking for the perfect kitchen towel to use.

Did you get some decorating ideas from the Spring Idea House Part 3? Well, there’s more good things to come! Be sure to subscribe to be notified of future posts.

Thanks for stopping by and happy decorating!

Phyllis

Follow on Pinterest, Bloglovin and Facebook, too!


This post is linked to many of these parties…..


Posted in Decor | Tagged , , , , , , , , , , , , | 10 Comments

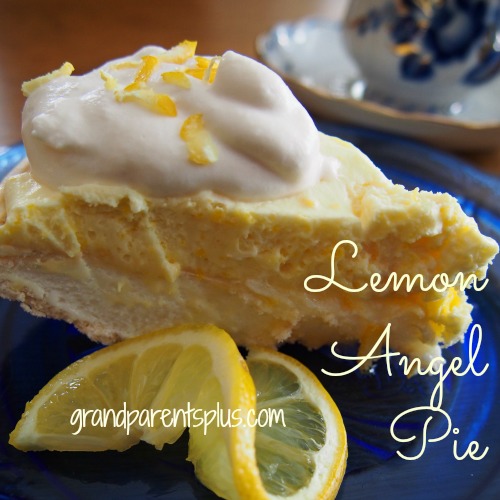
Lemon Angel Pie

Lemon Angel Pie   grandparentsplus.com

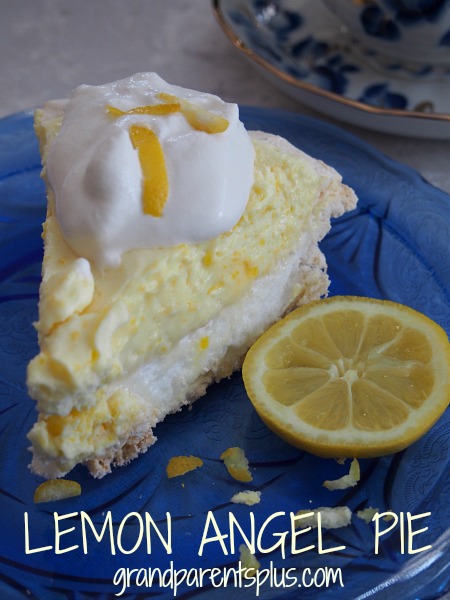
When Spring arrives, my dessert cravings turn to the flavors of lemon. One of my favorites is Lemon Angel Pie. It is so lemony, light, delicious, and easy to make! It satisfies my cravings for a great lemon dessert. It’s a wonderful pie to serve for Easter or anytime!

I’ve been told that this is the Lemon Angel Pie recipe that Betty’s Pie Shop serves  in northern Minnesota. You don’t have to go that far to enjoy this pie as the recipe is here, but if you go that way, be sure to stop in. Make the first two steps (meringue crust and custard filling) the day before serving! Add whip cream to the top when ready to serve.

Lemon Angel Pie

Meringue Crust:

4 egg whites  Be sure these are at room temperature! (I break the eggs and let the whites sit until at room temp.)
1 cup granulated sugar
1/4 teaspoon cream of tartar

Custard Filling:

4 egg yolks
1/2 cup sugar
3 Tbsp. lemon juice
1  cup heavy whipping cream.

Extra whipping cream needed for topping….

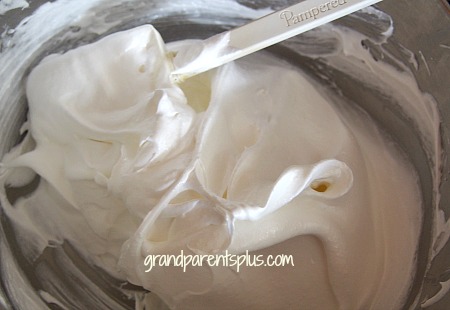
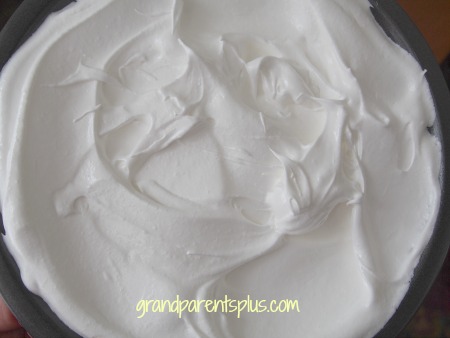
Beat 4 egg whites well until stiff peaks form. Add cream of tartar. Gradually add sugar – slowly add about 2 tbsp. at a time while beating.

Lemon Angel Pie grandparentsplus.com

Spread all around the bottom and up the sides of a greased 9″ pie pan. Bake at 275º for 1 hour. Turn oven off and leave door ajar and let the meringue cool.


Lemon Angel Pie  grandparentsplus.com

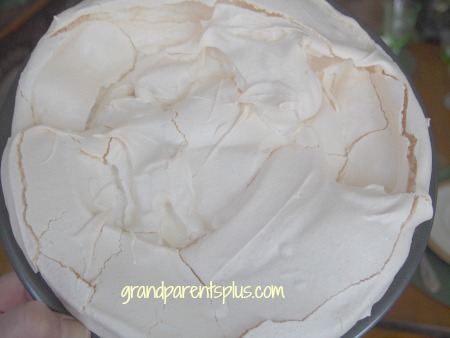
This is how the meringue will look…..  not brown, but all cracked! It is supposed to be that way!

Lemon Angel Pie grandparentsplus.com


Custard Directions…..
Beat 4 egg yolks and stir in 1/2 cup sugar and 3 T lemon juice. Add a drop of yellow food coloring, if desired. (I didn’t use it.) Pour into small saucepan and cook on low heat stirring continuously until thickened. Cool.

Whip 1 cup heavy cream until you have peaks and stir into cooled custard mixture. Pour into meringue pie shell and refrigerate. Carefully cover with foil!

Before serving, beat extra whipping cream for topping – lightly sweeten with sugar and add vanilla. (or use ready-made whipping cream)

Serves 8.

Lemon Angel Pie  grandparentsplus.com

Lemon Angel Pie  grandparentsplus.com


My mouth waters just thinking about this pie! So good!

Serve this anytime of the year, but it is especially great as an ending to your Easter dinner!

You might want to check out the posts on “Juicy Ham-Every Time” and “Shreds”!

Now, you have your dinner planned!

Enjoy!

Phyllis

For notice on future posts, subscribe on the sidebar!

Follow on Pinterest, Bloglovin, and Facebook, too!

This post is linked to some of the following parties…..

Featured on….    Wonderful Wednesday Blog Hop

Posted in Pies, Recipes | Tagged , , , , , , , , , , , | 92 Comments

Spring Idea House 2014 – Part 2

Spring Idea House 2014 Part 2 grandparentsplus.com  gran

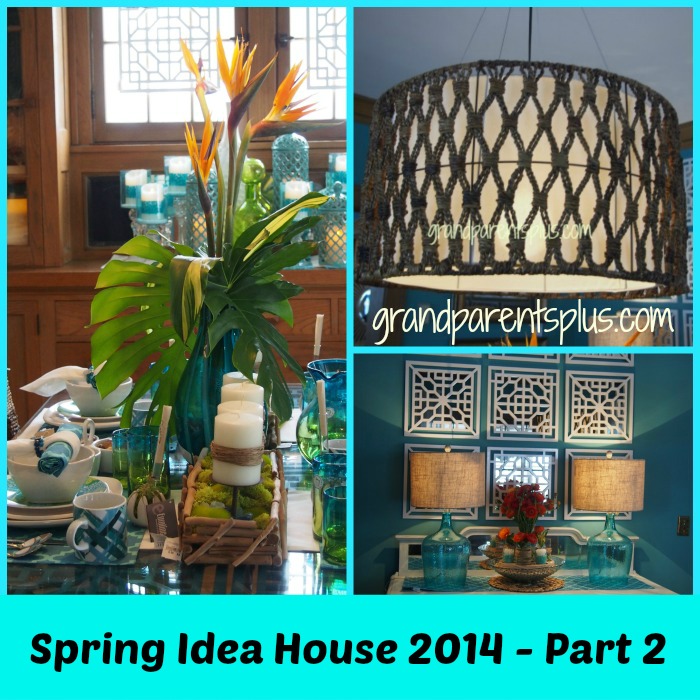
Today’s tour of the Spring Idea House takes us through the dining room, kitchen and small bathroom. This is an old house so some of the ideas are unique to this house, but certainly can be altered to fit other places in your home. I love that it gets the creative juices flowing!  Some ideas are trendy and some are timeless just by incorporating vintage items. 

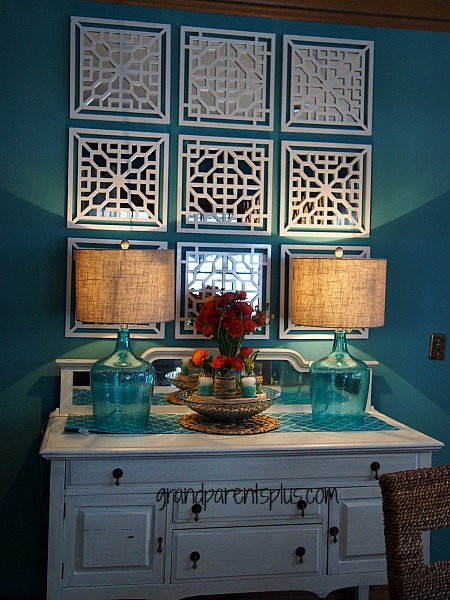
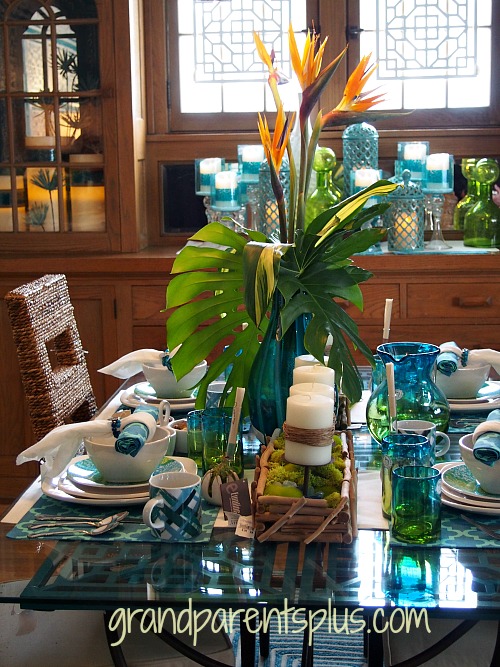
 Upon entering the dining room area of the Spring Idea House, your eyes are immediately drawn to the white sideboard.  Above it,  squares of garden art with mirrors are hung in repetition on the wall! The mirrors are an addition to the back of them.

Spring Idea House 2014 Part 2   grandparentsplus.com

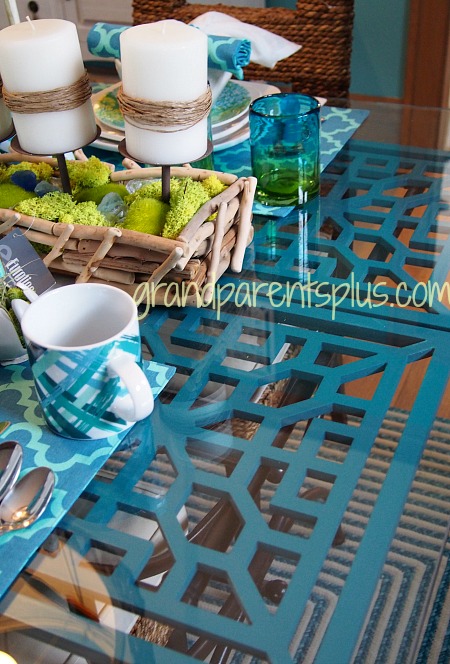
The same garden art is hung in the windows and used under the glass top table.


Spring Idea House 2014  Part 2  grandparentsplus.com

Here’s a better view of how it is used under the glass top table…..

Notice the candles wrapped in twine! Great look and easy to do!

Spring Idea House 2014 Part 2  grandparentsplus.com

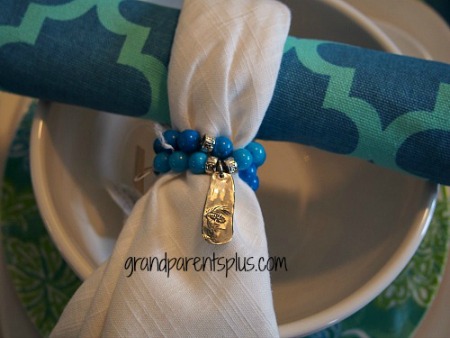
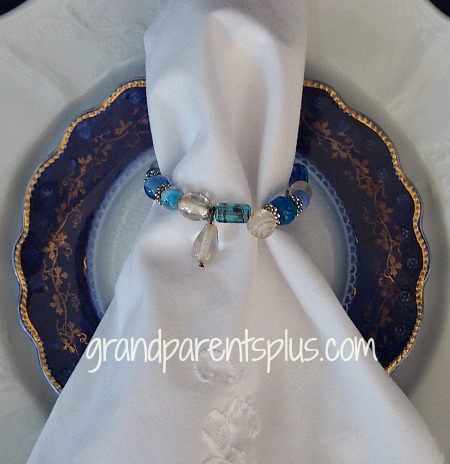
The napkin rings on the table are like “beaded bracelets”.  I found a beaded bracelet in my jewelry box and used it, too! For a women’s luncheon, wouldn’t these be a fun favor to make for your guests to take home!

Their version…..

OLYMPUS DIGITAL CAMERA

My version…..

Spring Idea House 2014 part 2  grandparentsplus.com

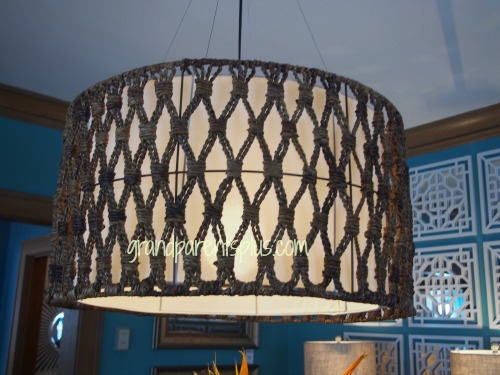
Here’s a unique dining room light tied with macrame cord. This might inspire you to try something like this with a lamp shade you own. The macrame cord is supported by a wire ring both on top and bottom of the shade. This is above my patience level! How about you?

Spring Idea House 2014 Part 2  grandparentsplus.com


Next on to the kitchen…..

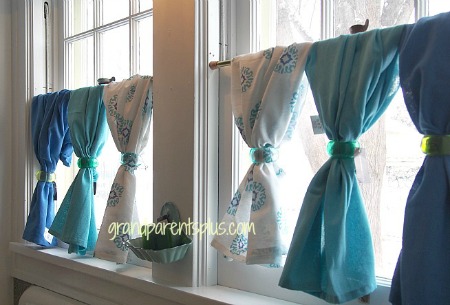
The window treatment was awesome! What a simple and cute idea to secure coordinating kitchen towels with a colorful napkin ring! Do you have a small window where this idea would work?

Spring Idea House 2014 Part 2  grandparentsplus.com

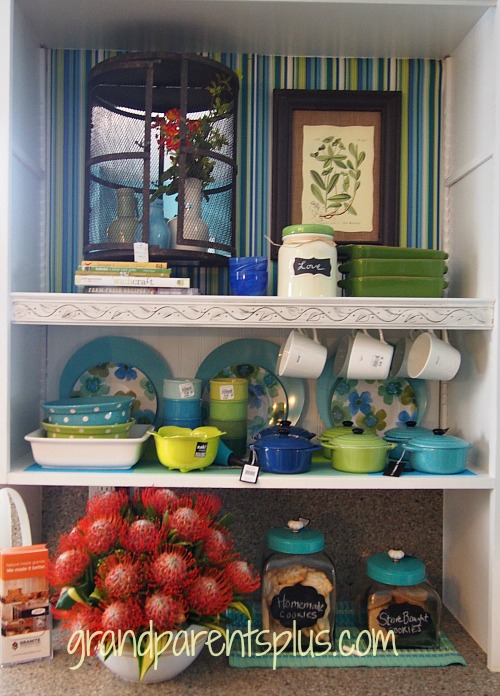
Open shelving in the kitchen shows off the color scheme.

Spring Idea House 2014 part 2  grandparentsplus.com


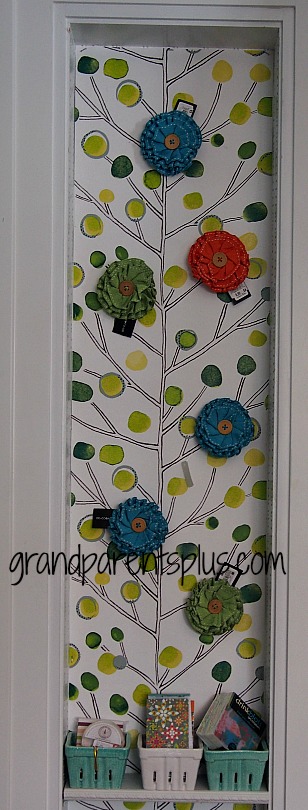
There’s a small niche’ in the kitchen.  A cute hand-painted, whimsical tree gives life to this space. Attached to the tree are three-dimensional flower magnet accents.

Spring Idea House 2014 Part 2  grandparentsplus.com

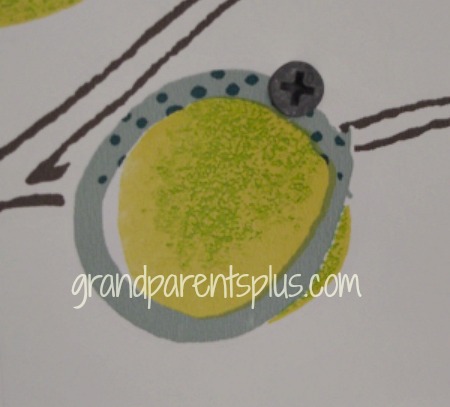
Here’s the secret of how they stay in place……

Spring Idea House 2014 Part 2  grandparentsplus.com

That’s right! They put a screw in the wall! The magnets now stick! So clever!

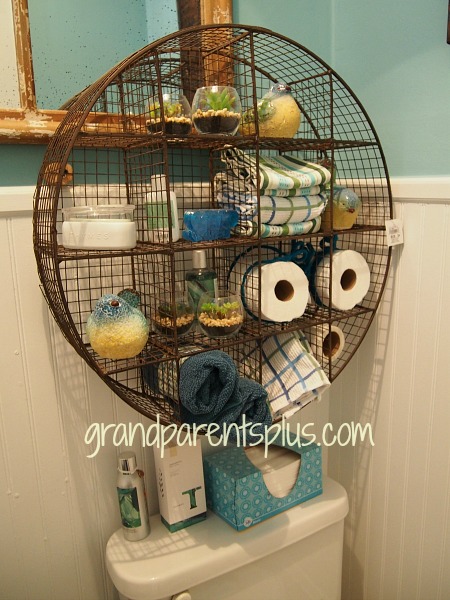
The bathroom off the kitchen used a unique wire piece as shelving storage.

Spring Idea House 2014 Part 2  grandparentsplus.com


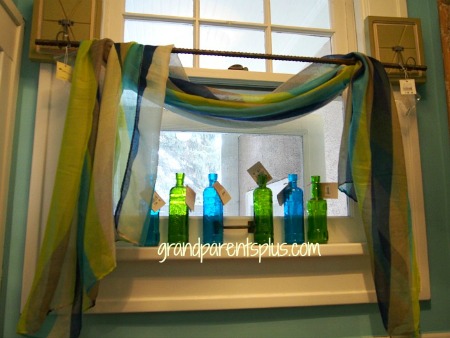
Here’s another easy accent idea for a small window…


Spring Idea House 2014 Part 2  grandparentsplus.com

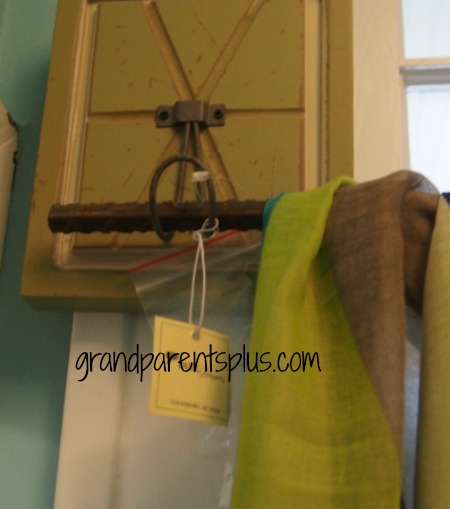
They used rebar for the rod and set it on hooks! Another easy idea!

Spring Idea House 2014 Part 2 grandparentsplus.com


 Which decorating idea, from the Spring Idea House, inspired you today ?  There’s lots more to come!

Happy decorating and thanks for stopping by!

Phyllis

You might want to subscribe on the sidebar!

Also, follow on Pinterest or Bloglovin’


This post in linked to many of these parties…..


Posted in Crafts, Decor | Tagged , , , , , , , , , , , , , | 10 Comments