Easter Napkin Ring Clips

Easter Napkin Ring Clips  grandparentsplus.com


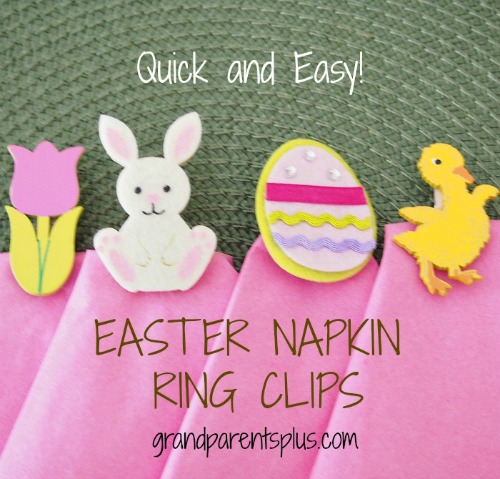
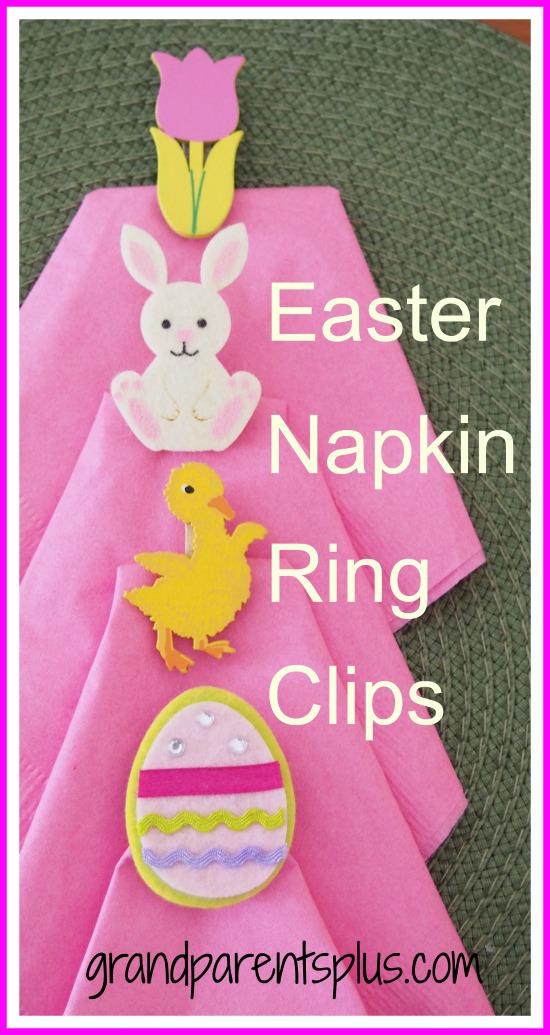
I like to coordinate my table for all seasons and holiday occasions. With these easy Easter Napkin Clips, you can use any Easter or seasonal theme. They are quick and easy to make. No special skills necessary. With a glue gun in hand, you can do it! (Tacky Glue works fine, too.)

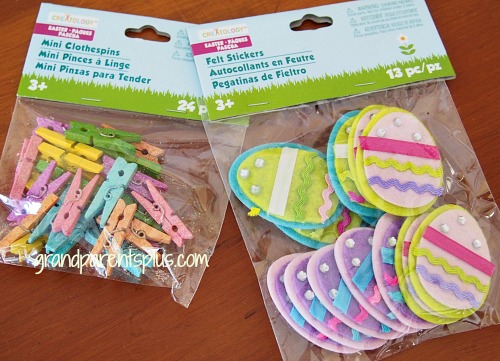
I found several cute Easter themed felt stickers made by Creatology. They had bunnies, eggs, chicks and other related Easter and Spring items. I, also, found small clothespins. The clips happened to be colored, but plain works, too.

Materials:

Easy Easter Napkin Clips   grandparentsplus.com

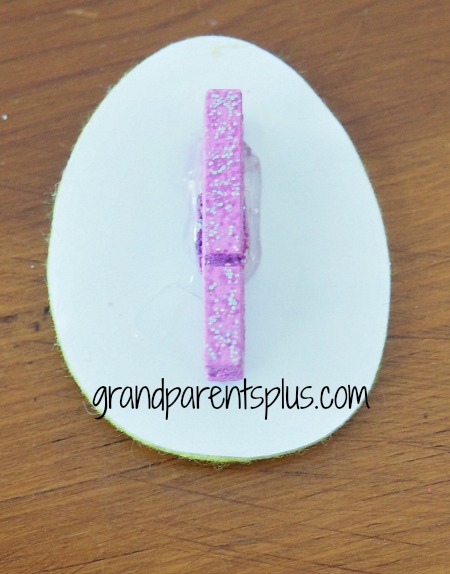
The felt stickers had a paper backing, but I just left it on and glued the clothespin on the back. (I may want to change them and use them in a different way at a later date.

Easy Easter Napkin Clips grandparentsplus.com

Even if you aren’t crafty, you can do this. On a scale of 1-10, these easy napkin ring clips rank as a #1, for easy!

Easter Napkin Ring Clips   grandparentsplus.com


  Use a variety of napkin ring clips for a fun, whimsical tablesetting.

Easter Napkin Ring Clips grandparentsplus.com


Another idea….

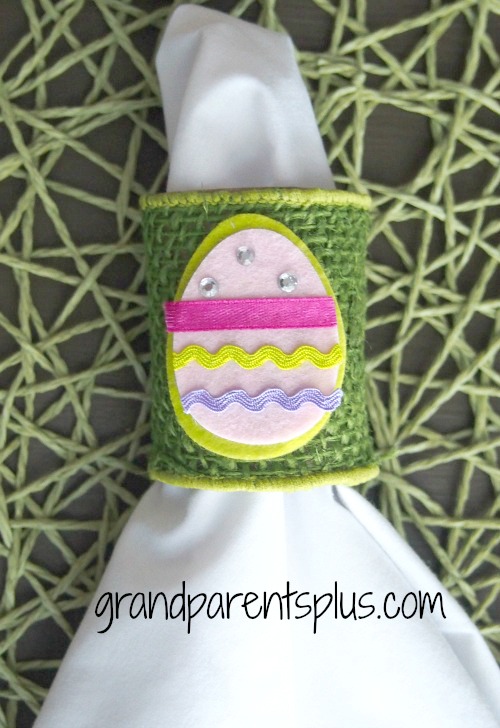
Easter Napkin Ring Clips   grandparentsplus.com


Instead of using clothespins, make your own Easter napkin ring with ribbon and place the Easter Stickers right on them. Go to DIY Napkin Rings for complete instructions.

The bunny napkin ring clip was used in the Easter Bunny Placesetting for Kids post.                                                                                 You might want to check it out, too!


Thanks for stopping by,

Phyllis

You’re invited to subscribe to future posts on the sidebar!

Also, you can follow on Pinterest or Bloglovin!


This post is linked to the following parties…….

Posted in Crafts, Easter, Holidays | Tagged , , , , , , , , , , , | 22 Comments

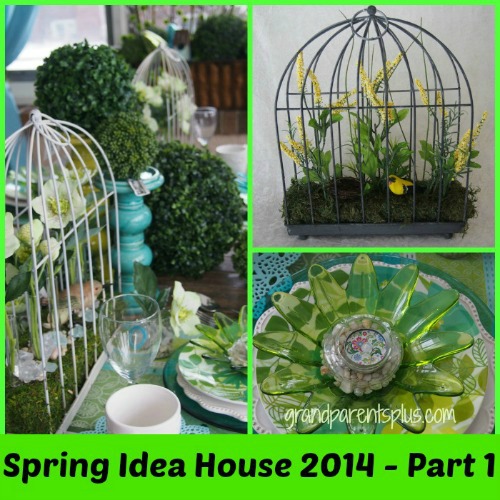
Spring Idea House 2014 – Part 1

Spring Idea House 2014  Part 1  grandparentsplus.com


The Spring Idea House 2014 in our area is always a treat for creative minds! There are  new decorating twists and ideas to start your own creative juices flowing. This old house is redone each season by several decorators and  open for tours in Spring, Fall and Christmas. I always look forward to going to be inspired! The home reflects the current trends and mixes them with vintage finds.

There are so many ideas that I will take you through separate areas of the house for each post. This is Part 1!

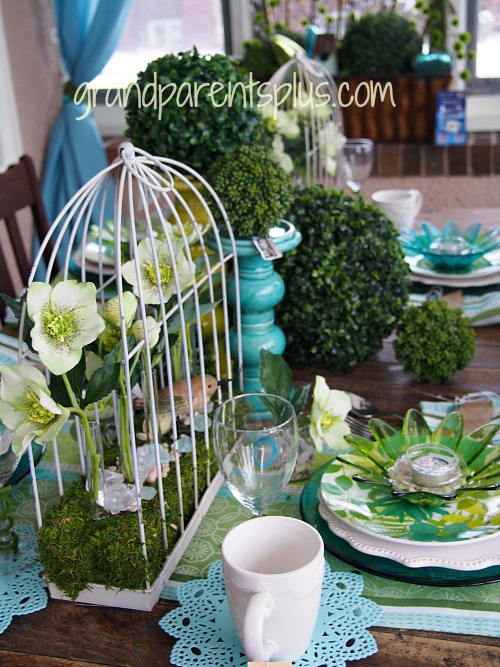
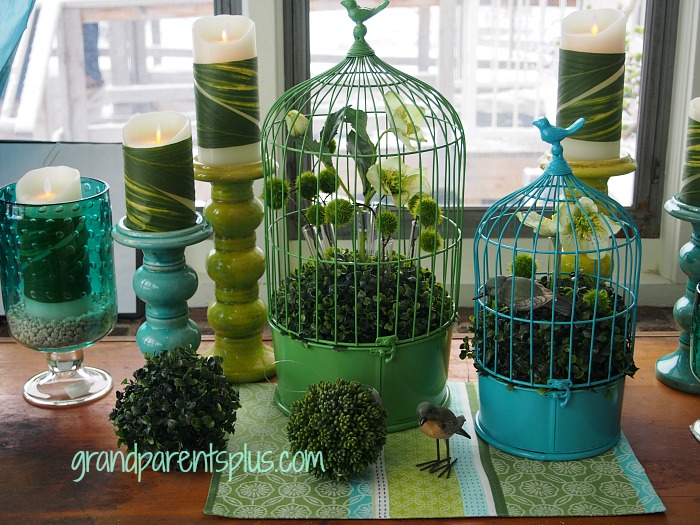
The first part is the porch entrance. As you walk in there is an old rustic table set in turquoise and greens.

Notice the cute bird cages on the table and the turquoise trivets used as coasters…..

Spring Idea house 2014 - Part 1

Spring Idea House Part 1  grandparentsplus.com

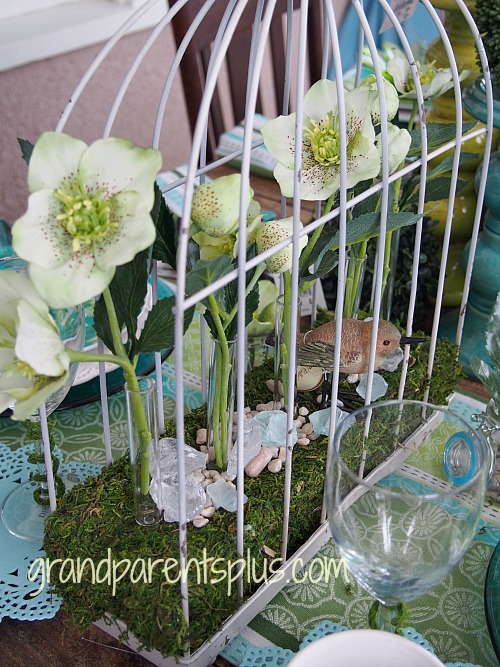
I noticed that they used floral foam wrapped in a sheet of artificial moss. Vials are filled with astromeria and stuck into the floral foam along with rocks and an artificial bird. OK! I can do that!  I knew I had most of the supplies at home.

Spring Idea House Part 1  grandparentsplus.com

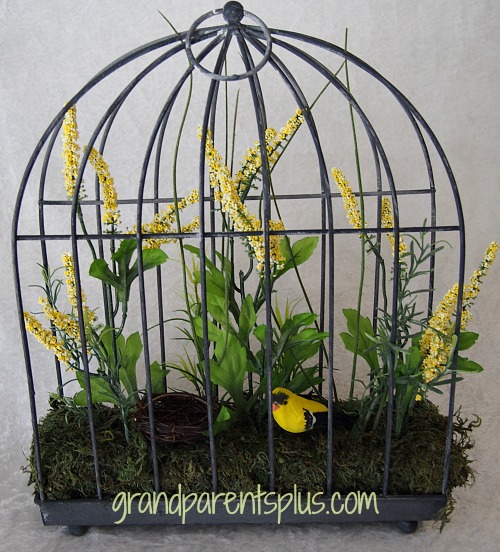
Here is my version although I didn’t use the vials, but just stuck the artificial greens right into the floral foam.

Spring Idea House Part 1  grandparentsplus.com

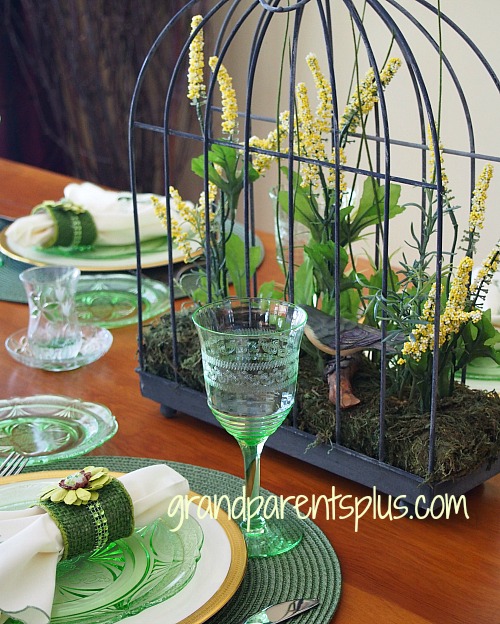
Here’s my version on my table. I loved the narrow centerpiece as my table is long and narrow!

Spring Idea House Part 1  grandparentsplus.com

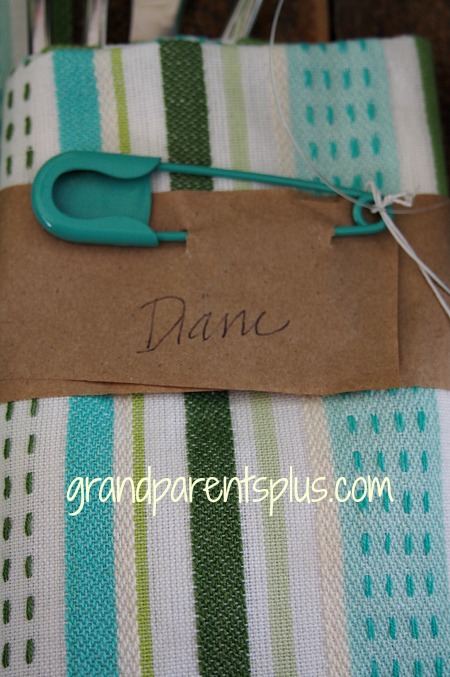
On their table, they used a simple idea of brown paper wrapped around a napkin attached by a pin and used as place cards.

Spring Idea House 2014  Part 1  grandparentsplus.com

This display was on a side table of the porch. The candles are wrapped in an artificial palm leaf. They used artificial Boxwood balls throughout the house on candle holders, in cages, window boxes, and hanging from lights.

Spring Idea House 2014 Part 1  grandparentsplus.com

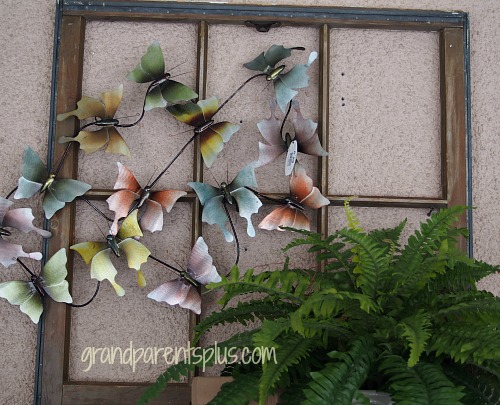
A salvaged window is hung as art with metal butterflies added as an accent.

Spring Idea House 2014  Part 1  grandparentsplus.com


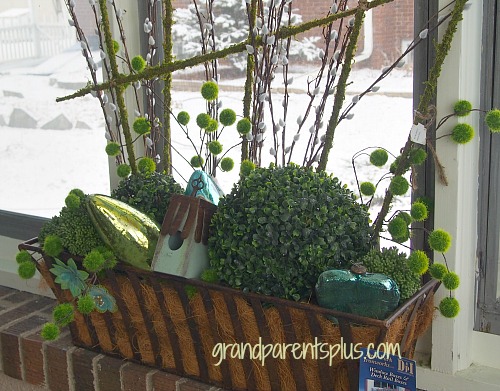
Interesting spring window box inside the porch.

  Spring Ides House 2014  grandparentsplus.com


Did you find some spring inspiration for your home?

What was your favorite detail in the Spring Idea House – Part 1?

I’ll continue with Part 2 – the Dining Room and Kitchen – in another post!

Be sure to subscribe so you don’t miss future posts!

Thanks for stopping by,

Phyllis


Follow on Pinterest and Bloglovin!

This post is linked to some of the following sites…….


Posted in Decor, Easter | Tagged , , , , , , , , , , , , , , | 23 Comments

Easter Cross Puzzle Piece Craft

Easter Cross Puzzle Piece Craft  grandparentsplus.com

The real reason for celebrating Easter often gets lost with the bunnies, eggs, chicks and Easter baskets. I’m not against all those fun things, however, let’s get across the real message of Easter, too. This Easter Cross Puzzle Piece Craft is an easy reminder of what Easter is really about. This craft is simple enough to use for kids’ Sunday School classes, Wednesday church activities or just for a special craft at home.

The materials used are inexpensive and easy to come by simply using mis-matched puzzle pieces. Planning ahead involves spray painting the puzzle pieces. Depending on the size of the cross, plan on about 25 pieces per cross.

Materials:

2 sticks per person

I used craft sticks that I had on hand. They were 8 inches long. I cut the horizontal stick to 5 inches.) Crafts sticks may or may not be painted. Popsicle sticks work, too! If you are doing this cross on just a piece of paper, no sticks are needed!

Small Puzzle Pieces  and spray paint (Yellow)


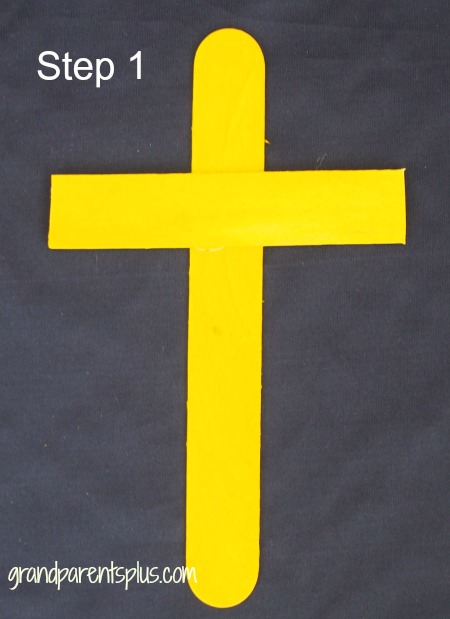
Step 1

Glue sticks together to form a cross.

Easter Cross - Puzzle piece craft   grandparentsplus.com


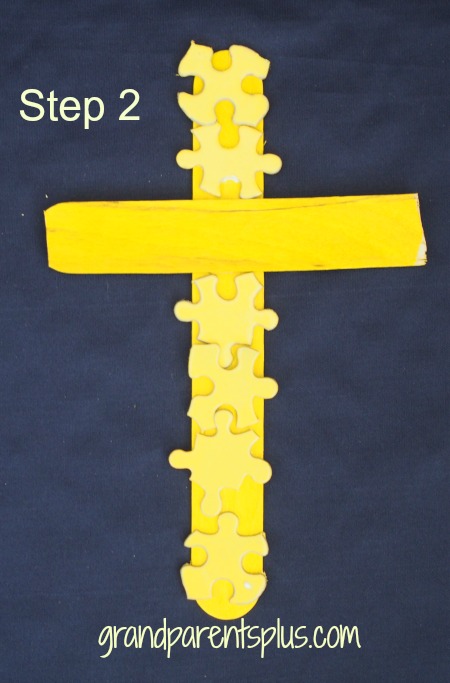
Step 2

Glue puzzle pieces on the vertical stick.

Easter Cross Puzzle Piece Craft   grandparentsplus.com

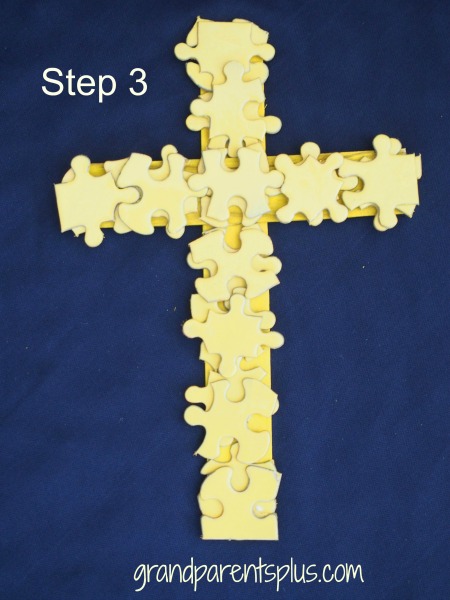
Step 3

Add puzzle pieces to the horizontal stick and repeat so that each area has double pieces.  Try to use the border pieces with a straight edge on each of the ends as the final piece.

Easter Cross Puzzle Piece Craft  grandparentsplus.com


Glue onto a piece of cardstock and add the words. (Print the words out on computer, cut and add.)

Talk about how God loved us so much that He gave His son to die as a payment for our sin. We have the gift of salvation by accepting what Jesus did for us and living for Him! It is not a “puzzle”, it is a gift!

John 3:16 For God so loved the world that He gave His one and only Son.  Whoever believes in Him, has  life everlasting!

Display the Easter Cross Puzzle Piece Craft to remind you of the free gift of salvation that Jesus offers to us!

Happy Easter!


Phyllis

Subscribe on the sidebar so you don’t miss future posts.

Follow on Pinterest and Bloglovin, too!

This post is linked to many of the following parties…..


Posted in Crafts, Easter | Tagged , , , , , , , , , | 8 Comments

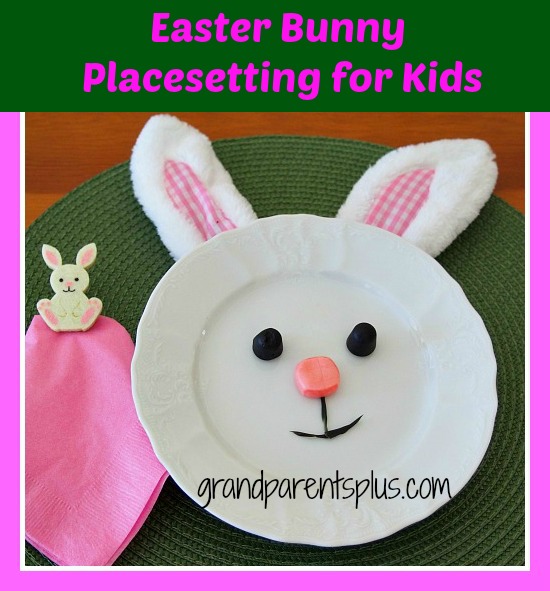
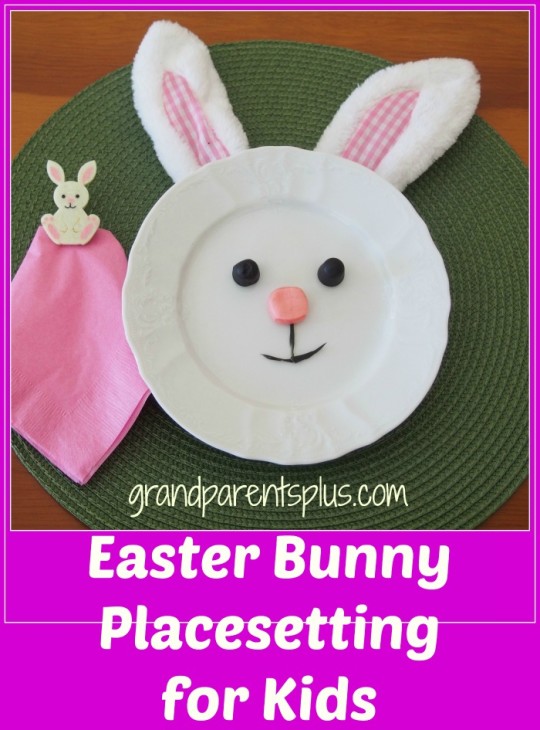
Easter Bunny Placesetting for Kids

Easter Bunny Placesetting for Kids grandparentsplus.com

What child wouldn’t be delighted with this Easter Bunny Placesetting ?  It is so quick and easy to do, too! The ears are wearable and the face is edible,! Watch their face as they sit up at the table to this cute Easter bunny placesetting!

Materials:

Bunny ears – found at Dollar Stores or Target

Dessert Size Plate (preferably white)

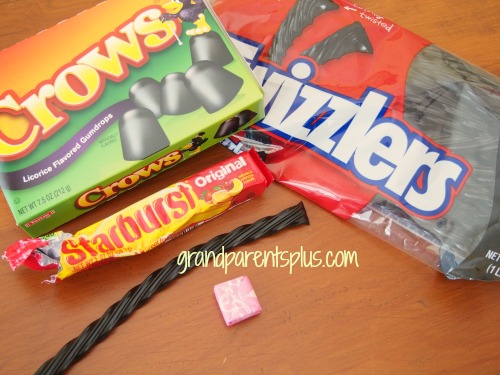
Candy:

Black licorice Crows

Black licorice rope

Strawberry Starburst

Bunny Placesetting for Easter   grandparentsplus.com

Place the dessert plate over the ears and add the face……

Two black crow candies are the eyes.

One strawberry Starburst, pressed into a circle, is the nose.

Cut the licorice rope into very thin small strips. They don’t bend easily so place in the microwave for about 10 seconds to make them soft and pliable. Now curl, bend, and cut into desired lengths and  shapes for the mouth.

That’s it! Now you have a cute Easter Bunny Placesetting for a special child (children?).

How many young kids will be at your Easter table?

Easter Bunny Placesetting for Kids   grandparentsplus.com


Check out the cute Easter bunny napkin ring clip.

You may want to subscribe so you don’t miss future posts.

Thanks!

Phyllis


This post may be linked to the following parties……

Follow on Pinterest and Bloglovin, too!


Posted in Easter, Holidays | Tagged , , , , , , , , , | 16 Comments

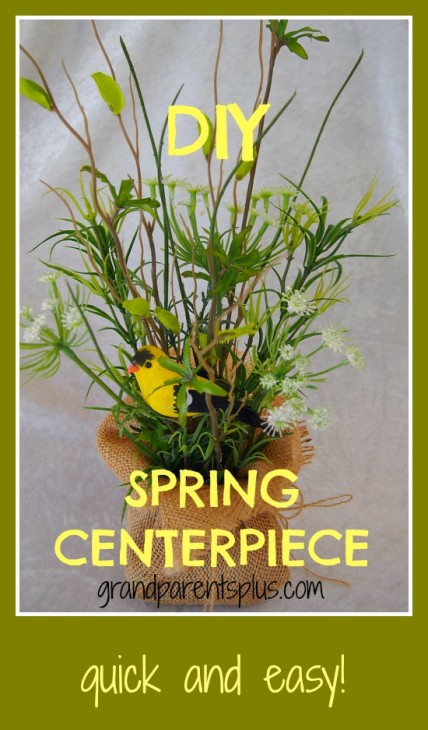
DIY Spring Centerpiece


DIY Spring Centerpiece  grandparentsplus.com

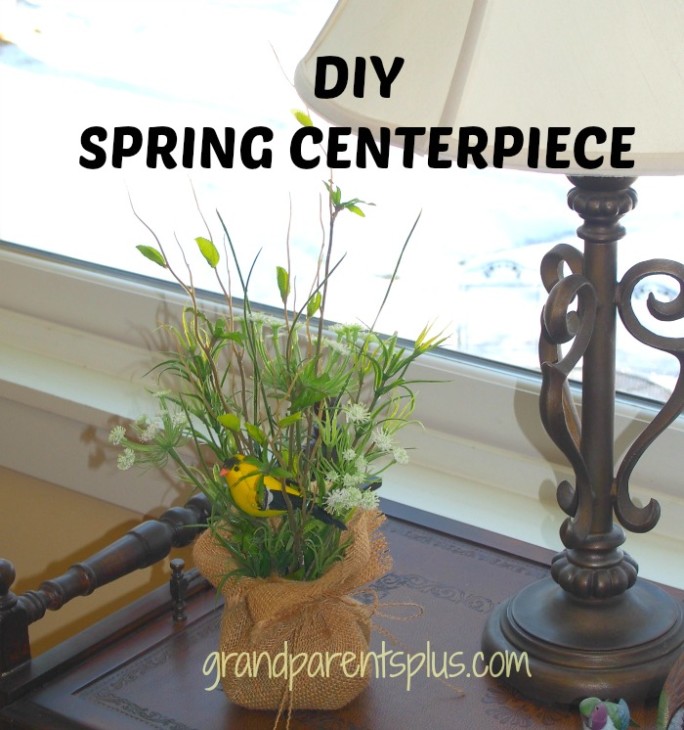
I didn’t have the right vase or pot, but wanted to make a DIY Spring Centerpiece! I had some burlap on hand so decided to use it instead of going out to find the right vase. It was more cost friendly anyway!

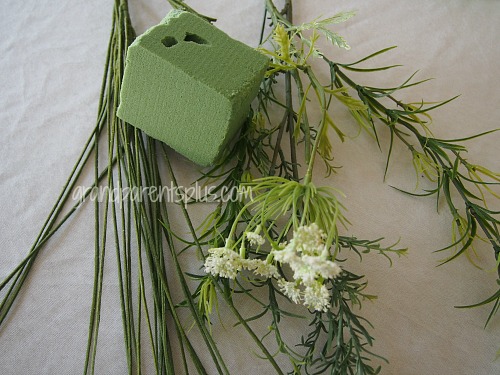
I started by cutting a square piece of floral foam around 3″ by 3″. Vary this size if you want to make it larger. I , also, had some artificial greens on hand with different textures and shades of color. OK, now to put it together.


Materials……

Floral foam

Variety of artificial greens

Burlap

Bird or butterfly (optional)

DIY Spring Centerpiece  grandparentsplus.com

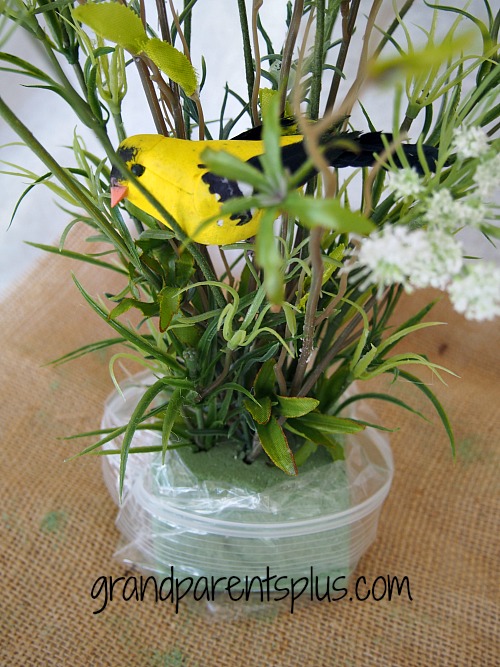
I just started cutting and poking the greens into the floral foam. Vary the heights of tall, medium and short. Start with the tall, add some medium and finish with short around the edges. Add a little bird, if you wish. 

When it was full enough, I cut a large square of burlap. (enough to fold up and gather together )  From a larger piece of burlap, I pulled two strings to use as ties.

Place the floral foam base into a plastic bag. This will keep the floral foam from sifting through the burlap and making a mess.

DIY Spring Centerpiece grandparentsplus.com

This DIY Spring Centerpiece was quick, easy, and very inexpensive. When you see the cost of floral arrangements, it certainly saves money to make your own. Doesn’t it?

I needed a little touch of Spring on my side table. Quite a difference from the white snow background outside! Spring is sure slow to come this year!DIY Spring Centerpiece grandparentsplus.com

Try making your own DIY Spring Centerpiece. Make it any size to use as a centerpiece on your table or as an accent anywhere you need a touch of Spring!

If you make it larger, add a flat weight of some sort under the floral foam. Another idea is to add some small rocks or kitty litter inside the baggie to keep it anchored down. Finish off with the burlap covering it all.


DIY Spring Centerpiece grandparentsplus.com

Thanks for stopping by!

Be sure to subscribe on the sidebar for future post notifications!

Follow on Pinterest or Bloglovin, too!

Happy Spring!

Phyllis


This post is linked to some of the following sites….


Posted in Crafts, Decor | Tagged , , , , , , , , , | 19 Comments

Spring Tablesetting with Birds


Spring Tablesetting with Birds  grandparentsplus.com

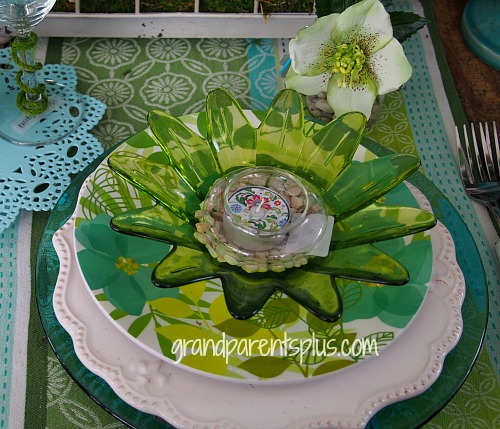
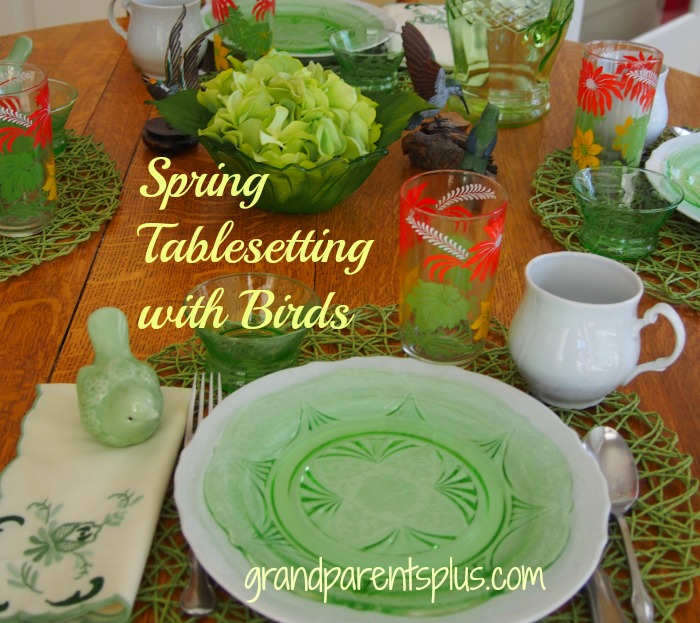
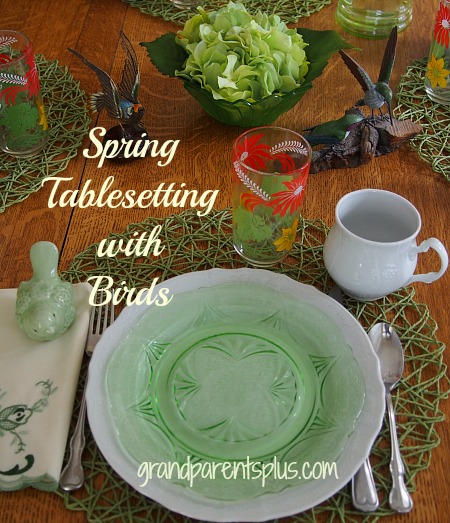
So tired of winter that I needed a taste of Spring. To me, the sound of Spring is when the birds are singing again.  This “Spring Tablesetting with Birds” accentuates the greens of Spring and displays a few of my birds. I’ve used some of my green depression glass pieces along with vintage water glasses.


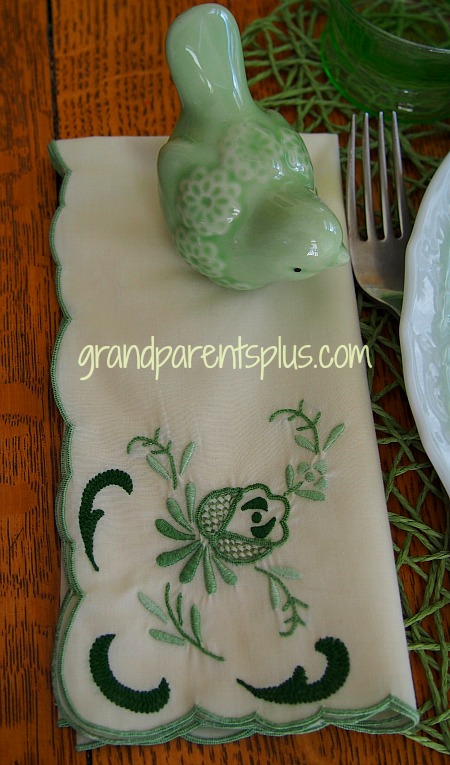
This little bird I found at Michael’s on sale for $1.00! Couldn’t pass them up! I just simply placed the birds on the napkins.


Spring Tablesetting with Birds  grandparentsplus.com

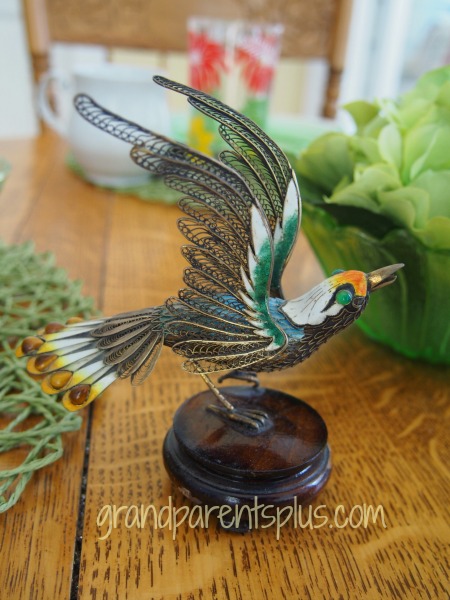
This one is from mainland China – a souvenir from a trip some years ago.

Spring Tablesetting with Birds  grandparentsplus.com

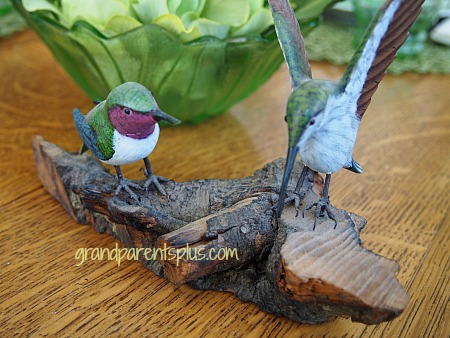
I have a passion for hummingbirds. With feeders around in my gardens, they are active all summer. If I don’t have my feeders out before they return, they come to my window and just look at me to let me know they’re here! Can’t wait until they return! Meanwhile, I have this hand carved piece to remind me of them!

Spring Tablesetting with Birds grandparentsplus.com

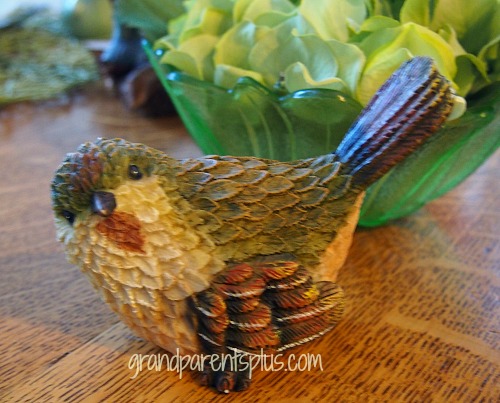
Just another little bird that I liked…..

Spring Tablesetting with Birds   grandparentsplus.com

Whatever collections you have, incorporate them into your tablescapes or tablesettings to make it interesting.

One fact about the color green, almost any shade works with another. Look at creation with all the shades of green!


Spring Tablesetting with Birds   grandparentsplus.com

Thanks for stopping by! Hope I have inspired you with my Spring Tablesetting with birds!

Now, if Spring would only hurry up and get here!


Phyllis

You’re invited to subscribe to future posts on the sidebar!

Follow on Pinterest, Facebook, and Bloglovin, too!


I link to some of these parties……

Posted in Decor | Tagged , , , , , , , , , , , | 33 Comments

Easter Story Cookies – Resurrection Rolls

Easter Story Cookies & Resurrection Rolls   grandparentsplus.com


Easter is the celebration of the resurrection of Jesus and God’s plan for our salavation. Telling  the story to children with these “Easter Story Cookies”, is a  hands-on devotional that makes it meaningful for them. I’ve included a second idea of Resurrection Rolls, too.

These Easter Story Cookies are to be made the night before Easter. Through the making of the cookies, the Easter story is told along with the reading of the corresponding scripture passages.


Ingredients:

1 c. whole pecans

Zipper Baggie

Wooden spoon

1 tsp vinegar

3 egg whites

Pinch of salt

1 c. sugar

Tape

Bible

Directions:

Preheat oven to 300 degrees. This is very important. Don’t wait until you are half done with the recipe!

Place pecans in zipper baggie and let the children beat them with the wooden spoon to break into small pieces.  Explain that after Jesus was arrested, He was beaten by the roman soldiers. Read John 19: 1-3

Let each child smell the vinegar. Put 1 teaspoon vinegar into mixing bowl. Explain that when Jesus was thirsty on the cross, He was given vinegar to drink. Read John 10: 28-30.

Add egg whites to vinegar. Eggs represent life. Explain that Jesus gave His life in order to give us life. Read John 10: 10-11

Sprinkle a little salt into each child’s hand. Let them taste it and brush the rest into the bowl. Explain that this represents the salty tears shed by Jesus’ followers and the bitterness of our own sin. Read Luke 23: 27.

So far, the ingredients are not very appetizing……

Add 1 cup of sugar. Explain that the sweetest part of the story is that Jesus died because he loves us. he wants us to know and belong to Him. Read Psalms 34: 8 and John 3: 16.

Beat the egg white mixture with a mixer on high speed for 12-15 minutes until stiff peaks are formed. Explain the the color white represents the purity in God’s eyes of those whose sins have been cleansed by Jesus. Read Isaiah 1: 18 and John 3: 1-3.

Fold in broken nuts. Drop by teaspoons onto baking stone. (or use a baking sheet with parchment paper) Explain that each mound represents the rocky tomb where Jesus’ body was laid. Read Matthew 27:: 57-60.

Place in oven, close the door, and turn the oven off! Give each child a piece of tape and seal the door. Read Matthew 27: 65-66.

Go to bed!

Explain that they may feel said to leave the cookies in the oven overnight. Jesus’ followers were sad when the tomb was sealed. Read John 16:20 and 22.

On Easter morning, open the oven and give everyone a cookie. notice the cracked surface and take a bite. The cookies are hollow! on the first Easter, Jesus’ followers were amazed to find the tomb open and empty. Read Matthew 28:1-9


Resurrection Rolls

Ingredients:

8 large marshmallows

4 Tbsp. butter

1 Tbsp. Cinnamon mixed with 3 Tbsp sugar

1 can of refrigerated crescent rolls


Lay the eight triangle rolls out.

In three separate bowls, place the marshmallows, melted butter and cinnamon/sugar mixture.

Dip a marshmallow in the butter and then roll in the cinnamon/sugar.

Place the marshmallow in the center of the crescent dough and fold around the marshmallow leaving no open spaces. Pinch together the edges tightly.
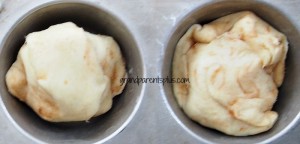
Resurrection Rolls  grandparentsplus.com

Put the roll into a slightly greased muffin tin.

Bake at 375 degrees for 10-12 min.

Crescent rolls should be lightly browned.

Cool!

When you open the roll, the middle is empty.
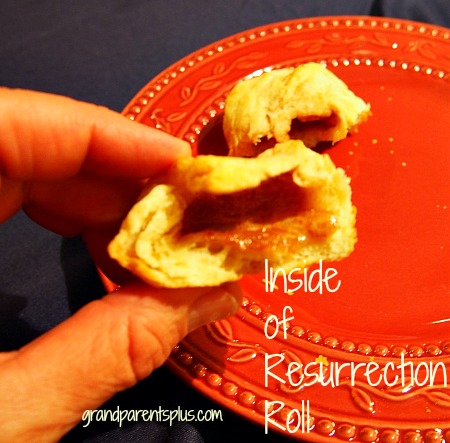
Resurrection Rolls  grandparentsplus.com

Talk about how they discovered the empty tomb on Easter morning. Jesus is Risen!

Both the Easter Story Cookies and Resurrection Rolls will remind kids of the true meaning of Easter!

Happy Easter!

He is Risen!


Phyllis


This post is linked to the following sites…..


Posted in Easter, Holidays | Tagged , , , , , , , , , , | 31 Comments

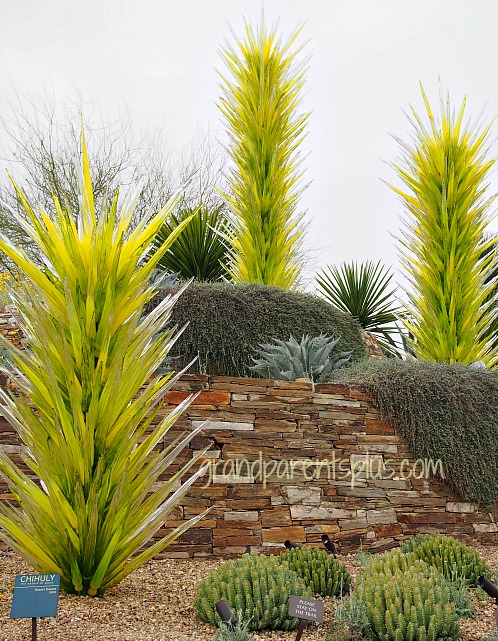
Chihuly Exhibit in Arizona

Chihuly Exhibit in Arizona  grandparentsplus.com


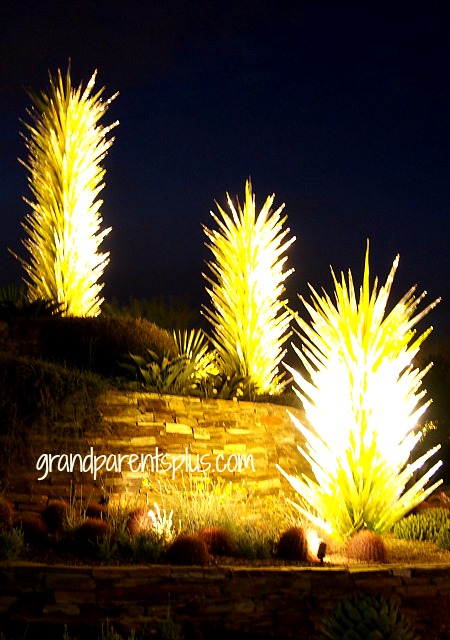
I am diverting from my usual posts to show some amazing designs at the Chihuly Exhibit in the Phoenix Desert Botanical Gardens. We took a warm respite and traveled to Arizona and visited the Chihuly Exhibit while there. The glass designs were lit at night, but they were just as beautiful during the day against the textures and beauty of the desert plantings.

There is a permanent Chihuly exhibit in Seattle so if you’re there, take it in! It is quite amazing what he does with glass!  Go to his site to learn more about Chihuly.

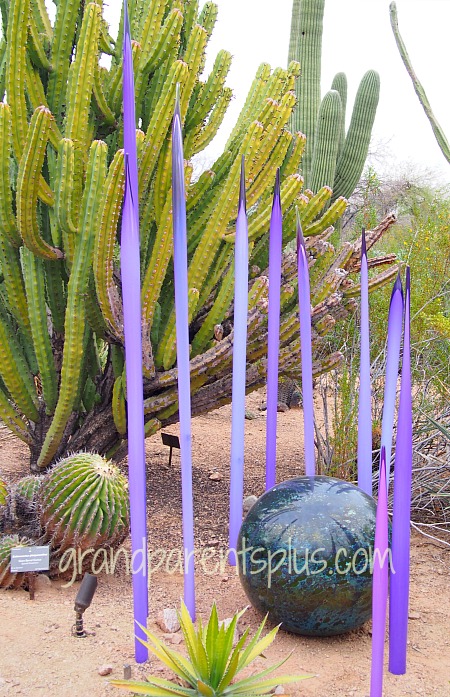
Here are some memories…..   Remember, each design is  all blown glass!

OLYMPUS DIGITAL CAMERA

At night, it looked like this….

Chiihuly Exhibit in Arizona   grandparentsplus.com

More designs!

Chilhuly Exhibit in Arizona   grandparentsplus.com


Chihuly Exhibit in Arizona   grandparentsplus.com


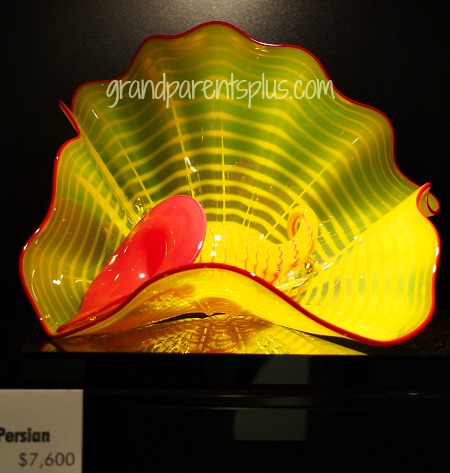
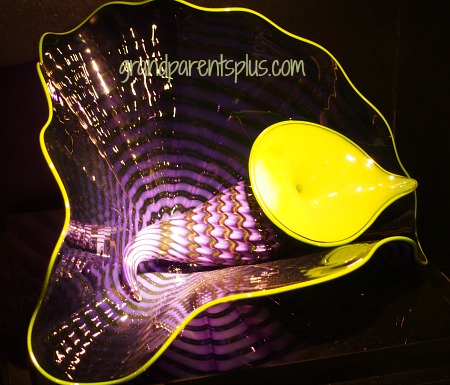
There was a gift shop with a display of his beautiful bowls for sale. Notice the price on the one bowl. Needless to say, I didn’t go home with one! Here are two of my favorites…..

Chihuly Exhibit in Arizona


Chihuly Exhibit in Arizona

More photos of the garden pieces……

Chihuly Exhibit in Arizona


Chihuly Exhibit in Arizona   grandparentsplus.com


Chihuly Exhibit in Arizona  grandparentsplus.com

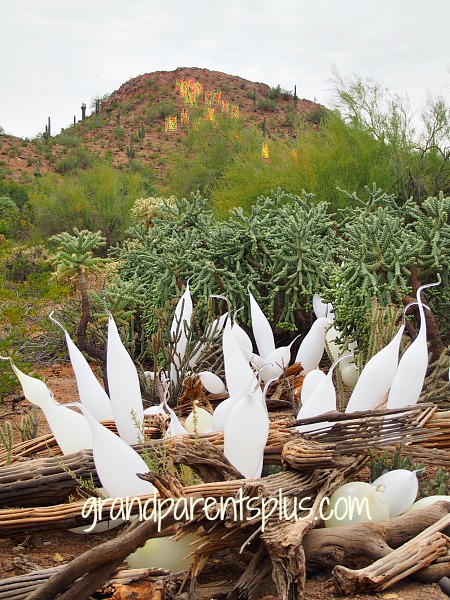
On this next picture, the exhibit that was up on the mountain shows, too!  Tell me how they got it there in one piece!

Chihuly Exhibit in Arizona  grandparentsplus.com


Chihuly Exhibit in Arizona  grandparentsplus.com


Do you have a favorite so far?


Chihuly Exhibit in Arizona  grandparentsplus.com

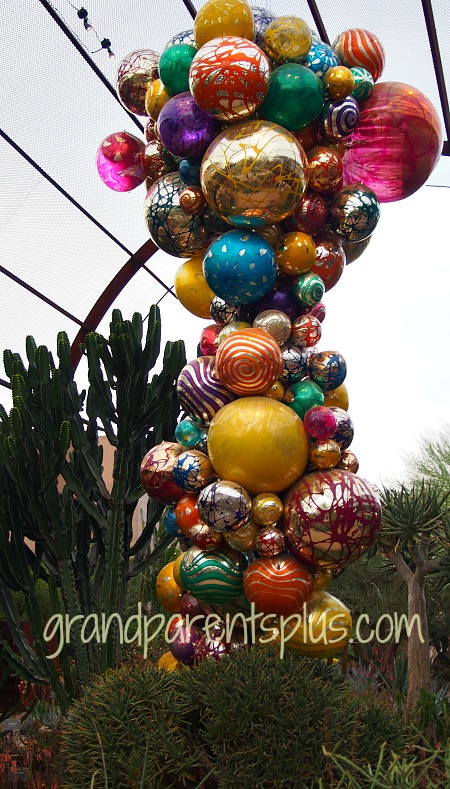
This  would make quite a Christmas tree! WOW!

Chihuly Exhibit in Arizona  grandparentsplus.com

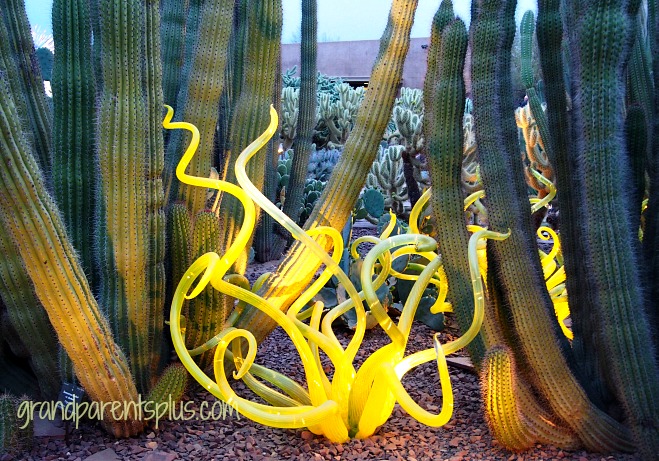
This kind of “snake” I don’t mind!

Chihuly Exhibit in Arizona   grandparentsplus.com

The grand finale!

Chihuly Exhibit in Arizona  grandparentsplus.com

At night……

Chihuly Exhibit in Arizona   grandparentsplus.com

I didn’t include all  my pictures, but wanted to give you a taste of how beautiful it was. This was held in February 2014 for 10 days at the Desert Botanical Gardens in Phoenix, Arizona.

When we arrived back home, it was zero degrees! Quite a shock! Looking forward to Spring!

Hope you enjoyed the pictures!

Which one was your favorite?

I always appreciate you taking the time to stop by!


Phyllis

Subscribe on the sidebar or follow on Pinterest or Bloglovin

Linking this post to some of these parties…..


 www.thededicatedhouse.com

www.coastalcharm.blogspot.com


Posted in Misc., Uncategorized | Tagged , , , , , , | 18 Comments

Easy Cheesy Potatoes – “Shreds”

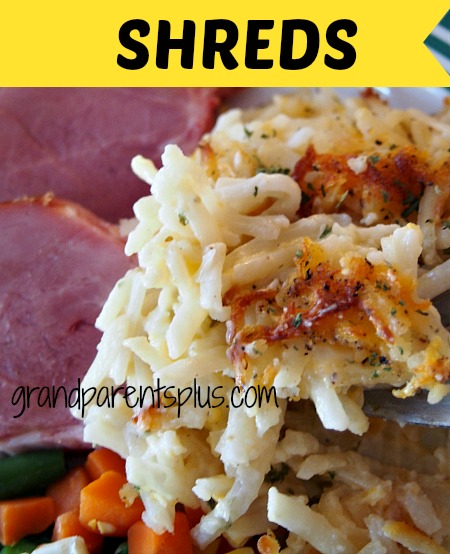
Shreds - Best Cheesy Potatoes grandparentsplus.com

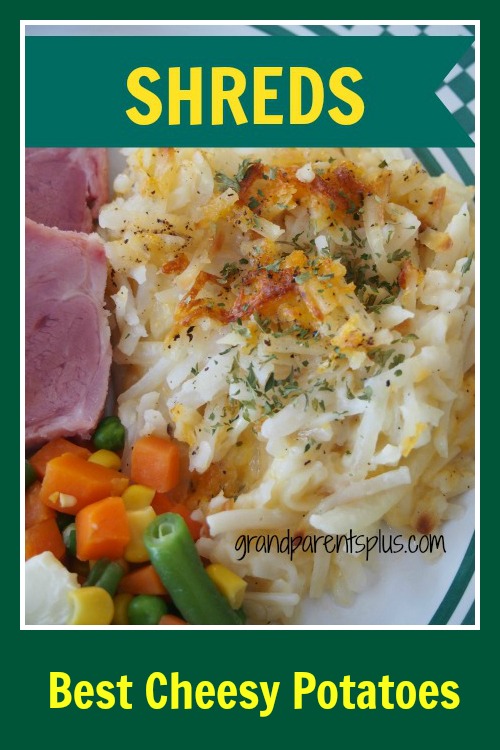
In my book, when you serve ham, you’ve got to have cheesy potatoes to go with it! They just naturally go together! The easiest and best cheesy potatoes are called “Shreds”! They take hardly any time to put together and taste fantastic! I’ll give you a couple of versions of them and you can choose which you think is best! I use the first one more often.

Both kids and adults are crazy for these potatoes! Don’t plan on lots of left-overs!  

Easy Cheesy Potatoes – “Shreds”
Recipe Type: Side Dish for Breakfast, Brunch, or Dinner
Cuisine: American
Author: unknown
Prep time:
Cook time:
Total time:
Serves: 12
Easy and Cheesy!
Ingredients
  • 2 packages of 28-30 oz. frozen hash browns
  • 2-3 cups of shredded Cheddar cheese
  • 1 cup of grated swiss cheese
  • 2 pints of heavy whipping cream
  • 2 small chopped onions – sautéed
  • Salt and Pepper to taste
Instructions
  1. Place 1/2 layer of hash browns in a 9×13 pan. (This looks like it won’t fit, but it cooks down.)
  2. Sprinkle onions over the layer and 1/2 of the cheese
  3. Repeat the same with the second layer.
  4. Pour cream over the top covering all areas.
  5. Bake uncovered at 350 degrees for 60 min. until hot and bubbly in the middle


For making a smaller batch, just use 1 package of shredded potatoes, 1 cup of cheese, and 1 pint of cream.

For an even cheesier version…..

32 oz. bag of frozen shredded hash browns – thawed

2 cups of shredded or grated mozzarella cheese

2 cups of grated Cheddar cheese

1 cup of grated Swiss

1 pint of whipping cream or half and half

Onion

Salt and Pepper

Combine and place in 9 x 13 pan and bake uncovered for  1  1/2 hrs at 325 degrees.


Both versions are delicious!

Shreds - Best Cheesy Potatoes grandparentsplus.com

If you serve ham with the Best Cheesy Potatoes – “Shreds”, check out the “Juicy Ham Every Time” post!

YUM!

Enjoy!

Phyllis


Be sure to subscribe so you don’t miss future posts!

Follow on Pinterest and Bloglovin, too!


This post is linked to the following sites…..

 www.thededicatedhouse.com

www.coastalcharm.blogspot.com

Posted in Recipes, Side Dish | Tagged , , , , , , , , , , , , , , , , | 32 Comments

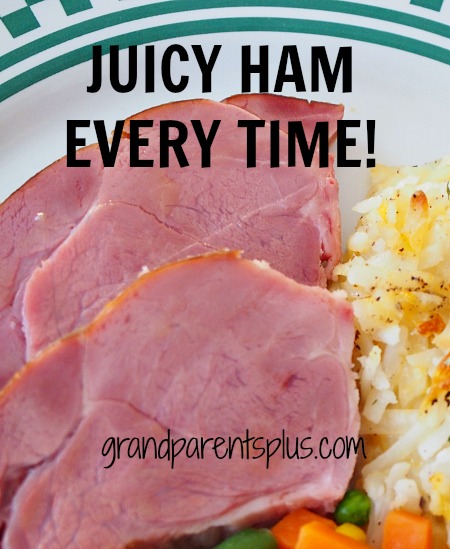
Juicy Ham Every Time!

Juicy Ham Every Time grandparentsplus.com

Are you tired of serving dry ham? Here’s the answer for a Juicy Ham Every Time!

A friend gave me this hint and it results in a Juicy Ham Every Time!  I will never ever again cook a  ham without doing it this way. Talk about moist!  All the juices are retained and the flavor and texture are fabulous. Try it and you won’t go back to your old ways!

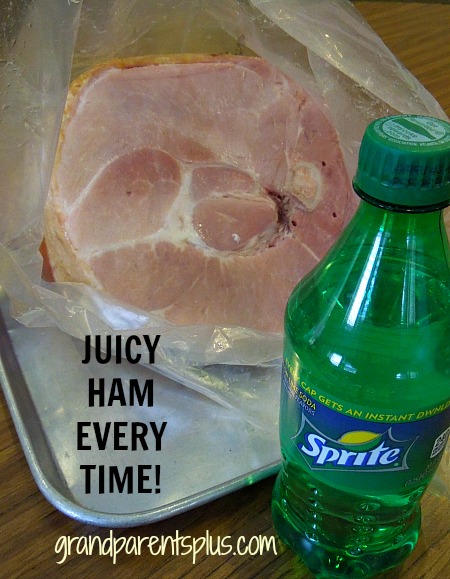
No need to buy an expensive ham. I buy the cheapest ham on sale and it turns out so juicy every time!  Here’s the secret….


Juicy Ham Every Time!

Ingredients

  • 1 Ham - don't buy a spiral, but any other ham will do!
  • 1 can Sprite (12 oz.)
  • 1 oven cooking bag

Instructions

  1. Place ham inside the cooking bag, but don't pierce the bag!!!
  2. Place bag with ham inside a large baking pan. (I line it with foil for easy clean up)
  3. Pour Sprite inside the bag.
  4. Seal bag as directed and put on a low rack of the oven so that inflated bag will not touch a heating unit.
  5. Bake as directed for the size of ham.
  6. Remove and serve.
  7. Note: Bag will inflate like a balloon so don't be alarmed. It will work as long as it doesn't touch a heating unit.
Schema/Recipe SEO Data Markup by Yummly Rich Recipes
https://grandparentsplus.com/juicy-ham-every-time/

Click on the “YUM” button to save to your recipe box.  

Juicy Ham Every Time grandparentsplus.com


That’s it! Think you can handle that?

I’ll admit that I was a bit skeptical until I tried it. Now, I know it is the best way to have a Juicy Ham Every Time!

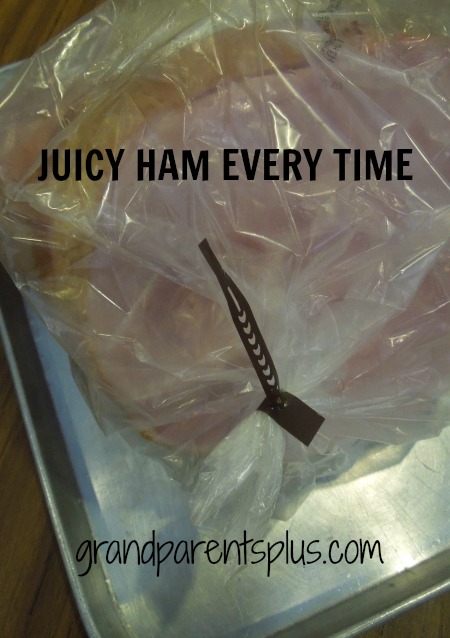
Simply place the ham  in the cooking bag, but don’t cut the slits on top!

Juicy Ham Every Time grandparentsplus.com


Now, pour the can of Sprite inside the bag. Seal the bag tight and bake according to the weight.

Juicy Ham Every Time grandparentsplus.com


Out will come the tenderest, moistest (is that a word?), ham  you have ever tasted. No more dry meat!

Well, that’s the method passed on to me by a friend. I am passing it on to you! Try it and you will say,

“That’s the best way to cook a ham!”

You’ll have Juicy Ham Every Time!

Shred - Best Cheesy Potatoes grandparentsplus.com

Whether for Easter or any other gathering, you’ll always want to have a “Juicy Ham Every Time”!

Enjoy!

Phyllis

By the way, along with the juicy ham, you’ll want to serve the best cheesy potatoes called “Shreds”. Check out my post for another easy, delicious recipe!  


You might want to subscribe so you don’t miss out on future posts.

Follow on Pinterest and Bloglovin, too!


This post is linked to the following sites……


Posted in Easter, Holidays, Recipes | Tagged , , , , , , , , , , , , , , , | 85 Comments