Best Art and Craft Tool

Best Art and Craft Tool   grandparentsplus.com

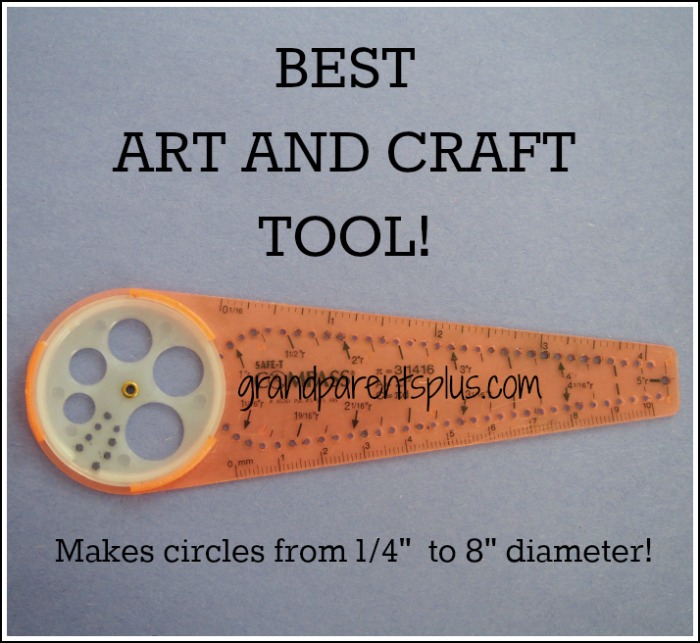
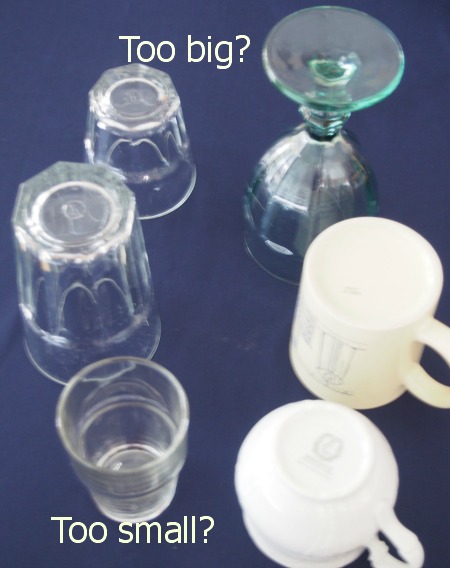
Have you ever hunted in your pantry or cupboards for the right size object to trace a circle? You try every can, glass, saucer, cup, and none are just the right size!  Now, no more frustration in finding just the right-sized circle! The answer for the best art and craft tool is the Safe-T-Compass.

Best Art and Craft Tool  grandparentsplus.com

You’ll always have just the right size circle at your fingertips with Safe-T-Compass. It is the best art and craft tool (next to scissors and glue)! Let me show you why…..

There are several ways to use this art and craft tool!

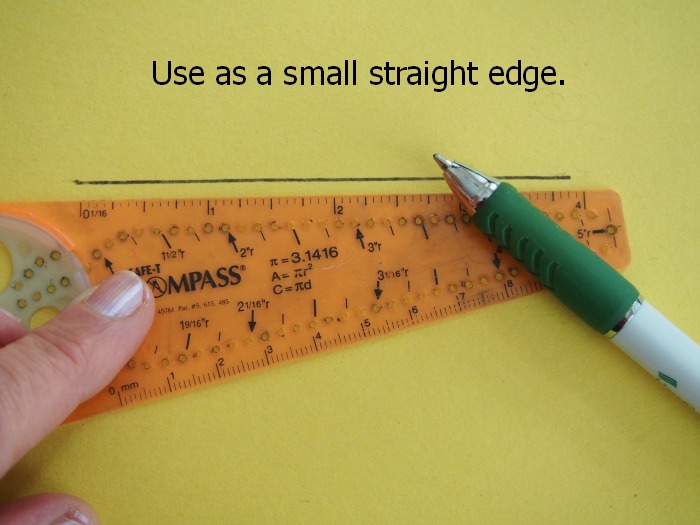
1. Use the straight edge as a small ruler.

So handy when you keep it right in a pencil caddy!

Best Art and Craft Tool   grandparentsplus.com

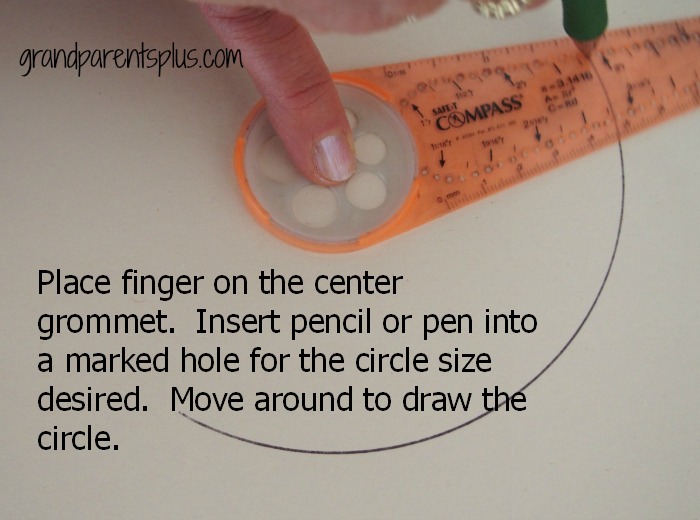
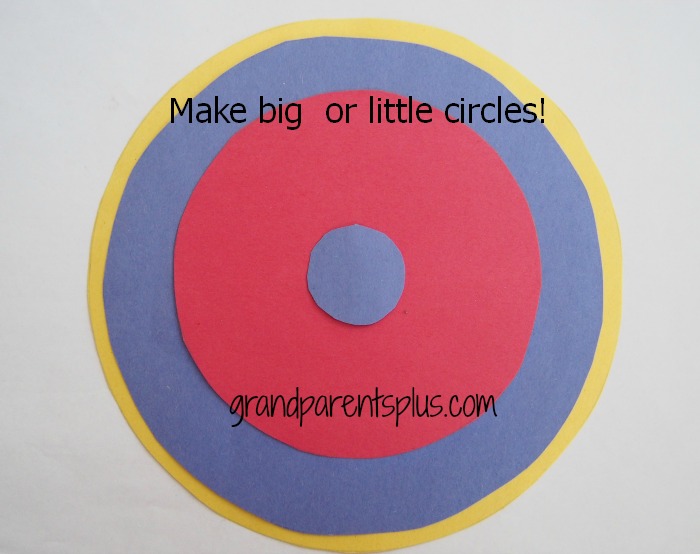
2. Make circles

Best Art and Craft Tool   grandparentsplus.com

Easy to make any size circle….

Best Art and Craft Tool   grandparentsplus.com

3. Make arcs.

Easy for making rainbows!

Best Art and Craft Tool   grandparentsplus.com

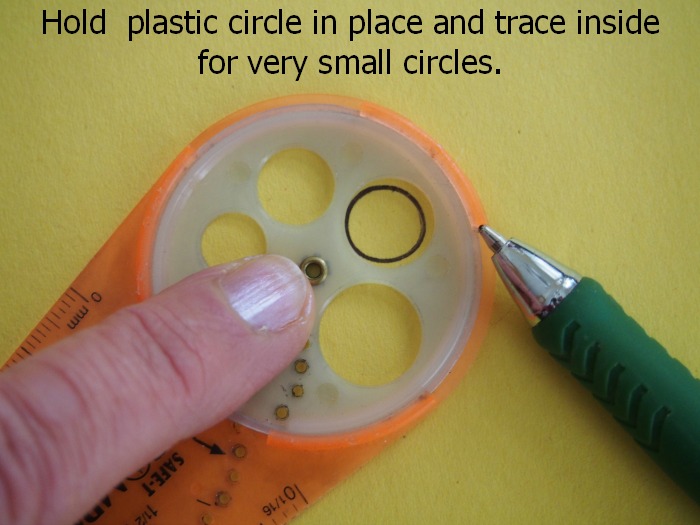
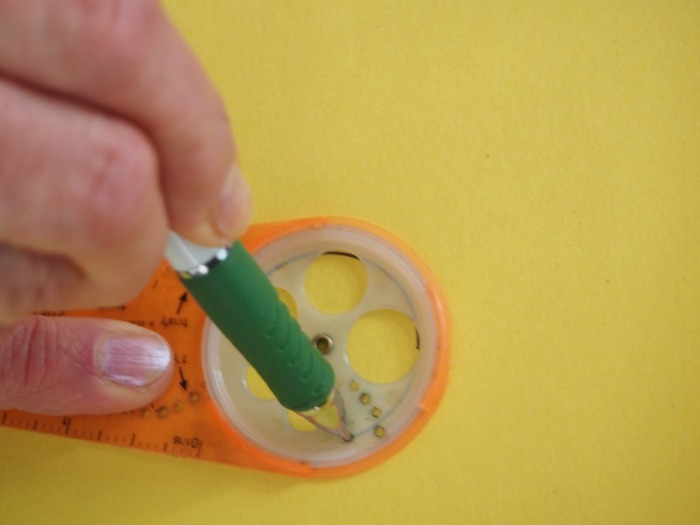
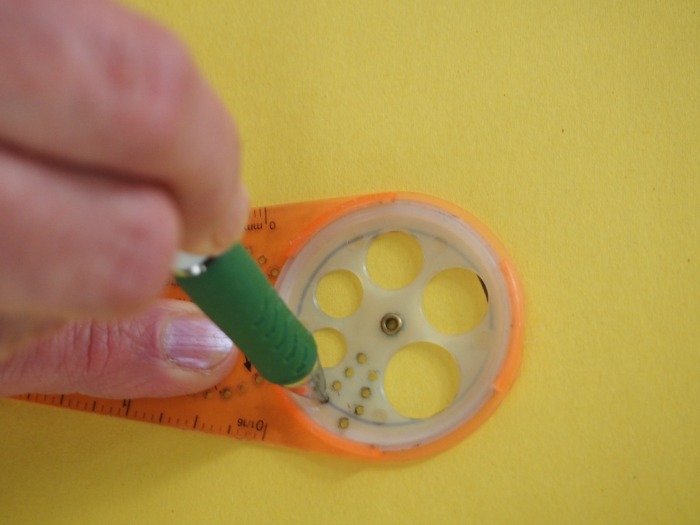
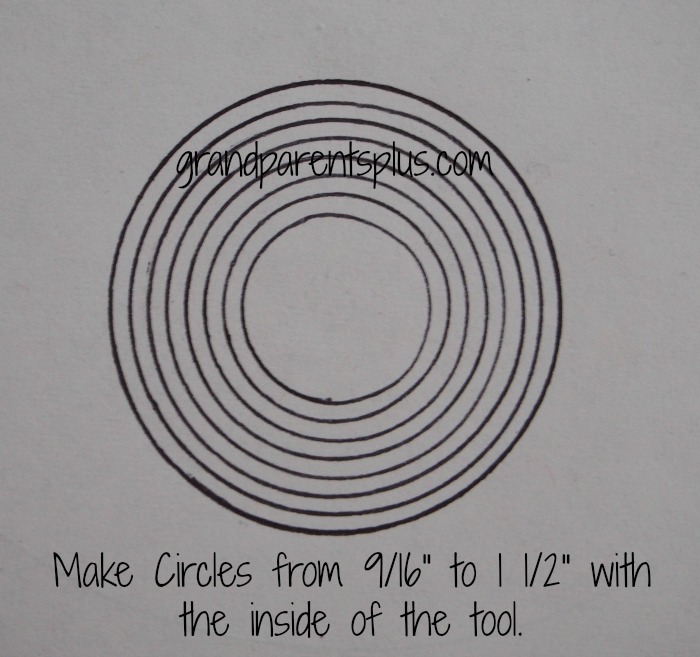
4. Inside circle for very small circles – eyes, nose, etc.

Best Art and Craft Tool   grandparentsplus.com

OLYMPUS DIGITAL CAMERAOLYMPUS DIGITAL CAMERA

Best Art and Craft Tool   grandparentsplus.com


This tool creates circles accurately just the size that you need.

Best Art and Craft Tool  grandparentsplus.com

This art and craft tool is completely safe and simple to use. It is easy enough for children to use, too!. I keep my Safe-T-Compass in my pencil caddy so it is handy to use anytime. Remember those compass tools of the past? Dangerous!!! Long, sharp point….yikes! You wouldn’t  be allowed on an airplane with them today!

Kids  can’t draw circles easily and they get frustrated when they try. Well, this tool makes it so easy. Even some preschool children can do it. Most young children can manage it with someone holding it in place.  Suddenly circle crafts and art projects become unlimited in possibilities and much more fun!

Think of all the possibilities….   snowmen, earth, balls, eyes, flowers, etc. ……..anything that can be done with a circle!

Great way to teach the terms radius and diameter, too! Kids won’t know they are learning a math skill!

Well, did I convince you that this is a must have? I have two of them. I keep them handy all the time! It makes a great little gift, too. They are so inexpensive!

Now your problem for finding the right-sized circle is solved!

Find this Safe-T-Compass tool at Dick Blick. They have the best price I have found!

Yes, by ordering from Dick Blick, I will receive a little reimbursement. However, I have used this tool long before doing this blog so my opinions are completely mine! Thanks for your support! Appreciate it!

 Thanks,

Phyllis

This post is linked to the following parties…..


Posted in Art Project, Crafts | Tagged , , , , , , , , , , , | 13 Comments

Easter Cross – Amazing Grace

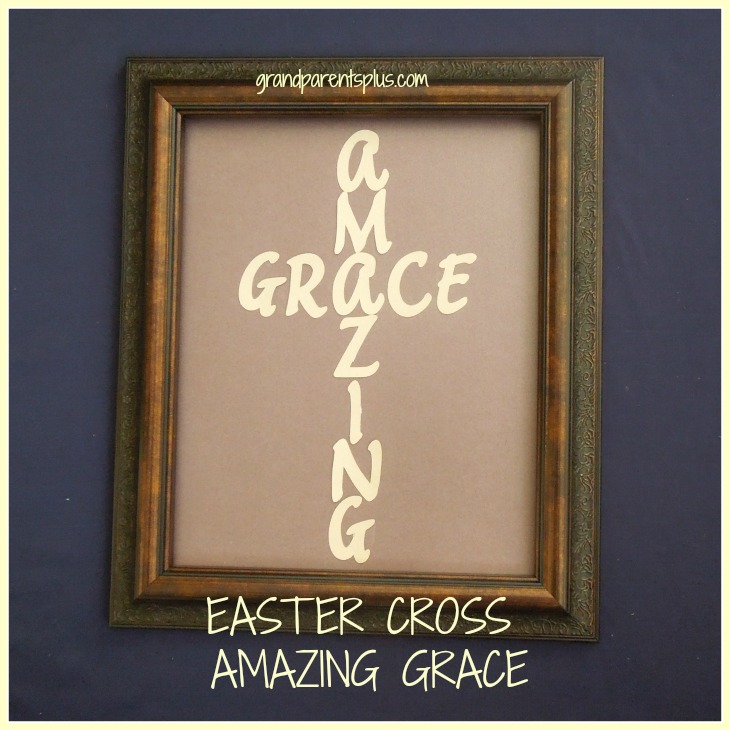
Easter Cross Amazing Grace grandparentsplus.com

This easy Easter craft of the “Easter Cross- Amazing Grace” is a meaningful reminder of the sacrifice Jesus made on the cross and the “grace” (undeserved free gift”) that is extended to all who call on His name. The wonderful gift of salvation is given to us by His payment of our sins! AMAZING!


Cross Art #cross #Easter craft #kids easter craft

Easy to make for adults and kids!


Below is the inspiration for the craft……   Looks great, but you need wall space to hang it! Plus it is expensive to do!


Easter Cross - Amazing Grace #Easter #cross #amazing-grace www.grandparentsplus.com

Easter Cross – My inspiration piece!


This idea was on Pinterest. The original post is from keierleber It was the inspiration piece that gave birth to a simple and less expensive idea that became the craft  for our Mops group (Mother of Preschoolers) at our church. No, I don’t have preschoolers, but serve as a mentor mom to this wonderful group of moms.

The original cross is made from large letters purchased at craft store which are glued together to form this cross.  It looks “Amazing” and I love the message, but it was expensive to buy each of these letters. Since that didn’t fit into the budget, a member of our planning group had a Cricut and was willing to do the letters.

She used plain copy paper and made them 1- 1/2 inches tall. They worked perfectly! The cost factor was perfect, too!

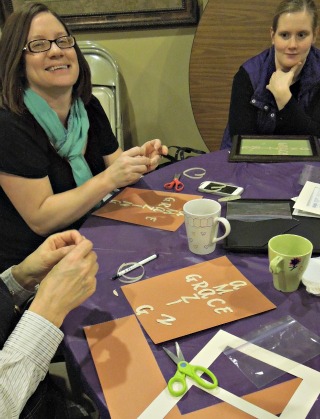
Using scrapbook tag-board paper for the background, the letters were arranged on an  8 x 10 piece. We used mounting tape to adhere the letters to the background.  No messy glue! The finished product was placed in an inexpensive 8 x 10 frame to display!

With the  1   1/2 inch letters pre-cut, it only took 20 -25 minutes to put together! Of course, part of that time was having fun chit-chatting away and looking at what others were doing with their creations. For you, it may take even less time.

Easter Cross-Amazing Grace - Mops Moms  #Easter #Cross #Easter Art

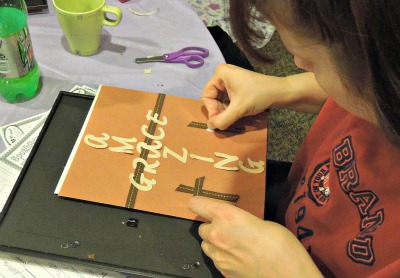
Mops moms working on their projects and adding their creative touches!


Easter Cross Art Project  #Amazing Grace #cross #Easter  www.grandparentsplus.com

They turned out amazing! The moms took them home to display the real message of Easter! The framed cross is easily displayed standing or hung on a wall!


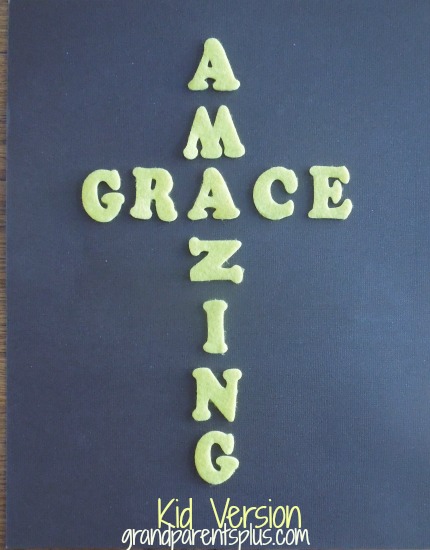
After  Mops ended, the idea came to me that this would work for kids by making it more kid-friendly. It makes a great craft for Wednesday night church clubs or Sunday School. By using foam letters (easier for kids to handle) and lightly placing a line for kids to follow down the middle vertically and horizontally, they would be able to make one, too! So off I went to get the foam letters…..  Foam letters are hard to find in one color, so use the cricut letters if you don’t like the multi-colored letters. Also, I found it very hard to find lots of “Z’s”‘ in one package. If you are making just a couple, the foam letters work, otherwise find someone that can cut out the letters.

Using small pieces of mounting tape works better than glue. Glue gets too messy for these letters. If  you are cutting out letters, making them larger makes it easier for kids to handle. If using larger letters, just use a legal-sized piece of paper and use a glue stick!

 This is the “elementary and up” kid version of this craft! I used construction paper for the background. It is simple, easy, inexpensive, and yet meaningful!! Notice the “n” on its side is a “z” and the “m” is an upside “w”!! It’s the best we could do for letters!

Easter Cross Amazing Grace

This craft provides a great opportunity to explain to kids the meaning of the Easter Cross.

Hope this gives Sunday School teachers, club volunteers and parents a great tool for talking about the real meaning of Easter!

John 3:16   For God loved the world so much that he gave his only Son so that anyone who believes in him shall not perish but have eternal life. (The Living Bible)

There’s a great kids’ song called “A-M-A-Z-I-N-G. My grandkids love it! Check it out on Youtube.

Have a blessed Easter!

Phyllis


I invite you to subscribe to future posts on the sidebar!

Follow on Pinterest and Bloglovin, too!


This post is linked to the following parties…….


Posted in Art Project, Crafts, Easter | Tagged , , , , , , , , , , , | 14 Comments

Easter Games

Easter Games for Family Fun  grandparentsplus.com

With families getting together at Easter time, it is always fun to have some Easter games to play. It adds some fun and memories for both kids and adults.

Some of these Easter games my sister and I’ve made up, some are “old” ones, and some have links to where they can be found. As  I come across or “think up” new ones, I will update and add to this list.

You’ll notice a different version of the old-fashioned egg hunt which is turned into the “Bunny Banker”. Check it out and have fun with it!

Easter Games for Fun!

1. Bunny Hop

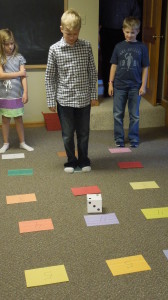
You will need….1 die, 12- 15  numbered paper slips (one set for each player), Paper carrots or stuffed bunnies.

Directions:

Tape numbered paper slips on the floor each being one hop apart.

Players take turns and rolls the die. If it lands on an even number, they may “hop” 2 places forward on the numbered slips. If it lands on an odd number, they must “hop” back one . The first one to finish and reach the carrot, wins!
Easter Games

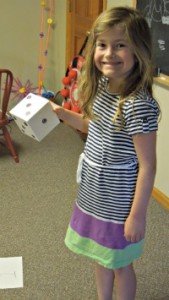
A large die was made from a gift box. Just color in the dots!
 

Easter Games #Easter #games #kid-activites  www.grandparentsplus.com


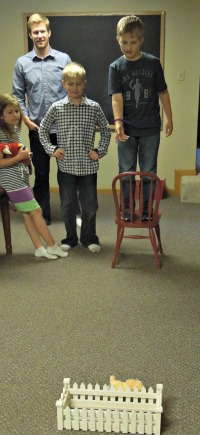
2. Throw Peter Rabbit into Mr. McGregor’s Garden or the Easter Basket

Take a small stuffed bunny and from a distance, try to land it in ‘Mr. McGregor’s garden” Use an Easter basket as the garden. Vary the distance according to age. Give each person 3-5 tries.
Rabbit Toss Easter Game #Easter #Games #kids-games www.grandparentsplus.com


3. The Easter Bunny Banker

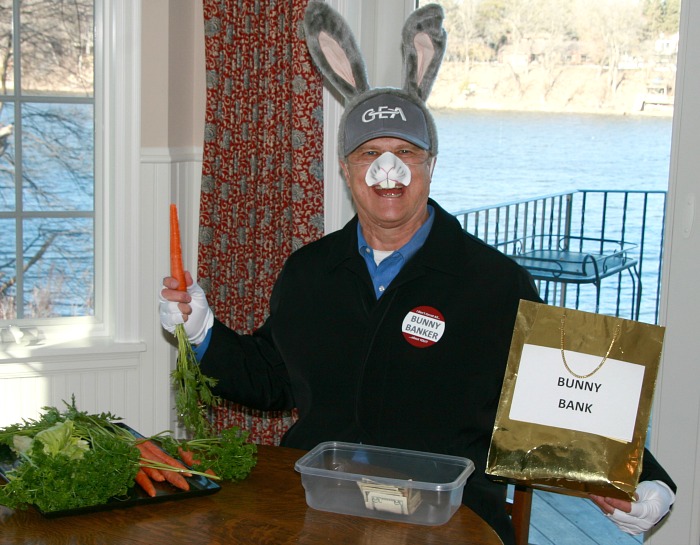
This idea is from my sister. Instead of more candy, fill the eggs with coins or slips of paper with a coin value. After finding the Easter eggs, they had to go to the “Bunny Banker” to cash in their coins for dollar bills. This gives good practice for counting money. The Bunny Banker was her husband sitting at a table all dressed in rabbit ears, nose and chewing on a carrot!
Easter Games  grandparentsplus.com

He kept saying, “What’s up, Doc?”! He was a greedy bunny wanting all the eggs and was willing to “pay” for them. The kids had fun counting their money slips to turn in for cash! Hopefully you can talk your husband or relative to play the greedy “Bunny Banker” role! The kids loved it!

4. Guessing Jar

Place candy, cotton balls (bunny tails) or small objects in a jar and have them guess the number contained in the jar . Keep the number under 100 for younger children.

5. Egg and Spoon Race

Kids hold an egg on a spoon and race to the finish line.  (For older kids, use raw eggs; younger use hard-boiled or plastic)

Play this individually or use as a relay! If the egg drops, the player needs to pick the egg up, go back,  and start over from the beginning or if using raw eggs, get a new one.

6. Egg Bowling

Fill plastic eggs with rice or sand and tape shut. Give each team a different color. From a distance, roll eggs to knock down plastic rabbit figures or bottles place in a row. Inexpensive figures from the dollar store will do. Each team member gets one turn. Score points for the number of bunny figures or bottles knocked down. The next team gets their turn. Play several rounds and tally the points.

Or……Play individually and give each person 3 tries.

Here’s another variation of this Easter Game

7. Steal the Egg

This game is very similar to Capture the Flag.


8.  Pin the Tail on the Easter Bunny or Pin the Egg in the Basket

  Free Easter Clipart


Play a version of “Pin the Tail on the Donkey”

Draw a bunny figure  or basket and have kids blindfolded try to pin the tail on the bunny or land the eggs in the basket.

A ready-made game for Pin the Tail on the Bunny is available from…….  

Oriental Trading


9.  Easter Egg Toss

Play outside with a partner using either raw or hard-boiled eggs. Move back each time and see whose egg stays whole the longest!

10. Egg Scramble

Place an equal amount of each color plastic eggs in a large circle( for younger kids) or around in a designated area. Players have 3 minutes to find their color, only. (If you’re playing with a small group, give them two colors.) Count the number of their eggs found! (You need a  large number of plastic eggs for this game!

11. Carrot Scavenger Hunt

Take a bag or two of individual carrots and hide them throughout the yard.  Kids search for them and turn them in for a prize or money! Hey, no need to worry about carrots not found as they’ll get eaten by a real bunny! Warn the kids that they need to be washed before eaten! After all, carrots come from the ground so no need to waste them!

12. Egg Relay

Each team has a basket of plastic eggs at the start and an empty basket at the end. Teams need to pass the plastic eggs from one person to another. Any eggs that drop, must be returned to the starting basket. First team with all their eggs in the ending basket, wins!

Using lots of eggs makes this fast and fun!


13. “Hot” Hard-Boiled Egg – version of Hot Potato

Players sit in a circle and pass the egg quickly while the music is playing. When the music stops, the person holding the egg is “out”. Music starts again and play continues until there is one winner.

14. Treasure Hunt

Play this game in teams or as one group of kids. Clues are place in numbered plastic eggs. Starting with the first egg, the clue is read with a hint to where the next egg is located. Keep going with several clues until the last clue that tells where there are prizes for each child.

15. Egg Bocce Ball

Fill plastic eggs with sand or raw rice and glue together.(This gives them weight)  Play with teams 2-3 (teams have the same color eggs) or individually (everyone needs a different color egg).

Have one white egg or ball be the “jack”. One team throws the “jack”. The object is to get your “egg” the closest one to the “jack” to score a point. Check the complete bocce ball rules.

16. Easter Bingo

Lots of free printable Easter Bingo cards!

More Easter Bingo Cards!

17. Pass the Easter Cup

This game is changable for any season by changing the paper cup theme. Each player gets a straw and passes the cup from one person to another using only the straw place in their mouth to pass the cup. To make it harder, use a bendable straw!

18. Duck Relay

Players need to squat, grab ankles and walk like a duck to get their eggs and bring them back to the basket. Play with a small amount of kids or play as a relay with more kids.

19. Egg and Spoon Race

To make this harder, do as a relay and pass the egg from spoon to spoon. If outside, use uncooked eggs. Inside, use hard-boiled or plastic eggs.

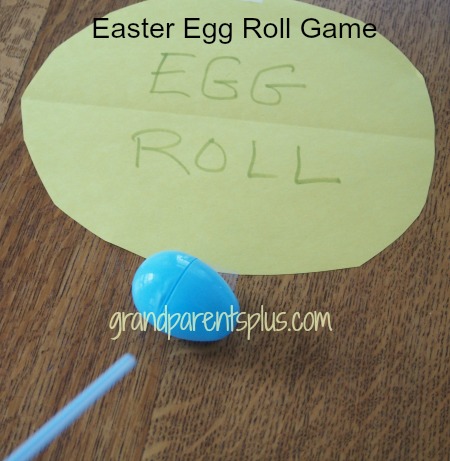
20. Easter Egg Roll

As an inside game, make a target  area  with painter’s tape on a wood/tile/concrete floor. Players need to roll the egg by blowing into a straw and directing it to the target area. This works on carpet, too, just not as easily.

Or……Play on a card table so players can move around the table to land the egg in the target area! This way, people don’t have to get down on the floor. Use a timer to see who gets it in the fastest. You may want to make this harder by giving them 3 eggs to get into the target area!
Easter Games   grandparentspluls.com


21. Easter Basket Memory

Load up an Easter Basket with all sorts of goodies. Put in little stuffed animals, plastic egg, candy, money, carrot, plastic fruit, and small toys, etc.  Play this with teams, pairs or individually depending on the ages. Give them a few minutes to look at all the items in the basket. Next remove the basket and they need to write down the items they remember in the basket. Another variation is to remove only one item and teams take turns guessing as to which item is missing. If one team can’t name the item, the other team can steal the point by getting it right.

22. Bunny Tag

Each person has a “tail” (scarf). The tail is pushed into the waist of their shorts or pants so that the scarf is hanging out in back. The person that is “it” has to tag them by grabbing the “tail”. Kids then switch places and the new person that is “it” repeats the same.

23. Egg  Basketball

Place a basket on a high object. From a “free throw line”, kids throw plastic eggs into the basket to score points. Play individually or with teams.

24.  Oriental Trading has an inflatable bunny ear toss game.

Easter Bean Bag Toss Game, Egg Shaped Memory Cards, Easter Egg Popper Game, Jumping Bunnies and More……


Easter Party Supplies and Decorations

25. Easter Pictionary

Use terms like: Easter eggs, basket, bunny, chick, grass, egg hunt, ducks, decorated eggs, cross, church, tomb, stone, angel, Jesus, risen…..


Do you know some other Easter Games that I could add? Let me know!

I’d love to hear how these games worked for your family!

Have fun, but remember that Easter is about the risen Jesus! Celebrate Him!


Enjoy!

Phyllis

This post is linked to the following parties…..


Posted in Easter, Games | Tagged , , , , , , , , , | 21 Comments

Puppy Themed Birthday Party

Puppy Themed Birthday Party  grandparentsplus.com

One of our granddaughters had a birthday. We traveled there to spend the weekend and get in on the party. I just had to share the cute Puppy Themed Birthday Party with you.

It was held at a Petland store. I don’t know if you have one near you, but you can check your local listings. They supplied goodie bags and had the party in a separate room at the store.

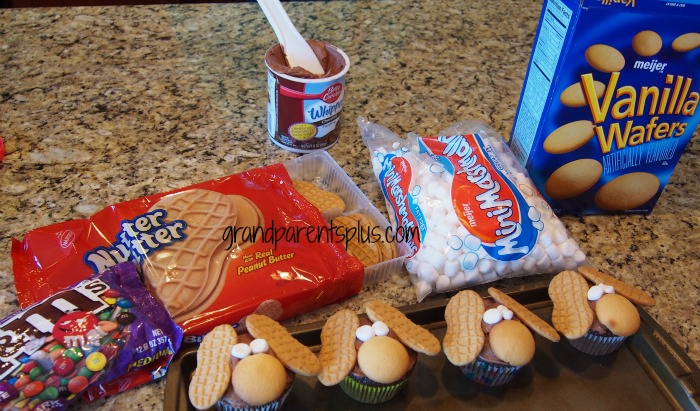
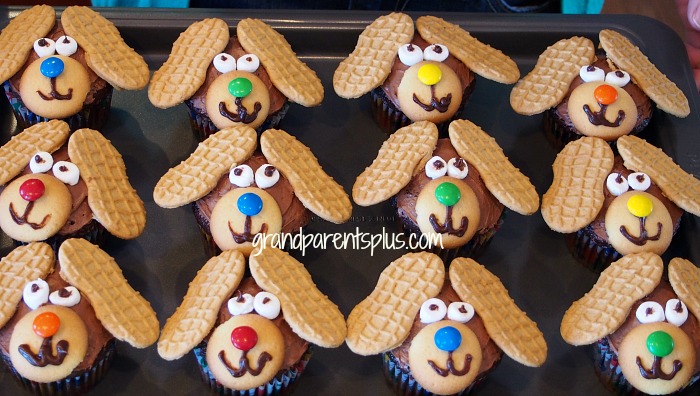
In preparation, my daughter-in-law and our granddaughter made the cutest puppy cupcakes! They were so easy to make! Our granddaughter added most of the details while her mother added the eye and mouth details.

Materials needed:

Puppy Birthday Party

Puppy Birthday Party

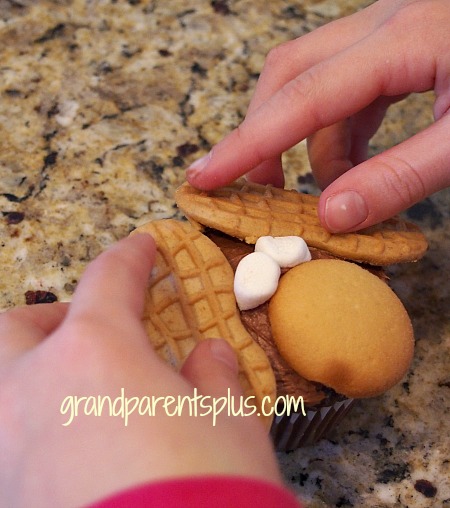
Pull apart the Nutter Butter cookies and place 1/2 on for each ear!

Puppy Birthday Party

Didn’t they turn out cute?

Instead of purchased “eyes” , they cut a miniature marshmallow in half and added a dab of frosting.

Now, on to the party…..

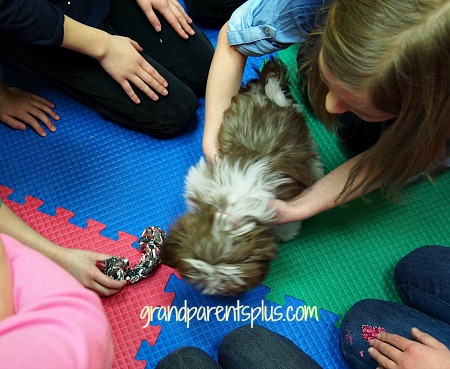
At the Puppy Themed Birthday Party, the kids sat in a circle in a back room. Every 10 minutes the birthday person got to choose a new puppy or other animal to bring into the room. The employee would bring them in one at a time and talk about the animal they chose while the kids played with them. The girls loved it and had so much fun holding and petting each animal! The store employee in charge of the party was there to watch and guide them in handling the animals.

Puppy Birthday Party


After having fun with all the puppies, kittens and rabbits, the kids washed their hands and had their birthday party with the presents and puppy cupcakes. The idea for the cupcakes was found at the Cupcakepedia website.

Puppy Themed Birthday Party  grandparentsplus.com

So fun to celebrate with our granddaughter! Happy Birthday!

Hope you enjoyed this easy Puppy Themed Birthday party idea!


Phyllis

You can be sure to see future posts by subscribing on the sidebar!

Follow on Pinterest and Bloglovin, too!


This post is linked to the following parties…….

Posted in Misc. | Tagged , , , , , , , , , | 16 Comments

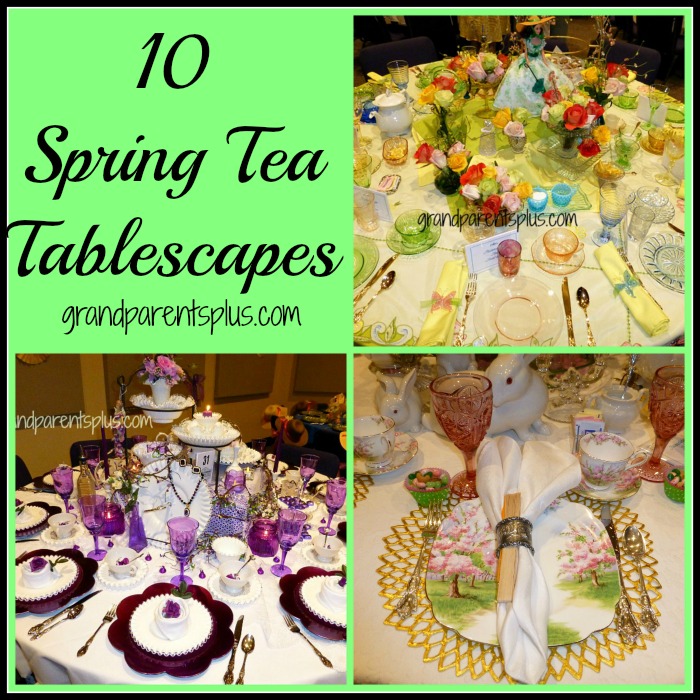
10 Spring Tea Tablescapes

Spring Tea Tablescapes

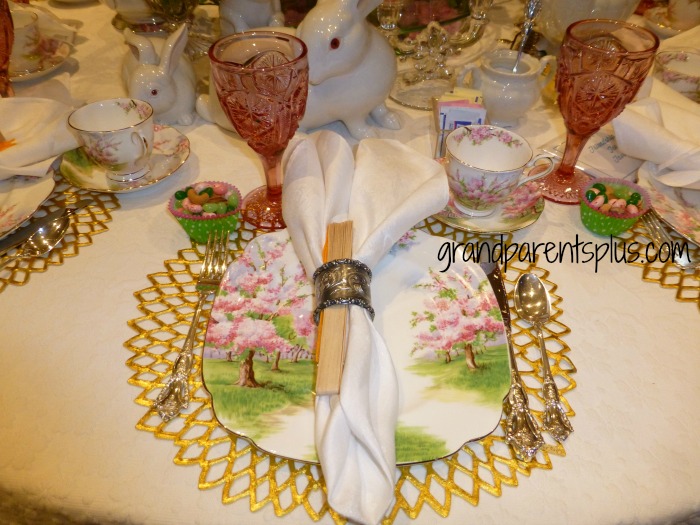
Since I have a “dish disease”, I am partial to beautiful tablescapes and tablesettings! Whatever you’re eating, tastes so much better when you sit down at a wonderfully arranged  table with pretty dishes!  Don’t you think? These Spring Tea Tablescapes look so lovely and inviting. Inspirations for Spring are just what you need after a long, cold winter. The women that attend this tea look forward each year to this special event! You will see why!

I am sharing 10 Spring Tablescapes using a variety of themes and color schemes. I’m sure you’ll find ideas for your own Spring tablescape, too!

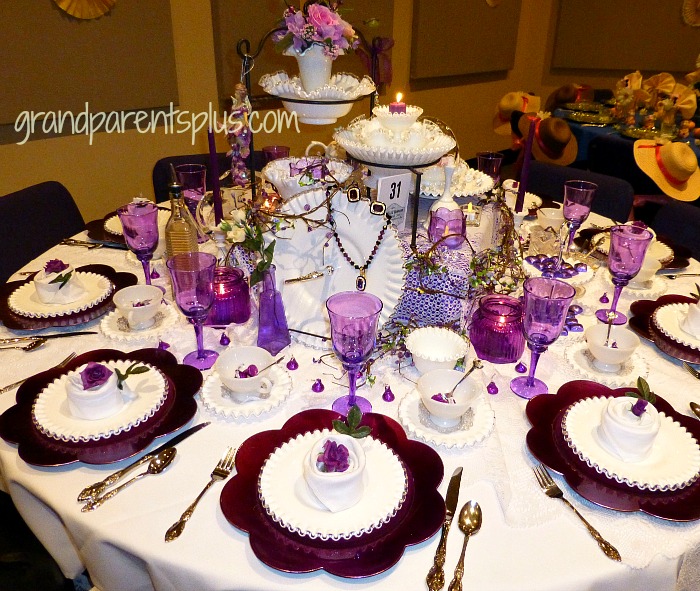
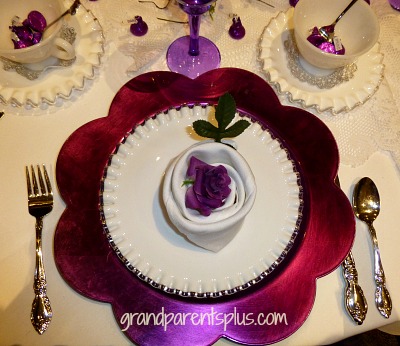
#1

Love the purple, don’t you!


Spring Tea Tablescapes  grandparentsplus.com

spring tea 2

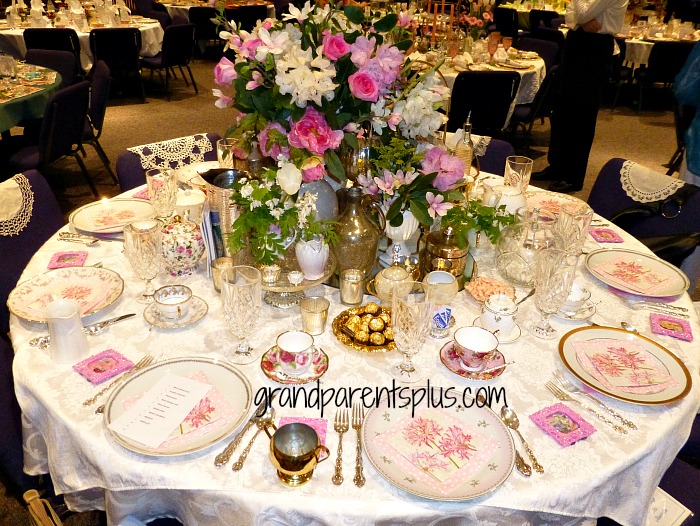
#2

The doilies on the back of the chairs give a great old-fashioned look!

Spring Tea TAblescape   grandparentsplus.com

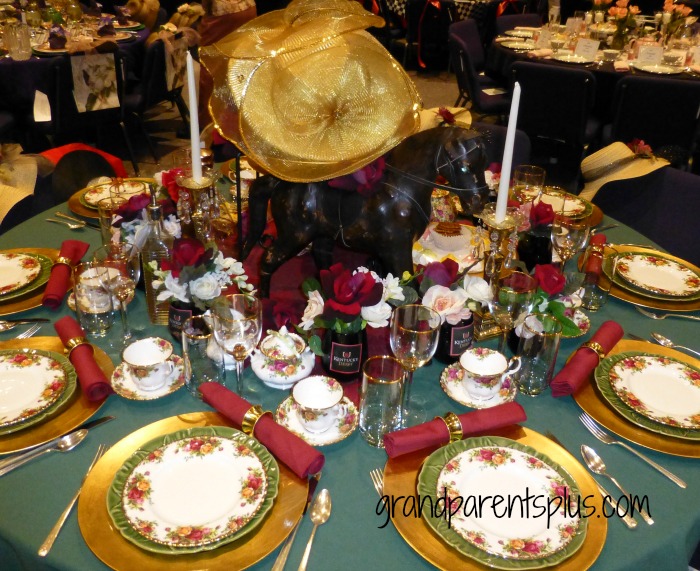
#3

Gold, green and deep red roses – an elegant combination!

red and gold p1

#4

Aren’t these pink cherry blossom plates unusual?

Spring Tea Tablescape  grandparentsplus.com

Here’s a closer look…..   I think they must be hand painted.


Spring Tea Tablescapes grandparentsplus.com

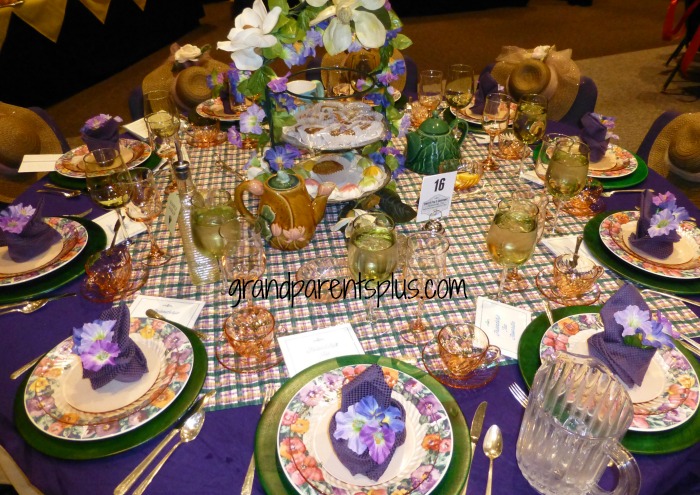
#5

On this tablescape, a plaid tablecloth coordinating with the colors of the dishes makes a big  impact.


Spring Tea Tablescape  grandparentsplus.com

#6

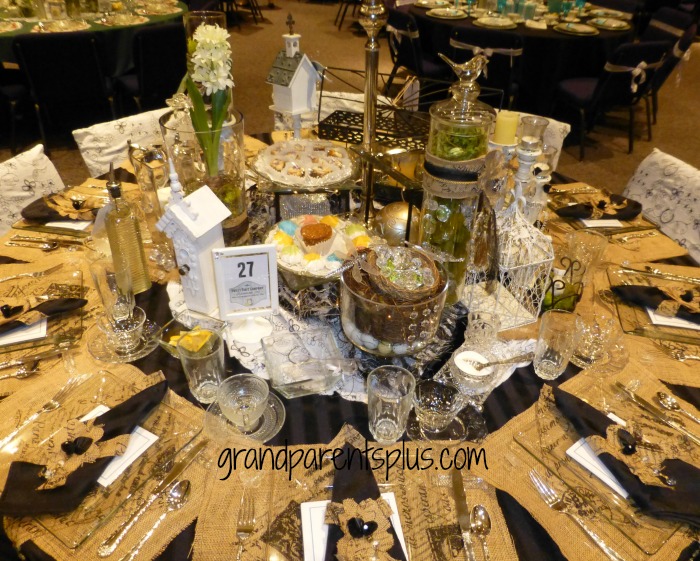
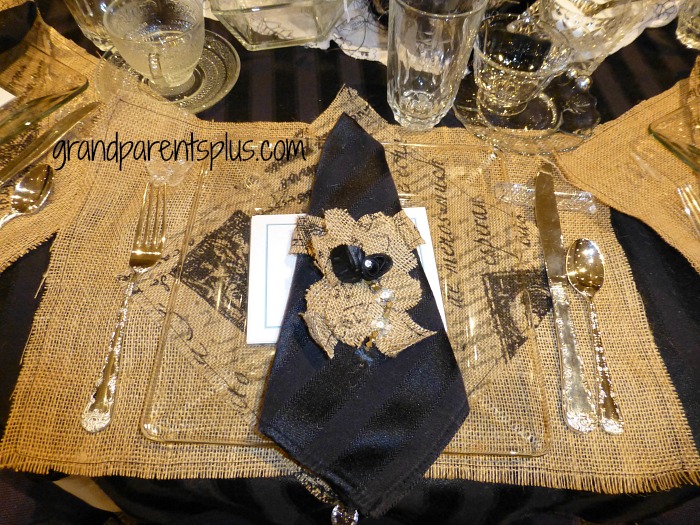
This burlap and black tablescape would work for many seasons by changing the flower accents.

Spring Tea Tablescape   grandparentsplus.com

Using clear glass plates lets all that texture show through!

Spring Tea Tablescapes  grandparentsplus.com

#7

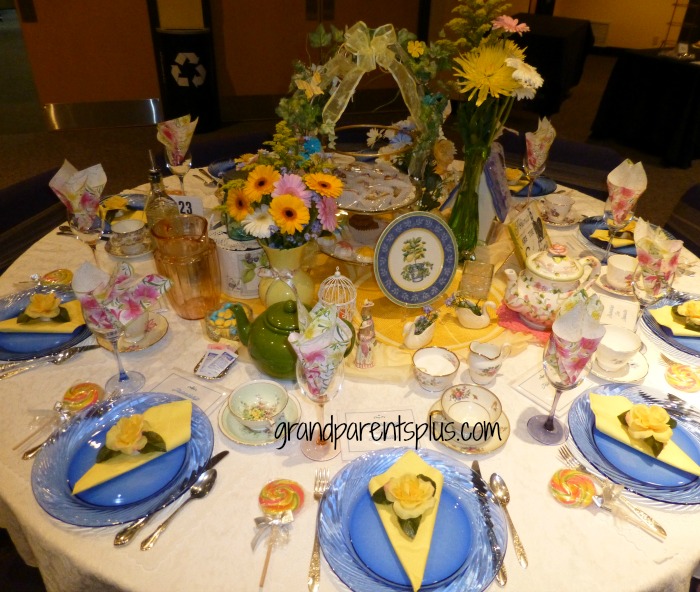
At this tablescape, there are pretty blue plates mixed with a variety of flowered teacups! What a wonderful way to use your teacup collection!


Spring Tea Tablescapes

#8

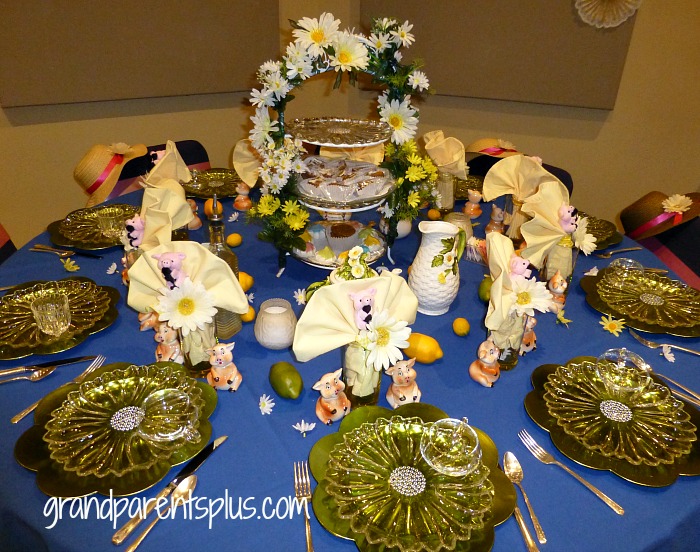
A combination of a blue tablecloth, green chargers along with perky yellow and white daisies sets off this table.

Spring Tea Tablescape  grandparentsplus.com

#9

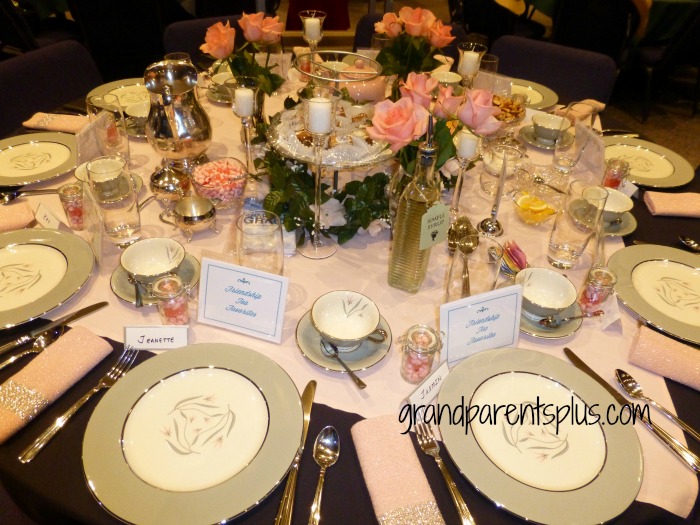
Subdued grey, pink and black combinations make an elegant statement for this tablescape.

Spring Tea Tablescapes  grandparentsplus.com

#10

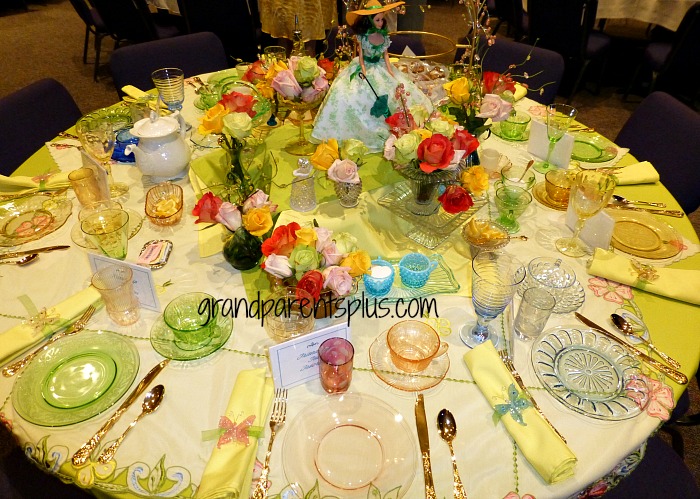
Notice the different colors of depression glass used on this garden-like tablesetting….

Mary, Mary, quite contrary! How does your garden grow?  Isn’t that how the rhyme goes?

So colorful and fun!

Spring Tea Tablescapes grandparentsplus.com

Which one is your favorite?

Thanks for stopping by!

Phyllis


Just so you don’t miss future posts, subscribe now!

Follow on Pinterest or Bloglovin, too!


This party is linked to the following  parties……

Posted in Decor, Easter | Tagged , , , , , , , , , | 16 Comments

Korean Salad

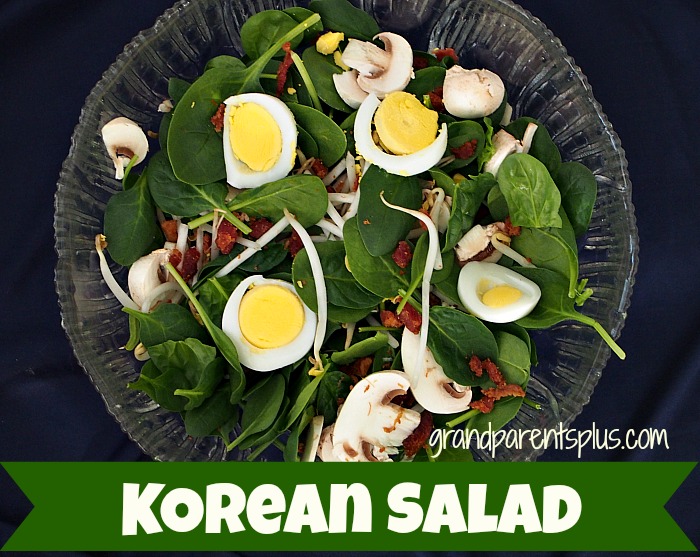
Korean Salad   grandparentsplus.com

This is an old, old recipe! The recipe card with the Korean Salad recipe is actually written in my mother’s writing. I remember her making this recipe a lot! I have forgotten about this Korean Salad  and recently made it for a gathering. Everyone loved the salad! I guess what is an old recipe becomes new again with another generation.
It certainly is easy to put together. A little planning ahead is necessary to make the dressing. The recipe says to make it 24 hours ahead. I find that making it in the morning works fine if you just shake it a couple of times to mix the ingredients well or blend in a blender. After all, it is sometimes hard to plan a day ahead, right?
Korean Salad Dressing:
1  cup of salad oil
3/4 cup sugar
1/2 cup ketchup
1/4 cup white vinegar
salt and pepper to taste
Salad Ingredients:
1 lb. fresh spinach
1 can water chestnuts, drained and sliced (optional)
1 cup fresh bean sprouts (I never measure, just add what you like)
8-10 fresh mushrooms sliced
1 lb. bacon, fried
2-4 hard-boiled eggs (I like 4 eggs) You may slice or grate them into the salad.

Directions

  1. In a bowl, mix oil, sugar, ketchup and vinegar. Season with salt and pepper. Cover, shake and chill at least 24 hours. If preparing in the morning, put in a sealed container and shake several times during the day or blend in a blender.
  2. Place egg in a saucepan, cover with water, bring to a boil, and remove from heat. Cover pot and let eggs stand in hot water for 12 minutes. Pour in cold water and let sit until cool. Then peel and slice or grate.
  3. Cook bacon in a skillet until browned. Drain and crumble.
  4. In a large bowl, mix eggs, bacon, spinach, water chestnuts, bean sprouts and mushrooms. Toss with dressing just before serving. ( I prefer to pass the dressing and let people add the amount they like. That way, any left-overs are good the next day.)

Serves 8-10

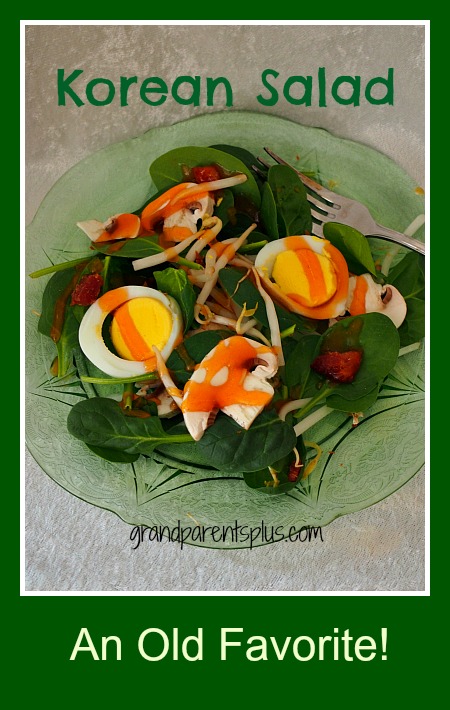
This salad is hard to improve upon. The dressing has a sweet, tangy flavor and really enhances the taste combinations. Try it and I’m sure you’ll enjoy it!

Have you  ever made this recipe?

Enjoy!

Phyllis

I invite you to subscribe to future posts on the sidebar. Thanks!

Follow on Pinterest or Bloglovin!

This post is linked to the following parties…..


Posted in Recipes, Salads | Tagged , , , , , , , , , , , | 29 Comments

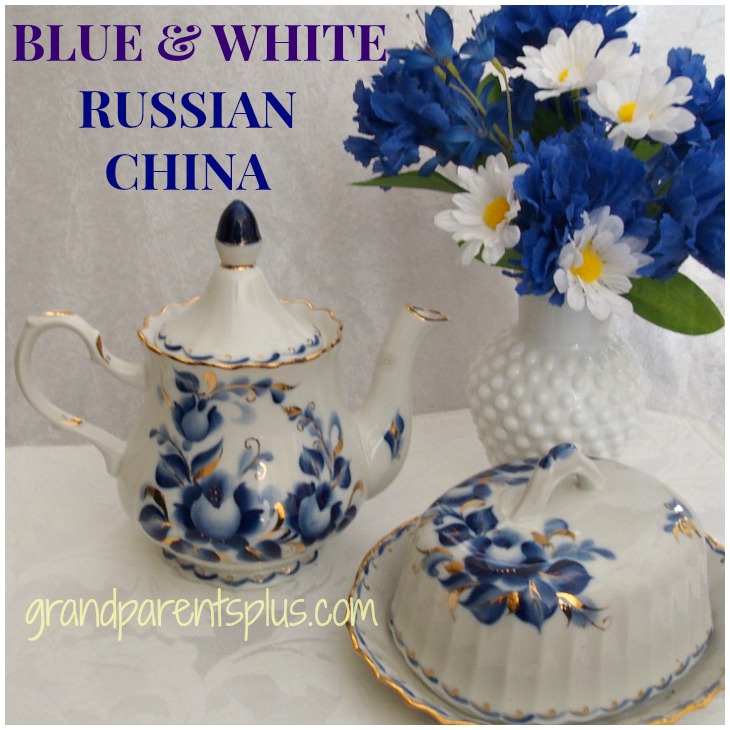
Blue and White Russian China

Blue and White Russian China    grandparentsplus.com


 I purchased some  blue and white Russian china while on a visit to the former USSR and Belarus.  I carefully hand-carried this china back home. It now is a visual reminder of the wonderful friendships that began on that trip and continue today.

With the Olympics in Sochi, it reminds me of the special time that I spent in Belarus and Russia. I went on an adult exchange called “Friendship Force” – started by former President Carter with an “old” college girl friend (our husbands stayed home). We stayed with the mayor of the town called Villeika, outside of Minsk. He and his lovely family played host to us for a week. We grew to know and love this family and learned that we have more in common than differences in a very diverse world.  Our ties to that family remain strong today and we stay in touch via FB and emails.

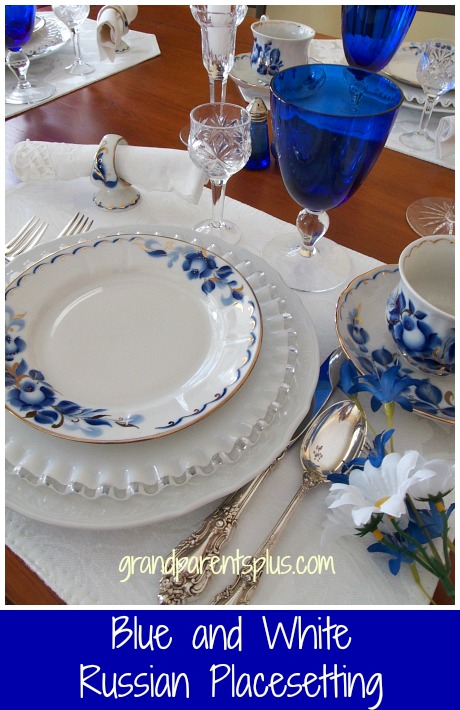
While there, I admired the beautiful blue and white pieces of china that I saw during the trip! Of course, it was the “usual” china for them. 

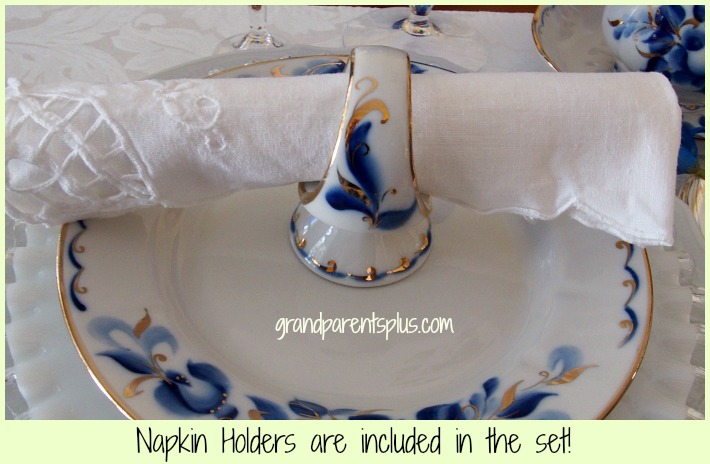
They graciously brought me to a store and I managed to carry a set of 6 dessert-sized plates, cups  saucers plus a whole set of extra pieces safely back home! Wish I could have carried more as I would have loved to have more than six. Their sets come with a covered butter dish, napkin holders, coffee and teapots, sugar and creamer! WOW! I believe I paid the equivalent of $30 American dollars for all those blue and white Russian dishes! I wonder what you would pay today?

So, here’s my salute to the Sochi Olympics with my blue and white Russian (Belarus) china!

OLYMPUS DIGITAL CAMERA

The tiny glass is a vodka glass, but since we don’t drink vodka, I use it as a tea light! (These were a gift from the Belarusian family.)

Belarusian and Russian dinners last a long time with many eloquent toasts throughout the evening. Also, they serve on plates the size of our dessert plates, so it was hard to find regular sized dinner plates. I probably couldn’t have made it back with the larger plates anyway!


Remember how I said they include china napkin holders?


Blue and White Russian China   grandparentsplus.com

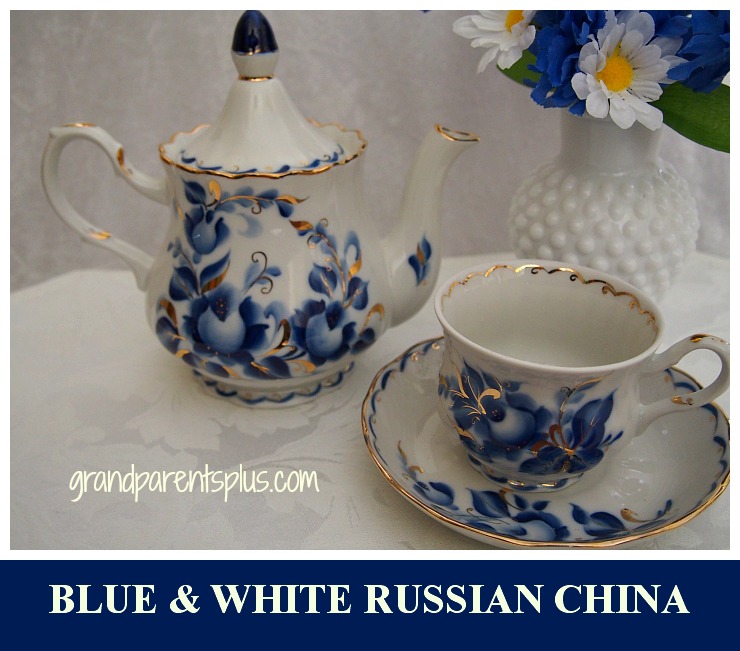
So, while watching the Olympics, I can relax and sip tea in my blue and white Russian china teacup!

Blue and White Russian China   grandparentsplus.com

Here’s to good memories and wonderful friendships made in Belarus (part of the former USSR)!

Now, back to watching the Olympics!


Phyllis


Please join me for future posts by subscribing on the sidebar!

Also, follow on Pinterest or Bloglovin!


This post is linked to the following parties…….


Posted in Decor | Tagged , , , , , , , , , , , , , | 23 Comments

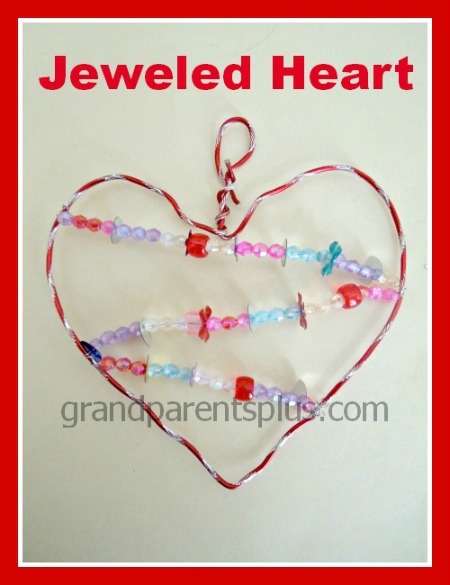
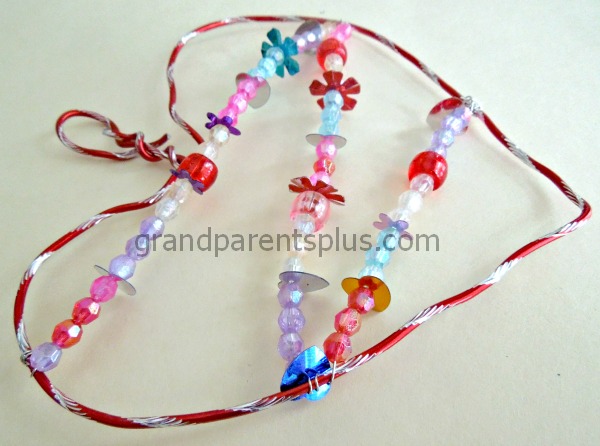
Jeweled Wire Heart

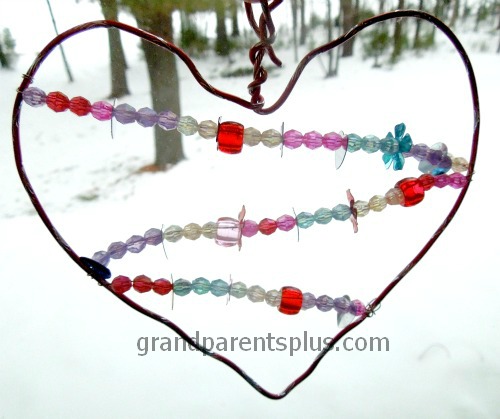
Make this lovely Valentine jeweled wire heart to hang in your window and let the sunshine show off the colored beads! That is, if you have some sunshine! Oh well, sunshine or not, it looks great in your window.

This is a Valentine to keep and use each year. Hang in a window or hang several of varying sizes from a chandelier for that special party! While it is easy for elementary kids to string the beads, an adult needs to help shape the wire into a heart.

Jeweled Heart for Valentines! Easy craft for elementary kids! #craft #Valentine #heart

Beautiful jeweled wire heart craft! Easy for elementary kids to do!

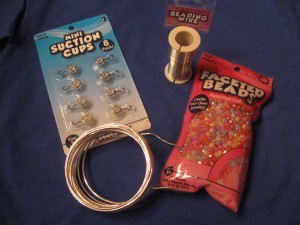
Items Needed:

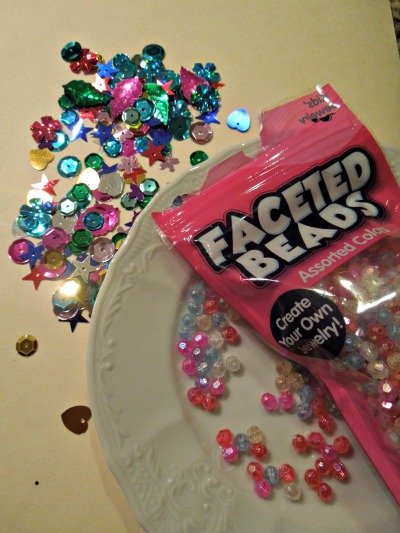
Supplies of Bead and Sequins. Vary the sizes and colors! #heart #craft #beads #valentine

I happened to have a package of sequins that had flowers and hearts – Perfect!
They added a lot of sparkle!

Supplies

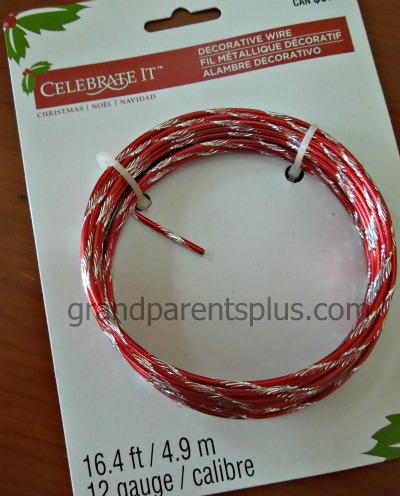
  1. 12 gauge Aluminum wire to make the shape (any color wire will do)
  2. 24 gauge Aluminum wire to string the beads
  3. Faceted Beads or other various beads or sequins
  4. Suction Cups – for hanging on the window
  5. Needle Nose Pliers

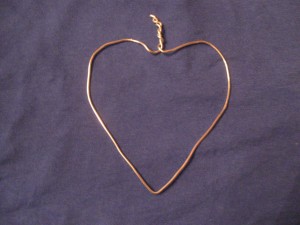
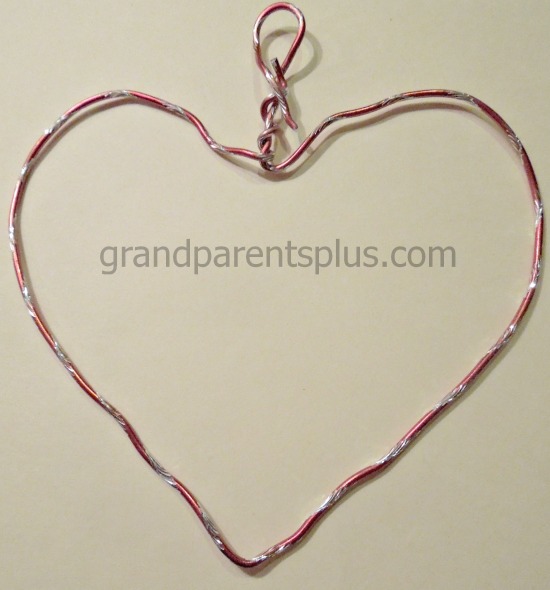
First, bend the 12 gauge wire into desired shape. I used about 18 ” to make the heart. If you have trouble making the shape, form around a large cookie cutter! Another method is to make a circle, find the half-way mark and make the bottom point of the heart. Then push the twisted area down until you have a heart shape.

Colored Wire for Jeweled Heart Craft  #Valentine #craft #heart

Found this wire at Michael’s after Christmas on sale! Any color wire will work!

Wire heart  #heart #craft #Valentine

Wire heart can be formed to any size. This is about 5 in. across.


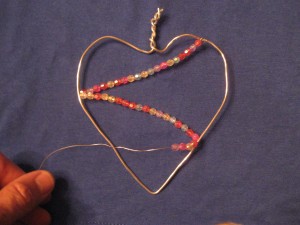
Next,  measure a length of 24 gauge wire to go back and forth 3-4 times inside the shape.

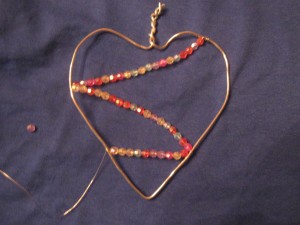
Twist the 24 gauge wire to the top of the shape and start threading the beads. Use different shapes and sizes of beads along with sequins, if you wish. When it reaches the other side with the beads, string the wire across and then wind it tightly around the wire a few times. Start back to the other side and string more beads and sequins. When finished, be sure to secure the wire well by twisting it around several times.

Jeweled Heart   #beads #heart #craft #Valentine

Thin 24 gauge wire is used to go back and forth after beading sparkly beads and sequins.


Using a variety of beads works well and gives it lots of sparkle and color!

Jeweled Heart displayed in a window! How lovely!  #heart #Valentine #craft

By hanging in a window, the sunshine bounces off the colored beads and makes them sparkle!

This Valentine craft is worth keeping each year!

Add another to it next year!

Isn’t this easy?


 Have fun!

Phyllis

Love to have you subscribe to future posts!

Follow on Pinterest and Bloglovin, too!

Linked to these parties…


Posted in Crafts, Holidays, Valentines | Tagged , , , , , , , , , , , , , , | 22 Comments

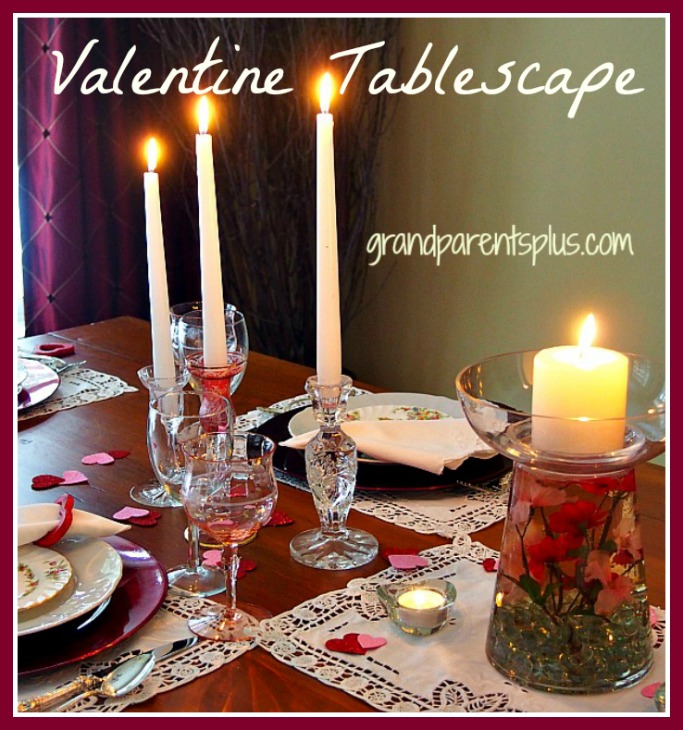
Valentine Tablescape

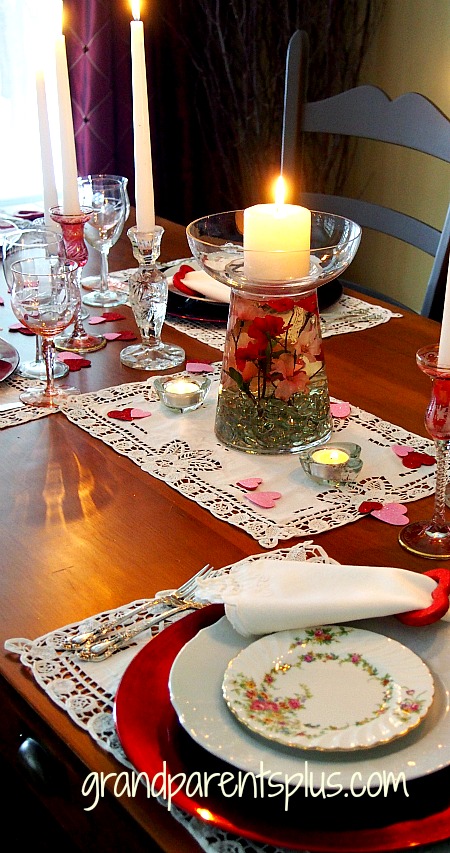
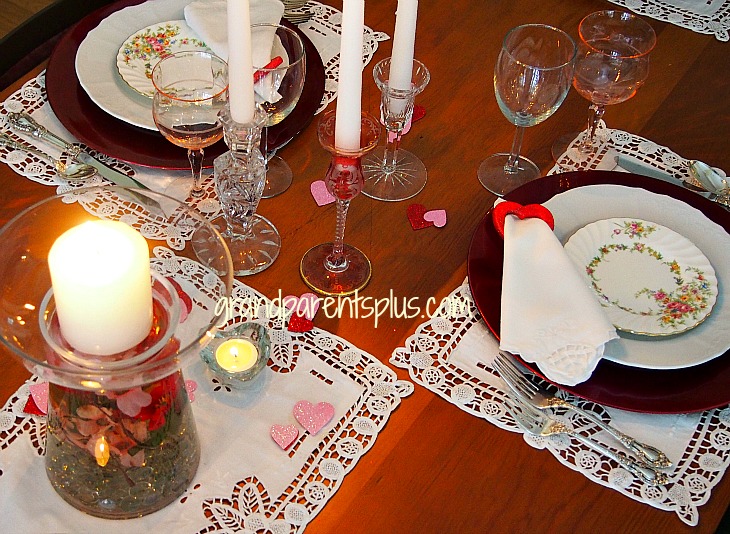
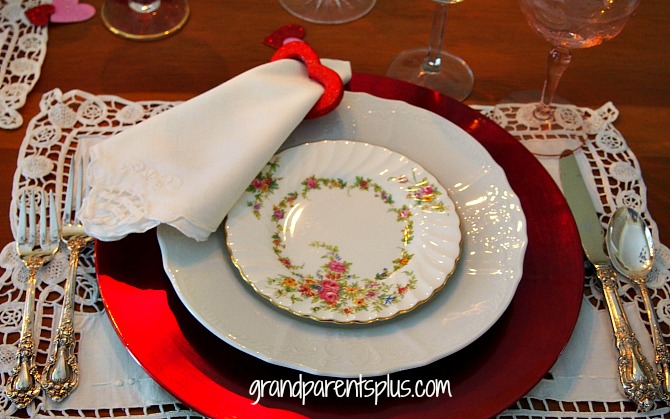
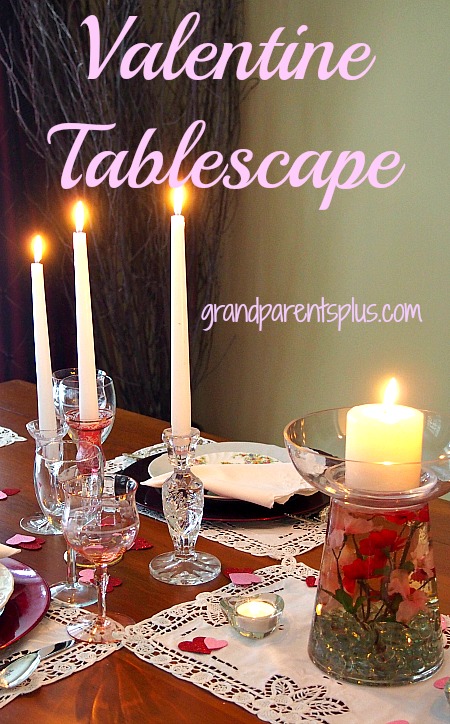
For a Valentine dinner, the colors of pink and red make it romantic and beautiful! Using red chargers, red heart napkin rings, my mother’s pink flowered china and pink goblets along with a pink and red-flowered centerpiece, the table looks spectacular!

Valentine Tablescape grandparentsplus.com


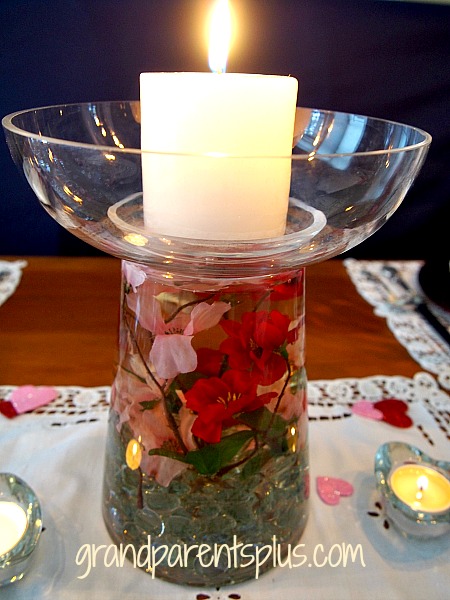
For the centerpiece, I filled the container with red and pink silk flowers, then added distilled water.  It coordinates with  the pink and red combination used throughout this Valentine Tablescape.

Valentine Tablescape  grandparentsplus.com

The pink china is from my mother and I remember many Sunday dinners, right after church, with the table set so beautifully with this china! Lots of great memories! People don’t do Sunday dinners anymore! It’s a lost art!

I can blame my mom for giving me the “bug” for beautiful dishes and entertaining. She had many sets and loved to set a beautiful table.

The pink and red candlesticks are from  Czechoslovakia. I hand carried them home from a fun trip years ago.

Valentine Tablescape grandparentsplus.com


Valentine Tablescape   grandparentsplus.com

The heart napkin rings are wooden heart ornaments I found after Christmas. They were unpainted and I merely painted them red and then gave them a coat of red sparkle paint.

Valentine Tablescape   grandparentsplus.com

 Valentine Tablescape  grandparentsplus.com


Hope this gives you some inspiration for your own “Valentine Tablescape”!

Enjoy!

Phyllis

Subscribe so you don’t miss future posts!

This post is linked to the following parties…..


Posted in Decor, Holidays, Valentines | Tagged , , , , , , , , , , , , , , | 22 Comments

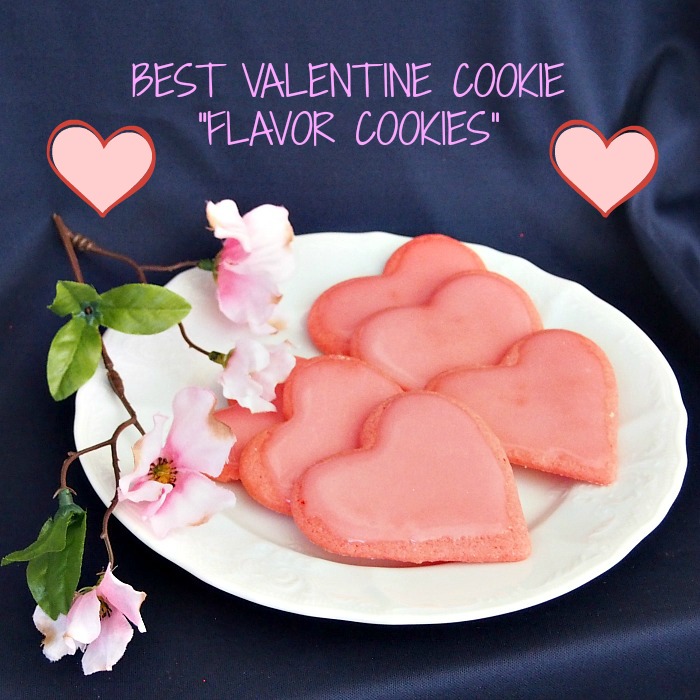
Best Valentine Cookies! – “Flavor Cookie”

Best Valentine Cookies - Flavor Cookies  grandparentsplus.com

I am not kidding!

This is the best cookie! It is not just a sugar cookie. It has a wonderful cherry-almond flavor! You won’t eat plain sugar cookies again!

I usually save this recipe just for Valentine’s Day because of its red color and wonderful flavor.  I started making these when my kids were young and they have eagerly anticipated that these cookies would “show up” every Valentine’s Day since then!

When they went to college, I sent a package of them to each one of my kids on Valentine’s Day.

When they got married, they still wanted the cookies. One year, I thought, ” Well, they are getting older and they probably don’t care about getting them.” Wrong!

They called on Valentine’s Day and asked, “Where are the cookies?”

Guess I can’t stop sending them each year. Now they’re married with children and they still want those cookies! It has become a tradition!

 I’m sharing the recipe so you can start the tradition in your family, too!


Flavor Cookies

1 cup butter

1 cup sugar

1 (3 oz) package Cherry jello

3 eggs

1 tsp. almond extract

3 cups flour

1 tsp. Baking Powder

1/2 tsp. salt

Mix and chill overnight. Roll out like a sugar cookie on a floured surface.

I use a pastry cloth and a rolling-pin cover. The dough never sticks! When done, just shake the flour outside and roll the cloth together and place in plastic bag in the freezer! This way, it won’t mold or spoil. Just take out and use again the next time!

"Flavor Cookies" a family favorite! Cherry almond flavor!

Flavor Cookies with cherry almond flavor! Awesome!

Bake cookies on an un-greased pan at 375 degrees for 8 minutes (larger cookies) – 7 minutes (smaller cookies)

Cool completely and frost

Frosting

1 cup powdered sugar

2 t. cherry juice ( from maraschino cherries) or use milk and red food coloring

2 tsp. light corn syrup

1 tsp. almond flavoring

Mix and add more corn syrup and cherry juice to get the right consistency.

Frost cookies and let dry!

Makes about 5-6 dozen depending on size of cookie.

Best Valentine Cookies! Cherry almond flavor!

Best Valentine Cookies!
Wonderful cherry almond flavor! Delicious!


These are also good with other flavors of Jello, but the Cherry gives it the most flavor! Try lime and make shamrocks! Almond flavoring doesn’t go with lime, however, so leave it out.  Don’t use strawberry as it doesn’t give enough color or flavor! These would also be good at Christmas, but I have so many cookies that I make at Christmas that I just save this one for Valentine’s Day! It makes it special!

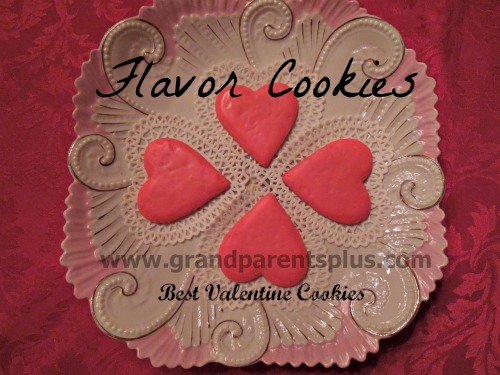
Best Valentine Cookies  "Flavor Cookies"   grandparentsplus.com

What are your Valentine traditions?

Enjoy!

 Phyllis


Be sure to subscribe so you don’t miss future posts!

Also, follow on Pinterest and Bloglovin!

 Linked to many of these party sites…..

Posted in Desserts, Recipes, Valentines | Tagged | 62 Comments