Denim Wreath – No Sew!

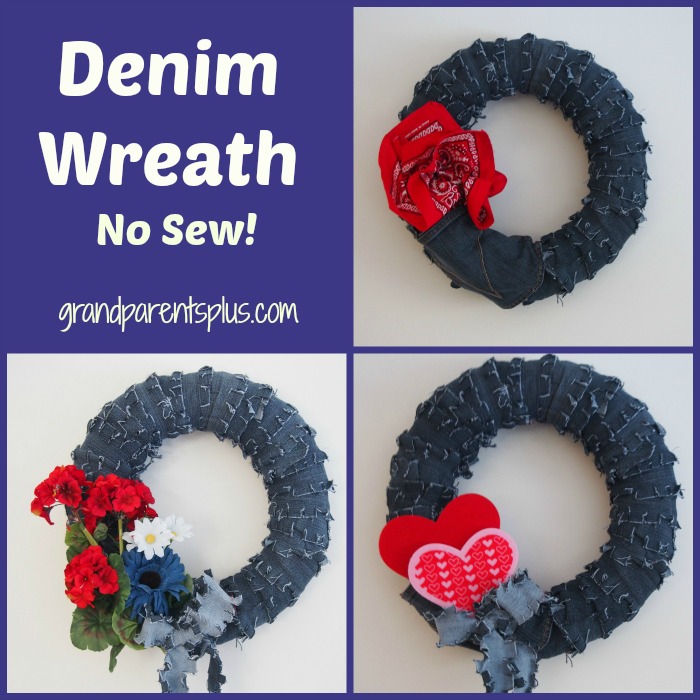
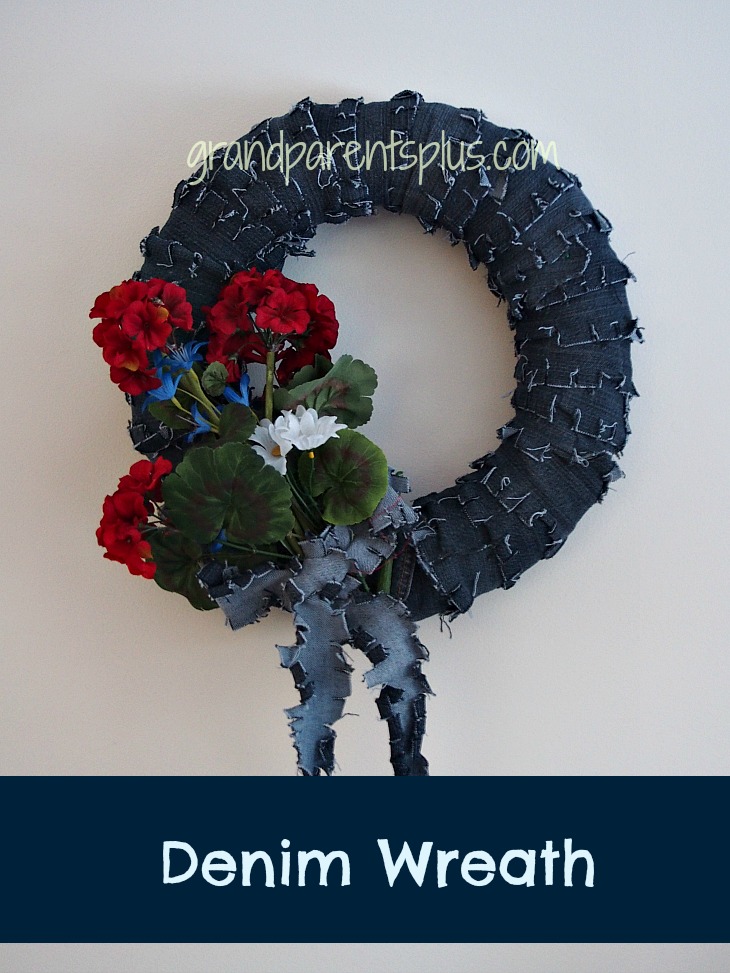
Denim Wreath  - no sew   grandparentsplus.comDenim Wreath?  Another up-cycle or re-purposing idea for your old jeans? Yes, but this one is NO-SEW! Anyone can do this! If you can cut with a scissors, you’ve got all the skills needed for this one!

After upcycling jeans and making a Scrappy Jean Quilt, I had some jeans left over and decided to create a “Denim Wreath” using the same scrappy method. You don’t even have to be “crafty” to make this wreath!

Elementary kids and teenagers could easily make this Scrappy Jean Wreath. The  younger ones may need some help cutting the strips, but most elementary kids can handle that, too!

What makes this Jean Wreath special is the texture that comes from the fringing. If you prefer, you can mix jean fabrics for added color variations. Just experiment and make it the way you like it!

If you wanted to make a smaller wreath, just cut the strips a bit narrower and fringe only 1/2 inch at the most.

Materials:

Old jeans – just one pair of very large jeans will make this wreath

Scissors – sharp ones!

Common Pins or you also can use the glue gun if you prefer.

Straw wreath base or styrofoam (your choice) My wreath was 14 inches in diameter.

Directions:

First cut lengths of jean fabric ( I cut the jeans apart so they would lay flat. It is much easier to work with them this way. ) You don’t have to be very accurate, just cut away! The strips I cut were about 3 1/2 inches wide. No straight lines here!

Scrappy Denim Wreath grandparentsplus.com

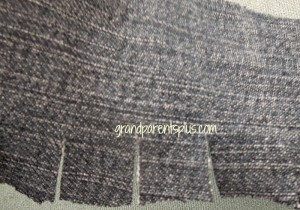
Fringe one side by cutting 1/2 -3/4 inch cuts on the side of the fabric. On one piece, fringe both sides. This will be the last piece of jean fabric to wrap around the wreath. That way, the fringe will show and you won’t have a bare spot without fringe.

Wet fabric strips completely and throw in dryer. They will begin to fray. Repeat again until you get the fringed, scrappy look.

Denim Wreath grandparentsplus.com

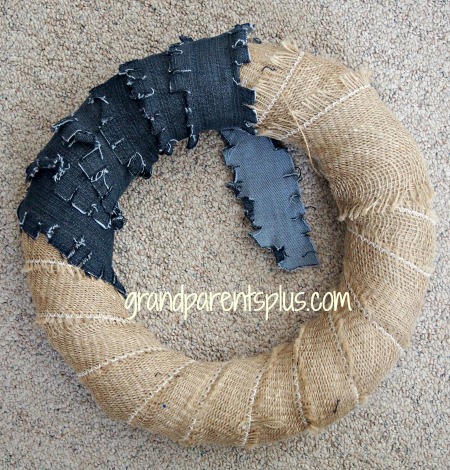
At an angle, start wrapping the strips of jean fabric around a straw wreath. I like to use the straw wreaths versus the styrofoam as they don’t bust or break,  if dropped. Use a common pin to keep the fabric in place. When one piece ends, be sure to end it on the backside of the wreath. Now, pin another strip over it and keep going! Continue until you meet the first piece. Just be sure to connect all pieces on the backside of the wreath. They won’t show anyway.  (You may notice that this straw wreath is wrapped in burlap. I just covered it up with the denim and when I want to change it back, no problem as nothing is glued or permanent.)

Denim Wreath grandparentsplus.com

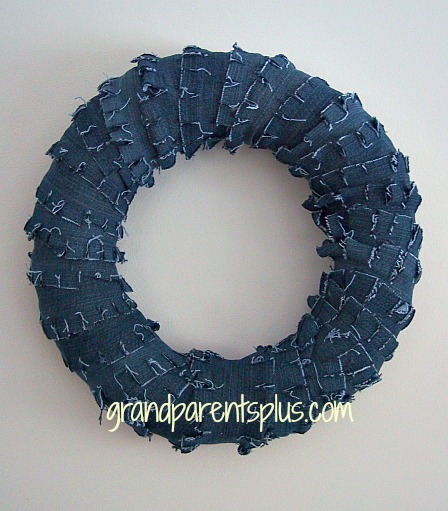
When completely wrapped, it will look like this….


Denim Wreath  grandparentsplus.com

Now get creative and add embellishments.

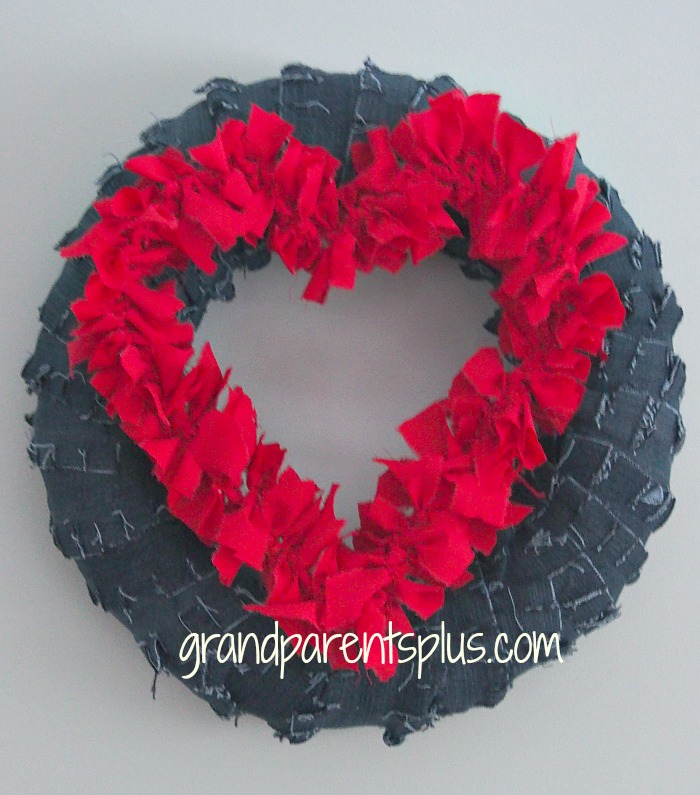
I merely placed the rag heart on top and pinned it to the wreath. See the Rag Heart post on how to make this heart.

Denim Wreath   grandparentsplus.com

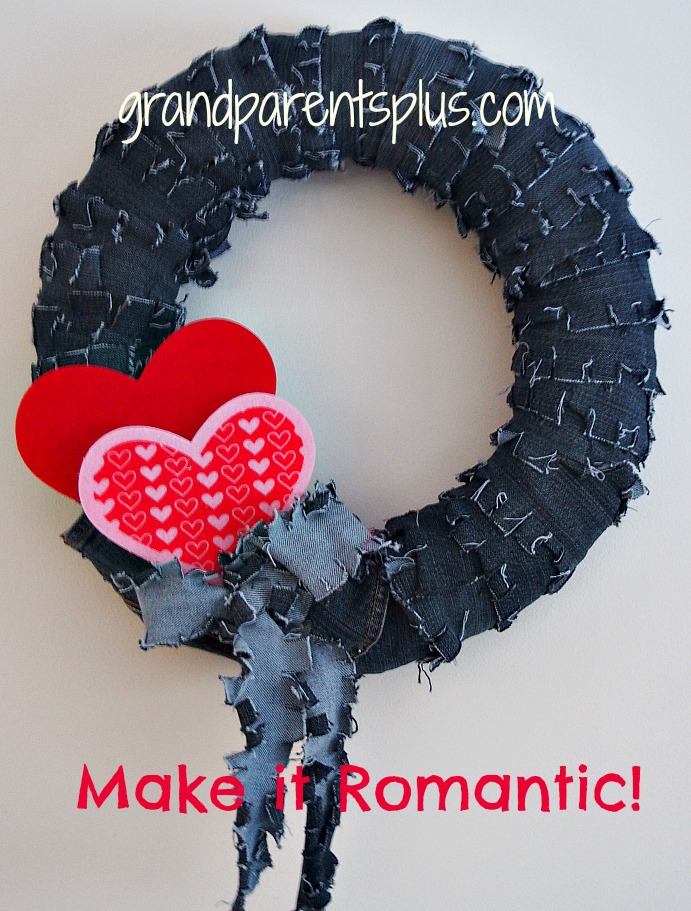
Or this….  The denim bow is made from a narrower strip, fringed, and tied so that the opposite side shows for some contrast.

Denim Wreath  grandparentsplus.com

For a boy’s room, pin a pocket on it and add a western red handkerchief!

Denim Wreath  grandparentsplus.com


Or for Summer……

Denim Wreath grandparentsplus.com

For 4th of July, add a flag!

Make it nautical!The possibilities are endless!

This wreath is a good base for any season. By pinning the arrangements, they are easy to change.  No need to buy or store multiple wreaths! However, if you prefer, you can use a glue gun.

Easy, isn’t it?

After the posts on the Scrappy Jean Quilt and this Denim Wreath, you’ll never throw a pair of jeans out again, right?

Have Fun!

Phyllis

Now, go ahead and subscribe so you don’t miss new posts!

You can also follow on Pinterest or Bloglovin!

I appreciate your visits to my blog! Thank you for stopping by!


This post is linked to the following parties……


Posted in Crafts, Decor | Tagged , , , , , , , , , , , , , , , , , | 38 Comments

Toddler Valentine Crafts

Toddler Valentine Crafts


Need something to keep your toddler occupied for a craft? These Toddler Valentine Crafts are easy to do and use materials you probably have on hand or are inexpensive to buy.

The Toddler Crafts are easily made by your child or grandchild, but need some final putting together by an adult!  Supervision and a paint shirt are recommended, too!

Each individual step doesn’t take long to do so it goes well with a short attention span.

Materials:

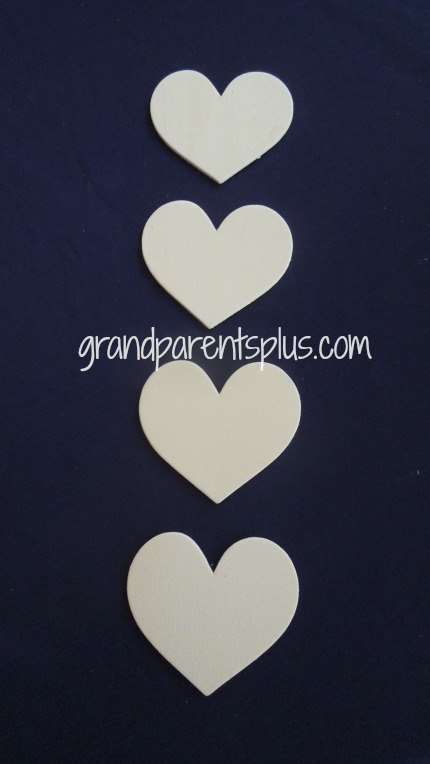
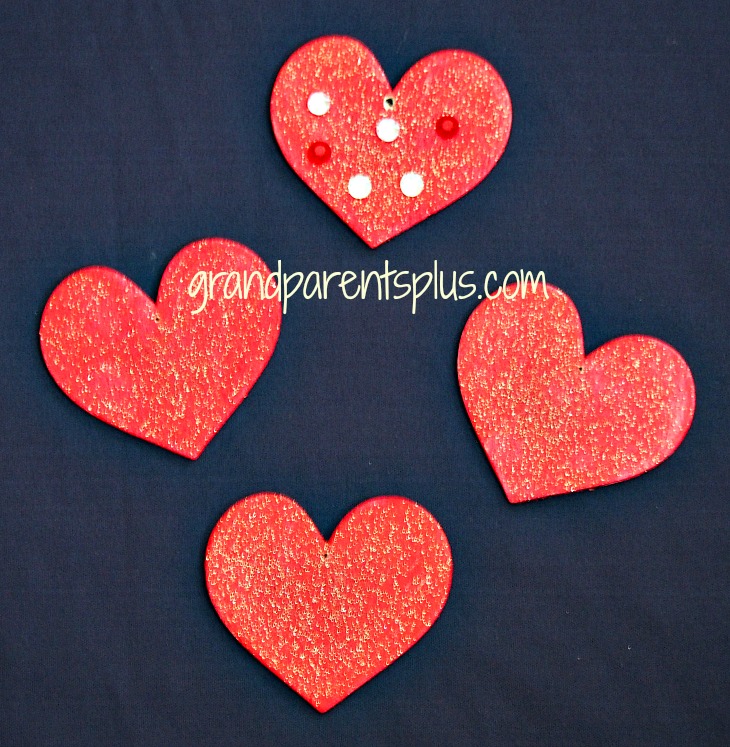
4 wooden hearts about 2  3/4 inches across. I purchased these at a craft store for $.29 each! You can use bigger ones if you choose. You don’t need four unless you are spelling out “LOVE”.

Red acrylic paint

Red Craft “Twinkles paint”  or glitter glue

Foam Letters (optional)

Red Ribbon (for hanging – optional)

Toddler Valentine Crafts  grandparentsplus.cm

Kids love to paint and you really can’t mess this up! Use a sponge brush and let them dab or brush the paint on. Hint: the wooden heart moves around so tape it to the plate or paint area.

Let dry.

Next, paint with sparkle paint!  When dry, let them decorate with stickers or stick-on foam letters “L-O-V-E”

Toddler Valentine Crafts  grandparentsplus.com

When finished, an adult can drill the holes and put this together or hang each heart by themselves.


Toddler Valentine Crafts  grandparentsplus.com

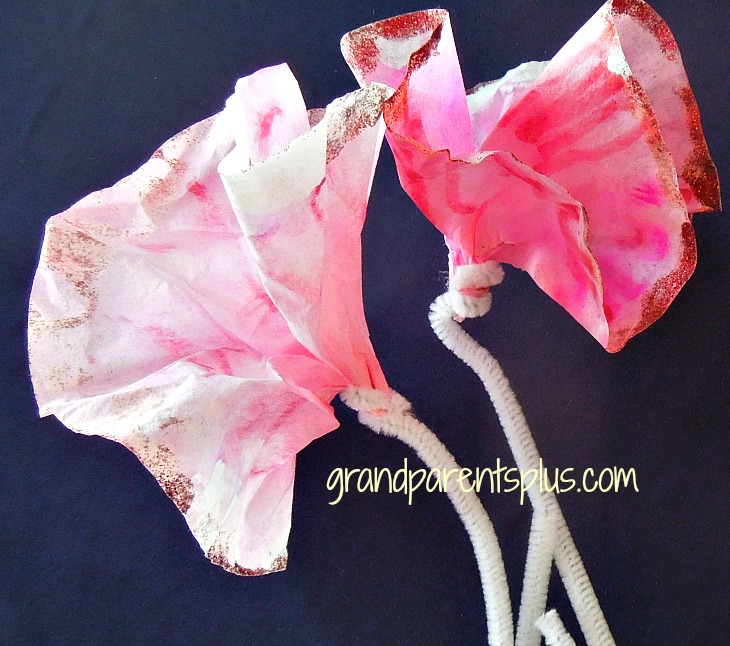
The next two ideas of the “Toddler Valentine Crafts” use coffee filters.

Materials:

Coffee Filters

Permanent Markers – Pink,  Red

Rubbing Alcohol

Eye Dropper

Red or Pink Glitter Paint (optional)

Pipe Cleaners


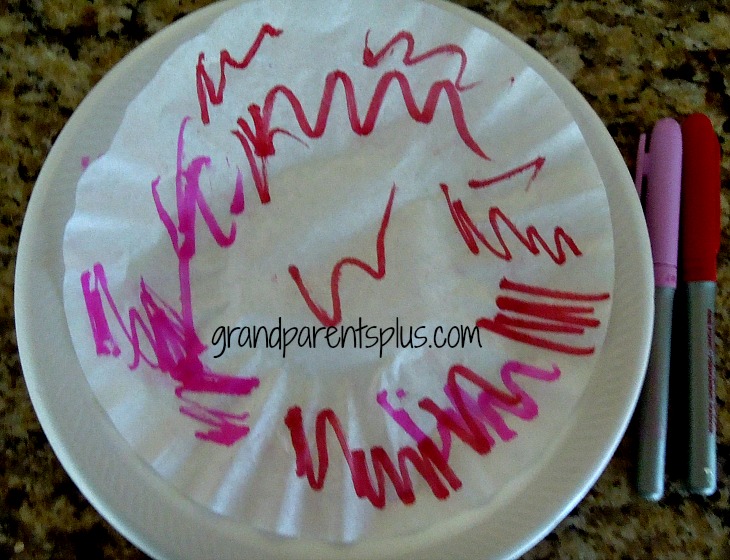
First, lay a coffee filter on a foam or plastic plate.

Color at random with a permanent marker.

Toddler Valentine Crafts   grandparentsplus.com


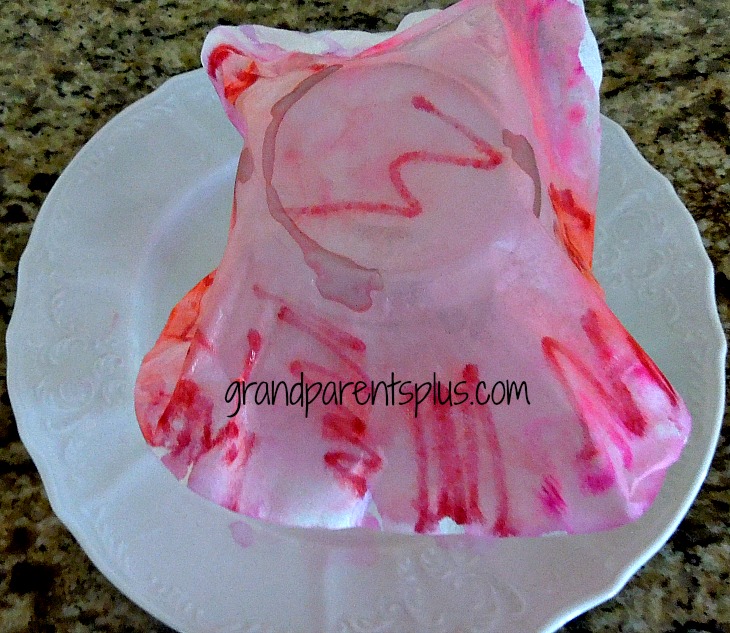
When finished with markers, drop alcohol onto filter. Colors will run together.  Place filter over a jar to dry. This dries fairly quickly!

Toddler Valentine Crafts   grandparentsplus.com

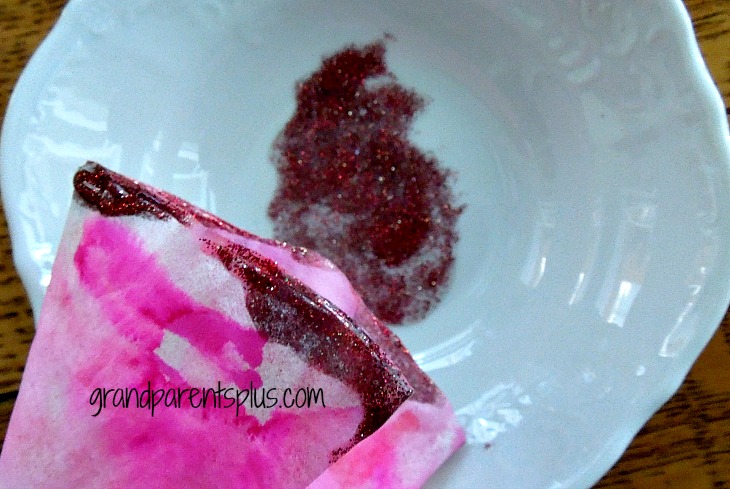
When dry, fold together. Your toddler can dip it into the sparkle paint along the edges. It’s OK if it gets other places on the filter. When done, unfold and place over the jar again to dry. (The sparkle paint will take longer)

Toddler Valentine Crafts   grandparentsplus.com

When dry, fold together and attach pipe cleaner to the flower. (needs adult help)

Toddler Valentine Crafts   grandparentsplus.com


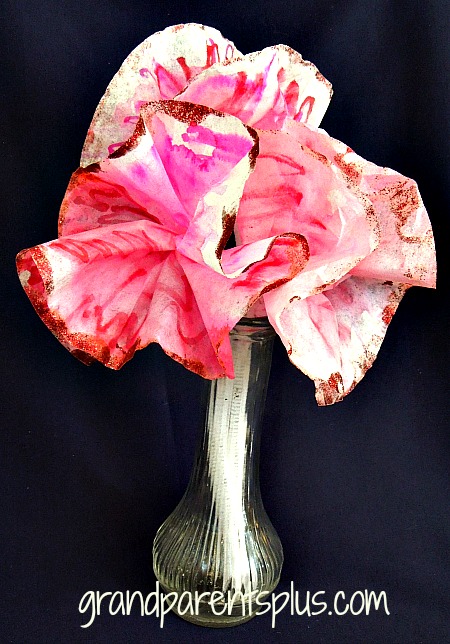
Display on your table for a Valentine centerpiece.

Toddler Valentine Crafts   grandparentsplus.com

Another version of the same technique is this….

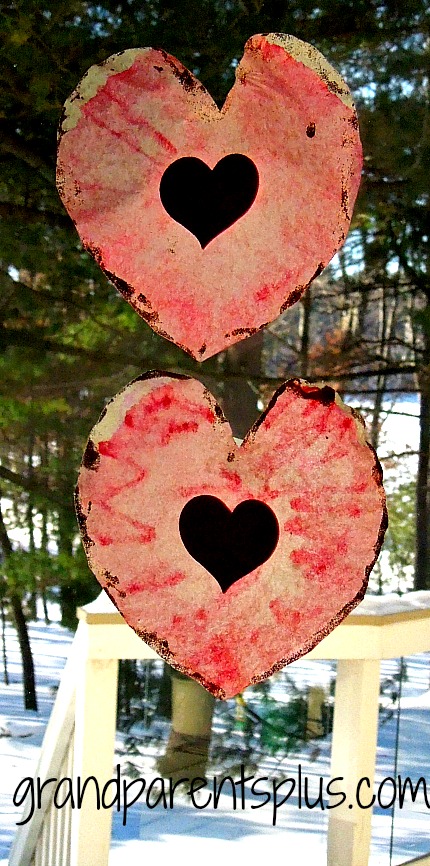
Right after you have dried the filter in the rubbing alcohol step, cut the filter into a heart shape. Let the toddler decorate the edges or wherever with sparkle paint. Let dry if using the paint and apply stickers. Display on a window to highlight the colors!

Add to a Valentine card, too!

Toddler Valentine Crafts grandparentsplus.com


Toddler Valentine Crafts   grandparentsplus.com


Have fun doing these Toddler Valentine Crafts with your child!

For more ideas check out my post on Easy Valentine Crafts for Kids!

Enjoy!

Phyllis

I’d love to have you subscribe to future posts!

This post is linked to the following parties……


Posted in Crafts, Holidays, Valentines | Tagged , , , , , , , , , , , , | 27 Comments

Easy Valentine Crafts for Kids

Easy Valentine Crafts for Kids   grandparentsplus.com


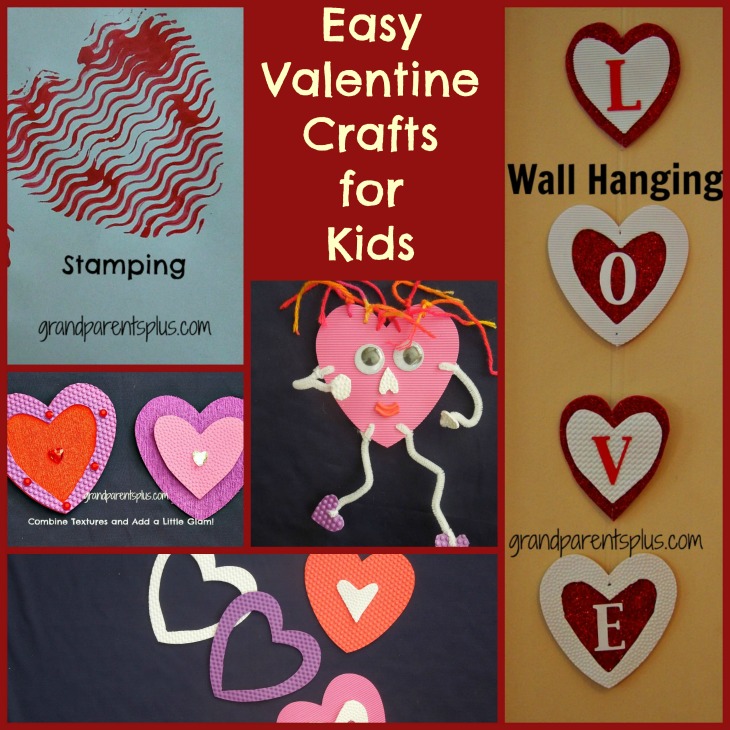
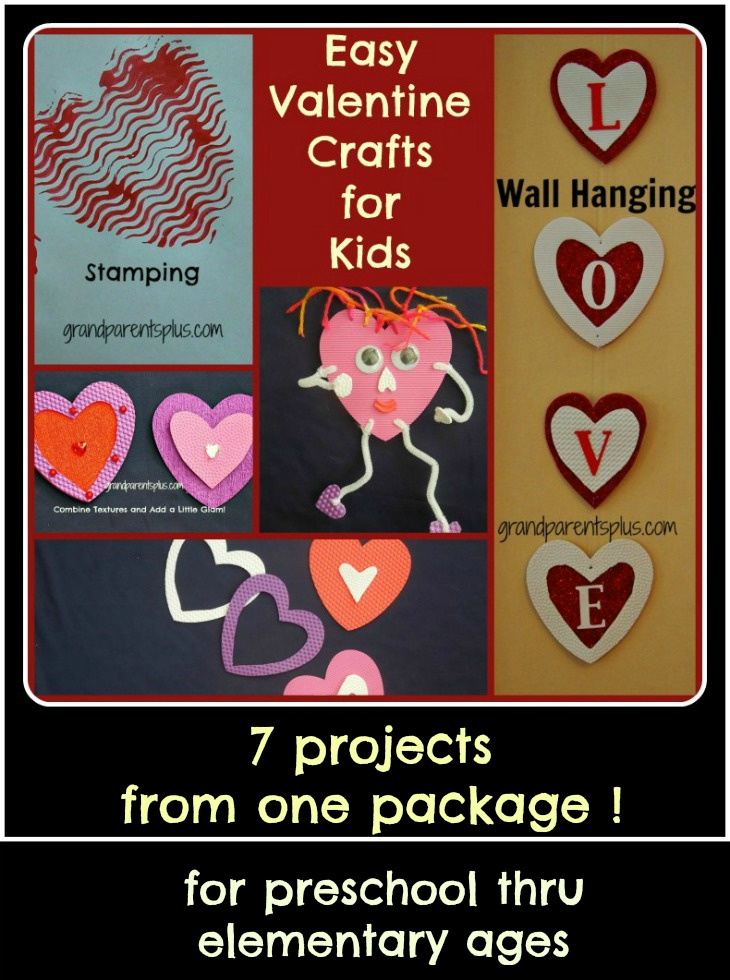
The following ” Easy Valentine Crafts for Kids” all come from one package of materials!  The list of ideas could go on and on, but I will focus on 7!  Some are easy for preschool and some need more skill with the help of an adult.

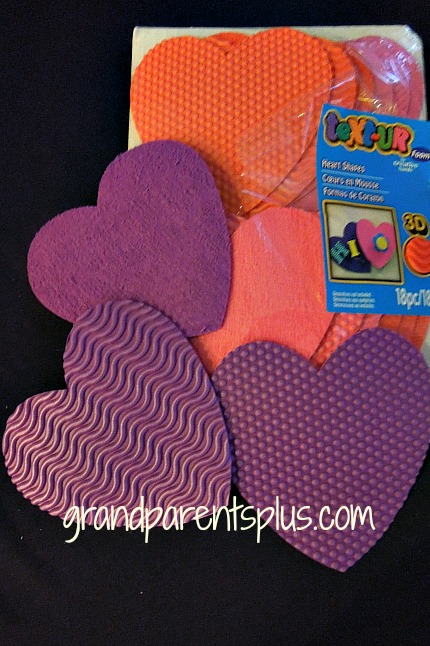
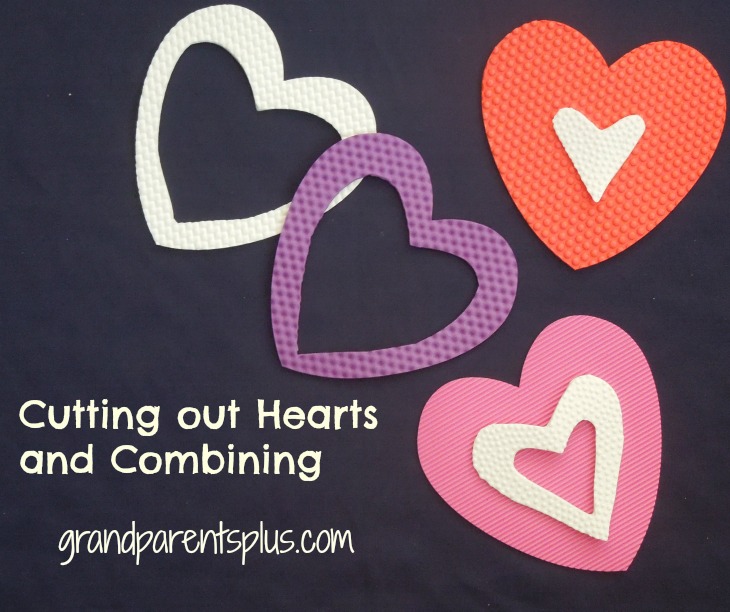
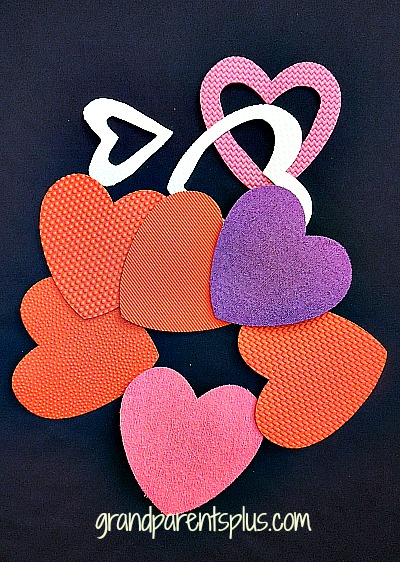
I found this package at a Michael’s Craft Store. In it were 18 pieces all large foam hearts with 6 different textures. It is called Text-ur Foam. It retailed for $3.95 and I got at least 7 different projects from one package. What is unique about this material is that it has “texture” as the name says! They look 3D!

4 Valentine Crafts for Kids

The colors included: purple, pink, red, and white!

Here are some fun things to do with these materials…..

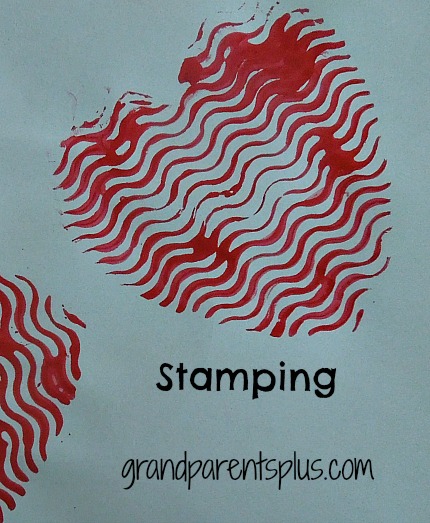
1.  Stamping – Great for preschoolers!

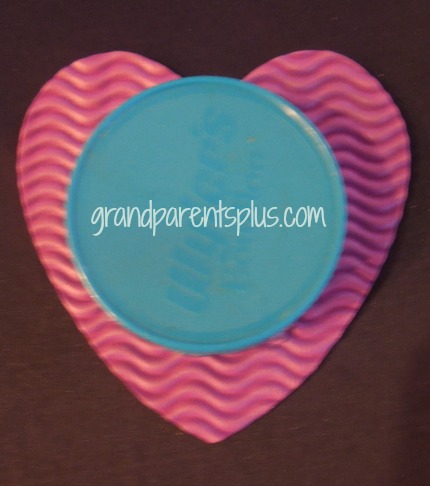
With such fun textures, cut smaller valentines from the larger ones and apply a “handle” and let them stamp away! Good handles include large legos, bottle caps and jar lids. The stamps wash off and are usable again.

4 Valentine Crafts for Kids   grandparentsplus.com


4 Valentine Crafts for Kids

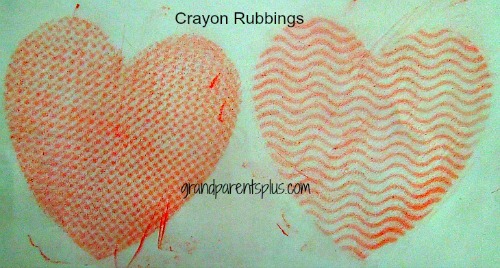
2. Crayon Rubbings – Great for preschoolers!

For younger kids, tape the hearts to the table and tape the paper over the textured hearts. Use a thick crayon and let them discover the patterns.

4 Valentine Crafts for Kids   grandparentsplus.com

Cut the rubbings out and make Valentine Cards for loved ones.


3.  Combining Hearts to Hang


4 Valentine Crafts for Kids   grandparensplus.com

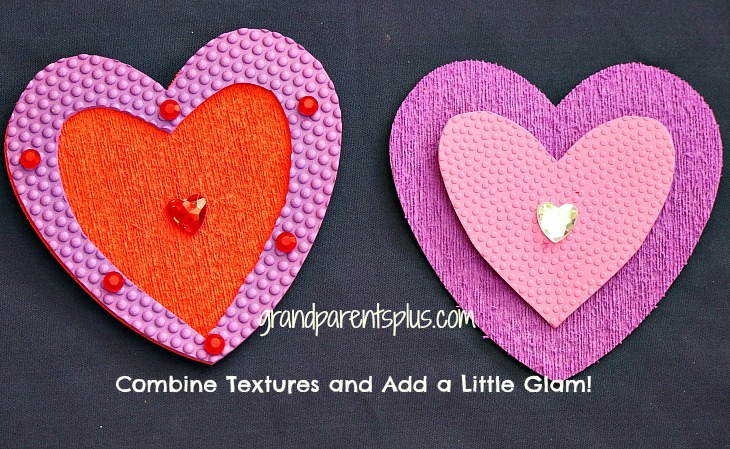
Cut out smaller hearts from the big ones and glue together or hang individually. The foam is easy to bend, trace a half-heart and cut out the design out. (Adults may have to help young children with the tracing and cutting.) Hang on light fixtures or from the ceiling in their rooms. Add sparkles and sequins to glam them up! Both sides can be decorated!

Easy Valentine Crafts for Kids   grandparentsplus.comusns


4. Make a wall hanging

Combine with sparkle foam or combine the colors and textures of the hearts together to create a wall hanging. Tie together with ribbon or fishing line. Use a nail or toothpick to punch holes in the foam hearts to string together.

4 Valentine Crafts for Kids   grandparentsplus.com

Add some foam letters or use a cutting machine to make the letters.

5. Valentine Creatures

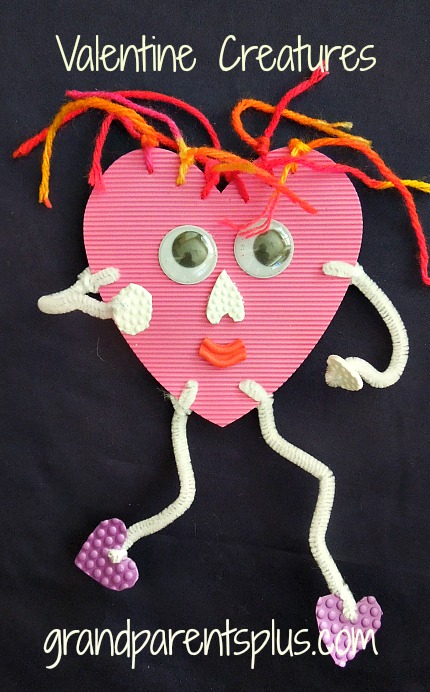
These Text-ur Foam Hearts make great creatures!

Easy Valentine Crafts for Kids   grandparentsplus.com

With the foam, you can make a hole using a toothpick and thread yarn through for the hair. The arms and legs are pipe cleaners. They are able to poke right through easily. Just twist and they will stay! Use these as puppets or hang from the light fixtures or bulletin boards in kids’ rooms.


6. Valentine Butterflies or Bugs

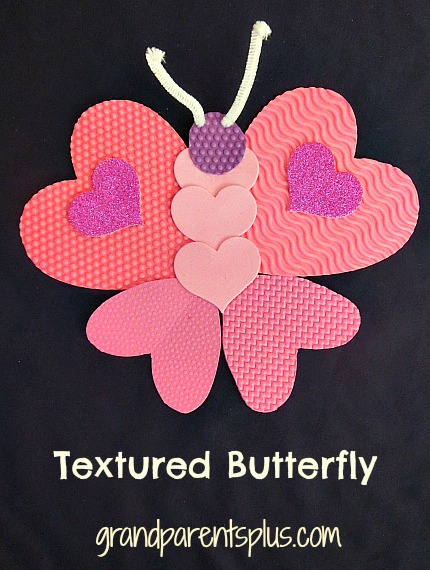
The texture on this butterfly gives it a great look!  Let kids get creative and make their own butterflies and bugs. I added a few heart foam stickers for the body and wings. The antennae is a pipe cleaner.

Easy Valentine Crafts for Kids  grandparentsplus.com


As I said, all the above Easy Valentine Crafts for Kids were made from one package of Text-ur foam! I still have this much left…..


Easy Valentine Crafts for Kids  grandparentsplus.com


These projects are inexpensive!


Easy Valentine Crafts for Kids   grandparentsplus.com

Just imagine the other project ideas  such as: Valentine wreaths, animals and picture frames, etc.!

Have fun! Hope I’ve inspired you for some Easy Valentine Crafts for Kids – all from one package of “Text-ur foam”!


Thanks for stopping by,

Phyllis


Be sure to subscribe to future posts!

This post is linked to the following parties……


www.coastalcharm.com

Posted in Crafts, Holidays, Valentines | Tagged , , , , , , , , , , , | 34 Comments

Valentine Cream Cheese Delights

Valentine Cream Cheese Delights

Looking for a new delicious cookie for Valentine’s Day? Try these pink Valentine Cream Cheese Delights!  You can’t resist them!  Not only do they look pretty, but just one bite into this flavorful cookie with a wonderful chocolate or raspberry surprise inside, and you’ll be hooked!

They make a pretty addition to any Valentine cookie plate! After tasting them, your family will request them each Valentine’s Day and in between as well! Let the kids help put the surprise in each one!

Valentine Cream Cheese Delights

Ingredients:

1  cup butter

1  c. granulated sugar

6 0z.  cream cheese (room temperature)

1  tsp. almond extract

3 tsp. baking powder

2 cups flour

Red food coloring

Powdered sugar

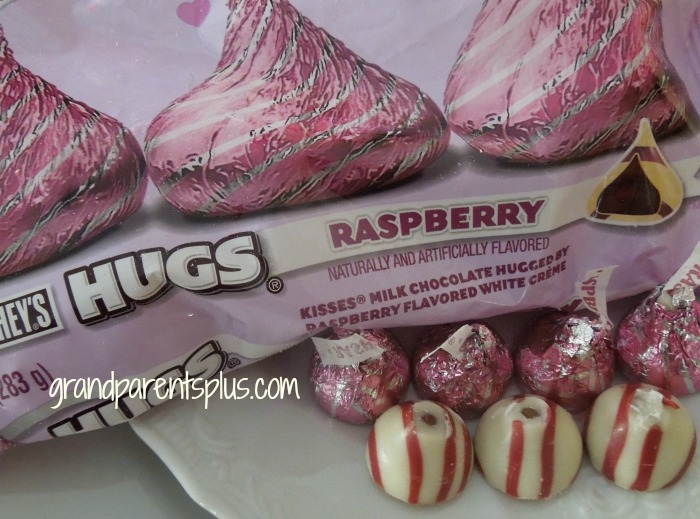
Chocolate candy or  Kisses ( I used the raspberry flavor Kisses),


Valentine Cream Cheese Delights  grandparentsplus.com


Directions:

Cream butter, granulated sugar, cream cheese, and almond extract until fluffy. Add red food coloring and beat in. Add baking powder and flour until well mixed. Chill 1-2 hours.

Coat hands with a little flour and shape into walnut-sized balls around a piece of candy (if using Kisses, break off the top peak -). Be sure candy is totally covered with the dough. Bake on ungreased cookie sheet at 350 degrees for 12-15 minutes. (Watch so they don’t brown.) Cool slightly to handle. Roll in powdered sugar. When thoroughly cool, roll in powdered sugar again. Makes about 3 1/2 dozen.

 Let the cookies cool completely. The inside will look like this……

Valentine Cream Cheese Delights   grandparentsplus.com

 YUM!

Valentine Cream Cheese Delights  grandparentsplus.com

 I’ll bet you ate the top peaks of the Kisses, right?

Enjoy!

Phyllis

You’re invited to subscribe to future posts and follow on Pinterest or Bloglovin.

This post is linked to the following parties……


Posted in Holidays, Recipes, Valentines | Tagged , , , , , , , | 17 Comments

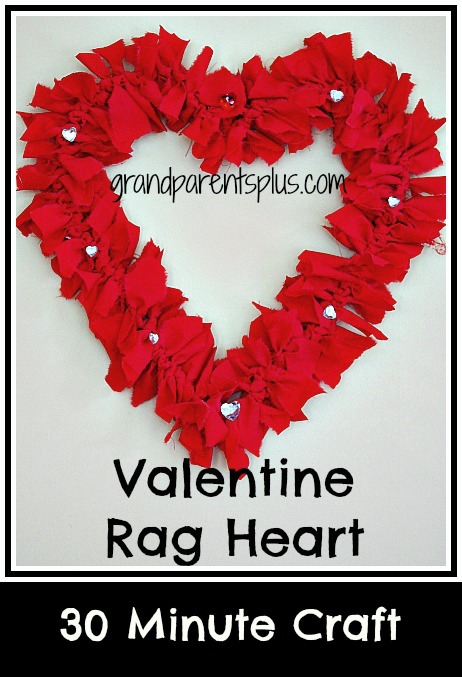
Valentine Rag Heart- 30 minutes

Valentine Rag Heart  grandparentsplus.com


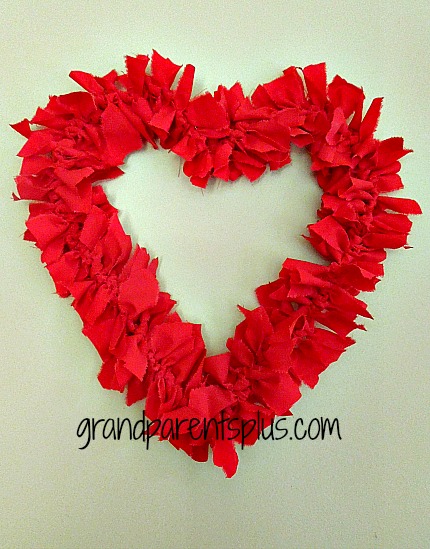
Left over from a earlier project, I still had some red sheet fabric to use.  I decided I would turn it into a Valentine Rag Heart! This is something school-age kids can do. Elementary kids that can tie a simple knot are certainly able to handle this craft! It turns out great and takes less than 30 minutes!

Materials:

Wire:

The gauge depends on the size. Larger hearts need a lower gauge (thicker) wire.

I had a package of floral wire from Dollar Tree so that is what I used. It didn’t have the gauge on it, but as long as you can bend a shape fairly easily, it  works. Using a wire hangar works, too for a larger project!  The larger the wreath, the thicker the wire needed for holding its shape.
An adult needs to bend and shape the wire.

Fabric:

Approximately  1/2  – 1 yard – depending on the size you want for your Valentine Rag Wreath. I used about a half yard for an 10×10 inch heart.


Directions:


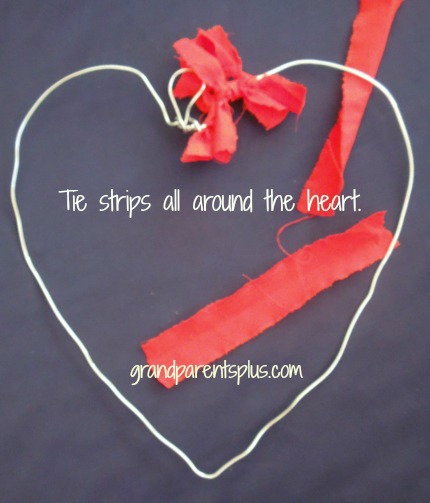
First, shape the wire into a heart. I made a loop on the top for hanging. (The heart doesn’t  need to be perfect as you can adjust the shape when finished.)

Valentine Rag  Heart


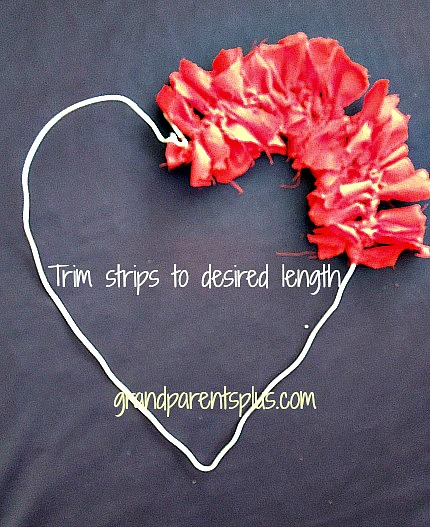
Next, cut or rip strips about 1 inch wide. Cut into pieces 6 inch long. Don’t worry that they look a little long as the longer strips are easier to tie for elementary kids. You can always trim later. No double knots needed. Just do a simple one-step knot and it will stay just fine!

Valentine Rag Heart  grandparentsplus.com

You can trim as you go or trim everything at the end. Keep pushing tied strips together.

Valentine Rag Wreath  grandparentsplus.com


Finished product looks like this….

Valentine Rag Heart  grandparentsplus.com

Add some embellishments or keep plain.

Valentine Rag Heart  grandparentsplus.com

 Have fun creating this Valentine Rag Heart!

Phyllis

Love to have you subscribe to future posts!  Follow on Pinterest or Bloglovin, too!

This post is linked to the following parties…..


http://linda-coastalcharm.blogspot.com/


Posted in Crafts, Holidays, Valentines | Tagged , , , , , , , , , , , , , , | 46 Comments

Chilly Night Chili Recipe

Chilly Night Chili grandparentsplus.com

I have used this chili recipe for over 25 years. It is quick and easy and tastes great! I make it easier to put together by precooking several portions of the hamburger and onions and freezing them in packets enough for one recipe. Then, when I want to put a meal together quickly, I take a packet out, add the rest of the ingredients, and it’s ready in 10 minutes!

Leftover chili freezes well, too!

Chilly Night Chili Recipe


Chilly Night Chili Recipe
Recipe Type: Dinner or Lunch Main Dish
Prep time:
Cook time:
Total time:
Serves: 5-6 servings
Chilly Night Chili Recipe
Ingredients
  • 1 lb. hamburger
  • 1 med. onion , chopped
  • 1 can red kidney beans – undrained
  • 1/2 – 1 can black beans (rinsed)
  • 1 14.5oz. can stewed tomatoes
  • 1 can tomato soup
  • 2 1/2 – 3 tbsp. chili powder
  • Optional ingredients: sauteed green pepper, corn, other varieties of beans
Instructions
  1. Brown hamburger and onion
  2. Drain
  3. Add beans, stewed tomatoes, tomato soup and chili powder.
  4. Mix together, heat and serve!
  5. Quick and easy chili recipe.

Chilly Night Chili grandparentsplus.com


My family doesn’t like chunks of tomatoes, so I blend my stewed tomatoes in my bullet. No chunks!

Enjoy!

Phyllis

Subscribe on the sidebar knowing that your email is never shared or sold!

Follow on Pinterest.

Post linked to these parties…

Posted in Recipes, Soups & Stews | Tagged , , , , , , , | 39 Comments

32+ Valentine Games

Follow my blog with Bloglovin

Fun Family Games for Valentines #Valentine Games #Games #Valentines # Valentine Family Games #Family Games #games

Lots of fun games ideas for parties at home or at school.

This ” 32 + Valentine Games” post has been added to and is now over 40 game ides!  Thought I’d take it from the archives and re-post due to all the new ideas! …….

Valentines Day is just around the corner! Now is the time to be thinking of fun Valentine Games to do with your kids, grandkids or classroom for the Valentine season. I’ve come up with some fun games and compiled a list of other games along with some extra resources for you to use wherever you are having a Valentine celebration! Some games are old and some are new! I hope this will be a nice list of ideas to have filed away. As I think of more, I will update and add to this list! That is the “+” part!

1. “Wink-um”  This is an OLD game!

Have a circle of chairs. The boys are standing behind the chairs and the girls are sitting in the chairs. There is one empty chair and the boy behind it winks at a girl. The girl has to quick get out of the chair before the boy behind her tags her on the shoulder.

2. Valentine Relay

Cut small hearts out of tissue paper  Give each person a straw (not a flexible one). Players need to suck the straw so that the heart sticks and run to assigned area and release the heart into a basket or bowl. Play this game individually with small kids or in relay teams with large groups. Another version is where you start with a sandwich bag full of tissue hearts. The first person sucks out a heart and passes it to the next person’s straw without using their hands. The last person has an empty sandwich bag in which they put the hearts. The team to first pass all their hearts, wins!

3. Broken Hearts

Cut large hearts out of construction paper. (approx 6-9 inches across) Now cut them into puzzle pieces. Cut them differently or all the same. If you cut them differently, each one needs to have the same number of pieces. For young children, mark the top side, but for adults, make it harder by not marking the top side. Place individual puzzles in an envelope.  Either start everyone at the same time and see who can put the puzzle together the fastest or do it individually and time each person. Vary this depending on the number of people playing and the age of the players.

4. Heart Grab

This is like the “Hungry Reindeer” Game that I posted at Christmas. There are small heart-shaped red hots available at Fleet Farm and perhaps other places. Place the “hearts” on a large tray. Players wear a thick athletic sock on their hand and have 15-30 seconds to see how many hearts they can grab and put in a bowl. If they miss the bowl, they don’t count! (Decorate the sock with hearts to go with the Valentine theme!)

5. I Spy the Heart!

This is also one that I played as a kid.  Everyone is out of the room while one person places a small heart somewhere in the room. Do not have it totally hidden, but have some little part showing. When a player spies it, they quietly walk over to a chair and sit down. They are not to let anyone know where it is hidden. Each one that spots it, also walks over and sits down until the last one finds it. The first one to spy it, is the next person to hide it.

6. Heart Land

Place cut-out hearts or doily hearts several places on the floor (tape them down). Kids try to land a nickel or quarter on a heart. If they do, they keep the money. You decide how many tries they get! Let them have the money even if it is touching a heart.

7. Cupid 

Place hearts on a wall or door with different point values on each one. Use a Nerf Gun or Nerf  Crossbow to shoot the hearts. Tally points after 10 tries.

8. Heart Hunt

Place lots of hearts in various places around the house. Give kids a basket or cup to place all the hearts they find.  Either give a time limit or game ends when all the hearts are found.  Count hearts to see who found the most.

The next 6 games are from      Activity Village    

9. Heart target game

Scatter large hearts cut from construction paper all around the floor. Blow up red balloons, but don’t tie them. Give them to a player and they let them go trying to land close or on a heart somewhere in the room. Give them several tries. It is fun to see where they land. The person closest or the one on the heart, wins.

10. Heart Basketball

Cut a heart-shaped frame out of a corrugated cardboard box and spray paint it red or pink.  Hang it from a doorway or have two adults hold it.  Blow up red balloons and tie the ends. Kids try to score by batting it through the opening of the heart to score a point.

11. Valentine Balloon Pop

Inflate balloons and place a small piece of paper inside each one with the name of a prize.  Each child has a pin. They need to keep the balloons in the air without popping it until you signal. At the signal they can start trying to pop one!  Whatever heart they find inside, they win that prize!

12. Wipe That Smile Off Your Face!

Everyone sits in a circle. The one that starts smiles and tries to get each person to smile. They get a point for each one that they get to smile on their turn. When their turn is over, they “wipe the smile off their face” and it is the next person’s turn!

13.  Valentine Fishing

Cut hearts and turn them into “Valentine fish”. Attach a small magnet to each fish. Give either point values to the fish or write a prize on the back of some of the fish.  Poles with string also have magnets which “catch” the fish.

14. Computer Games at

a kids heart
apples4the teacher

Games # 15-20. Go to:    365kidsgames.com

for complete directions on the following games….. #15-20

15. Heart Attack

A relay game where players pick a red construction paper heart with a chocolate heart candy taped to it. On the back are the instructions of what they have to do to run the relay. For instance, one might be “hop”, “jump”, “walk backwards”, “crabwalk”, etc. When the teams finish, they can enjoy their chocolate.

16. Heart Strings

This game is like  “I Spy the Heart” above only have a string on the heart and only let that show.

17. How Many Kisses?

Guessing game with a jar full of “chocolate kisses”.

18. Heart Stomp

Using red hearts cut from construction paper taped to the floor, players walk around going from heart to heart. When the music stops, they must find a heart to stomp on. The player that is not on a heart is “out”.  This is like musical chairs only using hearts.

19. St. Valentine Says…

Like Simon Says….

20. Valentine Pictionary

Use words like: candy, heart, love, Valentine, kiss, envelope, letter, lollipop, balloon, cupid, arrow, flowers, etc.

21. Steal My Heart

Give kids chopsticks and have them transfer Valentine candy hearts from one bowl to another using only the chopsticks. Two pencils also work for this game if you don’t have chopsticks.

22. Heart-A-Stack 

Take Valentine heart candies and see how high they can stack them before they fall! Give a set time limit.  More than one player can do this at a time or do it in pairs.

23. Valentine Printables for Valentine Memory Games, etc.

Go to :   spoonful

activityvillage

The next three ideas that I like come from this site:  Kaboose

They have other games, too, that would work for large groups or classrooms.

24. Straw and Valentine Cup Relay

For this game you need a bendable straw for each player and a Valentine Cup for each team. Players hold the bendable end in their mouth and pass the Valentine cup using only the straw. If the cup falls, it goes back to the beginning or for younger kids, just go back one player.

25. Heart Stomp Relay

Cut out large red hearts. Give each team two large hearts. Players on each team must step on one heart and then take the heart from behind and place it ahead so they can continue on. They always take the one from behind and move it forward to get to the goal. They cannot move unless they are stepping on a heart. Players  run back with the hearts to the next player.

26.  Red Licorice Chew

This is where each player gets one string of red licorice (use Twizzlers Pull-A-Parts).  Without using hands, players must get the licorice all the way in their mouth by chewing. This makes for funny pictures! Get your camera out!

27.  Size-A-Heart

Have approx. 15 hearts that are various sizes. Players must put them in order from smallest to largest. Time each person  or race against two players at the same time.

28.  Stop in The Name of Love

Take a small heart pillow or small Valentine stuffed animal and pass like a “hot potato” while the music plays. When the music stops, the person holding the animal is out. Play continues until one player is left.

This next game is from Birthdayinabox

29. Valentine Candy Relay

Team members must run to a spot, unwrap a candy and eat it completely before they run back and tag the next person. A good candy to use is Hershey’s Kisses as they are hard to unwrap, but go down easily.

30. Heart Tic-Tac-Toe

Make paper hearts with a Tic-Tac-Toe board on it and kids use candy hearts of one color to play.

31. Lots of Minute to Win It Games for Valentines here:

Sunnydaysinsecondgrade

Mommylessons101

32. Heart Toss 

Outline a heart on the floor either with tape or cut a large one out.  Use bean bags (heart-shaped?) to toss. Anything landing inside the outline counts as a point. Give kids a set amount of tries. I noticed that www.orientaltrading.com has an inflatable Valentine game that is very much like this.  If you play the Heart Basketball Game, use that heart for the target area. Dollar stores have little Valentine soft toys to use as bean bags.

 +  Heart Throb Match

In this game, teams or individuals find the match for the things that belong together. Use famous couples (for adults), famous cartoon couples, or items like : cream & sugar, cookies & milk, etc.  The leader says the first part and the teams or individuals write down the second part.  Another variation is to put 1/2 of the match on the back of one person and the other half on the back of another. Without knowing what is on their back, they need to ask “yes or no” questions to find out their half and then look for the other matching half.

+ Heart Drop

For this game, you need a sturdy chair. Players kneel on the seat backwards and reach over the back of the chair to drop valentine hearts in a jar. Use a large pickle jar so the heart candies don’t bounce out. Give them 20 hearts to try. Count the hearts in the jar and then it is the next person’s turn.  Person with the highest number in the jar, wins!

 +  Coloring Pages

http://www.valentines-coloring.com/

http://www.crayola.com/free-coloring-pages.aspx#%2Fcategory%3Aholidays%2Fsubcategory%3Avalentines%20day

+ Heart Bowling

Take ten empty water or pop bottles and put heart stickers or glue paper hearts on them.  Place them like the 10 pins in bowling. Using a small stuffed Valentine animal, slide it across the floor to knock over the “pins”.  Players get two tries  just like bowling. Count the number of “pins” down. Repeat and keep score.

+ Pin the Heart on Cupid

Trace a Cupid on Paper and play like  “Pin the Tail on the Donkey”

+ Cupid’s Arrows

For this game you need Q-tips, straws, and a bowl or basket or a large paper heart target. Players place a Q-tip in the end of their straw and try to land (Cupid’s Arrows) it in the bowl, basket or on the heart set at a distance away. Give it a try  it to see how far away the targets need to be for both young kids and older ones. Adjust as necessary. Points are scored for those that land inside the target area.

+ Go to Oriental Trading for more Valentine Games


Free Shipping on orders over $49

The following Valentine Games are found here……. Shop party supplies and decorations at Oriental Trading Company!

1. Stretchable Flying Heart IN-32/123

Use these to fly through a cut out heart or score points for hitting numbered hearts on a door or wall.

2. Valentine Bend Game IN-32/1263

This is for two players –  a Valentine version of a popular game.

3. Valentine Cupid Arrow Missiles IN-32/1471

These are fun to fly into a heart decorated box or basket.  Also, play a team game and fly them to the opponents side. (like a snowball fight) After 3-5 minutes, the team with the least number Arrow Missiles on their side wins.

4. Inflatable Valentine Game IN-32/1278

This is all done for you. Just play and have fun!

5. Valentine Bean Bag Toss Game IN-32/1546

Everything is included and ready to play.

6. Heart Ring Toss  IN-32/4054

7. Valentine Disk Shooters IN-32/1526

These are fun to shoot through a hula hoop or heart!

8. Inflatable Valentine Octopus Ring Toss  IN-32/305

9. Valentine Bingo  IN-32/1548


 The list has now grown to more than 40!

Do you have more ideas for games that I could add?

For more updates, subscribe to this website!


Have fun!

Happy Valentine’s Day!


 Phyllis


This post is linked to the following parties…..


Posted in Games, Holidays, Valentines | Tagged , , , , , , , , , , , , | 49 Comments

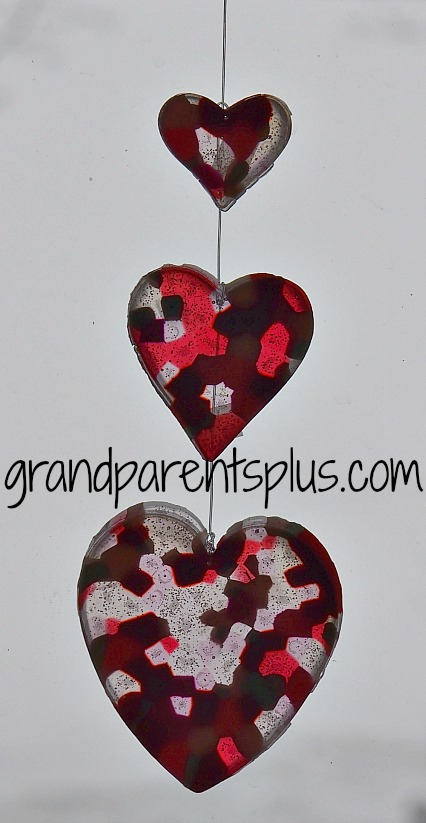
Melted Bead Valentine Sun Catcher

Melted Bead Valentine Sun Catcher    grandparentsplus.com

Kids (adults, too)  enjoy making and displaying this Melted Bead Valentine Sun Catcher Craft! It is quick and easy to do along with looking colorful on your window! You know the three conditions of a good craft are: easy, inexpensive and turns out great! This craft meets the criteria!

My inspiration came from here

Supplies:

Metal cookie cutters of various sizes (important: do not use plastic!)

Plastic beads – any color, any shape, any size

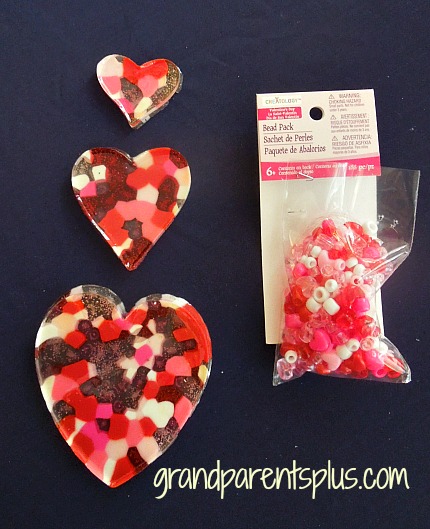
This is what I used…..

The package of beads cost $1.00 and it made all three sizes.

(The clear beads look dark against this background.)

Drill


Melted Bead Valentine Suncatchers  grandparentsplus.com

I used a toaster oven and did this in our garage. You do get some plastic fumes if you do it inside! Make sure you are in a well-ventilated area.

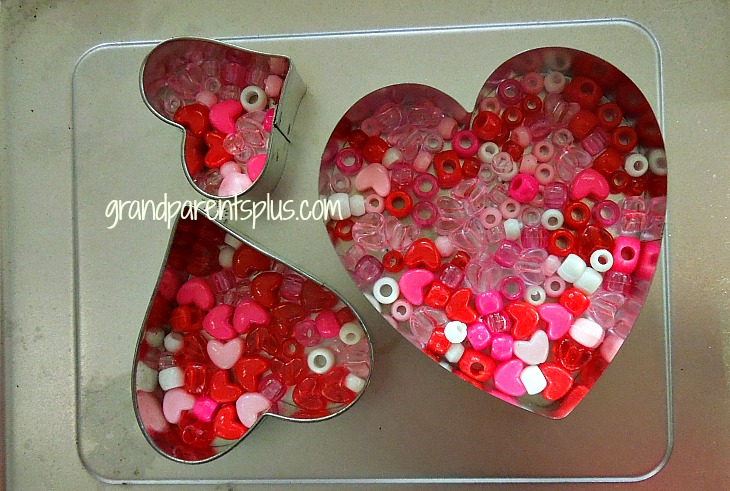
First, place beads inside the metal cookie cutter on a metal pan. If you use a disposable foil pan, spray with non-stick spray. When placing the beads, make sure there are no blank spaces. They need to be touching each other. It doesn’t matter if they are flat or on their edge as they melt anyway.


Melted Bead Valentine Suncatchers  grandparentsplus.com

Next, put in oven at 400 degrees for approximately 5 minutes. Check often to see if they are melted. Remove and let cool completely!! (very important) When cool, the Melted Bead Valentine Sun Catcher will release from the metal cookie cutter with just a little force! Your cookie cutters are useable again for another sun catcher or cookies!

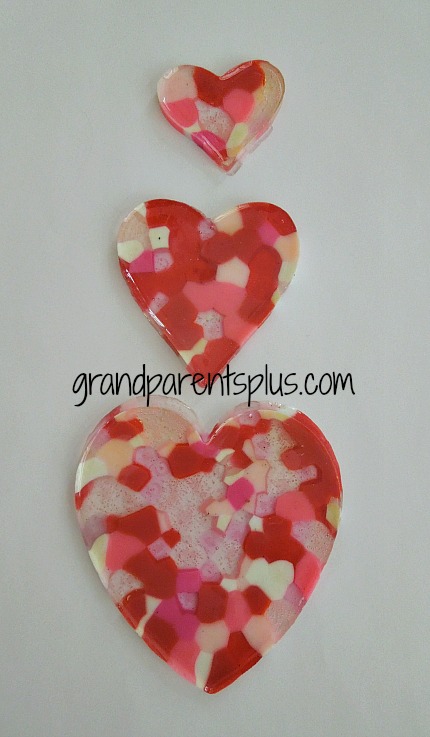
This is how they look…..


Melted Bead Valentine Suncatchers   grandparentsplus.com


When cool, drill holes and attach together or separately. If attaching them together, the bottom one needs a hole at the top and the others need a hole at both the top and bottom to string together.

Melted Bead Valentine Sun Catcher

Now hang on your window!

Melted Bead Valentine Suncatcher   grandparentsplus.com

Another option is to make a patterned heart. Go here to see my other post for making different melted bead objects.

Have fun!

Phyllis

Love to have you subscribe to future posts!


 This post is linked to the following parties…..

Posted in Crafts, Holidays, Valentines | Tagged , , , , , , , , , , , , , | 41 Comments

Scrappy Jean Quilt for Upcycling Jeans!


Scrappy Jean quilt   grandparentsplus.com

What does one do with old jeans? Well, make a Scrappy Jean Quilt! Outdated, out-grown, and worn-out  jeans are perfect to recycle or upcycle into a wonderful quilt. Lots of variation in the blue jean shades adds texture and interest to the look of the quilt.

As I found jeans that would work, I just cut the squares and set them aside. When I felt I had enough for a lap quilt, I went to work putting them together. What I really liked about this quilt is there is no backing and no binding! Once you sew them together, cut and wash it,  it is done!


Step 1

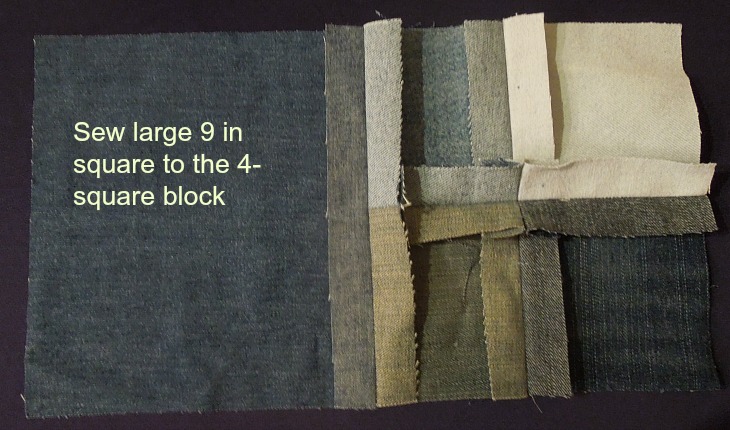
First, I cut the large 9 inch squares. The others are 5  1/2 inch squares. For every large square, you’ll need 4 small squares. My lap quilt is 7 x 9 completed squares. Out of the smaller pieces, cut the 5 1/2 inch squares.

Step 2

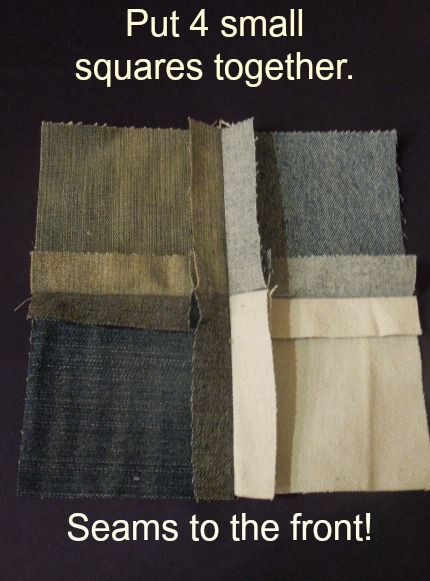
After cutting, sew the 5 1/2 inch squares together to form a 9 inch square. Use a 1 inch seam allowance with wrong sides together! Remember, the seams are to the front side! This will look awful at first!
Scrappy Jean Quilt  grandparentsplus.com

Step 3

Start putting the plain squares and 4-square blocks together.

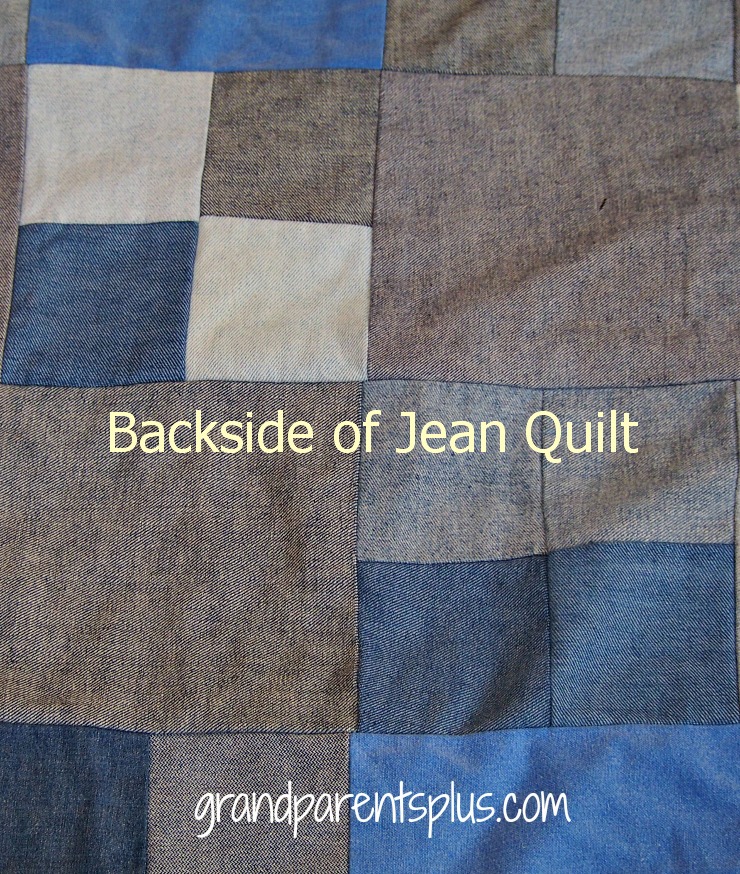
Start with a plain block and then add a 4 square block alternating as you go. The next strip starts with a 4 square block and then a plain one. This way, they will fit together.

Scrappy Jean Quilt

The picture of the Jean Quilt  backside shows the pattern well.

Scrappy Jean Quilt  grandparentsplus.com


Step 4

When the quilt is the size you want, sew a 1 inch seam allowance all around the outside edges to finish it off.

Step 5

Now, start fringing the seam allowances every half-inch or so. Be careful not to cut the seam itself. You need a really good, sharp scissor for this!

The “scrappy” comes from the seam allowances being cut and fringed on the front side. You may choose between little cuts or bigger cuts. (It is to your liking). After you wash it, the seam allowances get “scrappy” looking as they ravel.  I recommend going to a laundromat to do the washing so your machine doesn’t get filled with threads!

Wash and dry a couple of times. Each time, the Jean Quilt fringe gets better and better.

Scrappy Jean Quilt   grandparentsplus.com


This is a perfect Jean Quilt to make for a teenage boy or girl!


Scrappy Jean Quilt  grandparentsplus.com

What I like about this project is that you can do a little at a time as you find the jeans  and then piece the whole thing together! It is also indestructible! You can’t destroy this! It lasts forever!


Enjoy!


Phyllis

Love to have you subscribe to future posts!


This post is linked to the following parties…..

Posted in Decor, Home | Tagged , , , , , , , , , , , , , , , , | 42 Comments

Sweet Potato and Sausage Soup

Sweet Potato and Sausage Soup

January and “soup” go together! On a chilly night nothing satisfies more than a hot bowl of soup and this Sweet Potato and Sausage Soup is a great recipe for a winter warm-up!

This soup was served at a recent get-together! Oh, I  had to have the recipe! Where this soup originated, I am not sure. The mixture of the sausage flavors along with the sweet potatoes is truly a winner to my taste palate! I’m sure you’ll love it, too!

Ingredients:

3 Tbsp. olive oil

10-11 oz.  Chorizo (Mexican)  sausage (cut 1/4 ” thick) substitutes for Chorizo are: Italian sausage or chicken  Be sure the Chorizo is link and pre-cooked; not bulk!

2 medium onions

2 garlic cloves, minced

2 lbs. red skinned sweet potatoes (peel and cut crosswise 1/4 ” thick and halved)  – approx . 2 large sweet potatoes

1 lb. white skinned potatoes (peel and halved lengthwise, cut 1/4″ thick) approx. 4 med. potatoes

6 cups low-salt chicken broth

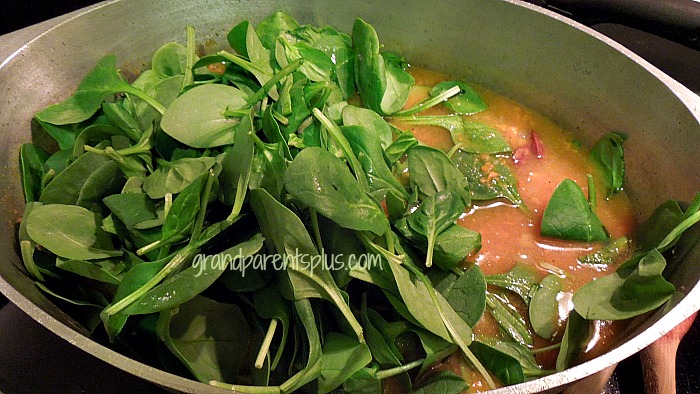
9 oz. fresh spinach


Directions:

Heat 2 Tbsp. Olive Oil in large pot over high-high heat. Add sausage and cook till brown. Stir about 8 minute and transfer sausage to paper towels and drain. Add onions and garlic, cook stirring approx. 5 minutes. Add all potatoes and cook until beginning to soften – approx 10 min. (with a small amount of broth) Add chicken  broth, bring heat to medium-low. Cover and simmer until potatoes are soft approx 20 min. Using masher, mash some potatoes.( not all)  Add browned sausage. Stir in spinach and simmer until just wilted – 5 minutes. Stir in 1 Tbsp. oil, salt and pepper.

Sweet Potato and Sausage Soup   grandparentsplus.com

Serves 8


Sweet Potato and Sausage Soup  grandparentsplus.com

YUM!

Enjoy!


Phyllis

Love to have you subscribe on the sidebar for future posts!

This post is linked to the following parties….

Posted in Recipes | Tagged , , , , , , , | 22 Comments