Western Craft Ideas


Western Craft Ideas

Western Craft Ideas

With a Western theme for our last Oma and Opa Camp (Grandma and Grandpa) ,  I tried to make the Western Crafts appeal to both boys and girls. Not everyone did all the crafts which is just fine.  Sometimes kids just like to play and have fun! So, I don’t make them do each Western Craft. It is their choice!

I like ideas that are easy to do, cost friendly and appeal to both boys and girls !

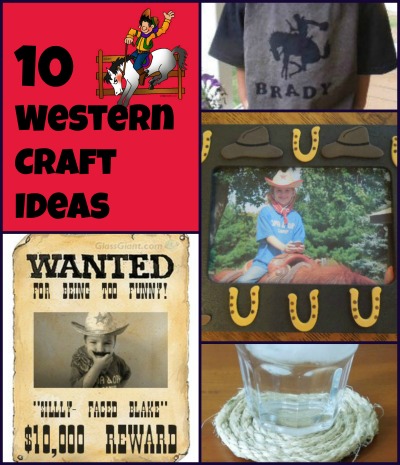
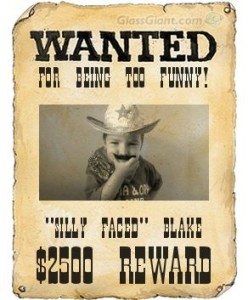
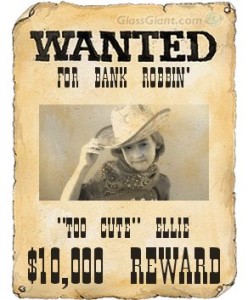
1. Wanted Posters

I bought fake stick-on mustaches at the dollar store. They came several to a package for $1. With two packages, I let them pick out the one they wanted. Wearing a cowboy hat, mustache (for the boys), and a red western bandana around their neck, I took each of their pictures with a “mean look” against a blank wall and printed out individual wanted posters. I gave them some possibilites of why they were “wanted” and they chose the one they wanted for the poster. They loved them! They took them home at the end.

Western Crafts


Western Crafts  www.grandparentsplus.com

 Go to Glass Giant to make the wanted posters.

Another option is to decoupage these posters onto a piece of wood to hang in their room.

2. Rope Coasters

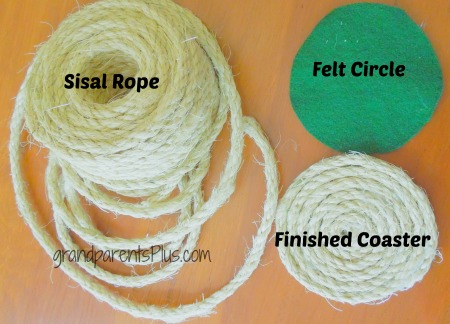
Supplies Needed: Sisal Rope, Felt, Hot Glue Gun

Western Crafts   Rope Coast.er   www.grandparentsplus.com

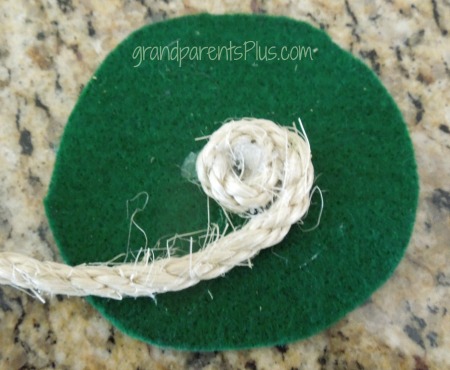
Cut felt circles. I made them 3 1/2 inches in diameter.

Start by hot gluing the beginning of the rope to the middle of the circle (adult needs to do this part).

Western Rope coaster  www.grandparentsplus.com

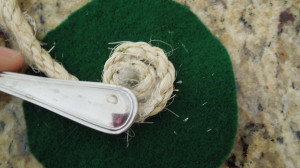
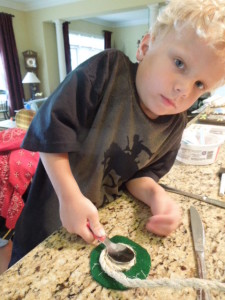
Next step is to put hot glue onto the edge and pull sisal rope to stick to that glued area. I found it easy for kids to pull the rope around while I did the hot glue and then hold it in place with a metal spoon. That way they didn’t get burned by the hot glue.


Western Crafts Rope Coaster   www.grandparentsplus.com

Continue around gluing about 2-3 inches at a time and holding the rope in place. It only takes about 10-20 seconds for the glue to hold it.

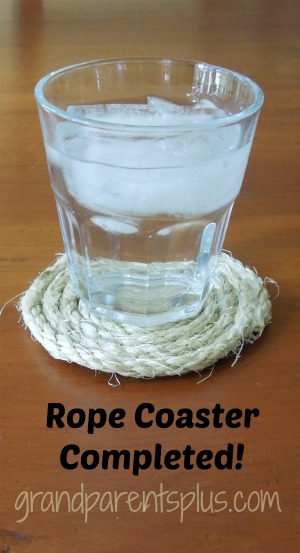
When completed, trim off any felt edges that show.

An adult should secure the end with plenty of hot glue.

Western Crafts  www.grandparentsplus.com


Western Crafts


3. Painted Snakes


I found a kit of a wooden snake at the craft store. It was sectioned so you could straighten it or coil it. The kids painted them and we used them for the Snake Tic-Tac-Toe Game ( see post on Western Games)
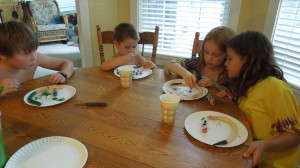
Western Crafts   www.grandparentsplus.com

Another variation for the snakes is to make them out of  a flexible molding compound found at craft stores. The snakes would remain either straight or coiled, however.

4. Western Frame

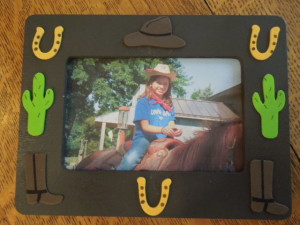
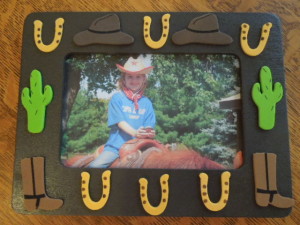
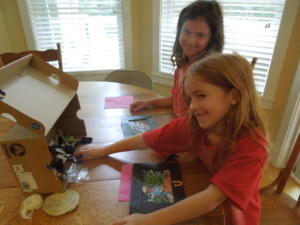
While we were at the horse ranch, I took pictures of each child riding the horse. I printed a 4×6 picture out on the computer.

The frames I found at a  craft shop for $1.  They were wooden and came without glass (which was just fine for this project).  Due to lack of time, I spray painted them all a basic brown. The kids then decorated them with Western Foam Stickers (also found at the craft shop). The picture was inserted and they turned out cute to put in their room.
Western Crafts


Western Crafts


Western Crafts


5. Western Themed T-Shirt (Bleached Method)


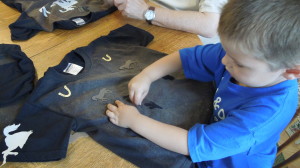
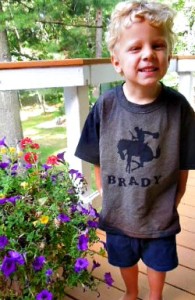
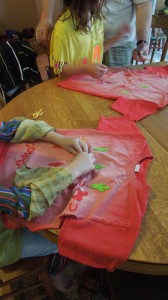
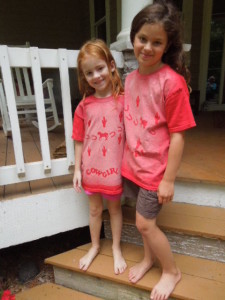
Using a stencil as a pattern, I cut out a cowboy riding a bucking bronco from freezer paper. We also used western foam stickers. Each child decided what they wanted on their shirt. Some chose the large cowboy cutout and others wanted the smaller western stickers. I also had alphabet foam stickers so they could spell their own name or”cowboy” or “cowgirl”.

Using a washed t-shirt ( we used black and red ones as dark colors work best), adhere the stickers or iron the freezer paper cutouts onto the front of the shirt. Make sure the edges are stuck very well to the shirt.

Place newspaper or plastic bags in the shirt so the bleach doesn’t go through to the other side. I folded the sleeves back so the bleach didn’t touch them.

In a spray bottle, put bleach and add water (ratio 1 bleach to 1/2 water). Lay shirt in the sun and spray lightly – don’t soak!  Repeat spraying until desired lightness. Let dry in between spraying so the sun does its work. When completely dry,  remove stickers.

Western Crafts   www.grandparentsplus.com


Western Crafts   www.grandparentsplus.com


Western Crafts  www.grandparentsplus.com


Western Crafts

I found other ideas that I didn’t do, but are extra ideas to have on hand……

6. Horse pictures made from a footprint:
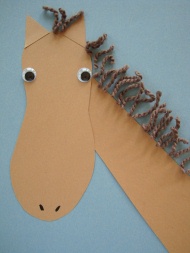
Go to busybeecrafts for complete instructions!

This is more for younger children!

7.  Desert Pictures

tippetoecrafts

This site also has ideas for sand pictures!

8.  Horseshoe Craft

Go to this  Pinterest 

If you a lucky enough to find horseshoes, this is a good option for older kids.  Shrinky-Dinks using Western shapes makes a cheaper option rather than buying lots of charms. Check out various free clipart options online for patterns.

9. Leather Crafting

Just buying a kit is rather expensive and hard to do with multiple kids.  Making this with a couple of kids is doable, but needs supervision.  Smaller kits with one tool are available at craft stores. Leather bracelets or bookmarks are some options.

10. Western Melted Bead Suncatchers

Melted Beads   www.grandparentsplus.com

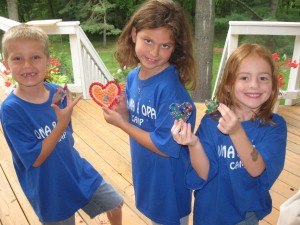
We didn’t use this Western Craft idea because we did it another year with a different theme and I like to do something new each year.  The melted beads work with any theme as long as you can find the metal cookie cutters.  Using western metal cookie cutters (boots, cactus, etc.) is another great option for a western craft.

Go to Suncatcher-Melted Beads for complete directions

I know there are lots of other options, but don’t over-plan!  If you do a Western Party with many kids, the crafts go smoothly if you have “stations” where one adult supervises and helps kids, but they can pick which station to go to.  With our 7 grandkids, we gave the options one at a time spacing them out through the 3 days of Oma and Opa Camp!

Hope these Western Craft  ideas help with your party!

Enjoy!

Phyllis (Oma)

Posting other Western Food Ideas and Western games, too,  so subscribe so you don’t miss future posts. Also follow on Pinterest or Bloglovin.

This post is linked to the following parties….

Posted in Crafts | Tagged , , , , , , , , , , | 18 Comments

Fall Arrangement Inspiration!


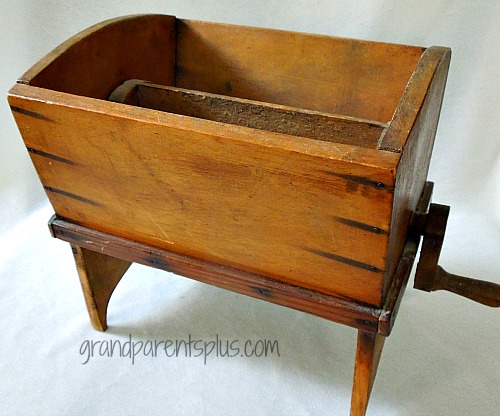
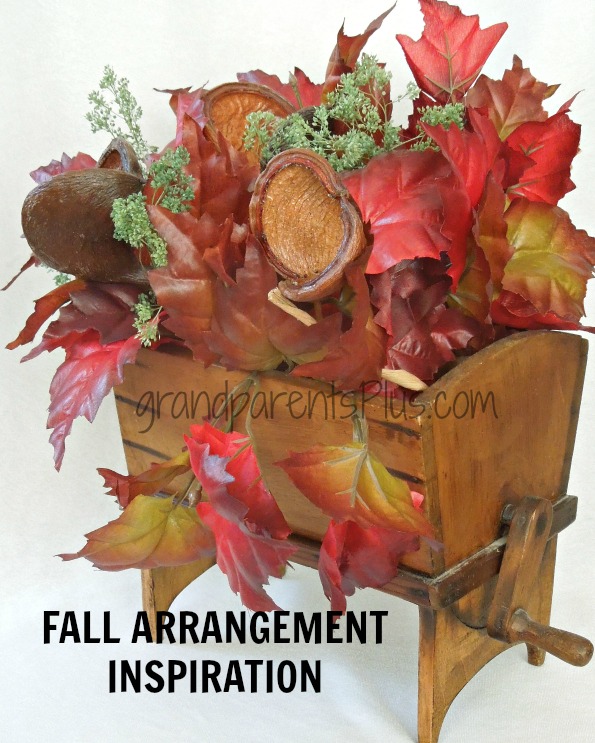
I have an antique  Dutch wooden flour sifter that I got in Holland some years ago.  I’ve displayed many things in it, but decided to use it in making a fall arrangement for the sunroom.


Fall Centerpiece  #2  grandparentsplus.com

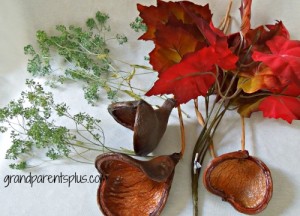
I used three things for this fall arrangement :    3 –  $1  Dollar Tree Fall picks, 3 pods and 3 clumps of dried green material. I had all these on hand.

Fall Arrangement   grandparentsplus.com

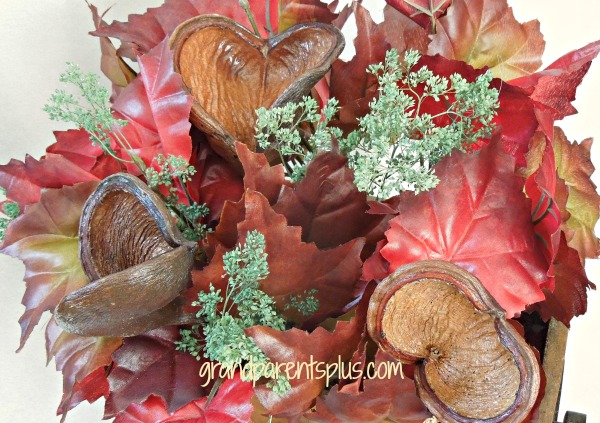
First, I bent and filled the sifter with the maroon leaf picks. Then, I added the pods. Finally. the three bunches of dried greens got tucked in for a bit of contrast.  (Always use 3 or 5 of something – odd numbers work best)  This fall arrangement came together in about five minutes! 

I really like the accent of the pods which pick up the wood tones from the sifter.

Here’s a close up view of the dried material in the sifter…..

Fall Arrangement


Final results are this…..


Fall Arrangement Inspiration   www.grandparentsplus.com

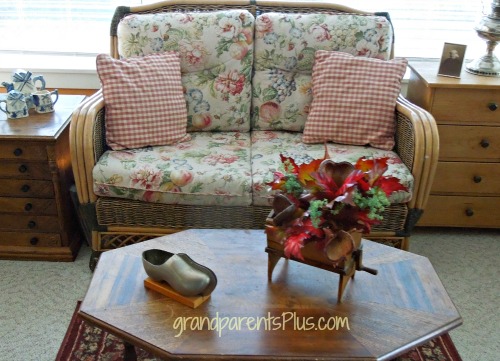
 I love how quickly this fall arrangement came together. It looks great in the sunroom on my small coffee table!


Fall Arrangement Inspiration

 What unusual items have you used for arrangements?

I hope this post inspires you to look at antiques or simple items in your home as new possibilities to use for arrangements.


Enjoy!

Phyllis (Oma)


Would love for you to subscribe to future posts, follow on Pinterest or Bloglovin’!


This post is linked to the following parties…..


Posted in Crafts, Decor | Tagged , , , , , , , , , , | 16 Comments

Western Game Ideas

Western Game Ideas


This year the theme of our Oma and Opa Camp was a Western Round-Up! I used many of these Western Game ideas during the time we had all the grandchildren at our house.  Thought I’d share them with you!

1. Snake Tic-Tac-Toe Game

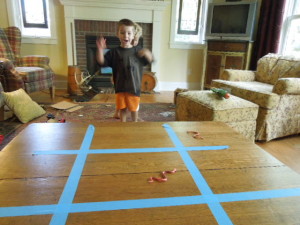
Using two bags of Dollar Store snakes, divide by color. Half of the snakes were mostly green and half were orange. I used my square coffee table, but this could be placed on the floor or use an old sheet and tape off a Tic-Tac-Toe Board. I made a slight variation in the game in that each player had 3 tries to land their snake on a square. Sometimes it landed on the wrong square, but it had to stay there. After 3 tries and if the player didn’t make it onto any square, the other person had a turn. This made the game more fun rather than the “cat” always winning.

Outdoor variation:

Play this western game outdoors on the sidewalk or driveway by chalking a tic-tac-toe board.

Western Game Ideas


2. Round -em Up!

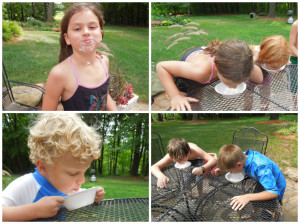
Put several animal crackers in a bowl. (Find cows or horses or any animal cracker will do.) Cover the crackers with whipped cream (from a can). They have to “round up” the animals by eating them without their hands and digging into the bowl face first!

Western Game Ideas

3. Snake in a Boot

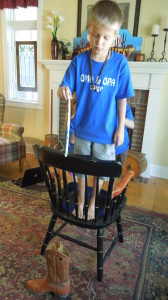
First, I found wooden snakes at a craft store and the kids painted them. They used their snakes for this western game.  Have a cowboy boot on the floor. Place a chair by the boot and have the kids stand on the chair to try to get the snake in the boot by dropping it. Set a height of where kids can drop it from – this can vary with the ages of the children.  They get a set amount of tries (I did 5) to see how many times they make it in the boot!

Western Game Ideas   www.grandparentsplus.com


4. Round Up or Barrel Racing!

Blow up several large balloons.  Kids have to kick or maneuver their balloon through set course. Place objects that they have to move around (“barrels”) and come back to the starting line. You may time this or just let it be for fun! (Also used as a relay if you have lots of kids.) This game is best played in a large area on a calm day or indoors, otherwise the balloons are too hard to control.

5. Pin the Mustache on the Outlaw!

Draw or blow-up a clip art picture of an outlaw. Kids take turns trying to place  the mustache on the outlaw while blindfolded. Another version is to use a picture of them and try to stick the mustache on their picture while blindfolded!

6. Rattle-Skee-Daddle!

Using the plastic snakes or any ones that you may find. Kids throw the snakes trying to land them in a basket placed a distance away.  Give them a set amount of tries ( 5  or 10?).

7. Cowboy Lasso

Using a hula-hoop, tie a fairly long rope to it and have the kids try to get it around a play horse. If you have a rocking horse, this works well. Otherwise, making a simple wooden horse or an adult playing as a horse will do!

8. Target Shooting

We live in a rural area so B-B Gun shooting is fine, if supervised. My husband being a hunter is very careful about teaching gun safety. Set up a target of tin cans. Let kids try to hit the target.

If you are not in an area where you can shoot a B B Gun, use balls to try to “shoot” the target. Make a pyramid of cans and see if they can knock all the cans down in one “shot”.

Another version is to “shoot” small paper cups off the table with a squirt gun. Use bathroom cups and the fastest time to accomplish shooting all off the table, wins!

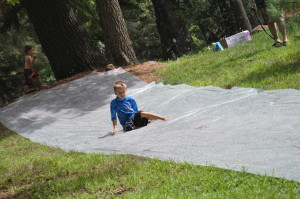
9. Yee Haw Slide

If you have a hill, you can do this activity. While it isn’t exactly a game, make it one by seeing who can slide the farthest.

Buy 6 mm plastic and cut to desired length. We used 8 1/2 ft. wide plastic. Place garden pins on the edges of the plastic to hold in place. Set sprinklers all along the length so they wet the surface constantly. To make it “Western”, take a run and slide and say Yee Haw! (I know that’s a stretch on the Western theme! Ha!) It was fun, though!

Western Slide    www.grandparentsplus.com

10. Water Pistol Tag

This game is played like tag, but you are ” it” if hit by water. Use cheap water pistols so they don’t shoot so far and  kids have a chance to get away.

Have fun with these Western Games! Yee Haw!

Phyllis (Oma)


Love to have you subscribe, follow on Pinterest and Bloglovin’!

This post linked to the following sites……


Posted in Games | Tagged , , , , , , , , , , , , , , , | 14 Comments

Front Garden Goodbye!


Front Garden Goodbye


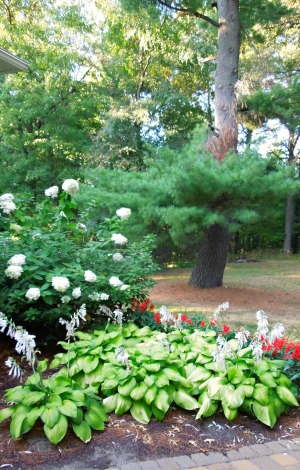
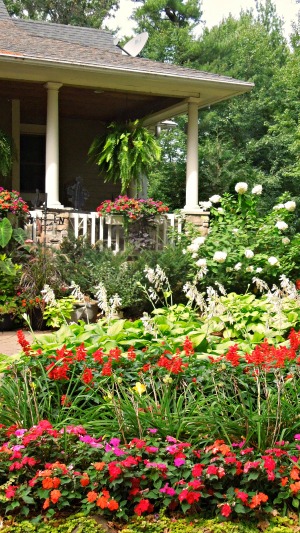
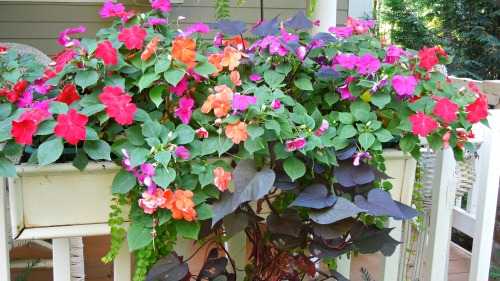
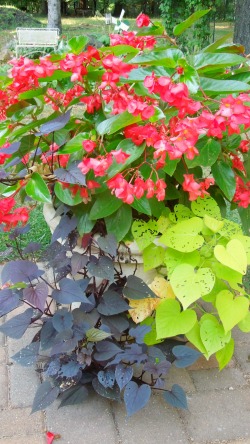
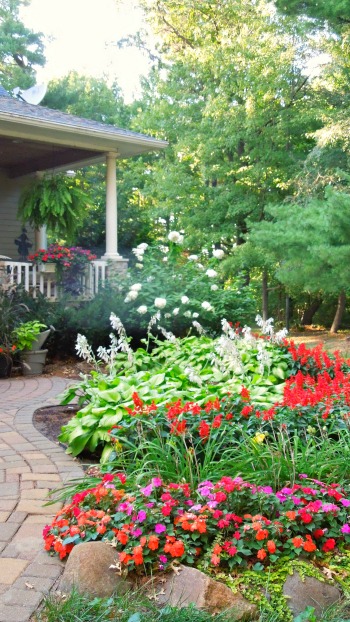
This post is my front garden goodbye! I enjoy my front entrance with all the colors. I realize this is now short-lived with fall upon us. It seems so sad that just when they get mature and at their peak, the frost comes and ends it all! Thought I’d give you an end of summer tour before it all goes away.


Garden and house front 029pmsized


House and 005pmsize


Front Garden Goodbye


Front Garden Goodbye   www.grandparentsplus.com


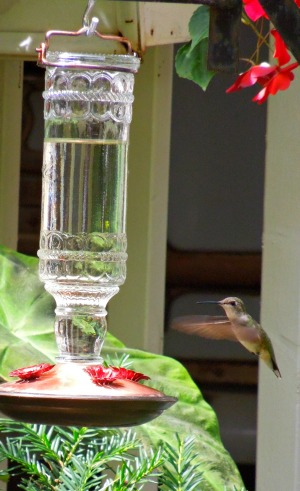
It’s hard to say goodbye to these little hummingbirds! They come to the window to tell me when one of the feeders is empty! Yes, they do that!

Front Garden Goodbye   www.grandparentsplus.com

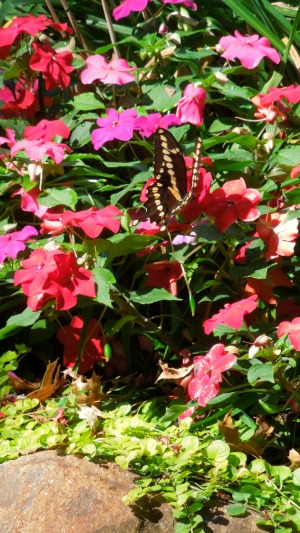
 Also, hard to say goodbye to the beautiful butterflies that visit here!

Front Garden Goodbye


Front Garden Goodbye

Now I say, “Front Garden, Goodbye!” Till next year!


Phyllis


Follow on Pinterest, Bloglovin or subscribe to future posts on the sidebar!


This post linked to the following parties…


Posted in Decor | Tagged , , , , , , , , , , , , | 20 Comments

Western Food Ideas


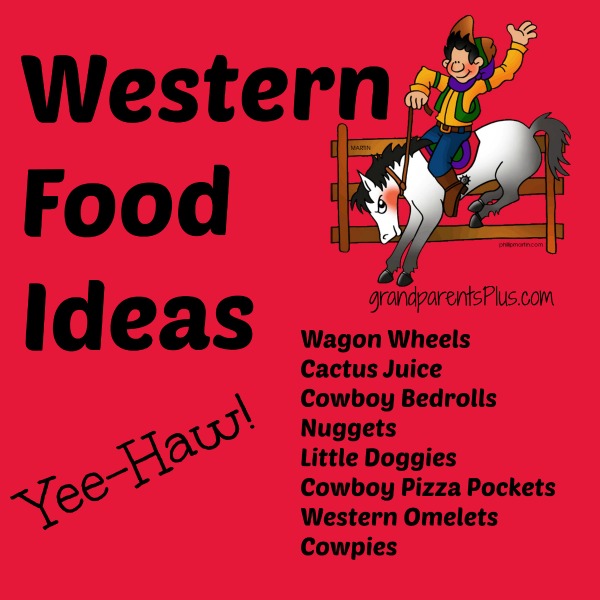
Western Food Ideas   www.grandparentsplus.com

Yee Haw!

Having a Western party? Here are some Western Food Ideas that are fun to serve.  I did many of these for my last Oma and Opa’s Camp (Grandma & Grandpa) .  I like to have kids prepare some of the food themselves so many of these work well for kids doing part of the preparation. They have fun participating in making their food and it helps me, too!

For an adult party, I have served chili or Bar-B-Que Beef, too. Those foods don’t work too well with kids, especially in the summer. However, for adults or kids, it’s fun to add a few of these western food ideas .


1. Wagon Wheels

I found this snack that looked like wagon wheels. They were perfect for a kid’s snack and would be great for an appetizer snack at an adult party. They come in both peanut butter or cheese filled! They look like wagon wheels to me!

Western Food Ideas


2. Cactus Juice

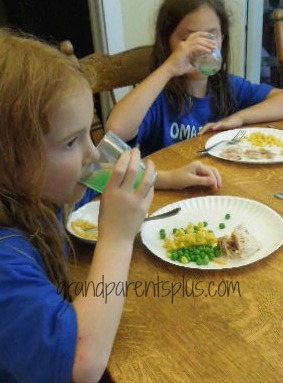
This green drink looked good and tasted great! The kids wanted the recipe (don’t tell their moms that it had a bunch of sugar)! Take green Kool-aid (mix according to directions), add lime sherbet and mix in some Sprite or lemon-lime carbonated drink!  So simple!

Western Food Ideas   cactus juice   www.grandparentsplus.com


3. Cowboy Bedrolls

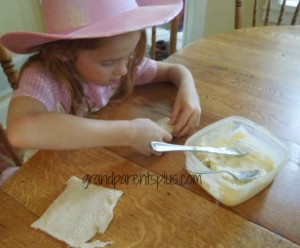
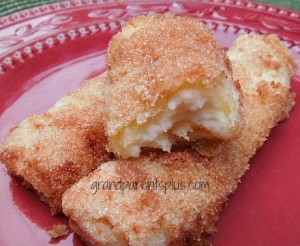
Cowboys roll up their beds and carry them with them so I thought these looked like bedrolls! The real name is Cinnamon Cream Cheese Roll-Ups. The kids helped make these and they were so-o-o-o GOOD! The recipe is found here. Great for dessert served with a little ice cream!

Western Food Ideas   www.grandparentsplus.com


Western Food Ideas    www.grandparentsplus.com

 4. Nuggets

What kid doesn’t like chicken nuggets? These nuggets are far better than those bought pre-made in the store!

Simply cut boneless chicken breasts into approx. 1 inch cubes. Dredge chicken in flour, dip into an egg wash and roll in Panko bread crumbs. Place in a little hot olive oil or vegetable oil and fry turning to brown all sides! Keep warm in oven until served. De-lish! The Panko bread crumbs are the best!

Use these “Nuggets” as appetizers for adults or as a main course for children.


5. Little Doggies

Cowboys refer to the cattle as “little doggies” so I used this old idea of rolling up hot dogs in crescent rolls. I cut the hot dogs in half and then each child rolled their “doggies” up!

Western Food Ideas

6. Cowboy Pizza Pockets

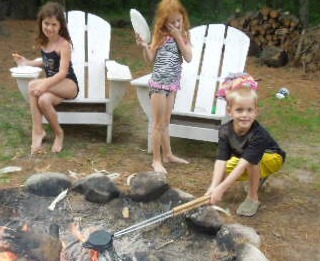
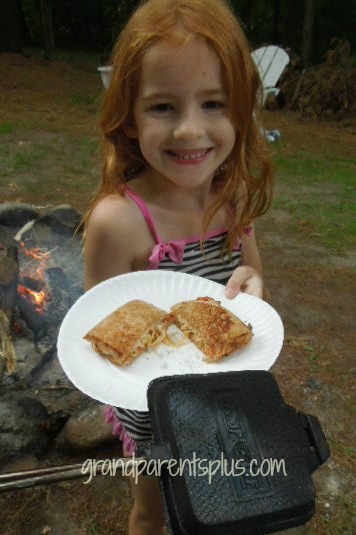
For this meal, we ate by the campfire. I used several pie irons. They are available through many outdoor and hunting stores. I had spaghetti sauce, pepperoni, mozzarella cheese and cooked spaghetti that they could put into their “pizza pockets”. Spray each side of the pie irons with a no-stick cooking spray. (Hint: The square ones work the best!) Then butter one side of the bread and lay the buttered side down on each side of the irons. Spread spaghetti sauce on each side. One one side put the fillings of choice. Close up the iron and lay in the coals for approx  3-5 minutes turning once during that time. (times vary due to how hot the coals are). Open and cut in half! You can cut off the crusts ahead of time or cut off burned crusts before opening.

Western Food Ideas   Cowboy Pizza Pockets


Western Food Ideas - www.grandparentsplus.com


7. Western Omelets

These were omelets made in a freezer bag. See directions here.

Western Food Ideas   Western Omelets


8. Cowpies

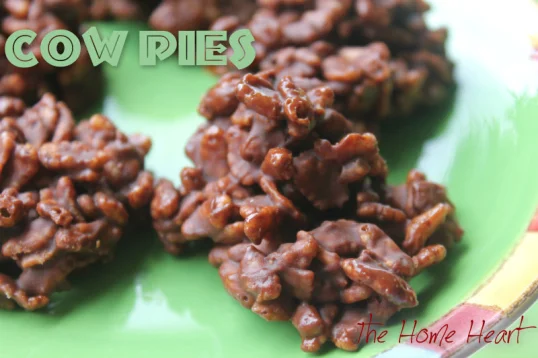
The cowpies are cookies. I found several different recipes on Pinterest. Since I didn’t have enough Rice Krispies as the recipe called for, I substituted some honey oats along with the Rice Krispies. I think any cereal would work!  Here is the recipe I followed with those substitutions.  Click here.


cow pies


 Almost forgot one………

9. Armpit Ice Cream!

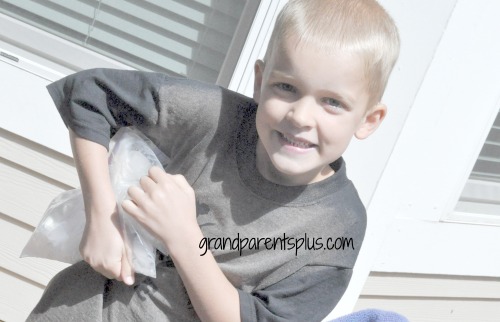
The kids really wondered what this was going to be.  I told them that out west, they had to make their own ice cream. I gave them a towel so it wouldn’t be so cold on their armpits or hands when making it.

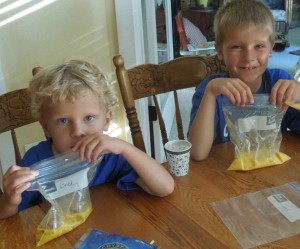
Take three freezer bags ( one quart and two gallon) In the quart bag, mix 1/2 cup half and half, 2 tsp sugar, 1 tsp vanilla and seal the bag very well!

In the gallon bag, place ice cubes, approx 3 tbsp. Coarse Salt (I used ice cream salt).  Now place small bag into the ice and seal the gallon bag very well! Get as much air out as possible. Place in a second bag and seal well. Now, place under armpit and shake and squeeze. Shake in you hands, too. Just be careful that the bags don’t break! Shake for about 10-15 minutes until ice cream forms. Take small bags out of the large and place in freezer for about 30 minutes. Serve “armpit” ice cream with the bedrolls!

Armpit Ice Cream    www.grandparentsplus.com

Other ideas include corn as “gold”, cucumber slices as “silver dollars”, beef jerky as “boot leather”…….etc.  I’m sure you can come up with more ideas, too! If you want to make it really Western, serve your meal on aluminum pie plates and use red western bandanas for napkins!

Have Fun!

Phyllis (Oma)

Follow me on Pinterest, Bloglovin or subscribe to future posts on the sidebar.

This post linked to the following parties….


Mumtopia


Posted in Recipes | Tagged , , , , , , , , , , , , , | 16 Comments

Fall Wreath

Time to change the decor! Summer seemed short, but school has started and the sumac leaves are starting to turn.That means fall is here!

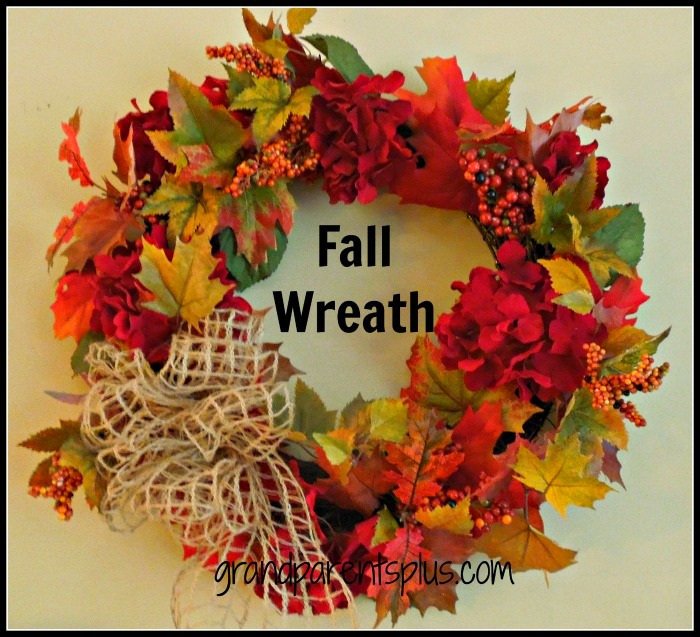
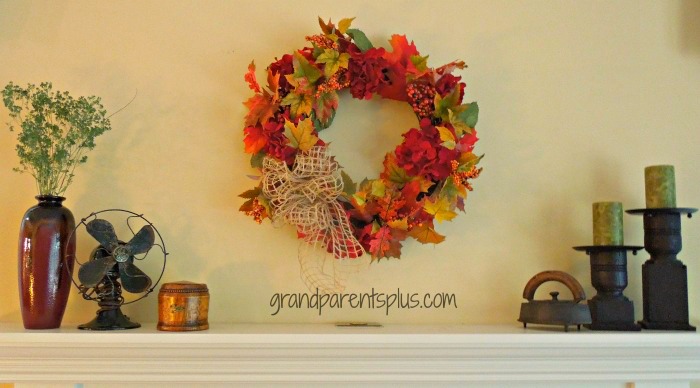
This fall wreath is so quick and easy to make. It took less than 30 minutes to put together.  It makes a wonderful addition to your fall decorations. You may have some of the supplies already on hand.


Fall Wreath  www.grandparentsplus.com

I used four large artificial ruby-colored  hydrangeas for the main accents on this fall wreath.  (I watched for the sale on these!)  A  straw or wire wreath works the best. (I don’t like styrofoam as they sometimes break apart especially if you drop it.)

Next,  I filled in with artificial fall leaves that I happened to have on hand.

Finally, I added  a few berry picks, too.

Everything is hot glued in place.

Finish your fall wreath with a bow! If you prefer,  change the bow to a plain burlap one or whatever you may have on hand!


I saw a similar idea at a craft store, but it was so easy to replicate with some of my materials.

Hope this gives you a simple idea to try!

Fall Wreath   www.grandparentsplus.com


Fall Wreath www.grandparentsplus.com

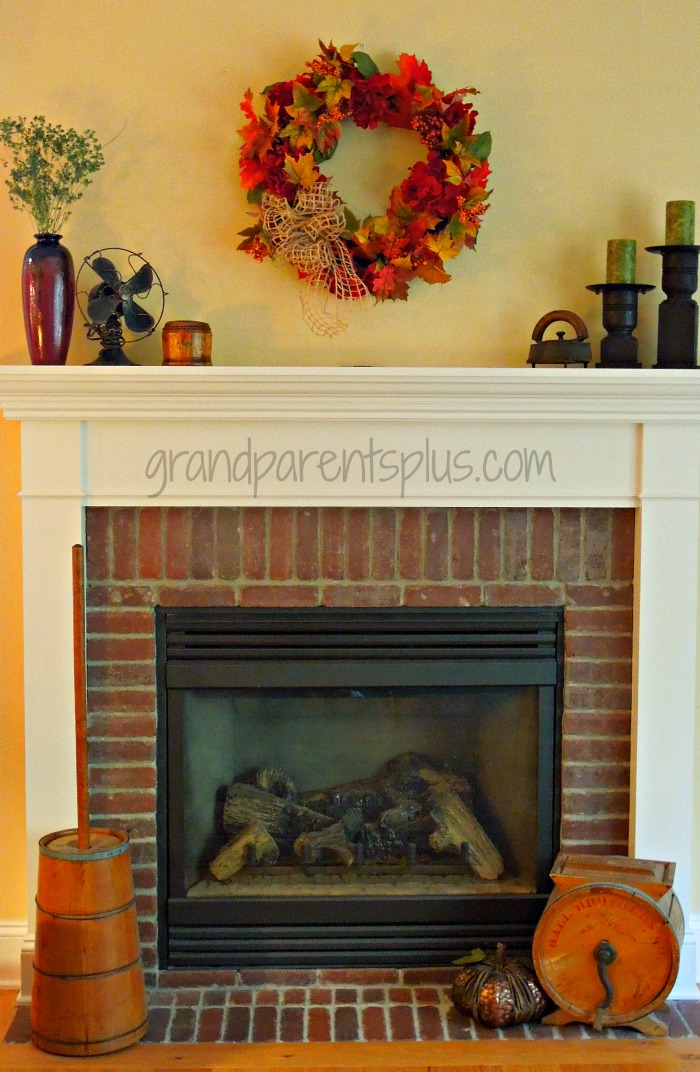
I’ll be able to enjoy this fall wreath through Thanksgiving!

Give it a try!

Have fun!


Phyllis (Oma)


To keep updated on future posts, subscribe to this site on the sidebar,  follow on Pinterest or Bloglovin’!


This post is linked to the following parties…..

Posted in Crafts, Decor | Tagged , , , , , , , , , , | 39 Comments

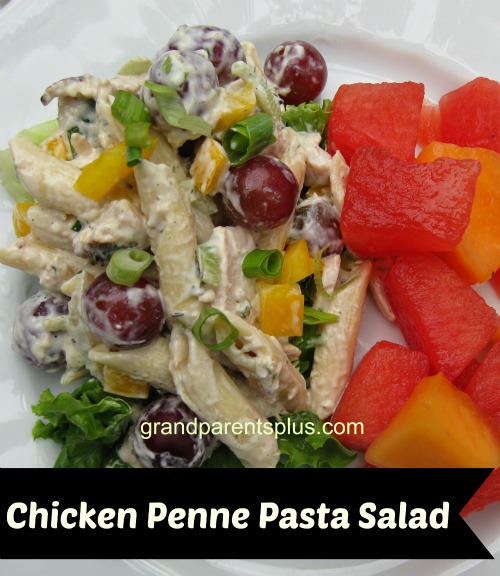
Chicken Penne Pasta Salad

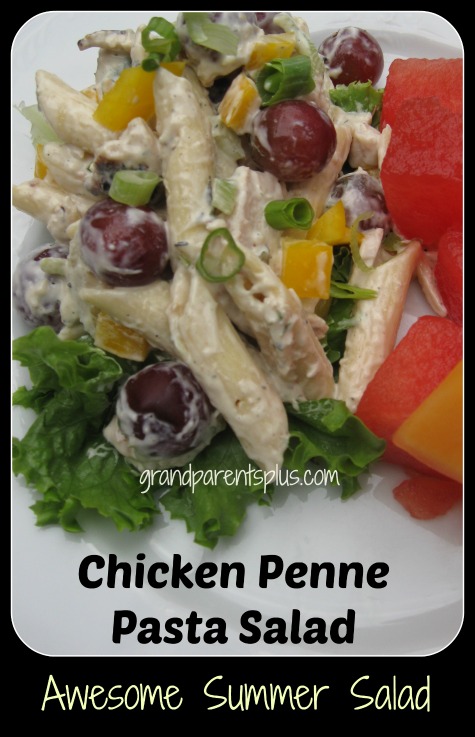
This summer, I’ve shared a few pasta salads with you. Chicken Penne Pasta Salad is another favorite of mine.  It has lots of grilled chicken in it, so it is hearty and filling  when using for a meal! I know you’ll love it as much as I do.


Chicken Penne Pasta Salad www.grandparentsplus.com

Ingredients:

1 ( approx 3 lb.) pkg. boneless, skinless chicken breast filets

1 – 16 oz. pkg. penne  pasta

1/2 cup thinly sliced celery

1/2 cup sliced green onion.

4 cups red seedless grapes, sliced or left whole

1 cup coarsely chopped walnuts, toasted (optional)

1/2 cup Italian Salad dressing ( for chicken breasts)

1/4 vegetable oil

1 – 1/4 tsp  crushed thyme

1/2 cup (or more) chopped yellow or orange pepper (optional) I prefer this to the walnuts! I add this for more color!

Dressing for Salad:

2  1/2 cups Mayonnaise

3 Tbsp. milk

3 tbsp. honey

1   1/2 tsp salt

1 Tbsp. Dijon mustard

3 tsp. crushed thyme


Directions:

If grilling chicken, use the following directions. (Another option is to use store-bought rotisserie chickens – not as good as the pieces are not thick and uniform,  but quick and easy!)

For grilling the chicken: Pierce chicken on both sides with a fork and brush with Italian salad dressing. Spray grill with a non-stick cooking spray. Grill chicken for 5 minutes on one side. Turn, brush with salad dressing and grill until juices run clear. Cool and cut into thin strips.

Cook pasta and rinse with cold water and drain.
In large bowl, combine oil and 1  1/4 tsp thyme. Toss into grilled chicken mixture. In another small bowl, combine mayo, milk, honey, 3 tsp. thyme, mustard and salt. Refrigerate salad and dressing separately overnight. Several hours before serving, fold dressing into salad. Refrigerate covered. Before serving, fold grapes and walnuts (optional) into salad   Before serving, garnish with thinly sliced green onions.

Makes 20 (1 cup) luncheon servings.

Chicken Penne Pasta Salad www.grandparentsplus.com


I hope you enjoy this Chicken Penne Pasta Salad! I know it will become one of your favorites, too!

Enjoy!

Phyllis (Oma)

I invite you to subscribe to this blog or follow on Pinterest or Bloglovin so you don’t miss future posts!

Questions? I answer each one! Thanks for your comments!

This post is linked to the following Linky Party sites:


Posted in Recipes, Salads | Tagged , , , , , , , , , , , , , | 24 Comments

Dice Bingo Game

Dice Bingo Game 

(craft and game)

                                                                                                                                                              Copyright ©2013 by Phyllis (Oma)

Dice Bingo Craft & Game grandparentsplus.com

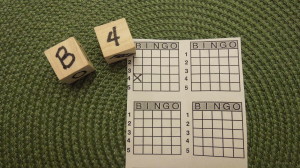
This simple Dice Bingo Game is easy to make and fun to play with one or more players.  It is simple enough for young children age 4 up to adults! There is no caller and everyone plays. Dice Bingo is even played as a solitary game and makes a great travel game, too!

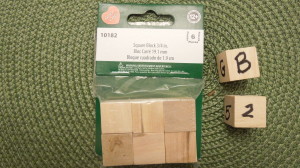
There are two dice made of  small wooden blocks purchased at a craft store. On one of the wooden blocks, write the letters B,I,N,G,O and FREE! On the other one write 1,2,3,4,5, and FREE!

Dice Bingo Game    grandparentsplus.com


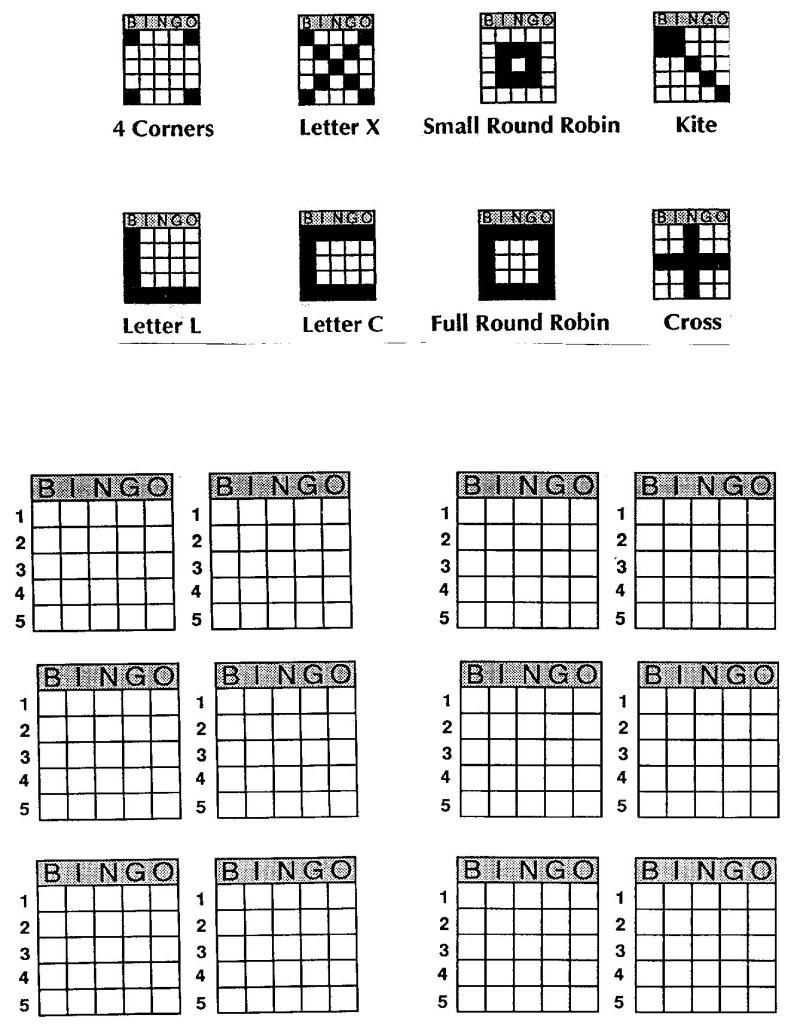
Dice Bingo Game sheets have 5 columns with B,I,N,G,O written above each column across the top and 5 rows horizontally numbered 1,2,3,4, and 5.

The first player rolls the dice and marks their sheet accordingly. For instance, if the player rolls the dice and gets a “B & 5”. They put an X on the B,5 spot. If the roll was “FREE & 5″, the player would mark any spot of their choice on row 5. If it is ” Free & B”, they would mark any spot on the B column. If it is ” Free & Free”, the player can mark any spot they choose anywhere on their Bingo sheet.
Dice Bingo Game

Each player rolls and marks their card. Then the dice are handed to the next player for their turn. Only the player that rolls the dice, marks their card. The other players wait for their turn. If the square is already marked, play moves to the next player.

The Tools for Teachers website has a free printable program where you can type in the letters and numbers for each die and print out dice on cardstock to glue together. Go here…..

Variations for winning the Dice Bingo Game and sample score sheets are here…

Dice Bingo Game Sheet

For a one player game, count the number of rolls to make a BINGO! Next game see if you can beat your score!

I like to keep this game in a ziplock bag with some score sheets and Bingo Dice.  Easy to take along in your purse or car! Pull it out and play anytime!

Easy game, don’t you think?

Have fun and Enjoy!

Phyllis (Oma)

Subscribe so you don’t miss future posts! Follow on Pinterest and Bloglovin’.

Be sure to check out my other games posts!


Posted in Crafts, Games | 11 Comments

Tri-Color Pasta Salad


Tri-Color Pasta Salad

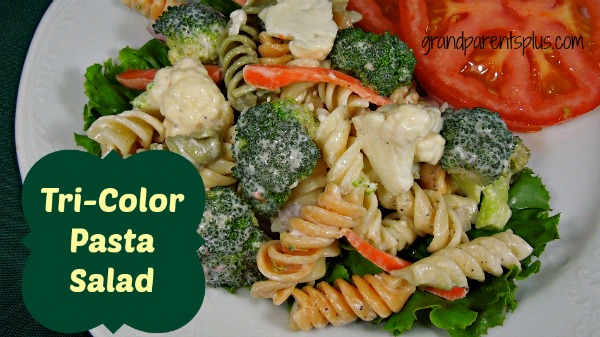
There are certain pasta salads that are requested during the summer by my husband. This is one of them. I simply took the colors of the pasta, added the vegetables that matched and came up with this recipe! You can make a little or a whole recipe just by varying the amounts.  When two people are home, I make 1/2 a box of Rainbow Rotini. It keeps well for a couple of days for lunches or a side dish for dinner.

Tri-Color Pasta Salad www.grandparentsplus.com

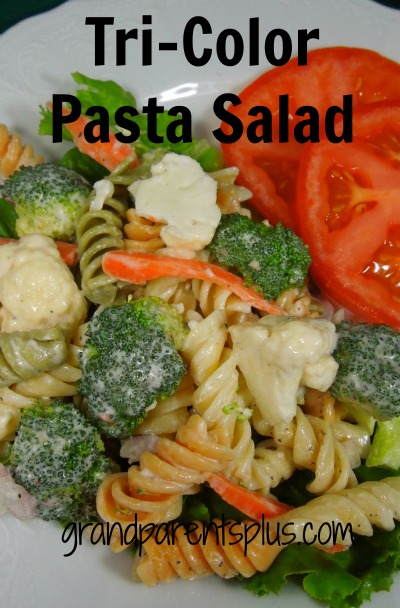
Colorful goodness in a pasta salad!

  1 box Rainbow Rotini ( or any three colored pasta)

All of these amounts are approximate and variable according to your liking. I never measure, but just add what I think is a good amount.

1 cup  Cauliflower ( broken into small flowerets) or more

1 cup chopped Broccoli (or more)

1/2 – 3/4  cup slivered Carrots

1/2 cup onion (red or your choice)

 Approx 1 cup of Mayo

3/4 cup Italian Salad Dressing (I’ve used  fat-free, regular and zesty)

Salt & Pepper

Optional Ingredients: Black or Green Olives, chicken, ham, salami


Directions:

Cook pasta according to package directions for “firm” pasta, rinse and drain

Add vegetables: carrots, broccoli, cauliflower, and onions

In a separate bowl, add mayo and mix with Italian Salad Dressing

Add to pasta and vegetables.

Mix well and refrigerate overnight.

Salt & Pepper to taste

Before serving, add more mayo and Italian Salad dressing, if necessary, to moisten it.

Serve as a side salad.

Tri-Color Pasta Salad

Great summer pasta salad!

 Don’t you love the colors?

Enjoy!

Phyllis (Oma)

I invite you to follow on Pinterest, Bloglovin or subscribe for future posts…..


This post is linked to the following parties….


Amaze Me Monday

Coastal Charm


Posted in Recipes, Salads | Tagged , , , , , , , , , , , , | 6 Comments

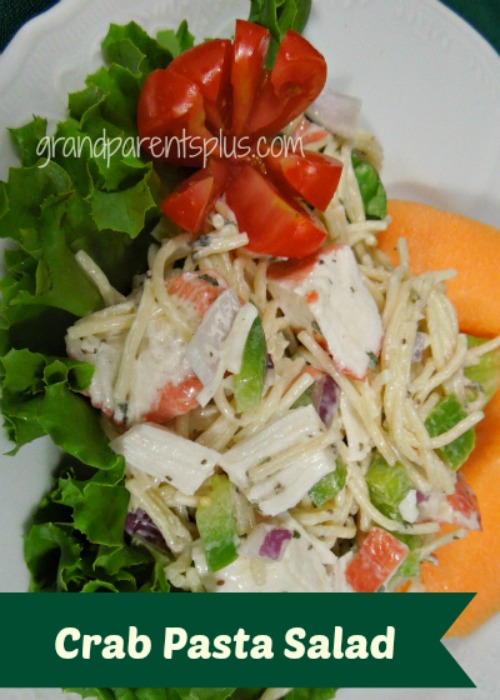
Crab Pasta Salad

Are you a fan of crab? I love it! If not, you certainly can substitute chicken in this recipe, however, I think it is best with crab!

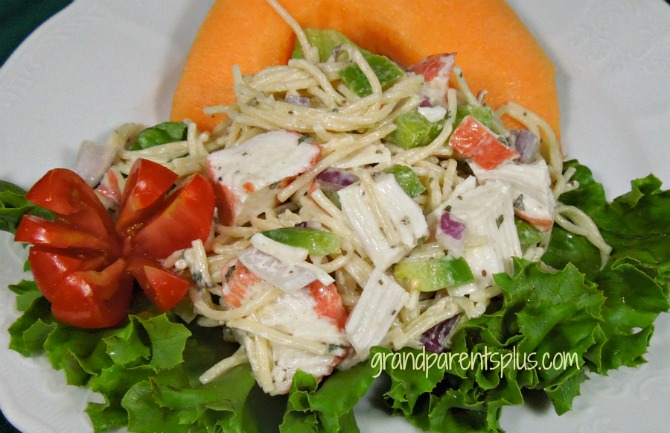
This Crab Pasta Salad is best the next day so make it the night before you serve it. Great Italian flavor and just a little zest of lemon add to this colorful, tasty salad.  I use imitation crab so it is less costly when serving to a large group.

Crab Pasta Salad   www.grandparentsplus.com

Wonderful flavor! You’ll make this again and again!


Crab Pasta Salad

Ingredients:

12 oz. vermicelli broken into 1 inch pieces, cooked, drained and cooled.

1 medium red onion, chopped (approx. 1/2 cup)

1 medium green pepper, chopped (or use red pepper for a sweeter taste)

1/2 teaspoon Italian seasoning

3/4 cup Italian Salad Dressing ( lite or regular) I’ve also used a zesty Italian dressing!

1 cup Miracle Whip (lite or regular) If using mayo, just as some extra Italian spices and a little sugar to the Mayo.

1 pound crab or imitation crab, chopped

1 tablespoon lemon juice

optional items: (black olives, celery, peas)


Directions:

Cook vermicelli, chop onion,  green pepper. Mix Italian seasoning, celery seed and parsley into Italian Dressing. Add Miracle Whip or seasoned mayo. Add lemon juice and crab. Refrigerate overnight.

Serves approx. 8-10

Remember, this pasta salad is great with chicken instead of crab.

Crab Pasta Salad    www.grandparentsplus.com


Great summer meal!

Enjoy!

Phyllis (Oma)

Love to have you subscribe, follow on Pinterest or Bloglovin! Thanks!

This post is linked to the following parties…..


Posted in Recipes, Salads | Tagged , , , , , , , , , , , | 28 Comments