Vegetable Centerpieces

 Vegetable Centerpieces

Usually we  think of mainly flowers and decorative items as centerpieces. Well, making Vegetable Centerpieces is something different and certainly spectacular with color, texture, and form! Gardens are now producing wonderful fresh vegetables which gives you the makings for your centerpieces right in your backyard! If you don’t have a garden, a quick visit to your local farmer’s market or grocery store will give you all the ingredients you need.

Vegetable Centerpieces   www.grandparensplus.com

Easy to create!

When using vegetables as a centerpiece, they are spectacular for your party and still usable the next day. Flowers wilt and die, but there is no waste with using vegetables.

These large Vegetable Centerpieces are beautiful on any buffet table!

They make a gorgeous display for fall or Thanksgiving tables.

Vegetable Centerpiece! #vegetable #centerpiece #vegetable centerpiece   www.grandparentsplus.com

Vegetable Centerpieces
Easy to do!  #vegetable #centerpiece #vegetable centerpieces     www.grandparentsplus.com

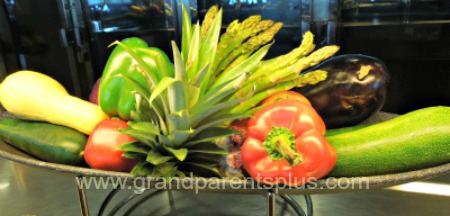
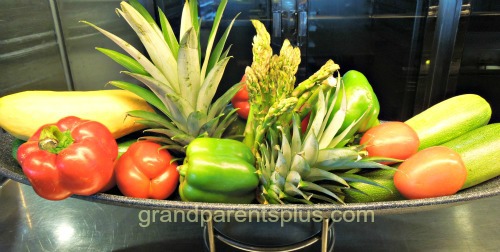
I love the different textures and colors! By using an elongated dish or basket for the base, just arrange and change around as desired until you like the way it looks.  The center is higher while mixing the colors and textures on each side.  Items used are red and green pepper, cucumber, eggplant, zucchini, pineapple tops, asparagus, summer squash, and tomatoes.

Vegetable Centerpiece Variation

Another variation of a vegetable centerpieces! #centerpiece #vegetable #vegetable centerpiece        www.grandparentsplus.com


You don’t need designer talent to do this! It is such an easy centerpiece for any occasion! I also like that everything is  still edible, too!

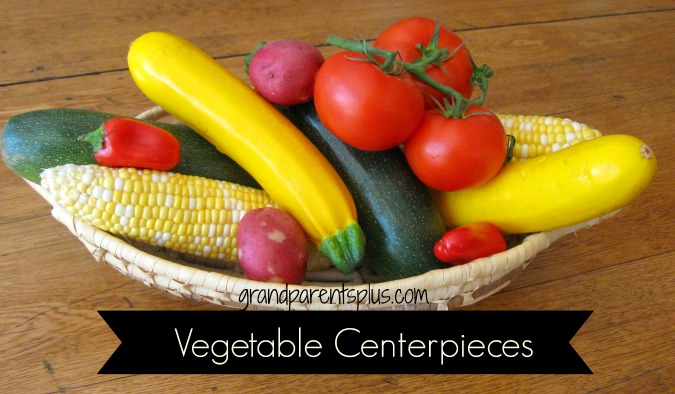
A smaller version for your table….

Hint: To make vegetables stay in a certain spot, use a toothpick and insert in each one to hold it.

Vegetable Centerpieces

Vegetable Centerpieces  www.grandparentsplus.com

By the way, I found an oval tray and an oval basket at the thrift store! Great deal!

Thanks for visiting! I enjoy your comments and answer any questions!

Please subscribe to future posts on the sidebar. Also, follow on Pinterest!

Phyllis (Oma)

Post in linked to these Linky parties…..


Posted in Decor, Holidays, Thanksgiving | Tagged , , , , , , , , , , , , | 15 Comments

Summer T-Shirt Ideas

Summer T-Shirt Ideas!

There are so many ways to make fun summer t-shirts! Summer is the perfect time to do many of these ideas outside!  No mess to clean up inside! I’ve included 10+  Summer T-Shirt Ideas. Most of them are kid friendly! It is a good way to reuse a stained shirt and make it new again! Most work best if done outside, however, some ideas require less mess and are fine to do inside. So, don’t limit these ideas to just summer! (or to just t-shirts)

Summer T-Shirt Ideas   www.grandparentsplus.com

1. Tie Dye

This is old, but there are so many ways you can do it depending on how it is tied! Experiment with two primary colors and see how they mix to form a different color. There is an excellent site for ways to tie the shirt to create unique patterns here.

Tie Dye Swirl Shrt #1

richardsartsandcrafts.com


Another design  for a  Tie Dye Heart is here

Don’t forget you can do hats, shoes, pants, pillow cases, etc.
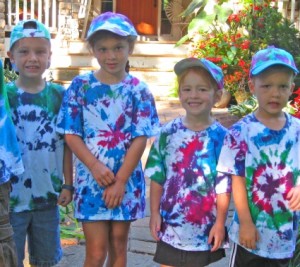
t-shirt ideas

We made these shirts and hats using premixed dye. The kids loved the way they turned out!


2.Tie Dye with Permanent Markers

This is an easy method and turns out different every time. This one can be done indoors!

Create a special design like this….
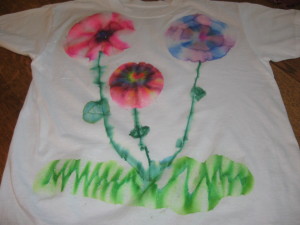
Tie Dye with Permanent Markers  www.grandparentsplus.com

Or mix colors together to create this….
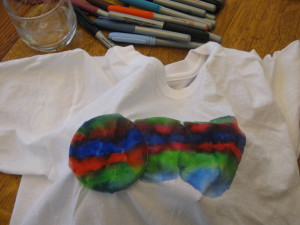
Tie Dye with Permanent Markers   www.granparentsplus.com


Complete directions are found on an earlier post of mine here.


3. Bleach Techniques

Here are some ideas using bleach. The first one is using a bleach pen.

Bleach Pen T-shirt tutorial

Directions for the bleached shirt above are found here at The Trendy Treehouse

Another technique is what I used for our 4th of July shirts. The idea is easily varied to do with any theme. It uses bleach solution in a spray bottle. With proper supervision, it is easy for kids to do.
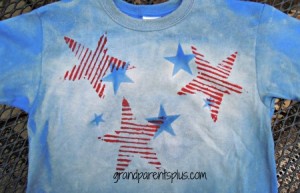
DIY 4th of July t-shirts

All instructions are found on an earlier post  here

Red star stamps were added after the bleach technique.

4. Taped and Painted Techniques

By applying painters tape or duct tape, areas of a t-shirt are blocked off and open areas are painted.
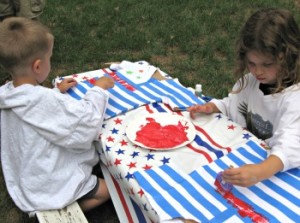
4th of July Flag t-shirts

This was the method we used for a 4th of July t-shirt, but any color can be applied for a great look! Place tape diagonally, criss-cross, vertically or a combination of all for a unique look! Dab paint with sponge brushes into areas that are left uncovered. Use a variety of colors or stick to a few! Your choice!

Hint: If you have lots of acrylic paints, just add Folk Art Textile Medium to your paints to make them permanent on fabrics! No need to buy fabric paints.


5. Stamped

I love the way they use foam stickers to stamp this shirt. This opens up a multitude of possibilities. Check it out!
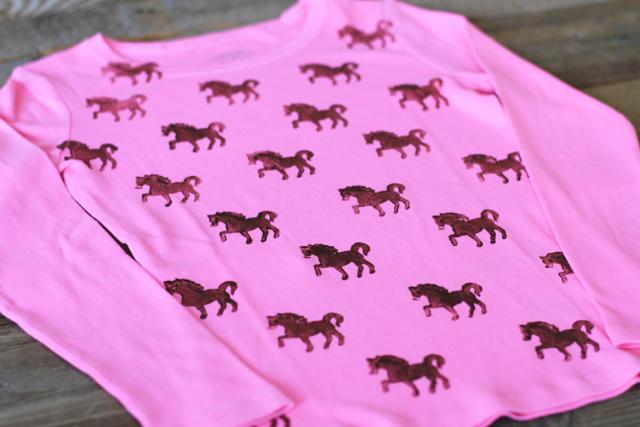
http://www.lilblueboo.com/wp-content/uploads/2012/10/MG_5033.jpg

 lilblueboo.com

Use stamps made from corrugated cardboard as seen in the bleach technique. Stamp with fruit, veggies, etc. The possibilities are endless!


6. Glue Batik Techniques

Elementary kids can do this and come up with a unique shirt using glue and paints!


http://kidworldcitizen.org/wp-content/uploads/2012/09/91112Kids_Painting_Tshirts_Batik.jpg


kidworldcitizen.org

7. Coloring Book T-Shirt

This is a great idea for another t-shirt project. This can be permanently colored or by using washable markers, it can be repeated over and over with each washing! An adult or older child needs to do the first part, however.


Go to  kidactivitiesblog.com for complete instructions here.

8. Sand Paper Printed

 

Complete instructions are found on AlphaMom.com

9. Sun Printing Technique

This technique is a bit more involved, but certainly turns out interesting! This was used on a piece of material, but is able to be done on a t-shirt as well.


Finished sun printed piece


Go to bloombakeandcreate.com for complete instructions.

This technique requires use of

Jacquard Dye-Na-Flow Fabric Colors

  which is available through Dick Blick Art Supplies ( happens to be a sponsor of mine and ,yes, I get a little bit from them, perhaps a cup of coffee! Ha! Thanks!).

Order through their site here…. www.dickblick.com

When doing a T-shirt, do one side at a time and be sure that you put something in between so the colors don’t bleed to the other side.

10. Stenciling Technique


 Complete instructions are found at stencilrevolution.com

I have also used sponge brushes to use with stencils. Just make sure you don’t have too much paint on them!

10+  Here’s the “+”

(Remember, I said 10+?)

This next technique uses a product called Design Dye. You cut out a design from their special colored paper and iron it on to fabric. Only the color remains. The design you cut is removable and able to be used over and over again! This gives you all sorts of possibilities of making your own uniquely designed shirts, bags, napkins and pillows (just to name a few). It even works on wood!

Design Dye, Design Dye, crafts, art, material, silkscreen, t-shirts, scrapbooking

There is no mess with this product. All you need is scissors and an iron!  By overlapping a design, the colors blend together! The kit comes with pre-cut letters, too! You won’t want to throw a scrap away as every little bit can be used!

I made a simple butterfly design and found that I could easily do it three times at least. It was easier to adhere the design together before ironing. The colors were better that way. The color variation is due to how long you keep the iron on it. I liked the variations so kept it that way. Remember to always use fresh tissue as the color bleeds on it and by reusing it, you’ll get some color where you don’t want it. Making some special onesies for a baby shower would make a great gift!.  Use white or a light colors with this product for the best outcome.
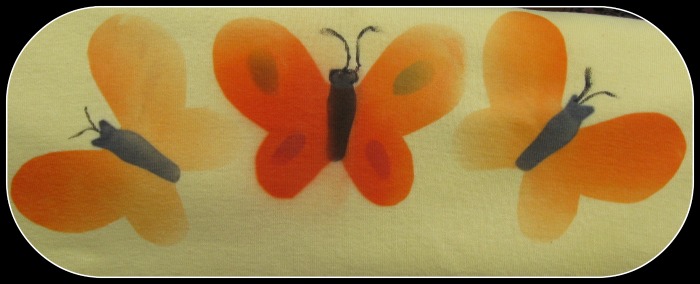
Design Dye Butterfly

Check out this technique here at Design Dye!  

Now comes the creative part!

All these Summer T-shirt Ideas can be combined. Combine the bleach technique with the stencil or stamping! Combine the crayon technique with the bleached shirt! OR… Combine the Tie Dye with a stencil! Combine the bleach technique on light colors with the Design Dye. You see, there are endless ways to make your shirt unique! Hope this gives you some great summer t-shirt ideas to try on your own! Don’t limit them to just summer as many can be done indoors year round.

All of these same ideas would be great on a bag, pillow case, hat or skirt or whatever!

Now, off to the thrift store to find some items to make new again!

Which one will you try?

Have fun!

Phyllis (Oma)

I’d love to have you subscribe to future posts or follow on Pinterest or Bloglovin’ ! Thanks!

This post is linked to these fabulous parties….


Disclosure statement:

This blog is a personal blog written and edited by me. I take pride in giving my honest opinion and assessment of all the products that are submitted to me and experiences I may be given. I reserve the right to opt out of publishing a review if I do not feel that I can be fair about my opinion.

As the owner of this blog, I may accept forms of cash advertising, or sponsorship. Any compensation received will never influence the content, topics or posts made in this blog..
I believe in honesty and integrity therefore I will always give my personal opinion-whether or not it shows a product or company in a favorable light.  Compensation received may influence the advertising content, topics or posts made in this blog. That content, advertising space or post will be clearly identified as paid or sponsored content.
The views and opinions expressed in this blog are purely and entirely my own. I do not claim to be nor make an effort to be an expert on a certain topic, product or service.  I will only endorse companies, products and services that I believe, based on my own experiences, are worthy of endorsement.  All product or service claims should be verified with the manufacturer or provider.


Posted in Crafts, T-Shirt Ideas | Tagged , , , , , , , , , , , , , , , , , , | 23 Comments

Bird Problem?

 Bird Problem?

Funny question and a strange post,  but I promise this info about a bird problem will come in handy sometime.  I had such a problem with birds nesting under our front porch.  After some research, I came up with a solution and decided to pass this info on as this might be just what you are looking for in solving a bird problem, too!

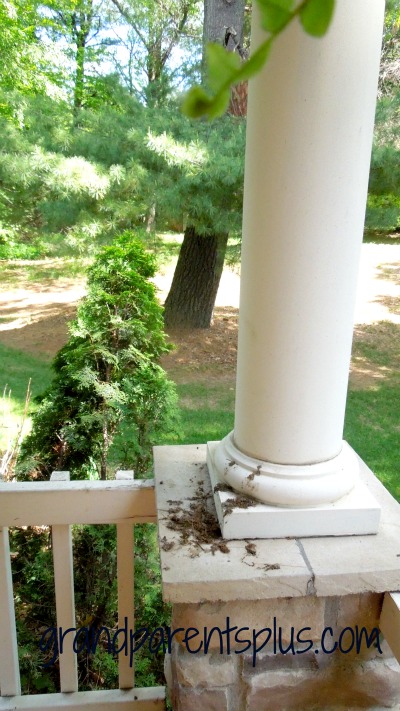
My bird problem was this… I had birds always wanting to nest up on the top of the pillars under the porch. They also liked my hanging ferns which are protected from the elements by the porch roof.

Now don’t get  me wrong. I love birds! I feed them and love to hear them sing. They are a beautiful part of God’s creation! It’s just that I don’t want them in my hanging baskets on my porch or up on the ledges. They make a terrible mess! I would rather enjoy them at the feeders and bird houses that I have all around!

Nesting Bird Problem  www.grandparentsplus.com

They love those protected corners. Guess birds aren’t dumb!

Here’s the mess they leave down below!

nesting Bird Problem   www.grandparentsplus.com

This looks terrible and it’s not fun to clean!


If you have young children, it is cute to watch the stages of the eggs hatching and young birds growing, but my kids are grown, my plants suffer, and I have a mess to clean! We live in a wooded area so it isn’t as if there aren’t plenty of nesting options all around. See the woods in the background?

Putting nails up above wasn’t an option so I set out to find what might be a deterrent. I found that the natural predator for birds is a snake. If they see a snake, they leave.   So that gave me an idea.

Off to the Dollar Store I went to find some snakes. They had to be quite small to fit in those places. Besides, I didn’t want to scare any guests I  have sitting on my porch sipping lemonade only to look up and see a large snake! That wouldn’t do!

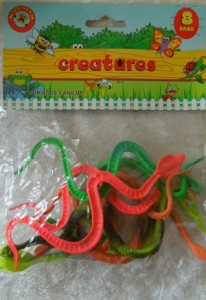
 I found a package of small plastic snakes 8/$1! I thought they would be perfect! At least it was worth a try! It worked!

Now, each year, if I don’t have my “deterrents” in place early, they find those choice spots and quickly make their nests. Once the eggs are there, I don’t have the heart to destroy it. So I need to place them quickly at the start of spring. I can leave them on the ledges over the winter, but sometimes they get lost with the winter winds blowing them off.


Bird Nest Problem

I placed the snakes up on the pillar ledges and in the fern baskets. No one can see them, but they are there! The birds will fly in, check it out, see the snake, and off they go!

Nesting Bird Problem

See the small snake? It doesn’t matter which color! I used an orange one so you could see it!

I haven’t had one bird make a nest in those places again!

It even works under a boat lift. Barn swallows like to nest there and then you have a very messy boat.  Place a larger plastic snake up in the corner and those birds won’t be back!

Now you know how to end a bird problem! ! If you have a spot where you don’t want birds nesting, try it! You only have a dollar to lose.

Have you ever had a problem with this?

Love for you to follow on Pinterest or Bloglovin’ and subscribe to future posts.

P.S. Guess I’ll place this post under “Misc.”!


Phyllis (Oma)


Post linked to the following parties….


Posted in Misc. | Tagged , , , , , , , , , , , , | 35 Comments

Peach-Nectarine Muffins

Peach-Nectarine Muffins!

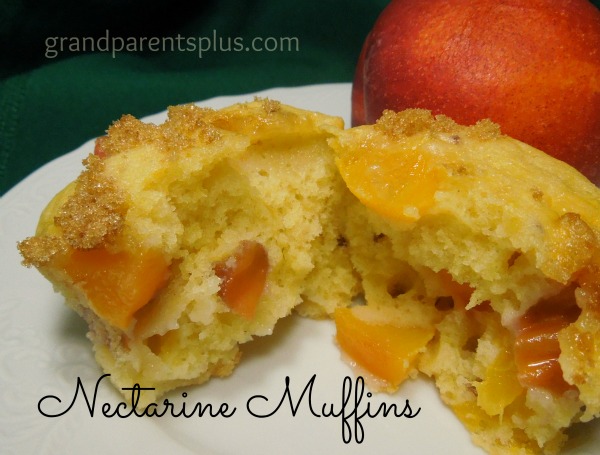
Someone gave me a bunch of nectarines that were pretty ripe and needed to be used within a couple of days!  There were too many to eat so quickly so I scrambled for ideas and modified a Peach-Nectarine Muffins recipe that turned out fabulous. While I used nectarines, peaches are interchangeable with this recipe.

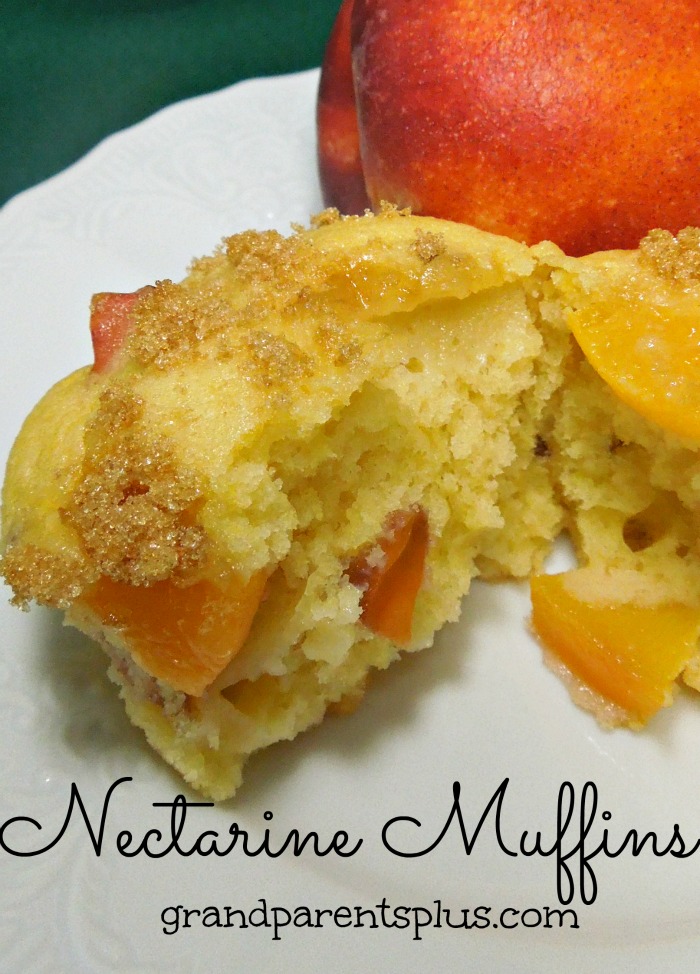
These Peach – Nectarine Muffins were like eating a moist muffin with jam inside! So good! It didn’t even need butter! Everyone loved these muffins!

My favorite part of cooking with nectarines is that you don’t need to peel them.  It is much faster and  easier than using peaches.

Peach-Nectarine Muffins

Peach - Nectarine Muffins www.grandparentsplus.com


Ingredients:

1  1/2  cup flour

3/4  cup  white sugar

1/2 teaspoon salt

2 teaspoons Baking Powder

1/3  cup vegetable oil

1 egg

1/3 cup of nectarine slurry + 3 tbsp milk  If not making slurry then just 1/3 cup of milk  (not both!)

3 nectarines or peaches diced (two for the muffins and 1 for the slurry)

1/4 cup brown sugar (for the top of the muffins)

Directions:

Mix flour, white sugar, salt and Baking Powder

Add vegetable oil, egg, nectarine slurry or  1/3 cup milk

Note: Make slurry by dicing 1 nectarine or peach and adding a small amount (1 tsp+) of milk. Use a blender or bullet to make a slurry, thick type liquid. Add this to the dry ingredients instead of 1/3 cup of milk. If using the slurry, add 3 tablespoons of extra milk to the batter. This slurry was not in the regular recipe I had, but it adds more flavor!

Mix in 2 diced nectarines

Fill muffin cups to the top. Makes 12 Peach – Nectarine muffins!

Sprinkle brown sugar on top of each muffin.

Bake @ 400 degrees for 15-17 minutes until very lightly browned.

Peach - Nectarine Muffins www.grandparentsplus.com

No need for butter on these muffins!

 I love Nectarines! No peeling is necessary! If using peaches, drop peaches in boiling water for a few seconds and the skin slides off easily!

 Enjoy these Peach – Nectarine Muffins!

Phyllis (Oma)

Follow on Pinterest, Bloglovin’ or subscribe for future posts.

Linked to the following parties…


Posted in Bread/Muffins, Recipes | Tagged , , , , , , , , , , , , , , , , , | 44 Comments

Tequillaberry Salad

Tequillaberry Salad?

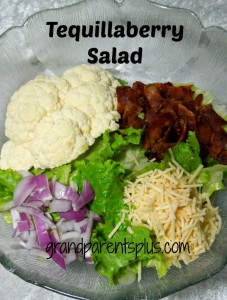
Such a strange name for a salad! Well, the name comes from the Tequillaberry Restaurant in Coon Rapids, MN, which served this salad. It is no longer in business, but the salad lives on. The name is very different and has nothing to do with the ingredients or taste! A better name would be Cauliflower, Bacon and Parmesan Salad, I guess, but people know it as Tequillaberry Salad. Yes, a unique name, but a delicious salad!!

I’m not sure that this is the authentic original recipe, but it is quite similar! I have found a few variations around, and I sometimes add a couple of additional items as well just for more color.

I recently served this Tequillaberry Salad at a family gathering and not a bit was left! Everyone loved it!

Ingredients:

1 head of iceberg lettuce torn into pieces ( I mix iceberg with romaine and sometimes endive for added color or just using iceberg is fine, too.)

3 cups (approx.) of cauliflower (chopped) I made a large recipe and used a full head of cauliflower

1 lb. bacon, fried and crumbled (or more)

1 or 2 bunches of green onions or 1/2  med. red onion, chopped

3/4  cup shredded Parmesan Cheese (or more)

Green Peas (Optional)

Dressing:  Mix 2 cups of Mayo, 1/2 c white sugar and 4 tbsp of milk    Mix this early and place in your refrigerator  so the sugar melts. If you have extra dressing, it will keep in the refrigerator for a week.

Tequillaberry Salad

Ingredients for salad

Directions:

Add all ingredients in a large bowl.

Add dressing just before serving and mix well.   Top with more shredded Parmesan Cheese

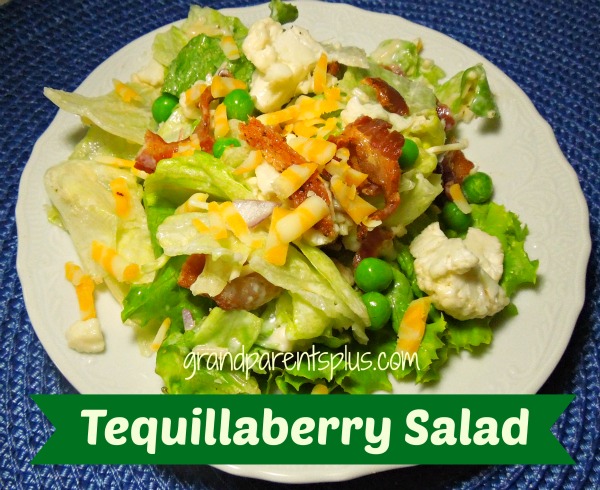
Optional: Sprinkle with shredded cheddar, add thawed frozen peas

Serves 12


Tequillaberry Salad   www.grandparentsplus.com

This is one of my favorite salads!

Enjoy!

Phyllis (Oma)

This post is linked to the following parties….


Posted in Recipes, Salads | Tagged , , , , , , , , , , , , , | 33 Comments

Fresh Blueberry or Strawberry Pie (No bake)

Yum! A favorite of mine!

Fresh Blueberry or Strawberry Pie

(No bake)

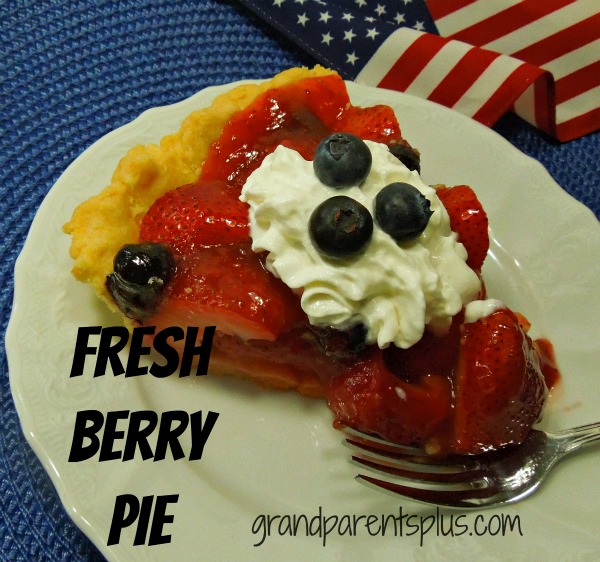
Fresh Berry Pie

Make this delicious no-bake pie!

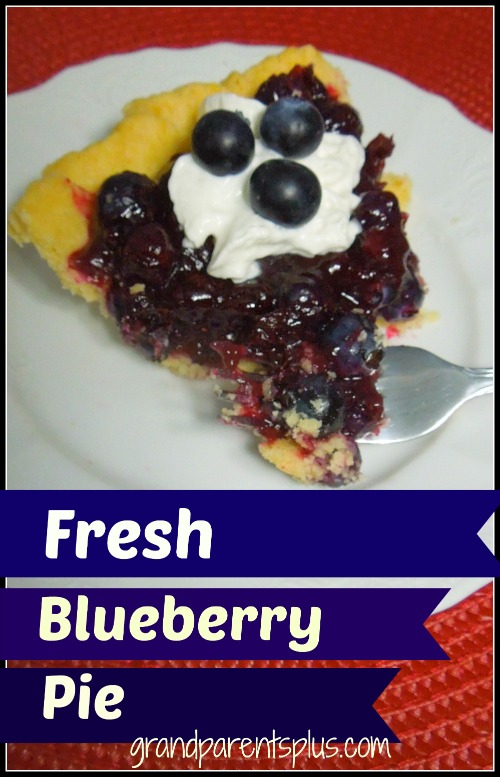
When berries are in season, I love to make a fresh blueberry or strawberry pie! This recipe (which was handed down from my mother) is for a no-bake pie.  I have no idea where it originated, but grew up loving it and have made it all my married life for my own family! I like it when the berries stay whole and the blueberry or strawberry sauce gently coats each luscious, plump berry. Add whip cream or ice cream and you have a fabulous dessert!

The crust is a cookie-like crust and goes so well with a fresh blueberry or strawberry pie. I like it better than a graham cracker crust. You mix this crust right in the glass pie pan. No need to dirty another dish!

Fresh Blueberry Pie    www.grandparentsplus.com


Crust Ingredients:

1   1/2 cup of flour

1   1/2 tsp. sugar

1 tsp. salt

1/2 cup vegetable oil + 2 Tbsp. milk – beat together


Crust Directions:

Add flour, sugar and salt into an ungreased 9 inch glass pie pan.( I always use a glass pie pan for all my pies! Your pies turn out better!)

Fresh Blueberry Pie

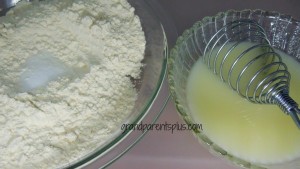
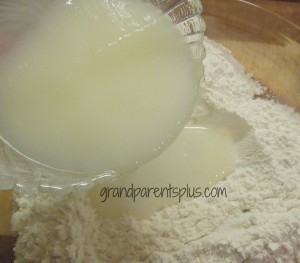
Whip vegetable oil and milk together and add to dry mixture in the glass pie pan

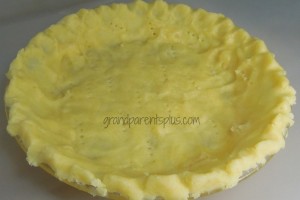
Fresh Blueberry Pie Crust    www.grandparentsplus.com


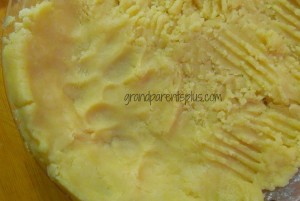
Mix with a fork (the consistency gets like soft playdough) and press mixture with your hands into a pie crust working the outer edges first.

Fresh Blueberry Pie Crust

Prick pie crust with a fork  and bake @350 degrees for 15-20 minutes (this will stay very light in color)

blueberry pie crust


Let crust cool completely!


Blueberry Filling:

 Ingredients:

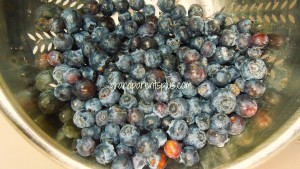
2 and 1/2 pints of fresh blueberries:     Rinse 1 dry pint of blueberries and shake water off. This is for the blueberry sauce.  Rinse off the other  1   1/2 pints of blueberries and let dry. (Save for pie)

1 dry pint of blueberries , rinsed

1 cup sugar

3 Tbsp cornstarch

Juice of one lemon  (approx. 3 tbsp of lemon juice if using bottled juice)

Fresh Blueberry Pie   www.grandparentsplus.com

Shake off water and dry somewhat before using.

Directions:

Add 1 pint of washed semi-dry blueberries to a saucepan.

Add 1 cup of sugar, 3 Tbsp. of cornstarch and juice of a lemon.  Stir before placing on the burner.

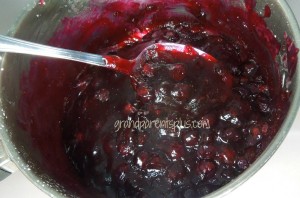
With saucepan on the burner,  stir until bubbly and thickened. Be sure to stir vigorously and lower heat so it doesn’t burn on the bottom! Use a double boiler if you can’t stir it constantly! (Using a double boiler takes a lot longer, however.)

Cool thickened blueberry sauce until just slightly warm to the touch. (not hot)

Blueberry Pie sauce


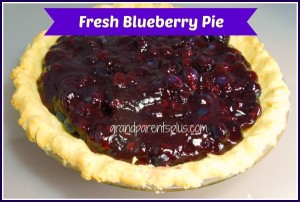
Place 1 -1/2 pints of berries into the cooled pie crust. Spoon blueberry mixture over the berries, slightly moving them so mixture covers the berries. Refrigerate until set for at least 3 hours.

Fresh Blueberry pie    www.grandparentsplus.com

Serve with whip cream or ice cream!

Strawberry Pie – Please note one important difference!

This same recipe works with strawberries. Use the same ingredients, but just substitute strawberries  Be sure the strawberries are dry when placing them in the pie shell! (Note one important difference!) Use only 1 dry pint of strawberries for the cooked glaze. Strawberries come in quarts and not pints so be careful not to use the quart of strawberries for the sauce.  I always save a pint box so I can measure that amount of whole berries. If you use more, the glaze will be too runny! You can tell how old this recipe is because I remember as a kid that strawberries always came in a green plastic pint boxes or sometimes wooden boxes. (Maybe you can tell my age, too) The recipe says “1 box”of strawberries and if you use the quart, it won’t turn out! Remember to adjust!!!


Fresh Berry Pie    www.grandparentsplus.com

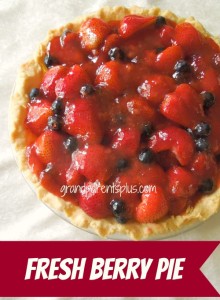
Placing a few blueberries in with the strawberries makes it look patriotic!


This makes a great 4th of July recipe, too! Make it red, white and blue by topping the blueberry pie with a strawberry or add a few blueberries to the strawberry pie! (Note: By adding strawberries to the blueberry pie, they don’t show up very well with the blueberry coating)

Fresh Berry Pie  www.grandparentsplus.com

Pie with glaze.

Whether strawberry or blueberry, this pie is delicious!

Fresh Berry Pie   www.grandparentsplus.com

A bit patriotic for the 4th of July!


Fresh Blueberry Pie www.grandparentsplus.com

 Enjoy!

Phyllis (Oma)

I invite you to subscribe to this blog, along with following on Pinterest and Bloglovin’

You’ll find this post linked to the following parties….


Posted in Pies, Recipes | Tagged , , , , , , , , , , | 62 Comments

Fruit Fling (Salad or Dessert)

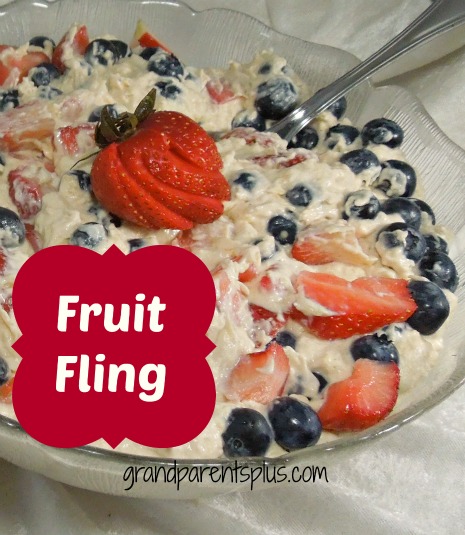
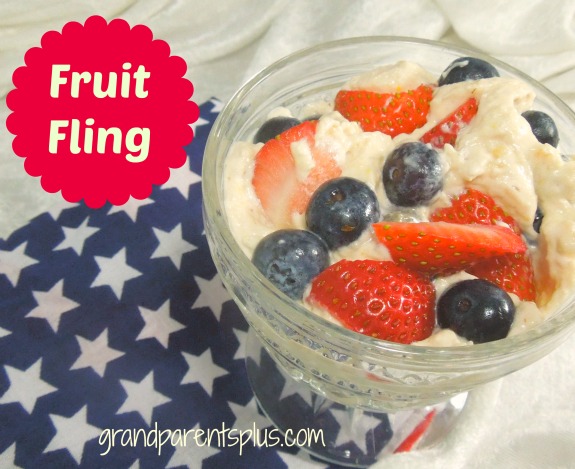
I’m not sure whether to call this Fruit Fling recipe a salad or dessert. The original recipe calls it a salad, but it tastes like a dessert. Either way you serve this, you’ll love it.

The name is a bit of a tongue twister. Say it 5 times quickly and you’ll know what I mean. This is one of my mom’s recipes so don’t know where it originated or how it got its quirky name!

The Fruit Fling goes together so quickly and makes a large bowl full! This is more than a family can eat. If you are taking this to a potluck or have a large gathering, make the whole recipe, otherwise, cut this in half and you’ll have more than plenty for your family. For extra color, add more strawberries or blueberries on the top before serving.

Fruit Fling (salad or dessert)

Fruit Fling

1 – 16 ounce vanilla yogurt

12 oz. frozen whipped topping – thawed

2 pkg. ( 3.4 0z.) vanilla instant pudding

1 can 20 oz. crushed pineapple – DRAINED

Strawberries, blueberries, either or both!

Directions:

Mix yogurt, crushed pineapple, whipped topping and pudding by hand.

Add fresh strawberries, blueberries or both!

Place in refrigerator until served

For a full recipe, I used 1 quart of strawberries, quartered, and 1  1/2 pints of blueberries.  (vary amounts to your liking)

Before serving add additional fresh fruit on top!

Fruit Fling (salad or dessert) www.grandparentsplus.com

 Would you serve this as a salad or dessert?

Enjoy!

Phyllis (Oma)

I’d love for you to follow on Pinterest, Bloglovin or subscribe to future posts!  Thank you!


This post is linked to the following parties……

Posted in Desserts, Recipes, Salads | Tagged , , , , , , , , , , , , | 39 Comments

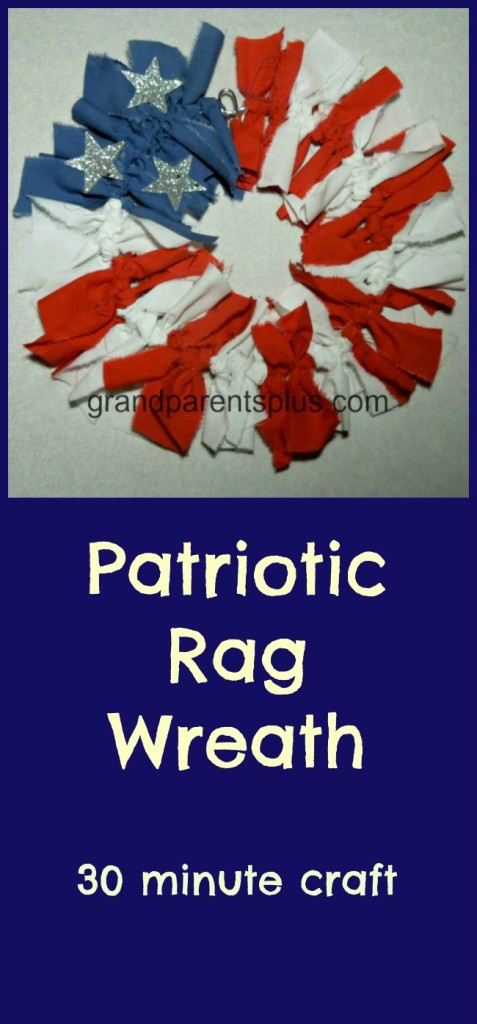
Patriotic Rag Wreath

Patriotic Rag Wreath

Short on time to make something special or different for Memorial Day or the 4th of July? This idea takes very little time and may be the project that is just right for you. It is easy enough for a child to do as long as they can tie a knot. You see, tying a knot is the greatest skill level needed to make this Patriotic Rag Wreath.

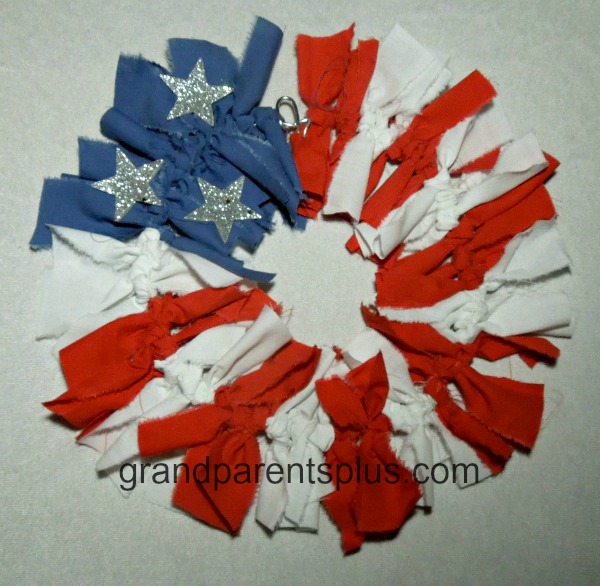
Patriotic Rag Wreath

 This idea was born after I saw a 4th of July Rag Wreath here.

I wanted to make it more in the traditional red, white and blue.

I happened to have  red, white and blue sheets that were in a bag ready to be donated to a thrift shop. When I thought of  making this, I went right to that bag and salvaged those sheets! Lucky I had not given them away! I just happened to have everything on hand. Here are the supplies I used….

Supplies:

red, white and blue material 

  I liked the sheets as there was no wrong side. The solid color was on both sides. You might want to remember this if you buy material. (If buying material, adjust amount to the size of the wreath. One fourth yard of red and white will be more than plenty – 1/8 yd. of blue for a 6 inch wreath)

Wire – 12 gauge   (this can vary – it’s just what I had on hand)

Foam glitter stars or any stars


Directions:

Tear or cut material into 1  1/2 inch wide strips

Cut strips into approx 5 1/2 inch lengths

I used 21 (5 1/2″) lengths of white, 21 lengths of red, and 10 lengths of blue.  This was for a 6 inch diameter wreath.

If you make a bigger wreath, you will need to adjust those lengths. You want an open area in the middle of the wreath. Trim lengths if you find them too long.

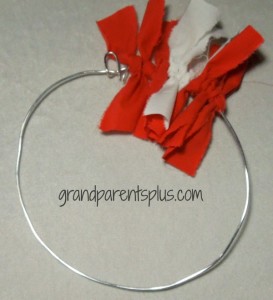
Bend wire into a 6 inch diameter circle and bend a hook or loop for hanging the wreath.  ( Adjust this diameter to your liking.)

Fold in half and tie each length on to the wire. I tied 3  of red and then 3  of white. For the blue area, I tied 10 lengths.

Patriotic Rag Wreath

Alternate red and white.

When finished tying all the lengths, add foam sparkle stickers to the blue area.

Make is as fluffy or flat as you choose.  Hang on a door, window or use in your decor as a patriotic accent!

Fast, easy and turns out great!

patriotic Rag Wreath

 Check out my other 4th of July Patriotic posts for more games and crafts Part 1 & Part 2

Other options: Make a larger wreath using a hanger for the wire base. Adjust the length of the pieces to the size of the wreath.

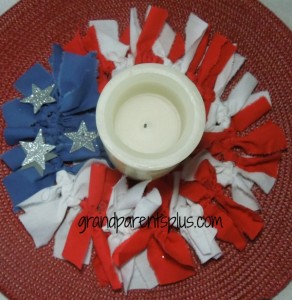
Rag Wreath

It works as a candle ring, too!


Happy 4th of July!

Phyllis (Oma)

Follow on Pinterest, Bloglovin’ or subscribe to future posts!

This post is linked to the following parties….


Posted in 4th of July, Crafts, Holidays | Tagged , , , , , , , , , , , , | 34 Comments

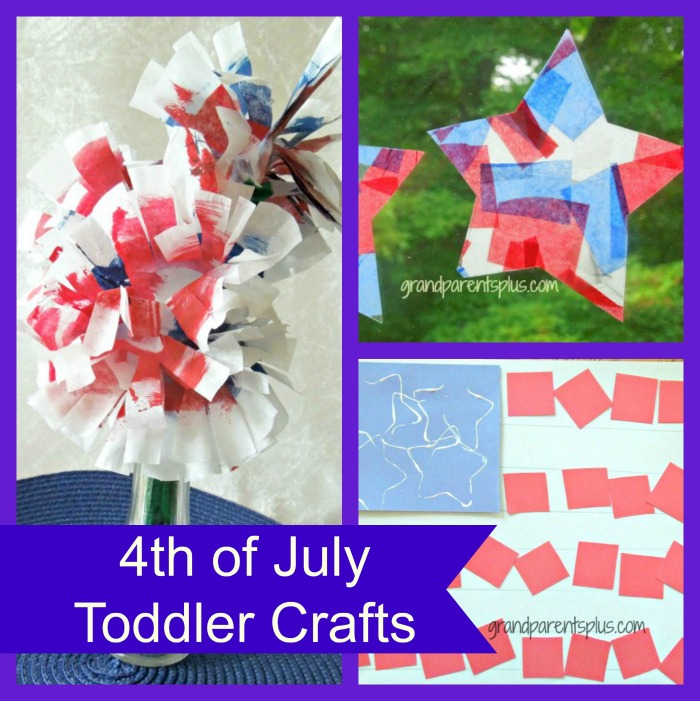
4th of July Toddler Crafts

4th of July Toddler Crafts

A friend of mine asked me for some toddler ideas for the 4th of July. The three that I came up are easy and use materials you most likely have on hand. Remember, I like easy, inexpensive and quick crafts! With the short attention span that toddlers have, these 4th of July toddler crafts are just the right time length for success! The end products look great, too!


1. American Flag

Supplies:

Red, White and Blue Construction Paper

scissors

White Tempra Paint

Brush, Glue

Small star cookie cutter or white foam sticker stars


Directions:

Cut a rectangle to fit in top left hand corner of the white paper.

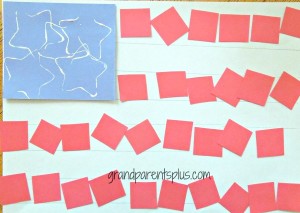
Cut strips of red construction paper into squares.

Very lightly, draw lines for the red stripes. It makes it easier to know where to glue the squares on the white paper

Take blue rectangle and add stars.

Options:

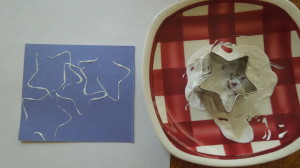
#1 Dip cookie cutter in white paint and stamp on the blue paper.

#2 Use stickers for the stars.

#3 Use finger and dip in paint and apply to blue rectangle.

4th of July Toddler crafts  www.grandparentsplus.com

Paste blue rectangle in the left corner of the white paper.

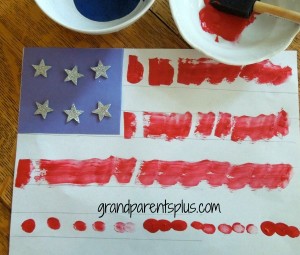
Using a small sponge, sponge brush, paper squares or just a finger dipped in paint, make the red stripes of the flag.

4th of July Toddler crafts   www.grandparentsplus.com

This method uses red squares cut out of construction paper. Other methods mentioned above work, too!


4th of July Toddler craftsSample of a brush method or finger method of painting the stripes.

Cover with contact paper and use as a placemat!

2 Patriotic Flower Centerpiece

Along with the placemat,  you need a centerpiece! Kids can’t mess this one up. Anyway it is painted, it works.

Supplies:

White coffee filters

Pipe Cleaners

Red and Blue Tempra Paint

Paint brush ( small foam or other)


Directions:

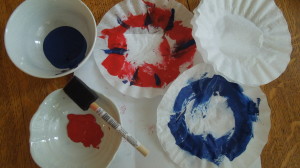
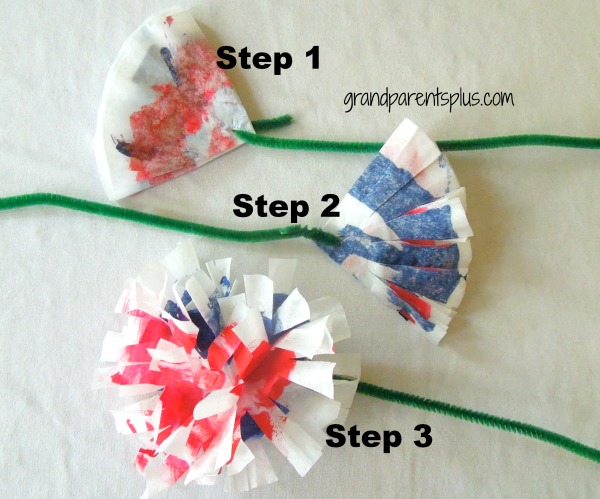
Paint one coffee filter red in a circle pattern. It’s OK that it is not perfect. You do want some white showing.

Paint another one blue.

4th of July Toddler Crafts   www.grandparentsplus.com

This is the mom’s part:

When dry, fold 2-3 pieces together into fourths. You can use one plain  coffee filter for the middle one.

Cut a small hole and insert the pipe cleaner and bend around to secure. Wrap a piece of tape around the opening.

Cut slits going half way down.

4th of July Toddler Crafts  www.grandparentsplus.com

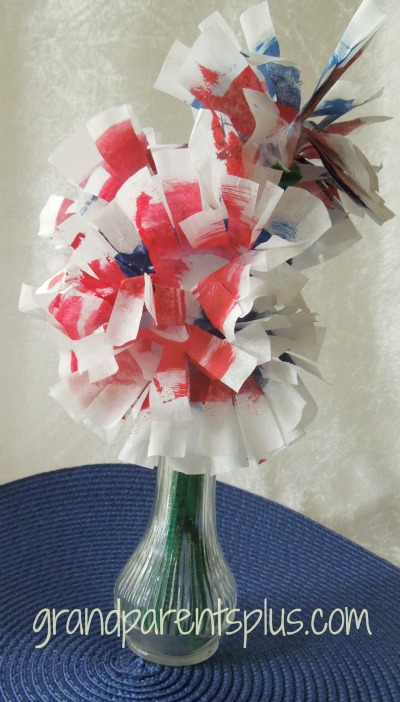
Open the flower and separate filter pieces.

Place 3 in a bud vase.

4th of july toddler crafts


3.  Translucent Stars

    Window Decoration

Another kid-friendly 4th of July Toddler Craft! They will love the beautiful colors showing through!

Supplies:

Red, White & Blue Tissue Paper ( Cut into squares -you don’t need to be precise)

Contact Paper

Scissors

Directions:

Place a piece of contact paper down with sticky side up

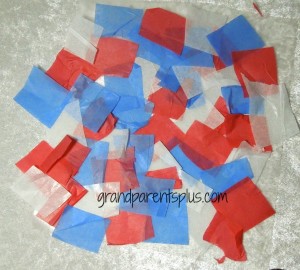
Apply squares of tissue paper, in random order, covering the entire surface . Overlap colors.

4th of July Toddler crafts  www.grandparentsplus.com

Place another sheet of contact paper on top.

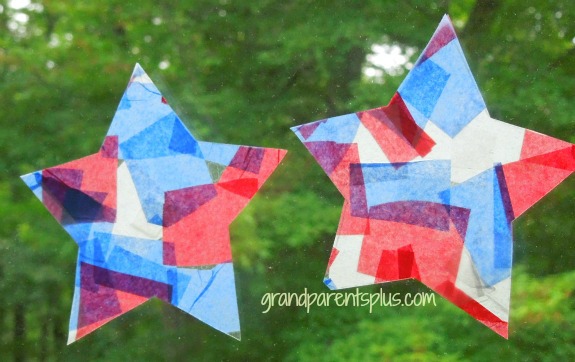
Cut out stars of various sizes.  Place on a window to show the patriotic colors.

4th of July Toddler Crafts   www.grandparentsplus.com


 Have fun with your toddler making these easy crafts!

4th of July Toddler Crafts www.grandparentsplus.com

Happy 4th of July!

Phyllis (Oma)


I’d love for you to subscribe, follow on Pinterest or Bloglovin’! Thanks!

This post is linked to the following parties….


Posted in 4th of July, Crafts, Holidays | Tagged , , , , , , , , , , | 29 Comments

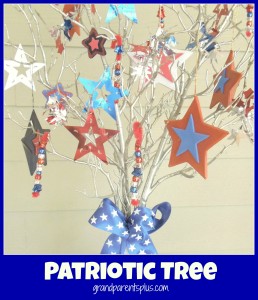
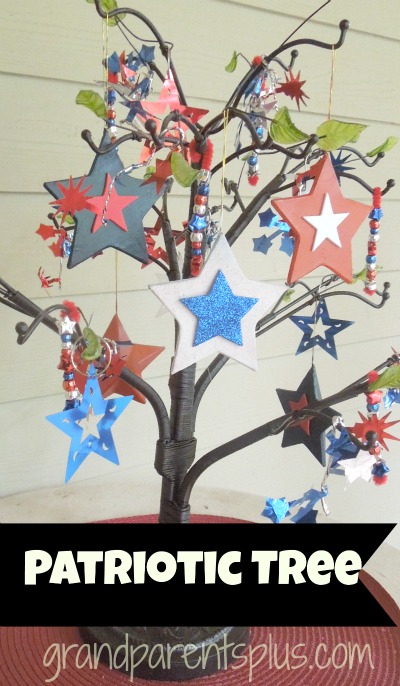
Patriotic Tree

Patriotic Tree

This post is part of the awesome Red White Blue Series over at Sugar Bee Crafts. I am pleased to be a part of this series of wonderful patriotic projects. Thanks to Mandy for including my Patriotic Tree as one of the featured projects. Buzz on over to Sugar Bee Crafts and see all the wonderful projects.

Sugar Bee Crafts Red White Blue


Patriotic Tree

You may have noticed that I have done a few patriotic posts from t-shirts to decorations. Now I’m presenting another one with the Patriotic Tree.

Did you know there are four holidays to use this patriotic craft? Memorial Day, 4th of July, Flag Day and Veteran’s Day!  That’s maximum use for your patriotic decorations! This tree does not use a “Christmas tree”, but uses tree branches or a jewelry tree (which I happened to have and don’t use ). Each of the decorations on the tree are easy for kids to make so let them have fun creating this project!

It’s OK that every star is different!

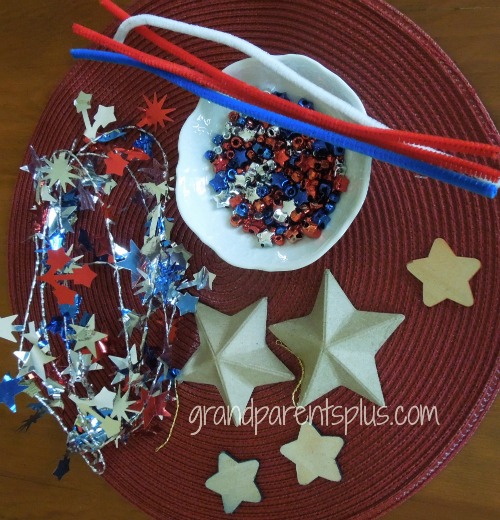
Supplies:

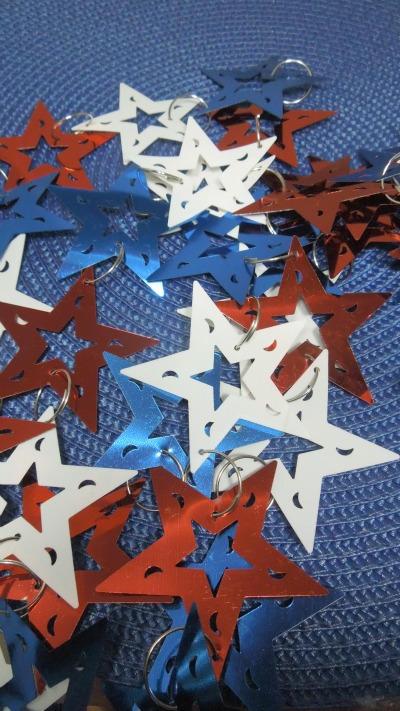
Paper Mache’ Stars (cost 67 cents) I found these on sale for 40% off!! Yea!

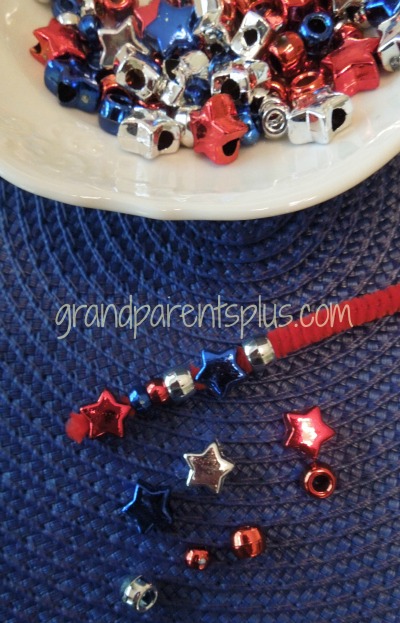
Star Beads with red, silver, and blue beads (these came together in one package)

Pipe cleaners

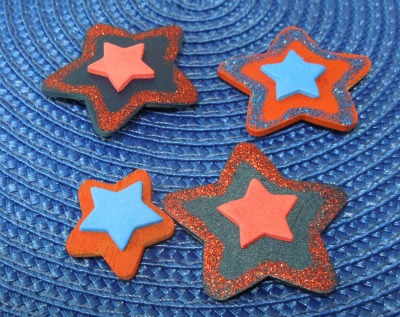
Small wooden stars (optional)

Foam sticker stars (optional)

Glitter, garland pieces and other patriotic decorations (ribbons & bows?)

Red, White & Blue Paint or colored markers for the wooden stars

Patriotic Tree

Lost cost supplies to make a great centerpiece!


Patriotic Tree   www.grandparentsplus.com

Found a garland on sale which even included some rings for hanging!


Directions:

Paint stars or color with markers (both sides).  When dry, adhere decorations or foam stickers on the flat back side of the mache’ stars.  Use glitter on top side or leave plain.

Decorate small stars with stickers, glitter or paint.

Patriotic Tree   www.grandparentsplus.com

Wooden stars colored with markers. Glitter glue and foam stickers were added. Drill a small hole for hanging.

String beads on pipe cleaners  (Turn end over to secure beads and make a hook-like end for hanging) This is easy enough for a preschooler to do!

Patriotic Tree    www.grandparentsplus.com

Threading the beads on a pipe cleaner is easy for kids to do!

Use small pieces of patriotic garland for decorating the tree, too!

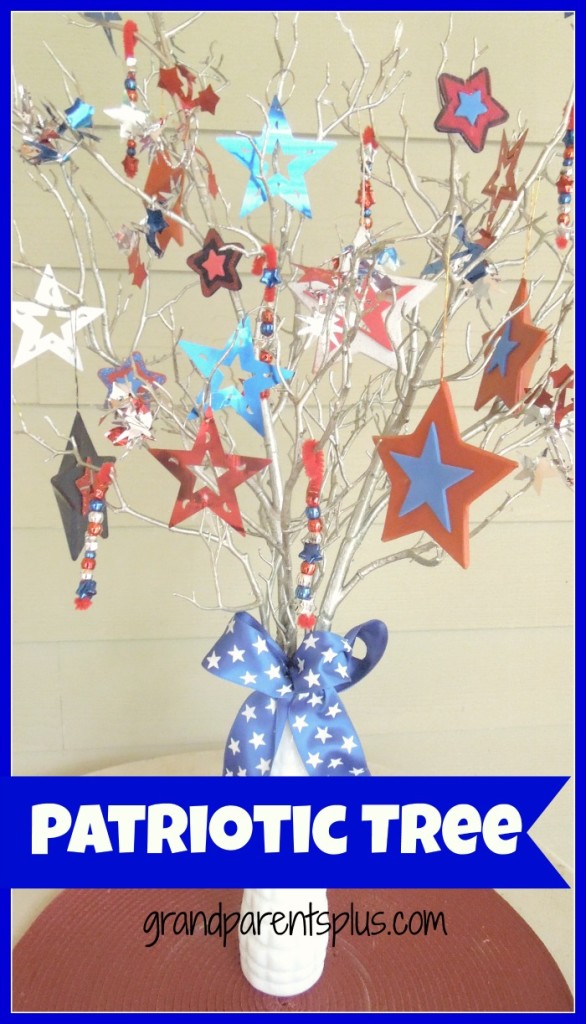
Find branches (no leaves),  place in a vase, and decorate with patriotic ornaments. Branches also look good painted white or silver!

patriotic tree   www.grandparentsplus.com

Place painted or natural branches in a vase and add the decorations.

This is my jewelry tree that worked well, too!

Patriotic Tree   www.grandparentsplus.com

Using a jewelry tree works, too!

From small kids to adults, anyone can make something to add to this tree!

Have a great holiday!

Phyllis (Oma)

Love to have you subscribe for notices on my new posts!

Follow on Pinterest or Bloglovin’!

This post is linked to the following sites……..

Post is featured on…

.http://thet2women.com/


Posted in 4th of July, Crafts, Holidays | Tagged , , , , , , , , , , , , , | 25 Comments