Crock Pot Orange Pork

Two ingredients added to pork? Really?

Yes! Just add orange soda and soy sauce!

orange pork

Who could guess that such an odd combination could make such a tasty main dish?

I would never think to put orange soda and soy sauce together! I read a recipe for chicken made this way long ago and placed it in my files. Just recently I came across it and decided I had to give it a try.  I had boneless pork chops thawed so instead of chicken, I decided to try it with pork.

Ingredients:

1  – 1/2 lbs. boneless pork

1/2 cup Soy Sauce ( I used lite sodium and gluten-free)

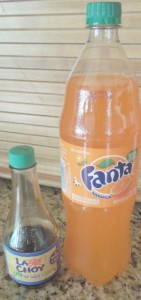
1 can ( 12 oz.) orange soda (I used Fanta because it is caffeine free)

Place all ingredients in a crock pot and let cook on low for 5 hours

The first time I made this, I served the pork chops over rice and thickened the juices with flour for gravy. For gluten-free, use cornstarch to thicken the juices.

Crock Pot Orange Pork   www.grandparentsplus.com

Easy way to fix pork or chicken!

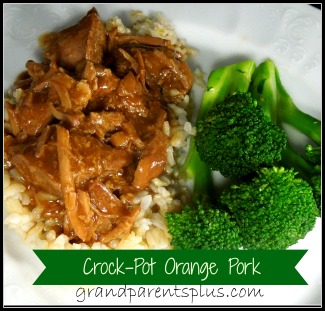
The second time I made this orange pork,  I broke apart the meat after cooking for 5 hours, I thickened the juices with flour, and cooked for another 1/2 hr. I like this way the best!  Serve over rice or noodles. It was like a pork stroganoff.

You probably know this, but be sure to put flour in cold water, mix together, and then add to the crock pot. Just adding flour to a hot mixture makes lumps.

Pork with orange soda and soy sauce    www.grandparentsplus.com

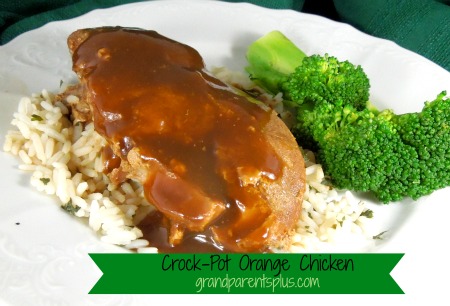
Next time you want a simple two ingredient crock pot dish, try Orange Pork or Orange Chicken.  Optional items to include are sautéed mushrooms, onions or frozen peas ( added at the end). With this easy dish, there is very little time spent in preparation! Dinner made easy, right?

Phyllis (Oma)

Linked to the following parties……

Featured on……


Posted in Recipes | Tagged , , , , , , , , , , , , , , , | 20 Comments

Chocolate Chip Cookies Extraordinaire!

M-m-m-m-m  Who doesn’t like chocolate chip cookies?

I’ve tried lots and lots of chocolate chip cookie recipes, but this one is my all time favorite! The recipe makes a ton of cookies, too (60+). It has a light crunch on the outside with a soft chewy inside! If that is how you like your chocolate chip cookies, this recipe is for you.

I’ll let you in on what I think is the best method for keeping them just perfect!

Chocolate Chip Cookies Extraordinaire!

Best recipe and method I have found!


 Ingredients:

2 eggs

1  1/4 c. white sugar

1  1/4 brown sugar

2 sticks butter

1/2   cup Crisco

1 Tbsp. vanilla

4 cups flour

2 tsp. baking soda

1 tsp. salt

1 bag chocolate chips


Directions:

Cream together butter, Crisco, and sugars. Beat in eggs and vanilla. Add dry ingredients. Mix in chocolate chips by hand. 

Drop spoonfuls on a greased or non-stick baking sheet and bake at 350 degrees for 13 minutes (this is what the recipe says).


Here is what I recommend as my method…… Bake at 350 degrees for 11 minutes. (at this point, cookies will be very lightly browned and puffy)

Remove from oven and let sit on baking sheet for 2-3 minutes. Cookies will continue cooking, but stay light brown. 

Chocolate Chip Cookies Extraordinaire  #cookie #recipe #chocolate-chip   wwww.grandparentsplus.com

Let sit for 2-3 minutes!

After 2-3 minutes, remove from pan and cool completely on a rack.

(I can never wait until they are completely cooled to have one!)


Enjoy! 

Chocolate Chip Cookies Extraordinaire

Enjoy!

Need a glass of milk?

 I invite you to subscribe to this website and follow on Pinterest!

Phyllis (Oma)

Post links here……


Posted in Recipes | Tagged , , , , , , , | 17 Comments

The Best Easy Dice Games for Young Children!

Best Dice Games for Young Children  www.grandparentsplus.com

I’ve had times when there’s been a long wait! Ugh! When you’re waiting, time seems to crawl and it is so- o-o-o boring! Have you noticed that time goes faster when you’re having fun? Well, keep dice handy for those long wait times especially when you have young children with you!  It doesn’t take much room to always have a few dice in your purse or pocket just ready for appointments, airport, airplane, bus or car rides. The time seems shorter by having a little fun! I’ll share a few that I have used.

There are loads of  dice game variations, but keep it simple and to their level.

Dice games are great for number recognition, patterns, and many other math skills, too!

1. Simple Dice Game:

(you can use any number of dice for this game)

Choose a number and roll the dice. You score a point every time you roll that number. When you roll that number, you get another turn. When that number is not rolled, the turn is over. Mark the tally for each time you roll the number.  First one to a certain score of 10 points wins! (Set the point total low for young children and higher for older ages.)

2. Bugs

 Requires only 1 die or you can speed it up by using two. With two, the player gets to choose which number they want to use for the drawing.

In this game, each number on the die represents one part of the bug.

#1 = Body, #2 =Head, #3 =Leg, #4=eye, #5= antenna, #6=tail

Each player needs to roll a #1 to start and then can add each detail to that part. For instance, you cannot add each eye until you have rolled a #2 for the head, but you can add each leg that goes on the main body (need to roll a “3” for each one) . The first player to finish their bug, wins.

You can vary this with a bunny, cat, snowman, face, mouse etc. Just decide what number stands for each part to go on the picture.

3. Pig

 Requires one die

In this game each player rolls the die.  If you roll anything except a “1” you can add that score or take a chance and roll again. You can keep rolling and add that number to your score until you roll a “1”.   If you roll a “1 “, you lose all the amount you scored on that turn. It is the player’s option to quit at anytime and take the score up to that point.  The first player to 100 wins.

4. Beat That  

Each player rolls two dice and writes the highest value number that you can make with the two numbers on the dice. For instance, if a player rolls a 6 and a 1, they would write “61”. The next player rolls the dice and tries to beat that number. The player with the highest number on a round, scores a point. First player to 10 points wins.  Vary this for multiplication. Multiply the two dice numbers rolled and the highest value on the round scores a point. Add a third die and then roll all three. Add the lowest two and then multiply it by the highest number.  Again, the highest number of the round scores a point.

5. Going to Town

This game uses addition. Play with 3 dice. Roll and keep the highest die. Roll the remaining two and keep the highest. Roll the last die and add the three numbers for your total score.  Play several rounds and the highest total wins.

6. Ladder

On a piece of paper, draw a ladder and number 1-6 on both sides of the rungs from bottom to top. This game requires two dice. Each number 1-6 is crossed off on one side before they can come back down the ladder on the other side. For instance, if a player rolls a 1 and a 2, they can cross off both the 1 and 2 or they can add them and cross off the 3.  For older players, you can go to 10 on the rungs; younger players go to 6. When all the numbers are eliminated, that player wins.

There are so many variations of these games that I could go on and on. These are just a few that are handy to keep in mind when you need something to fill some time. Of course, there is Farkel and Yahtzee, but these take some strategy and are for older kids. I’m concentrating on age 4 through early elementary.

Hope these suggestions help! What are your favorite dice games? I’d love to hear your ideas.

Forgot the dice? Need a quick link to dice games online? Go to playonlinedicegames.

Playing online eliminates the interaction between parent and child along with teaching the math skills, but in a pinch it will do!

Keep those dice handy!

Have fun!

Phyllis (Oma)


Post linked to these sites….


Posted in Games | Tagged , , , , , , , , | 34 Comments

DIY 4th of July – Memorial Day Centerpieces

No Vase?

No Problem!


Looking for easy, inexpensive, yet impressive DIY centerpieces

for the 4th of July or Memorial Day?

Well, check out these ideas!

These centerpieces won’t blow away with the summer breezes. They will stay right where placed because of the weighted “vases”.

Not only are these centerpieces great for Memorial Day or the 4th of July, but by adjusting the colors to your liking, they make lovely centerpieces at any casual outdoor wedding or party.


4th of July Easy Tutorial www.grandparentsplus.com

Plan early! Pin this for the future. Great tutorial for when you don’t have vases! www.grandparentsplus.com

I got this centerpiece construction hint from a friend that worked as a floral designer.

It sure cuts down on the cost of multiple centerpieces.


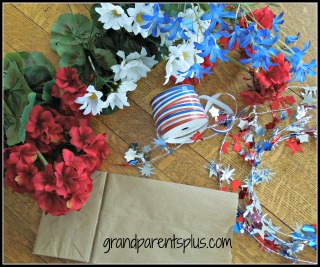
Supplies:

Brown Lunch Bag with flat bottom (If you want taller centerpieces, use a tall, flat-bottomed, brown paper bag from a liquor store. Another option is to use white bags from a bakery)


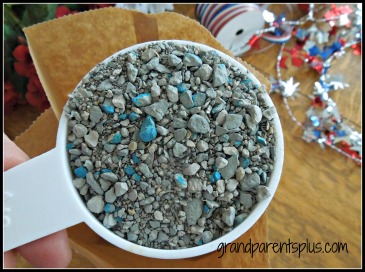
Cat Litter or Sand


Paper Towel or Newspaper


Choice of Silk Flowers


Red, white & blue ribbon, twisty garland or raffia  

(I bought red, white & blue curling ribbon at the Dollar Tree)

No Vase? No Problem! 4th of July www.grandparentsplus.com

Materials Needed for 4th of July or Memorial Day centerpieces. (Not pictured: cat litter or sand)

Directions:

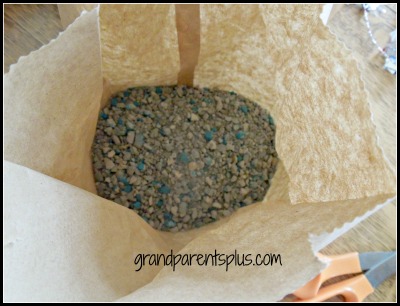
Open bag and scoop cat litter or sand and fill almost half way.

4th of July materials

4th of July fpm

Take some paper towel, wad it up, and place on top of the sand or cat litter.

This gives your centerpiece so much weight that it will  stay on the table even when windy!

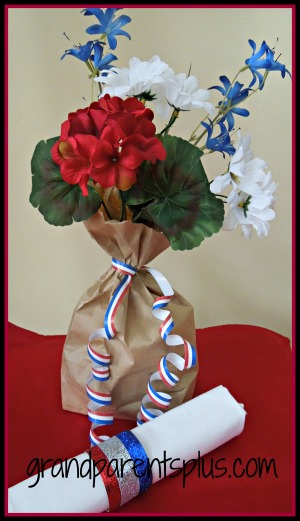
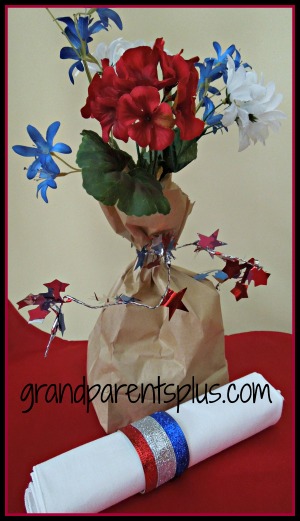
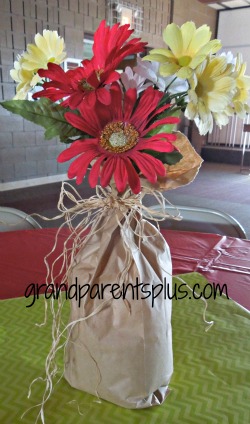
Add the flowers and tie tightly with a twisty patriotic garland, patriotic curling ribbon or just plain raffia.

w4th of July Centerpiece ww.grandparentsplus.com

Tied with red, white, and blue curling ribbon.

Patriotic Centerpiece  www.grandparentsplus.com

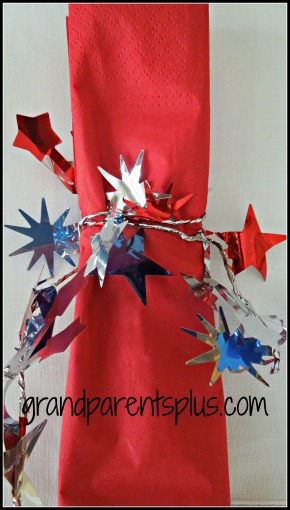
Centerpiece tied with a piece of twisty red, white & blue garland.


Red, white and blue napkin rings from paper towel or toilet paper rolls add to the theme.  Complete directions are found here.

Another option for a decorative napkin ring is using a piece of twisty garland.

4th of July Napkin Rings www.grandparentsplus.com

This centerpiece uses the taller liquor store bag.

DIY Centerpieces #centerpiece #paper-bag #flowers

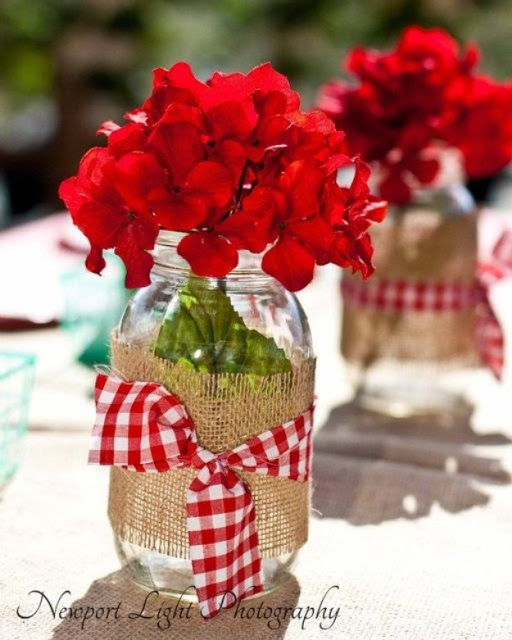
Another easy and quick centerpiece idea is from Catchmyparty.com

Outdoor Centerpiece www.grandparentsplus.com

Use a ball jar wrapped with fringed burlap and tied with a ribbon. For 4th of July or Memorial Day, use a patriotic ribbon! After the party, reuse the jars for jam!

If you’re on a budget, but want that extra special touch, these ideas are a super way to go! When I look at some of the table settings for the 4th of July on Pinterest and in magazines, I wonder, “Who sets such a formal table for the 4th of July?”. To me, 4th of July is casual, no mess paper plates and napkins! These decorations fit right in with “casual” and “outdoors”.

Besides that, as I said, they are so inexpensive, quick and easy!!!

(My kind of qualifications for a project!)


I hope these ideas are helpful and fun for you to use!

Yea! Red, White and Blue!

Celebrate the freedoms that we enjoy!


Are you the formal or informal type

for 4th of July / Memorial Day

get-togethers?


Phyllis (Oma)


Linking post to these parties….

Posted in 4th of July, Crafts, Holidays | Tagged , , , , , , , , , , , , , , , , | 9 Comments

Crock Pot Southwestern Chicken

This is one of my favorite recipes because it is so easy and looks so colorful and delicious! I always have the ingredients on hand for Southwestern Chicken when I want an easy dinner. My daughter-in-law shared this recipe with me. I’ve altered it a bit because I like more sauce. There are 3 ingredients plus chicken and simple, super easy directions.

Ready?


Crock Pot Southwestern Chicken


2 – 15 1/4 oz.  cans corn ( I usually use one)

1- jar chunky salsa (24 oz)  (Recipe called for 16 oz. )  Your choice on mild, medium or hot!

1 -15 oz can black beans, rinsed and drained

6 boneless, skinless chicken breast halves

1 cup low-fat or regular shredded Cheddar cheese (optional)


Directions:


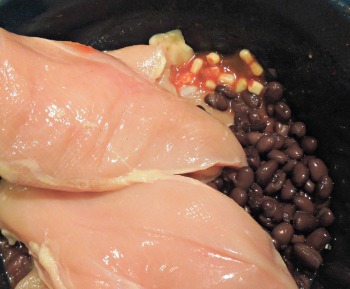
Combine corn, beans, and 2/3 cup salsa in slow cooker.

Top with chicken.

Crock Pot Southwestern Chicken


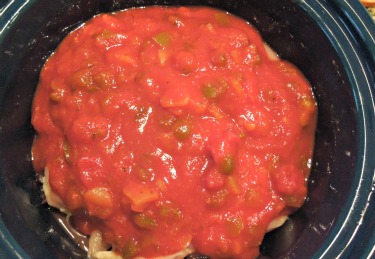
Pour remaining salsa over chicken.

Crock Pot Southwestern Chicken  #chicken #crockpot #recipeswww.grandparentsplus.com

Cover and cook on High 3 hrs. or Low 7 hrs.

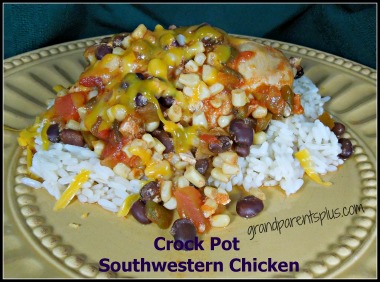
Serve over rice. With slotted spoon, ladle the corn and black beans over the chicken. Top with cheese. Serve extra sauce on the side along with sour cream.

Crock pot southwestern chicken

Top with cheese and serve with sour cream #recipe #chicken #crock pot www.grandparentsplus.com


Enjoy!


Phyllis (Oma)


This post linked to the following sites…..


Posted in Main Dishes, Recipes | Tagged , , , , , , , , | 23 Comments

DIY Cards,Posters & more….
DIY


Cards, Posters, Awards,


Certificates, Calendars & More…. Free!


Graduations!  Birthdays! Anniversaries!

New Baby!

Achievement Certificates!

Weddings!

Sports Awards!

Holiday Events!


Whatever the event, you can create a free card, poster, etc… all at no cost to you with the easy templates on this site! I am so excited to find this and I thought I would share it with everyone. Each project is easily printed on your own home printer. The quality is not like ordering from a picture website, but for quick everyday uses, it is fantastic!

What kid or adult doesn’t love a special poster or card created just for them. Graduations are just around the corner and personalized posters make great decorations, too. Just print them out right at home!

In the past, I have made my own cards and invitations on my computer using Publisher and other programs, but this is so much easier! Anyone can do this! It is much quicker with the templates ready to go. You have an option to change any text to your own liking.

Here is a picture sample of a couple things I’ve made….


Make Your Own Cards, Certificates #cards #certificates #awards wwww.grandparentsplus.com

Lots of templates for cards, posters, certificates, awards, etc.  www.grandparentsplus.com

If you’re a coach, children’s ministry leader, youth leader, Brownie or Girl Scout leader, Cub Scout leader, mom, grandmother, S.S. teacher, or school teacher (just to name a few), you’ll want to be sure to check this out. I receive no money from this recommendation, but just wanted to share it with you! I find it so easy and quick to do!

I love it and will be using it often!

Have fun creating!

The link is here.

Phyllis (Oma)


                                                Sign up at Viraliti to make money with your Pinterest posts!

Check it out – no obligation!

I hope you subscribe and follow me on Pinterest!


The post is linked to these party sites…..


Posted in Misc., Photobook and Photo Card Sites | Tagged , , , , , , | 5 Comments

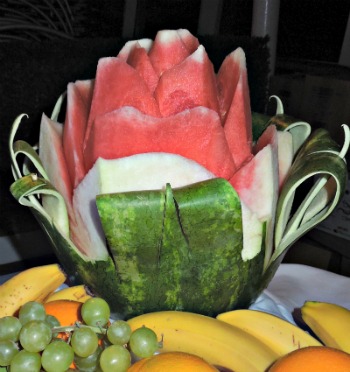
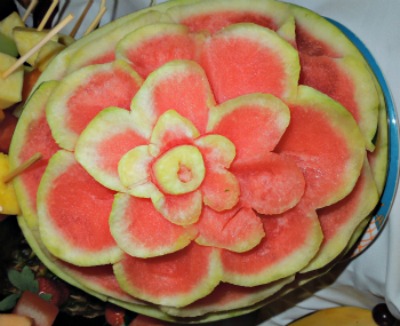
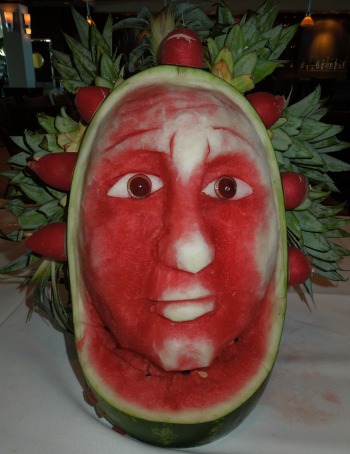
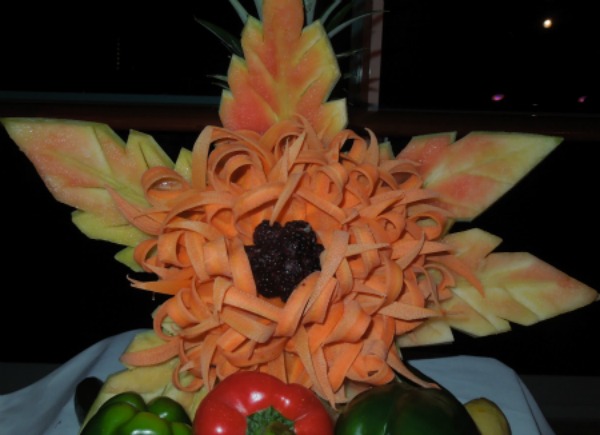
Watermelon Centerpieces


Watermelon Centerpieces
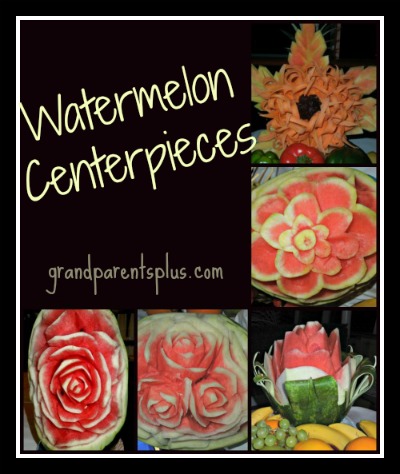
Elegant creations from watermelons and cantaloupe! Tutorial link included. www.grandpartsplus.com #watermelon #centerpieces

Summer is coming and soon we’ll see bins of watermelon in the grocery stores! Instead of just serving watermelon wedges, think about creating a centerpiece out of it. If you happen to get a tasteless one, this might be a way to salvage it for another purpose.

 While this is not like my usual posts, I just had to share these ideas. Perhaps they’ll inspire you to try something different. Some of these ideas are easy and some more difficult.

Watermelon Flower  #watermelon #fruit creations #centerpieces  www.grandparentsplus.com
Imagine this bursting forth on your table! Truly a show-stopper!  www.grandparentsplus.com  #fruit  #centerpiece #watermelon flower


 Are you brave enough to try this?

Beautiful Watermelon Creation! Perfect for a fruit  and salad table!  #watermelon #watermelon creation #centerpiece  www.grandparentsplus.com
Flower centerpiece made from a watermelon. #fruit#centerpiece #fruit-centerpiece www.grandparentsplus.com


Now, the next one is way beyond my ability!  Don’t think I’ll be trying this, but if you are artistic, go for it! The headdress is from radishes and greenery.

Watermelon Sculpture
Watermelon Sculpture!
#watermelon #fruit sculpture #watermelon creations www.grandparentsplus.com


Made with leaves carved out of the watermelon rind, this next creation uses long carrot curls for the petals, and black raspberries for the center! Soak the long carrot shavings in ice water to make them curl. Then, place them to look like the flower petals. Use toothpicks or skewers to hold everything in place.

Fruit flower creation!
Beautiful Flower made with watermelon rind carved leaves, long carrot curls and black raspberries!


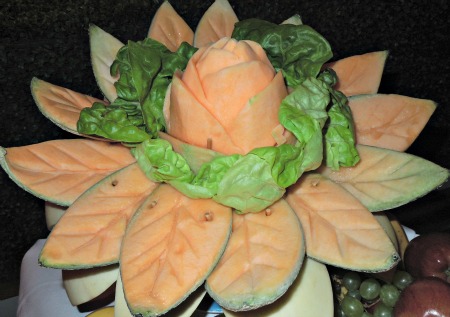
Another melon creation made from cantaloupe!

Another beautiful flower made from fruit.
Made from canteloupe!

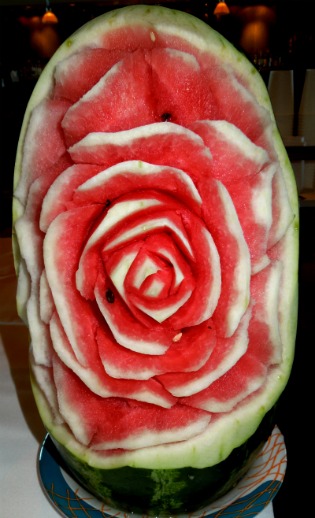
The best video for directions on how to do the roses is on YouTube at this site…

 http://wp.me/p2kxxE-AR

Watermelon rose
Watermelon made to resemble a rose.
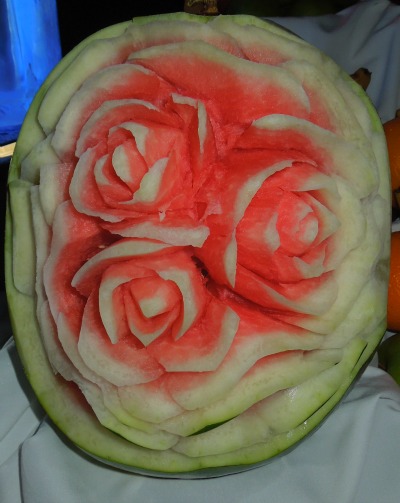
Watermelon Centerpiece
Wow!
Watermelon Centerpiece Carving
Spectacular!

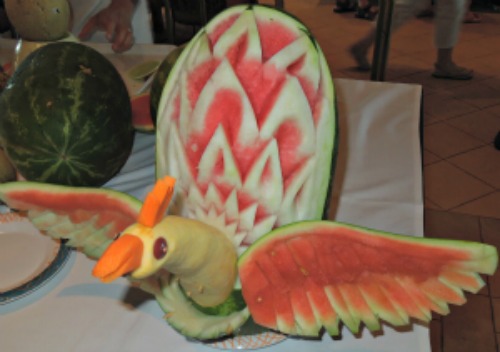
This bird is easier than it looks. Hold everything together with skewers and then cut off with pliers at the entrance point to hide it. 

See my  Fruit & Vegetable Creations post for pictures of the construction.


 Now if you are brave and you feel inspired, it is your turn to try these watermelon creations for your centerpiece! Beautiful, aren’t they? Thanks to the chefs on Royal Caribbean for the inspiration and for instructions on YouTube!


I’m starting on the Watermelon Rind and Carrot Curls Flower!

What have you got to lose?

If it doesn’t turn out, just eat it!

Phyllis (Oma)

 Sign up at Viraliti to make money with your Pinterest posts!

This post linked to these parties……


Posted in Art Project, Misc. | Tagged , , , , , , , , , , , | 10 Comments

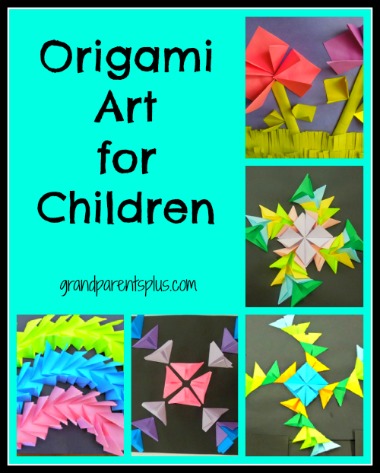
Origami Art for Children

Follow my blog with Bloglovin

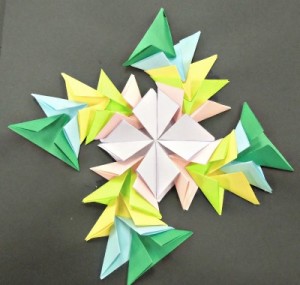
Origami Art for Children

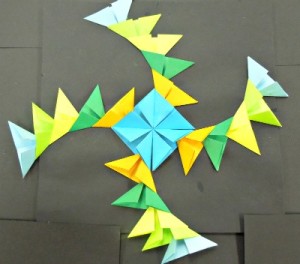
Great color and pattern exploration! Beautiful designs made by elementary kids. #art #origami #kid art www.grandparentsplus.com

 Origami is the art of paper-folding.

This is a simple project where kids or adults can have fun with color and design.

 Using just two simple folding methods, these designs are quite easy, dazzling in color, and fun to do. Designs can be symmetrical or free-flowing. This is a great project to experiment with color combinations, patterns or simply creating an interesting picture. The project keeps elementary kids busy and hold their interest for a long time!

The end product looks great because they are so colorful and 3-dimentional!

Materials:

Neon or brightly colored copy paper (cut in 3 inch squares or any size square you wish),

or use Post-it or Sticky Notes ( 3 inch squares)

Glue

Background paper (Construction paper or whatever you prefer)

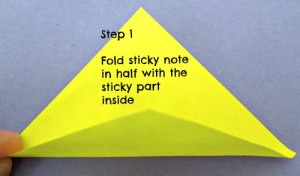
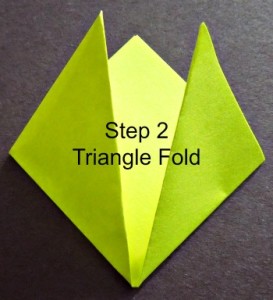
Triangle Fold

Step 1 Triangle Fold #sticky note #post-it note #origami art   www.grandparentsplus.com

Triangle fold with 3 inch paper square or post-it notes. #origami #cross #Easter www.grandparentsplus.com


Triangle Fold - Step 2 #origami #Easter #kid art www.grandparentsplus.com

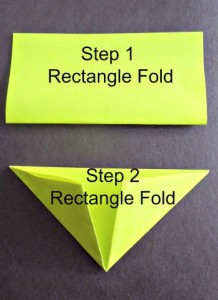
Origami Fold
Step 2
#origami #Art #post-it note www.grandparentsplus.com


Rectangle Fold

Origami Art #Art  #Origami  #Kid Art


Kid Created Art Designs

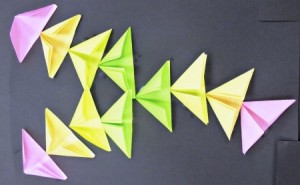
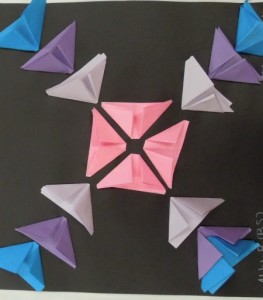
These designs used the rectangle fold. The designs differ by linking or connecting the pieces in various ways.

Origami Art #art #kid art  #origami      www.grandparentsplus.com

Origami Art   www.grandparentsplus.com

Origami Art    www.grandparentsplus.com


Origami Art #kid art #art #origami

origami Art  www.grandparentsplus.com

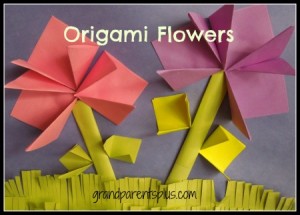
Use the triangle fold to create flowers and leaves!

Leaves are made from smaller squares folded in the triangle fold.

 : origami Flowers #flower #origami #origami flowers       www.grandparentsplus.com

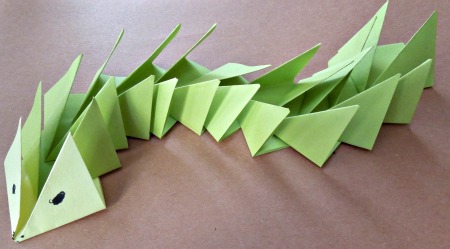
or even a caterpillar!

origami   #origami #art #kids art   www.grandparentsplus.com

A creepy crawly caterpillar!

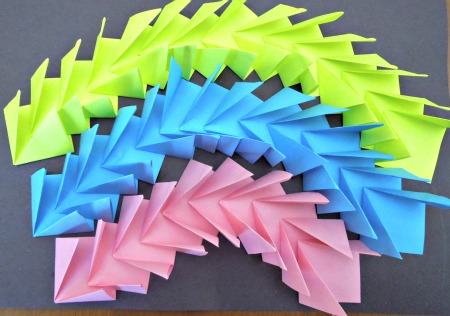
And a rainbow!

Origami Rainbow #origami #kid art #art

Origami Rainbow
#origami #kid art #children   www.grandparentsplus.com


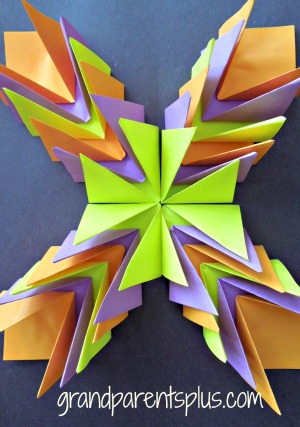
Origami Art Design   #art #origami #kids art    wwww.grandparentsplus.com

Design using triangle folds. #origami #kids art #post-it note art    www.grandparentsplus

The possibilities are endless!

Use the small triangle folds for birds in a tree, leaves,  or fish in an ocean. 

Try it and have fun with color and design!

My earlier post of the “Origami Cross” also explains this method. Click here to view it.

What will you create?

Phyllis (Oma)


This post linked to the following sites…..


Posted in Art Project | Tagged , , , , , , , , , , , | 32 Comments

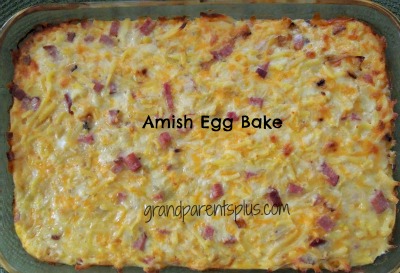
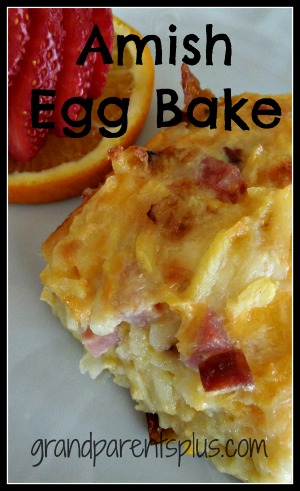
Amish Egg Bake

Follow my blog with Bloglovin

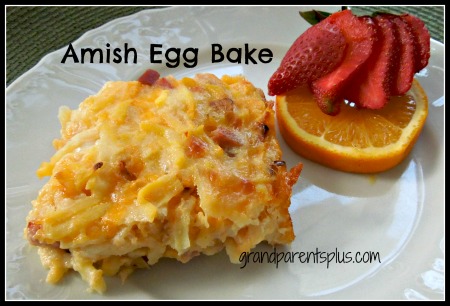
Amish Egg Bake  #egg bake #egg casserole #gluten-free   www.grandparentsplus.com

Delicious no-bread egg bake for any holiday brunch! #egg bake #egg casserole #gluten-free www.grandparentsplus.com


I love egg bakes or egg casseroles!

(I think I said that in another egg bake post!)

Egg bakes are so easy to serve whether you have a big or small group for brunch at holiday time or anytime!

  Easter is  a good time to get your egg bake recipes together and this is a great one!

The Amish Egg Bake is refrigerated overnight so it is ready to place in the oven in the morning.  I really like is that it has no bread in it so it is gluten-free! Also, you don’t feel like you’re overdosing on carbs if you serve  muffins, rolls or scones with it.

Your kids will like this one, too! (my grandchildren liked it)  Just don’t tell them there is cottage cheese in there!

Ingredients:

1 pound sliced bacon (diced,  ham (diced) or sausage ( I’ve used Jimmy Dean’s)

1 medium sweet onion, chopped

6 eggs, lightly beaten

 30 oz. bag of  frozen shredded hash brown potatoes, thawed

2 cups (8 oz. ) shredded cheddar cheese

1-1/2 cups (12 oz.) cottage cheese

1-1/4 cups shredded Swiss cheese

1 teaspoon salt

1/2 teaspoon pepper

Optional items: red or green peppers, roasted red peppers, mushrooms (sauté with onions) or sun-dried tomatoes

Directions:

In a large skillet, cook bacon or sausage and onion until done, drain. (I used turkey ham so just sautéed the onions separately and added the turkey ham)  In a bowl, combine the remaining ingredients; stir meat mixture of choice into the potato, cheese, and eggs.  Transfer to a greased 9×13 pan and refrigerate overnight.

Bake, uncovered, at 350 degrees for 40-45 minutes or until set and bubbly.

Let stand for 10 minutes before cutting.

Amish Egg Bake #egg bake #egg casserole #Amish egg bake www.grandparentsplus.com

I used turkey ham in this one! #egg bake #egg casserole #gluten-free www.grandparentsplus.com

Hope you enjoy it!

Are you having a brunch this Easter?

Amish Egg Bake #egg bake #egg casserole #Amish egg bake www.grandparentsplus.com

No-bread egg bake! Great for a brunch #egg bake #gluten-free #egg casserole www.grandparentsplus.com

Have a blessed Easter!

Phyllis (Oma)

Interested in future posts? Follow me on Pinterest or subscribe for future posts!


This post is linked to the following linky parties…..

Angels Homestead  Cutesy Crafts


Featured on Kathewithane.com

Posted in Recipes | Tagged , , , , , , , , , , , , | 53 Comments

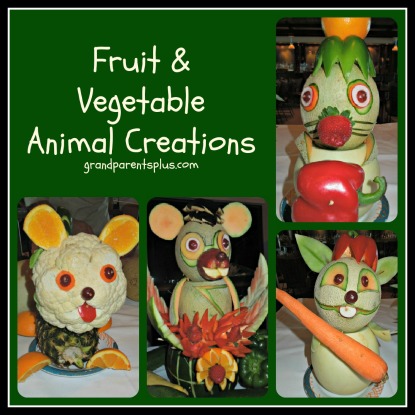
Fruit & Vegetable Animal Creations

Follow my blog with Bloglovin

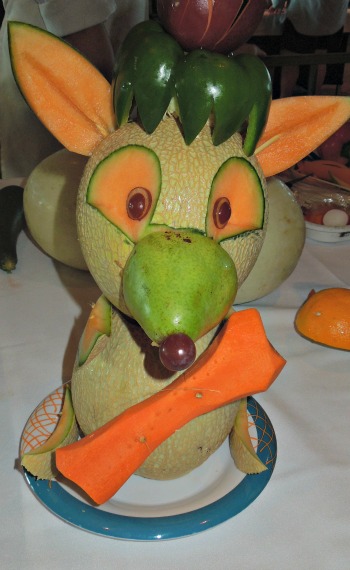
Fruite and Veggie animal creations  #fruit #centerpieces # fruit animals

Fun collection of ideas for whimsical fruit & veggie creations. #fruit #vegetable #animals  www.grandparentsplus.com

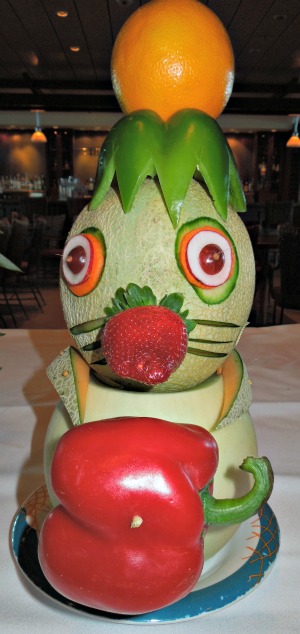
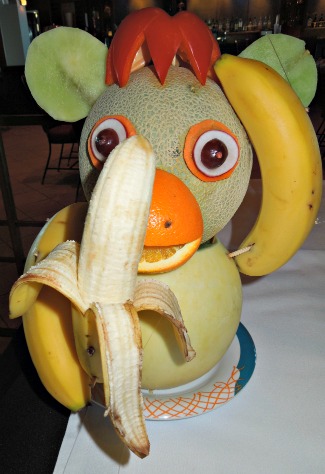
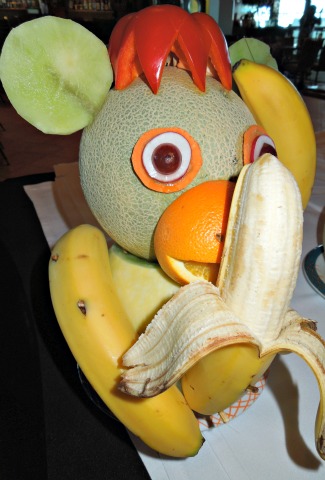
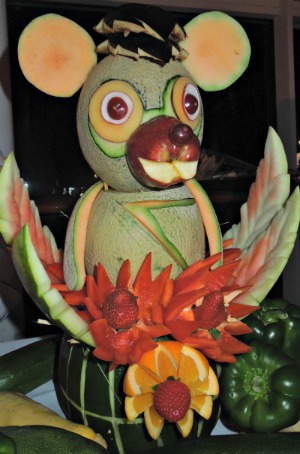
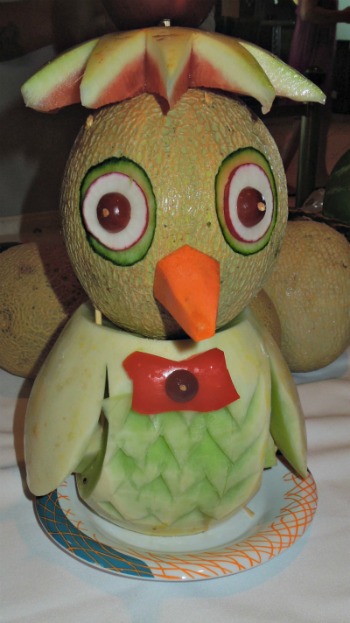
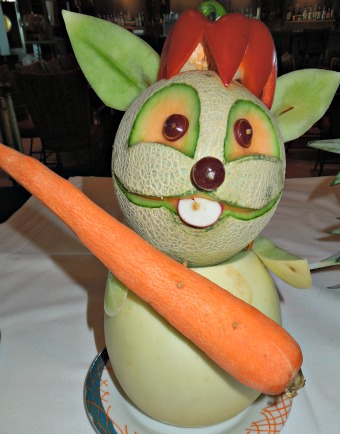
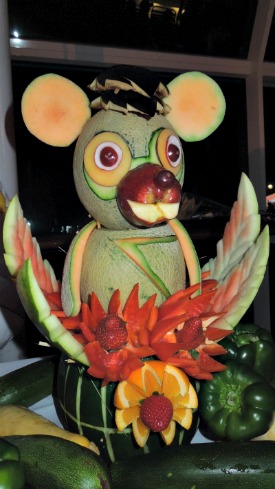
Just recently, we went on a beautiful Caribbean Cruise. Luckily it wasn’t the ship that was stranded! We cruised on the Liberty of the Seas by Royal Caribbean and it was fabulous! I highly recommend Royal Caribbean! The food, service, entertainment and the ship itself was outstanding! The presentation of the food was so beautiful. One night they had a dessert buffet where they displayed such fun, creative fruit creations.

Fruit & Vegetable Creations 2

Fruit & Vegetable Creations 3 Fruit & Vegetable Creations 7 Fruit & Vegetable Creations 8

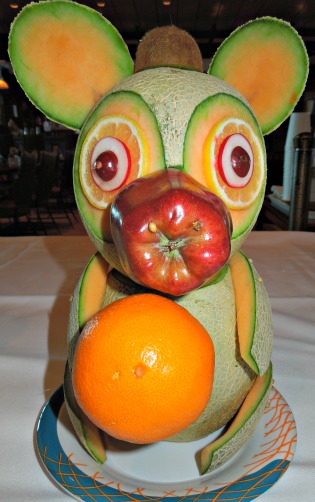
Fruit & Vegetable Animal Creation #fruit animal  #centerpiece #fruit centerpiece   www.grandparentsplus.com

More variations of fruit and vegetable creations!

Final product!

So many fun designs!


I loved the whimsical animals! I had never thought of doing this for a centerpiece! My creative juices started and I got to thinking of all the possibilities that could be made. The nice thing is after using your creation for a centerpiece, the fruit and vegetables are still usable the next day!

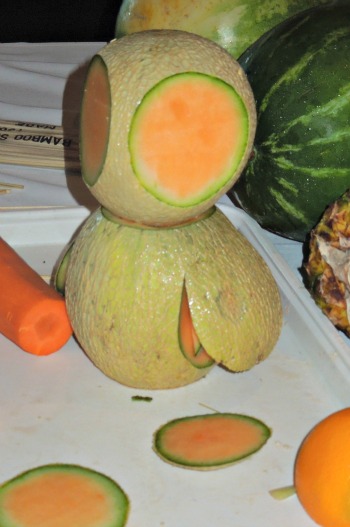
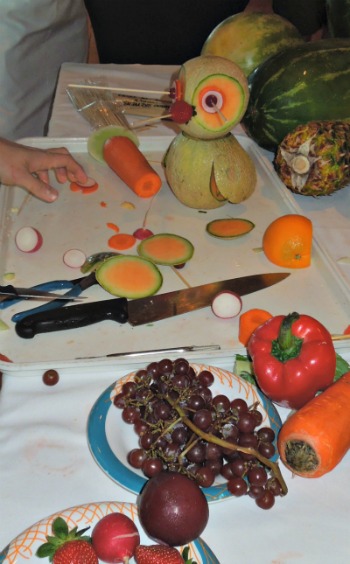
I took some pictures of a fruit creation that a chef was making and thought I might try these at home for a special occasion! Some of them didn’t look that difficult if you know some of the secrets.  The only tools needed are a couple of sharp knives (small & large),  pliers and bamboo skewers along with a variety of fruit and vegetables. The bamboo skewers hold everything together and then they are snapped off with the pliers when everything is in place. The pictures tell the story of how to create it.

Animal Fruit Creations #fruit #centerpieces #fruit centerpiece

Fun creations using fruit and veggies!

To make the wings stick out, insert a small part of cantaloupe underneath each wing.

Fruit & Vegetable Animals   #fruit  #fruit centerpiece #fruit animals

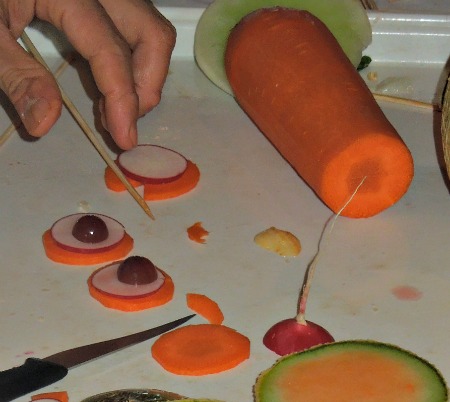
Making the eyes

A slice of carrot, radish and grape make the eyes.


Fruit Animal   #fruit  #fruit centerpiece #fruit creation   grandparentsplus.com

Adding the eyes and nose

A strawberry for the nose or try a carrot, too! The hat is either a cut of watermelon, a red or green pepper or whatever you choose.

Fruit & Vegetable Animal Creation   #fruit #vegetable #centerpiece   grandparentsplus.com

Another variation of a fruit and vegetable animal

Whimsical Fruit & Veggie Centerpiece Creations! #fruit #centerpieces #fruit creations

Make a whimsical centerpiece with fruit and veggies!


Fruit & Vegetable Dog Creation    #fruit  #vegetable  #fruit centerpiece

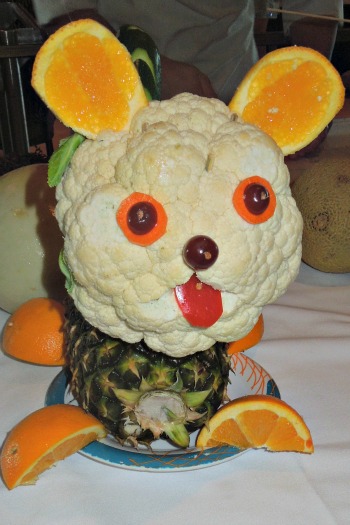
Puppy Dog made from fruit and vegetables!

Puppy Dog made from fruit and vegetables!  #fruit  #vegetables #centerpiece   grandparentsplus.com

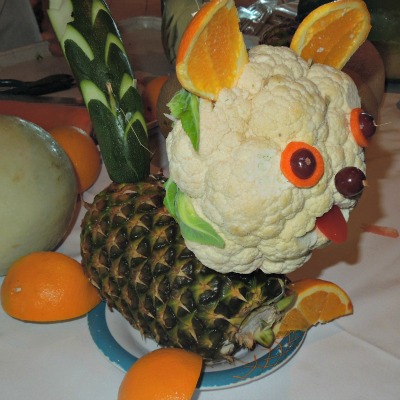
Side view of the puppy dog!

Use red pepper for the tongue and oranges for the ears and feet.

A decorative cut cucumber makes the tail!

Fruit & Vegetable Creations 12

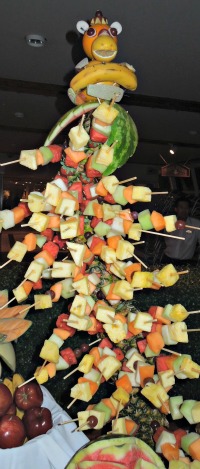
Fabulous way to present fruit kabobs!

What a way to present fruit kabobs!

Fruit & Vegetable Creations 7

Other creations seemed more difficult and I’ll post those later. Meanwhile, happy creating with fruits and veggies! I think the possibilities are endless! I’m going to try these for a special occasion! I think they would be great for a summer centerpiece, don’t you?

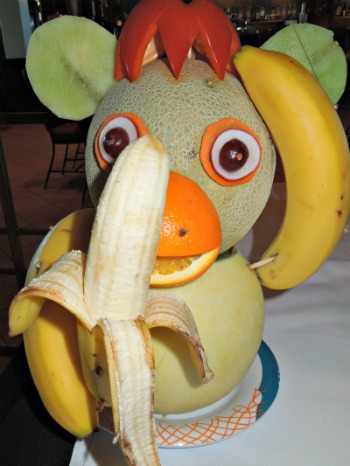
Smaller versions would work, too. Perhaps combining an orange and grapefruit instead of using a cantaloupe and making a smaller individual animal for a child.  

I love these fruit and vegetable animal creations! They make you smile, don’t they?

Thank you Royal Caribbean chefs for inspiring me!


Post linked here…

Posted in Misc., Recipes | Tagged , , , , , , , , , , , , , , , , | 14 Comments