You may also like.....
No related posts.
I used this as one of the activities for our “Oma and Opa” Camp. I will use it again at Christmas time for an indoor game only I’ll use pom-poms.
First take a paper cup (I used a hot/cold 7 oz cup left over from 4th of July)
Cut out the bottom of the cup.
Slit the bottom of the balloon.
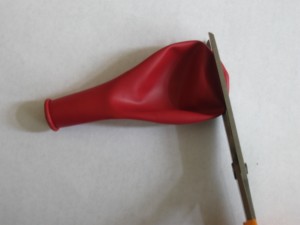 Tie a knot at the blow-up end and stretch the cut end over the cup. Put a little glue under the balloon to keep the balloon in place.
Now, set up some targets, bowls or hula-hoops to shoot at or through. See how high and how far they can shoot. Shoot the marshmallow up and catch it in their mouth. I’m sure you can think of lots of crazy things to do!
Using pom-poms in the house would also work. I will use these at Christmas with some holiday targets. I can just see having a “snowball” fight with white pom-pom! Set a timer and the team that has the most pom-poms on their opponent’s side wins!
This idea was from cometogetherkids.com
A fun, easy idea! Try it!
Many people have asked me for the photobook & photo card sites that I have used for making all my books and cards. I have used many sites.The following is a list and their links. What I recommend is to register on each site. They will usually send you offers of free or discounted books. I always look for those offers and try to take advantage of them. The memories are priceless, but my pocketbook likes the free or discounted offers! Don’t you? Besides using them for grandchild memories, I like to make photobooks for myself and others, too! You can download your pictures to the sites, work on your book, save, and be ready to go when a good discount offer comes through.
I hope this list encourages you to try something new. If you are new to photobooks, just play around with the sites until you are comfortable with them. Many of them have an “automatic fill” choice, too. That is where they put your pictures in the book for you. You don’t have to buy them until you like how it looks and you push the “purchase” button. Have fun trying it out!
Besides making books, I love making cards for my grandchildren as they really get excited when they get mail. Just another memory maker!!! So check out the card making sites, too! I figure that when you pay $3-7 for a regular card in the store, receiving a personal one with their picture on it is much more special! Don’t you agree?
HINT: When making a book, collage or card, always hit “save” after each action. I have learned the hard way. You can always change it, but can’t get it back if lost, so “save” often as you go along!
Happy photobook, photo gift and card making!!!
Do you have other suggestions?
Thanks for stopping by,
Be sure to subscribe on the sidebar for future posts. Your email is never sold or shared!
Follow on Pinterest and Bloglovin, too!
Sometimes you need to change things up a bit. Mealtime might be the same ritual each night. Why not change it up with a few ideas for family fun at mealtime? Make it memorable and different. Try something new each month and make it a lasting memory. Take pictures and get into the fun!
1. Hat Night
Wear or make a hat to wear to the dinner table. Be as crazy as you can. Decorate a hat you already have or make one from a paper plate, paper bowl, newspaper or whatever you might have on hand.
2. Make a Card Night
Assign each a member of your family. Put names in a hat and draw one out for the next evening. Make a card for that person and tell what is special about them. Share at the dinner table the next night.
3. Backwards Night
Wear an item of clothing backwards to the dinner table that night. Item choices could be t-shirt, shorts, hat, etc. Good for some laughs! You could even have the meal backwards – dessert first!
4. Random Acts of Kindness Night
Put names in a hat and draw one out for the next evening. Anytime during that next day, secretly do some kinds acts for that person. It could be picking up their clothes, making their bed, making a card for them, putting away a toy they left out, letting them play with something special of yours or whatever kind idea they can find to do. At the dinner table, each person tells what it is that they did for their person. When my kids were young, I found they spent the day looking for kind things to do for the other person and not always thinking of themselves.
5. Joke Night
At dinner, be ready to share a joke. With little kids, Mom or Dad can help with this.You could have a jar filled with jokes and riddles and each draw one out.
6. Fancy Dinner Night
Get out the good china and have the kids help set the table. Use goblets purchased at the dollar store so you’re not afraid if they break. Let the kids be in charge of a nice centerpiece or you can help them make something by arranging flowers or using a plant. Use special napkins and have them make the table look great. Stress good manners, On this night, kids can help Mom be seated and push the chair in for others, etc.
7. “Restaurant at Home” Night
On this night, Mom and Dad are the waiter or waitress. Tell them what the “special” is for the night and take their order. At the end, present the children with a fake bill. When the kids know the routine, they take their turn being the waiter or waitress the next time. Be sure to refill the water glasses, too!
8. Glasses Night
Decorate a pair of sunglasses or find some crazy glasses to wear to dinner. Use pipe-cleaners, glue, tissue paper to decorate existing glasses or make some out of cardboard, pipe cleaners, tag-board etc, and decorate with markers.
9. Theme Night
This could be Mexican, Italian, Chinese or any theme. Serve food that is from that country and have the kids make some decorations that would go with the dinner. For Mexican night, they could make some tissue paper flowers. On Chinese night, get some chop-sticks for the kids to try. Talk about that country and what it might be like to live there.
10. Make your own dinner night!
On this night you could do foil packet dinners. (I call this a hobo dinner.) Give each person a piece of foil. With shiny side in, spray with a non-stick spray. Layer hamburger, par-boiled diced potatoes, spoonful of cream of mushroom soup, onions, mushrooms, frozen vegetables or Veg-all and cheese. Each one chooses their own ingredients and then wraps the foil in a pocket. Place in oven @350 for 20-30 minutes. There are many foil desserts that each one could make, too. Check out my other posts for Banana Boats.
11. Crazy Hair Night
Use gel and let them make it crazy for the dinner that evening. It is good for laughs! Be sure to take pictures. For those with short hair, wear a wig!
12. Pajama Dinner
Everyone gets ready for bed early and eats in their pajamas. (I probably wouldn’t recommend this if you have company! HA!) This could be combined with a popcorn and movie night!
13. “Red” Night (or Blue, Green, Orange, etc.)
Pick a color and everyone should wear something that color for dinner. Even your food could go with that color. Red: red meat, strawberries, beets, cherries, watermelon or red velvet cake for dessert.
14. Winter picnic
Spread a blanket by the fireplace (or use a pretend fireplace) and have a picnic. Kids will think this is so much fun! Serve hotdogs with all the fixings.
15. Funky Night
Dress “funky” with mismatched clothes, colors, shoes, hats, etc. Anything goes! Serve mismatched food! (Chinese with spaghetti, etc.)
Rotate the different suggestions each week or month to make fun memories! Be sure to take pictures!
What do you do for fun at mealtime?
Share your ideas!
Enjoy!
Phyllis
Follow on Pinterest or subscribe on the sidebar. Your email is never shared or sold!
Linked to these parties…
The theme for the 4th year of Oma and Opa Camp (Dutch for Grandma and Grandpa) was “GOD’S COLORFUL WORLD“. All the crafts were about color. The Bible stories included a “color” theme as well. First, I used the story of Noah and the rainbow promise that God made. The second story was Joseph and his coat of many colors. We spent a day at a local water park called Wild Mountain. Of course at the end I made a photo-book for each child. This book is a reminder of all the fun experiences we had together. If interested, you can look at this link. http://www.artscow.com/gallery/book/oma-and-opa-camp-2012-tjm38flshni4
You can register through this link and receive free photos and 6 free book credits. http://www.artscow.com/?Ref=500841
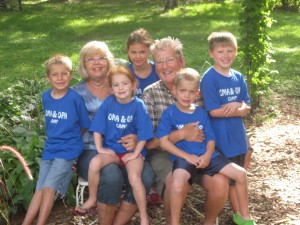 The grandchildren are getting older (so are we) and I needed to capture the 3 boys’ attention and not just appeal to girls. The crafts I chose worked well and both girls and boys loved doing them! I taught them the colors of the rainbow and the order that they appear. Each child got a prism so they could bend the light and see the colors. ROY G. BIV (red, orange, yellow, green, blue, indigo, violet) is a good way to remember the order. I ordered the prisms through www.sciencecompany.com at $5.95 each. They had a great time looking through them even if it was a little expensive.
Crafts, Activities and Food
1. Color Wheel:
This was an activity where they learned to mix the 3 primary colors to make the secondary ones. I found this idea on Pinterest and downloaded the files from www.mama-jennblogs.com I located eye-droppers in the pharmacy dept. of a chain store and ordered liquid water colors from www.discountschoolsupply.com The liquid water colors will last for other projects as well. They are much more intense and fun to use than the regular watercolor tins. Just remember to rinse the eye- droppers in between with clean water. The chart tells you exactly what color and how many dots to mix to get the new color.
I had made these before out of pvc pipe, but I couldn’t find all the parts that I needed so I searched online and found everything in one package at www.discountschoolsupply.com I couldn’t have done it cheaper by buying the individual pieces. Everything was there in a kit with complete directions and they sold for $12.95 dozen/pack. You can’t go wrong with that! The only thing I added was some stickers for decorating the outside. They had so much fun making them, they wanted to make two.
I used metal cookie cutters and placed them on a cake pan or cookie sheet. The boys liked the bug, cars, planes and geometric shapes. The girls liked the hearts and flowers. Place the plastic beads (I used translucent pony beads) side by side and touching. Make a design or just do it randomly. See the “suncatcher” post on this site for complete directions.
This color craft taught them about how to make tints by adding white and shades by adding black. Complete directions are on “Color Spinners” post. After completing the coloring, they twisted them to make them spin. They could see the new colors made. I taught this lesson at school, but don’t know where it came from or I would give it the credit due.
After learning about the colors in light and the order that they appear in the rainbow, we made rainbow cupcakes. Using primary icing food colors (found at Michael’s in the cake decorating aisle), I divided the white cake batter into seven bowls. With only the primary colors, they had to decide how to make each color. The kids mixed the colors and placed them in order. They put a spoonful of each color in a cupcake liner. After baking and cooling, I put a topping of Redi-Whip on each cupcake. They thought they were incredible! So fun to see all the colors in one bite!
These were so easy to make and we used them for target practice, long distance and seeing who could shoot the highest. I will use these again with pompoms at Christmas time. Again, I found this idea on Pinterest. Check my “marshmallow shooter” post for easy directions. I used colored marshmallows! That way I made it fit with the theme! HA!
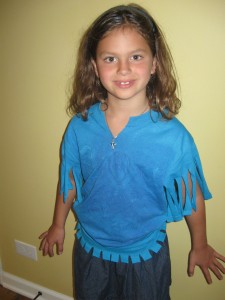
7. Spray Painted Shirts:
While the kids enjoyed this, I would change this if I did it again. It would be better with a light-colored shirt using spray paint about 3 shades darker. I followed the directions on my Pinterest board, but let the flour and water mixture stayed on until the next day as we were so busy. That was the mistake as we should have painted them one hour later. I had to wash the shirts to remove the paste. Also, the paint soaked under the paste so there wasn’t a clear definition of the design. Oh well! I learned that I always need to try it first! Lesson learned. At least the kids had fun doing it and didn’t mind the outcome.
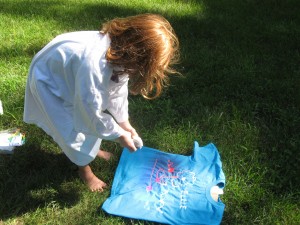
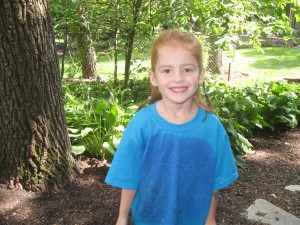 The girls added glitter spray paint to their design. As you can see, the design didn’t turn out very visible. With a little change, the shirts turn into a more fashionable design. See “t-shirt” post for directions.
8. Jolly Rancher Suckers:
Place Jolly Rancher candies (2 or 3) on parchment paper and melt in 200 degree oven for 5 minutes. Just before they are all melted, add a sucker stick and twist to get it into the candy. Finish melting, remove and cool!
This was at their request so we made them again. Be sure to use a freezer quart bag! Directions are on Oma and Opa Camp 2010 post.
I got color samples from a paint department and punched a hole at the top and laced with yarn. This way, they could flip through the samples easily. I sent them off with a camera to find things in nature that matched the colors. They went all over the yard and took pictures of the matches they found. Once the match was found, they crossed off the color and hunted for more. I called time after 20 minutes. They kept busy the entire time.
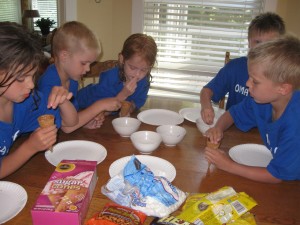
Using sugar cones, I gave them chocolate, peanut butter,and butterscotch chips, mini-marshmallows, and butter-brickle bits. They added them to the cones (about half full) and placed them on their sides and wrapped them in foil. We put them in the oven at 300 degrees for about 15 minutes. We let them cool to touch and added ice cream on top!
 12. Turkey/Chicken Cheesy Pockets:
I like to use recipes where the kids can take part. My daughter-in-law gave me this one and they all ate it! Not bad for some picky eaters! They had to roll out the dough, place the mixture in the center and then fold it over and seal it. They tasted delicious! I thought they could be used as an appetizer as well. Check the post on “Cheesy Pockets” for the recipe.
13. Songs:
When in the car, the time goes faster while playing upbeat fun Christian songs. They sing them out and it is such fun to hear their voices altogether. Their favorites this year were from two VBS CD’s that I bought. “A-M-A-Z-I-N-G“, “Remarkable”, “You, You, You”, and “Our God”. Check the post on Best Children’s Christian Music for the links and you can listen to them and see the motions on Youtube, too.
14. Bible Story Time:
Noah – Genesis 6
In this story, I highlighted how hard it must have been for Noah to follow God when there was evil all around him. Also, how hard it must have been to build the ark, follow God’s exact instructions and trust God not really knowing all that God was going to do. After the flood when Noah and his family set out on the dry earth, God sent a rainbow as a promise that he would not send such a flood again. It was an everlasting promise between God and every living thing on the earth.
For us, it can be hard to follow God when others make fun or try to get us to do things we know God doesn’t want us to do, too. Just like Noah, we need to listen to God and His word. God knows what is best for us.
Joseph – Genesis 37-47
The story of Joseph is a long one. I used a Children’s Storybook version with pictures. I also told this in three parts. I love this story and there are so many lessons to be learned. I emphasized how sometimes Joseph showed-off with his coat and his dreams. The brothers got mad, became very jealous and made some bad choices. Even though Joseph went through very tough times, God worked good out of a bad situation.
After praying and thanking God for the day, we sang our blessing on the kids and off to bed they would go!
Oma and Opa Camp was successful with all the fun, songs, activities, and field trips! Wow!! Oma and Opa needed a rest!