Amazing Stuffed Jalapenos Recipe

While visiting in Arizona, we had an extended family get-together which grew to over 70 people! One of the relatives brought these Amazing Stuffed Jalapenos! Now, I’m from the midwest and don’t like really hot spicy food, but these were absolutely delicious! My second-cousin, Beth, graciously shared this recipe.


Amazing Stuffed Jalapenos

Great Jalapeno Poppers!

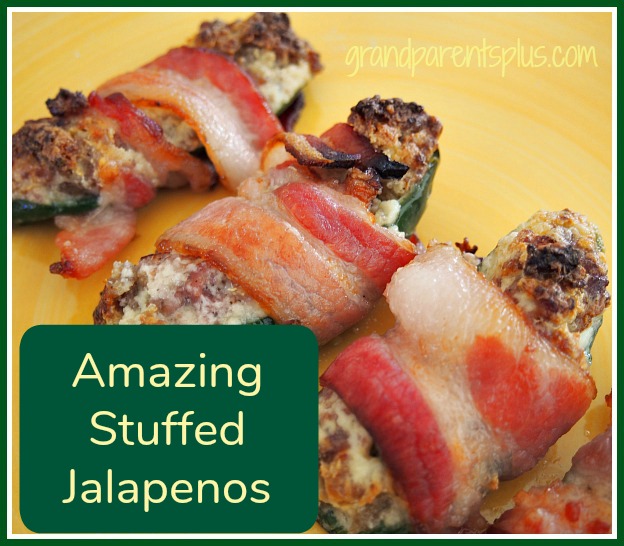
The recipe makes a generous amount of appetizers, but people absolutely love them and they really go fast. So, plan accordingly. They’re stuffed with a combination of sausage, cream cheese and parmesan cheese. Then, they’re wrapped with bacon. Ooh, my mouth just waters thinking of them. Please don’t shy away from this recipe because you might think of it as way too spicy. You can control the amount of heat. If you want it spicier, just leave some pulp, seeds, or use a spicy sausage for the stuffing. Make one batch spicy and another fairly mild, just to please everyone.

 Click on the “YUM” button to add to your recipe box.

Amazing Stuffed Jalapenos

Ingredients

  • 15-20 jalapenos
  • 1 lb. breakfast sausage (I used Jimmy Dean)
  • 1 pkg. of cream cheese
  • 1/2 cup shredded parmesan cheese
  • 1 pkg. bacon

Instructions

  1. Brown and crumble sausage.
  2. Melt cream cheese in with sausage and add parmesan cheese.
  3. WEAR GLOVES
  4. Halve jalapenos, lengthwise
  5. Remove stem and remove seeds and pulp
  6. Fill with sausage mixture
  7. Wrap with 1/2 slice of uncooked bacon
  8. Bake at 425 degrees for 25-30 min.
  9. If you want bacon really crisp, broil on high for 2-3 minutes.
  10. Serve immediately.
Schema/Recipe SEO Data Markup by Yummly Rich Recipes
https://grandparentsplus.com/amazing-stuffed-jalapenos-recipe/

I wanted my family to taste these and give me their opinion. I didn’t want to make the entire recipe for just a couple of people, so  I made half and refrigerated the sausage-cream cheese combination and made the rest two days later. It was nice to have them fresh-made two times in a week.  By the way, the family opinion was that they were AMAZING!

These are ready for the oven…..   I baked these Stuffed Jalapenos on foil for an easy clean up.

Amazing Stuffed Jalapenos


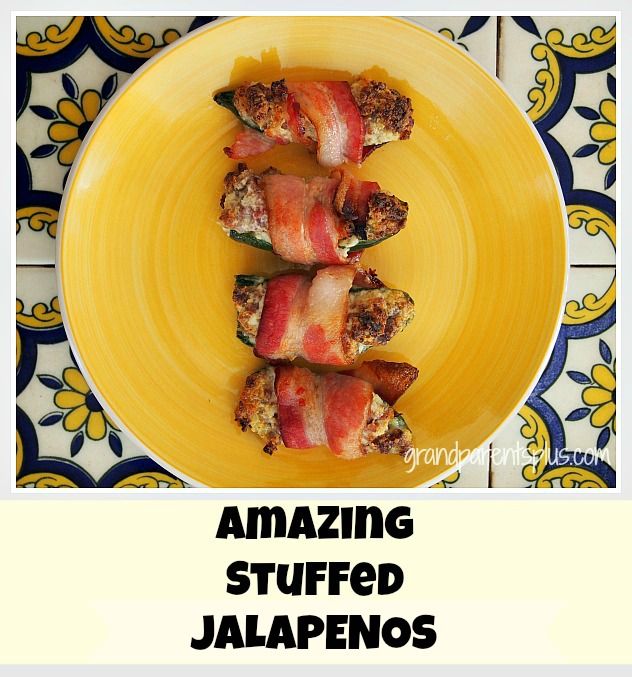
Baked at 425 degrees and ready to eat!

Amazing Stuffed Jalapenos


Just wait until you taste one…..you’ll be amazed at how delicious they taste! These are perfect for Cinco de Mayo, too, when you’re looking for something Mexican to serve.

Amazing Stuffed Jalapenos


I hope I’ve convinced you how delicious these appetizers taste. They were a big hit at the family get-together!

Enjoy!

Phyllis

Subscribe on the sidebar knowing that your email is never shared or sold.

Follow on Pinterest..

post linked to these parties….

Posted in Appetizers, Recipes | Tagged , , , , , , , , , | 15 Comments

Zucchini Orange Bread Recipe

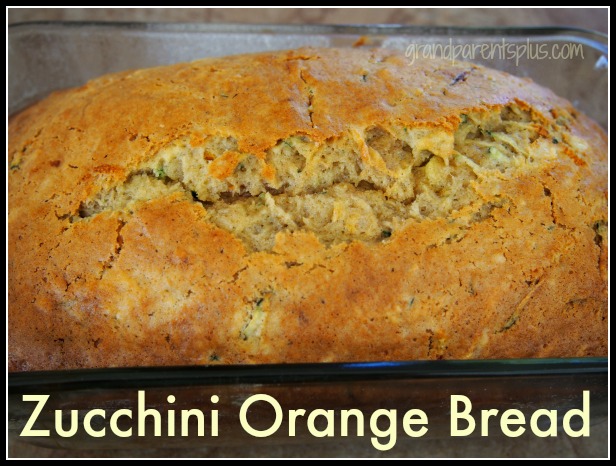
Zucchini Orange Bread

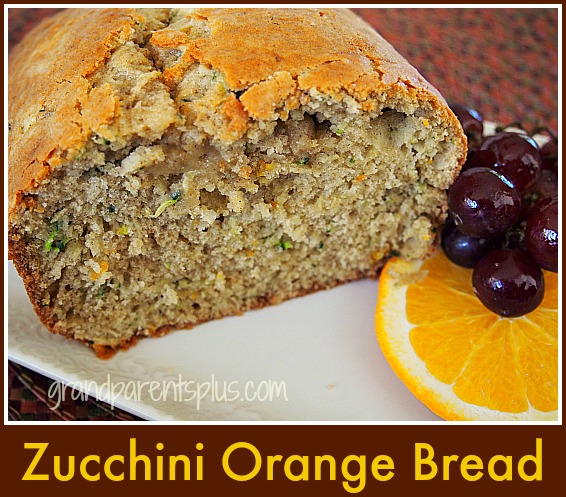
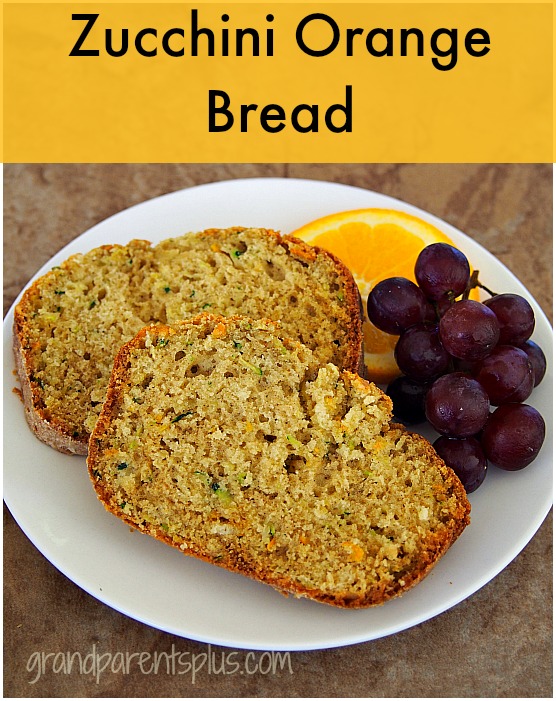
A zucchini bread with a hint of orange? Yes, it’s a delightful addition to zucchini bread! Zucchini Orange Bread is a tasty change from the usual zucchini breads. The light orange flavor comes from orange juice and orange peel.

Zucchini Orange Bread grandparentsplus.com

Perhaps you have some zucchini frozen. If not, buy some fresh from the grocery store. Don’t wait for your crop of zucchini to come in the fall to make this bread. Bake some this week!


Zucchini Orange Bread Recipe

Ingredients

  • 4 eggs
  • 1 1/2 cup sugar
  • 3/4 cup oil
  • 2/3 cup orange juice
  • 2 cups shredded zucchini
  • 3 1/4 cups flour
  • 1 1/2 tsp baking powder
  • 1 1/2 tsp baking soda
  • 3 tbsp. grated orange peel
  • 1 tsp. cinnamon
  • 1/4 tsp. ground cloves

Instructions

  1. Preheat oven to 350 degrees. Grease and flour two 8 x 4 loaf pans.
  2. In a large bowl, beat eggs until thick and lemon colored.
  3. Gradually beat in sugar
  4. Stir in oil, orange juice, shredded zucchini, flour, baking powder, baking soda, salt, cinnamon, cloves and orange peel.
  5. Mix until well blended.
  6. Pour batter into prepared pans,
  7. Bake for 45-55 minutes.
  8. Let cool for 10 minutes and remove from pans.
  9. Cool on wire racks.
Schema/Recipe SEO Data Markup by Yummly Rich Recipes
https://grandparentsplus.com/zucchini-orange-bread-recipe/

Be sure to click the Yummly button to add it to your Yummly recipes!

This recipe goes together quickly and produces two nicely shaped loaves. This is a wonderful alternative to chocolate zucchini bread, too. It’s a vegetable, right? 

Zucchini Orange Bread grandparentsplus.com

I know your family or guests will enjoy this bread! I like having quick breads in the freezer ready to use.  I pre-slice them before freezing so I can take out only what I’ll use.

Zucchini Orange Bread grandparentsplus.com


Zucchini Orange Bread! Vegetable and fruit together! Do you agree?

Phyllis

I urge you to subscribe on the sidebar so you don’t miss a future post! Your email is never sold or shared.

Follow on Pinterest, too.

linked to these parties…


Posted in Bread/Muffins, Recipes | Tagged , , , , , , | 25 Comments

Oma and Opa Camp 2015

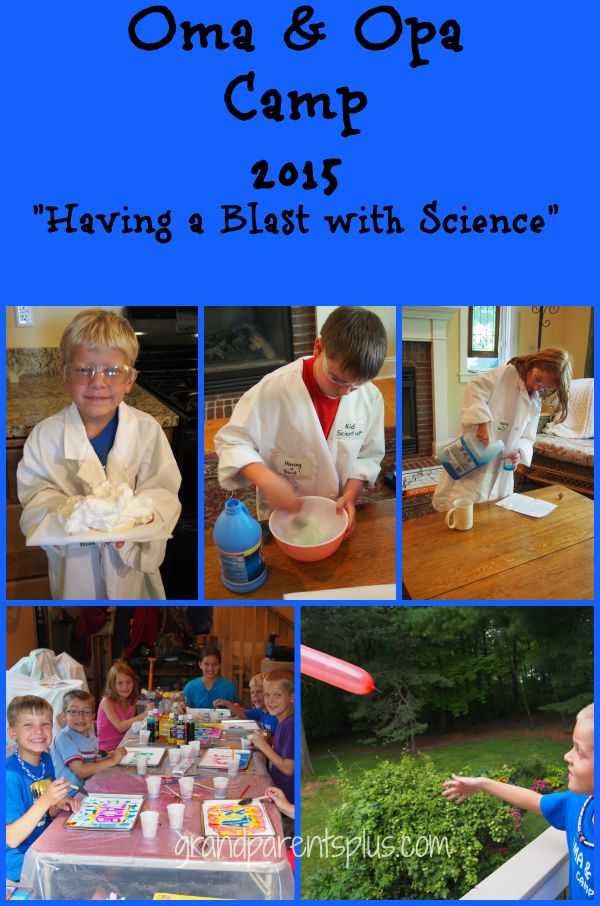
Oma & Opa Camp - Having a Blast with Science grandparentsplus.com

Oma and Opa Camp ( Grandma and Grandpa Camp or Cousin Camp) was held late in the summer last year. In fact, it was the week before school started. We always try to find a date where the three families’ kids can come, but so much was going on that we were lucky to get a time that worked. That is why this post never got done before the summer ended.

The kids were excited about the theme. When I announced the theme, “Having a Blast with Science”, I asked the kids to come ready to do an experiment of their choice, bring what they needed, and be able to explain what happened and why.  I gave the parents several sites to check out. When someone decided on an experiment, no one else could do the same one. These are some of the sites I suggested…

www.sciencekids

www.sciencebuddies 

www.pbskids

www.scifun

www.hunkins

www.green-planet-solar-energy

www.teacherstryscience

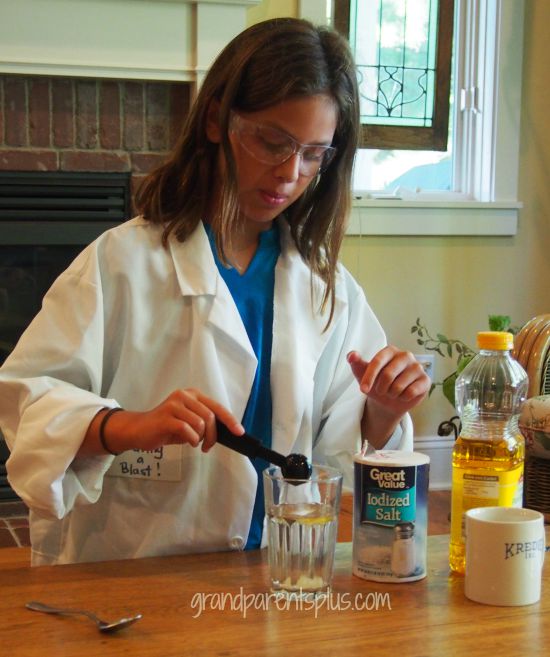
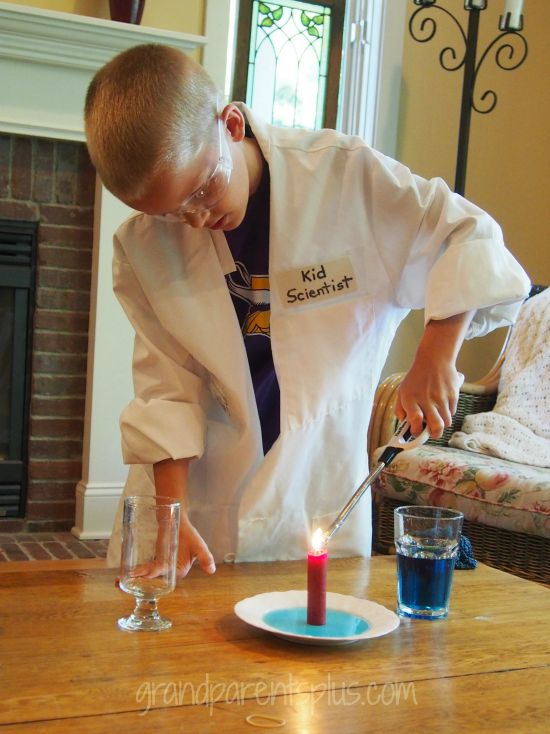
I was able to find a lab coat (a little big) and put the label on the pocket “Kid Scientist”. On the other side I put the theme, “Having a Blast”. They, also, wore goggles. 

The first morning, I asked the 3 youngest to do their experiments. They took it very seriously. Carefully, they did their experiment and then explained what happened and why. After the first grandchild did theirs, the rest broke out in clapping and shouting “good job” spontaneously. When the three youngest had finished, they all wanted to continue, so we spent that morning with each one doing theirs. It was so much fun and they did an excellent job.
Oma & Opa Camp Having a Blast with Science grandparentsplus.com


Oma & Opa Camp 2015 Having a Blast with Science grandparentsplus.com


Oma & Opa Camp Having a Blast with Science grandparentsplus.com

I took a picture of each one holding their experiment and framed them for a take home surprise.

Oma and Opa Camp Crafts:

The crafts had to do with experiments, too.

1. Art Experiment:

This showed what happens when water and oil are mixed.

Before they came, I outlined their name in bubble letters with a glue gun on a plain piece of water-color paper. They were to use water colors and paint their name. On the background around their name, they used a variety of water colors and then dropped cooking oil on the wet water-color paints and watched the reaction on their paper. The paints need to be very wet when you drop the oil for it to work. they all liked watching how the paint colors reacted. For complete directions, go to Watercolor and Oil Art.

 

Watercolor and Oil Art grandparentsplus.com


2. Catapult:

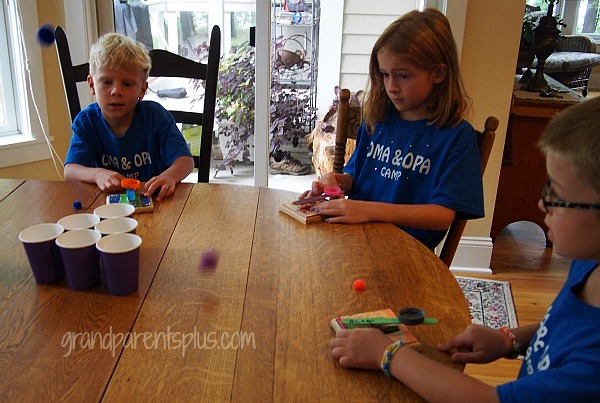
This  device is a simple machine. By pushing down on a flexed piece of wood, the energy is transferred to the object when released sends it flying off.

I must say, I tried several styles of catapults. All were too difficult for kids to actually put together and they threw the object into the ground and not in the air. (like the Kleenex box ones) I finally found one design that was simple to do and worked for a game, too. Go to How to make an Easy Catapult.
Oma and Opa Camp 2015 grandparentsplus.com


3. Tie-Dye Shirts:

The experiment on shirts was two-fold. First, we soaked the shirts in soda ash. Each year, the tie-dye shirts would fade after each wash. The soda ash is supposed to keep the bright colors so we’ll see if the experiment works. Secondly, we folded the shirts accordion way and added rubber bands at different places to see if it would result in stripes. It did! The soda ash worked, too! The shirts retained their color much better!

Oma and Opa Camp 2015 grandparentsplus.com

4. Making Plastic:

We made plastic from milk and vinegar! Crazy, but it worked. You could mold it, too. After a couple days of drying, it was hard plastic! Go to: Valentine Heart made with Milk and Vinegar


5. Balloon Launch:

At the Dollar Tree, I found long rocket balloons. We pumped air into them and let them go from the upper deck and watched how far they would fly. It was an experiment in jet propulsion! They had a blast watching them shoot up and all around.

Oma and Opa Camp 2015 grandparentsplus.com

Field Trips:

Science Museum:

With the science theme for our camp, this was a natural field trip. The museum, also, had different programs going on that kids participated in. They loved it.

Oma and Opa Camp 2015 grandparentsplus.com

Circus Juventas:

There is a program in our area where young people are trained in the circus arts and put on a fantastic show in the summer. It might have been a stretch with a science theme, but they used catapults and jumped through the air in all sorts of ways. The grandchildren absolutely loved it!

Water Park:

It was so hot last year for our Oma and Opa camp so we spent an afternoon at a water park pool. It was a nice way to cool off and have lots of fun! It fit with science as the slides were a simple machine called an incline plane. So were the stairs! HA! 

Devotions:

The verse for the week was James 1:17  Every good action and every perfect gift is from God.   At God-time together we talked about different ways that we know God is real. In the Old Testament, Elisha conducted an experiment to prove God was the one true God. Also, through nature we can see God’s handiwork. God’s gift to us, Jesus, is really the perfect gift in that we all can receive forgiveness for our sins through Him! We don’t have to experiment to know that Jesus died for us so that we could have eternal life in heaven with Him!

At the end, it was hard to say good-bye, but Oma and Opa needed a rest! HA! We had a BLAST!
Oma and Opa Camp 2015 grandparentsplus.com

I took lots of pictures of the fun times and made a photo book for each child at ArtsCow. If you register with them, they often send coupons for free books and other photo items.

Hope this gives you some ideas of things to do with your grandchildren or children during the upcoming summer.

Have fun and make memories!

Phyllis

Subscribe so you don’t miss new posts. Your email is never sold or shared!

Follow on Pinterest and Facebook.


Posted in Kid's Camp, Oma and Opa Camp 2015, Oma and Opa Camp 2015 | Tagged , , , , , , , , | 11 Comments

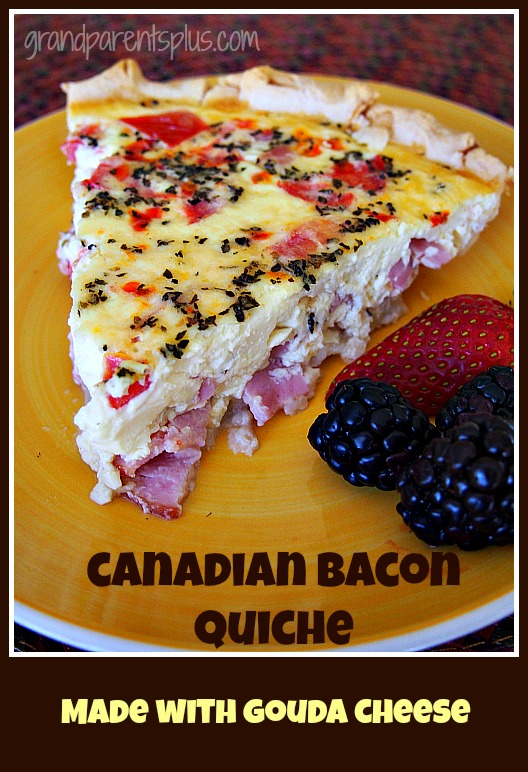
Canadian Bacon Quiche Recipe

You may think of this Canadian Bacon Quiche Recipe as a breakfast entree, but this is delicious as a brunch or lunch, too. In fact, a breakfast quiche works for a light dinner! Anytime is good for this quiche. This recipe is served at A Spot for Tea in Oklahoma City, OK, where it is a favorite.

Canadian Bacon Quiche grandparentsplus.com

You may have noticed that I’m on a “Gouda Cheese kick” as I have included it in a few of the last recipes posted. It has a wonderful flavor and it’s a nice change from cheddar. In my grocery store, it is included with the regular cheeses and you can buy it already shredded. If you can’t find it there, look in the specialty cheese section of your grocery store. 

To save this recipe in your Yummly box, just click on the YUM button.

Canadian Bacon Quiche

Ingredients

  • 4 eggs
  • 2 cups half and half
  • 1 tomato, seeded and chopped
  • 1 cup diced Canadian Bacon
  • 1/2 cup shredded Gouda cheese
  • 1 tsp garlic salt
  • 1 tsp pepper
  • 1 tsp dried basil
  • 1 9" unbaked pie crust

Instructions

  1. In a large bowl, combine eggs, half n' half, chopped tomatoes,diced Canadian Bacon, Gouda cheese, garlic salt, pepper, and dried basil.
  2. Mix well and pour mixture into unbaked pie crust.
  3. Bake for 50-60 minutes.
  4. Knife inserted should come out clean when done.
  5. Let quiche rest for 10 minutes.
  6. Cut and serve with fruit.
Schema/Recipe SEO Data Markup by Yummly Rich Recipes
https://grandparentsplus.com/canadian-bacon-quiche-recipe/


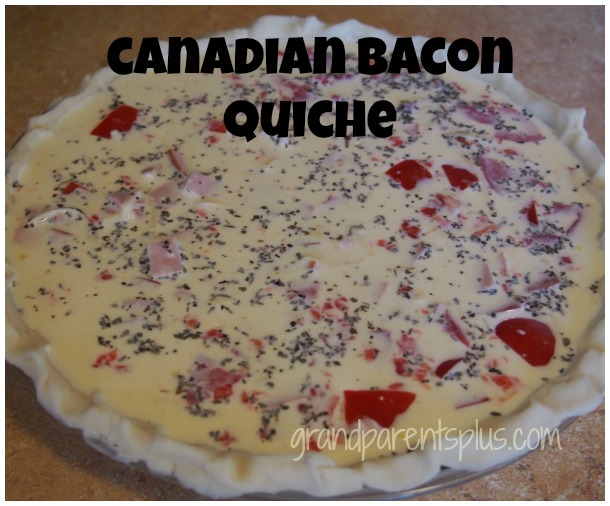
The Canadian Bacon Quiche is ready for the oven.

Canadian Bacon Quiche grandparentsplus.com


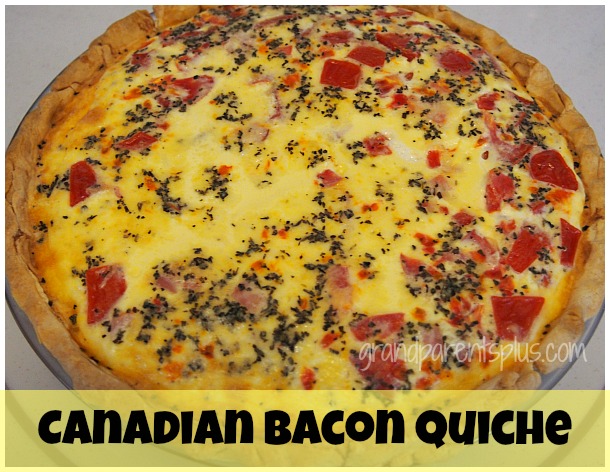
Done when a knife inserted in the center comes out clean.

Canadian Bacon Quiche grandparentsplus.com


What makes this Canadian Bacon Quiche so easy is there is no frying of bacon ahead of time and all the ingredients go together quickly. Canadian bacon is a nice change from bacon and the Gouda cheese is delicious in this quiche!

Canadian Bacon Quiche grandparentsplus.com

Try it and I know you’ll like it!

Enjoy! 

Phyllis

I hope you subscribe so you don’t miss a future post. Your email is never sold or shared.

Follow on Pinterest, too.

linked to these parties…

Posted in Main Dishes, Recipes | Tagged , , , , , , , | 19 Comments

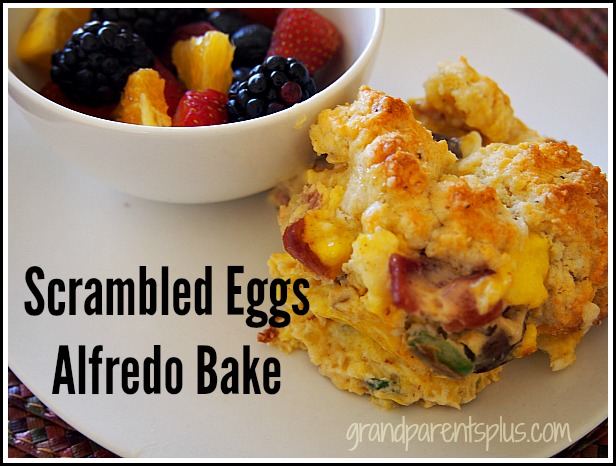
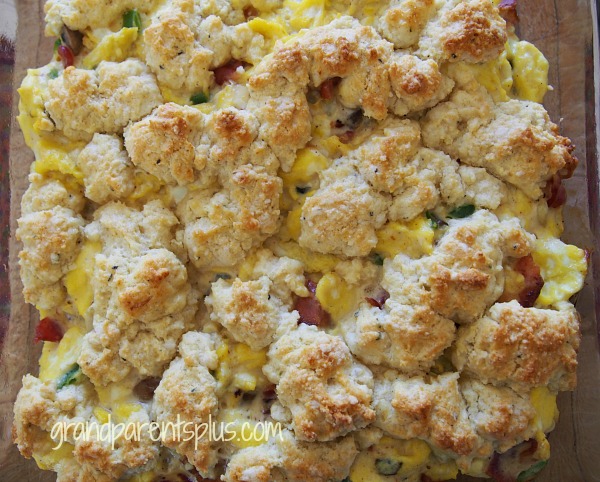
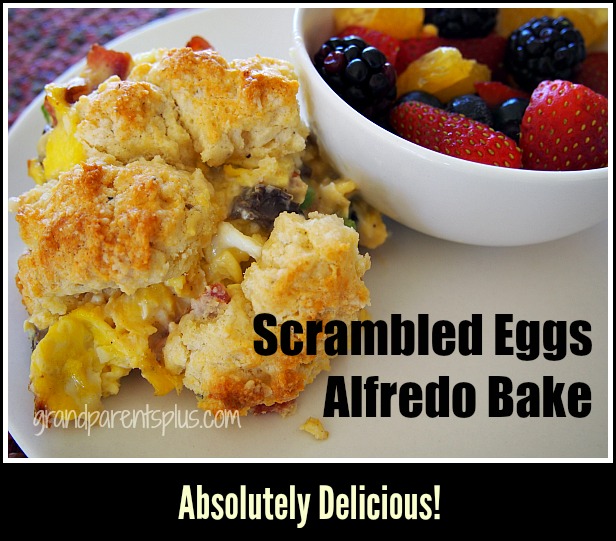
Scrambled Eggs Alfredo Bake

Scrambled Eggs Alfredo Bake

Scrambled Eggs Alfredo Bake


Add a bit of Italian flavor to your morning with this Scrambled Eggs Alfredo Bake Recipe.  This is a very different type of egg bake from the soggy bread recipes. The eggs are scrambled with green pepper, mushrooms, onions, and bacon with an Alfredo sauce added. The delicious combination is topped with dollops of an Italian flavored crust. Keep this recipe on hand as it is a delicious one. By eliminating the crust, it becomes gluten-free and still is wonderful!

Add this recipe to your Yummly box by clicking on the YUM button.

Scrambled Eggs Alfredo Bake

Prep Time: 20 minutes

Cook Time: 15 minutes

Yield: 6-8

Ingredients

  • 1 c. Bisquick baking mix
  • 1/4 tsp. Italian seasoning
  • 6 tbsp. butter, divided
  • 13 eggs, divided
  • 1/4 chopped onion
  • 1/4 c. chopped green bell pepper
  • 1/4 cup chopped fresh mushrooms
  • Salt and Pepper to taste
  • 1/3 cup crumbled, cooked bacon
  • 3/4 cup Alfredo pasta sauce

Instructions

  1. Preheat over to 400 degrees
  2. Grease 8x8 baking dish
  3. In a small bowl, add Bisquick, 4 Tbsp butter and Italian seasoning. Blend with a pastry blender until mixture is crumbly. Add 1 egg and stir in gently. Set aside.
  4. In a skillet, over med. heat, saute' onions, peppers, and mushrooms in 2 tbsp. butter, until veggies are tender, but crisp.
  5. Mix 12 eggs together in a bowl.
  6. Add eggs to skillet with the veggies.
  7. Stir occasionally until eggs are set.
  8. Remove from heat and stir in bacon and Alfredo sauce
  9. Spread egg mixture in the prepared 8x8 baking dish.
  10. Plop small dollops of Bisquick mixture over eggs.
  11. Bake for 15 minutes until the topping is light brown.
Schema/Recipe SEO Data Markup by Yummly Rich Recipes
https://grandparentsplus.com/scrambled-eggs-alfredo-bake/


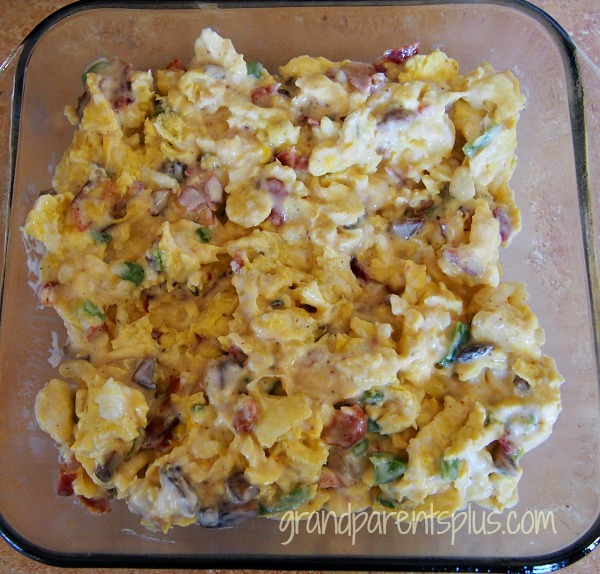
Scrambled Egg Mixture in Baking Dish……

Scrambled Eggs Alfredo Bake grandparentsplus.com

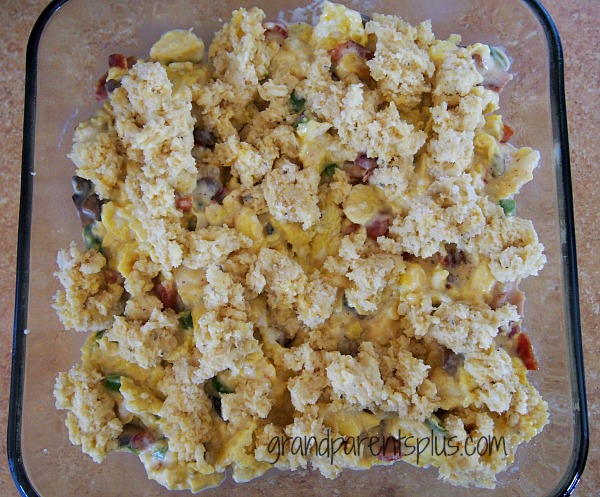
Dollop the Bisquick mixture on top of the eggs.

Scrambled Eggs Alfredo Bake grandparentsplus.com

Remove when topping is lightly browned.

Scrambled Eggs Alfredo Bake grandparentsplus.com

If desired, offer remaining warmed Alfredo sauce on the side. Serve with fresh fruit for an outstanding breakfast or brunch.

To shorten the prep time for the morning, cut the veggies and prepare the bacon the evening before. Cover and place in refrigerator. Now, it is so quick and easy to put together in the morning.

This recipe makes a nice option for a holiday brunch. Also, if you like breakfast for dinner, make it in the evening. Anytime is good for this Scrambled Eggs Alfredo Bake.

Scrambled Eggs Alfredo Bake grandparentsplus.com

Without a doubt, I know you’ll enjoy this “out of the ordinary” egg bake.

Thanks for taking the time to stop by….

Phyllis

When you subscribe on the sidebar, know that your email is never sold or shared.

Follow on Pinterest, too.

linked to these parties…


Posted in Main Dishes, Recipes | Tagged , , , , , , | 9 Comments

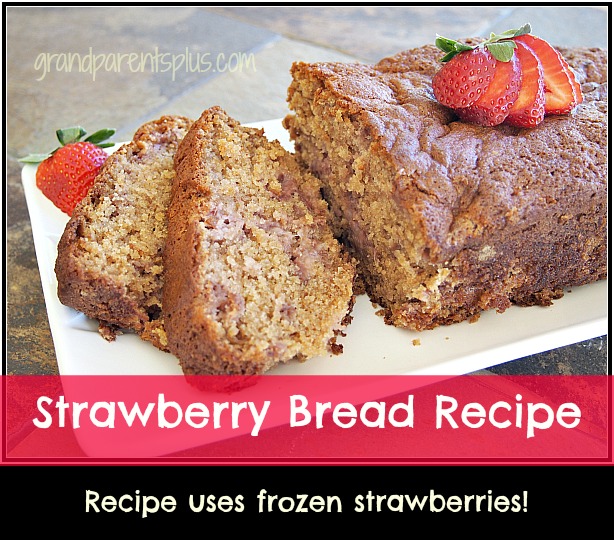
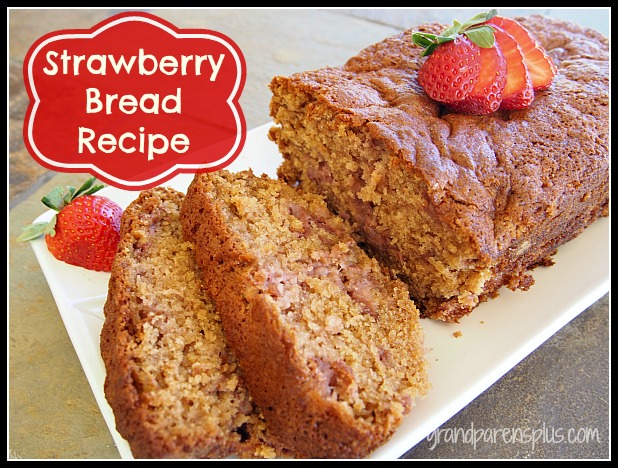
Strawberry Bread Recipe

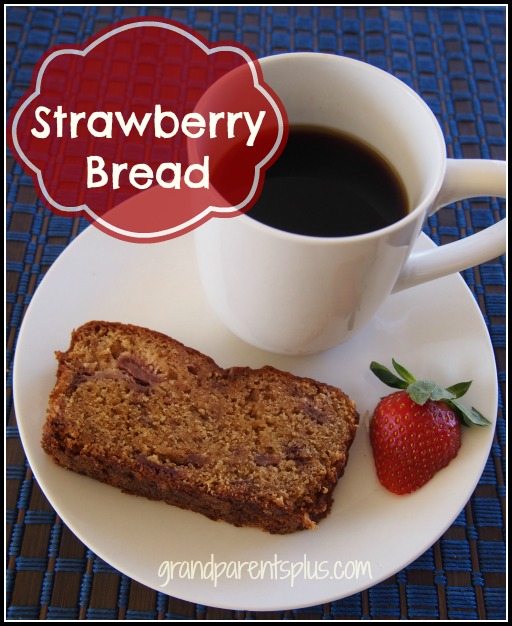
This Strawberry Bread Recipe comes from the Rose Mountain Manor Tea Room in California. I’ve change it just a bit so it has enhanced strawberry flavor using a bit of strawberry jello. The recipe makes one 5 x 9 loaf. It may not be strawberry season, but don’t worry as this recipe uses frozen strawberries which are easily available at your grocery store.

Strawberry Bread Recipe grandparentsplus.com


Strawberry Bread Recipe

Strawberry Bread Recipe

Ingredients

  • 1/2 cup butter, softened
  • 1 cup sugar less 2 Tbsp.
  • 2 Tbsp. strawberry jello (my addition)
  • 1 tsp. almond extract or imitation strawberry extract (my addition)
  • 2 eggs, separated
  • 2 cups flour
  • 1 tsp. baking powder
  • 1 tsp. baking soda
  • 1 (10 oz.) pkg. frozen strawberries, thawed

Instructions

  1. In a large bowl, cream together butter, sugar, jello and extract. Add egg yolks to butter mixture, one at a time, until light and fluffy. Sift in flour, baking powder and baking soda and mix well.
  2. Drain juice from strawberries saving 1/4 cup juice. Add the juice to mixture and fold in drained strawberries. In a separate bowl, beat egg whites to stiff peaks. Fold egg whites into mixture and spoon mixture into a greased 5 x 9 loaf pan. Lightly drop pan to release any air bubbles.
  3. Bake 50-60 minutes at 350 degrees. Bake until a toothpick inserted in center comes out clean. Remove bread from pan after 20 minutes.
  4. Let bread cool completely before slicing.
Schema/Recipe SEO Data Markup by Yummly Rich Recipes
https://grandparentsplus.com/strawberry-bread-recipe/

Be sure to click the “YUM” to save to your recipe board.

Strawberry Bread Recipe grandparentsplus.com

This recipe freezes well. It’s great to have on hand for a quick addition to breakfast, afternoon tea, brunch, or snack. Add a cup of coffee or tea and you have a wonderful, tasty afternoon break!


Strawberry Bread Recipe grandparentsplus.com

If this bread is good enough to serve at a bed and breakfast, you know it will be a great recipe to try. 

Enjoy!

Phyllis

Subscribe so you don’t miss a post. Know that your email is never sold or shared.

Follow on Pinterest, too.

linked to these parties….


Posted in Bread/Muffins, Recipes | Tagged , , , , , | 29 Comments

Chicken-Pear Salad with Pear Dressing

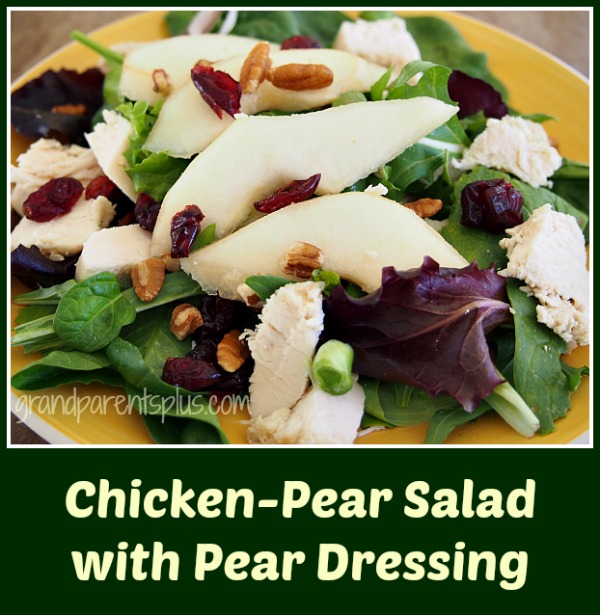
What a refreshing, delicious, lo-cal salad to serve! The Chicken-Pear Salad with Pear Dressing is a wonderful tasting combination of flavors with an easy homemade pear dressing. It looks delightful and tastes the amazing!

This is a close-up of the ingredients before adding the dressing. It’s such a pretty combination, don’t you think?

Chicken-Pear Salad with Pear Dressing grandparentsplus.com

You can save this recipe to your Yummly account by just clicking on the “YUM” button! So easy!

Chicken-Pear Salad with Pear Dressing

Prep Time: 20 minutes

Total Time: 20 minutes

Yield: 4 servings

Ingredients

  • Chicken-Pear Salad with Pear Dressing
  • Recipe Type: Salad
  • Cuisine: American
  • Author: Nancy Heishman in Country Woman Magazine with my variations
  • Prep time: 15 mins
  • Total time: 15 mins
  • Serves: 4
  • A delicious, low-cal, colorful salad.
  • Ingredients
  • DRESSING
  • 3 Tbsp. light olive oil
  • 2 Tbsp. lemon juice
  • 1 Tbsp. honey
  • 1/4 tsp. salt
  • 1/4 tsp. ground ginger
  • 2 medium ripe pears, divided
  • SALAD
  • 8 cups fresh arugula or Spring Mix with Spinach greens
  • 2 cups cubed cooked chicken or turkey
  • 1/4 cup chopped pecans,
  • 1/4 cup dried cranberries
  • 2 green onions, sliced
  • Salt and pepper to taste
  • I

Instructions

  1. For dressing combine the first five ingredients in a blender or bullet. Take one pear and peel, halve, and core. Add to blender and process until smooth.
  2. Divide greens among four plates and top with chicken or turkey. Add dried cranberries, onions, pecans. Top with sliced pears (peeled or not) and sprinkle with pear dressing.
  3. Serve immediately.
Schema/Recipe SEO Data Markup by Yummly Rich Recipes
https://grandparentsplus.com/chicken-pear-salad-with-pear-dressing/
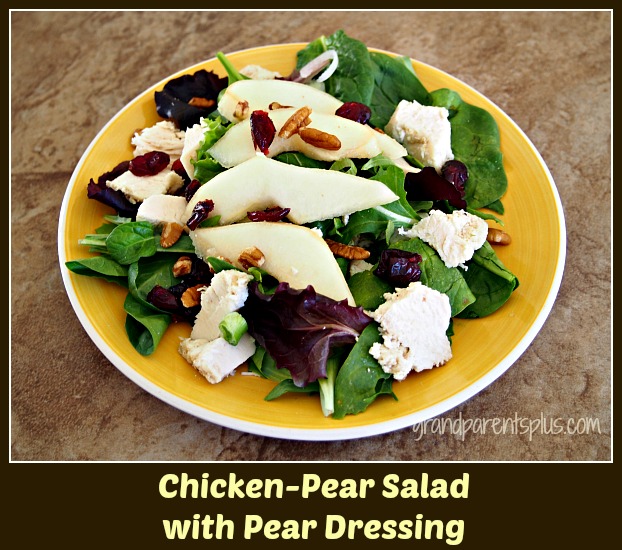
Another picture without dressing…

Chicken-pear Salad with Pear Dressing grandparentsplus.com

The ingredients for the dressing made a little more than 1 cup.  Since I made only two salads, I had leftover dressing. I used the dressing over fresh fruit and it was delicious!

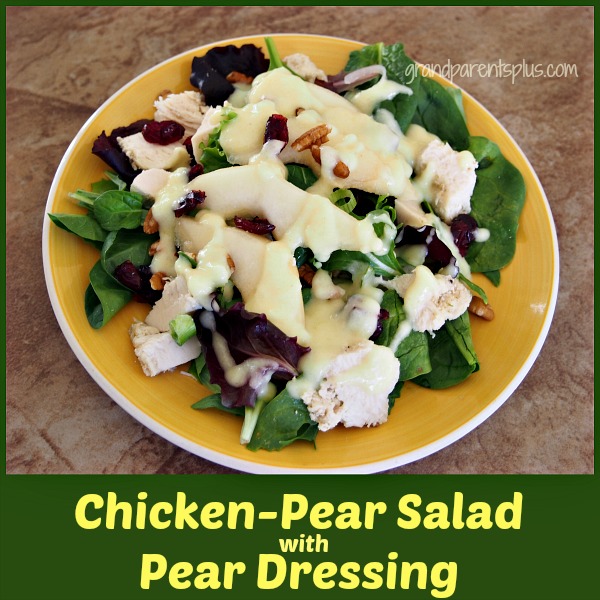
Salad with pear dressing drizzled over it……

Chicken -Pear Salad with Pear Dressing grandparentsplus.com

Put this recipe on your list of awesome salads.  Besides being colorful and delicious, it is low-cal, too! The salad is around 360 calories. 

Enjoy!

Phyllis

You’re invited to subscribe on the sidebar! Know that your email is never sold or shared.

Follow on Pinterest, too.

linked to these parties…..

Posted in Recipes, Salads | Tagged , , , , , , , | 16 Comments

Amazing Grace Easter Wreath

The Amazing Grace Easter Wreath says what Easter is really about. While I’m not against bunnies and chicks, Easter is really not about them, but about the amazing grace given to us through Jesus Christ, God’s son, by paying our sin debt on the cross. 

I’m thrilled to have found a source for the beautiful wooden crosses. I’ve made my own displays by cutting out paper letters and forming a cross, but this wood cut-out is beautiful to just hang by itself or use in a wreath. It greets your guests with the message of Easter.  They make a wonderful hostess gift if you’re invited out for Easter dinner.

Amazing Grace Easter Wreath grandparentsplus.com

I bought 3 Amazing Grace crosses at under $4 each. I thought I would need to paint them, but when they arrived, they looked absolutely fine without painting. That saved a step! Click on Artistic Supply to find them. They were quick on delivery, too! They have several different styles of crosses that would work if you would like a different style.

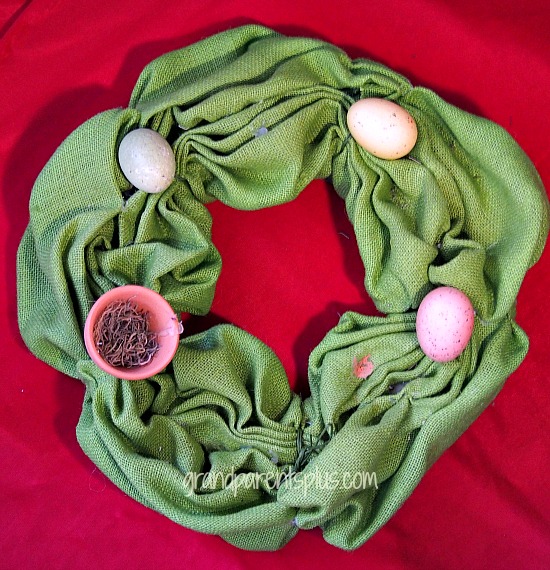
The first version I tried was working with this gathered green burlap wreath. I had bought it for a couple of dollars on clearance, as it was missing several pieces, and looked awful. For the money, I thought I could change it up into something worthwhile.  So, fixing some of the flaws, I used the cross in the middle and highlighted it with bunches of white lilies.

Amazing Grace Easter Wreath grandparentsplus.com

This wreath went from the above picture to the one below!

Amazing Grace Easter Wreath grandparentsplus.com

For the next design idea, it was simple, but tedious, to add the two types of ferns to the twig wreath. I had seen something similar and had the ferns at home, so just worked with it to tuck and glue the ends into the twigs.( A boxwood wreath works, too.) I simply added the cross in the middle. I felt it didn’t need any more than the simple greenery elegance to let the cross stand out. If you’re pressed for time, buy one!

Amazing Grace Easter Wreath grandparentsplus.com

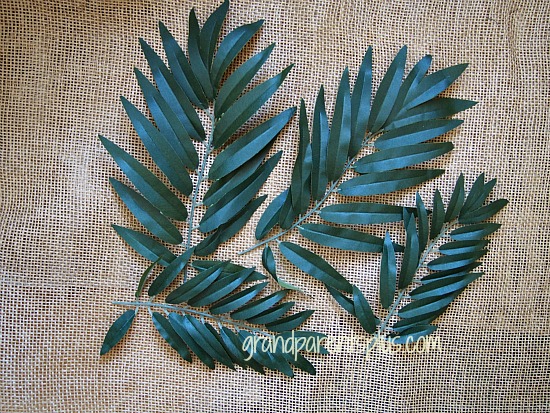
The third idea was to use palms for the base.

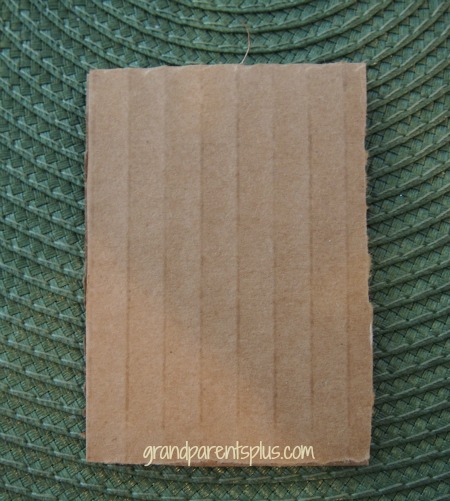
First, I cut a small rectangle from a cardboard box. I tried foam, but it stood out from the wall or door and I wanted it to be flush against the wall. The cardboard worked well.

Amazing Grace Easter Wreath grandparentsplus.com

I found a small artificial bush that had eight palm branches on it. It was around $9.00 at Michael’s, but a coupon took that price down. With eight, I could make two of them.

Amazing Grace Easter Wreath grandparentsplus.com


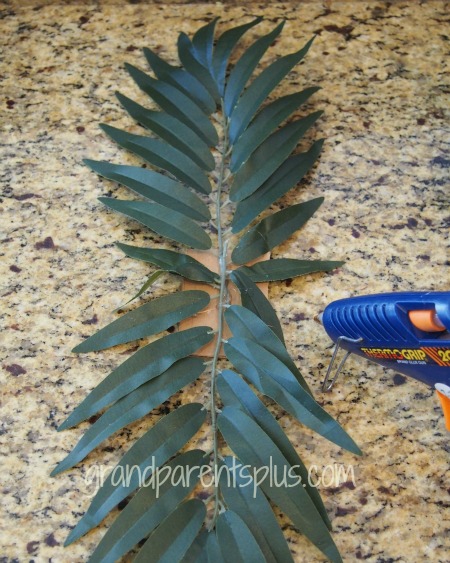
Using the glue gun, I secured the top and bottom palms on the cardboard.  Continuing  on with the other smaller palms, I glued them on horizontally forming a palm cross. Make sure that the top vertical palm part is slightly smaller than the lower part.


Amazing Grace Easter Wreath grandparentsplus.com

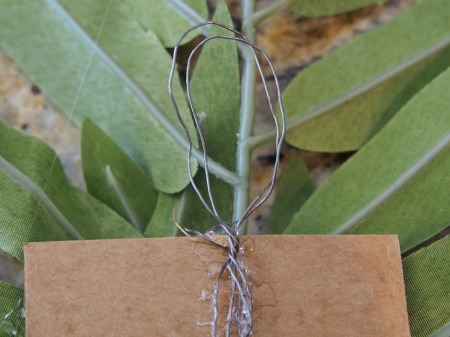
I twisted some wire to form a hook for hanging, and glued it on the back of the cardboard.


Amazing Grace Easter Wreath grandparentsplus.com

The last part was to carefully glue the wooden cross cut-out on top of the ferns.

Amazing Grace Easter Wreath grandparentsplus.com

The last version turned out to be the easiest. So if you don’t have a wreath that you can use, make the version with the palm leaves. It really goes together fast!

Amazing Grace Easter Wreath grandparentsplus.com

The wooden cross cut-out certainly may be used alone, but it looks outstanding on a wreath. I hops you enjoy your Amazing Grace wreath however you choose to make it!

Happy Easter! 

Phyllis

Subscribe so you don’t miss a post. Your email is never shared or sold.

Follow on Pinterest, too.

linked to these parties…

Posted in Crafts, Easter, Holidays | Tagged , , , , , , , | 24 Comments

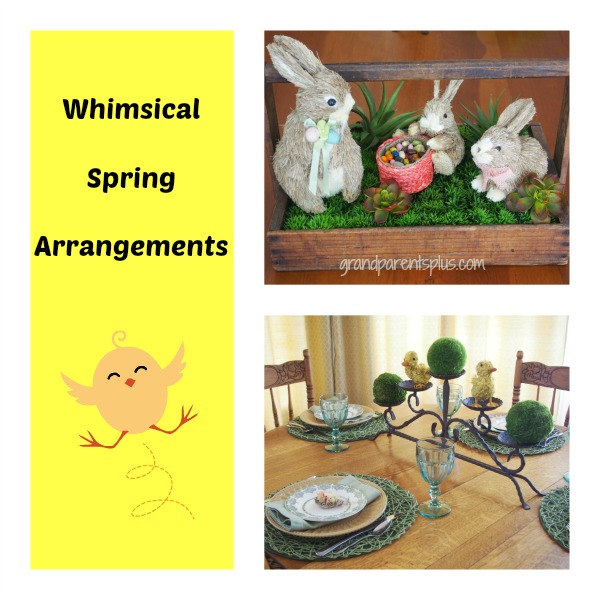
Whimsical Spring Arrangements

The cute little bunnies, ducks, and chicks that you see in stores are hard to resist. Well, last year I bought a few on clearance (75% off)  and this year made a couple whimsical spring arrangements with the bunnies and ducks.

Whimsical Spring Arrangements grandparentsplus.com

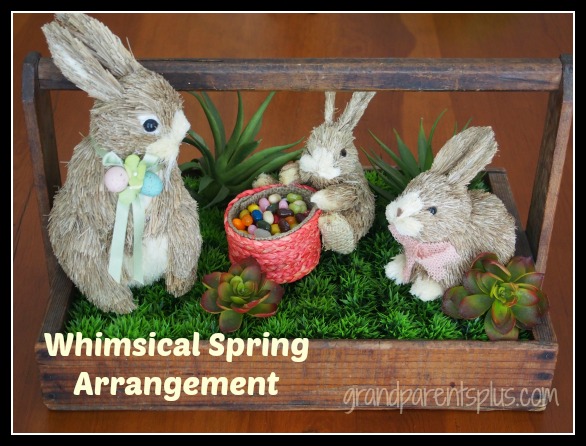
For the first one, I used a vintage berry carrier. By just placing some artificial grass on the bottom, adding the three different size bunnies, and placing artificial succulents here and there, the arrangement is complete.

Whimsical Spring Arrangements grandparentsplus.com

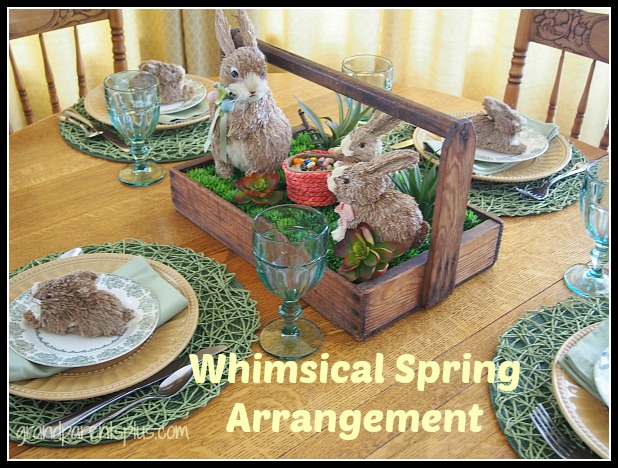
I used this arrangement as a centerpiece.  Notice those little bunnies on each placesetting….those I got for 12 cents each! I happened to find them at 90% off of sale price! Such a deal!

Whimsical Spring Arrangements grandparentsplus.com

Use those whimsical animals perched on a candle holder and alternate with green moss balls.

Whimsical Spring Arrangements grandparentsplus.com

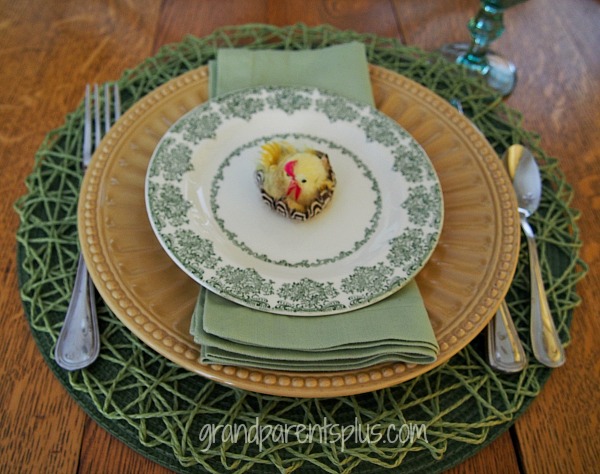
The little feather chicks in a nest were purchased some years ago in Germany. I just love the detail. They’re cute to use with a place-card.

Whimsical Spring Arrangements grandparentsplus.com

Perhaps this gives you some ideas on how to use those bunnies, chicks, and ducks in a whimsical spring arrangement of your own.

Whimsical Spring Arrangements grandparentsplus.com

Now, watch those sales and take advantage of them for next year!

Phyllis

By subscribing on the sidebar, know that your email is never sold or shared!

Follow on Pinterest, too.

linked to the following parties…

Posted in Crafts, Decor, Easter, Holidays | Tagged , , , , , , , | 10 Comments

Irish for a Day!

We’re not Irish, but that doesn’t mean that we can’t be Irish for a Day! You can have fun with it and make the day special for your children or grandchildren. There’s green scrambled eggs, green oatmeal, pots of gold pineapple, and a rainbow of fruit just to name a few easy ideas. So, why not print an Irish picture, button, or card to greet them on the morning of St. Patrick’s Day? It is easy to do and will guarantee a smile on your kids’ faces as they see their own picture in green! Best of all….IT’S FREE!

Irish for a Day grandparentsplus.com


First, find a picture of your child or grandchild on your computer. Go to glassgiant.  This link should take you to “St. Patrick’s Day”.

Next, click on “choose file” and find your picture on your computer to upload and double-click on the picture. It should upload to their site. Then click on “send”.

This will make a button, but I’ll show you how I changed it for a picture. I’ll walk you through those instructions after you have finished your button.

Once you have the basic button made with adding the words on it and picking the background, now download it to your computer. The picture will be off-center and look like this…

Irish for a Day grandparentsplus.com

If you’re making a button, you are done.  If you want to make a frame and change it to a picture for a card, continue on……

After you have downloaded the picture, go to Picmonkey.   Picmonkey is a free online editing site for your pictures. You’ll love this site and have fun enhancing your own pictures.

On Picmonkey, click edit and double-click to upload the picture you downloaded from glassgiant. Now, click  “crop”, and change to the size you want. Like this…..

Irish for a Day grandparentsplus.com

If you want a border, click “frame” and select the type you want and the color. You can always change if you don’t “apply” it..

Finally, when you get the picture the way you want, click “save” on top and it will save to your own computer. You can now print the picture and place on a card or use however you wish.

Irish for a Day grandparentsplus.com

This is actually a quick and easy process, once you have done it. Remember, anyone can be “Irish for a Day”! Your children or grandchildren will be delighted. Have fun!

Phyllis

By subscribing, you won’t miss a post and your email is never shared or sold!

Follow on Pinterest.

post linked to these parties….


Posted in Crafts, Holidays, St. Patrick's Day | Tagged , , , , , | 7 Comments