Easter Cross Scrabble Craft

Do you have extra scrabble letters? If so, this Easter Cross Scrabble Craft is an easy, quick, yet a meaningful one to make. If you need to find them, just do a search online or find at your local craft store. Thrift stores are a good source, too! I’ve included 2 versions of this craft; one for kids, and one for adults.

Easter Cross Scrabble Craft grandparentsplus.com

I recommend using a strong adhesive like GOOP instead of a glue gun. The pieces are varnished and mine broke easily when I used the glue gun. I re-glued with the stronger glue. This version is for adults as I found it hard for kids to use the glue. The” kid version”,  is explained later in this post. It makes it easier for them to do and you don’t have to find all those tiles for multiple kids doing this project.

Here’s the number of letters you will need for the cross….

H-1, E-3, D-2, I-1, F-1, O-1, R-1, M-1

When your Easter Cross Scrabble craft is completed, you can hang it as is, or frame it. 

An easy way to do this for a “kid version” Sunday School Craft is to copy the letters on your printer. It’s a lot cheaper, too.

Materials Needed:

1 copy of letters for each child

Scissors

Glue and Toothpicks (flat work better for glue)

1/2 sheet of construction paper red and black


Easter Cross Scrabble Craft grandparentsplus.com

Have students cut out the squares and glue to a half-sheet of paper. It helps to fold the paper in half the long way, and about one-third down. Now, students can follow the folds to glue on the letters. Have them start in the middle with the word “died” placing two letters on each side of the fold. This way, they will line up easier. Hope you can see how I folded this sheet of paper.
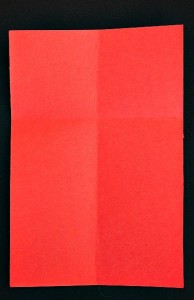
Easter Cross Scrabble Craft grandparentsplus.com

Hint for gluing….  Kids always add too much glue.  Have a dish of glue where they use a toothpick and apply just a dab. This will be enough to glue it on, but not enough to ooze out.

Add a black frame to finish it off. ( I would have these already cut for the students.)

Here’s the finished “kid version” project using paper tiles.

Easter Cross Scrabble Craft grandparentsplus.com


Either version you make is a craft that is meaningful and memorable for the Easter season and throughout the year. It’s a great reminder of God’s love for us.

Easter Cross Scrabble Craft grandparentsplus.com

Yes, Jesus died for YOU!

Romans 5:8-9  But God demonstrates His own love toward us, in that while we were yet sinners, Christ died for us. Much more then, having now been justified by His blood, we shall be saved from the wrath of God through Him. 

He is Risen!

Phyllis

Subscribe so you don’t miss a post. Your email is never shared or sold.

Follow on Pinterest, too.

linked to these parties...


Posted in Art Project, Crafts, Easter, Holidays | Tagged , , , , , , , , , , , , , | 11 Comments

How to Make an Easy Catapult

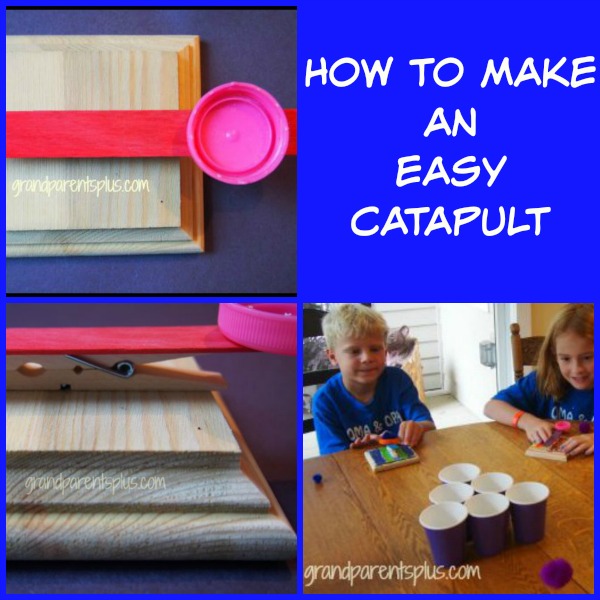
How to Make an Easy Catapult!

How to make an easy catapult grandparentsplus.com

For our Oma and Opa Camp (aka cousins camp, grandma camp, etc.), I was researching catapult projects. I tried so many catapult ideas, but none worked very well. They were either so difficult to put together or the trajectory was that they just threw something straight down. (like the Kleenex box ones) How fun is that? For all the effort of putting it together, you want something that really works.  I, also, wanted  6-10 year old kids to be able to make it themselves without much help.

I finally found an idea that was both simple and worked! The materials were inexpensive and easy to obtain, too! I need to give credit to almostunschoolers  for this basic idea.

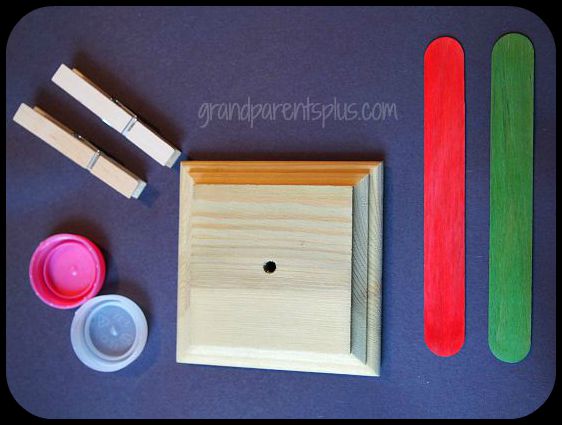
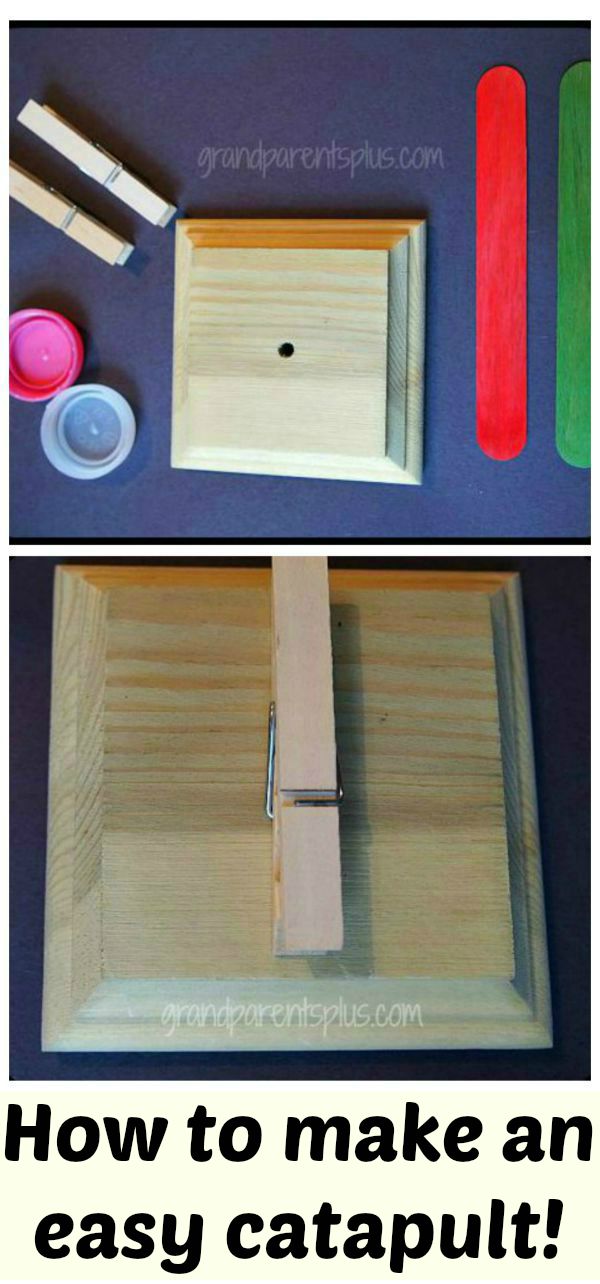
Materials Needed:

Tongue depressors or large craft sticks

Spring Clothespins

Approximately 4 inch wood square  ( cut from a 2×4) or buy these end posts from Menards

Milk Cap

Glue Gun

Directions:

If you want to decorate the base with markers or paint, you may do that first or wait until it is put together. How to make an easy catapult grandparentsplus.com

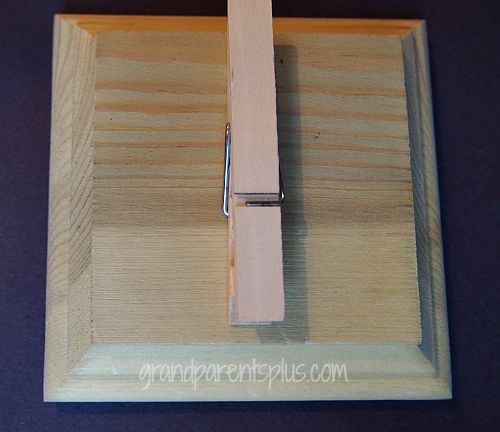
First glue the clothespin to the base…

How to make an easy catapult grandparentsplus.com

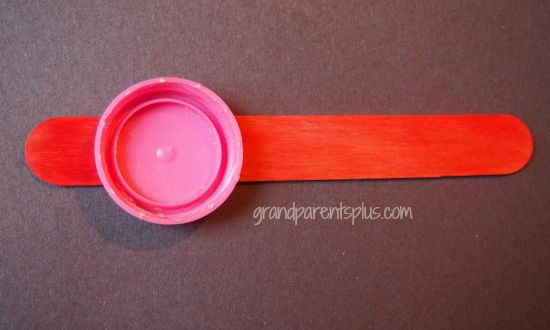
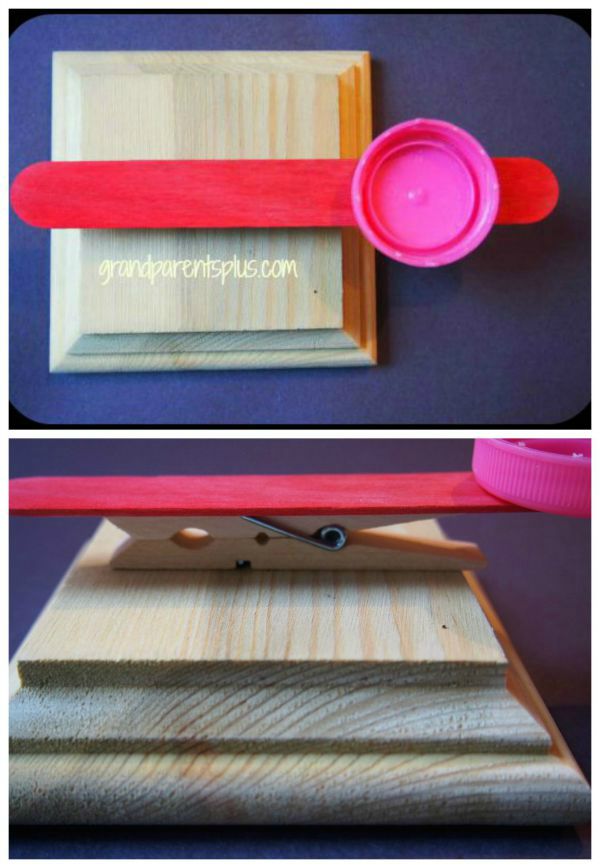
Hot glue the milk cap to the tongue depressor or large craft stick.  Be sure to leave room at the end for pressing it down.

How to make an easy catapult grandparentsplus.com

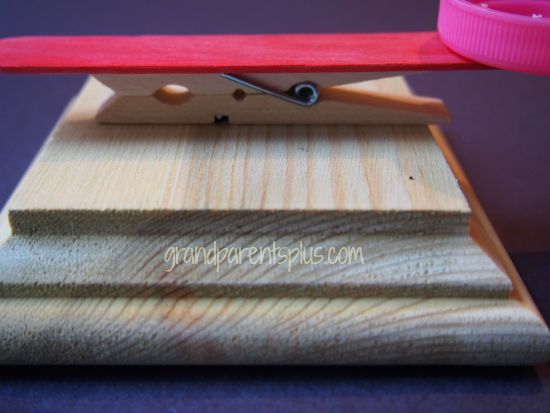
Next, glue the craft stick to the top of the clothespin.

How to make an easy catapult grandparentsplus.com

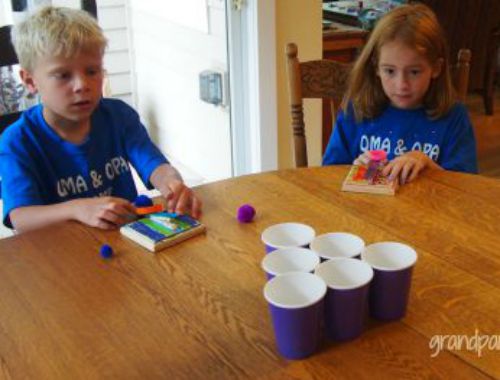
When glue is dry, kids can decorate with markers or paint at this point, too.  Now, use pom-poms to catapult into the cups. Number the cups with points and give turns to see who can make the most points.

How to make an easy catapult grandparentsplus.com

They enjoyed making the catapult, decorating it, and playing the game.  I call that success! How did it fit into a Science Camp? Well, we talked about simple machines and a catapult is one which uses a lever! You use force to push the lever down and the energy is transferred to the pom-pom which sends it flying up.

How to make an easy catapult grandparentsplus.com

PicMonkey Collage2a

Now you know how to make an easy catapult that actually works and is easy to put together!

Have fun!

Phyllis

By subscribing on the sidebar, you won’t miss a post. Know that your email is never sold or shared.

Follow on Pinterest, too.

linked to the following parties,,,


Posted in Crafts | Tagged , , , , , , , , , , | 21 Comments

Chicken Spirals with Creamed Spinach Sauce

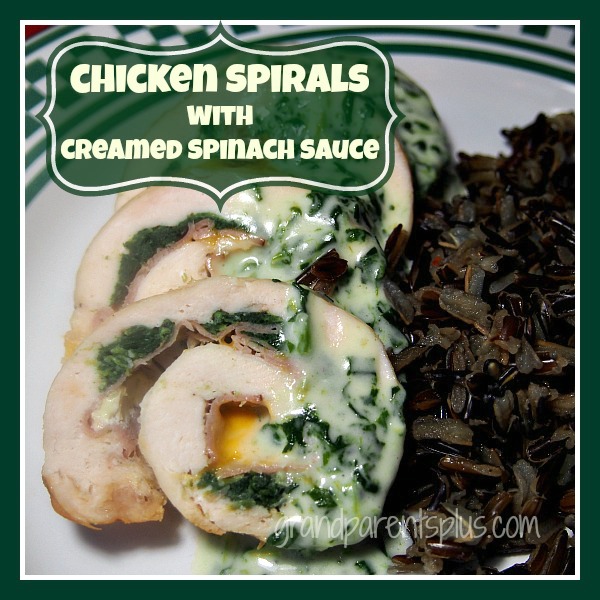
Chicken Spirals look absolutely amazing ! This recipe certainly has that “wow” factor of a beautiful and delicious company dish. Your guests will think you spent hours preparing this , but it’s actually easy to put together. 

When you’re looking for something special to serve, consider Chicken Spirals with Creamed Spinach Sauce. Your guests will be delighted!

Chicken Spirals with Creamed Spinach Sauce grandparentsplus.com

For this recipe, I am using the thin-sliced ham, but you can use Pastrami, any Kosher deli meat, or the expensive prosciutto. I also used 3 large,whole breasts instead of the 6 half-breasts. This made 3 larger rolls and I just cut them into 6 slices instead of 3.

Chicken Spirals with Creamed Spinach Sauce
Recipe Type: Dinner
Cuisine: American
Author: Adapted recipe from the Grand View Lodge in Nisswa, MN
Prep time:
Cook time:
Total time:
Serves: 6 servings
A spiral of chicken that is stuffed with ham, cheese, and spinach. This is a special main dish that has a “wow” factor!
Ingredients
  • 6 large skinless and boneless chicken breast halves
  • 1 10 oz. packages of frozen, chopped spinach, thawed
  • 1 egg, lightly beaten
  • 12 thin slices ham
  • Colby Jack cheese, Gouda, Monterrey Jack. Pepper Jack or any cheese
  • Cut into six 2 x 1/2 inch sticks
  • 2 Tbsp. butter, melted
  • Creamed Spinach Sauce:
  • 3 tbsp. butter, melted.
  • 2 tbsp. flour
  • Use 1/2 pkg of chopped spinach from ingredients above
  • 3/4 cup chicken broth
  • 1/2 cup whipping cream or half and half
  • Salt & Pepper to taste
Instructions
  1. Stuffed Chicken Directions:
  2. Place a chicken breast with boned side up between 2 pieces of plastic wrap. Pound lightly with the flat side of a meat mallet. Start in the center and work to the edges. Pound to 1/8 inch thickness. Remove top of wrap and sprinkle with pepper. Continue with each chicken breast.
  3. squeeze spinach until well-drained and almost dry. In a small bowl, combine 1/2 of the Squeeze spinach until very dry. Use 1 1/2 pkg and mix with the lighty beaten eggs. Save 1/2 box of the spinach for the cream sauce.
  4. For each chicken roll, spoon about 2-3 tbsp. spinach mixture over each flattened chicken breast
  5. Top with a slices of ham or other choice of thin-sliced meat. Place a stick of cheese at the edge.
  6. Start from the edge with the cheese and roll into a spiral, pressing edges in to seal. Secure spirals with wooden toothpicks
  7. Place rolls,seam sides down, in a 9 x 13 greased baking dish. Drizzle the rolls with melted butter.
  8. Bake uncovered at 375 degrees for 35-40 minutes or until chicken reaches 170 degrees.
  9. Cover with foil and let rest a couple of minutes.
  10. Remove toothpicks and slice each chicken roll. Top with cream sauce.
  11. Creamed Spinach Sauce:
  12. Melt 3 tablespoons of butter in a saucepan
  13. Add 2 tbsp. flour and stir constantly until bubbly
  14. Slowly add 3/4 cup chicken broth to the flour mixture stirring constantly
  15. Add remaining spinach, stir and cook for 4-5 minutes.
  16. Add 1/2 cup whipping cream or half and half. Heat until warm. If too thick, add more cream.
  17. This should be a gravy-like consistency.
  18. Salt and Pepper to taste.
  19. When chicken is done…
  20. Remove toothpicks from chicken
  21. Cut chicken into spiraled slices
  22. Ladle hot creamed spinach sauce over the spirals.
  23. Serve with wild or white rice

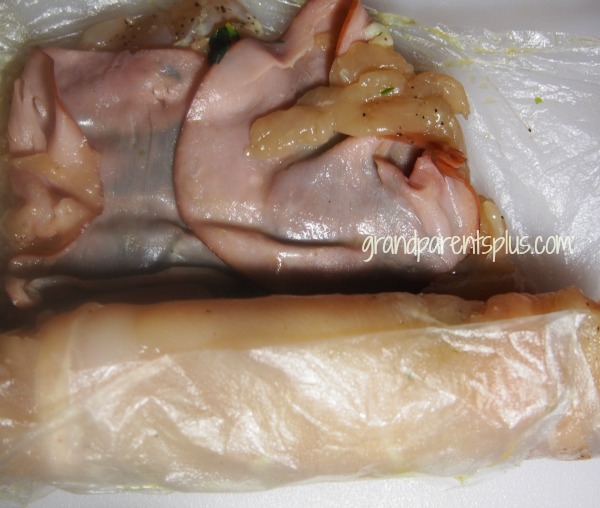
While I’m not paid for this recommendation, it is a lot easier to work with pounding the chicken when using Glad Press and Seal. Lay one piece on top and one on the bottom of the chicken breast. It stays together while pounding and it makes it easier to roll the chicken up, too. Just take the bottom piece and roll the chicken in a spiral.

Chicken Spirals with Creamed Spinach Sauce

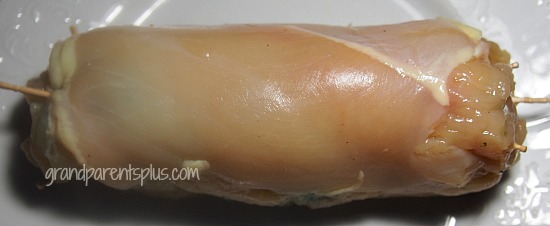
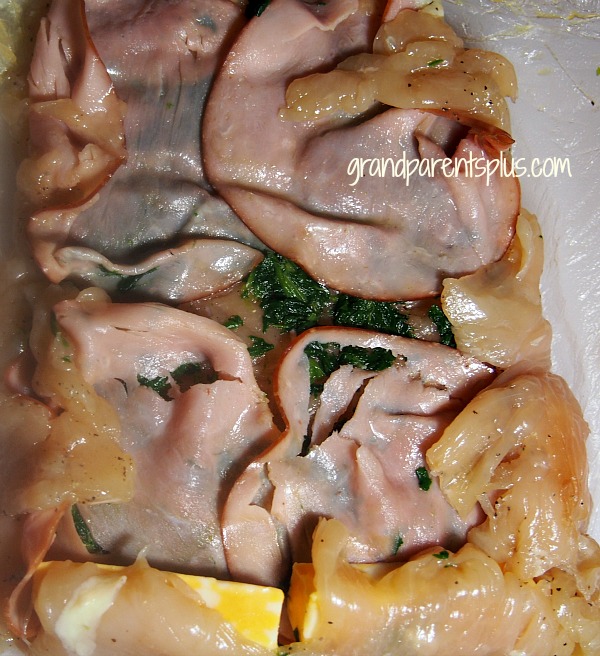
Layer the spinach mixture, ham, and roll with cheese. Secure with toothpicks. Don’t worry if your chicken roll resembles a porcupine, just secure it as the toothpicks come out after cooking.

Chicken Spirals with Creamed Spinach Sauce grandparentsplus.com

Chicken Spirals with Creamed Spinach Sauce grandparentsplus.com

It’s nice to prepare and roll the chicken spirals on the evening before your dinner. Wrap and place the chicken rolls in the refrigerator ready for the oven.  This way, you don’t have the preparation and clean up to do before your dinner. When ready, just pop the chicken in the oven to bake. I made the creamed spinach sauce ahead as well. It thickened as it cooled, but just thin with extra chicken broth, if needed.

When baked, remove toothpicks, slice chicken, layer 3-4  spiral chicken slices on a plate and drizzle with the sauce. Serve with wild rice, white rice, or a combination. Offer additional creamed spinach sauce in a gravy- boat for guests. 

Chicken Spirals with Creamed Spinach Sauce grandparentsplus.com


I know you’ll enjoy this special recipe for Chicken Spirals with Creamed Spinach Sauce! Next time I’m going to try it with Gouda cheese. You can change the cheese and the meat for a different flavor combination.

Enjoy!

Phyllis

By choosing to subscribe on the sidebar, know that your email is never sold or shared.

Follow on Pinterest, too.

linked to these parties


Posted in Main Dishes, Recipes | Tagged , , , , , , | 33 Comments

Watercolor and Oil Art

Watercolor and Oil Art explores a science fact in a very fun and colorful way.  Oil and water don’t mix, you see, so you’ll have interesting things happen with your art project.  It’s so exciting to see how oil makes waves and moves the color. By using a glue gun, you can design shapes or squiggles that make a design among the melding colors.

Watercolor and Oil Art grandparentsplus.com

Using just liquid watercolors, a glue gun, and oil, you never know just what you’ll end up with for color variations. It’s fun to watch. Change this project for any holiday theme or design you would like to use. This is one art project that can be done over and over again. It will never turn out the same. Use your imagination and try different combinations.

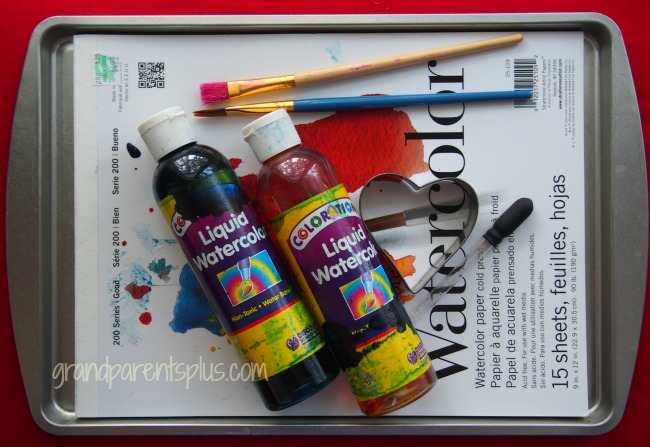
The materials include: Watercolor Paper, Glue Gun, Liquid Watercolors, Brushes, Vegetable Oil, tray (optional), and Eye Dropper.

Watercolor and Oil Art grandparentsplus.com

Here’s an easy way to keep this project from getting messy. I bought 9×13 metal cookie trays at the Dollar Tree. They are the perfect size for any painting or craft project. It keeps the mess contained and if things need to dry, you can just dry them right on the trays. For this watercolor project, they can be stacked to dry by placing one tray horizontal and the next vertical. I have one for each grandchild, and it sure helps to keep glitter, glue, paint, etc. all contained! When the project is done, they are easy to wash off.

Ok, now to the directions….  This project requires watercolor paper. Construction just doesn’t work well. It is better with liquid watercolors, too. If you haven’t tried them, they are very colorful and easier to use than the watercolor paint trays. Have some wider brushes to use such as small sponge brushes.

You can buy liquid watercolors from Blick Art Supplies on the sidebar.

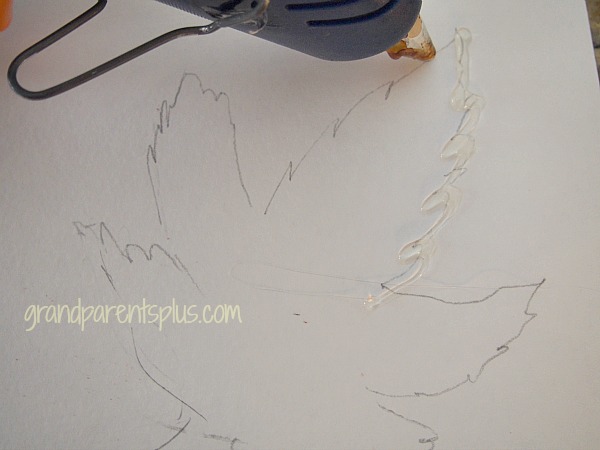
I’ve seen paintings that merely cover the entire paper, but I decided to experiment using some shapes outlined with hot glue. I liked the outcome. If you are using a shape, draw it lightly with a pencil and go over it with the glue gun. (I recommend that an adult operates the glue gun.)This will keep the shape from mixing with the other colors and it will stand out from the painting.


Watercolor and Oil Art grandparentsplus.com

Outline a shape with the glue gun.


Watercolor and Oil Art grandparentsplus.com

Paint watercolor inside the glue area.

Watercolor and Oil Art grandparentsplus.com

Drop oil in several places and watch it work!

Continue on and paint the background.

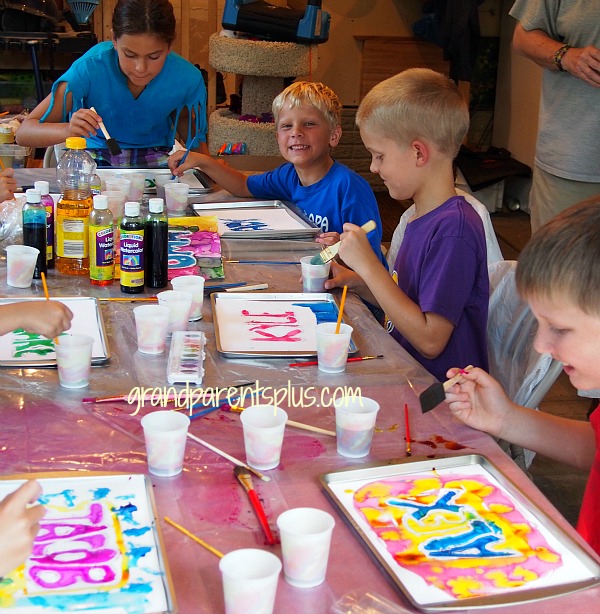
For our Oma and Opa Camp, I did the kids’ names in bubble letters with hot glue and they used liquid watercolors to make their project colorful and dotted it with oil . Even the boys got into it and thought it was “cool”!


Watercolor and Oil Art grandparentsplus.com

After you have painted a section, while it is still wet, drop oil in squiggles or drops, and watch it change the paint. Continue until the entire paper is painted the way you like. If the watercolors dry too much, just get them wet again with more color or spray with a little water before you drop the oil. The action will continue for a while as it dries.

Let dry for a day and enjoy your watercolor and oil art that you’ve created. 

There are so many ways to vary this project. For instance, you can outline a pumpkin, stars, names, trees, bells, angels, cross, bunnies, fall leaves, and flowers, just to name a few. It is changeable for any season and the outcome is always different. 

For Easter…..

Watercolor and Oil Art grandparentsplus.com

Christmas…..

Watercolor and Oil Art grandparentsplus.com

The oil was also dripped on the trees above.

Watercolor and Oil Art grandparentsplus.com

For Valentines…..

Watercolor and Oil Art grandparentsplus.com


This cross was painted with the usual watercolor tray instead of the liquid watercolors. It’s not as bright and harder to get the oil action to show. You need to use very deep colors, paint it heavy with color, and still it doesn’t have the same intensity as the liquid colors.

Watercolor and Oil Art grandparentsplus.com

It’s a good investment to get the liquid watercolors as they last a long time. Your kids will enjoy those bright colors! No messy watercolor trays to clean, either.

Now, what will you plan on making with your watercolor and oil art?  Have fun!

Watercolor and Oil Art grandparentsplus.com

Enjoy!

Phyllis

Subscribe so you don’t miss a post! Your email is never shared or sold!

Follow on Pinterest!

linked to many of these parties….

Posted in Art Project, Christmas, Easter, Halloween, Holidays, Thanksgiving, Valentines | Tagged , , , , , , , , , , , , , , | 19 Comments

Roast Beef Reuben Sandwich

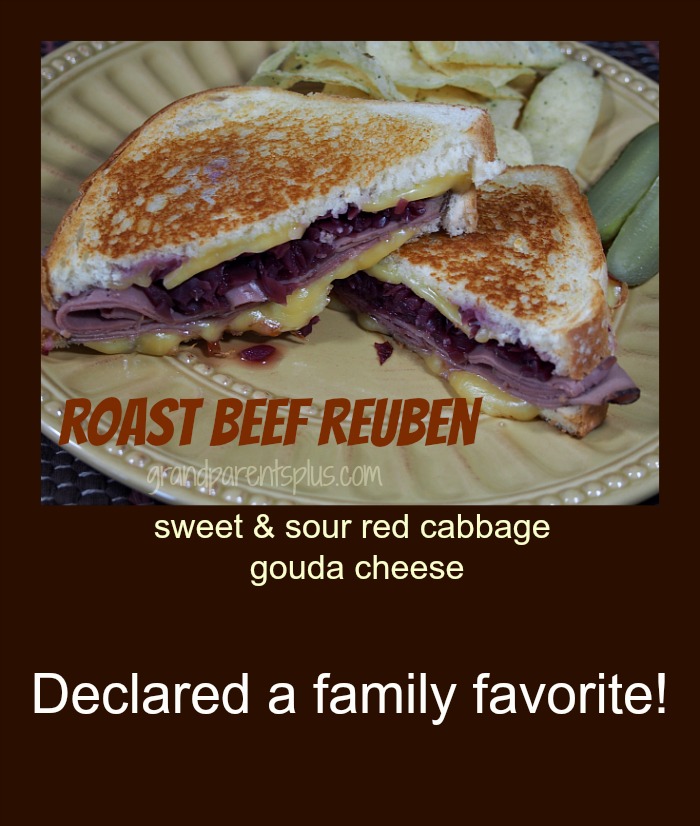
Try this new version of a Reuben. I call it a “Roast Beef Reuben Sandwich”! This sandwich is so delicious with the new combination of flavors that it may become your favorite. My mouth just waters when I think of it. My family loved it!

Roast Beef Reuben grandparentsplus.com

Roast Beef Reuben Sandwich
Recipe Type: Lunch or Dinner Sandwich
Cuisine: American
Author: Phyllis Van Rossum
Prep time:
Cook time:
Total time:
Serves: 4
A new combination of flavors make this Roast Beef Rueben Sandwich absolutely delicious!
Ingredients
  • 8 slices of bread- Sourdough
  • Sliced Roast Beef – don’t skimp!
  • 8 slices Gouda cheese
  • Jar of Sweet and Sour Red Cabbage (found ready-made in vegetable aisle) or homemade
  • Coarse Ground Dijon Mustard – optional
  • Butter
Instructions
  1. Pre-heat skillet
  2. Drain Sweet and Sour Red Cabbage
  3. Arrange 8 slices of bread
  4. Place a slice of Gouda Cheese on 4 slices of bread
  5. Layer Sweet and Sour Red Cabbage on top of cheese
  6. Add Roast Beef on top of Cabbage
  7. Top with remaining slice of Gouda Cheese
  8. Spread remaining 4 slices lightly with coarse ground Dijon mustard (optional or serve on the side)
  9. Place those 4 slices with mustard side towards the four cheese-topped sandwiches.
  10. Spread with butter and place buttered side down in pre-heated skillet.
  11. Butter the top of the sandwich while in the skillet
  12. Grill until browned on each side.
  13. While grilling cover with a lid to warm the inside of the sandwich and melt the Gouda cheese

The combination of Roast Beef, Gouda Cheese, along with Sweet and Sour Red Cabbage is fantastic! My husband was skeptical and then after tasting it declared it to be his favorite!! You just have to try it to believe how good it is.

Roast Beef Reuben grandparentsplus.com


Serve with Coarse Ground Dijon or regular mustard on the side. Not a mustard fan? You’ll still love it without it.

Wish you could taste it right now. YUM!

Roast Beef Reuben grandparentsplus.com

Even if you don’t particularly like a corned beef  with sauerkraut Reuben sandwich, I know you’ll enjoy this one! Try it! 

Enjoy!

Phyllis

Don’t miss a post! Subscribe on the sidebar and know that your email is never shared or sold.

Follow on Pinterest, too.

linked to these parties…


Posted in Main Dishes, Recipes | Tagged , , , , , | 29 Comments

DIY Copper Drapery Rods

My DIY Copper Drapery Rods!

DIY Copper Drapery Rods grandparentsplus.com

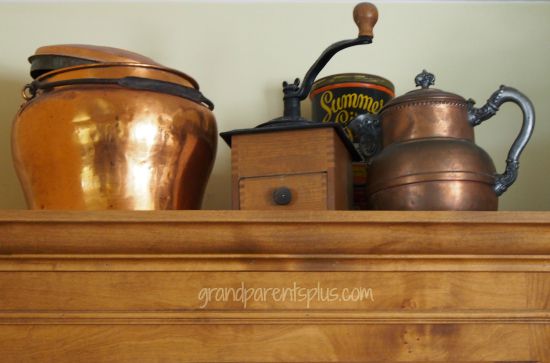
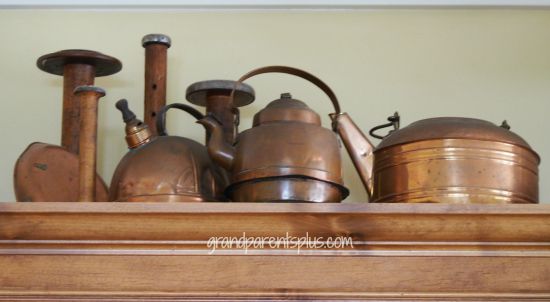
In my kitchen, I  display my collection of vintage copper tea kettles and coffee pots above the cupboards. I like the patina the copper gets as it ages. While wondering what I was going to do about drapery rods in the kitchen, I got the idea of looking into using copper drapery rods to coördinate with my vintage copper accents!

Here’s a sample of two of the areas above the cupboards where I display my copper pots.

DIY Copper Drapery Rods grandparentsplus.com


DIY Copper Drapery Rods grandparentsplus.com

I looked online, but what I found was a fake copper finish and not real copper plus they were expensive. So, I  went to my local home hardware store to see what they had for copper pipe that might work.  

One problem I had to work around was that the windows were at a 45 degree angle to each other. There was not enough room to put two rod holders in that area. I needed something with a 45 degree angle to tie the two areas together. A custom rod was too expensive.

Also, I wanted to hide that the windows were not centered on each wall when they built the house. That has always bothered me so I hoped that the final product would hide that flaw. (why don’t builders think of those things?)

Deciding to use the copper pipe, but not wanting it so shiny, I researched online about how to give new copper that aged patina. I finally came up with a product that would do the trick in one application. Other ideas like hard-boiled eggs, etc. (yes, that was what one site suggested) were too complicated. The product I found is called, Liver of Sulphur Extended Life Gel. It came in a 4 oz. jar, but I only needed a small 1/2 tsp. to do all the copper. (If you need some, I’ll sell you mine. I don’t think I’ll ever use it up.) Perhaps contact someone who makes jewelry to see if they have something to give patina to the copper.

The 10 ft. length of 3/4 inch copper pipe was around $11.00. I also found a 45 degree copper fitting that would work for the bend in the wall.

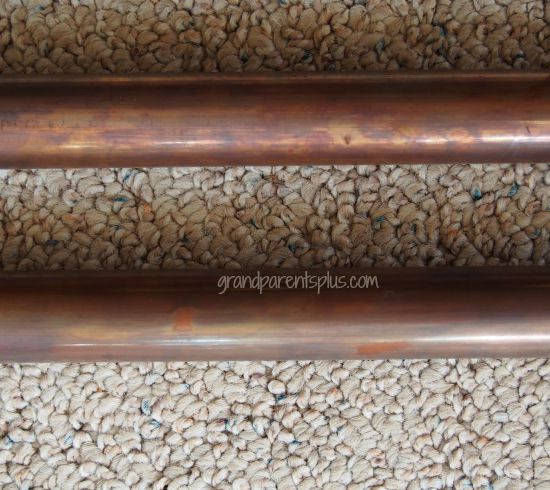
The Liver of Sulphur aged the copper, but it was a bit uneven. It was hard to paint the product on a round pipe and then quick stop the aging with Baking Soda solution.

DIY Copper Drapery Rods grandparentsplus.com

My husband took some fine steel wool and evened out the patina. Yes, perfect!

DIY Copper Drapery Rods grandparentsplus.com

There wasn’t room to add a finial on the end so I just used copper end-caps to finish it off. My husband put the rods up with three drapery rod holders which I had painted with a copper color spray paint and it was perfect! The window placement flaws are hidden and I feel so much better about it and I love my DIY Copper Drapery Rods! They sure cost less than the standard drapery rods and far less than custom ones that were at a 45 degree angle! Total cost was around $25.00 for both windows. (not counting the Liver of Sulfur, but including drapery rod holders) 

DIY Copper Drapery Rods grandparentsplus.com

These diy copper drapery rods would go with many combinations of neutral decor as well. I am very happy with how they turned out! Have you thought of using copper pipe?

Thanks for stopping by, 

Phyllis

When you subscribe on the sidebar,know that your email is never shared or sold.

Follow on Pinterest, too.

linked to these parties….


Posted in Decor | Tagged , , , , , , , | 40 Comments

Valentine Scones (quick and easy)

Scones are sometimes tricky and hard to make tender and delicious. This recipe will make you an expert. It is quick, easy, and the scones turn out delicious. There is a simple trick to making them tender which I’ll share with you so stay tuned…..

Valentine Scones (quick and easy) grandparentsplus.com

These Valentine Scones are almond flavored with mini cherry chips in the batter. They’re perfect for a Valentine tea or just a breakfast or afternoon treat.

Valentine Scones grandparentsplus.com


Valentine Scones (quick and easy)
Recipe Type: Bread
Cuisine: American, English
Prep time:
Cook time:
Total time:
Serves: 12-18 scones
Light, tender, and delicious scones. Vary the flavors and what you add to them for serving anytime.
Ingredients
  • 2 3/4 cups flour
  • 1/3 cup sugar
  • 3/4 teaspoon salt
  • 1 tablespoon baking powder
  • 1/2 cup cold butter
  • 1 cup to 2 cups chopped dried fruit, chocolate, cherry, or other flavored chips, nuts, or a combination,(optional)
  • 2 large eggs
  • 2 teaspoons vanilla extract or the flavoring of your choice (I used almond extract)
  • 3/4 cup half and half or milk for free-form scones
  • Topping:
  • 2 teaspoons milk
  • 2 tablespoons sparkling white sugar or cinnamon, or colored sugar
Instructions
  1. Whisk together the flour, sugar, salt, and baking powder.
  2. Cut in the butter until the mixture is crumbly. It’s OK if there ar a few larger lumps.
  3. Stir in the chips, fruit or whatever you’re adding to the dough.
  4. In another bowl, mix eggs, milk ( or half and half), along with flavorings
  5. Add the egg mixture to the flour mixture and stir until moist.
  6. Line a baking sheet with parchment or use greased pan Sprinkle a little flour on the parchment or pan.
  7. Drop approx. 1/4 to 1/3 cup of dough on to baking sheet for each free-form scone.
  8. Brush top of scone with milk and sprinkle sugar on them
  9. Place in freezer for 30 minutes.
  10. Remove and bake in 425 degree oven for approx. 20-25 minutes. Watch closely as this time depends on the size of your scones.
  11. Remove from pan and cool on rack.
  12. When cool, frost with a powdered sugar glaze and sprinkle with red colored sugar for Valentine Scones (this is optional)
  13. These scones are easy to” prepare for any occasion. Use dried fruits, nuts, or chocolate chips, too.


Ok, did you catch the secret? It’s the 30 minutes in the freezer that relaxes the gluten, makes them tender, and rise higher. It, also, chills the fat which makes them flakier! Did you know that fact?


Valentine Scones (quick and easy) grandparentsplus.com


The free-formed scones are so much easier to make and they taste the same! If you decide to freeze them, don’t frost until you thaw them out. 

Serve with Devonshire cream and lemon curd, if desired.

Devonshire Cream

1 C. heavy whipping cream
1/2 C. granulated sugar
1 tsp. vanilla
Beat the cream, sugar, and vanilla together until whipped cream consistency.
Fold in 1 C. sour cream


Valentine Scones (quick and easy) grandparentsplus.com

You might enjoy the Best Valentine Cookies – Flavor Cookies, too.

Enjoy!

Phyllis

If you choose to subscribe, your email is never shared or sold.

Follow on Pinterest, too.

linked to these parties


Posted in Bread/Muffins, Recipes | Tagged , , , , , , , | 28 Comments

Stromboli – Baked Italian Sandwich

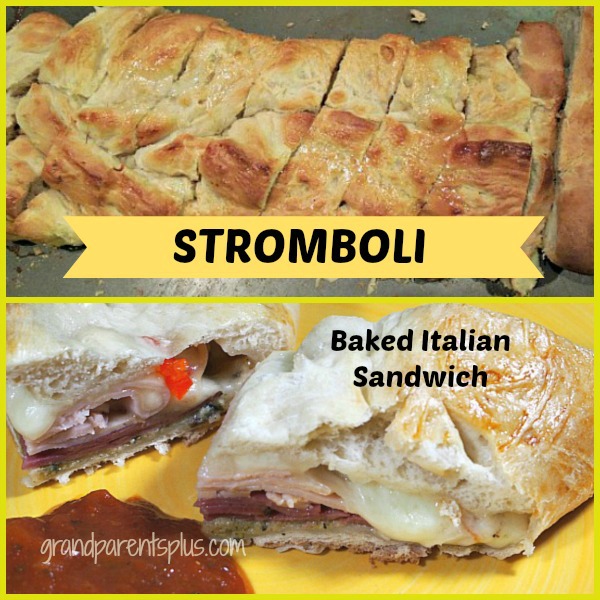
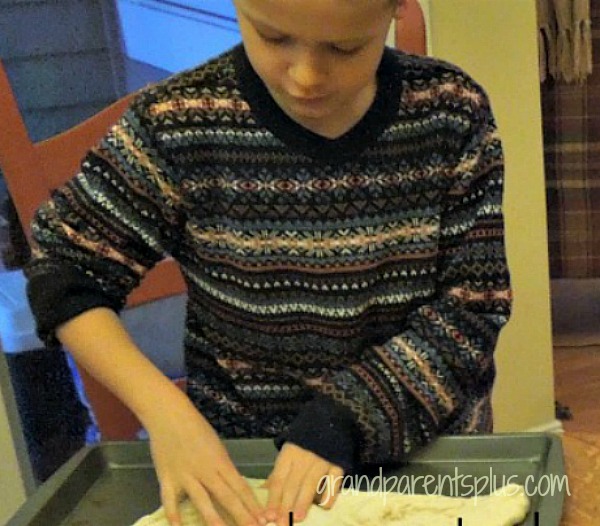
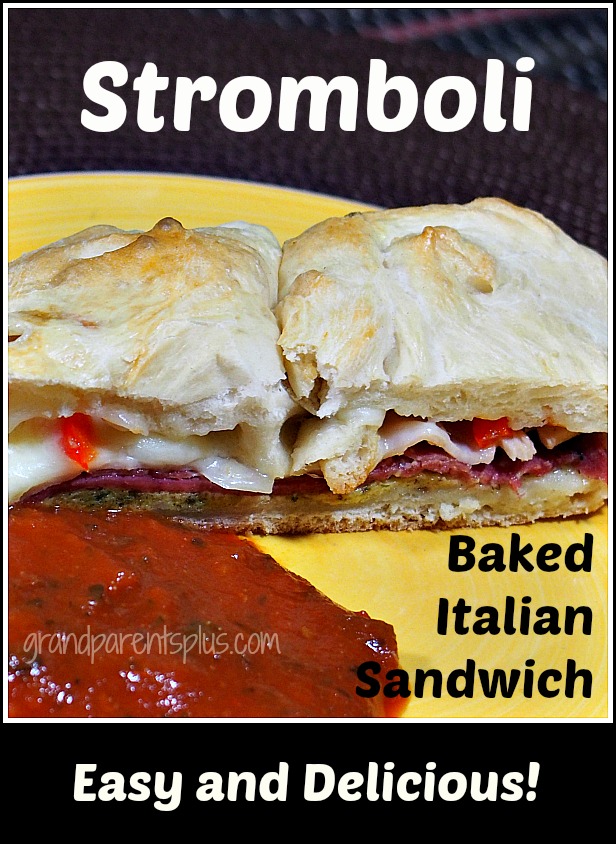
Stromboli – a baked Italian Sandwich, is a favorite at our house. It is so easy to make that even kids can do this recipe! The frozen bread dough makes it simple and ready to do when you get home from work. Just follow the directions on the frozen bread dough package to thaw and use for this sandwich.

Stromboli- baked Italian sandwich grandparentsplus.com


Vary the ingredients to what you like. If you like onions, but another person doesn’t want them, just do 1/2 the sandwich with them and 1/2 without. Mark with a toothpick. 

I’ve used this for an informal party and had my guests make their own.  Each couple makes their sandwich to suit their tastes.  (You need double ovens to bake four sandwiches, however.) At the end of the evening, send home the left-overs with them.


Stromboli – Baked Italian Sandwich
Recipe Type: Dinner
Cuisine: Italian
Prep time:
Cook time:
Total time:
Serves: 4-6 servings
Easy Italian sandwich using frozen bread dough, various meats, and cheese. Baked and served with warmed spaghetti sauce.
Ingredients
  • 2 loaves of frozen bread dough
  • 2 egg yolks (save whites)
  • 1 Tbsp. Parmesan cheese
  • 1/2 tsp. garlic powder
  • 1/4 tsp. pepper
  • 2 Tbsp. oil
  • 1 tsp. parsley flakes
  • 1 lb mozzarella cheese – shredded
  • Various meats, cheese, tomatoes, veggies, olives, etc.
  • (see suggested amounts below for two loaves)
Instructions
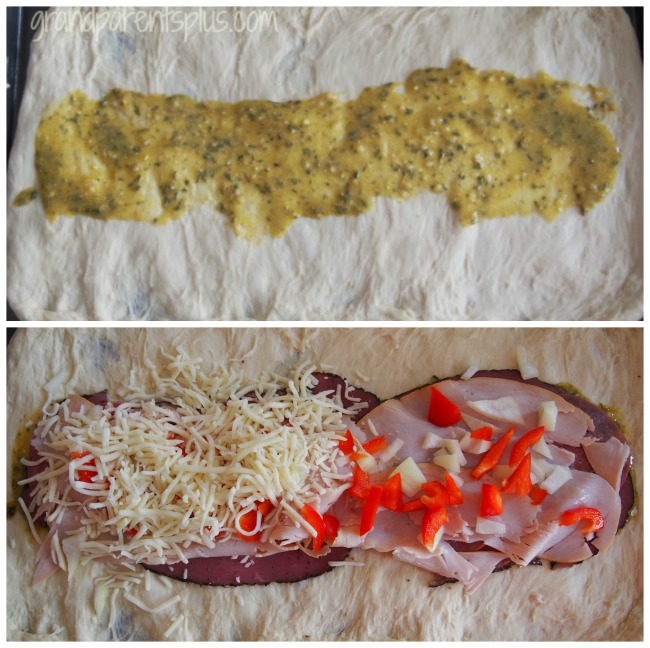
  1. Make a paste of egg yolks, Parmesan cheese, garlic powder, pepper, oil, and parsley flakes. Spread down half down the center of dough on each baking sheet. (This is like a pesto.)
  2. Layer ingredients of your choice. Approximate amounts for the two loaves are: ham (approx. 1/2 lb sliced), turkey (1/2 lb.), salami (1/4 lb.), green or red peppers, onion, tomato, olives ( black or green)
  3. Cover with mozzarella cheese or cheese of your choice. Add all ingredients to the middle 1/3 of the dough.
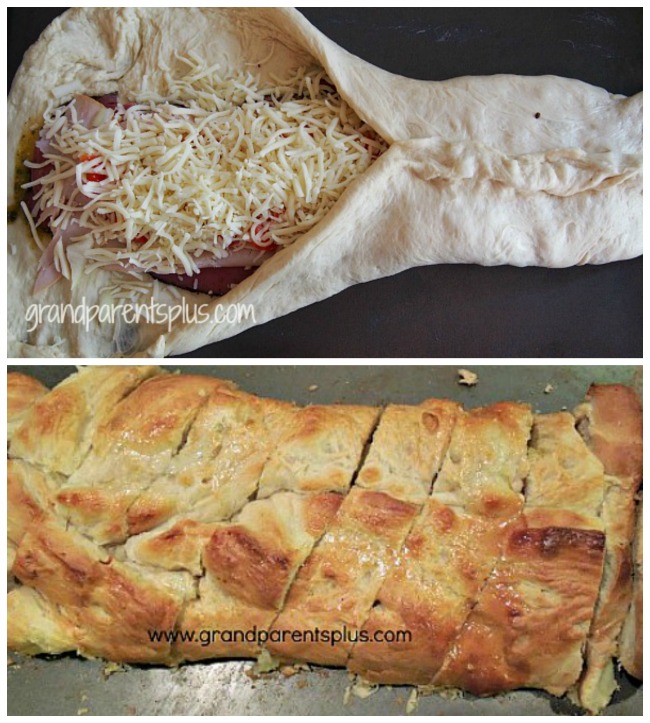
  4. Fold both sides over to the center. Moisten the edges with water and press to seal. Be sure to seal it well!
  5. Make air-vents by making cuts along the top sides.
  6. Brush on slightly beaten egg whites over the entire top.
  7. Bake @ 350 degrees for 30 minutes.


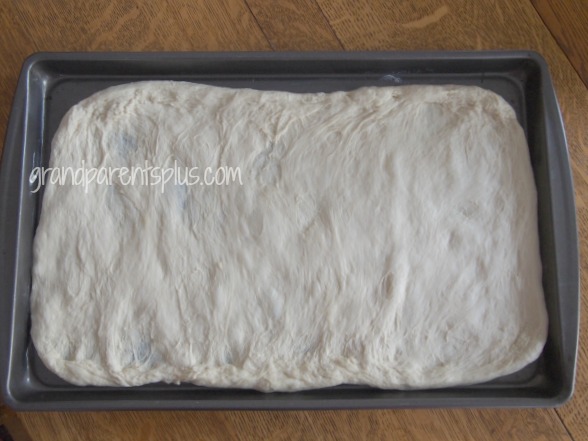
This is the first step of the Stromboli.

Stromboli - Italian Baked Sandwich grandparentsplus.com

Kids love to do this, too!

Stromboli - Italian Baked Sandwich grandparentsplus.com


Spread the pesto down the middle of the dough….. and follow the next steps.

Stromboli - Italian Baked Sandwich grandparentsplus.com

Stromboli - Italian Baked Sandwich grandparentsplus.com

I did this with grandchildren and the kids made the entire Stromboli by themselves. I sealed it up for them as that’s the hardest part. Because they put what they wanted in it, they loved it!

Stromboli - Italian Baked Sandwich grandparentsplus.com

After baking for 30 minutes, slice, and serve with hot spaghetti sauce for dipping! 

This is also a great idea for those football game days! 

Stromboli - Italian Baked Sandwich grandparentsplus.com

I’ll bet this becomes a family favorite!

Enjoy!

Phyllis 

If you choose to subscribe on the sidebar, know that your email is never shared or sold!

Follow on Pinterest, too.

linked to these parties…..


Posted in Main Dishes, Recipes | Tagged , , , , , , , , , , | 31 Comments

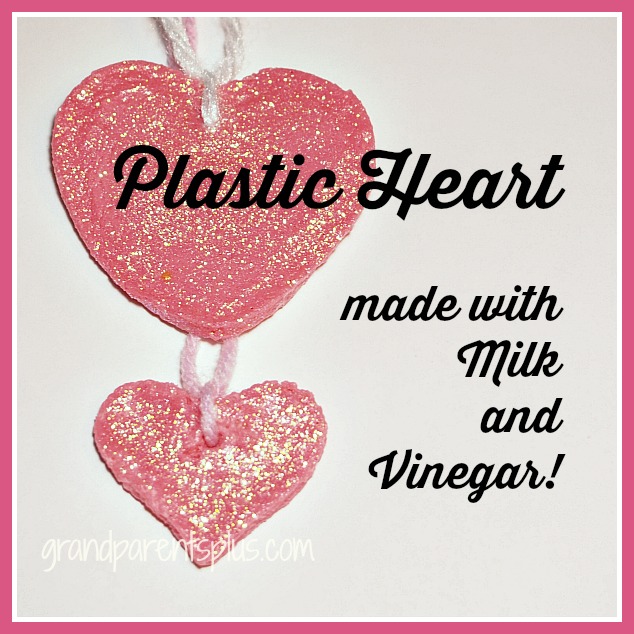
Plastic Heart made with Milk and Vinegar!

A “Plastic Heart made with milk and vinegar”? Yes, I can show you how to make plastic with milk and vinegar! I didn’t believe it either, but it works. Kids will be amazed and have fun with this craft and science experiment. At our Oma and Opa Camp 2015, I used this experiment. I found this on ScienceBuddies.

Plastic Heart made with Milk and Vinegar grandparentsplus.com

Use this idea to make Valentine hearts. ( or any shape you want) No need to run out and buy special stuff as the materials are right in your cupboard and refrigerator.

ll you need is…..

Materials:

Milk- 9 oz.  2% or whole

Vinegar- 4 teaspoons

Red Food Color – 2 drops (optional)

Small heart cookie cutters (mine were 2  1/4 and 1  1/2 inches across)

Straw or pen to poke a hole (optional)

Pin back or yarn for necklace (optional)

Glitter glue (optional)

Directions:

Add 2 drops of food coloring to  9 oz. of milk (use 2% or whole)  The color darkens a lot as it dries.

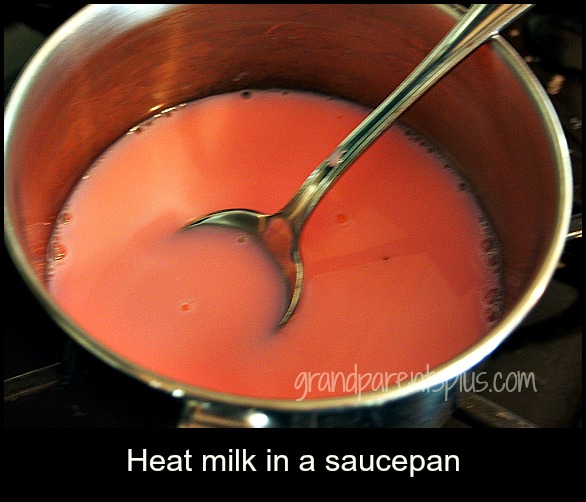
Heat 9 oz. milk in a glass for 2 minutes in a microwave or heat milk in a pan on the stove until hot, but do not boil!

Plastic Heart made with Milk and Vinegar grandparentsplus.com

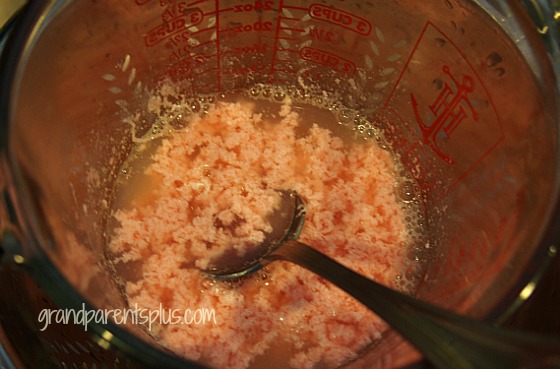
When hot, but not boiling, add 4 teaspoons of vinegar. Stir the milk and it will start to curdle. When curdled, pour into a strainer. This will look a bit like cottage cheese.

Plastic Heart made with Milk and Vinegar grandparentsplus.com

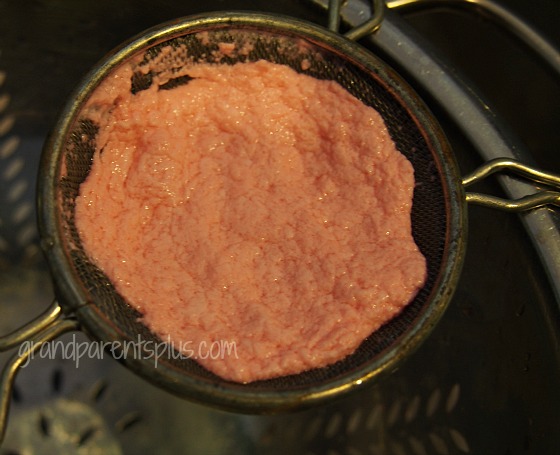
I used a tea strainer after most of the water was out and squeezed more water from the curds.

Plastic Heart made with Milk and Vinegar grandparentsplus.com

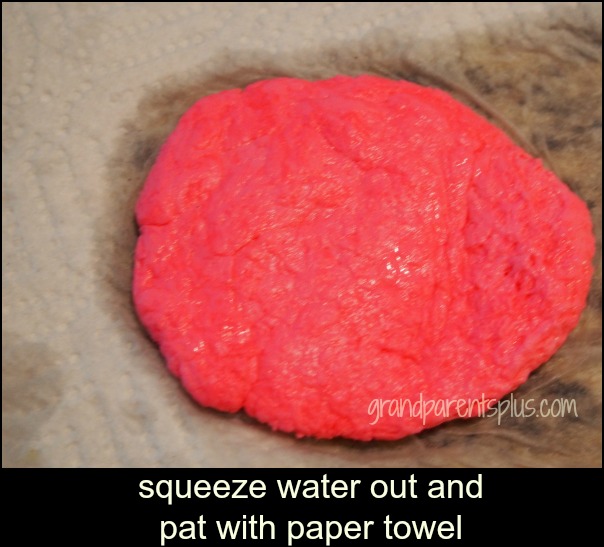
Place the plastic mixture on paper towel. Fold the towel over and over to squeeze more liquid out.

Plastic Heart made with Milk and Vinegar grandparentsplus.com

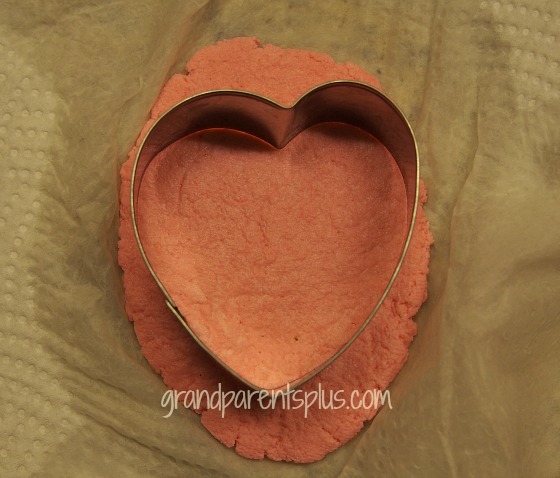
Press the plastic down to uniformly flatten it out as much as possible. Take a cookie cutter and cut a heart shape from the plastic.

Plastic Heart made with Milk and Vinegar grandparentsplus.com

 I was able to squeeze the remainder of the plastic together to cut out another smaller heart. You’ll notice that the plastic has a little texture to it.

Now, let dry on a flat surface such as a cutting board or counter top for a few days.

Plastic Heart made with Milk and Vinegar grandparentsplus.com

scraps

If you want to hang the hearts or wear as a necklace,  put a hole in them while wet. Use the end of a ball point pen and do this everyday while it is drying as it shrinks back a little.

Be sure to clean your utensils right away so the plastic doesn’t stick.

After a few days and the plastic is completely dry and hard, put a layer of glitter glue on top. (optional) Just spread it on the heart generously and let dry. Now, the heart has a shiny side. If you’re hanging the heart, repeat again on the other side and let dry. String a piece of yarn through the opening and wear to school as a necklace. Another option is to glue a pin back on it. School friends will be amazed that you made a Plastic Heart from milk and vinegar!

This process is actually how many plastics are made. To see a scientific explanation, go to Science Buddies.

Plastic Heart made with Milk and Vinegar grandparentsplus.com

Did you learn something new? I was skeptical when I first tried it, but it worked. Amazing! So, I adapted it for Valentine’s Day. Any cookie cutter or food color will work. Think of animals, insects, or basic shapes to use for other cut-outs. 

Have fun!

Phyllis

By choosing to subscribe, you won’t miss future posts. Know that your email is never sold or shared.

Follow on Pinterest, too.

linked to these parties….


Posted in Crafts, Holidays, Valentines | Tagged , , , , , , | 28 Comments

Homemade Chicken Nuggets

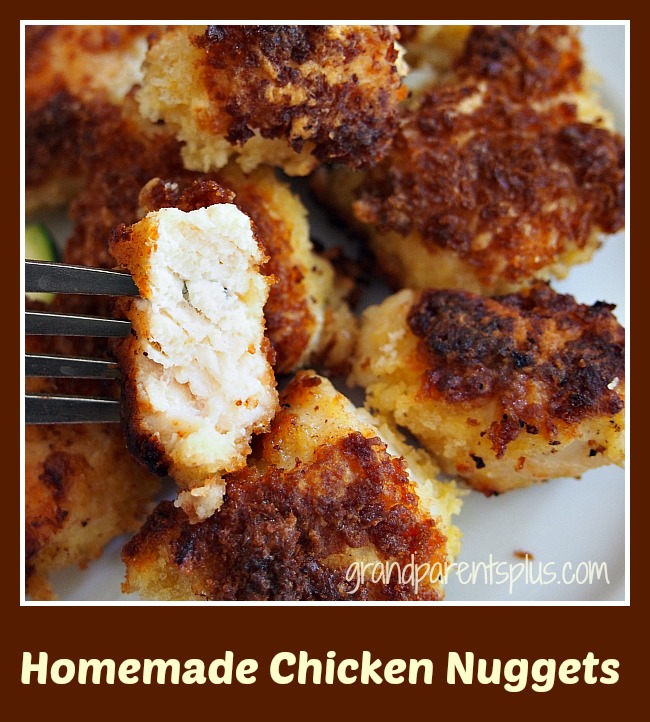
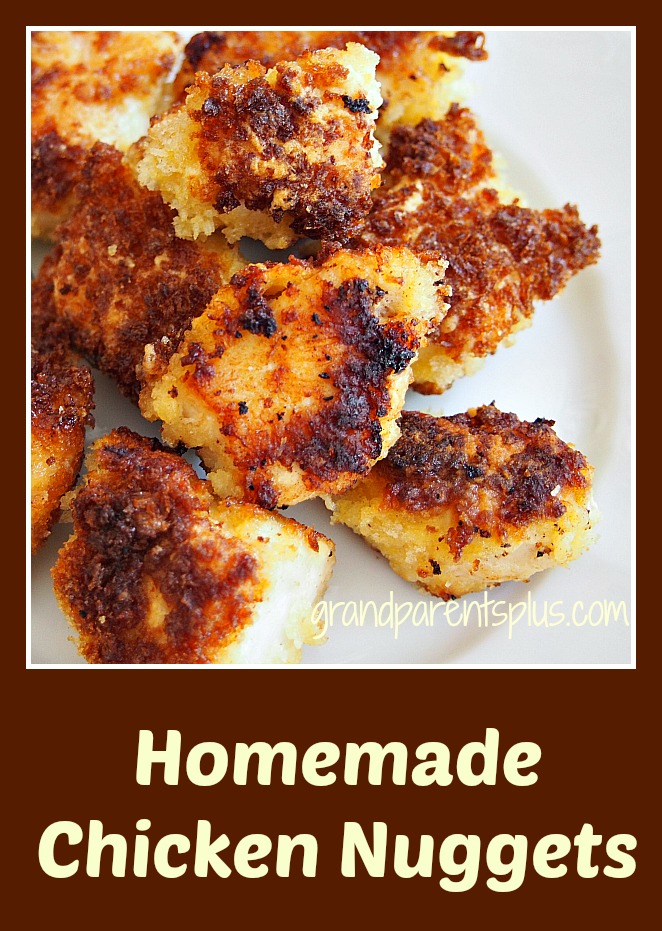
These are the best Homemade Chicken Nuggets by far! Your kids will never want any other chicken nuggets other than these, but don’t limit them just to kids! Adults like them, too!

They are so quick and easy to make. Besides that, they freeze well. It’s a quick dinner from the freezer to the oven. Heat in the oven at 400 degrees for 5-10 minutes and they are ready. 

Need a quick appetizer?  Add some dipping sauces of mustard, BBQ sauce, or honey and you’ve got a wonderful appetizer that adults will love. Great idea for those football game days!


Homemade Chicken Nuggets grandparensplus.com


Homemade Chicken Nuggets
Recipe Type: Main Dish
Cuisine: American
Author: Phyllis Van Rossum
Prep time:
Cook time:
Total time:
Best Chicken Nuggets!
Ingredients
  • Chicken Breasts
  • Flour
  • Eggs
  • Panko Bread Crumbs
  • Oil of choice or butter
  • Salt and Pepper
  • Like it spicier? Add some Kickin Chicken spice!
Instructions
  1. Cut chicken into bite-sized cubes.
  2. Beat eggs
  3. Have 4 shallow bowls and place flour, eggs, and Panko bread crumbs in each separate bowl.
  4. Roll cubes in flour to coat
  5. Dip in beaten eggs
  6. Roll in Panko bread crumbs – usually found in the baking aisle
  7. Fry in oil or butter of choice
  8. Season to taste
  9. When browned, remove and drain on a paper towel
  10. If freezing, place on baking sheet to freeze individually. When frozen, bag and seal. This way, you can use the amount that you need.


Don’t substitute regular bread crumbs for Panko. It’s Panko bread crumbs that make them so crispy and good. You’ll find a couple different brands of them in the baking aisle.

If freezing for later, place on a flat cookie sheet to freeze individually. When frozen, bag in smaller amounts. I like to make a big batch and have them in the freezer all ready to use. 

Homemade Chicken Nuggets grandparentsplus.com

YUM! Tender and juicy! They are the best! 

Enjoy!

Phyllis

Don’t miss a post. Subscribe on the sidebar. Your email is never sold or shared.

Follow on Pinterest, too.

Linked to these parties...


Posted in Appetizers, Main Dishes, Recipes | Tagged , , , , , , , , , , | 18 Comments