Christmas Tablescapes 2015 Part 1

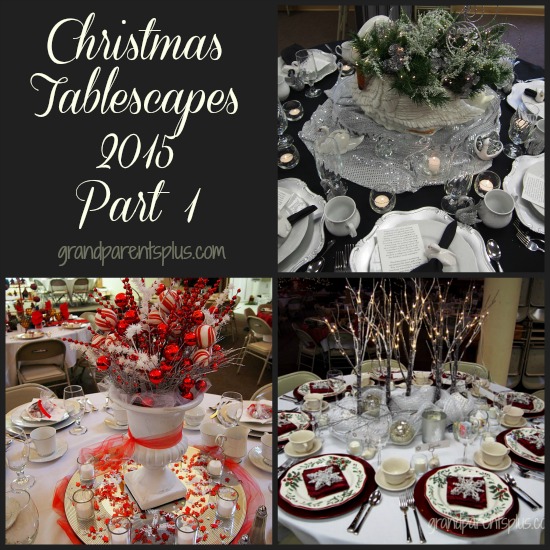
Oh, the creativity of the women at our church event! Each year the Christmas Tablescapes on each table are absolutely wonderful. We have a Christmas event that everyone looks forward to called a Christmas Extravaganza. Besides a wonderful Christ-filled program, the ladies attending enjoy seeing each table decorated by individual women in such gorgeous ways. It is a wonderful, festive way to start the season.

Christmas Tablescapes 2015 Part 1 grandparentsplus.com

I just need to share these beautiful ideas with you. Perhaps it will spark some inspiration for your own tablescapes. Some are elaborate, some whimsical, and others are very simple and elegant. Some start with a china inspiration and others go with a centerpiece inspiration.

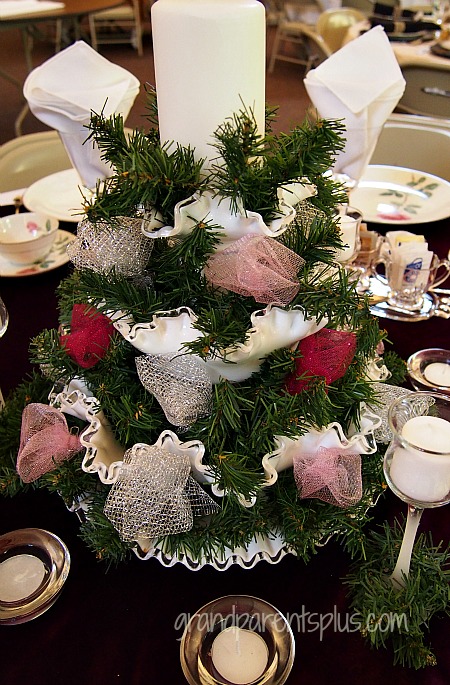
The first table centerpiece is four, graduated-sized milk glass serving pieces all tiered together.  It’s decorated with artificial pines, tuffs of pink, red and cranberry ribbon, and topped with a pillar candle. How clever to use some of your favorite pieces to create a one-of-a-kind Christmas tree.

Christmas Tabescapes 2015 Part 1 grandparentsplus.com

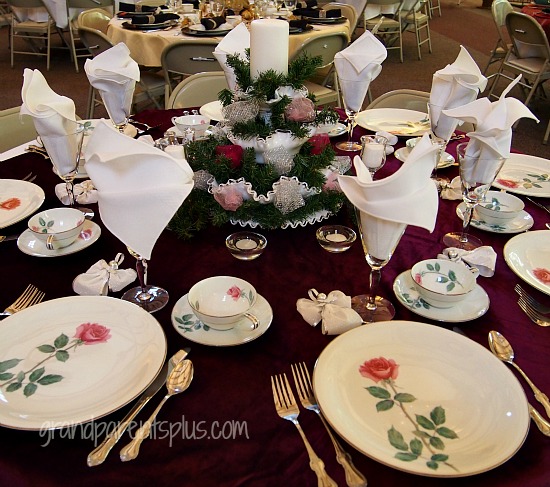
A burgundy tablecloth under the rose china makes a lovely vintage table setting.

Christmas Tablescapes 2015 Part 1 grandparentsplus.com

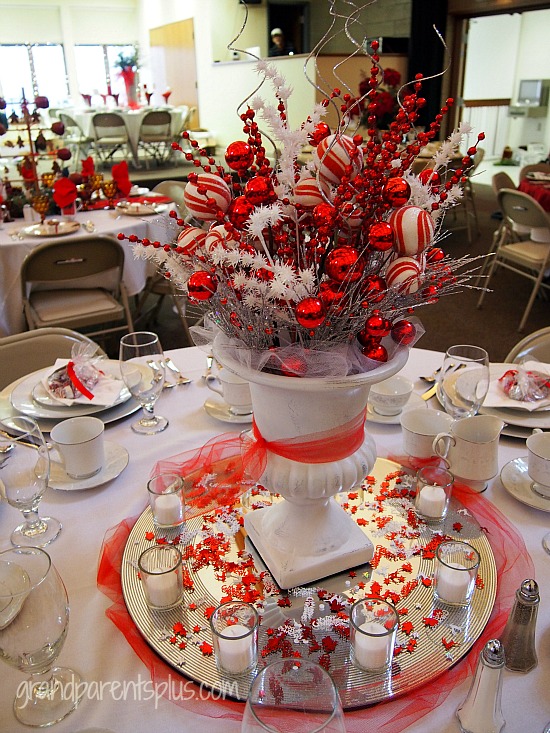
Lots of red and white balls accented with silver and red berries look great in the white garden urn. By placing it on a mirror base, the tea lights fill the table with light. Next summer, use the planter in your garden! Silver-rimmed, white dishes compliment the silver accents in the centerpiece.

Christmas Tablescapes 2015 Part 1 grandparentsplus.com


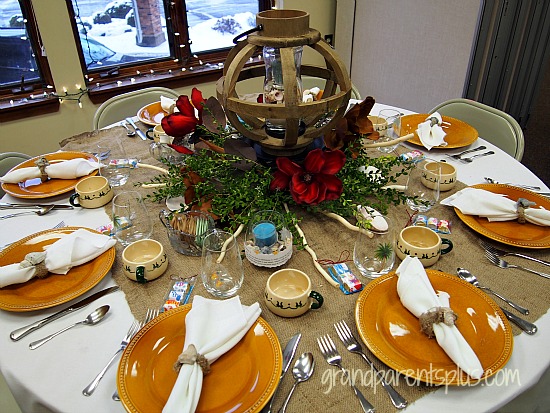
Not everyone lives in the northern regions that have snow, so why not have a Christmas table with a beach theme?

The circle wooden lantern has a candle inside surrounded by seashells. The artificial greens and flowers are typical of a tropical area, but do carry out the red and green of the season. Burlap on top of the table simulates the sand on the beach.

Christmas Tablescapes 2015 Part 1 grandparentsplus.com

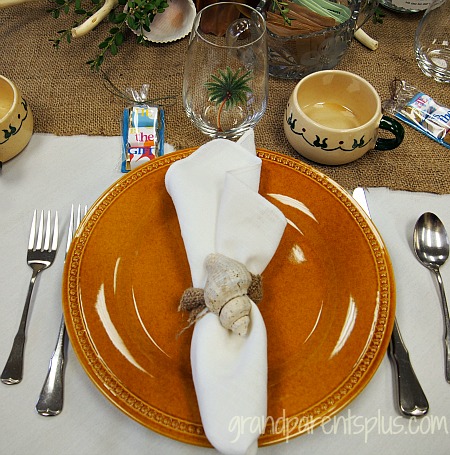
Lovely shell napkin rings fit the flavor of this Christmas table. Notice the glasses……they have a sticker attached to them to make them tropical as well! It make be cold outside, but this setting feels warm and fun!

Christmas Tablescapes 2015 Part 1 grandparentsplus.com

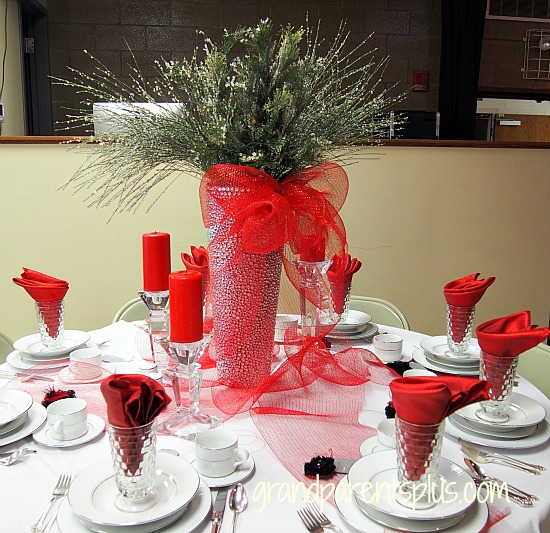
This elegant vase has rhinestones glued all around it. It is filled with greens and tied with a large red bow that flows down on the table. Three red pillar candles surround it.The white dinner set is accented with red napkins.

Christmas Tablescapes 2015 Part 1 grandparentsplus.com

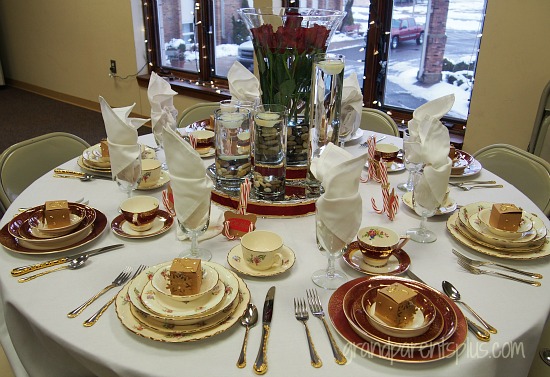
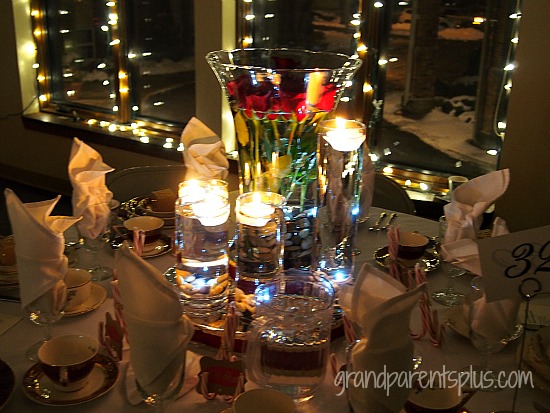
The two women that created this tablescape didn’t have enough place settings for eight people. However, each had a coordinating set with roses on them so they combined the two sets for this tablesetting. The centerpiece has roses held in the tall vase with pebbles. Distilled water is added up to the blooms with submersible lights added for drama. The graduated glass vases also hold pebbles, submersible lights, and floating candles.

Christmas Tablescapes 2015 Part 1 grandparentsplus.com


The centerpiece became quite dramatic when lit.

Christmas Tablescapes 2015 Part 1 grandparentsplus.com


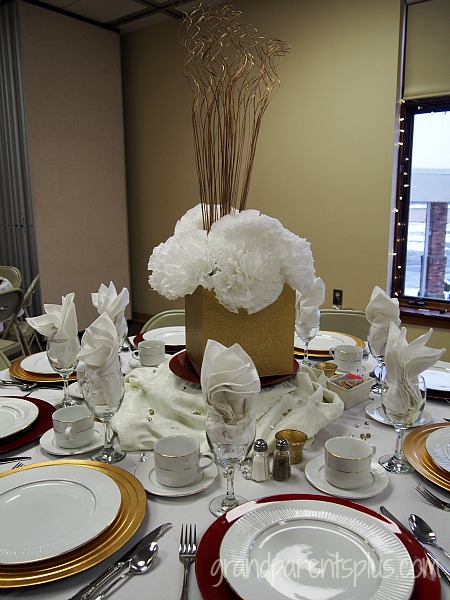
This centerpiece is made from a gold sprayed box, filled with white tissue paper flowers, and accented with tall gold floral stems.

Christmas Tablescapes 2015 Part 1 grandparentsplus.com

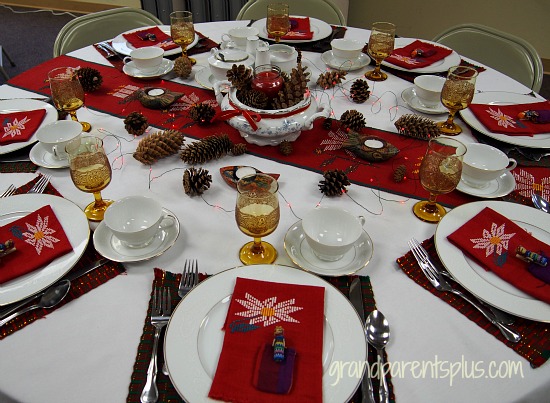
A detailed embroidered runner, placemats, napkins, and small dolls from Guatemala make this table unique. Christmas is celebrated around the world! The vintage soup tureen holds artificial pines and a candle. The glasses are also vintage pieces from her grandmother. How fun to create a table around special memories.

Christmas Tablescapes 2015 Part 1 grandparentsplus.com

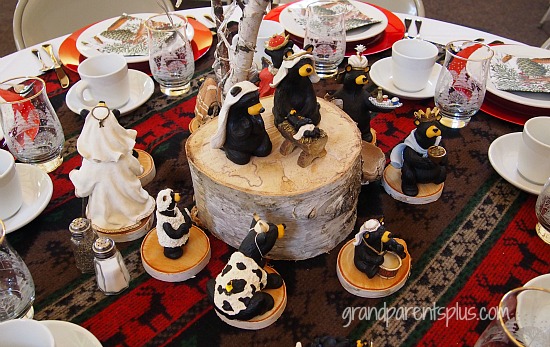
Even God’s animals celebrate Jesus’ birth! This is a whimsical, “beary” cute version of a nativity scene.  The figures are elevated on cuts from a birch tree. The woodsy table top adds to the theme. Notice the pine-tree glasses, too! 


Christmas Tablescapes 2015 Part 1 grandparentsplus.com

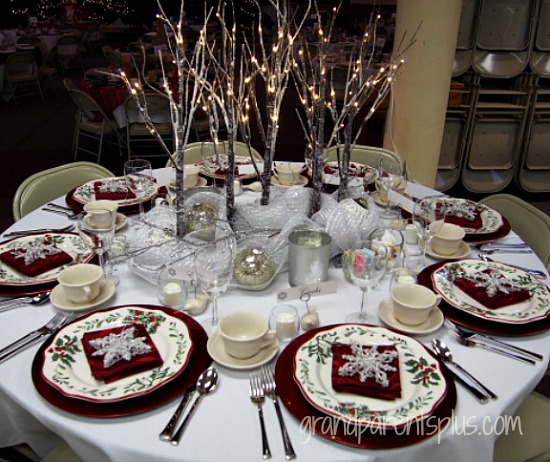
Five lit branches make this a festive, winter table. The centerpiece is tall, but guests can still see each other through the woods! Snowflake ornaments decorate the place-setting.

Christmas Tablescapes 2015 Part 1 grandparentsplus.com

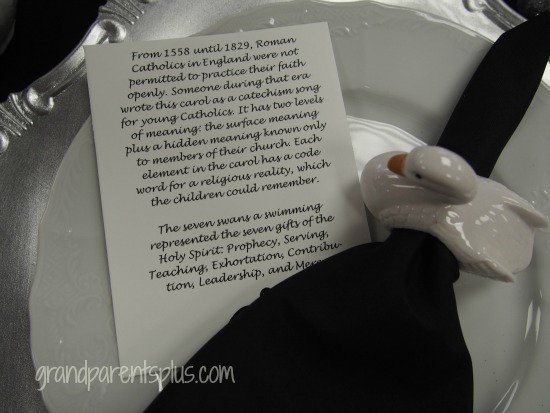
The last table for this party was the one that I decorated for this event. It is from the 12 Days of Christmas carol and represents the “7 Swans a Swimming” part. The song is actually a religious song that has a meaning for each phrase. Read the information on the card below.

Christmas Tablescapes 2015 Part 1 grandparentsplus.com

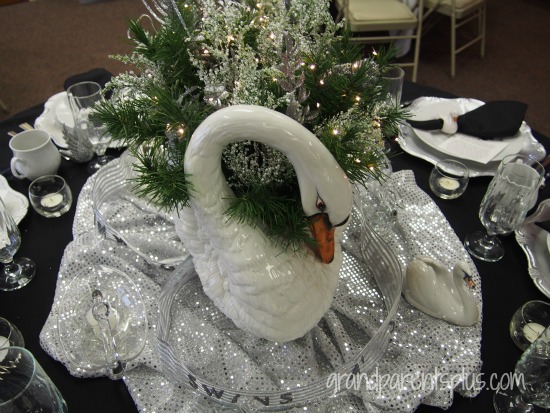
This swan usually sits in my bathroom with towels rolled and tucked into the opening. As a centerpiece, I filled it with artificial green pines along with white and silver floral additions. The small battery lights add a sparkle. Six other small swans circle the big one on  glittered silver fabric. 

Small silver swan ornaments sit to the right of each place-setting.

Christmas Tabescapes 2015 Part 1 grandparentsplus.com


Christmas Tablescapes 2015 Part 1 grandparentsplus.com

Did you know the meaning of “7 Swans a Swimming”?


I love to set a beautiful table, don’t you?

These are just some of the Christmas Tablescapes I have to show you. More are coming in Part 2 and

Part 3. 

Subscribe so you don’t miss the next posts. Your email is never shared or sold. 

Hope you enjoyed seeing this variety of tablescapes.

Phyllis

Follow on Pinterest.

post linked to these parties….


Posted in Christmas, Decor, Holidays | Tagged , , , , , , , , , , , | 5 Comments

Vintage Trunk with a Nativity

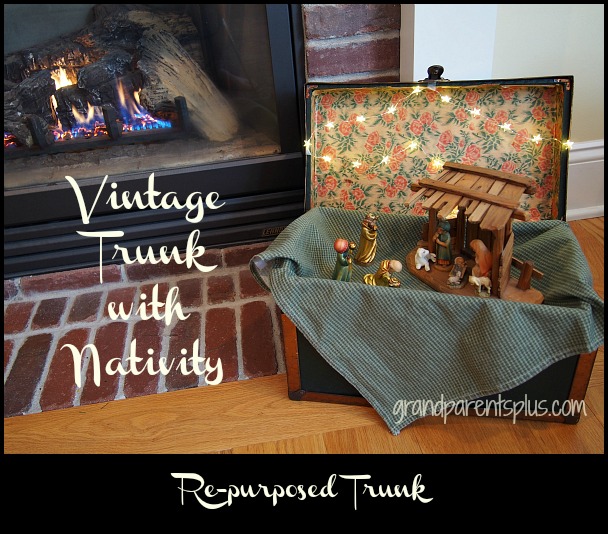
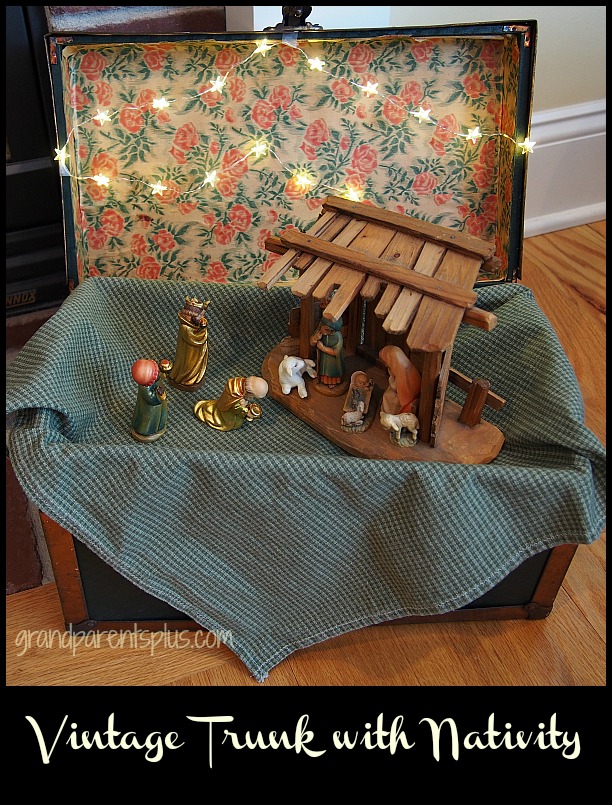
This past summer, at a garage sale, I came across a small vintage trunk in terrific shape. The price was very reasonable and I knew that it was a perfect size to display this Vintage Trunk with a Nativity set for Christmas. Needless to say, I quickly snatched it up!

Vintage Trunk with Nativity grandparentsplus.com


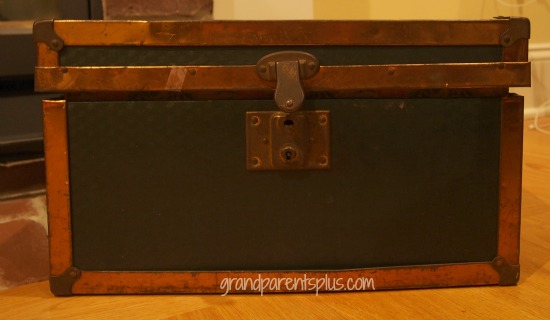
I had looked for a small suitcase, but this was even better. The inside was in great condition and the outside was a dark green color. Perfect for Christmas! It measured 16 inches wide and 11 inches high. 

Vintage Trunk with Nativity grandparentsplus.com

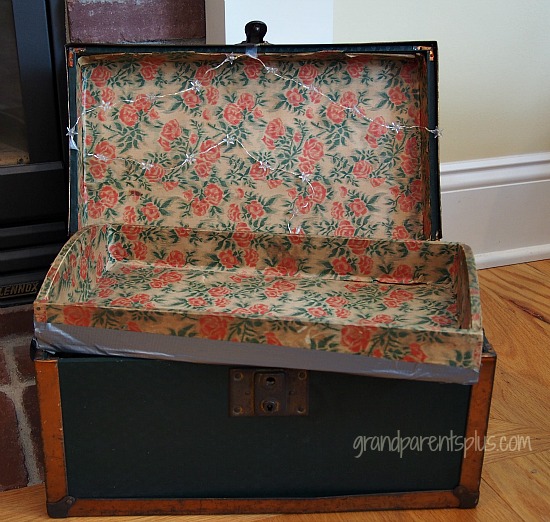
I said that the trunk was in great condition, but it had an ugly duct tape repair job on the tray. When it was inside the trunk, it didn’t show, but when I angled it, it was pretty bad. A piece of cloth covering it, took care of that! Besides, I didn’t want the display way down low. 

Vintage Trunk with Nativity grandparentsplus.com

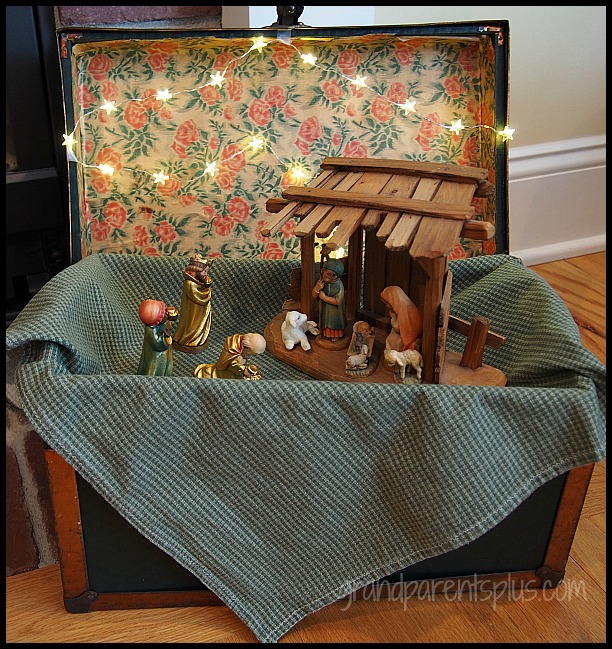
I had the little battery star lights from last year, so out they came and I gently taped them across the top, but not on the paper backing. I placed my little Italian nativity on the green cloth. It was a perfect size for the display! Because I angled the tray, it gave a space to drop the battery for the lights down in the trunk and out of sight.

Vintage Trunk with Nativity grandparentsplus.com

Ahh! My new addition to our Christmas decorations! I’ve had this idea from seeing a display in the Christmas Idea House 2014 Part 3  , but I wanted mine to be a Nativity display. 

Vintage Trunk with Nativity grandparentsplus.com

Thanks for stopping by and have a wonderful Christmas celebrating Jesus, our Savior’s birth!

Phyllis

If you subscribe, know that your email is never shared or sold!

Follow on Pinterest!

linked to these parties….
Posted in Christmas, Decor, Holidays | Tagged , , , , , , | 13 Comments

Snowman Placesetting for Kids

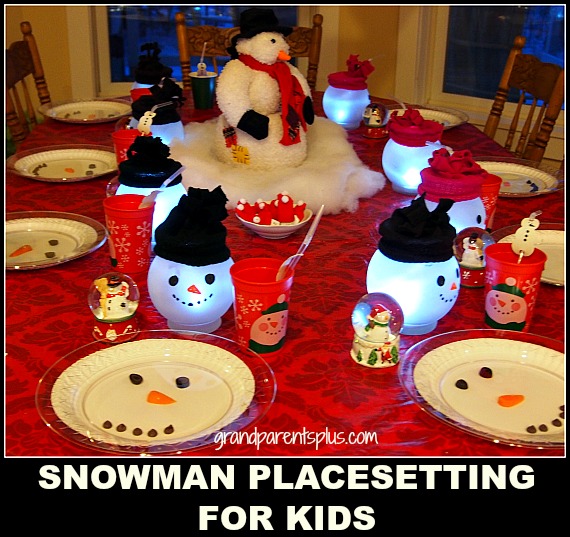
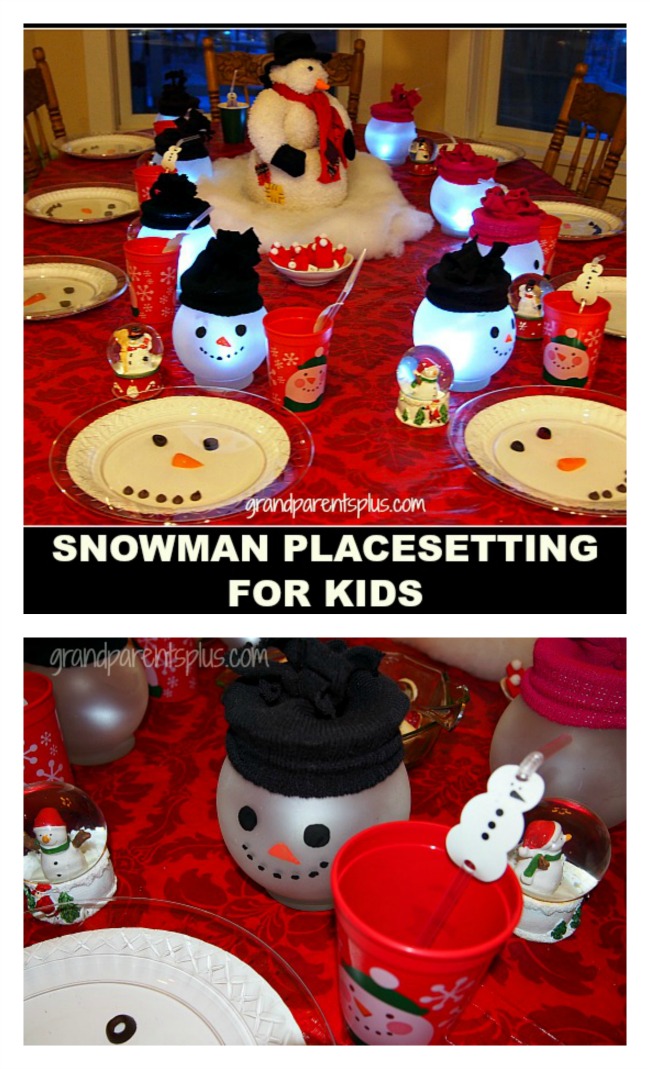
I like to make the grandchildren’s placesetting special for Christmas. Last year, I did the Snowman Placesetting for Kids! I took pictures and decided to share them with you this year.  The funny snowman in the middle was a last-minute thought and I couldn’t find a better one anywhere. It worked, though. I found him at a thrift store for $1!

Snowman Placesetting for Kids grandparentsplus.com

 Materials Needed for Snowman Plates:

Cheap white paper plate

Clear Plastic Dinner Plate

Black Olives – sliced

Carrot

Chocolate Chips


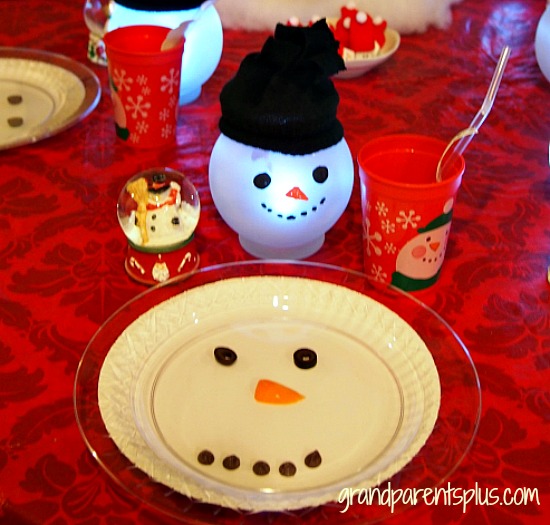
This is the easiest way to set a snowman table for kids. I used the sliced olives for eyes, slice of carrot for nose and chocolate chips for the mouth. Lay everything on the white paper plate and cover with the clear plastic dinner plate. Now, kids can eat and not disturb the snowman face!

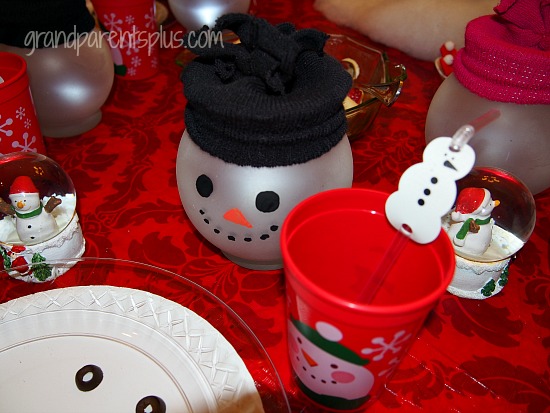
Snowman Lights, lit up with an LED light, were at each placesetting. I purchased the snowman cups after Christmas on clearance the year before. Also, I added a snowman straw decoration for another accent. The snow globes came from Dollar Tree. Finally, I added a snowman in the middle for a fun Snowman Placesetting for Kids!

Snowman Placesetting for kids grandparentsplus.com

Put the lights down low and let the snowman globes glow!

Snowman Placesetting for Kids grandparentsplus.com


Be sure to use LED lights in the snowman globes as the little candle lights are not strong enough to show through. Besides, the candle lights give a yellow glow and you want your snowman globe to have a white glow. Find the LED lights at a local craft store.

Watch the faces of the children light up as they see this special Snowman Place-setting just for them! The snowman face stays perfect while they eat on the plastic plate on top. You may want to check out my other kids place-settings for both Thanksgiving and Christmas.

Snowman Placesetting for Kids grandparentsplus.com

Make memories this Christmas! 

Enjoy!

Phyllis

Subscribe knowing your email is never shared or sold!

Follow on Pinterest, too.

Linked to these parties…

Posted in Christmas, Crafts, Holidays | Tagged , , , , , | 16 Comments

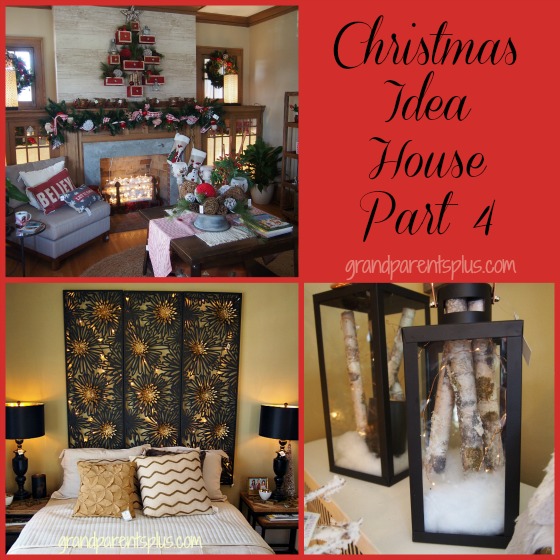
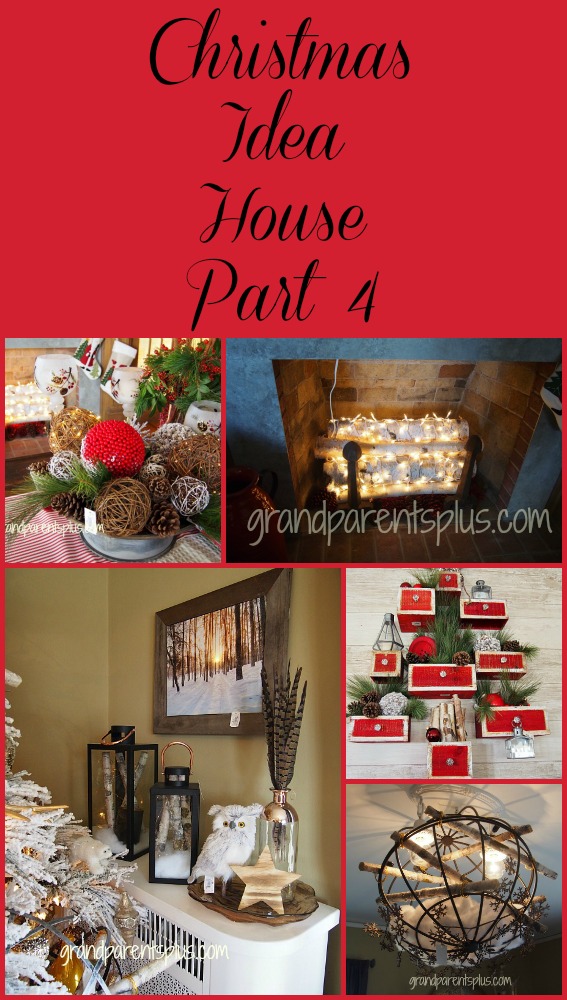
Christmas Idea House Part 4

Sad to say that this is the final post of the Christmas Idea House for this year. It has been fun to show you all the ideas included in this house decorated by many talented designers. Some ideas never go out of style so be sure to look at last year’s posts of the Christmas Idea House 2014 Part 1, Part 2, and Part 3  for more inspiration.

Christmas Idea House Part 4 grandparentsplus.com


This time we’ll visit the last four areas of this home: Den, Guest Bedroom, Sunroom and Living Room.

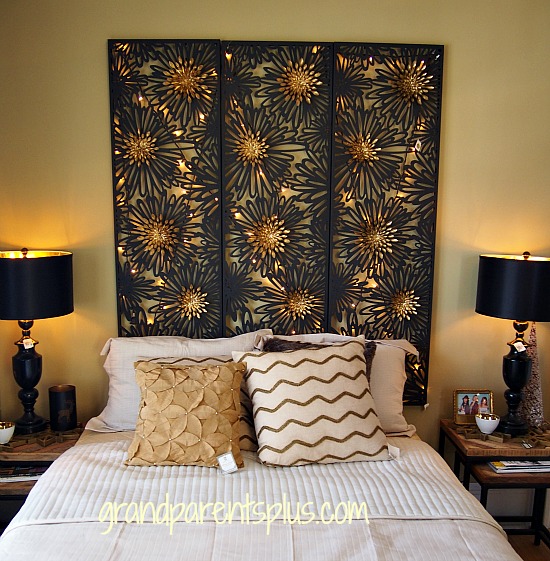
In the guest bedroom, three metal floral panels create this amazing headboard. For the Christmas season, lights are added for that holiday sparkle.

Christmas Idea House Part 4 grandparentsplus.com


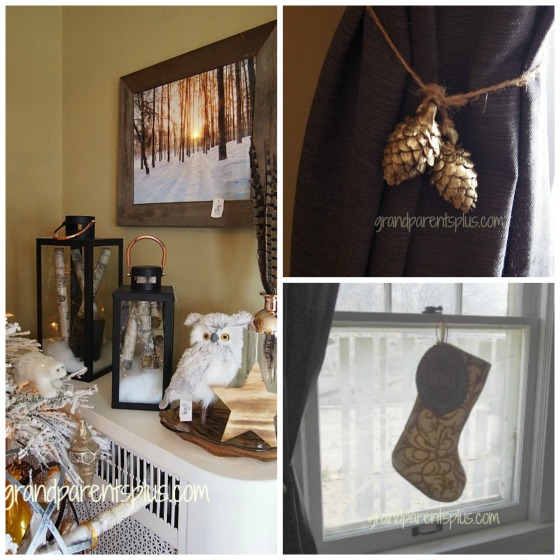
In the black lanterns below, artificial snow and a couple of birch branches with battery operated lights make an easy, but lovely display. The stencil on the windows is the same one that we saw in the kitchen and bathroom only this is used on the windows with snow spray.  The window stencil is not permanent, but sure adds to the woodsy feel of the room. The curtain tiebacks, use small pinecone ornaments as another woodland touch.

Christmas Idea House Part 4 grandparentsplus.com


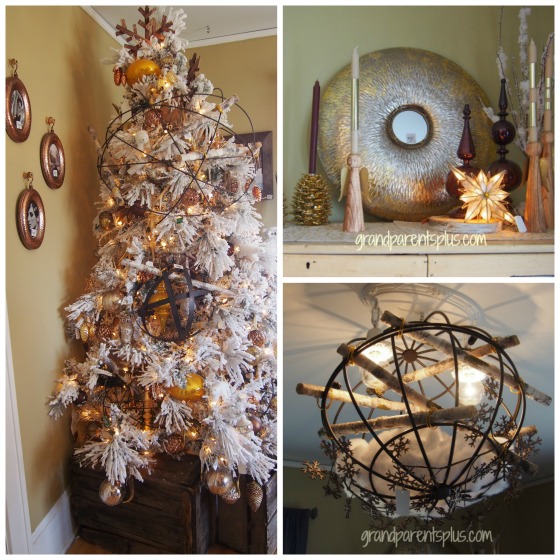
The Christmas tree has decorations of metal orbs and birch branches. The guest bedroom light is a metal orb attached to make a chandelier decorated with birch branches, batting for snow, and metal snowflake ornaments. The arrangement on the dresser uses a mix of metals, finials, and candles all highlighted by a star accent. Christmas Idea House Part 4 grandparentsplus.com

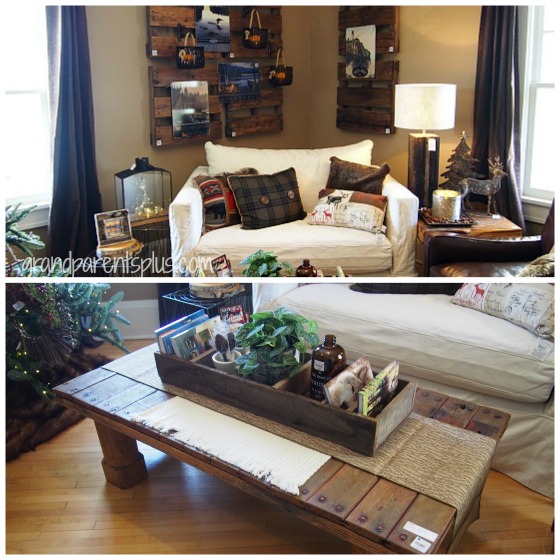
In the den, mini pallets provide a background for artwork and mini lanterns. A vintage dock makes a unique coffee table.

Christmas Idea House Part 4 grandparentsplus.com


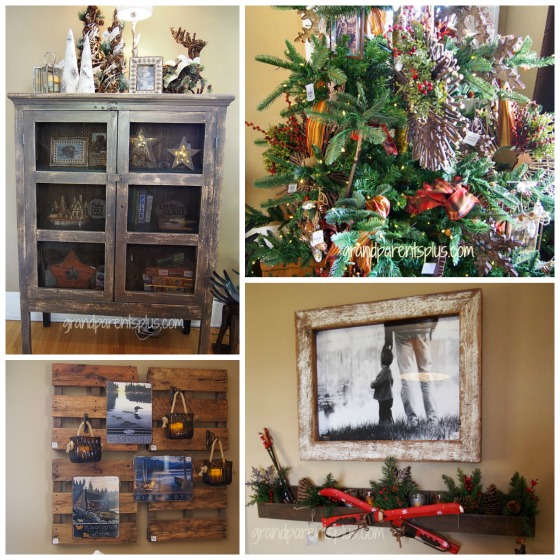
The vintage pie cabinet stores games and books with lit stars shining out as a Christmas accent. Small twig wreaths and  picture frames decorate the tree. A little vintage wall cubby placed under a picture makes a perfect spot for seasonal decorations of skis, pine stems, small ornaments, and battery votive candles. This is easily changed for another season, too.

Christmas Idea House Part 4 grandparentsplus.com

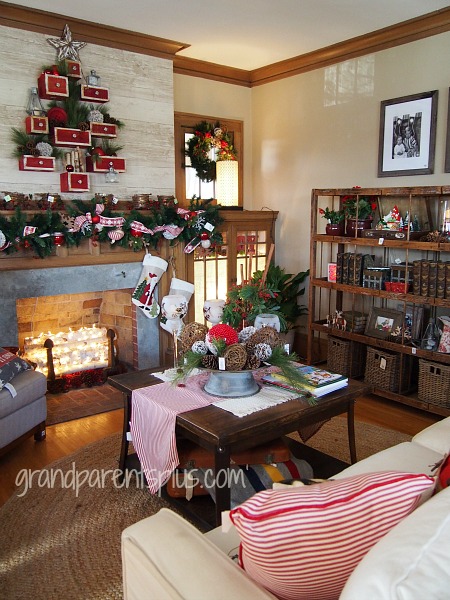
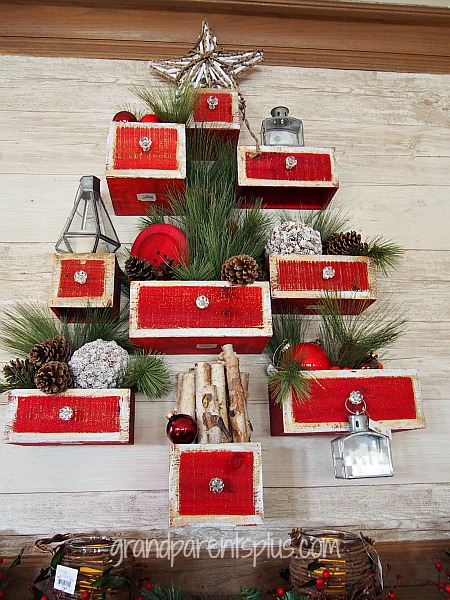
The fireplace display is the first thing that catches your eye as you enter the living room. Small. assorted-sized red decorative boxes create a Christmas tree above the mantle. The boxes hold artificial pine boughs, lanterns, birch sticks, and ornaments.

The logs in the fireplace have white lights wrapped around them with some red pinecones placed underneath. It suggests a burning fire.

Christmas Idea House Part 4 grandparentsplus.com


Christmas Idea House part 4 grandparentsplus.com

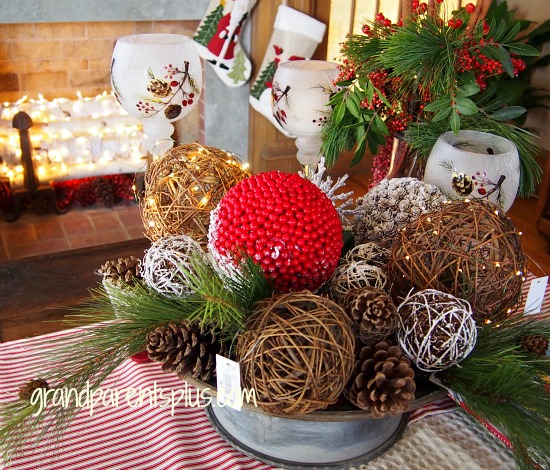
The arrangement in the vintage metal bowl holds twig balls, wrapped with battery powered lights, along with pinecones and an array of other ball ornaments and artificial greenery.

Christmas Idea House Part 4 grandparentsplus.com

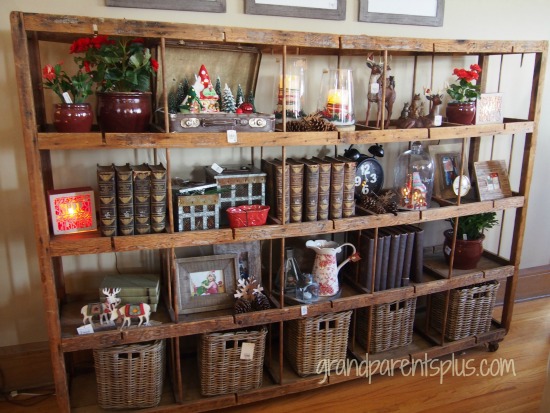
A large vintage wood rolling rack makes a one-of-a-kind wall shelving unit with lots of space for books, seasonal displays, candles, and baskets.


Christmas Idea House Part 4 grandparentsplus.com

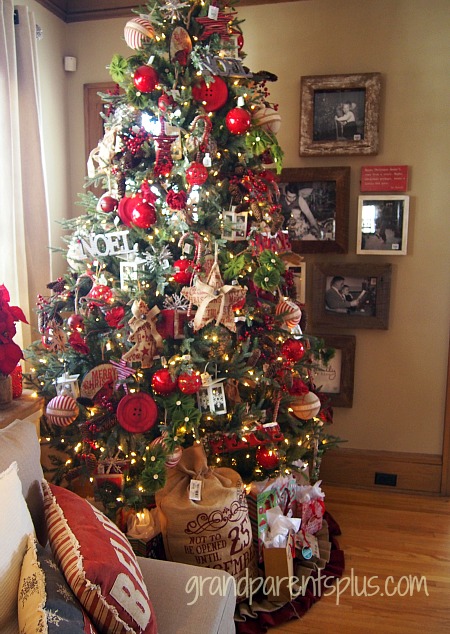
The living room Christmas tree is decorated in red and white. White decorative lanterns hang from the Christmas tree branches with large balls adding a bold punch of red color.

Christmas Idea House Part 4 grandparentsplus.com


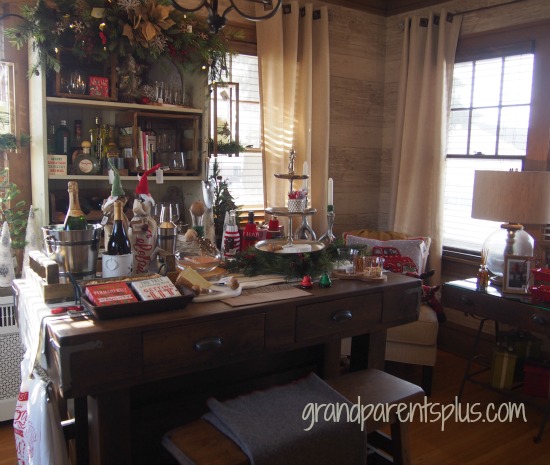
Adjoining the living room is the sunroom with an antique cabinet set on the radiator to create a bar.

Christmas Idea House Part 4 grandparentsplus.com

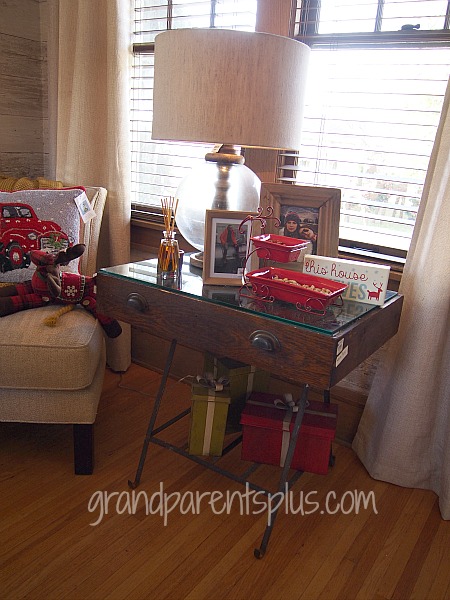
To the right of the bar, a vintage drawer is attached to the top of an iron stand to create a side table. Perhaps a vintage sewing machine stand would work, too!

Christmas Idea House Part 4 grandparentsplus.com

So many great ideas for decorating your own home both using vintage and new items. Did you find some ideas that you can use? The Christmas decorating season is upon us! I hope you enjoyed this tour and that it helped spur some creative ideas of your own. Be sure to go to Part 1, Part 2 and Part 3 of the 2015 Christmas Idea House, if you missed these posts.

Christmas Idea House Part 4 grandparentsplus.com

Happy Decorating!

Phyllis

Be sure to subscribe! I never sell or share your email.

Follow on Pinterest, too

linked to these parties….
Posted in Christmas, Decor, Holidays | Tagged , , , , , , , , , , | 13 Comments

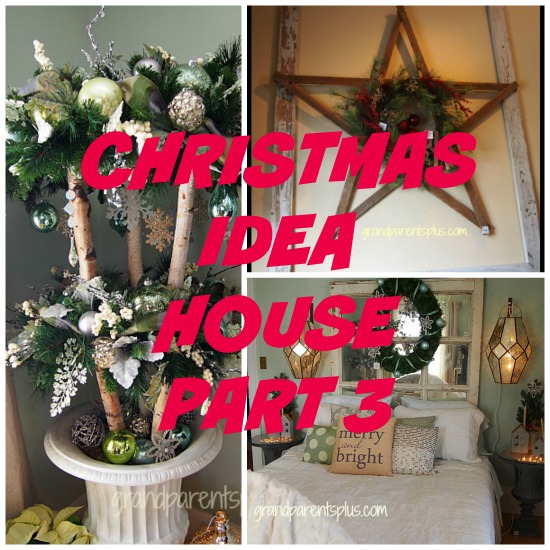
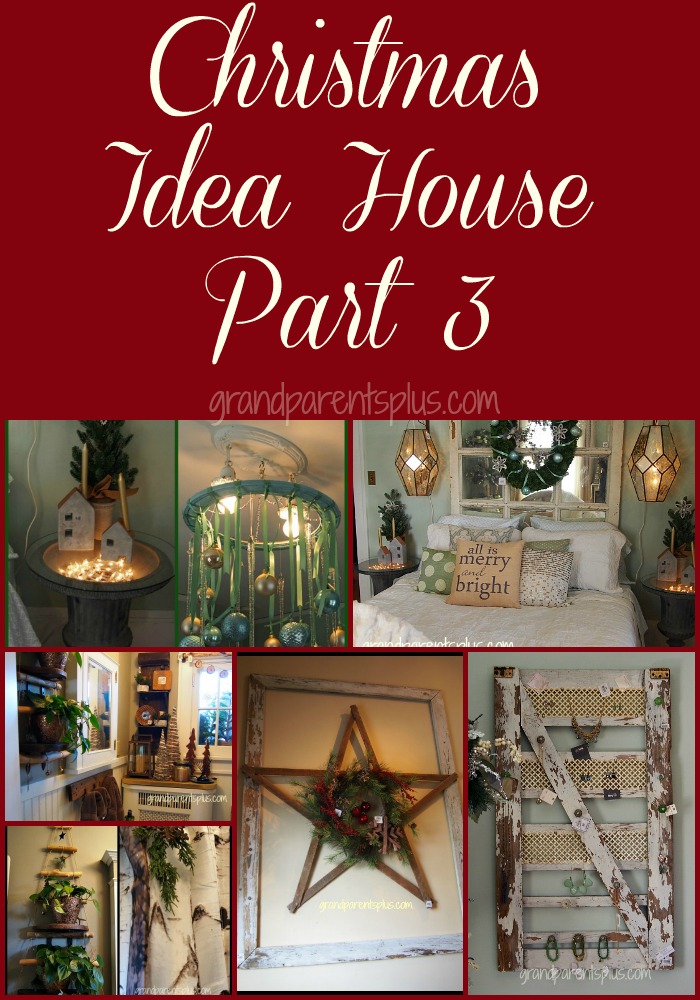
Christmas Idea House Part 3

Christmas Idea House Part 3 takes you into 4 areas of this home which is full of inspirational ideas for your own Christmas decorating. A team of decorators  fill this home with arrangements using new decor, vintage pieces re-purposed, along with unique decorating ideas that can be done in your own home.

Christmas Idea House Part 3 grandparentsplus.com

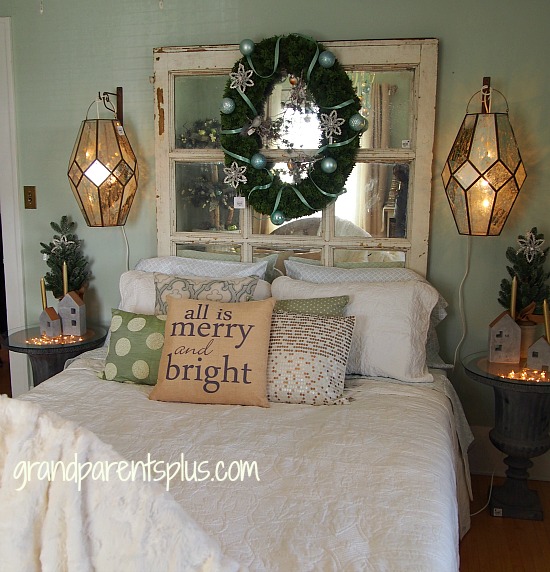
The headboard in the master bedroom is a beautiful mirrored vintage window. (actually an antique ballroom mirror) A large wreath makes it special for the Christmas season.

Christmas Idea House Part 3 grandparentsplus.com

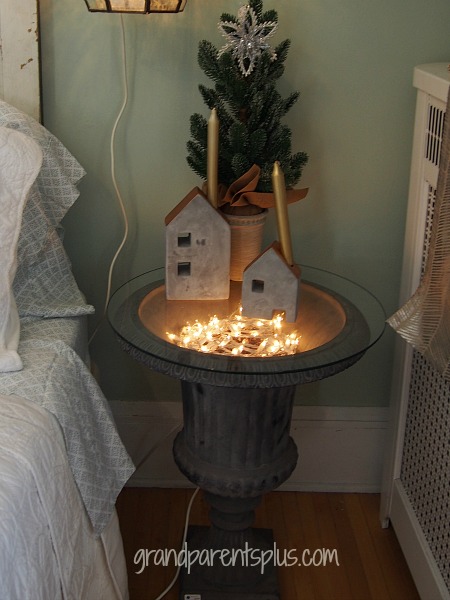
Notice the tables along side of the bed. They are metal garden urns turned into side tables.

Christmas Idea House Part 3 grandparentsplus.com

With a circle of glass on top and twig balls with Christmas lights inside, this garden urn makes for an unusual, but lovely bedside table.

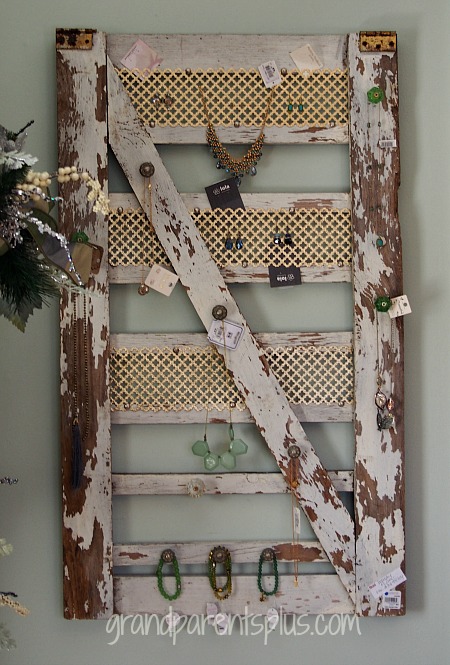
Two more creative ideas in this bedroom are the salvaged wooded gate and a non-traditional Christmas tree. The gate has decorative metal added between the rungs to hang jewelry.

Christmas Idea House Part 3 grandparentsplus.com

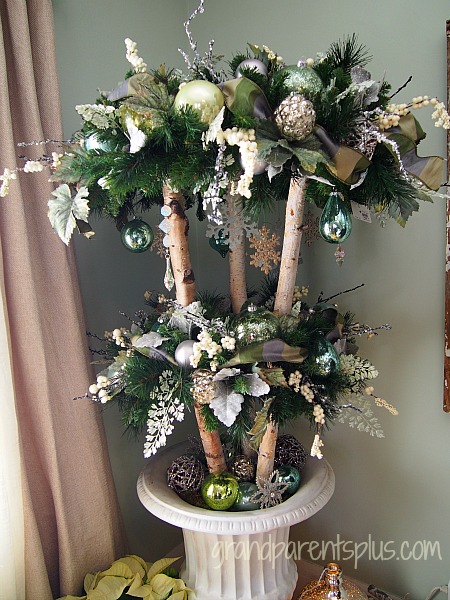
In the corner of the bedroom is the non-traditional Christmas tree. Three birch poles, two wreaths of different sizes, various ornaments, and lights all arranged in a garden urn become a unique tree.

Christmas Idea House Part 3 grandparentsplus.com

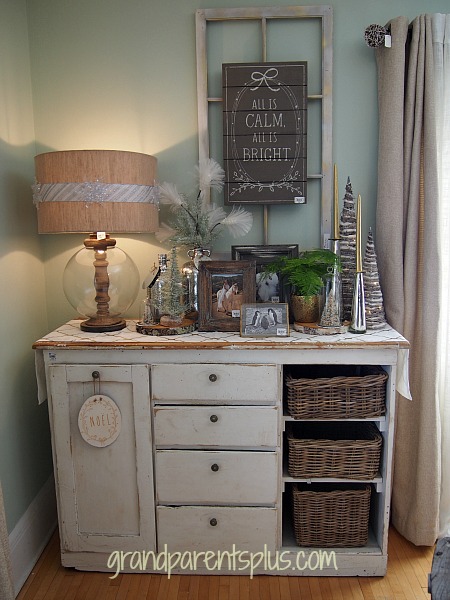
Over the dresser, another vintage window makes a backdrop for a Christmas wall plaque.

Christmas Idea House Part 3 grandparentsplus.com

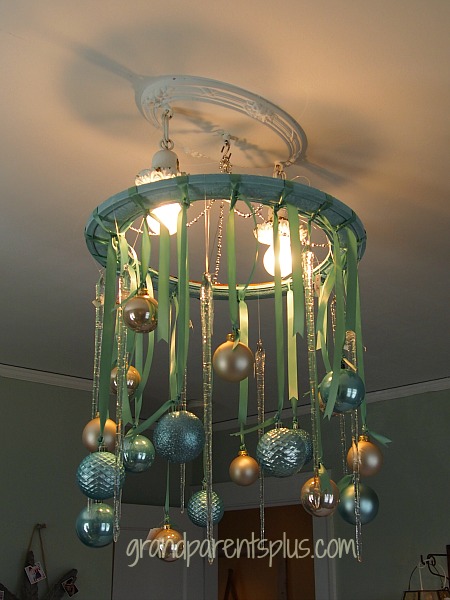
Hanging from the ceiling light fixture is a vintage wall frame decorated with ribbon, icicles, and ornaments.

Christmas Idea House Part 3 grandparentsplus.com

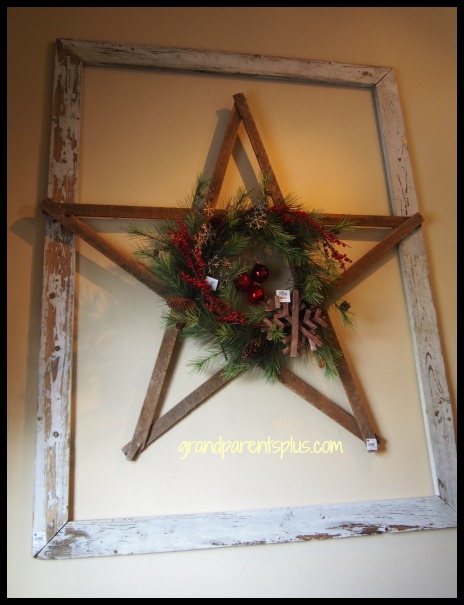
In the stairway, a salvaged frame with a wooden star, decorated with wreaths and ornaments, looks beautiful for a large space. If you want to know how to make an inexpensive star, go to $1 wooden star for an easy tutorial! Use it both for Christmas and 4th of July!

Christmas Idea House Part 3 grandparentsplus.com

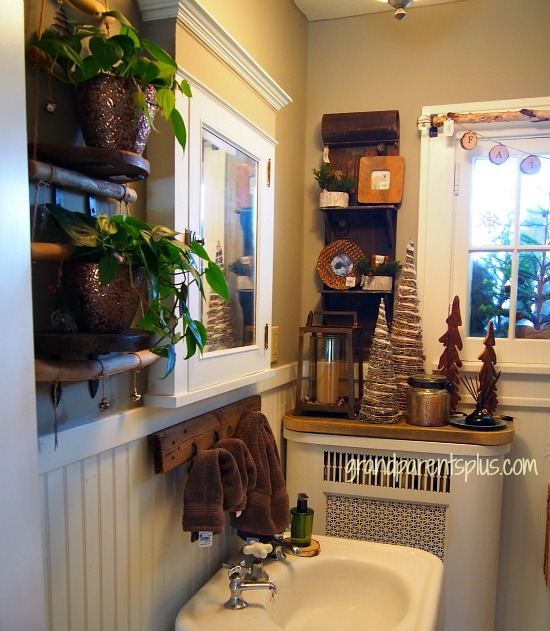
The small upstairs bathroom is very tiny, but it has big ideas. The curtain rods are birch branches with a wood-slice garland creating a valance for the small window. To the left of the window is a small wooden sleigh turned into a wall shelf.

Christmas Idea House Part 3 grandparentsplus.com


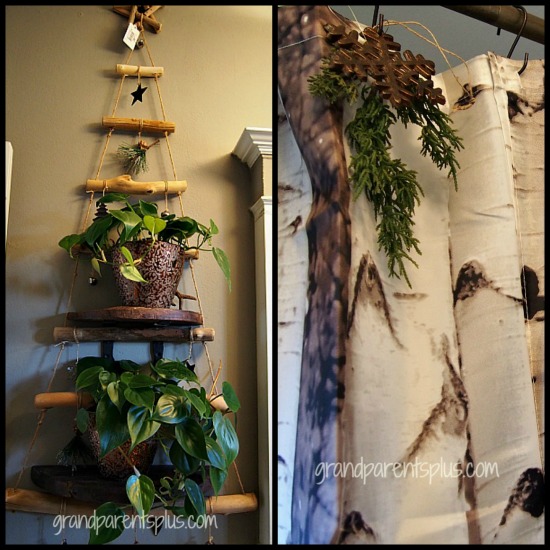
The birch printed shower curtain has accents of wood ornaments and permanent pine stems.

Graduated pieces of wood tied together create a Christmas tree that fits perfectly with the Northwoods decor.


Christmas Idea House Part 3 grandparentsplus.com


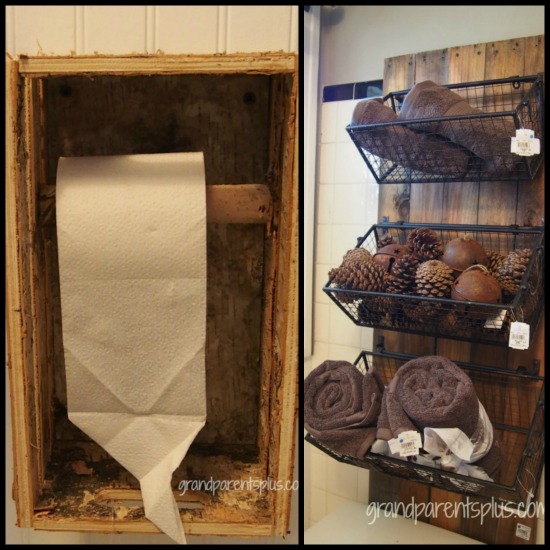
Of course, to go with the woodsy feel, the toilet paper holder is a birch box with a dowel through it! Also, the salvaged wood with baskets attached hold extra towels and pinecones.  They sure packed a lot of ideas in such a small bathroom!

Christmas Idea House Part 3 grandparentsplus.com

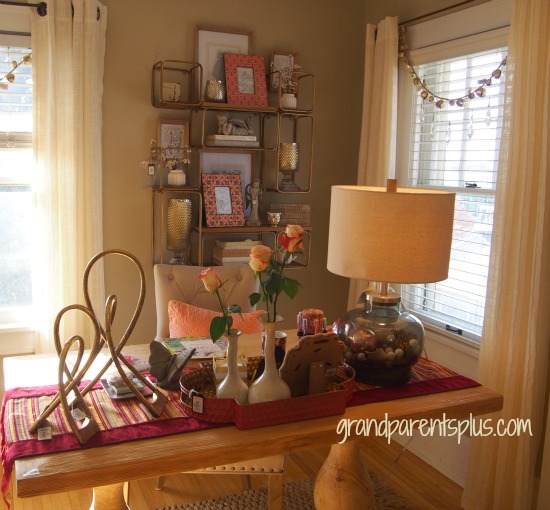
The last room of this post is the office. On the wall, gold cubes attached to the wall create very interesting decorative shelving.  The hollow lamp-base on the desk holds pinecones and ornaments.

Christmas idea House Part 3 grandparentsplus.com

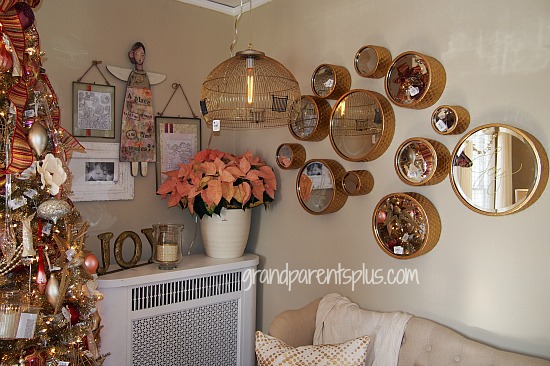
On the opposite side of the room are an array of gold mirrors on the wall. On several mirrors, they used gold window markers to write “Joy, Peace, and Noël”. That’s an easy Christmas idea!  The hanging pendant light is actually a re-purposed bird-cage.

Christmas Idea House Part 3 grandparentsplus.com

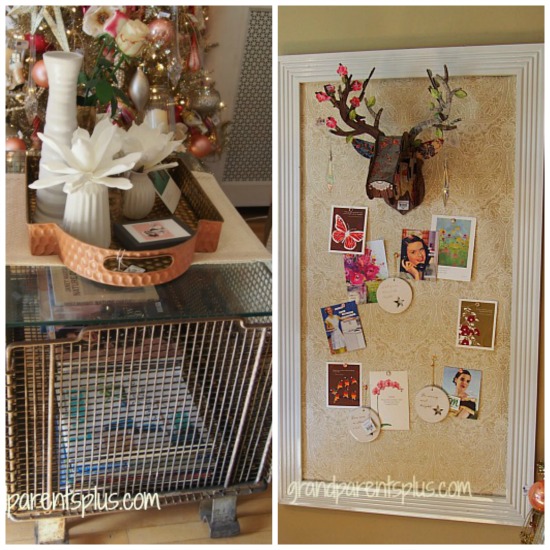
The coffee table is a salvaged lobster cage with an added glass top.

A metal deer decorates the bulletin board. The backing of the bulletin board is a paper tablecloth.


Christmas Idea House Part 3 grandparentsplus.com

I hope you are inspired by the wonderful creative ideas in this Part 3 post. If you missed Christmas Idea House Part 1 or Christmas Idea House Part 2, be sure to click on them and see the decorating ideas there, too!

Christmas Idea House Part 3 grandparentsplus.com

One Christmas Idea House post is left so subscribe on the sidebar and you won’t miss it. I never share or sell your email.

Thanks for stopping by and Happy Decorating!

Phyllis

Follow on Pinterest, too.

Post linked to these parties…

Posted in Christmas, Decor, Holidays | Tagged , , , , , , , , , , , | Leave a comment

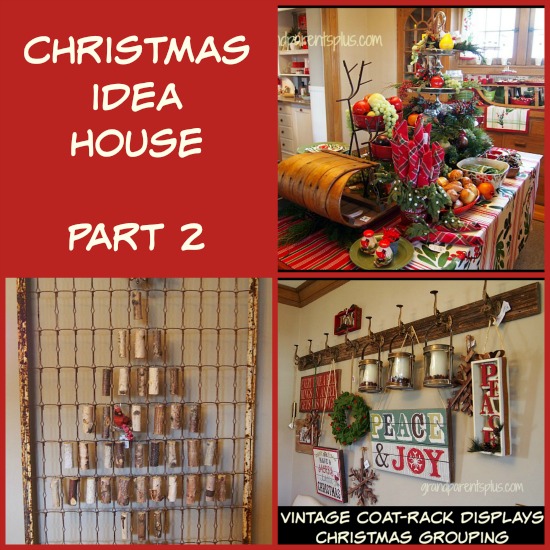
Christmas Idea House Part 2

The Christmas Idea House is decorated by several designers and is filled with Christmas decorating inspiration! I love new ideas to make our home festive at Christmas. For this post, I’ll show you the dining room, kitchen, and small bathroom. Watch for lots of re-purposed vintage pieces used in fun new ways!

Christmas Idea House Part 2 grandparentsplus.com

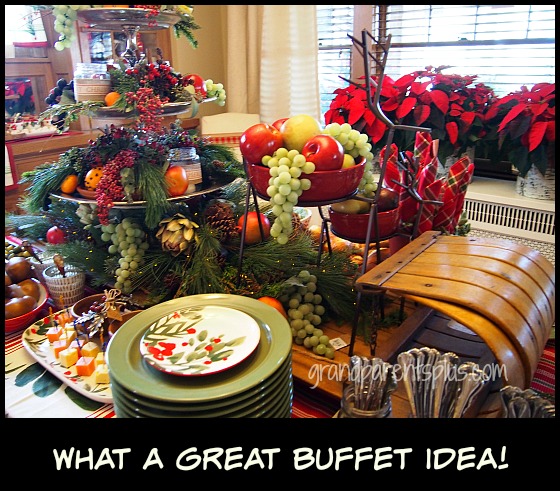
As you enter the house, the dining room catches your eye right away with the wonderful buffet displays and vintage pieces re-purposed.

The  table is all set for a fabulous buffet. Notice the toboggan placed on top of the table (how could you not notice – ha) with two large metal reindeer leading the way for the beautiful array of food! 

Christmas Idea House Part 2 grandparentsplus.com

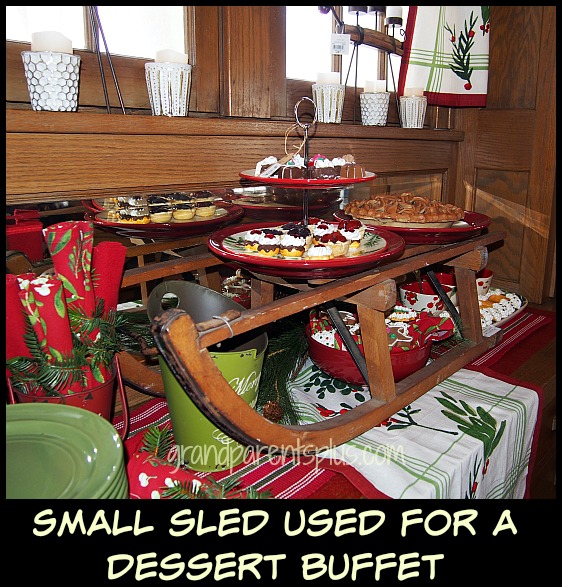
The desserts are displayed on another European sled on the built-in buffet.

Christmas Idea House Part 2 grandparentsplus.com

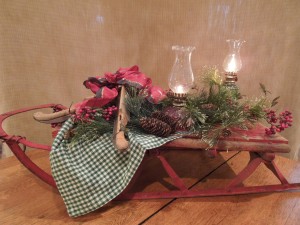
This is the cute little red sled that I use for decorating at Christmas. Sometimes it becomes the centerpiece and sometimes I use it on my coffee table.  It’s a great vintage piece that I really enjoy using.

24 Christmas Tablesettings grandparentsplus.com


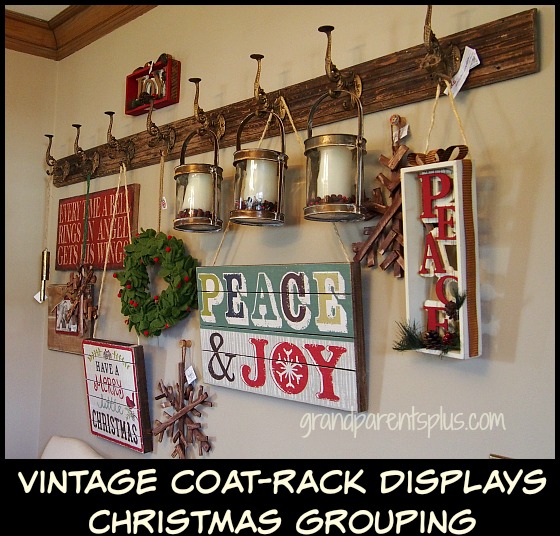
On one wall of the dining room, a display of Christmas wall hangings, wreath, lanterns, and winter decor all hanging from a vintage coat rack. Everything is changeable for a different season.

Christmas Idea House part 2 grandparentsplus.com

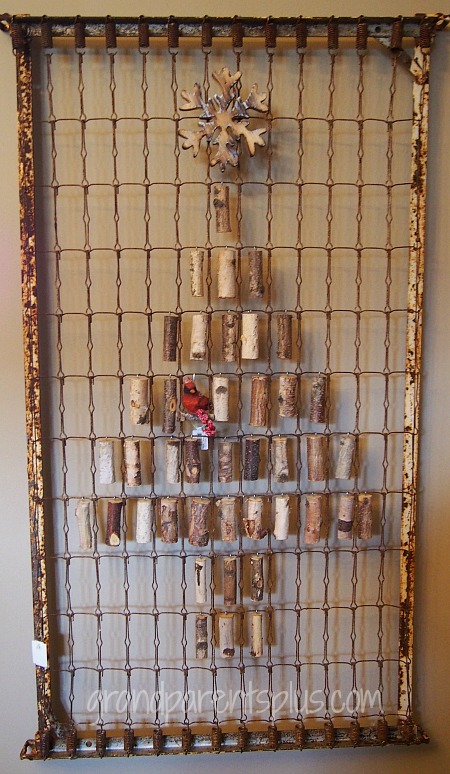
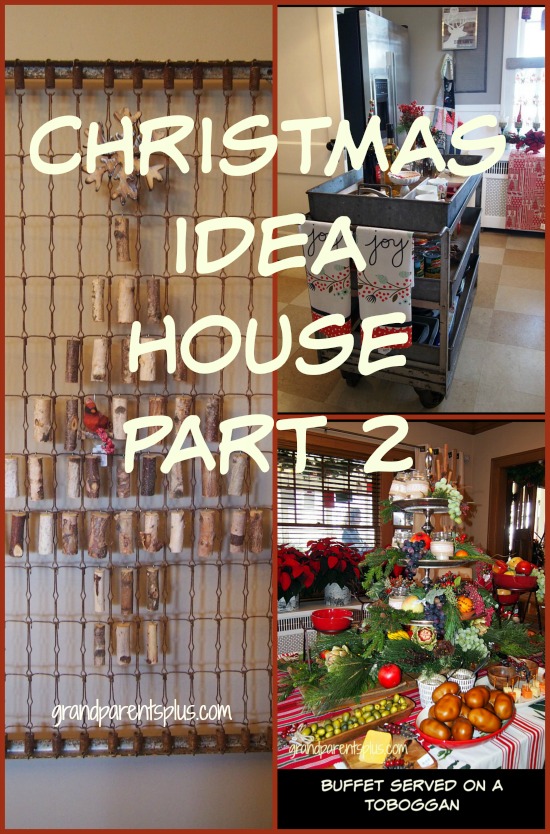
I’ve seen many ideas for a crib bed-spring, but this is one tops them all, I think! Each small section of a birch branch hangs from the sections of the spring to create a tree. Don’t you love the little bird, too?

The sections of birch branches have a cup hook attached at the top. 

Christmas Idea House Part 2 grandparentsplus.com

A wooden star finishes off the top of the tree! I think this is outstanding! It’s certainly a conversation piece! I thought the Fall Decor Idea House – Part 3  had an unusual idea for a bed-spring. Now, this is totally different. I wonder how many ways you can re-purpose an old bed-spring, don’t you?

The kitchen wall looks interesting with  birch trees stenciled on the wall. Little red birds accent the birch trees and add a pop of color. This winter scene wouldn’t last all year, but by putting it in a large frame instead of on the wall, it would be changeable with the season. 

Christmas Idea House Part 2 grandparentsplus.com

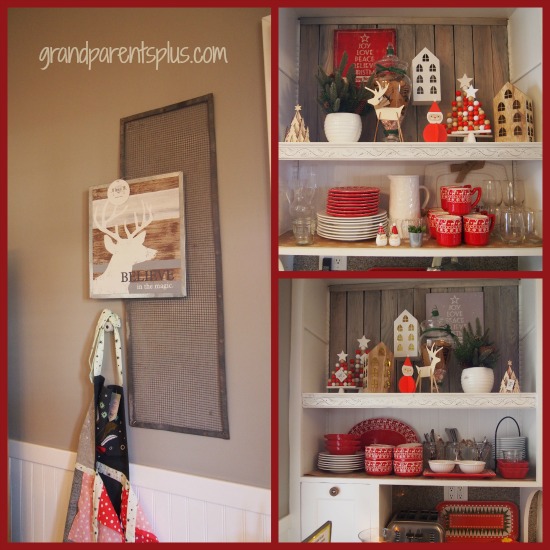
The open kitchen shelving includes red and white Christmas accents among the red and white china.

On the wall, a unique piece of metal screen is re-purposed as an accent for a piece of Christmas art. Also, an old insulator attached to the wall, serves as an apron hook. 

Christmas Idea House Part grandparentsplus.com

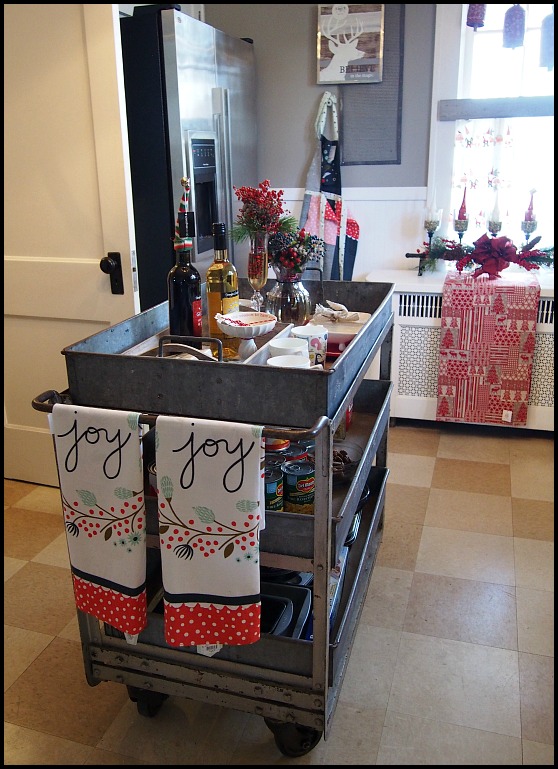
The island in the kitchen is a salvaged industrial cart. It gives extra storage below and can be moved anywhere.


Christmas Idea House Part 2 grandparentsplus.com

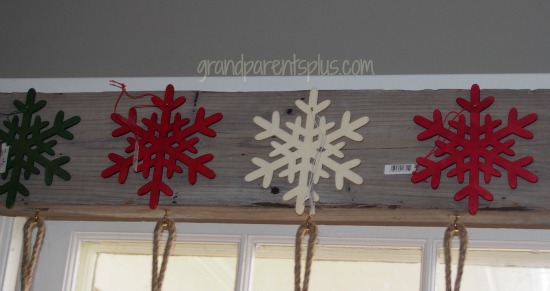
Salvaged wood with decorative wooden snowflakes create an interesting valance for the season.


Christmas Idea House Part 2 grandparentsplus.com

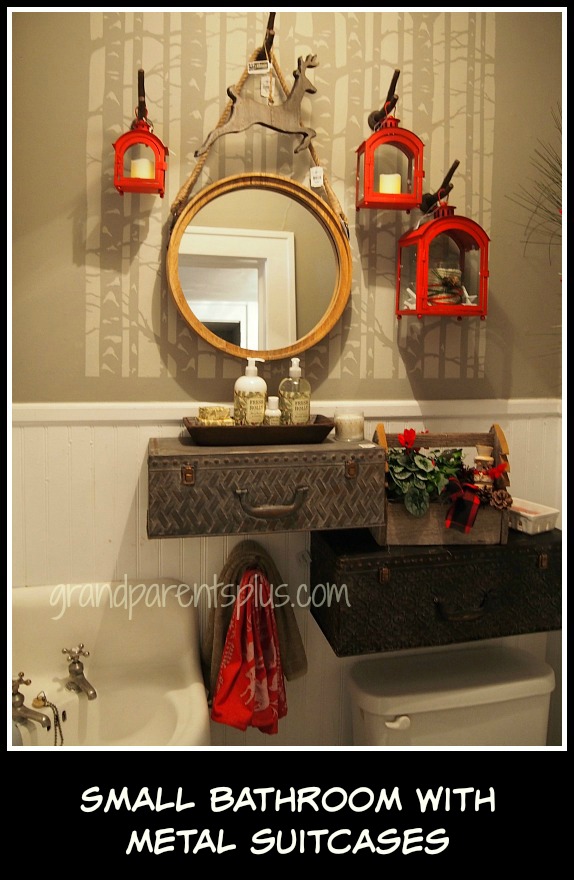
In the small bathroom just off the kitchen area, you see the same birch tree stencil. A simple wooden cut-out of a deer hangs as a seasonal decoration. He looks like he is running though the woods! The lanterns hang from metal twig hooks. 

Two metal suitcases, attached to the wall at different levels, serve as shelves and storage. 

Christmas Idea House Part 2 grandparentsplus.com


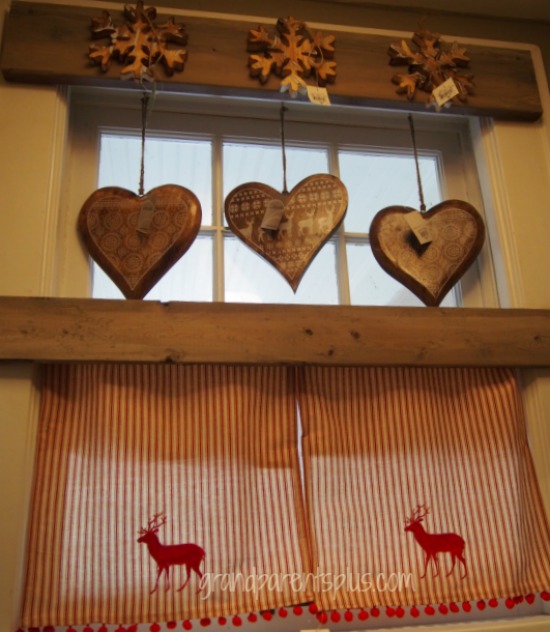
The small bathroom window also uses wooden snowflakes along with red wooden hearts hanging from the valance. The curtains are Christmas kitchen towels.


Christmas Idea House Part 2 grandparentsplus.com

All these wonderful ideas and this was just three rooms, but there is still much more to come in part 3 and 4! There’s eight more rooms to show you!

Christmas Idea House Part 2 grandparentsplus.com

Were you inspired by any of these ideas?  

Be sure to subscribe so you don’t miss the next posts. Your email is never sold or shared. 

Hope you enjoyed the Christmas Idea House Part 2!

Phyllis

Follow on Pinterest, too

Linked to these parties….


Posted in Christmas, Decor, Holidays | Tagged , , , , , , , , , , , , | 20 Comments

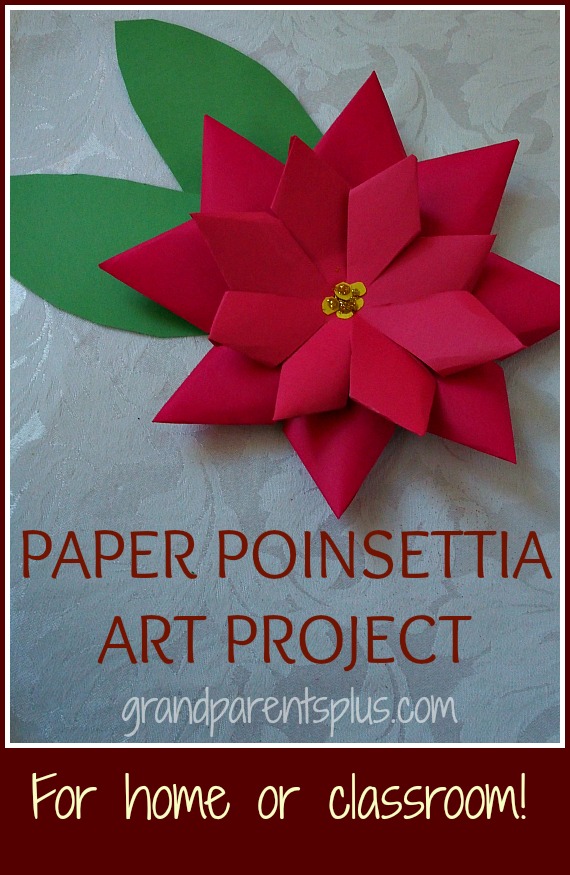
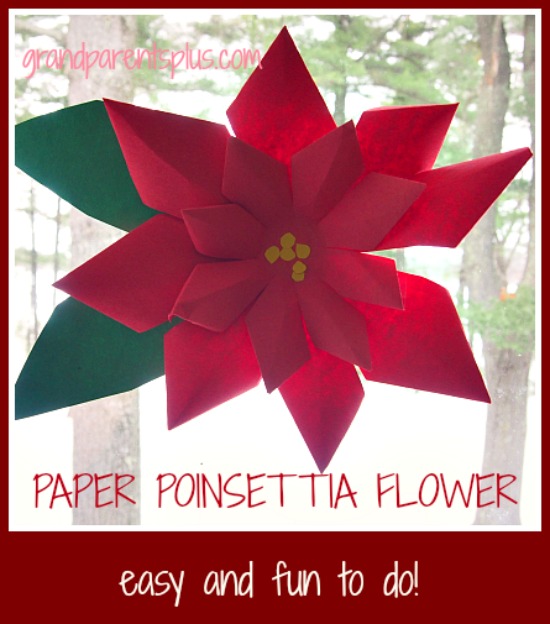
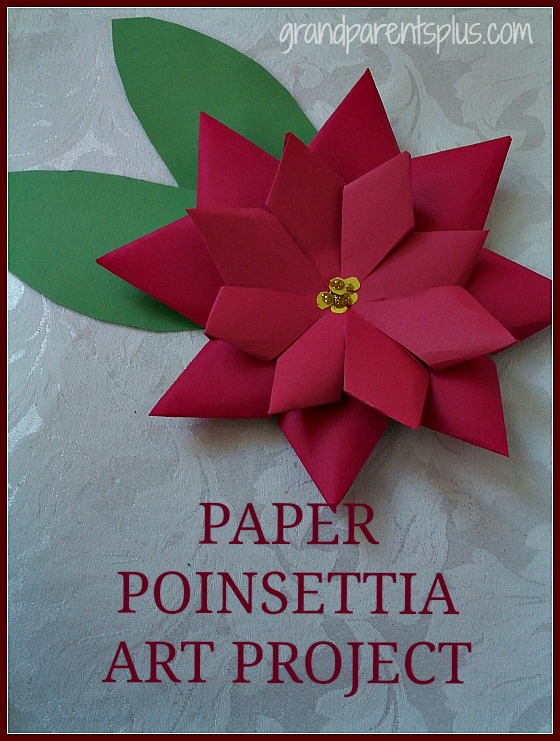
Paper Poinsettia Art Project

This Paper Poinsettia Art Project is very do-able for elementary children. Nothing about this is hard. The important part is to fold the petals to a point.It looks great as a tree decoration (when made small), package decoration,  bulletin board decor, and window decoration Wherever you use them,they look lovely and appear more difficult to make than they actually are.

Paper Poinsettia Art Project grandparensplus.com

Paper Poinsettia Art Project Directions:

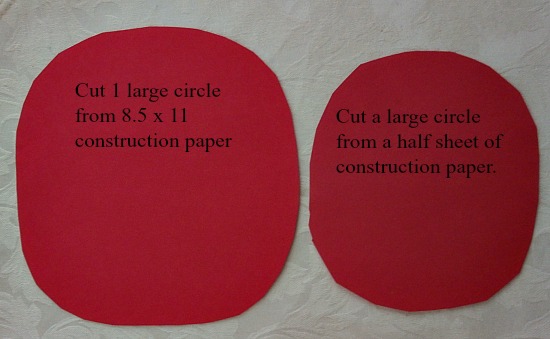
1.Use two pieces of red construction paper. Cut one large circle out of one piece. Fold the other piece in half and use only one half sheet to cut another circle. Make these circles as large as you can make them out of that size paper.


Paper Poinsettia Art Project grandparentsplus.com


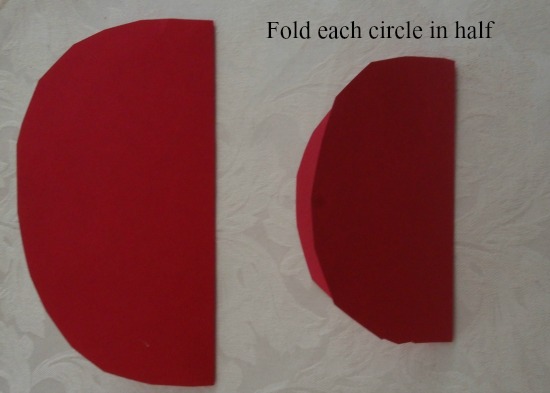
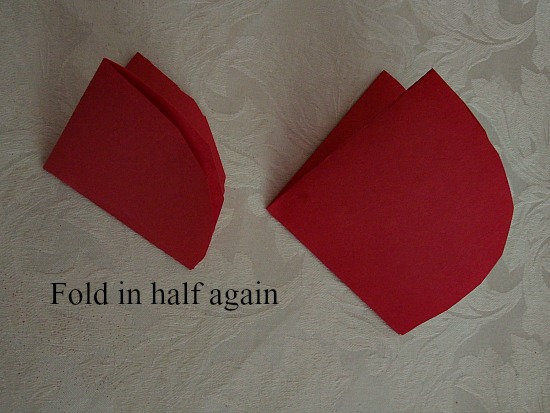
2. Fold once…

Paper Poinsettia Art Project 2 grandparentsplus.com

3. Twice….

Paper Poinsettia Art Project grandparentsplus.com

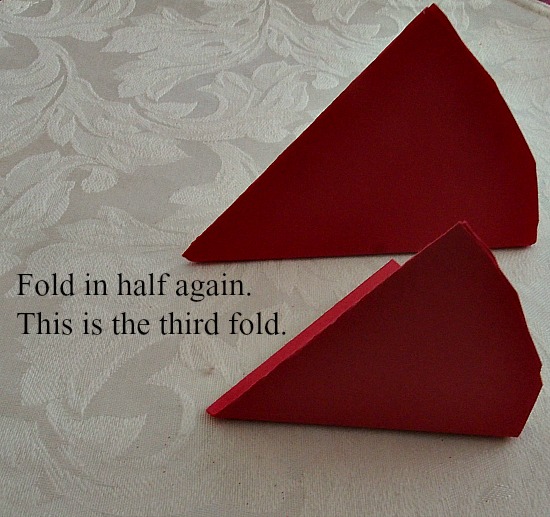
4. Three times!


Paper Poinsettia Art Project grandparentsplus.com

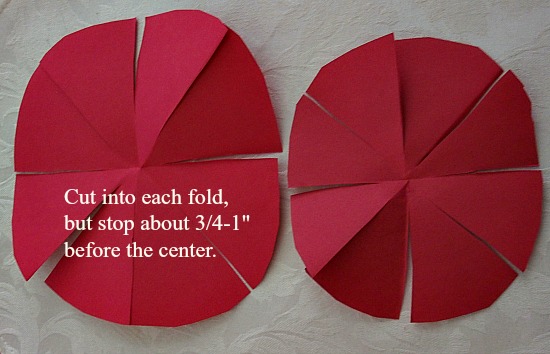
5. Now cut on the folded lines from the outside of the circle and stop 3/4 to 1 inch before reaching the center.


Paper Poinsettia Art Project grandparentsplus.com


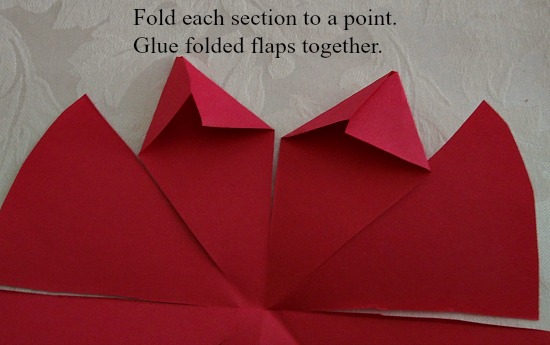
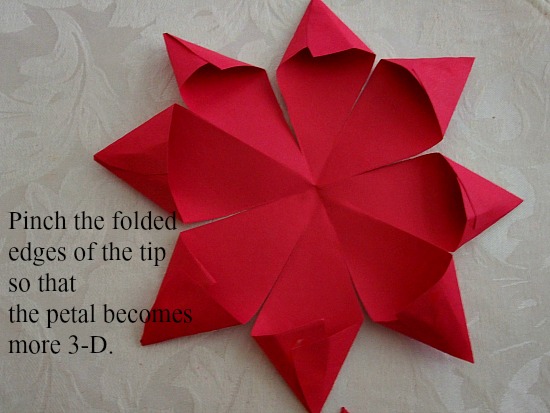
6. From the outside edge, fold each piece to a point and glue the folded flaps together….

Paper Poinsettia Art Project grandparentsplus.com


7. Put your finger inside the glued area to pinch it out and give it dimension.


Paper Poinsettia Art Project grandparentsplus.com


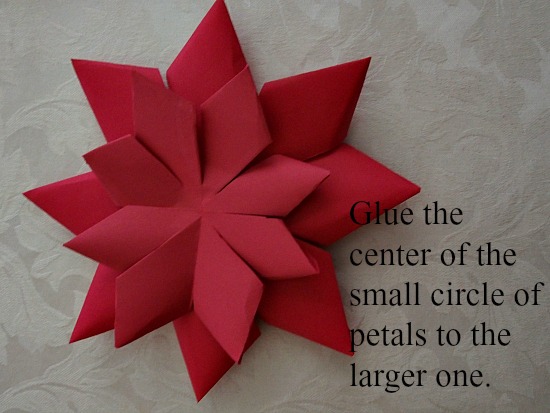
8. When finished with both sizes, glue the small one to the center of the larger flower.

Paper Poinsettia Art Project grandparentsplus.com


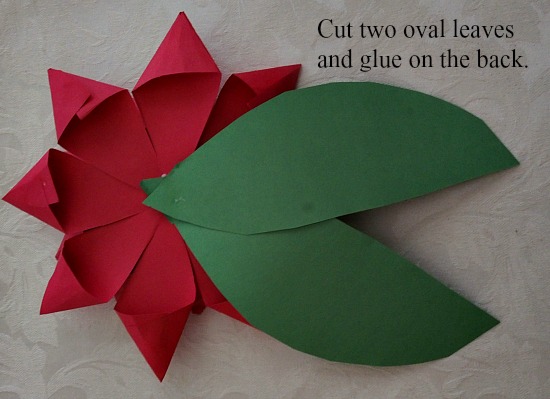
9. Cut leaves and glue to the backside.

Paper Poinsettia Art Project grandparentsplus.com


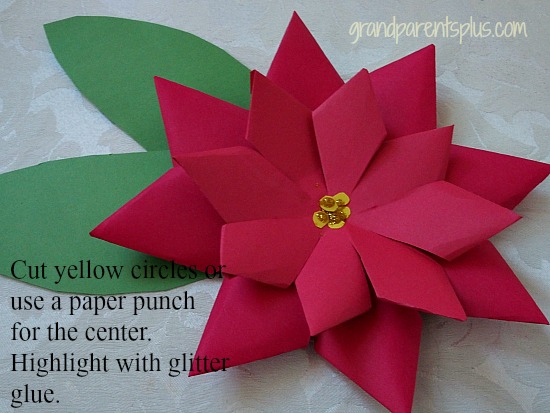
10. Cut small yellow circles from construction paper, glue in the center, and add some sparkle. A paper punch works well for this, too.

Paper Poinsettia Art Project grandparentsplus.com

Now, you’re done!

Paper Poinsettia Art Project grandparentsplus.com


The flower sizes are variable. Small ones look great on a homemade card, but are harder for children to make due to the size. The larger ones are easier and look beautiful on a package! They, also, look great on a wreath or as a table decoration.

Paper Poinsettia Art Project grandparentsplus.com


These are so easy and fun to make! You’ll want to make several.

Enjoy!

Phyllis


Subscribe on the sidebar knowing that your email is never sold or shared!

Follow on Pinterest, too!

linked to these parties…

Posted in Art Project, Christmas, Crafts, Holidays | Tagged , , , , , , , , , , , , | 26 Comments

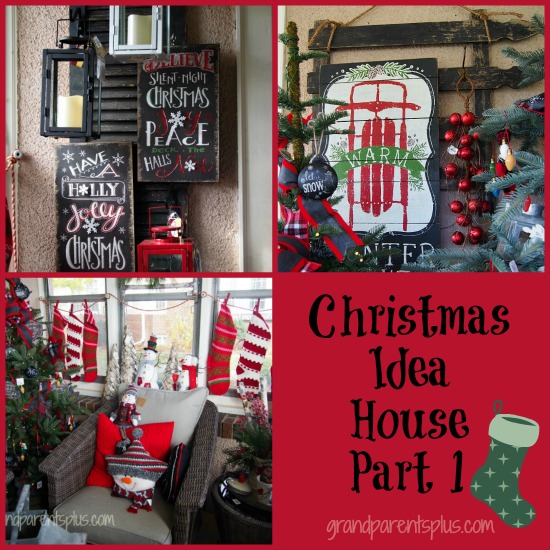
Christmas Idea House Part 1

I don’t mean to rush Christmas, but now is the time to gather ideas that inspire your own Christmas decorating. This Christmas Idea House – Part 1 is a home that designers transform three times a year with current trends, new items, old vintage pieces re-purposed, and loads of unique decorating ideas. There’s so much seasonal decorating inspiration here!

Christmas Idea House Part 1 grandparentsplus.com


Let’s start outside….

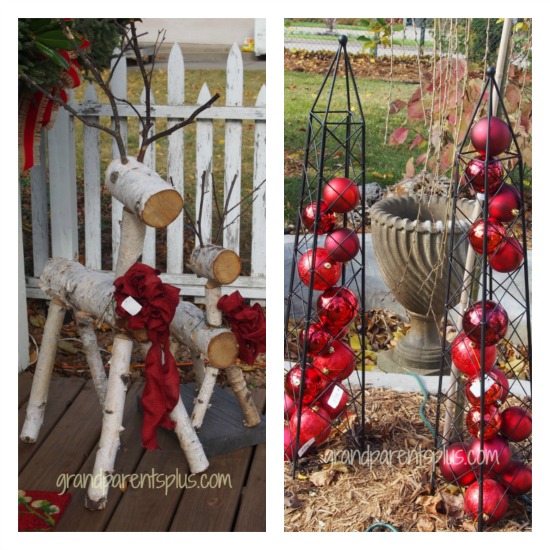
A pair of birch reindeer with big red bows greet guests  If you have access to birch trees, these would be easy to make.

Now that your gardens are in their winter state,  reuse a trellis by filling it with large red plastic ornaments. One change I would make, is to add a large red bow on top! What do you think?

PicMonkey Collage2a

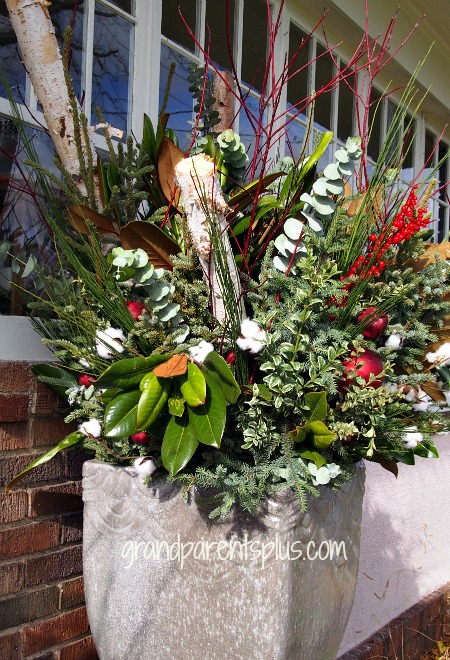
This container winter garden display uses lots of greens, three birch logs, pops of red balls, berries, red twigs, and accented with cotton bolls.(yes, bolls; not balls) If you’re from the south, you may have easy access to these. Up north, you need to buy them. They make a nice white accent among the green and red. I, also, though they would make a great accent on a Christmas tree. I like to use natural items on my tree along with the ornaments. 

Christmas Idea House Part 1 grandparentsplus.com

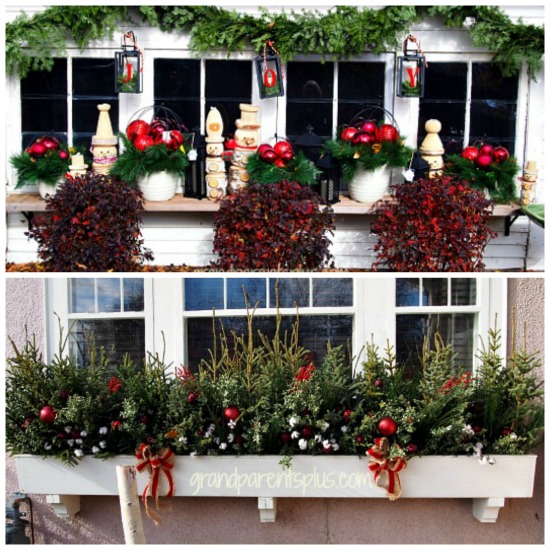
The window ledge of the out-building displays white baskets filled with evergreens and red balls. Whimsical snowmen, fashioned from a birch log, peer out among the greens.  Notice the lanterns hung from the garland spell “JOY”.

The window boxes of the home look festive filled with spruce tops, red balls, bows, along with more accents of white cotton bolls. 

Christmas Idea House Part 1 grandparentsplus.com


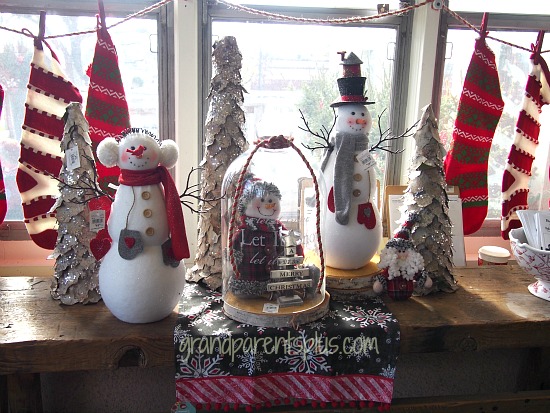
This old house has an enclosed front porch. As you enter, to one side there’s a display of snowmen and trees  The trees are faux birch bark with lots of glitter added to make them sparkle. Behind the snowman display, Christmas knit stockings, clothes-pinned on a decorative rope ribbon, hang in the windows.


Christmas Idea House part 1 grandparentsplus.com

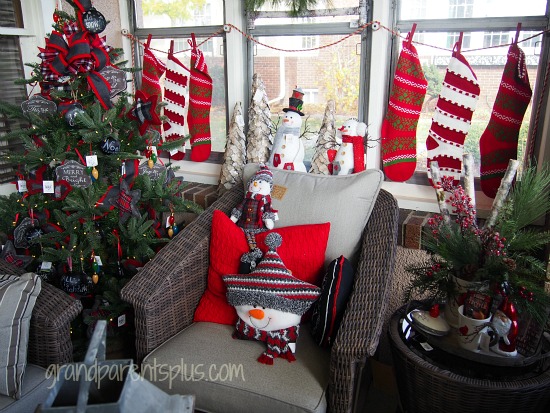
On the other side of the porch, you see the same hanging stockings repeated along with another snowman display. A stuffed snowman toy sits on one pillow while a funny snowman pillow repeats the theme.

Christmas Idea House Part 1 grandparentsplus.com

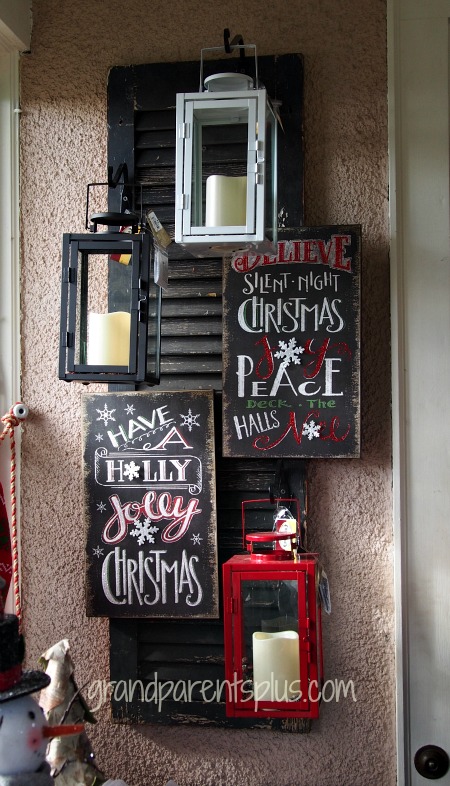
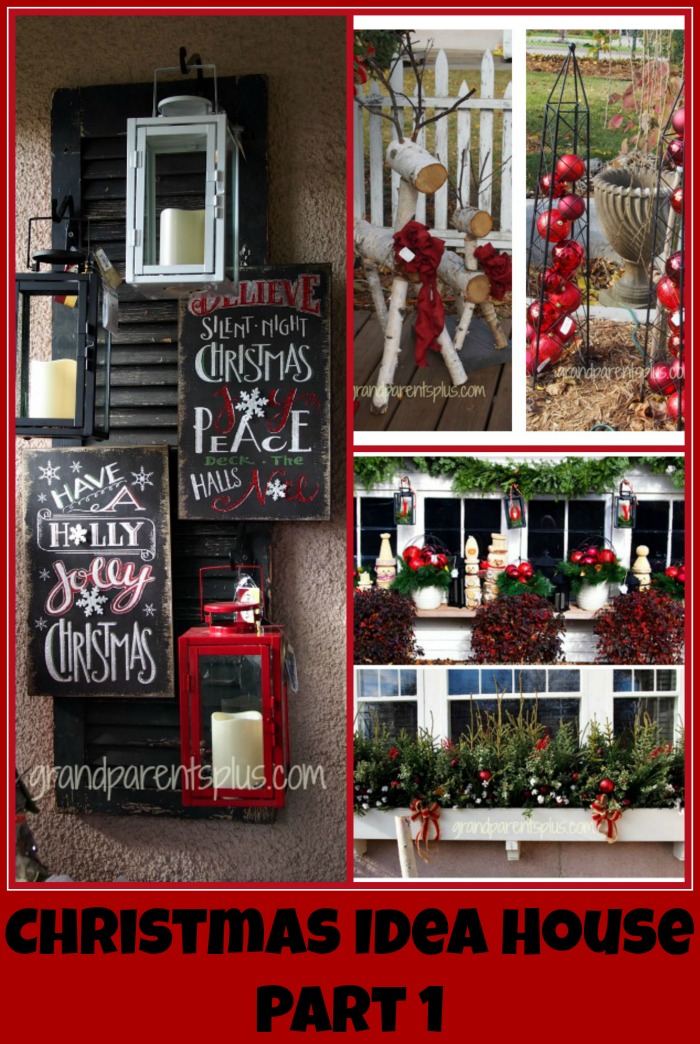
Using a vintage shutter, lanterns and Christmas plaques create a unique re-purposed decor idea.

Christmas Idea House Part 1 grandparensplus.com


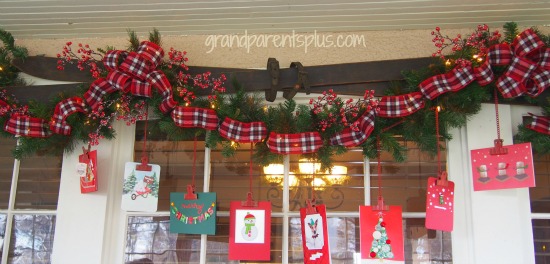
Above the windows to the house, you see vintage skis used as a valance.

Christmas cards hang from the green garland.


Christmas Idea House Part 1 grandparentsplus.com

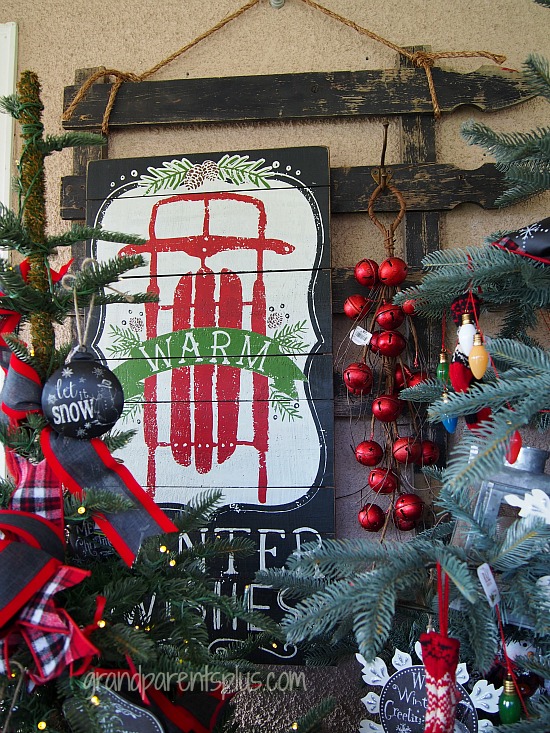
A  section of a vintage gate is transformed into a unique wall piece when a plaque and red bells are added. Decorated trees flank each side of this gate so it was hard to photograph the entire piece, but I think you get the idea.

Notice the chalkboard ornaments which are easily personalized with both art and words. Each year you can change what is on them. Now, that’s an easy project!

Christmas Idea House Part 1 grandparentsplus.com


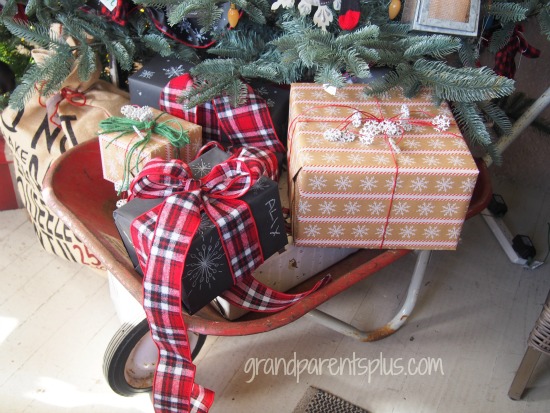
Under the trees is a red vintage wheelbarrow filled with gifts.

Christmas Idea House Part 1 grandparentsplus.com


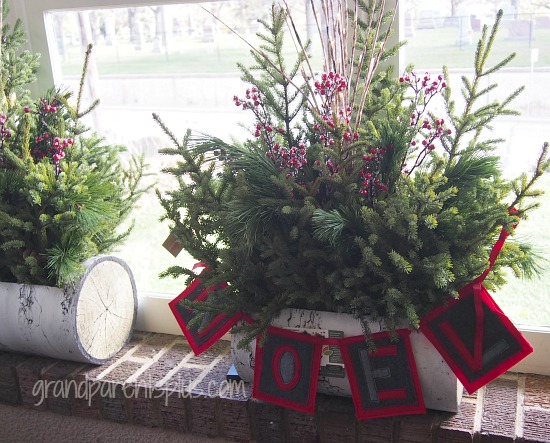
Sitting on the window ledge are faux birch bark planters filled with more spruce tops,  red berries and illuminated stems. A simple garland spells out “NOEL”.


Christmas Idea House Part 1 grandparentsplus.com

This is just a small sampling of ideas. More to follow..

Next time, we’ll enter the house with oodles more inspiration. You won’t be disappointed, I promise! 


Christmas Idea House Part 1 grandparentsplus.com


Thanks for viewing this Christmas Idea House Part 1. Hope to see you for Part 2!

Phyllis

Subscribe! You won’t miss the next post and your email is never shared or sold!

Follow on Pinterest!

linked to these parties….
Posted in Christmas, Decor | Tagged , , , , , , , , , , | 18 Comments

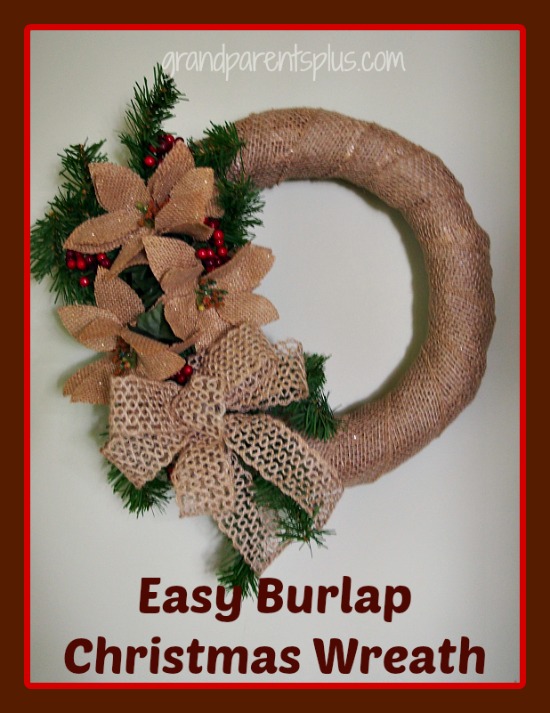
Easy Burlap Christmas Wreath

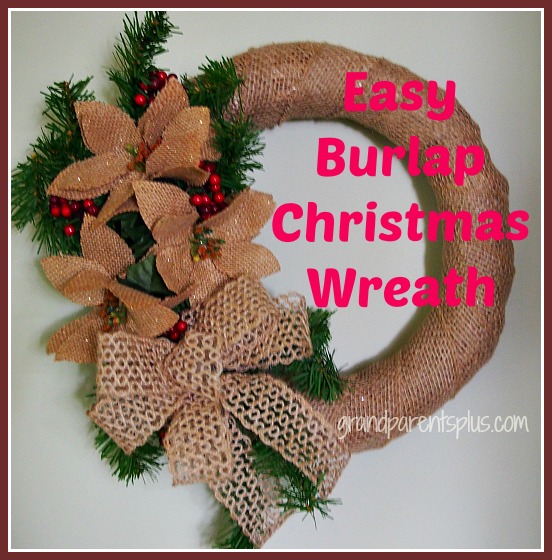
Easy Burlap Christmas Wreath grandparentsplus.com

A lot of Christmas decorations are glittery and elaborate, but sometimes a room calls for something more casual. This Easy Burlap Christmas Wreath might be just what is needed. Burlap is certainly popular for any season and it works for Christmas as well.
Check your Christmas decorations for items you already have on hand. I had most of the items needed and just bought the ribbon and burlap wrap (with a coupon, of course). Now, with glue gun or florist picks in hand, you are ready to put it together!

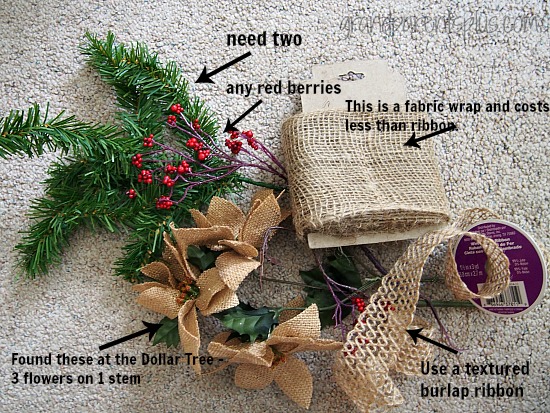
These are the supplies needed for a 12 inch diameter wreath. (either foam or straw) Make a bigger one if you wish, just adjust the size the other supplies fora larger wreath.

Supplies:

2 Christmas greenery picks (size them for the 12 inch wreath)

Red berries

Burlap Fabric Wrap  (found at Michael’s for about $2. Don’t look in the ribbon aisle, but in the floral wrap.)

Burlap Poinsettias (found at the Dollar Tree. One pick had 3 flower on it.)

Burlap ribbon for the bow. Choose a different texture of burlap ribbon from the wrap or flowers.

Easy Burlap Christmas Wreath grandparentsplus.com

Step 1:

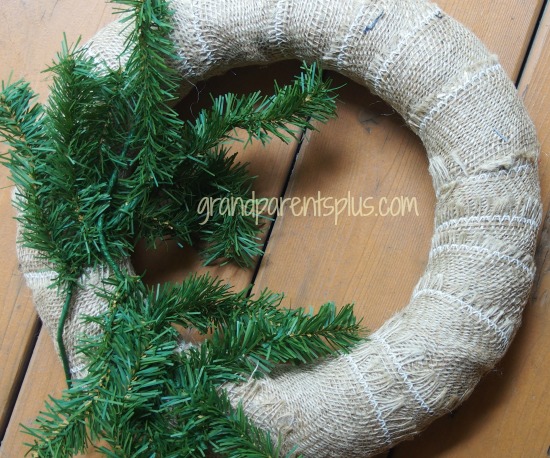
 Whatever wreath you are using, wrap with the wide burlap fabric. Start at an angle and overlap each round by just less than half. When you are back where you started, either hot glue it together or use a florist pin to hold it.

(Before I do any gluing or pinning, I like to lay out all my pieces in order to get the look I want.)

Step 2:

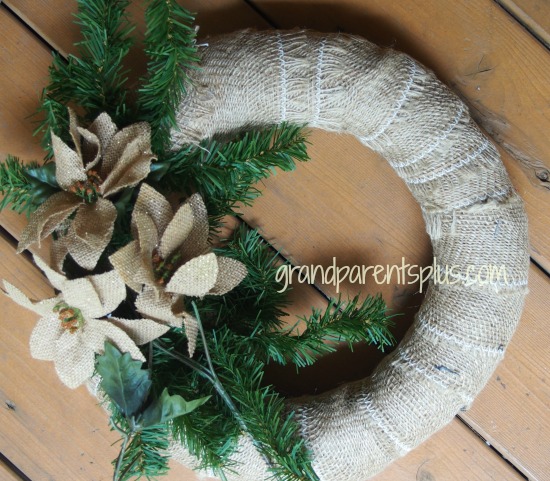
 Place the Christmas greenery on the wreath. Place one stem going down and the other going up. Get an idea of where you wanted it positioned before you attach it permanently. Once you have it positioned the way you like, cut the stems short and either use a florist pin or hot glue it to the wreath. (I like to use floral picks so I can change the wreath easily for another season or just a different look.)

Easy Burlap Christmas Wreath grandparentsplus.com

Step 3:

 Add the flowers using a group of 3. If your flowers are smaller, use 5. Always use an odd number.

Easy Burlap Christmas Wreath grandparentsplus.com

Step 4:

 Add the bow

Step 5:

 Glue the red berries in 3 to 5 places for an accent of color.

Step 6:

 Add a wire loop on the back for hanging the wreath.

Step 7:

Hang and enjoy your Burlap Christmas Wreath!

Easy Burlap Christmas Wreath grandparentsplus.com


When you compare the price of a ready-made burlap wreath, this is a real bargain! It is quick and easy to do. No real talent involved. ( OK, you need some talent to know how to use a glue gun!)

Try it!

Enjoy!

Phyllis

Subscribe on the sidebar! Remember, your email is never shared or sold!

Follow on Pinterest or Bloglovin, too!

Linked to the following parties…..


Posted in Christmas, Crafts, Holidays | Tagged , , , , , , , , | 12 Comments

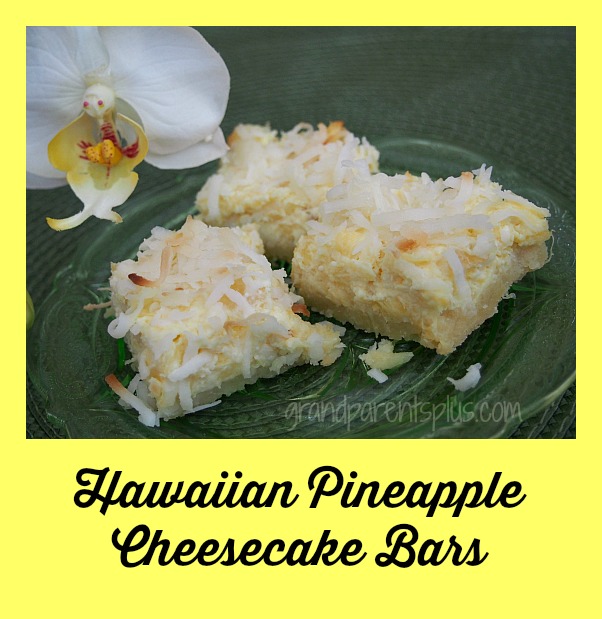
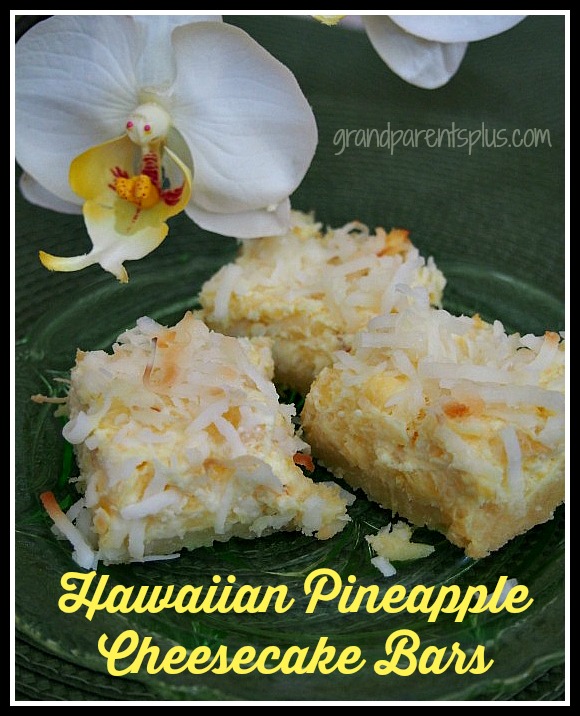
Hawaiian Pineapple Cheesecake Bars

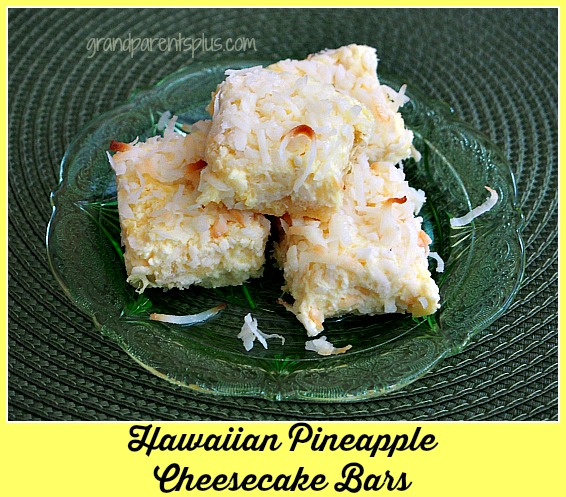
You don’t have to visit Hawaii to enjoy these wonderful Hawaiian Pineapple Cheesecake Bars. They are truly awesome! A mixture of pineapple, coconut, and cream cheese is absolutely “Hawaiian heaven” to the taste buds. Believe me, you’ll get rave reviews when you serve them!  

Hawaiian Pineapple Cheesecake Bars grandparentsplus.com


Hawaiian Pineapple Cheesecake Bars
Recipe Type: Dessert Bars
Prep time:
Cook time:
Total time:
Serves: 30 bars
Ingredients
  • Crust:
  • 1 cup flour
  • 1/2 cup butter
  • 1/2 cup sugar
  • Filling:
  • 8 oz. cream cheese
  • 2 Tbsp. sugar
  • 2 Tbsp. milk
  • 1 egg
  • 1 tsp. vanilla
  • 1 8 oz. can crushed pineapple, drained well
  • Topping:
  • 1 cup coconut
  • 1 tbsp. melted butter
Instructions
  1. Combine crust ingredients and pat into a 9″ square pan.
  2. Bake @350 degrees for 15 minutes and Cool
  3. Combine cream cheese, sugar, milk, egg and vanilla. Fold in drained crushed pineapple and spread over cooled crust
  4. Combine coconut and 1 Tbsp. melted butter. Sprinkle on top of the filling.
  5. Bake bars at 350 degrees for 15-20 minutes. (or until coconut is just slightly toasted and filling is set.)
  6. Cool. Place in refrigerator. Cut into small squares with a wet knife.
  7. These bars freeze very well!

Hawaiian Pineapple Cheesecake Bars grandparentsplus.com

While I love chocolate, these are a nice diversion with fantastic flavor. For holidays, decorate with a half cherry.

These are wonderful to make ahead for an occasion as they freeze well. I must confess that sometimes I can’t wait for them to thaw out before I eat one! YUM!

Hawaiian Pineapple Cheesecake Bars grandparentsplus.com


Enjoy these Hawaiian Pineapple Cheesecake Bars anytime of the year! 

Phyllis

When you subscribe, know that your email is never sold or shared.

Follow on Pinterest, too!

Post linked to these parties...


Posted in Desserts, Recipes | Tagged , , , , , , | 8 Comments