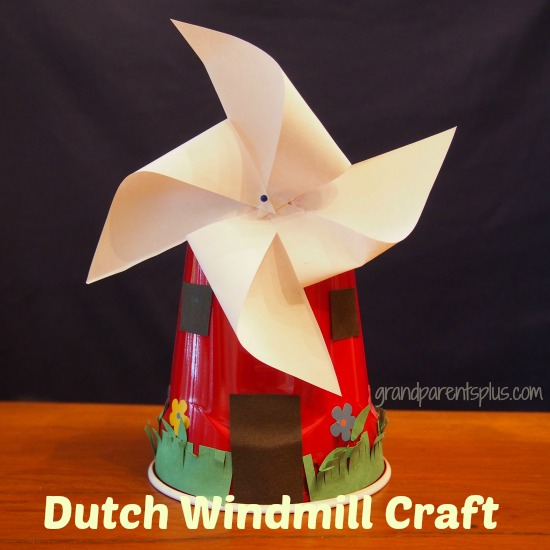
Wouldn’t this Dutch Windmill Craft would be fun to make when studying about other countries around the world? We’ve been to Holland several times and love the windmills. By getting off the beaten path and touring the small towns and fishing villages, you’ll find unique places and some old windmills, too. On our visit, we looked up relatives that we had there. They lived in a small town and had an old windmill located right behind their house. It was used for grinding grain years ago, but was still in great shape.
Well, this Windmill Craft is one that I am using for our family reunion in Washington state. (by the way, we are from a Dutch heritage, if you didn’t already get that) I was asked to come up with a craft for the elementary kids, so here it is!
I got the idea for using a Solo drink cup from the Dltk-Kids site, but the origami fins of the windmill were a little confusing, so I opted for a simpler version and added a few extra details. I felt kids would be able to do this on their own without too much help. After all, I may have several kids.
Materials:
Red or Blue Solo cups 18 oz.
Construction paper: green, black
White copy paper
Glue sticks, scissors
Small flower stickers (if you can find tulips, great, otherwise opt for any small flower) I found these at Walmart!
Straight pin with a round head or brads
Tape
Directions:
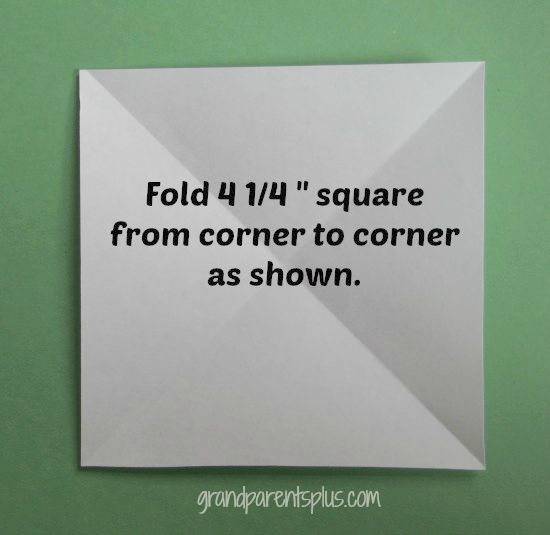
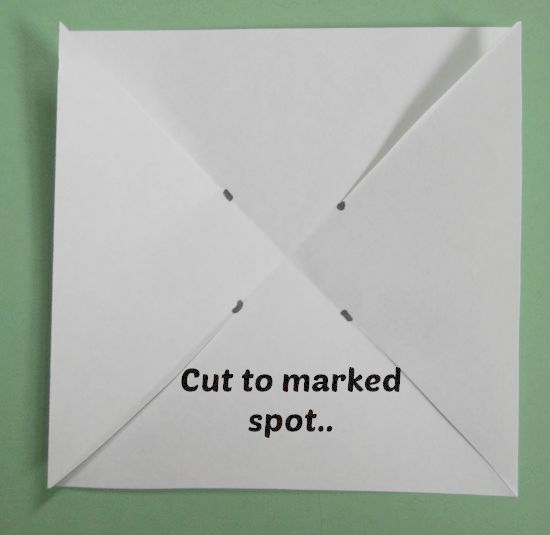
Cut 4 1/4 inch square from white copy paper and fold as shown.
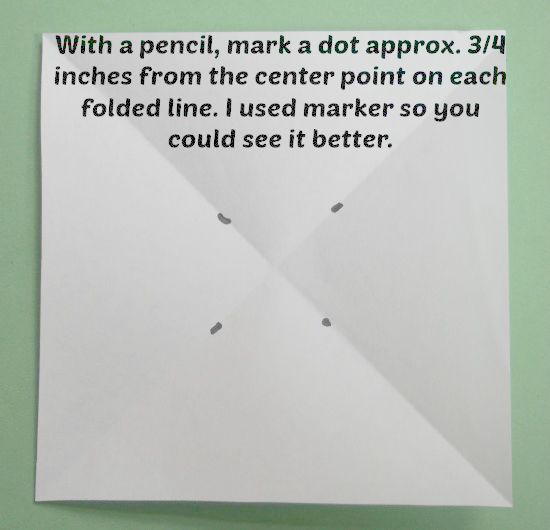
Mark a stopping point on each folded crease approx. 1/2 -3/4 inches from the center point. Use a pencil so the mark doesn’t show later.
Cut all four fold lines as shown……
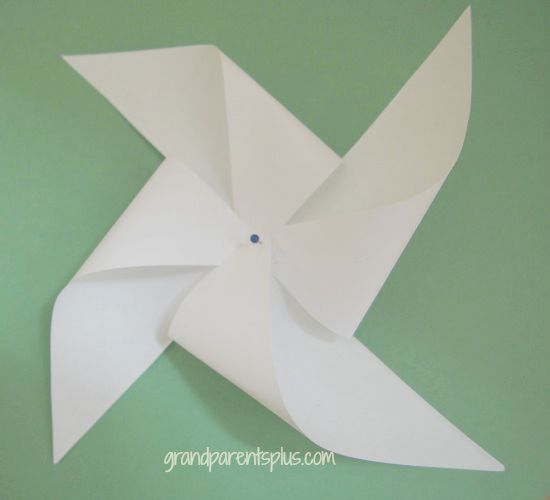
Fold one point to the center and glue. Go over the center just a bit so all points will be on top of each other.

Be sure to glue the same side point of each triangle to the center. Use a pin with a ball head and push it through all the points. (or use a brad) Set pinwheel aside and work on the cup.
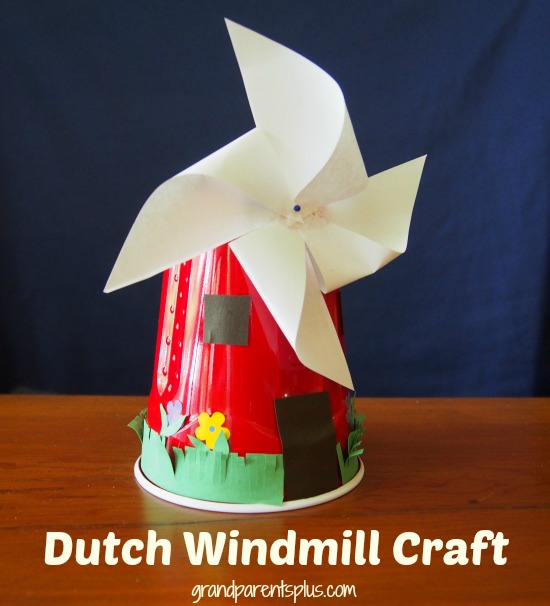
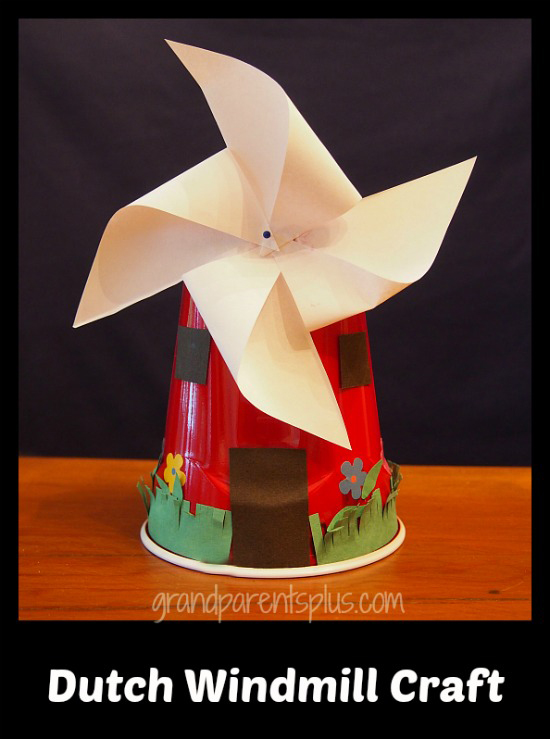
Take the Solo cup and mark a door with either a permanent marker or cut a door from black construction paper. After drawing a doorway, I covered it with black construction paper. I thought it was easier and looked better. Add windows if you like. Use a small square or rectangles of black construction paper, too! I, also, found that the glue stick works better than school glue.
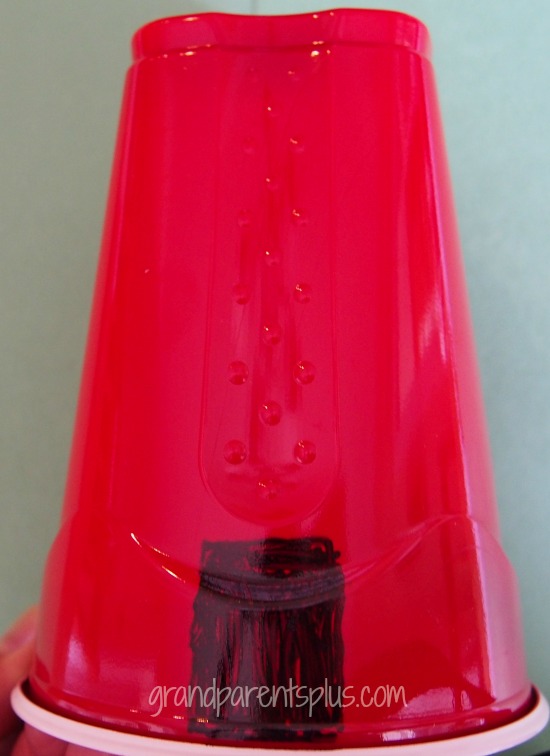
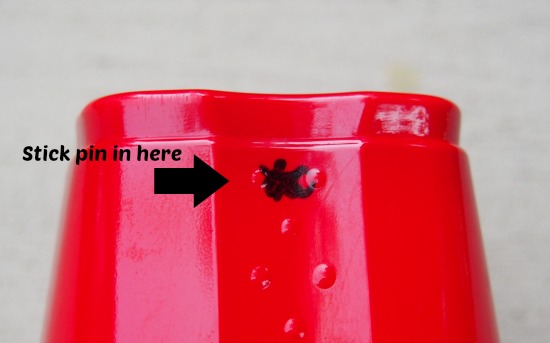
Cut a 3/4 inch strip from the length of a piece of green construction paper. Fringe it to look like grass. Glue it to the bottom edge of the cup. Add flower stickers and leaves, if desired. When you finish the decorating, stick the pin through the cup as shown. An adult should do this part…. Reach in the cup and bend the pin down 90 degrees. Use tape to hold it inside. This will allow the windmill to spin. For younger kids, use a brad.
Side view so you can see the flowers….
That’s it!
These little windmills would make cute centerpieces, too!
Have you been to the Netherlands? Did you see the windmills? Hope you got to see the beautiful countryside other than visiting just Amsterdam!
Enjoy!
Phyllis
By subscribing, I keep your email safe and secure. There’s no sharing or selling of it!
Follow on Pinterest, too!
Post linked to many of these parties….
Pingback: Travel Crafts and Hands-On Activities for Preschoolers • Our Whole Village