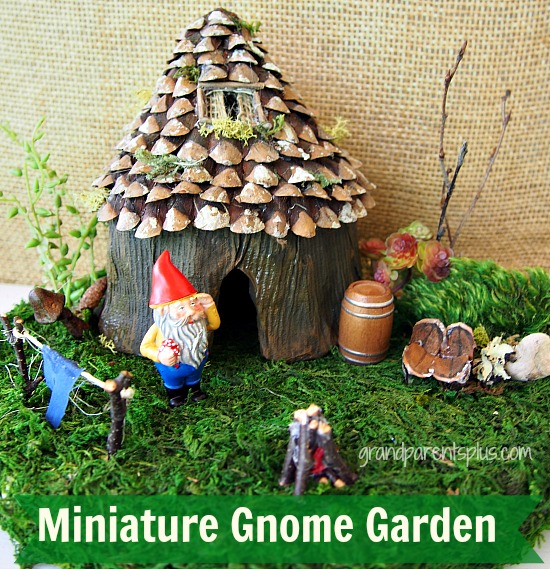
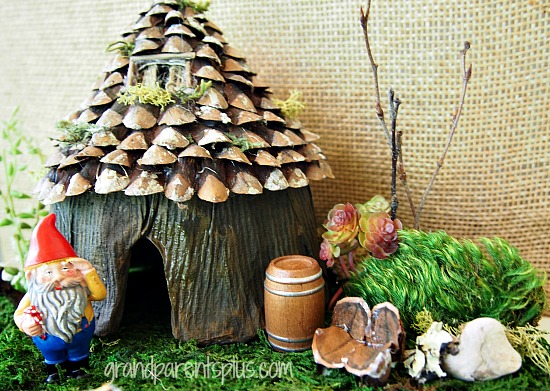
I have done a couple posts on miniature gardens lately and that started me on creating this Miniature Gnome Garden. At first, I thought this idea was way too much work, but when I got into it, I saw lots of possibilities. It became fun, too. Living near a wooded area, gave me ample supplies to make this. Besides items from nature, I used a plastic whipped topping container for the main base so it’s a bit of a reuse and recycle project, too. A post from Sharon Ojala. was my inspiration.
Materials I used…
Whipped topping plastic container or any other container…. Pringles can, styrofoam take-home containers, boxes, etc.
Tin Foil
Wide Masking Tape
Paper Towel
Tacky Glue
Glue Gun
Sticks, Pine Cones or other materials for a roof
Sheet Moss
12 inch Styrofoam Base
2 shades of Brown Acrylic Paint (or add black to one shade)
Paint Brush
Tag Board or Paper Plate
Scrap Burlap
Directions:
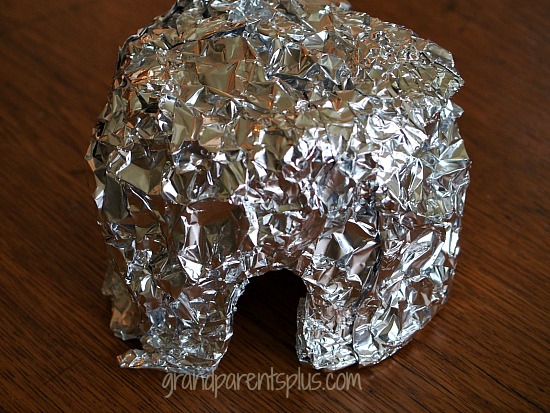
1. Decide on a container to use. Cut a door opening and windows, if desired.
2. Cover container with crumpled or straight tin foil so that it has texture. This step doesn’t have to be perfect. Use strips of tin foil and keep adding.Hot glue in place. With the foil, you are able to crumple it up so it looks like a tree or any type of texture you like.
3. Cover tin foil with wide masking tape. You need this step as the paper towel doesn’t stick to the foil.
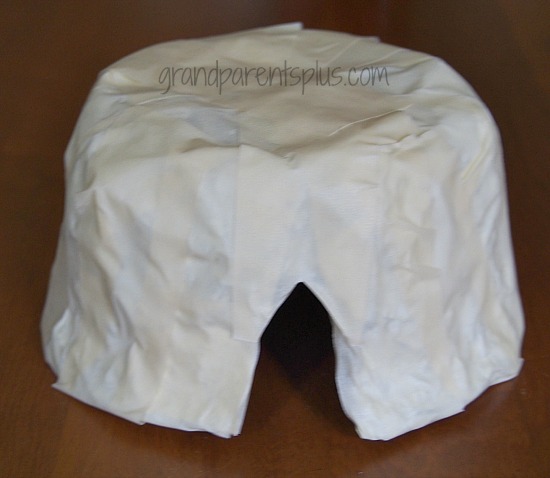
4. Make a mixture of tacky glue and water. Dip paper towel strips into glue mixture and place over masking tape.
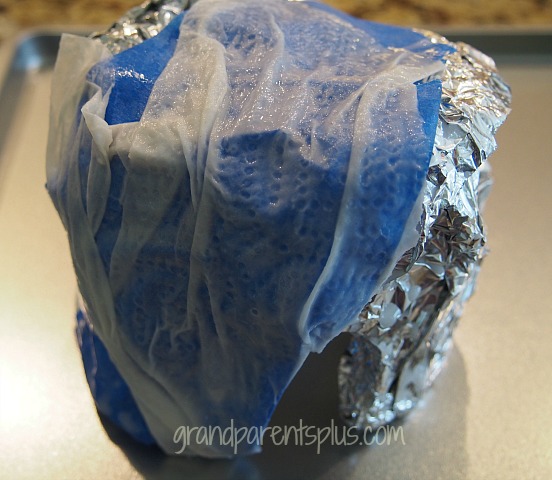
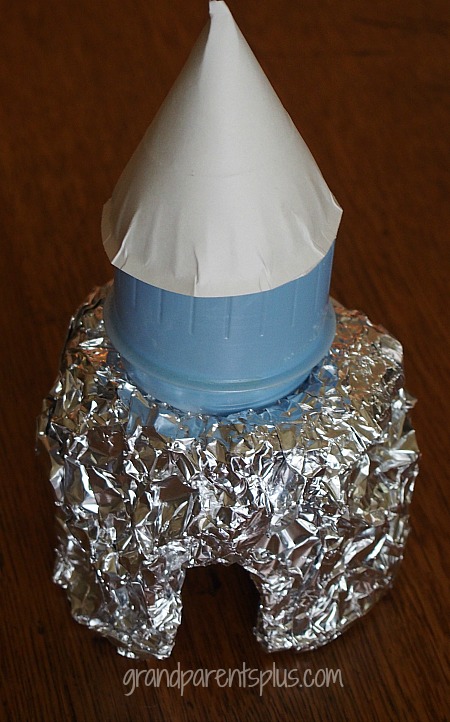
This shows the three steps of tin foil, tape (blue), and paper towel. I used blue for this sample so you could see it better. You really can’t go wrong as it will all be painted anyway.
5. When dry, paint. Use two tones of brown to give some shading to the Gnome home.
There are so many possibilities of items to reuse…. Make a castle by using a detergent cap and cone top.
Back to the Miniature Gnome Garden…..
6. Roof:
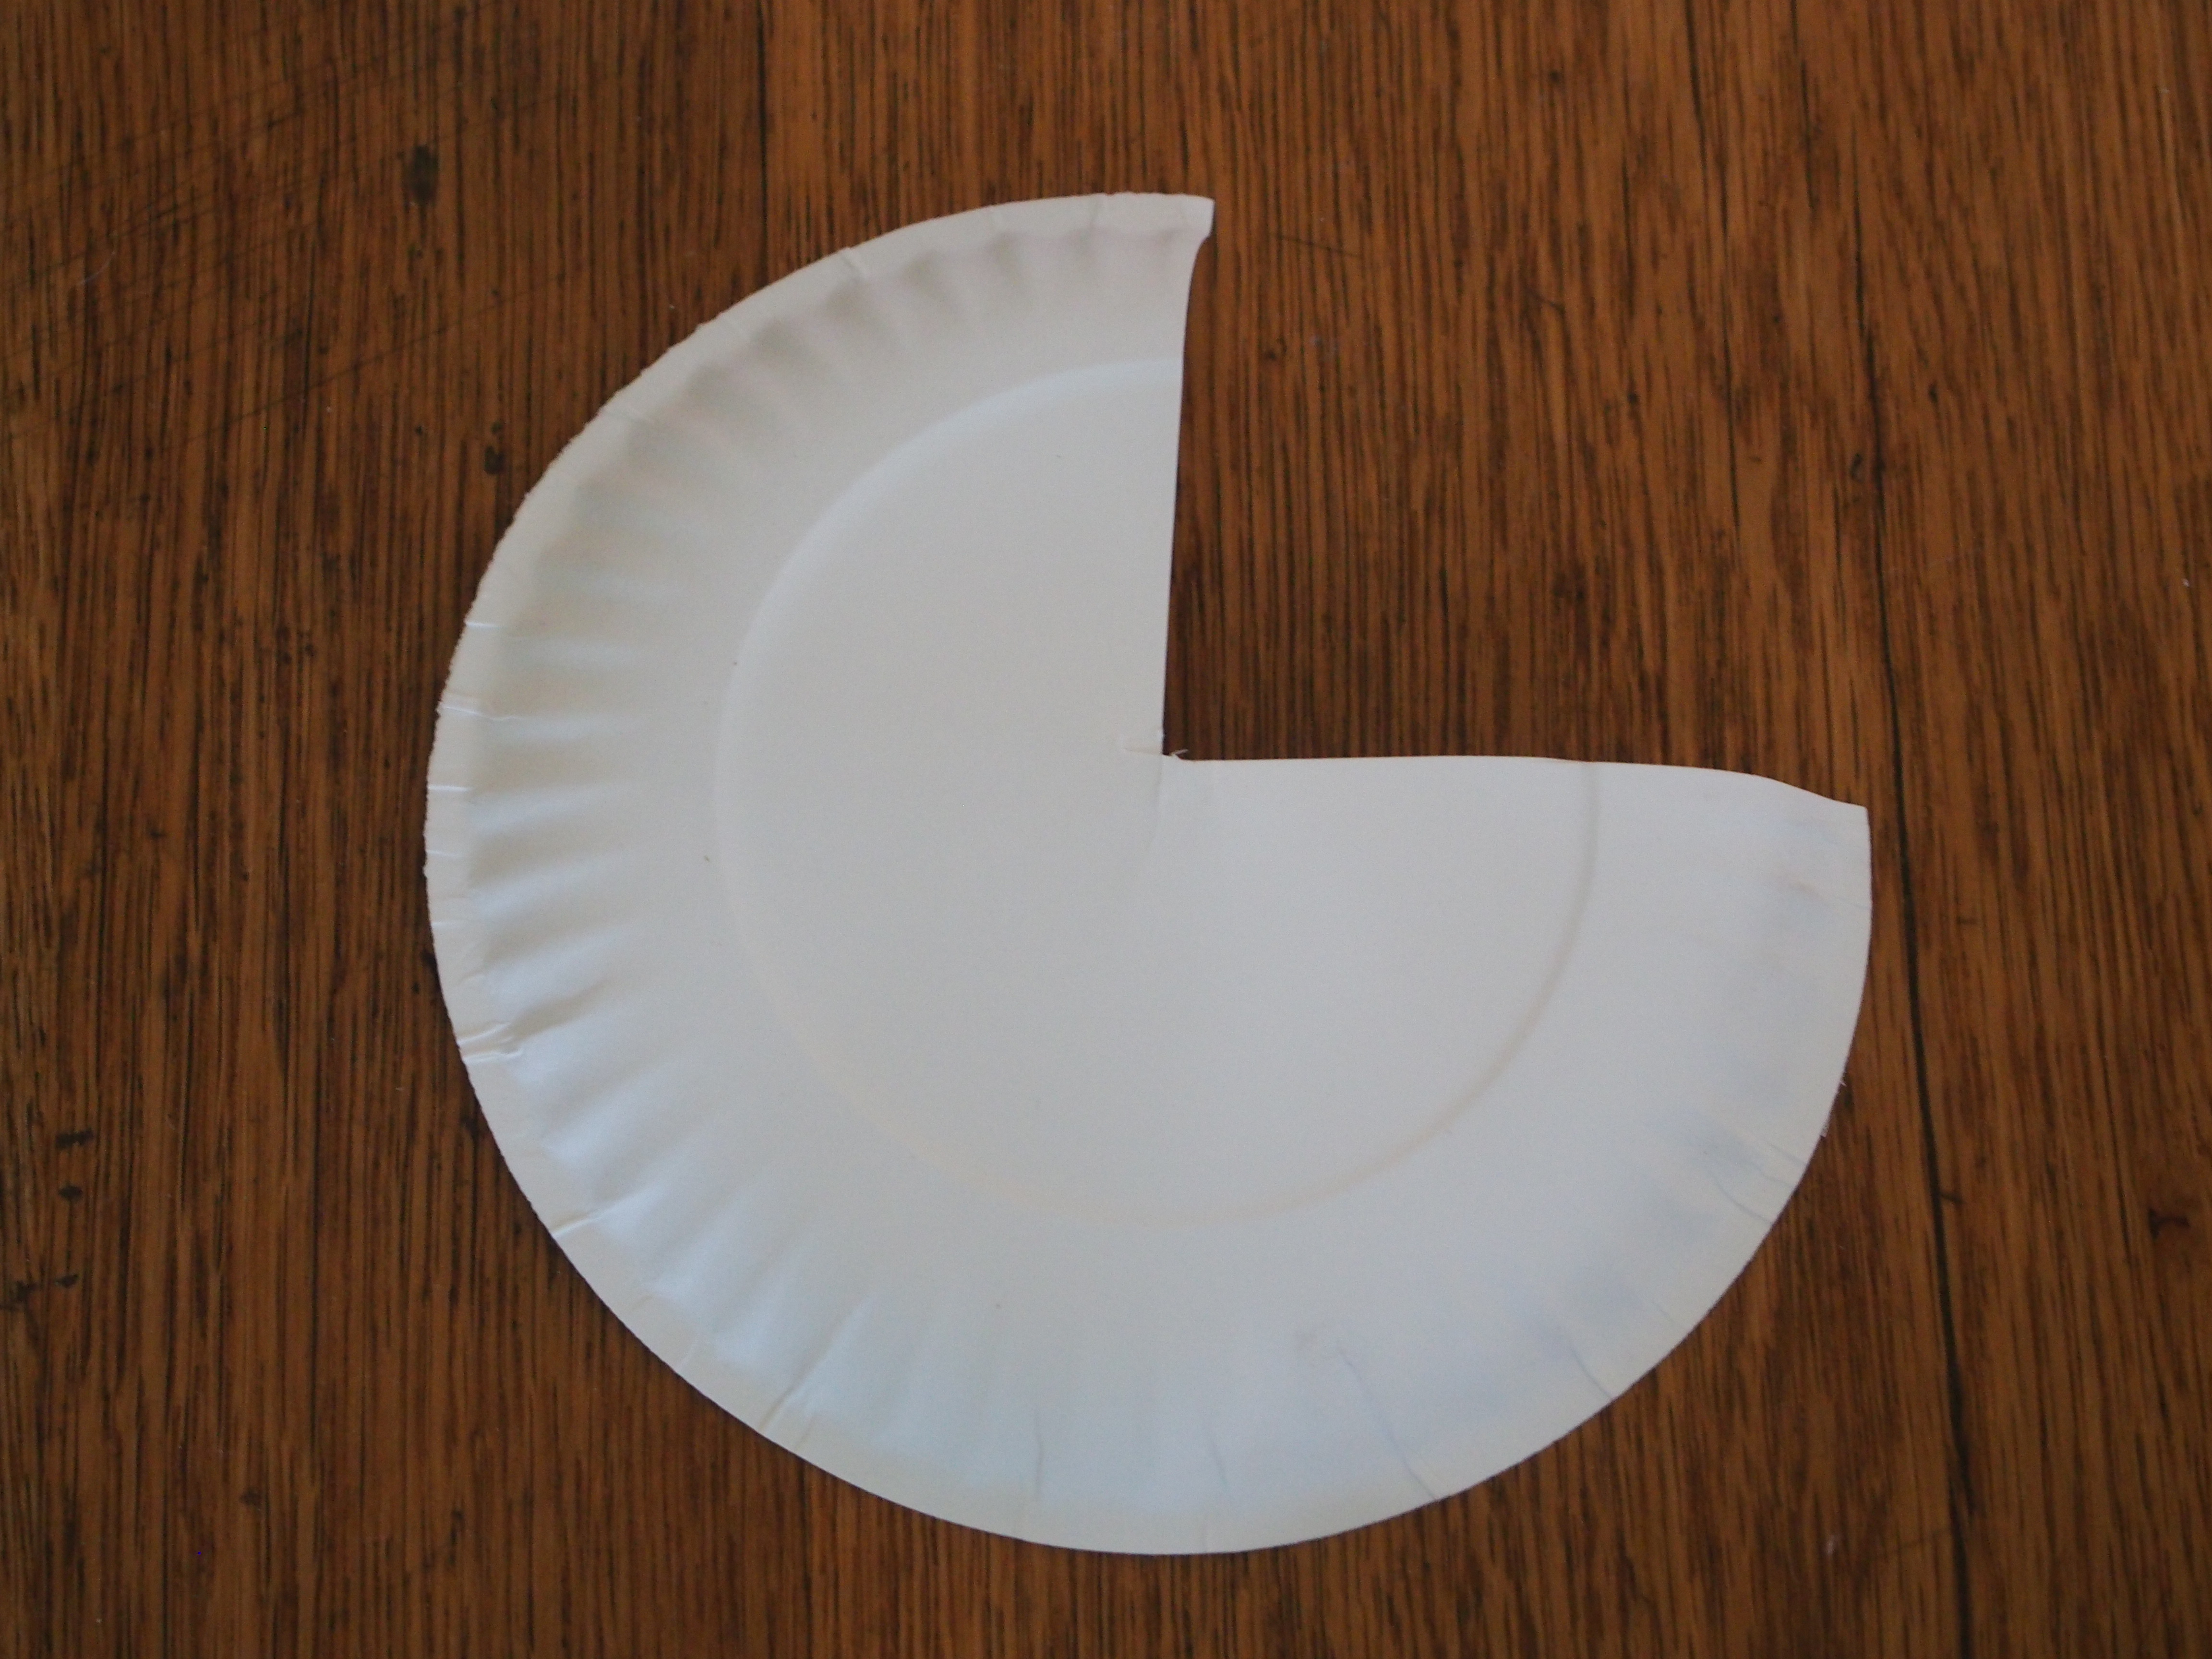
Cut a circle (don’t worry about size and you can cut it down to fit). Now, cut out 1/4 of the circle and bend around to form a cone and staple it together. Now, fit it to your project and cut it down to size. For this circle, I used a paper salad plate. Tag board works as well, too! If you want a window, cut it out with an exacto knife before putting the roof material on.
If you are going to use pine cones or sticks for the roof, then cover it with brown burlap. This way, the white tag-board won’t show. When you cover it with burlap, don’t worry about how it looks. Just use scraps and hot glue anywhere in place on the tag-board. Cut off excess along the bottom. Other possibilities are using moss, birch bark, or simply painting the roof. Do not glue the roof to your project, yet!
On my roof, I used pine cones and cut the scales off with a scissor. The pinecone scales were open. I didn’t need to dry them in the oven to get them to open. My pinecones had sap on the ends so after cutting the scales, I used hand sanitizer to remove the sap from my hands. I highly recommend doing this stage outside. The scales sometimes go flying and with the sap, you don’t want this in your home.
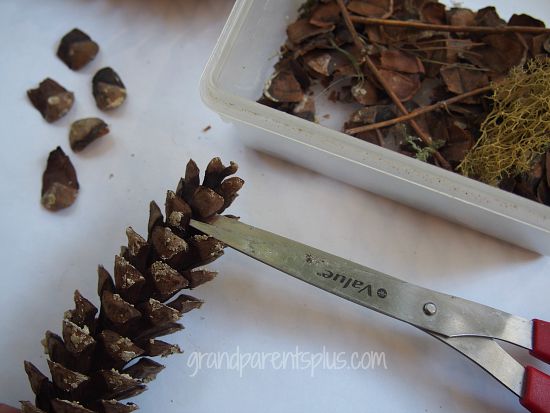
I didn’t worry about how straight the ends were as only the tips show on the roof. For my roof, I used about 6-7 pinecones.
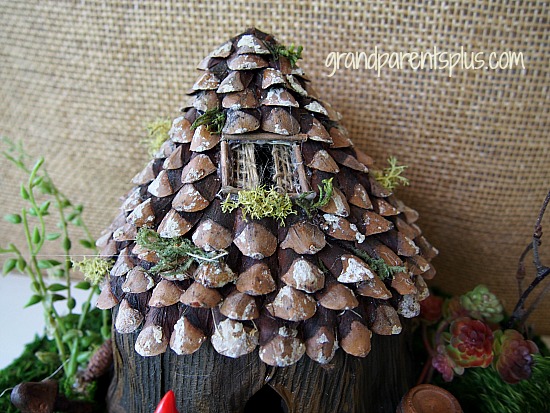
7. Next step is to edge the window, if you have one. I used thin sticks to make the edges finished before I added the scales for the roof. I , also, glued burlap inside to look like curtains.
8. Now you are ready to add the scales. With a glue gun, place a line of glue starting at the bottom of the roof and going about 5 scales wide. Place the scales so they overlap the roof just a little. Add more glue and keep going around. One the second round, start by placing the scales in-between the ones on the first row. This won’t come out exactly even as you can see on my roof, but it looks fine anyway.
9. When you’re completely done, hot-glue the roof onto the painted base. Add some moss or lichens here and there, if desired.
10. For the base, I used a 12″ round styrofoam piece. Do not use hot-glue on the styrofoam! I used a piece of sheet moss on the base and glued it with tacky glue. Then, I attached the house with hot-glue and used some pins in places that wouldn’t be noticed after adding artificial succulents. You can use any type base for this project.
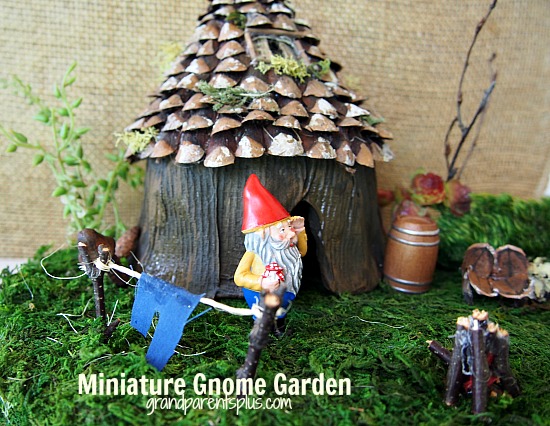
11. Add pieces of your choice to this Miniature Gnome Garden. I bought two items and then made some pieces by hand. Go to elowezil and see some unique items you can make for your garden.
I made a little fire pit with sticks and added a piece of red tissue paper for a flame.
This is a great project to involve your elementary age child. Let them help and think of things to add to your Miniature Gnome Garden. Remember, this is a garden to display inside; not outside.
Don’t like gnomes? Change it to a fairy garden! Have fun and use your imagination!
Enjoy!
Phyllis
By subscribing on the sidebar, your email is never shared or sold!
Follow on Pinterest, too.
Pingback: Oh My Heartsie Girl Wordless Wednesday - Crushed Car
Pingback: Link Round-up: Miniature Gnome Garden, S’mores Ice Cream, a Sensory Activity, and More | Family Magazine
Pingback: Oh My Heartsie Girls Wordless Wednesday | Oh My Heartsie Girl