Colorful and Delicious Ham Pasta Salad

Ham Pasta Salad, Easy Ham Pasta Salad  Colorful Ham Pasta Salad, Delicious Ham Pasta Salad

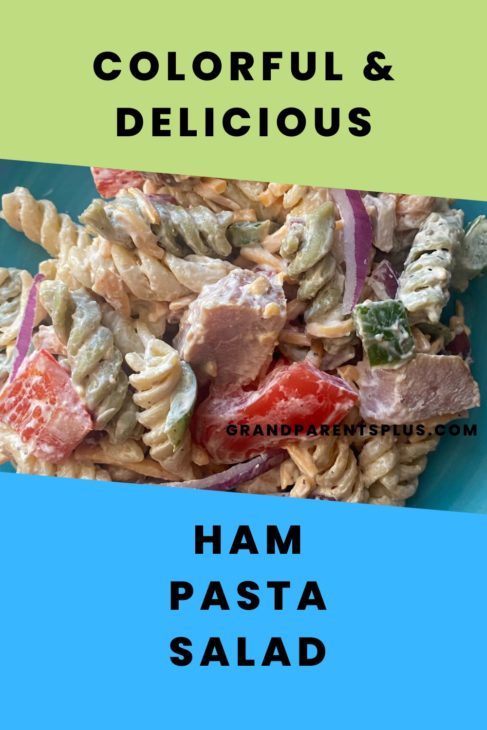
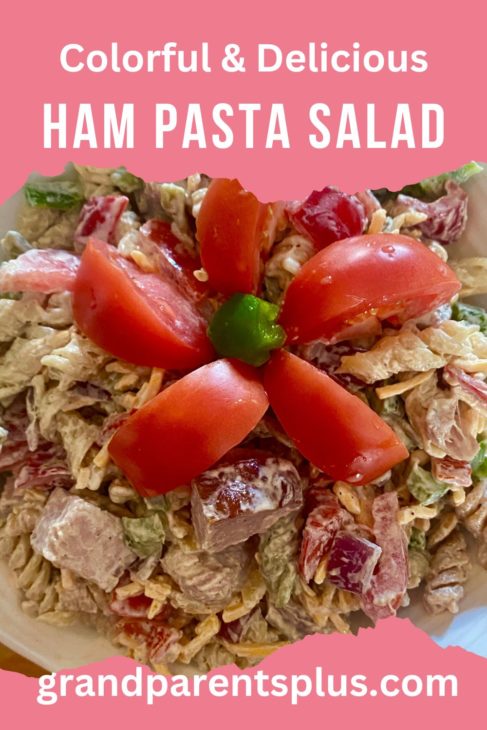
Looking for a good recipe to use up ham leftovers? This colorful and delicious ham pasta salad is a good and easy way to serve that extra ham. Use tricolor pasta for color along with red and green pepper, purple onion, yellow cheddar cheese and red tomatoes and you’ve got a colorful and delicious salad.

Ingredients:

  • 1 box of tri-color Rigitoni (or any other pasta )
  • 2 lb. or more of cooked ham, cubed
  • 1 lg. red pepper – cut in 1″ pieces
  • 1 green pepper – cut in 1″ pieces
  • 1 medium red onion – chopped or sliced
  • 2 medium tomatoes (seeded) and chopped
  • 1 package (8 oz.) shredded Cheddar Cheese
  • 1 cup Mayo
  • 1/2 c. Sour Cream
  • 2 Tbsp. “Better Than Bouillon” Beef Base (find it in the soup aisle)
  • 1 T. hot water
  • 1 T. white vinegar
  • 2 t. salt
  • 1/4 tsp. pepper
  • 1 tsp. garlic pwd.

Directions:

  • Prepare pasta according to package directions. Drain.
  • In a large bowl, add pasta, ham, red and green pepper, tomatoes, and onion.
  • In a small bowl, combine mayo and sour cream.
  • Add 1 Tbsp. hot water to the 2 Tbsp. Beef Bouillion and mix together.
  • Add the Beef Bouillion mixture to the mayo/sour cream along with the vinegar, salt & pepper (to your liking), and garlic pwd.
  • Add the mayo/sour cream to the pasta ingredients and mix together.
  • Sprinkle with shredded Cheddar Cheese.

If you make this the night before, you might need to add more of the mayo/sour cream ingredients as the pasta absorbs the mixture.

Enjoy this Colorful and Delicious Ham Pasta Salad!

Phyllis

Check out some of these other delicious Pasta Salads!

Posted in Easter, Home, pasta salads, Recipes, Salads | Tagged , , , , , , , , , , , , , , , | Leave a comment

Mexican Soup

I love soups! In the winter, they taste so good on a cold night! This is one of my new favorites as I can use almost any leftover meat that I have in my freezer. You certainly can start with uncooked meat, too! The extra ingredients are easy to keep on hand in the pantry.

Just recently, I had a pork loin that I cooked, but it was too large for the meal! So, part of was stored in the freezer and used later for a pork version of this soup. It was delicious!

With this Mexican Soup recipe, you can start with either uncooked or cooked meat.

Ingredients for Mexican Soup

1 1/2 lb. boneless turkey, chicken, pork or beef

1 envelope taco seasoning and 1/2 c. water

Jar of salsa (16 oz.) mild or spicy (your choice)

1 can black beans (15 oz.) Be sure to rinse and drain!

Package of frozen corn, thawed (10 oz. ) or 1 can of corn (15 oz.)

Cheddar Cheese – Shredded for garnish

Sour Cream – optional for garnish

Directions:

First, if you are using uncooked meat, cut meat into 1 inch chunks.

Using a non-stick skillet, saute’ uncooked meat in a little oil until no-longer pink. Then, add the taco seasoning packet and 1/2 cup water. Simmer the meat and taco seasoning until seasoning is absorbed.

If you are using left-over cooked turkey, chicken, pork or beef, simply cut into 1″ pieces and add the cooked meat to the crockpot. Also, add the packet of taco seasoning and 1/2 cup water.

Next, add the V8 juice, salsa, beans, corn, into the crockpot. Mix altogether.

Finallly, cook the Mexican Soup on low in the crockpot for 3-4 hours. When heated through, it is ready to serve or instead of a crockpot, heat on top of the stove for a quicker version!

When ready to serve, you can garnish each bowl with a dollop of sour cream and shredded cheddar cheese.

Serves: 6

This Mexican Soup is very easy and delicious Keep the ingredients in the pantry ready to use. When you have left-over cooked meat, it’s so quick to put together a delicious dinner!

Check out another quick and easy Mexican Chicken Soup here.

Enjoy!

Phyllis

Posted in Home, Recipes, Soups & Stews | Tagged , , , , , , , | Leave a comment

Arizona Chicken – Easy Chicken Dish

Arizona Chicken Recipe –  A Quick and Easy Chicken Dish!

What an absolutely, delicious and easy chicken dish for your family or company. It looks beautiful and tastes fantastic! You can make it mild or as spicy as you like. This Arizona Chicken recipe has only a few ingredients and takes less than 10 minutes to put together. Keep the ingredients on hand for when you’re in a time crunch!


Arizona Chicken - www.grandparentsplus.com

This may become a family favorite. It is for mine!

Arizona Chicken Recipe

1.    1 can Cream of Chicken Soup or Cream of Mushroom Soup

2.    1 small jar of picante sauce ( mild, medium or spicy)

3.     1 can of chicken broth

4.     1/2 c. shredded Mozzarella cheese

5.      1/2 c grated Cheddar cheese

6.      sliced black olives (optional)

7.       Crushed nachos and chopped parsley (optional)

Step 1: Mix the Cream of Chicken or Cream of Mushroom soup, picante sauce, chicken broth, and pour over chicken in a greased pan.


Arizona Chicken www.grandparentsplus.com

Step 2

Bake @ 350 until chicken is done. ( approx. 30-40 minutes) Time depends on the size of the breasts and thickness. Use an oven thermometer to check temp.

When done, add cheese and olives (optional) and bake until melted.


Arizona Chicken www.grandparentsplus.com

This recipe is also wonderful to use when entertaining a large group. There’s no breading. Merely place the chicken in a pan, pour the sauce over it, and bake. We’ve served Arizona Chicken at our church for over 450 people and they loved it.

For eye appeal, we added crushed nacho chips and chopped parsley on top.


Arizona Chicken - www.grandparentsplus.com

Serve Arizona Chicken with any type of rice, noodles, or quinoa. Add a vegetable of your choice.

This recipe has great eye appeal along with being so delicious!


Arizona Chicken www.grandparentsplus.com

This is a “must try” recipe!

Enjoy!

Phyllis

This post is linked to many of the following parties….

Posted in Main Dishes, Recipes | Tagged , , , , , , , | 2 Comments

The Bleeding Heart Flower and the Cinderella Story

The Pink Bleeding Heart, one of my favorite flowering plants, is one of the first plants to bloom in the spring. It has lovely, heart-shaped flowers that are arrayed along arching stems like a string of pearls. It has a drop at the bottom that makes it seem to be bleeding. Let me tell you “The Story of the Bleeding Heart Flower” and “The Story of Cinderella” that lies within the flower.


The Bleeding Heart Flower and the Story of Cinderella grandparentsplus.com

My mother told this story to me, I told it to my children and grandchildren as well. You may want to tell it to your children, too.

Once upon a time, there was a young girl named Cinderella. She lived with her mean stepmother and step-sisters. They treated her so poorly that she felt like her heart would break from their treatment of her.

One day, a handsome price decided to have a ball and invite all the girls of the land. He wanted to find a beautiful girl to be his bride. Cinderella dreamed of going to the ball, wearing a beautiful ball gown with a puffy top, just like the pink part of the Bleeding Heart Flower.

When we carefully take apart the flower, we see more of the story inside.

The night of the ball, the stepmother and step-sisters left early, all dress in their party finery. Cinderella stayed home alone. The mice and bunnies kept her company.


The Bleeding Heart Flower and the Story of Cinderella grandparentsplus.com

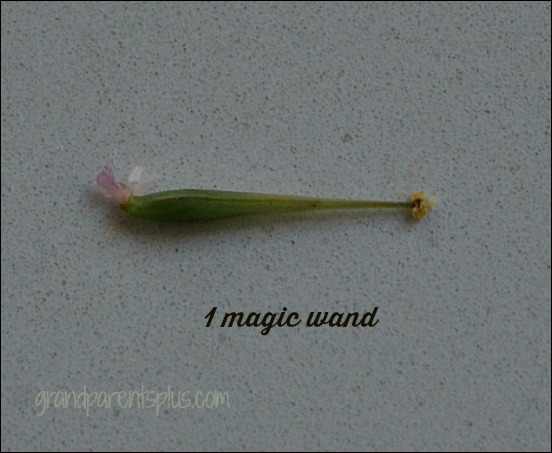
Suddenly, the fairy godmother appeared and with her magic wand and she dressed Cinderella in the beautiful ball gown she had dreamed of wearing.


The Bleeding Heart Flower and the Story of Cinderella grandparentsplus.com

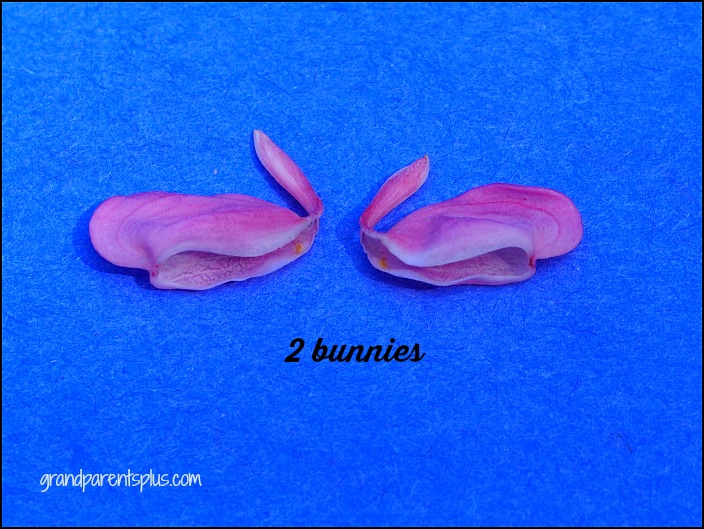
Her two pet bunnies hopped in delight.

Next, two lovely glass slippers were placed on Cinderella’s feet.


The Bleeding Heart Flower and the Story of Cinderella grandparentsplus.com

Lastly, a pair of beautiful earrings appeared on her dainty ears.


The Bleeding Heart Flower and the Story of Cinderella grandparentsplus.com

With another wave of the magic want, Cinderella was off to the ball. She met the prince, and they danced until midnight. And the rest of the story you ask?


The Bleeding Heart Flower and the Story of Cinderella grandparentsplus.com

Well, as in all fairy tales, they lived happily ever after!


The Bleeding Heart Flower and the Story of Cinderella grandparentsplus.com


There is a Japanese version of the Bleeding Heart Story, but it has a tragic ending and I prefer the one I pictured to tell to children.

Have fun telling this sweet version to your children.

Enjoy!

Phyllis

Subscribe on the sidebar so you don’t miss a post! Your email is never shared or sold.

Follow on Pinterest, too!

This post is linked to many of the following parties….

Posted in Garden, Misc. posts | Tagged , , , , | Leave a comment

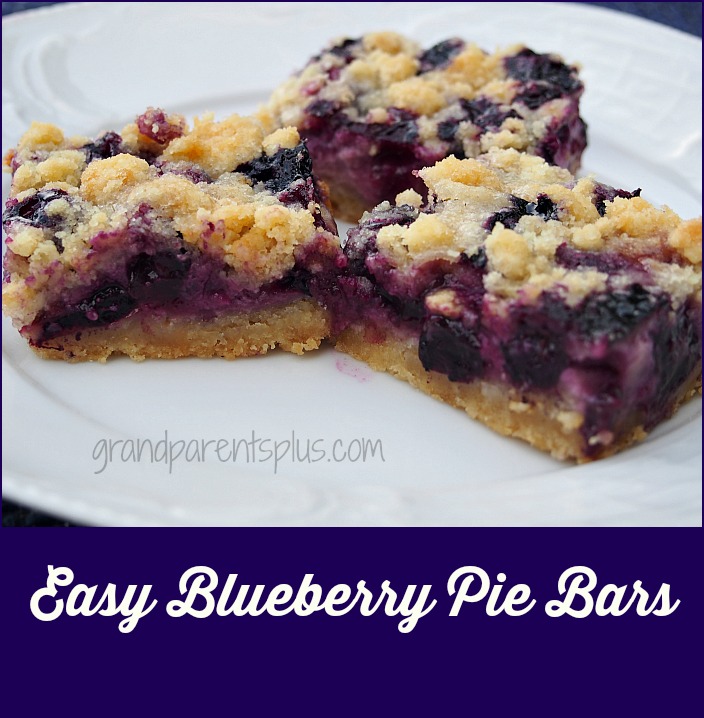
Easy Blueberry Pie Bars

I do love blueberries, but can’t eat a whole pie by myself. When you want the taste of a blueberry pie, but not the work of rolling the crust, these Easy Blueberry Pie Bars will satisfy your craving. You can store them in the refrigerator for a few days or freeze for future indulgence.


Easy Blueberry Pie Bars grandparentsplus.com

I used fresh blueberries, but frozen berries work, too. If you use fresh, rinse the berries and let them dry on a paper towel so you don’t add extra moisture. For frozen, do not thaw; just use them frozen.

Easy Blueberry Pie Bars

Ingredients

  • 3 Parts....
  • CRUST AND CRUMBLE TOPPING
  • 1/2 cup butter, melted
  • 1/2 cup granulated sugar
  • 1/4 cup light brown sugar, packed tight
  • 1 1/2 cups all-purpose flour
  • pinch of salt
  • FILLING
  • 1 large egg
  • 1/2 heaping cup of Greek Yogurt or Sour Cream
  • 1/3 cup granulated sugar
  • 2 tsp.vanilla extract
  • 1 tablespoon flour
  • BLUEBERRY LAYER
  • 12 oz. (2 cups) blueberries (fresh or frozen;( I used fresh) If you use frozen, don't thaw!
  • 1/3 cup granulated sugar
  • 2 tablespoons lemon juice (fresh or bottled)
  • 2 tsp. cornstarch

Instructions

  1. CRUST AND CRUMBLE TOPPING
  2. Preheat oven to 350F. Line an 8 inch pan with foil and spray the foil ( I use the spray with flour) Set aside. If you line the pan, the clean-up is a snap and the bars lift up easier.!
  3. Melt butter, add the white and brown sugars, and whisk together. .
  4. And the flour, salt, and stir together. Mixture will be somewhat dry and form some clumps
  5. Take a heaping 3/4 cup crumble mixture out and set aside for topping.
  6. Put remaining mixture in the 8 inch pan and pack it down to form a smooth and flat crust. Set aside.
  7. FILLING
  8. Add the yogurt, egg, sugar, vanilla and whisk to combine. Combine the flour into the filling mixture Pour filling over the crust and jiggle pan to help even it out over the crust. Set aside.
  9. BLUEBERRY LAYER
  10. In a separate medium mixing bowl, add the filling ingredients combine. Sugar will not completely dissolve, but that's OK!
  11. Place the blueberry mixture evenly over the filling.
  12. Now, sprinkle evenly with the reserved crust mixture over the filling.
  13. Bake for about 60 minutes, or until edges are bubbling and there's a little bubbling in the center. Crumble topping should appear set with a pale golden brown color. Important....Cool at least 1 to 2 hours or overnight before slicing and serving otherwise they will fall apart. Keep in refrigerator in air-tight container for up to 10 days or freeze (up to 6 months). Cut into bar size or cut a larger serving and serve with whip cream for a dessert. (or ice cream)
Schema/Recipe SEO Data Markup by Yummly Rich Recipes

https://grandparentsplus.com/easy-blueberry-pie-bars/

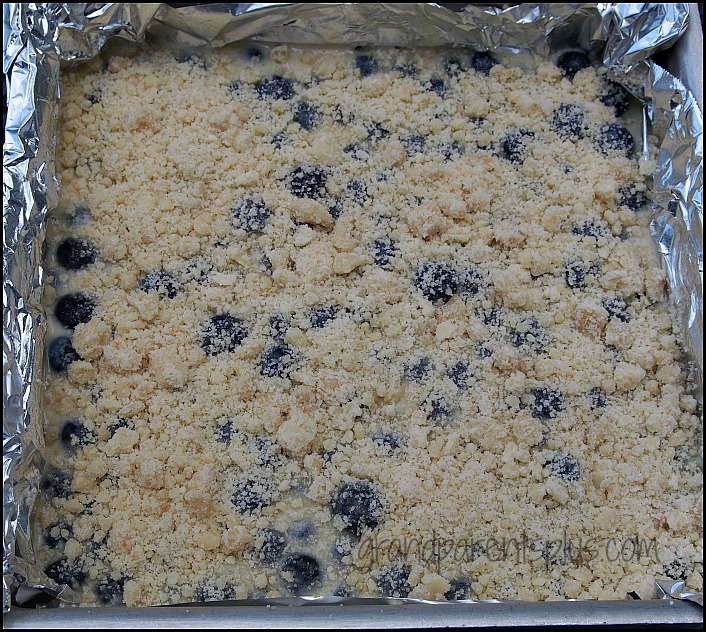
Ready to bake…….


Easy Blueberry Pie Bars grandparentsplus.com

Bake @ 350 for 60 minutes.

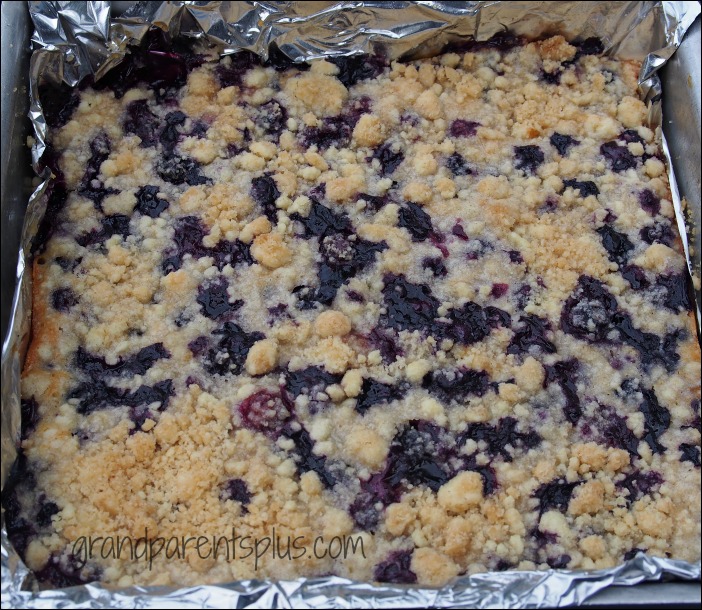
Done! Light brown and bubbly.


Easy Blueberry Pie Bars grandparentsplus.com

Be sure to let cool for at least 2-3 hours. When set, remove by lifting foil from the pan. Cut and store in an air-tight container in your refrigerator or freeze.

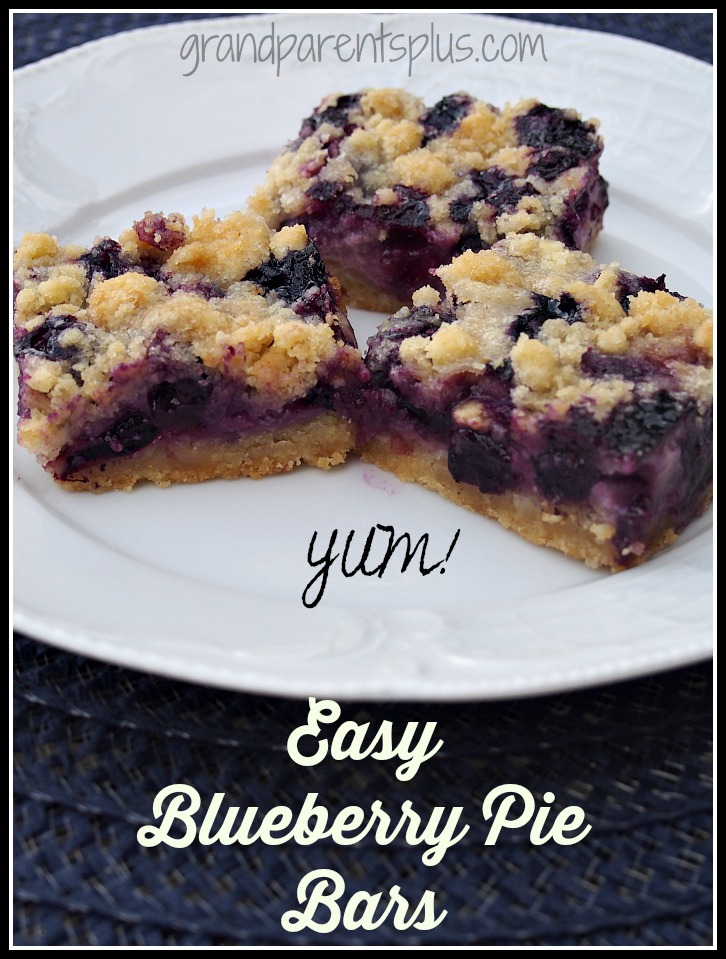
Easy Blueberry Pie Bars grandparentsplus.com

These taste like pie, but no rolling out a crust! Delicious!!!


Enjoy!

Phyllis

Subscribe on the sidebar so you don’t miss a post!

Follow on Pinterest, too.

This post is linked to many of the following parties….


Posted in Desserts, Recipes | Tagged , , , , , , , , , | Leave a comment

Beef Breakfast Burrito

Switch up breakfast a bit with a Mexican menu. A lot of the fast-food restaurants now have breakfast burritos on the menu. You can do it even better with this tasty Beef Breakfast Burrito recipe. Your family will love it.


Beef Breakfast Burrito grandparentsplus.com


Beef Breakfast Burrito

Ingredients

  • 12 oz. ground beef
  • 1 med. red bell pepper, chopped
  • 1 small onion, finely chopped
  • 2 t. chili powder
  • 1/2 t ground cumin
  • 4 eggs beaten
  • 2 T. water
  • 1 Tbsp. finely chopped fresh cilantro
  • 1/4 tsp. salt
  • 1/3 c. shredded Mexican or Cheddar cheese
  • 4 medium spinach or plain flour tortillas. (10 in.)
  • Salsa
  • Ingredients for Lime-Cilantro Cream
  • 1/2 c. sour cream
  • 1 T fresh lime juice
  • 1 Tbsp. finely chopped cilantro

Instructions

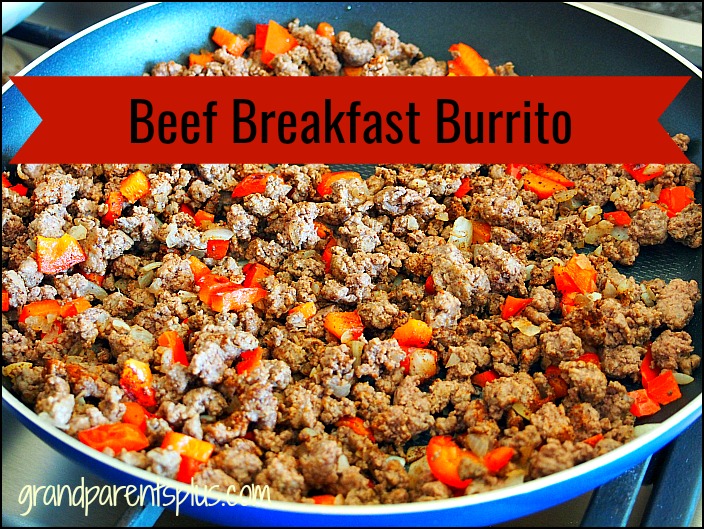
  1. Brown ground beef, onions, and red pepper. Add chili powder and cumin. Break into small crumbles.
  2. (At this point, you can freeze this for future burritos)
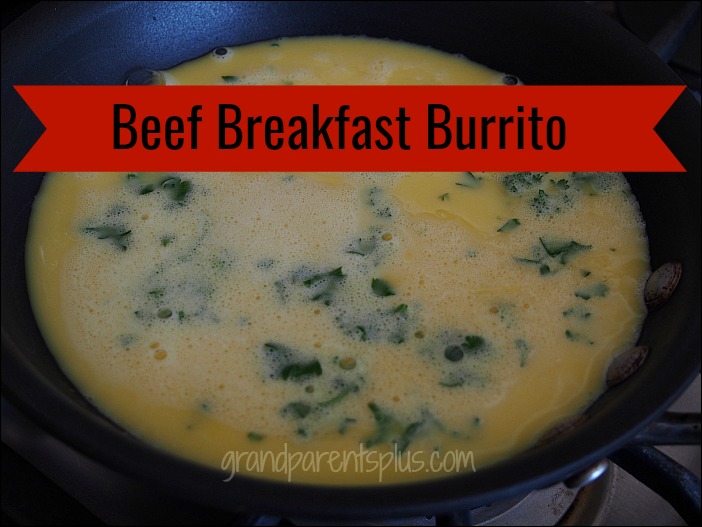
  3. Combine eggs, water and 1 tbsp. cilantro in med. bowl.
  4. Spray skillet with cooking spray.
  5. Pour eggs into skilled and scramble them, stirring occasionally. Season with salt.
  6. Add to beef mixture, add cheese and cook 1 minute to heat through.
  7. Spoon beef mixture across center of each tortilla, leaving a 1 inch border on right and left sides Fold right and left sides of tortilla over filling. Turn over and cut in half diagonally. Serve with Lime Cilantro Cream and salsa, as desired.
  8. Serves 4
Schema/Recipe SEO Data Markup by Yummly Rich Recipes

https://grandparentsplus.com/beef-breakfast-burrito/


This Beef Breakfast Burrito recipe is so easy to freeze the meat mixture for future use or refrigerate the beef, onion, bell pepper for the next morning ready to add the eggs.

Then, all you need to do in the morning is warm the beef mixture up, scramble the eggs, and mix together. It makes breakfast quick and easy.

During the summer around our area, many people head north to a the lake for the weekend. What an easy and yummy breakfast for family and guests at the cabin.

Step 1  Browning the beef, onion, and bell pepper mixture.


Beef Breakfast Burrito grandparentsplus.com


Step 2

Scramble eggs  
Beef Breakfast Burrito grandparentsplus.com

Step 3

Combine scrambled eggs with beef mixture and add cheese.


Beef Breakfast Burrito grandparentsplus.com


Step 4

Wrap in tortilla.
Beef Breakfast Burrito grandparentsplus.com

Step 5

Fold it like a burrito or roll it long like a taco!  Either way, it’s a wonderful start to the day. Use ground turkey in place of beef for fewer calories!

Step 6

Serve and eat! Serve with salsa and sour cream.


Beef Breakfast Burrito grandparentsplus.com

I’m all for doing things the night before to make mornings easy. This recipe is perfect to do ahead. You don’t need to get up early to fix this hearty breakfast!

Enjoy!

Phyllis

Subscribe on the sidebar so you won’t miss a future post! Your email is never shared or sold.

Follow on Pinterest, too.

This post is linked to many of the following parties…


Posted in Main Dishes, Recipes | Tagged , , , , , , , , , , , | Leave a comment

Easy Notebook Cover

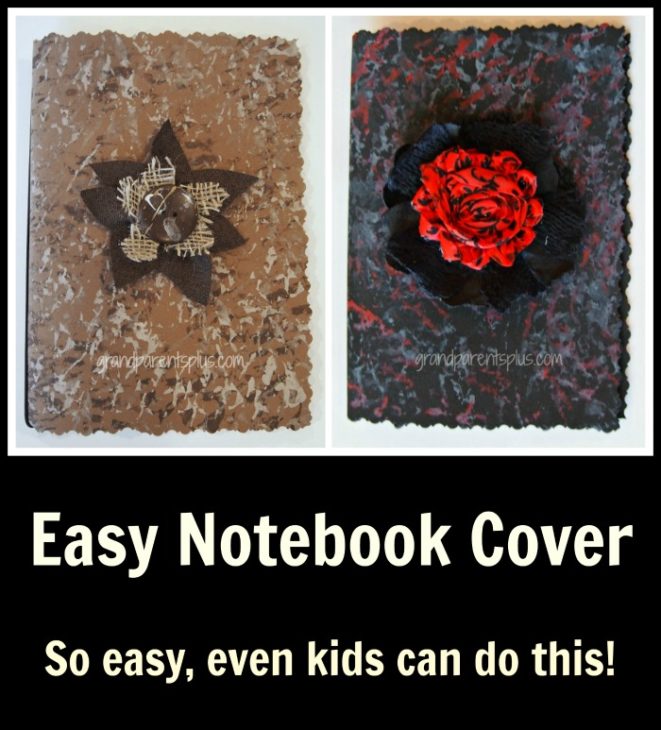
This Easy Notebook Cover idea is so easy, yet it looks amazing! It is simple enough for kids to make while adults can make this elegant looking. It makes a lovely special gift, too. Materials are easy to find and very inexpensive.


Easy Notebook Cover grandparentsplus.com

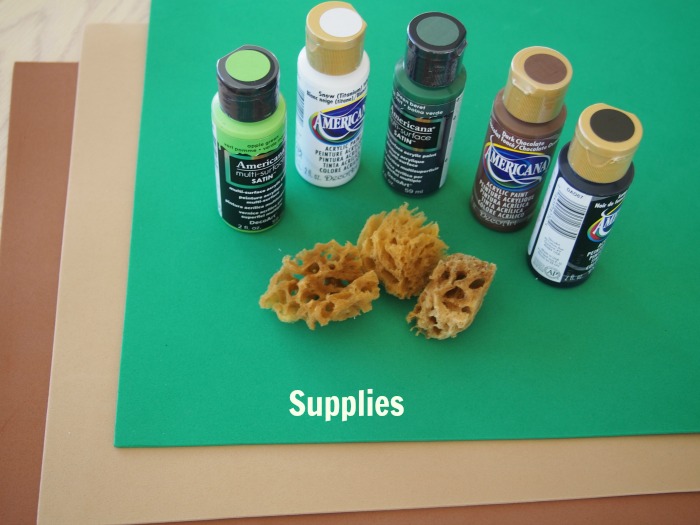
Materials needed:

  • Natural Sponge –
  • Acrylic Paint – 3 shades or colors
  • Fun Foam – choice of color
  • Decals, Stickers, Artificial Flowers, Buttons, Felt, Permanent Markers, or any Semi-Flat Decorative Objects
  • Glue Gun
  • Round Elastic
  • Notebook – any size, but I prefer journal-size (without a metal coil) I found ones at Walmart for under a $1.00

First, lay the notebook open on the Fun Foam and measure around it leaving an extra 1/4 in – 3/8 in to cover completely. You may use a regular scissor or a decorative one to cut out the cover. (For small kids, I did this part ahead of time.)


Easy Notebook Cover grandparentsplus.com

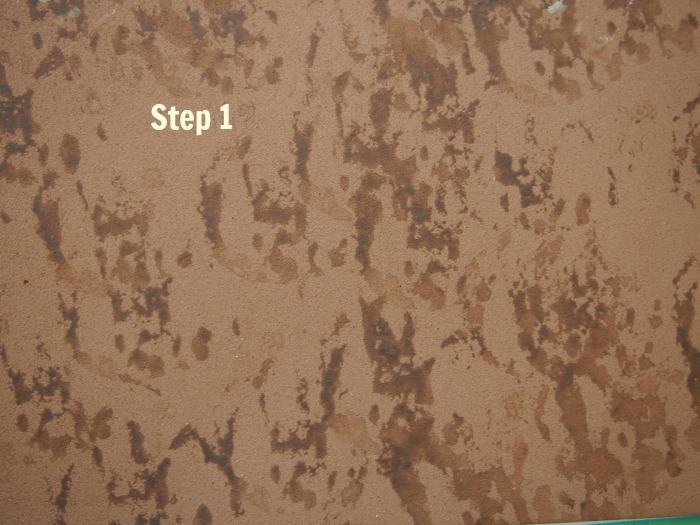
Next, with the Fun Foam laying flat, lightly dip the sponge in a dark color. Dab it on newspaper a couple of times so your paint is very light on the sponge. Now, dab the paint over the sheet of Fun Foam. Be sure to leave spaces for the other colors. Let dry in between colors.


Easy Notebook Cover grandparentsplus.com

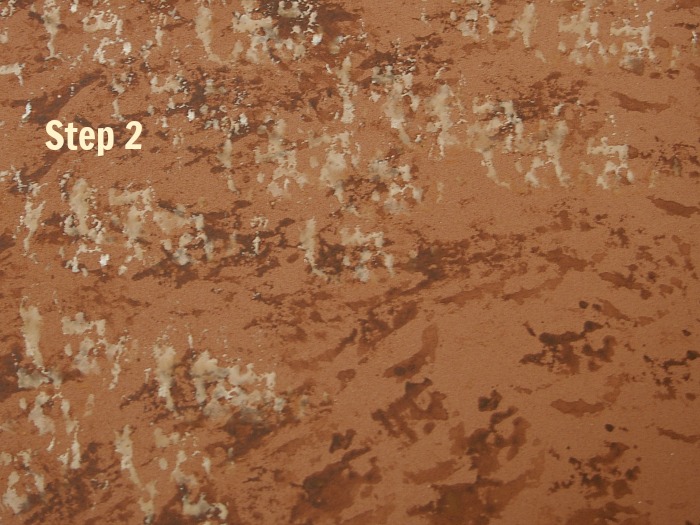
With a lighter color (you can mix just white with the base color), continue dabbing the paint onto the Fun Foam.

Easy Notebook Cover grandparentsplus.com

Using an accent or third shade, dab again over the Fun Foam sheet and let dry.


Easy Notebook Cover grandparentsplus.com

This project used one color of acrylic paint. Start with the dark color and apply. Add white to lighten and sponge the paint again. Finally, lighten even more for the third step.


Easy Notebook Cover grandparentsplus.com

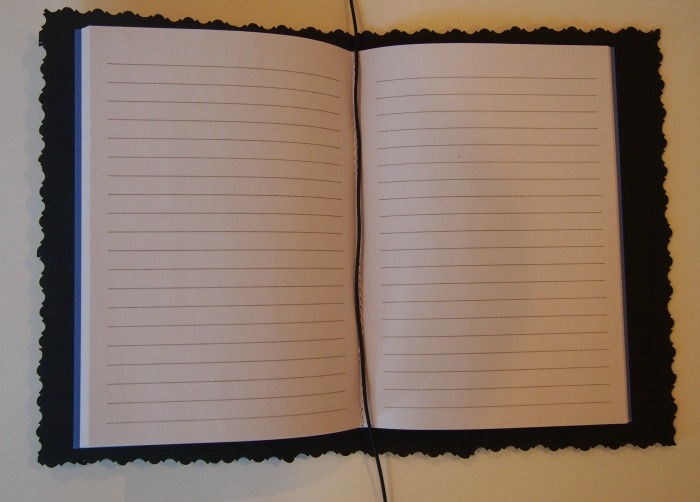
Finally, when you have reached the way you want it and it’s completely dry, fold the Fun Foam over the notebook. Use black elastic to keep the cover in place. Place the elastic in the middle of the pages in the book and around the outside cover. Tie a knot in the elastic and slide the knot inside the notebook so it is not noticeable.


Easy Notebook Cover grandparentsplus.com

At last, decorate the cover with stickers, artificial flower, feathers, etc. It works best to have the decorations fairly flat on the cover.

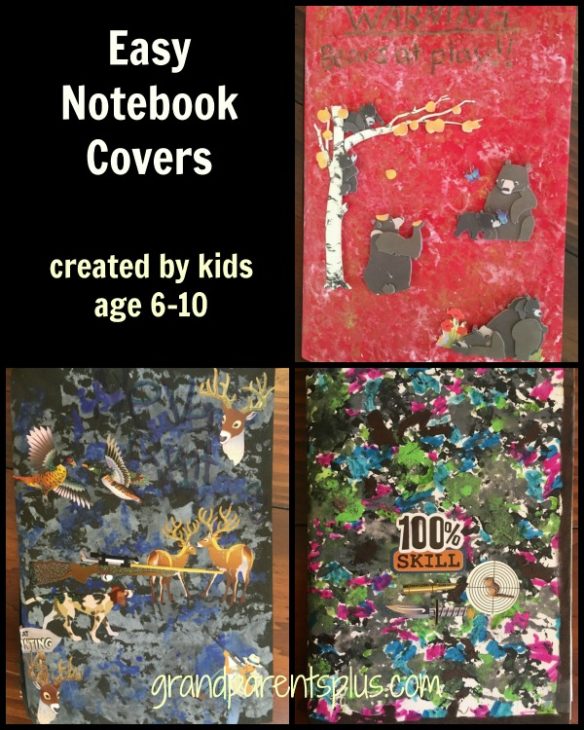
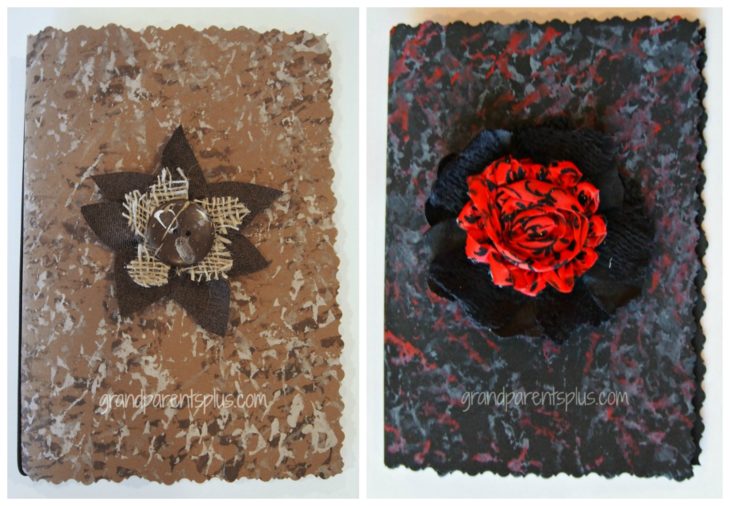
These Notebook Cover samples were made by my grandchildren. The foam colors they started with were red, black, and white. Stickers were applied after the paint dried. Using a black permanent marker, one child made a black border around the edge. Their choices were entirely made by them.


Easy Notebook Cover grandparentsplus.com

As I said, this project isn’t just for kids. You can make this elegant, too. It makes a great hostess gift or sell your creations at a craft sale.


Easy Notebook Cover grandparentsplus.com

This Notebook Cover was one of the crafts I did with my grandchildren (ages 6-12) at our Oma and Opa Camp this past summer. They really enjoyed making them. But remember, this is not just for kids!

Enjoy!

Phyllis

When you subscribe on the sidebar, remember that I don’t sell or share your email!

Follow on Pinterest, too!

….linked to the following parties.….


Posted in Art Project, Crafts | Tagged , , , , , , , , | Leave a comment

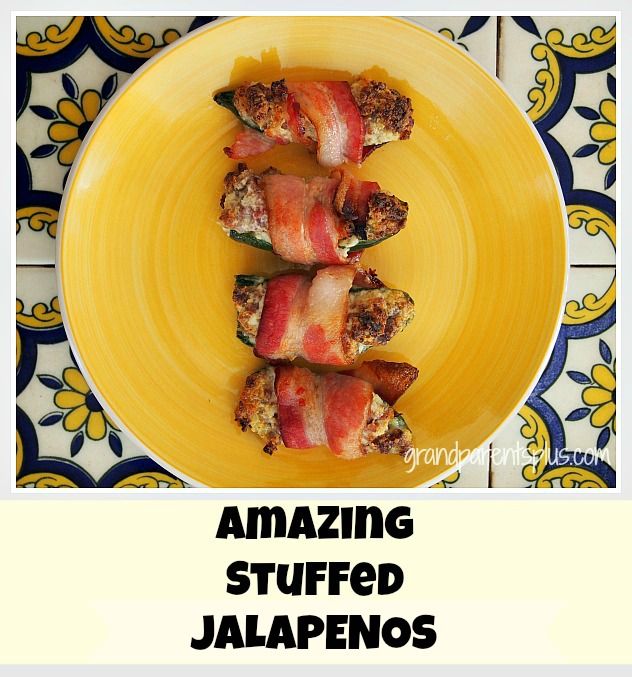
Amazing Stuffed Jalapenos Recipe

While visiting in Arizona, we had an extended family get-together which grew to over 70 people! One of the relatives brought these Amazing Stuffed Jalapenos! Now, I’m from the midwest and don’t like really hot spicy food, but these were absolutely delicious! My second-cousin, Beth, graciously shared this recipe.


Amazing Stuffed Jalapenos

Great Jalapeno Poppers!

The recipe makes a generous amount of appetizers, but people absolutely love them and they really go fast. So, plan accordingly. They’re stuffed with a combination of sausage, cream cheese and parmesan cheese. Then, they’re wrapped with bacon. Ooh, my mouth just waters thinking of them. Please don’t shy away from this recipe because you might think of it as way too spicy. You can control the amount of heat. If you want it spicier, just leave some pulp, seeds, or use a spicy sausage for the stuffing. Make one batch spicy and another fairly mild, just to please everyone.

 Click on the “YUM” button to add to your recipe box.

Amazing Stuffed Jalapenos

Ingredients

  • 15-20 jalapenos
  • 1 lb. breakfast sausage (I used Jimmy Dean)
  • 1 pkg. of cream cheese
  • 1/2 cup shredded parmesan cheese
  • 1 pkg. bacon

Instructions

  1. Brown and crumble sausage.
  2. Melt cream cheese in with sausage and add parmesan cheese.
  3. WEAR GLOVES
  4. Halve jalapenos, lengthwise
  5. Remove stem and remove seeds and pulp
  6. Fill with sausage mixture
  7. Wrap with 1/2 slice of uncooked bacon
  8. Bake at 425 degrees for 25-30 min.
  9. If you want bacon really crisp, broil on high for 2-3 minutes.
  10. Serve immediately.
Schema/Recipe SEO Data Markup by Yummly Rich Recipes

https://grandparentsplus.com/amazing-stuffed-jalapenos-recipe/

I wanted my family to taste these and give me their opinion. I didn’t want to make the entire recipe for just a couple of people, so  I made half and refrigerated the sausage-cream cheese combination and made the rest two days later. It was nice to have them fresh-made two times in a week.  By the way, the family opinion was that they were AMAZING!

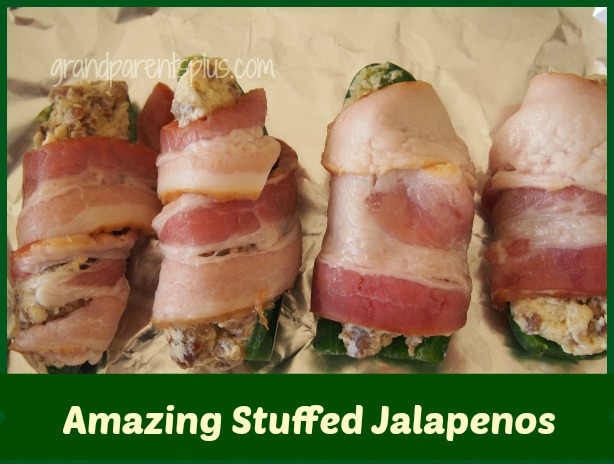
These are ready for the oven…..   I baked these Stuffed Jalapenos on foil for an easy clean up.


Amazing Stuffed Jalapenos


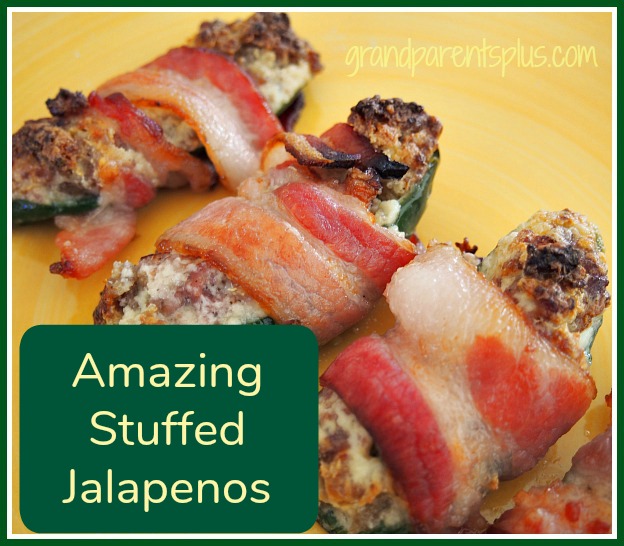
Baked at 425 degrees and ready to eat!


Amazing Stuffed Jalapenos


Just wait until you taste one…..you’ll be amazed at how delicious they taste! These are perfect for Cinco de Mayo, too, when you’re looking for something Mexican to serve.


Amazing Stuffed Jalapenos


I hope I’ve convinced you how delicious these appetizers taste. They were a big hit at the family get-together!

Enjoy!

Phyllis

Subscribe on the sidebar knowing that your email is never shared or sold.

Follow on Pinterest..

post linked to these parties….

Posted in Appetizers, Recipes | Tagged , , , , , , , , , | 15 Comments

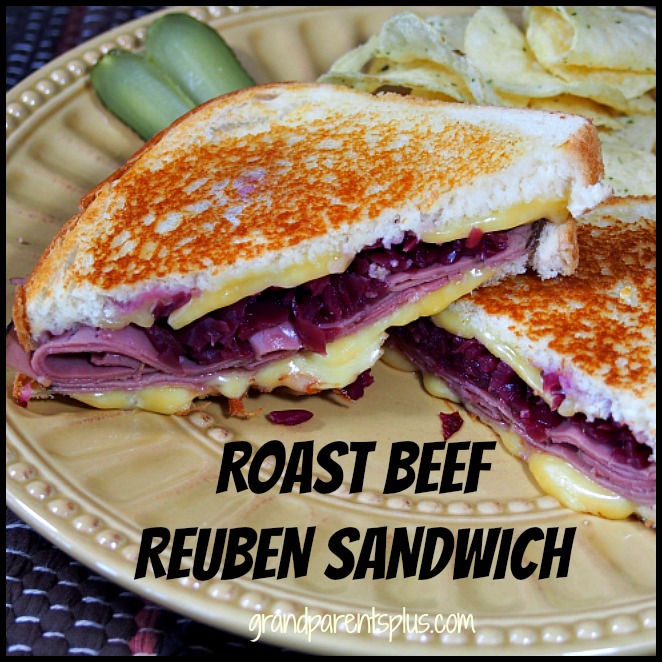
Roast Beef Reuben Sandwich

Try this new version of a Reuben. I call it a “Roast Beef Reuben Sandwich”! This sandwich is so delicious with the new combination of flavors that it may become your favorite. My mouth just waters when I think of it. My family loved it!


Roast Beef Reuben grandparentsplus.com

Roast Beef Reuben Sandwich
Recipe Type: Lunch or Dinner Sandwich
Cuisine: American
Author: Phyllis Van Rossum
Prep time:
Cook time:
Total time:
Serves: 4
A new combination of flavors make this Roast Beef Rueben Sandwich absolutely delicious!
Ingredients
  • 8 slices of bread- Sourdough
  • Sliced Roast Beef – don’t skimp!
  • 8 slices Gouda cheese
  • Jar of Sweet and Sour Red Cabbage (found ready-made in vegetable aisle) or homemade
  • Coarse Ground Dijon Mustard – optional
  • Butter
Instructions
  1. Pre-heat skillet
  2. Drain Sweet and Sour Red Cabbage
  3. Arrange 8 slices of bread
  4. Place a slice of Gouda Cheese on 4 slices of bread
  5. Layer Sweet and Sour Red Cabbage on top of cheese
  6. Add Roast Beef on top of Cabbage
  7. Top with remaining slice of Gouda Cheese
  8. Spread remaining 4 slices lightly with coarse ground Dijon mustard (optional or serve on the side)
  9. Place those 4 slices with mustard side towards the four cheese-topped sandwiches.
  10. Spread with butter and place buttered side down in pre-heated skillet.
  11. Butter the top of the sandwich while in the skillet
  12. Grill until browned on each side.
  13. While grilling cover with a lid to warm the inside of the sandwich and melt the Gouda cheese

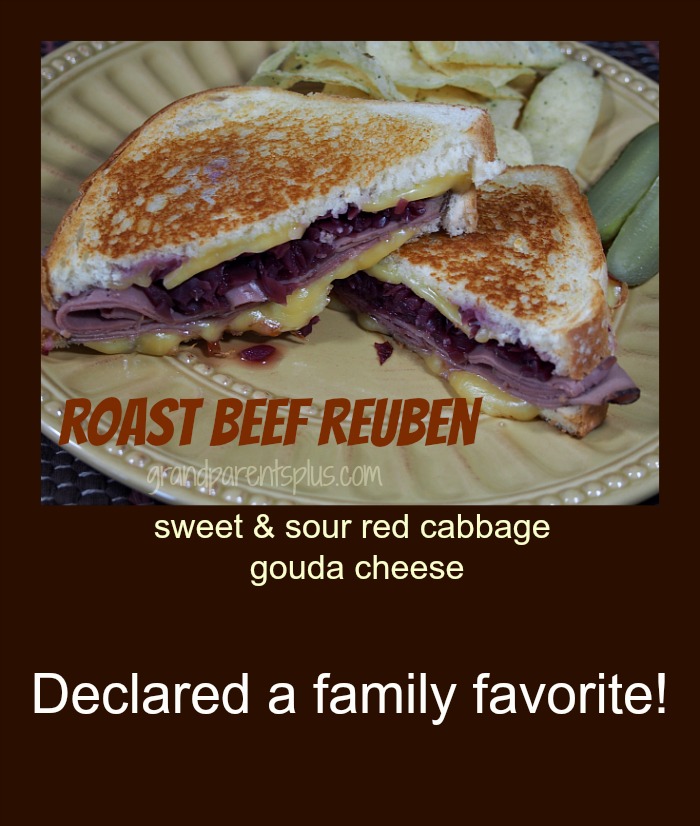
The combination of Roast Beef, Gouda Cheese, along with Sweet and Sour Red Cabbage is fantastic! My husband was skeptical and then after tasting it declared it to be his favorite!! You just have to try it to believe how good it is.


Roast Beef Reuben grandparentsplus.com


Serve with Coarse Ground Dijon or regular mustard on the side. Not a mustard fan? You’ll still love it without it.

Wish you could taste it right now. YUM!


Roast Beef Reuben grandparentsplus.com

Even if you don’t particularly like a corned beef  with sauerkraut Reuben sandwich, I know you’ll enjoy this one! Try it! 

Enjoy!

Phyllis

Don’t miss a post! Subscribe on the sidebar and know that your email is never shared or sold.

Follow on Pinterest, too.

linked to these parties…


Posted in Main Dishes, Recipes | Tagged , , , , , | 29 Comments

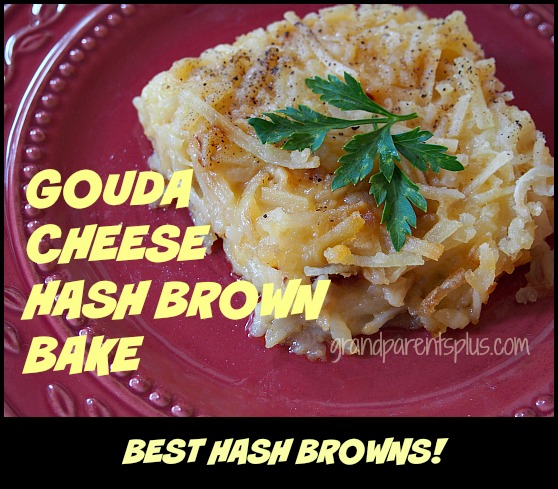
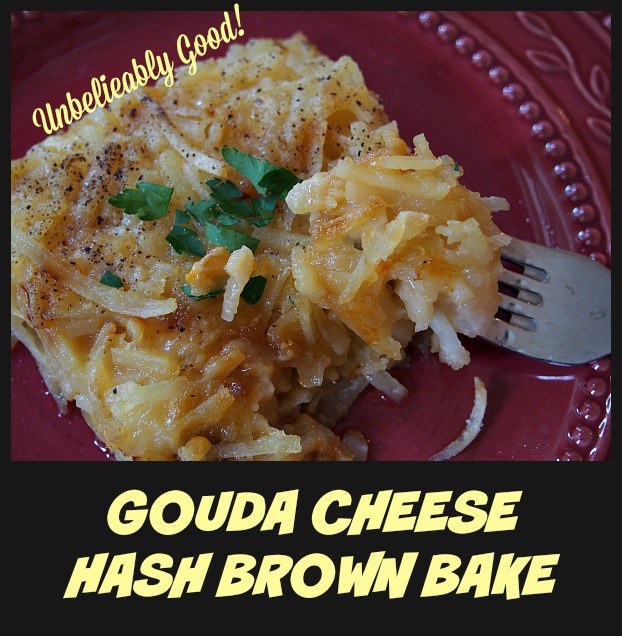
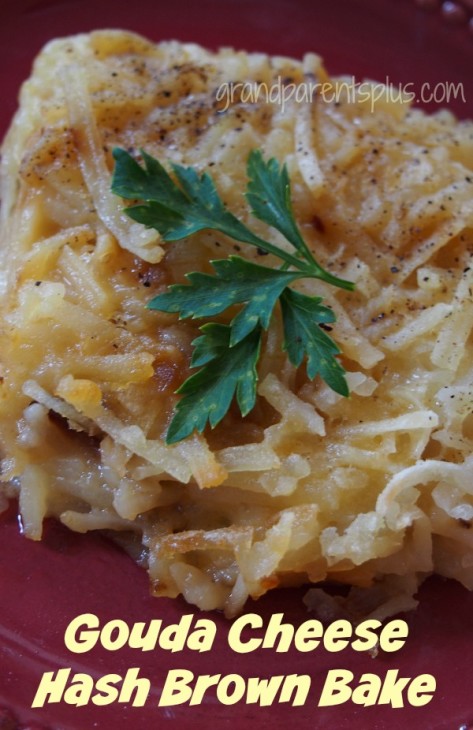
Gouda Cheese Hash Brown Bake

There’s a favorite restaurant that I like to go to for breakfast. Their Gouda Cheese Hash Brown Bake is amazing! I go there just to have that with an omelet or eggs.  I had never tasted hash browns like that before. I finally asked the cook if he gave out his recipe. He wouldn’t tell me the amounts, but he did give me the ingredients. So, I’ve experimented and have come up with a recipe that tastes like the one at the restaurant. They are the best! You might say they’re GOOD-Ah!


Gouda Cheese Hash Brown Bake grandparentsplus.com


Gouda Cheese Hash Brown Bake
Recipe Type: Breakfast or Brunch side dish
Cuisine: American
Author: Phyllis@grandparentsplus.com
Prep time:
Cook time:
Total time:
Serves: 10-12 servings
Gouda Cheese melted in with a hash brown mixture! The best hash brown recipe you’ll try!
Ingredients
  • Frozen Hash Browns (28-30 oz.)
  • 2 cups shredded Gouda Cheese
  • 3/4 cup yellow onions
  • 2 tsp minced garlic
  • 1 pint of heavy cream
  • 2 tsp vegetable base (look for this in your soup aisle)
  • Salt and Pepper
Instructions
  1. Thaw hash browns and place in large bowl.
  2. Add shredded Gouda cheese
  3. Saute onions and garlic until translucent in 1-2 T. olive oil and add to bowl.
  4. Add salt and pepper to taste
  5. Mix together
  6. Mix 2 tsp of Vegetable Base into 1 pint of heavy cream and stir until combined.
  7. Put hash brown mixture In a grease 9 x 13 pan
  8. Drizzle the heavy cream with vegetable base over the hash browns in the pan.
  9. Bake in 350 degree oven for 1 hour
  10. Remove from oven, cover with foil and let sit for 10 minutes before serving.
  11. Cut in squares and serve.

The vegetable base, in this recipe, adds great flavor. It’s a bit expensive, but you’ll use it again and again.

This Gouda Cheese Hash Brown Bake makes a nice big pan. If you have left-overs, just freeze the individual portions to use later. Take out as needed and microwave.

Another great recipe for hash browns are the Shreds. You might want to check them out, too!


Gouda Cheese Hash Brown Bake grandparentsplus.com

Oh, I’ll still go back to that restaurant for breakfast, but now I can have those hash browns anytime.


Gouda Cheese Hash Brown Bake grandparentsplus.com

I know you’ll enjoy this recipe!

Phyllis

When subscribing, know that your email is never sold or shared.

Follow on Pinterest, too.

linked to these parties…


Posted in Recipes, Side Dish | Tagged , , , , , , , , | Leave a comment

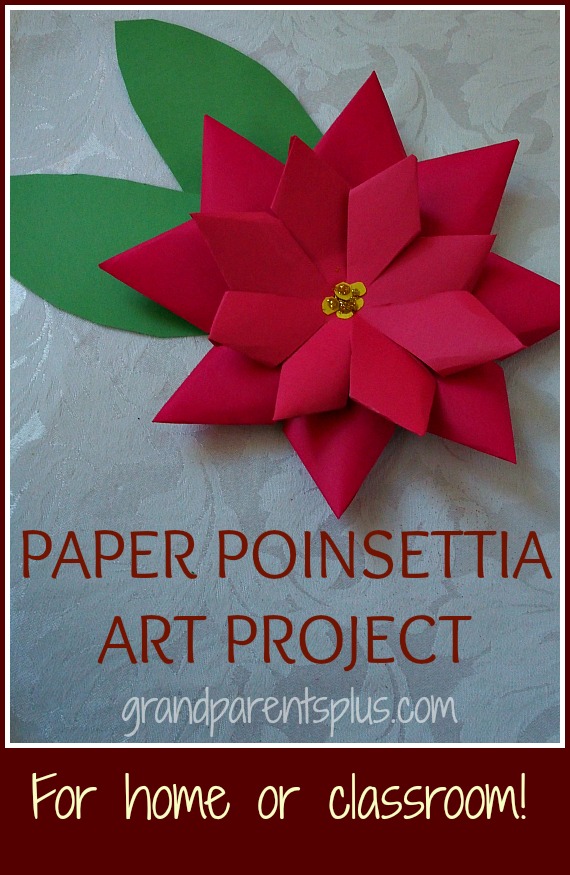
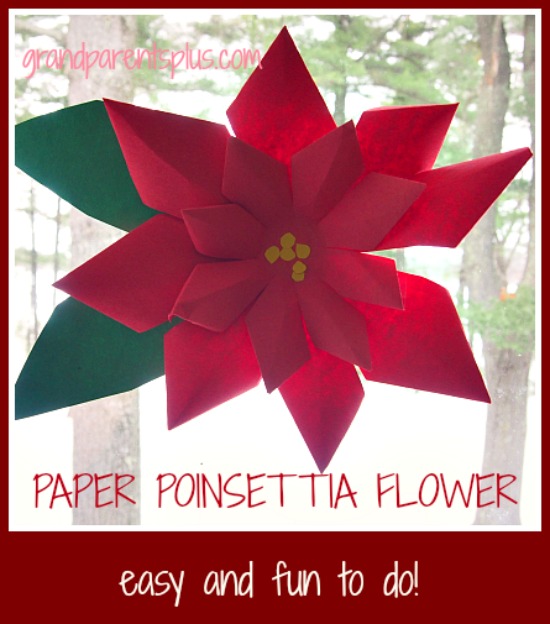
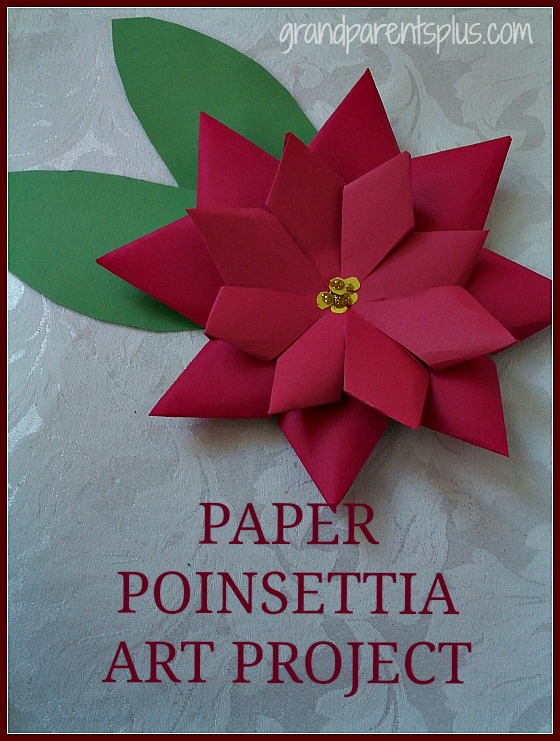
Paper Poinsettia Art Project

This Paper Poinsettia Art Project is very do-able for elementary children. Nothing about this is hard. The important part is to fold the petals to a point.It looks great as a tree decoration (when made small), package decoration,  bulletin board decor, and window decoration Wherever you use them,they look lovely and appear more difficult to make than they actually are.

Paper Poinsettia Art Project grandparensplus.com

Paper Poinsettia Art Project Directions:

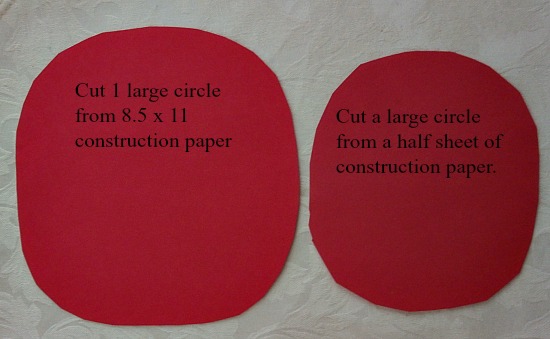
1.Use two pieces of red construction paper. Cut one large circle out of one piece. Fold the other piece in half and use only one half sheet to cut another circle. Make these circles as large as you can make them out of that size paper.


Paper Poinsettia Art Project grandparentsplus.com


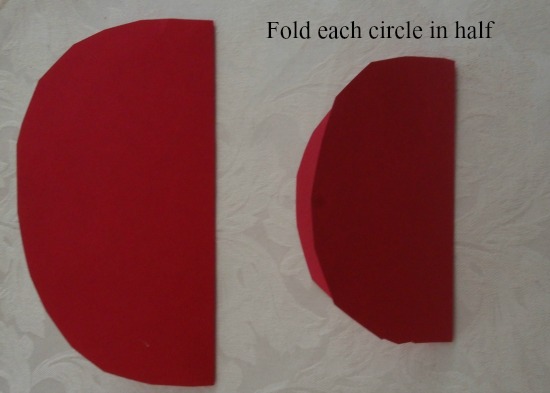
2. Fold once…

Paper Poinsettia Art Project 2 grandparentsplus.com

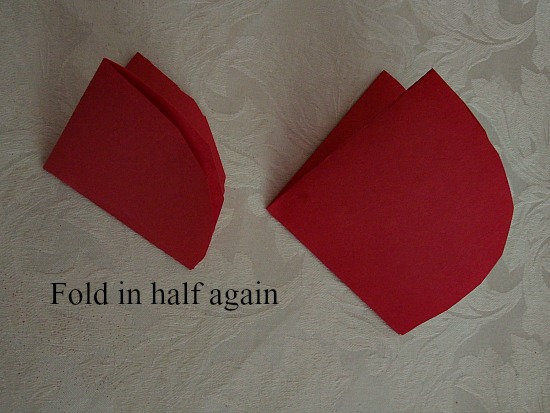
3. Twice….

Paper Poinsettia Art Project grandparentsplus.com

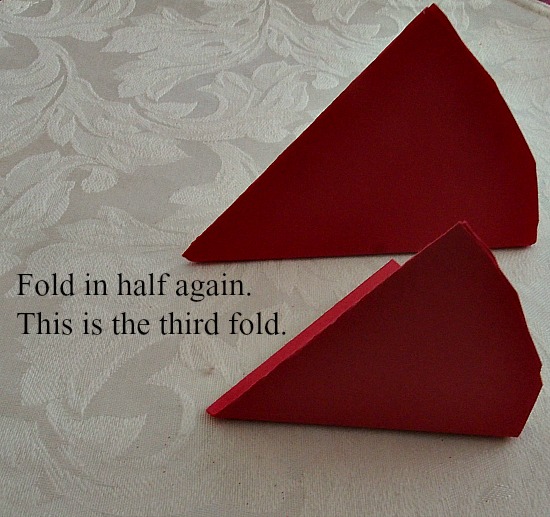
4. Three times!


Paper Poinsettia Art Project grandparentsplus.com

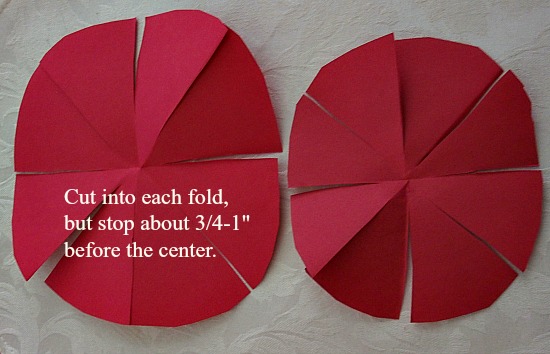
5. Now cut on the folded lines from the outside of the circle and stop 3/4 to 1 inch before reaching the center.


Paper Poinsettia Art Project grandparentsplus.com


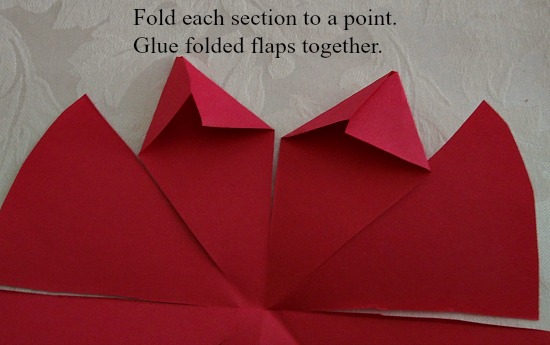
6. From the outside edge, fold each piece to a point and glue the folded flaps together….

Paper Poinsettia Art Project grandparentsplus.com


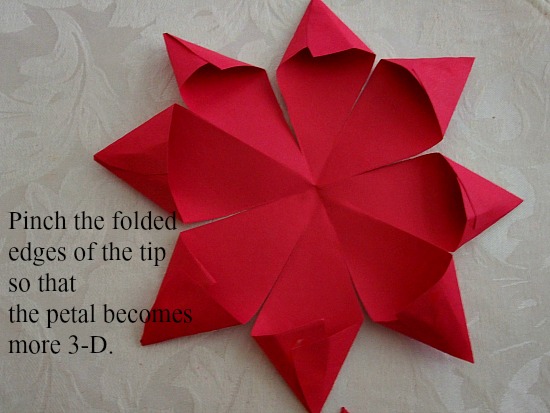
7. Put your finger inside the glued area to pinch it out and give it dimension.


Paper Poinsettia Art Project grandparentsplus.com


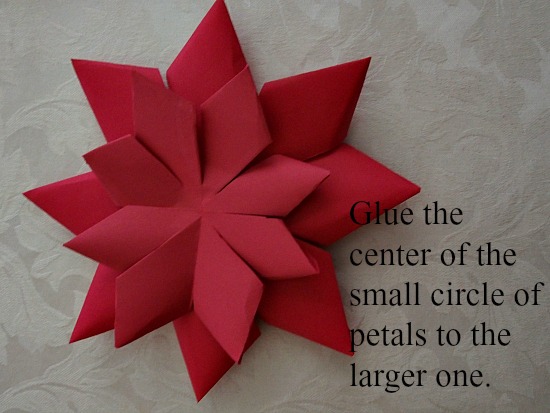
8. When finished with both sizes, glue the small one to the center of the larger flower.

Paper Poinsettia Art Project grandparentsplus.com


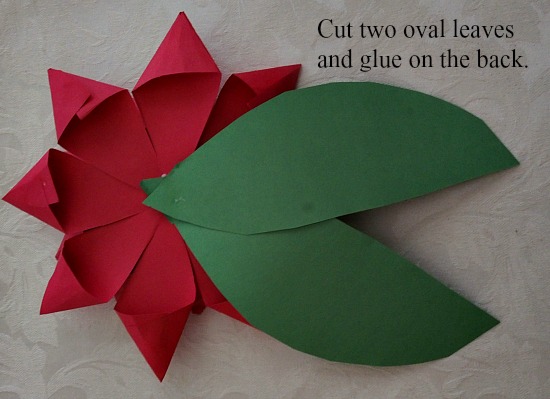
9. Cut leaves and glue to the backside.

Paper Poinsettia Art Project grandparentsplus.com


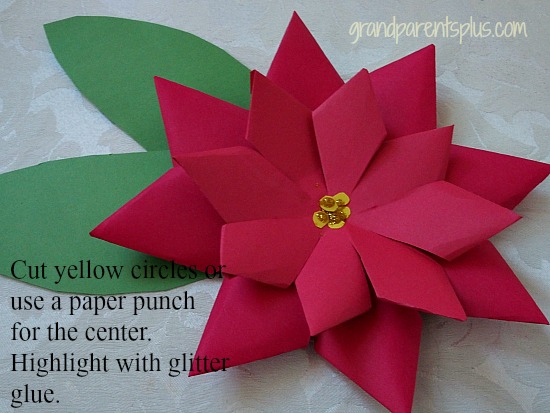
10. Cut small yellow circles from construction paper, glue in the center, and add some sparkle. A paper punch works well for this, too.

Paper Poinsettia Art Project grandparentsplus.com

Now, you’re done!

Paper Poinsettia Art Project grandparentsplus.com


The flower sizes are variable. Small ones look great on a homemade card, but are harder for children to make due to the size. The larger ones are easier and look beautiful on a package! They, also, look great on a wreath or as a table decoration.

Paper Poinsettia Art Project grandparentsplus.com


These are so easy and fun to make! You’ll want to make several.

Enjoy!

Phyllis


Subscribe on the sidebar knowing that your email is never sold or shared!

Follow on Pinterest, too!

linked to these parties…

Posted in Art Project, Christmas, Crafts, Holidays | Tagged , , , , , , , , , , , , | 26 Comments

Best Valentine Cookies! – “Flavor Cookie”


Best Valentine Cookies - Flavor Cookies  grandparentsplus.com

I am not kidding!

This is the best cookie! It is not just a sugar cookie. It has a wonderful cherry-almond flavor! You won’t eat plain sugar cookies again!

I usually save this recipe just for Valentine’s Day because of its red color and wonderful flavor.  I started making these when my kids were young and they have eagerly anticipated that these cookies would “show up” every Valentine’s Day since then!

When they went to college, I sent a package of them to each one of my kids on Valentine’s Day.

When they got married, they still wanted the cookies. One year, I thought, ” Well, they are getting older and they probably don’t care about getting them.” Wrong!

They called on Valentine’s Day and asked, “Where are the cookies?”

Guess I can’t stop sending them each year. Now they’re married with children and they still want those cookies! It has become a tradition!

 I’m sharing the recipe so you can start the tradition in your family, too!


Flavor Cookies

1 cup butter

1 cup sugar

1 (3 oz) package Cherry jello

3 eggs

1 tsp. almond extract

3 cups flour

1 tsp. Baking Powder

1/2 tsp. salt

Mix and chill overnight. Roll out like a sugar cookie on a floured surface.

I use a pastry cloth and a rolling-pin cover. The dough never sticks! When done, just shake the flour outside and roll the cloth together and place in plastic bag in the freezer! This way, it won’t mold or spoil. Just take out and use again the next time!

"Flavor Cookies" a family favorite! Cherry almond flavor!

Flavor Cookies with cherry almond flavor! Awesome!

Bake cookies on an un-greased pan at 375 degrees for 8 minutes (larger cookies) – 7 minutes (smaller cookies)

Cool completely and frost

Frosting

1 cup powdered sugar

2 t. cherry juice ( from maraschino cherries) or use milk and red food coloring

2 tsp. light corn syrup

1 tsp. almond flavoring

Mix and add more corn syrup and cherry juice to get the right consistency.

Frost cookies and let dry!

Makes about 5-6 dozen depending on size of cookie.

Best Valentine Cookies! Cherry almond flavor!

Best Valentine Cookies!
Wonderful cherry almond flavor! Delicious!


These are also good with other flavors of Jello, but the Cherry gives it the most flavor! Try lime and make shamrocks! Almond flavoring doesn’t go with lime, however, so leave it out.  Don’t use strawberry as it doesn’t give enough color or flavor! These would also be good at Christmas, but I have so many cookies that I make at Christmas that I just save this one for Valentine’s Day! It makes it special!


Best Valentine Cookies  "Flavor Cookies"   grandparentsplus.com

What are your Valentine traditions?

Enjoy!

 Phyllis


Be sure to subscribe so you don’t miss future posts!

Also, follow on Pinterest and Bloglovin!

 Linked to many of these party sites…..

Posted in Desserts, Recipes, Valentines | Tagged | 62 Comments

32+ Valentine Games

Follow my blog with Bloglovin

Fun Family Games for Valentines #Valentine Games #Games #Valentines # Valentine Family Games #Family Games #games

Lots of fun games ideas for parties at home or at school.

This ” 32 + Valentine Games” post has been added to and is now over 40 game ides!  Thought I’d take it from the archives and re-post due to all the new ideas! …….

Valentines Day is just around the corner! Now is the time to be thinking of fun Valentine Games to do with your kids, grandkids or classroom for the Valentine season. I’ve come up with some fun games and compiled a list of other games along with some extra resources for you to use wherever you are having a Valentine celebration! Some games are old and some are new! I hope this will be a nice list of ideas to have filed away. As I think of more, I will update and add to this list! That is the “+” part!

1. “Wink-um”  This is an OLD game!

Have a circle of chairs. The boys are standing behind the chairs and the girls are sitting in the chairs. There is one empty chair and the boy behind it winks at a girl. The girl has to quick get out of the chair before the boy behind her tags her on the shoulder.

2. Valentine Relay

Cut small hearts out of tissue paper  Give each person a straw (not a flexible one). Players need to suck the straw so that the heart sticks and run to assigned area and release the heart into a basket or bowl. Play this game individually with small kids or in relay teams with large groups. Another version is where you start with a sandwich bag full of tissue hearts. The first person sucks out a heart and passes it to the next person’s straw without using their hands. The last person has an empty sandwich bag in which they put the hearts. The team to first pass all their hearts, wins!

3. Broken Hearts

Cut large hearts out of construction paper. (approx 6-9 inches across) Now cut them into puzzle pieces. Cut them differently or all the same. If you cut them differently, each one needs to have the same number of pieces. For young children, mark the top side, but for adults, make it harder by not marking the top side. Place individual puzzles in an envelope.  Either start everyone at the same time and see who can put the puzzle together the fastest or do it individually and time each person. Vary this depending on the number of people playing and the age of the players.

4. Heart Grab

This is like the “Hungry Reindeer” Game that I posted at Christmas. There are small heart-shaped red hots available at Fleet Farm and perhaps other places. Place the “hearts” on a large tray. Players wear a thick athletic sock on their hand and have 15-30 seconds to see how many hearts they can grab and put in a bowl. If they miss the bowl, they don’t count! (Decorate the sock with hearts to go with the Valentine theme!)

5. I Spy the Heart!

This is also one that I played as a kid.  Everyone is out of the room while one person places a small heart somewhere in the room. Do not have it totally hidden, but have some little part showing. When a player spies it, they quietly walk over to a chair and sit down. They are not to let anyone know where it is hidden. Each one that spots it, also walks over and sits down until the last one finds it. The first one to spy it, is the next person to hide it.

6. Heart Land

Place cut-out hearts or doily hearts several places on the floor (tape them down). Kids try to land a nickel or quarter on a heart. If they do, they keep the money. You decide how many tries they get! Let them have the money even if it is touching a heart.

7. Cupid 

Place hearts on a wall or door with different point values on each one. Use a Nerf Gun or Nerf  Crossbow to shoot the hearts. Tally points after 10 tries.

8. Heart Hunt

Place lots of hearts in various places around the house. Give kids a basket or cup to place all the hearts they find.  Either give a time limit or game ends when all the hearts are found.  Count hearts to see who found the most.

The next 6 games are from      Activity Village    

9. Heart target game

Scatter large hearts cut from construction paper all around the floor. Blow up red balloons, but don’t tie them. Give them to a player and they let them go trying to land close or on a heart somewhere in the room. Give them several tries. It is fun to see where they land. The person closest or the one on the heart, wins.

10. Heart Basketball

Cut a heart-shaped frame out of a corrugated cardboard box and spray paint it red or pink.  Hang it from a doorway or have two adults hold it.  Blow up red balloons and tie the ends. Kids try to score by batting it through the opening of the heart to score a point.

11. Valentine Balloon Pop

Inflate balloons and place a small piece of paper inside each one with the name of a prize.  Each child has a pin. They need to keep the balloons in the air without popping it until you signal. At the signal they can start trying to pop one!  Whatever heart they find inside, they win that prize!

12. Wipe That Smile Off Your Face!

Everyone sits in a circle. The one that starts smiles and tries to get each person to smile. They get a point for each one that they get to smile on their turn. When their turn is over, they “wipe the smile off their face” and it is the next person’s turn!

13.  Valentine Fishing

Cut hearts and turn them into “Valentine fish”. Attach a small magnet to each fish. Give either point values to the fish or write a prize on the back of some of the fish.  Poles with string also have magnets which “catch” the fish.

14. Computer Games at

a kids heart
apples4the teacher

Games # 15-20. Go to:    365kidsgames.com

for complete directions on the following games….. #15-20

15. Heart Attack

A relay game where players pick a red construction paper heart with a chocolate heart candy taped to it. On the back are the instructions of what they have to do to run the relay. For instance, one might be “hop”, “jump”, “walk backwards”, “crabwalk”, etc. When the teams finish, they can enjoy their chocolate.

16. Heart Strings

This game is like  “I Spy the Heart” above only have a string on the heart and only let that show.

17. How Many Kisses?

Guessing game with a jar full of “chocolate kisses”.

18. Heart Stomp

Using red hearts cut from construction paper taped to the floor, players walk around going from heart to heart. When the music stops, they must find a heart to stomp on. The player that is not on a heart is “out”.  This is like musical chairs only using hearts.

19. St. Valentine Says…

Like Simon Says….

20. Valentine Pictionary

Use words like: candy, heart, love, Valentine, kiss, envelope, letter, lollipop, balloon, cupid, arrow, flowers, etc.

21. Steal My Heart

Give kids chopsticks and have them transfer Valentine candy hearts from one bowl to another using only the chopsticks. Two pencils also work for this game if you don’t have chopsticks.

22. Heart-A-Stack 

Take Valentine heart candies and see how high they can stack them before they fall! Give a set time limit.  More than one player can do this at a time or do it in pairs.

23. Valentine Printables for Valentine Memory Games, etc.

Go to :   spoonful

activityvillage

The next three ideas that I like come from this site:  Kaboose

They have other games, too, that would work for large groups or classrooms.

24. Straw and Valentine Cup Relay

For this game you need a bendable straw for each player and a Valentine Cup for each team. Players hold the bendable end in their mouth and pass the Valentine cup using only the straw. If the cup falls, it goes back to the beginning or for younger kids, just go back one player.

25. Heart Stomp Relay

Cut out large red hearts. Give each team two large hearts. Players on each team must step on one heart and then take the heart from behind and place it ahead so they can continue on. They always take the one from behind and move it forward to get to the goal. They cannot move unless they are stepping on a heart. Players  run back with the hearts to the next player.

26.  Red Licorice Chew

This is where each player gets one string of red licorice (use Twizzlers Pull-A-Parts).  Without using hands, players must get the licorice all the way in their mouth by chewing. This makes for funny pictures! Get your camera out!

27.  Size-A-Heart

Have approx. 15 hearts that are various sizes. Players must put them in order from smallest to largest. Time each person  or race against two players at the same time.

28.  Stop in The Name of Love

Take a small heart pillow or small Valentine stuffed animal and pass like a “hot potato” while the music plays. When the music stops, the person holding the animal is out. Play continues until one player is left.

This next game is from Birthdayinabox

29. Valentine Candy Relay

Team members must run to a spot, unwrap a candy and eat it completely before they run back and tag the next person. A good candy to use is Hershey’s Kisses as they are hard to unwrap, but go down easily.

30. Heart Tic-Tac-Toe

Make paper hearts with a Tic-Tac-Toe board on it and kids use candy hearts of one color to play.

31. Lots of Minute to Win It Games for Valentines here:

Sunnydaysinsecondgrade

Mommylessons101

32. Heart Toss 

Outline a heart on the floor either with tape or cut a large one out.  Use bean bags (heart-shaped?) to toss. Anything landing inside the outline counts as a point. Give kids a set amount of tries. I noticed that www.orientaltrading.com has an inflatable Valentine game that is very much like this.  If you play the Heart Basketball Game, use that heart for the target area. Dollar stores have little Valentine soft toys to use as bean bags.

 +  Heart Throb Match

In this game, teams or individuals find the match for the things that belong together. Use famous couples (for adults), famous cartoon couples, or items like : cream & sugar, cookies & milk, etc.  The leader says the first part and the teams or individuals write down the second part.  Another variation is to put 1/2 of the match on the back of one person and the other half on the back of another. Without knowing what is on their back, they need to ask “yes or no” questions to find out their half and then look for the other matching half.

+ Heart Drop

For this game, you need a sturdy chair. Players kneel on the seat backwards and reach over the back of the chair to drop valentine hearts in a jar. Use a large pickle jar so the heart candies don’t bounce out. Give them 20 hearts to try. Count the hearts in the jar and then it is the next person’s turn.  Person with the highest number in the jar, wins!

 +  Coloring Pages

http://www.valentines-coloring.com/

http://www.crayola.com/free-coloring-pages.aspx#%2Fcategory%3Aholidays%2Fsubcategory%3Avalentines%20day

+ Heart Bowling

Take ten empty water or pop bottles and put heart stickers or glue paper hearts on them.  Place them like the 10 pins in bowling. Using a small stuffed Valentine animal, slide it across the floor to knock over the “pins”.  Players get two tries  just like bowling. Count the number of “pins” down. Repeat and keep score.

+ Pin the Heart on Cupid

Trace a Cupid on Paper and play like  “Pin the Tail on the Donkey”

+ Cupid’s Arrows

For this game you need Q-tips, straws, and a bowl or basket or a large paper heart target. Players place a Q-tip in the end of their straw and try to land (Cupid’s Arrows) it in the bowl, basket or on the heart set at a distance away. Give it a try  it to see how far away the targets need to be for both young kids and older ones. Adjust as necessary. Points are scored for those that land inside the target area.

+ Go to Oriental Trading for more Valentine Games


Free Shipping on orders over $49

The following Valentine Games are found here……. Shop party supplies and decorations at Oriental Trading Company!

1. Stretchable Flying Heart IN-32/123

Use these to fly through a cut out heart or score points for hitting numbered hearts on a door or wall.

2. Valentine Bend Game IN-32/1263

This is for two players –  a Valentine version of a popular game.

3. Valentine Cupid Arrow Missiles IN-32/1471

These are fun to fly into a heart decorated box or basket.  Also, play a team game and fly them to the opponents side. (like a snowball fight) After 3-5 minutes, the team with the least number Arrow Missiles on their side wins.

4. Inflatable Valentine Game IN-32/1278

This is all done for you. Just play and have fun!

5. Valentine Bean Bag Toss Game IN-32/1546

Everything is included and ready to play.

6. Heart Ring Toss  IN-32/4054

7. Valentine Disk Shooters IN-32/1526

These are fun to shoot through a hula hoop or heart!

8. Inflatable Valentine Octopus Ring Toss  IN-32/305

9. Valentine Bingo  IN-32/1548


 The list has now grown to more than 40!

Do you have more ideas for games that I could add?

For more updates, subscribe to this website!


Have fun!

Happy Valentine’s Day!


 Phyllis


This post is linked to the following parties…..


Posted in Games, Holidays, Valentines | Tagged , , , , , , , , , , , , | 49 Comments

Mexican Chicken Taco Soup

Mexican Chicken Taco Soup

I love an easy soup!! This Mexican Chicken Taco Soup is easy, fast, and delicious! You can make it as hot or mild as your family likes it. I used left-over chicken, but it’s just as good with turkey, hamburger, or pork!
Once when I had extra pulled pork, I used the leftovers and made “Mexican Pork Taco Soup”! It was just as good.

OK, back to the Mexican Chicken Taco Soup! Here’s the basic recipe!

Mexican Chicken Taco Soup

1 Bottle or Can (32 0z) V8 Juice

1 -1/2 pounds of cooked chicken, turkey, pork or hamburger (you can use cubed or shredded meat)

1 packet of favorite taco seasoning

1 jar (16 oz.) salsa (mild, medium or hot – your choice)

1 can (15 oz.) black beans, rinsed and drained (you can also add any other beans along with the black beans))

1 can (15 oz.) of corn, drained or 1 package 16oz. frozen corn, thawed.

Toppings for Serving:

Shredded Cheddar Cheese and Sour Cream for garnish on top of soup.

Optional: Chopped fresh cilantro or chopped parsley.

Directions:

In a large skillet, saute uncooked chicken, turkey, or pork in 2 T. oil until no longer pink or use left-over cooked chicken, turkey, or shredded pork. I use a slow cooker and along with the cooked meat, add V8, corn, salsa, and beans. Mix in the packet of taco seasoning, and cook on low for 3-4 hours until heated through.

To serve Mexican Chicken Taco Soup, top with shredded cheddar cheese and a dollop of sour cream. Garnish with chopped cilantro or parsley, if desired.

Our family really enjoys this soup! I hope you do too!

Phyllis

Posted in Home, Recipes, Soups & Stews | Tagged , , | Leave a comment

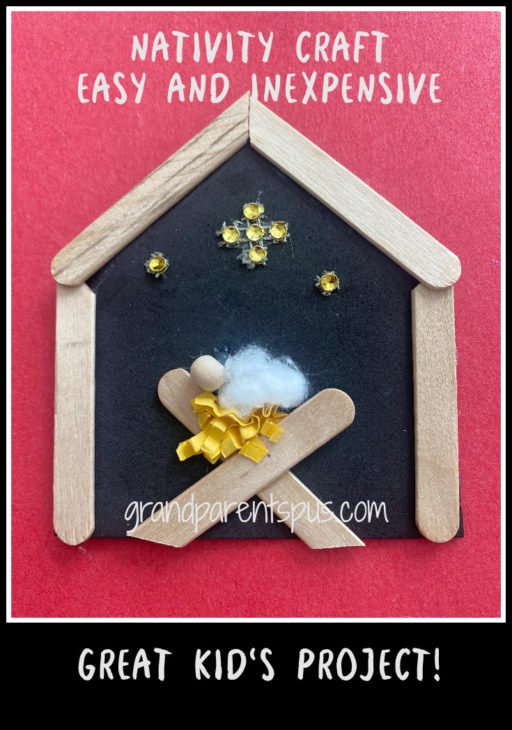
Nativity Craft – Easy and Inexpensive

I often work with a whole group of kids and whatever the project, it needs to be both easy, fun, and inexpensive. This Nativity Craft works well with a group of elementary kids because it fulfills those exact requirements that I mentioned.

Depending on how much time you have, the project can be shortened by preparing some of the pieces ahead of time. ( which I recommend) Precut the sticks and have a template made for the black foam piece. It mades it easier to do in a short timeframe. In the midst all the kid chatter, they got it done, and had fun making the craft, too!

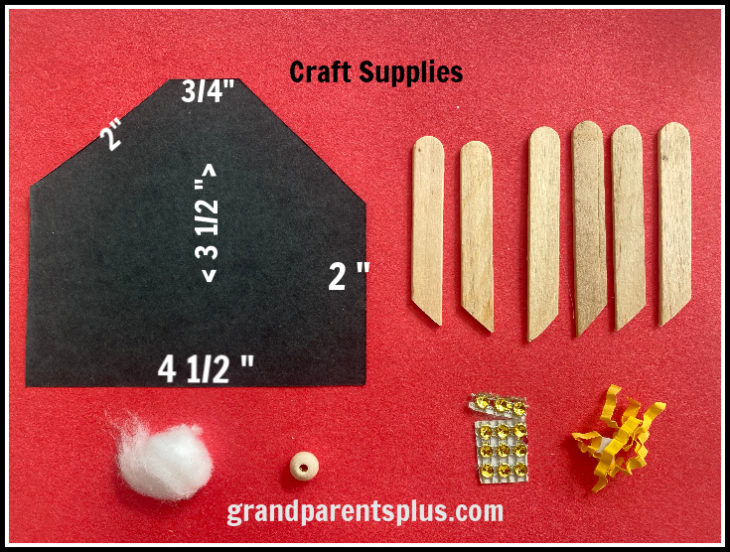
Items needed:

1.Black foam sheets or black construction paper

2. Wooden Popsicle Sticks

3. Cotton Ball

4. .8 mm wooden beads

5. Sparkle dots (I found a sheet at Dollar Tree)

6, Hay ( shredded colored paper or shredded tissue paper)

7. Tacky Glue or Glue Gun

Directions:

  1. First, pre-cut the wooden popsicle sticks at a 45 degree angle. Four larger ones measure 2 1/4″ from rounded end to the longest cut tip. The two shorter ones measure 2″ long.
  2. Next, using a template for the manger, trace and cut out of the black foam. Kids can easily trace a pre-made pattern on the black or have these precut for them to use. It depends on the time factor that you have with the kids. Dimensions are: Base: 4 inches, sides are 2 1/4 inches.
  3. Glue the four longer sticks on the outside and top of the manger.
  4. The two smaller sticks criss-cross for the manger.
  5. Now, add the “hay”. Use crumpled shredded paper, real hay, or whatever you find that looks like hay.
  6. Also, form the cotton ball to look like a baby in a blanket and glue the wooden bead on for the head.
  7. Glue all the pieces on the manger and add the stars. The sparkle dots can form the big star and single ones can be added, too.
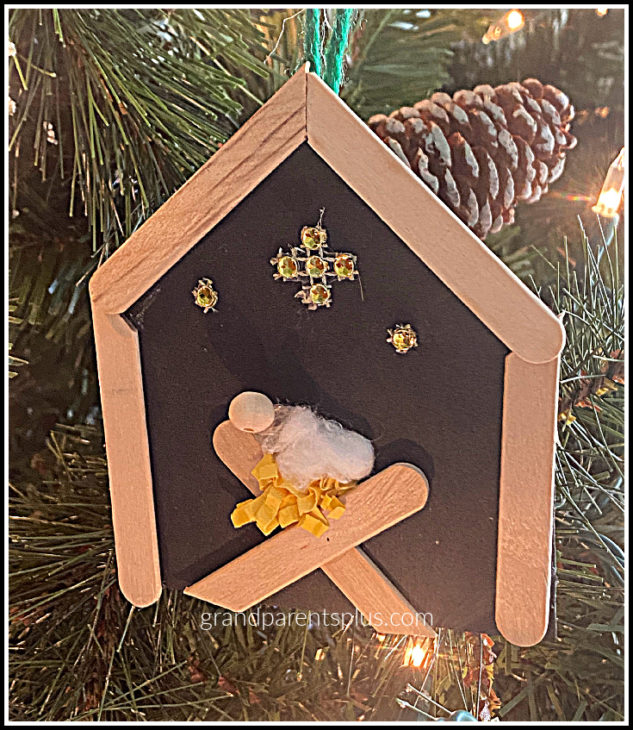
  8. At the end, glue a piece of yarn on the back for a hangar.
  9. Finally, hang on the tree and celebrate the real reason for the season!
Nativity Craft on the Tree

See how easy and inexpensive this is to do?

Enjoy other posts for Nativity Crafts here .

Also, enjoy Best Nativity Crafts.

Enjoy! Remember the real reason for the season!

Phyllis

Posted in Art Project, Christmas, Crafts, Home | Tagged , , , , , , , | Leave a comment

DIY Gift Bags

DIY Gift Bags are fun to make, easy to use and delightful to receive! They make gift-giving even more special when it’s in one of these cute DIY Gift Bags! Kids can make them, too. It is a wonderful classroom or individual project. 

I started by making a snowman gift bag  Then I made an Olaf one and couldn’t stop with the ideas. So now, you also have a reindeer, penguin, puppy and Santa! )


DIY Gift Bags grandparentsplus.com

Materials are inexpensive and easily found. The bags are under $2.00 for 50 in the grocery department of Walmart next to the regular lunch bags. Other materials include fun foam or construction paper, felt, and glue (if using foam, be sure you use a special glue).  I used a combination of fun-foam and construction paper on these samples, but if you’re doing it in a classroom, all construction paper works fine and keeps the cost down.

Personally, I like a bit of dimension that the combination gives. For kids, it is harder to cut and more expensive to use the foam.

First, gather all your materials…..
Fun foam or construction paper, white bags, scissors, glue, pom-poms, cotton balls, permanent marker and felt

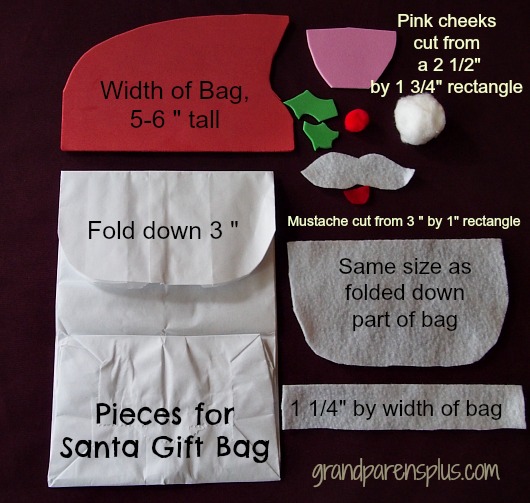
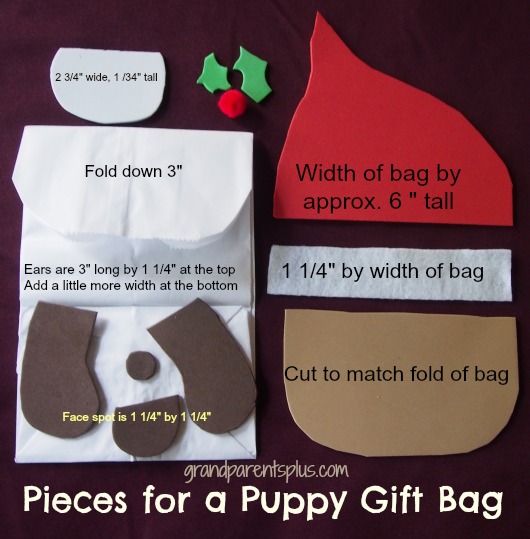
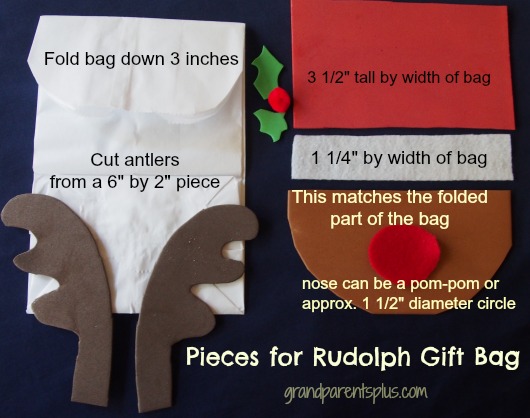
On the following pictures, there are approximate sizes for each piece. 
Santa Gift Bag


DIY Gift Bags  grandparentsplus.com

 Puppy Gift Bag


DIY Gift Bags   grandparentsplus.com

Rudolph or Reindeer Gift Bag  


DIY Gift Bags  grandparentsplus.com

Penguin Gift Bag 

The only difference for the Penguin Bag is the face piece. Cut from a piece of white  3 1/2 inches by  2  3/4 inches. The orange triangle beak is 3/4 in. by 3/4in.

On the Santa and Penguin bag, add a touch of blush on the cheeks with a q-tip. 

When you have placed the gift in the bag, secure on the sides with a small amount of tape. Now, watch for the comments on your cute DIY Gift Bags. These aren’t just for kids! 


DIY Gift Bags   grandparentsplus.com

Enjoy!

Phyllis  

This post is linked to many of the following parties…..

Posted in Art Project, Christmas, Crafts, Holidays | Tagged , , , , , , , , , , , , | 9 Comments

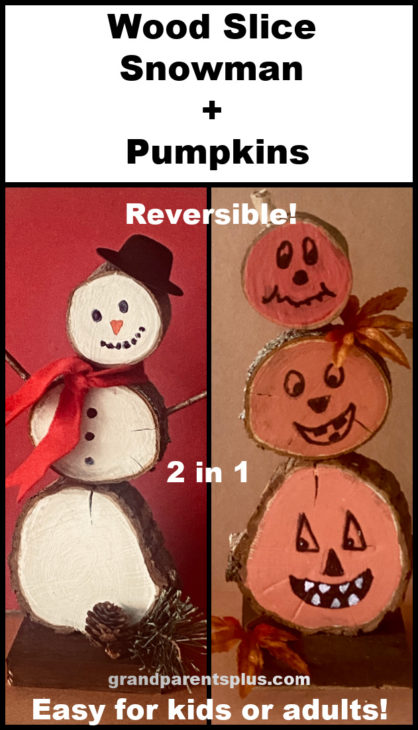
Wood Slice Snowman and Pumpkins DIY Craft

Easy for kids to make!! 2 decorations in 1! Reversible!

The Wood Slice Snowman and Pumpkins DIY craft is an easy, inexpensive, and fun DIY craft for adults, yet, it is adaptable and simple enough for kids, too!

I’m always looking for craft ideas that kids or adults can: 1. easily made, 2. looks good, and 3. inexpensive to do! (my three requirements) The Wood Slice Snowman and Pumpkins meet the requirements on all three counts!

Since I have a group of 20 kids (1st-5th) that I work with at church, those three requirements are very important (especially for the budget). While searching for ideas, I came across this post on The Craft Patch. I adapted it, made it easier, and kept costs down. You can certainly buy slices of wood and make it any size, but I like it low cost! How about you?

Here’s how……

First, take a walk in the woods and you’ll find lots of downed branches. It doesn’t matter if they’re different kinds of wood. In fact, the different bark textures make it interesting. Gather three branches of graduated sizes: small, medium, and large. My sizes ended up being approximately 2 1/4″, 3 1/4″, and 4″ diameter. I cut them into 1 inch slices. (a table saw works best) This is all free wood! Yea! Caution! Only adults should use the power tools! Be safe!

(If you don’t want cracking, use the product Pentacryl available at Home Depot)

No woods? Well, you can certainly buy the slices as well at crafts stores like Hobby Lobby and even Amazon! The wood slices are not 1″ thick, however.

Next, gather the materials needed.

1. Wood Slices : small, medium, and large. Mine were 2 1/4″, 3 1/4′, and 4″ diameter

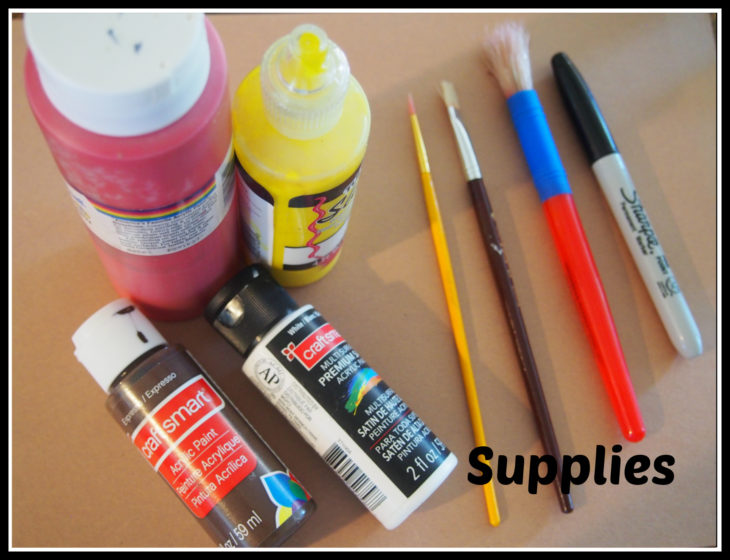
2. Acrylic paint: white, orange, black, brown

3. Paint brushes: small and medium

4. Permanent Black Markers: fine and regular

5. 1/4 ” dowel cut to sizes long enough to fit into both ends of wood slices

6. Drill: use bit for the size of the dowel

7. Extras:

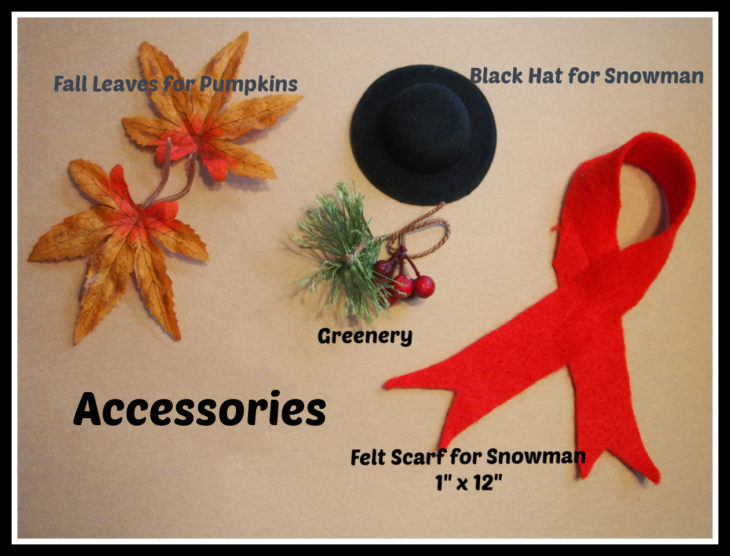
Small felt hats for the wood slice snowman are available on Amazon. Stocking caps, socks or mitten ends work depending on the size of your project.

Red felt or plaid material cut to size for the snowman’s scarf

Add fall leaves and Christmas greenery for decoration. (optional)

Now, it is time to drill, paint, and assemble the craft! Adults need to pre-drill for the kids!

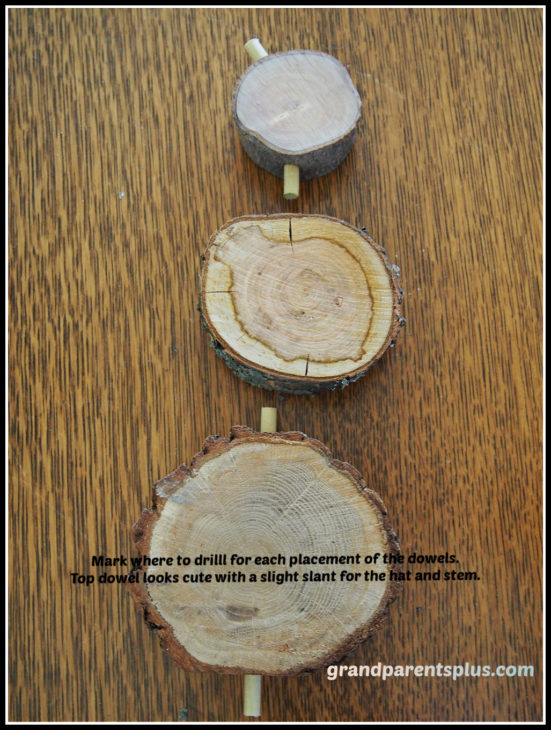
  1. Pre-drill the holes for the dowels to connect each wood slice and the base. Be sure to align pieces with a ruler and mark together with a pencil on how you want them to appear. On the top slice, make it a bit off center for the hat/ stem.
  2. Cut a wood base according to the size of your wood slices. You want a good solid base. Mine is approx. 3 x 4 inches.
  3. Paint wood base brown or black.
  4. Paint the inside of the wood slices white on one side (for the Wood Slice Snowman) Let it dry, and then paint the other side orange (for the Wood Slice Pumpkins) . It is easier to paint the wood slices when they are apart.
  5. When both sides are painted and dry, use a pencil to lightly mark the features you want on each side. Look at where the hole is for the dowel and use that line for the center of the faces.
  6. Using a permanent fine or medium marker, go over the pencil marked features for each slice. Be sure you have them in the order you want.
  7. When the face is completely dry, draw the features for the other side. Again, pay attention to the hole for the dowel and make that the center line for making the faces on the other side. On the snowman, make only one face on the top, small, wood slice and draw buttons on the medium wood slice.

I’ve included some links for face ideas to use for the Wood Slice Snowman and the Wood Slice Pumpkins, For kids, the best outcome is to keep it simple! If there’s a mistake, start over and paint with the acrylic again!

Check out these links for ideas…..

Snowman Faces

Pumpkin Faces

For the Wood Slice Snowman, add a small felt hat! I found these on Amazon on the link below.

Mini Black Felt Hats

Finally, connect the sections together with the dowels. Add a pumpkin “stem” by drilling a hole on top for another piece of dowel for the pumpkin side and use the stem to hold the felt hat when using it for the winter. This decoration can last for 5 months! Just turn it around! Display it during Sept., Oct., and Nov. with the pumpkin side, and Dec., Jan., for the Snowman! When the holidays are over, take the pieces apart and store in a plastic bag for next year.

Enjoy!

Phyllis

Posted in Christmas, Crafts, Halloween, Holidays | Tagged , , , , , , , , , , , , , , , , , , | 1 Comment

Wizard of Oz Party

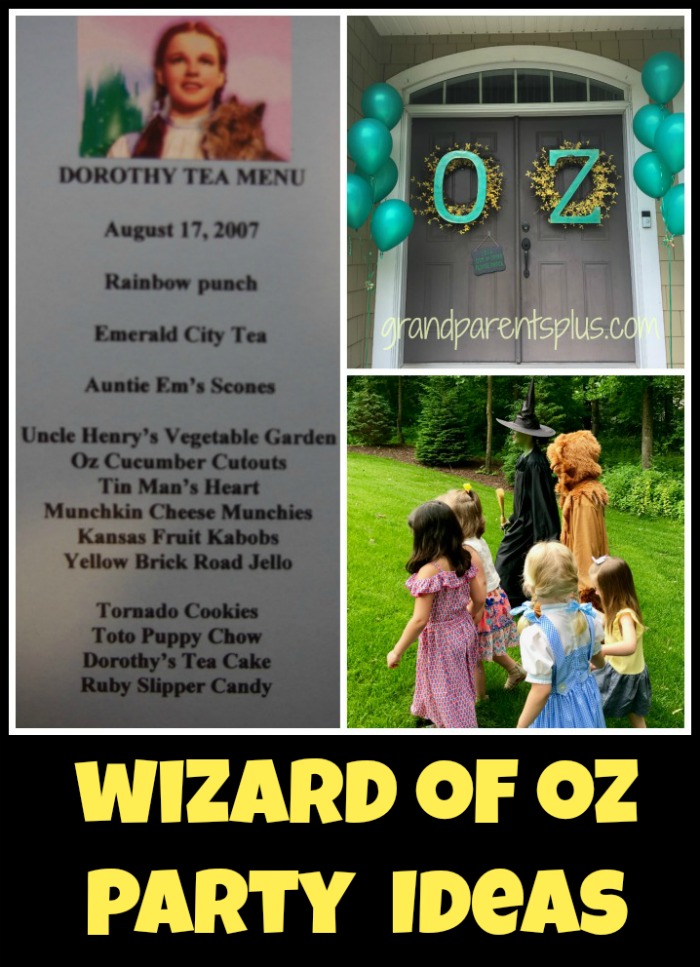
 A Wizard of Oz Party is a fun theme for a special kid’s birthday! Ideas for this party include decorations, games, food ideas and a spooky walk in the woods! What fun the kids will have!

Wizard of Oz Party Ideas grandparentsplus.com

There are lots of inexpensive posters to use for decorations to set the mood.

Wizard of Oz Party Ideas grandparentsplus.com

Posters can be found here.

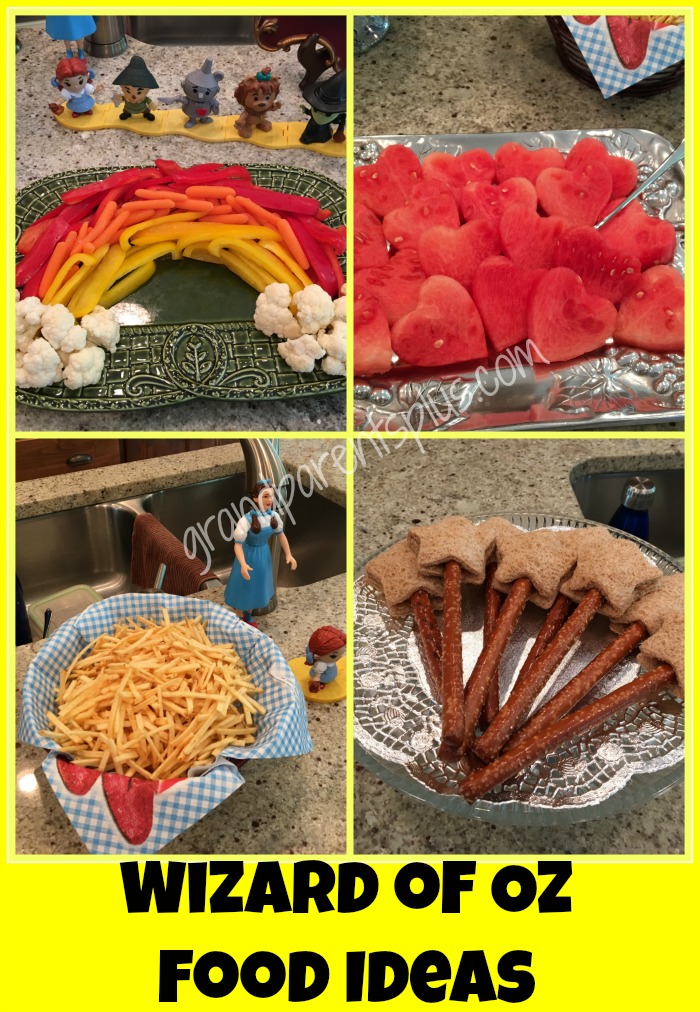
Wizard of Oz themed Food Ideas:

1. Uncle Henry’s “Over the Rainbow” – Garden Veggies arranged like a rainbow.

2.”Tin Man’s Heart” – Cut watermelon in heart shapes using a cookie cutter. Also, make small sweetened cream cheese open faced sandwiches with a “heart” strawberry on top.

3. “Good Witch” Magic Wands –  Make Peanut Butter and Jelly  star shaped sandwiches and put them on long pretzel sticks.  (Cut bread with a star shaped cookie cutter.)

4.  “Munchkin Munchies” – Scarecrow “hay”  potato sticks!

5.  Toto’s Puppy Chow – ( Puppy Chow recipe here)

6.  Yellow Brick Road Jello –  (lemon jello)  You can make these into “jigglers” or just jello cups.

7.  Emerald City Tea – Green Punch (lime)

Wizard of Oz Party Ideas - Food grandparentsplus.com

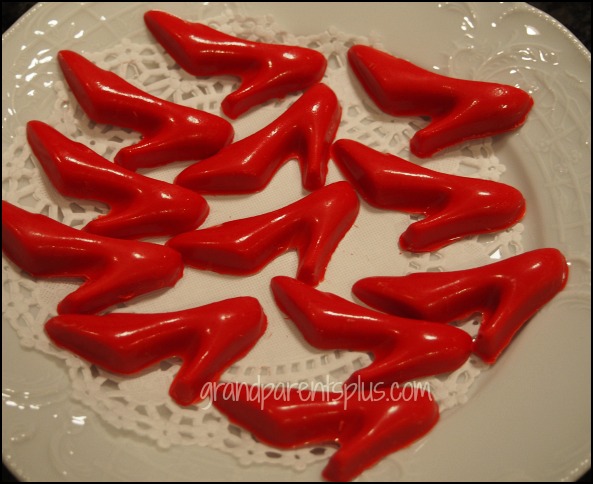
Of course, the party needs some Ruby Slippers!! Make Candy Ruby Slippers by using a plastic candy mold.

Wizard of Oz Party Ideas grandparentsplus.com

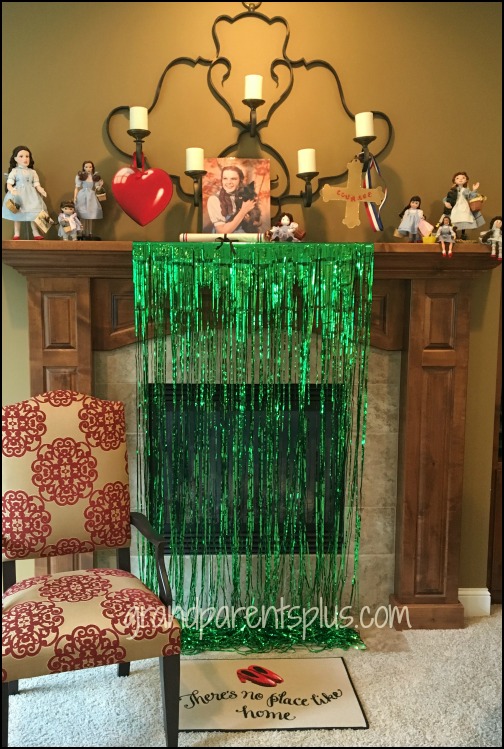
Wizard of Oz Room Decorations:

Set the stage using Dorothy dolls, a large heart, courage badge, and a certificate for the scarecrow’s brain! Of course, the green curtain is for the entrance to Emerald City!

Wizard of Oz Party Ideas grandparentsplus.com


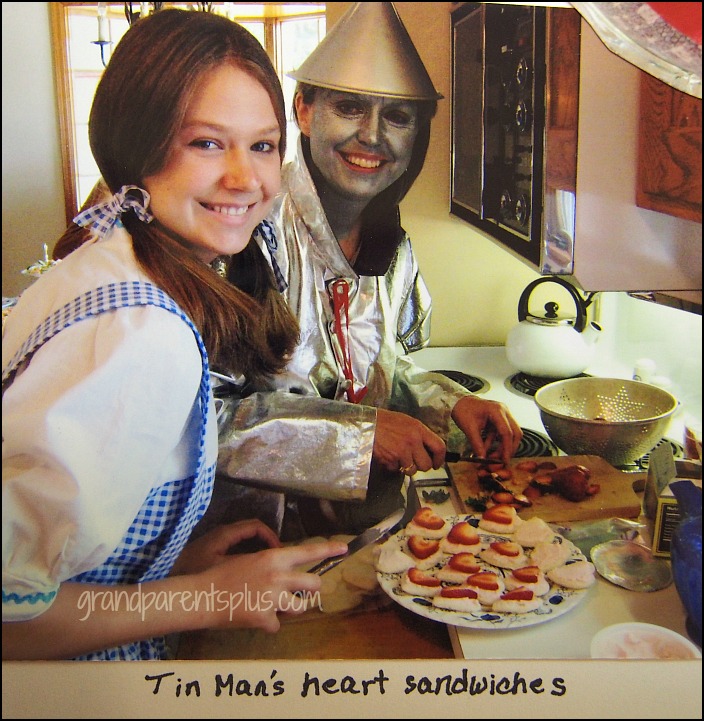
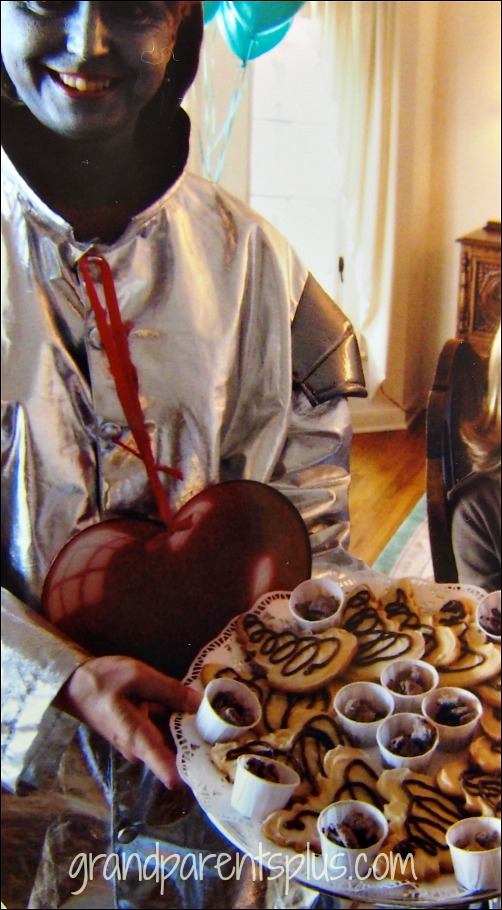
Neighborhood teens get in on the fun dressed like Dorothy and the Tin Man.

Wizard of Oz Party Ideas grandparentsplus.com

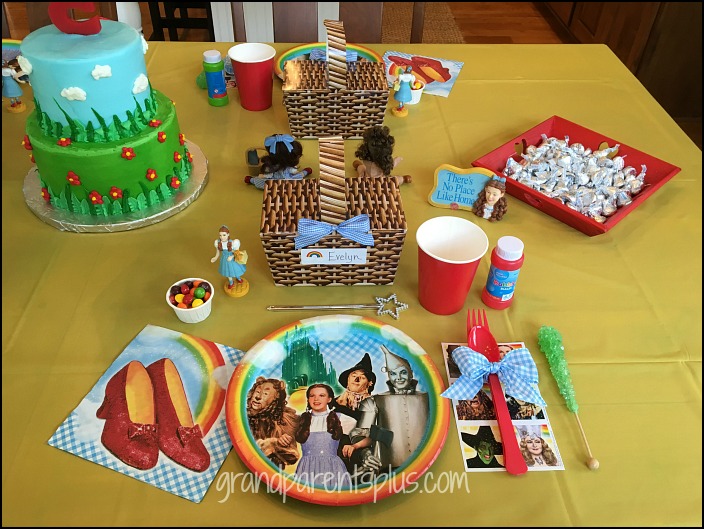
Wizard of Oz Table Setting!

Wizard of Oz Party Ideas grandparentsplus.com

For dessert, there’s Tornado Cookies!  Make these cookies using a Christmas Tree cookie cutter. Just bend the cutter a bit to look like a tornado. Finish it off with a swirl of chocolate on top! Yum!

Wizard of Oz Party Ideas grandparentsplus.com

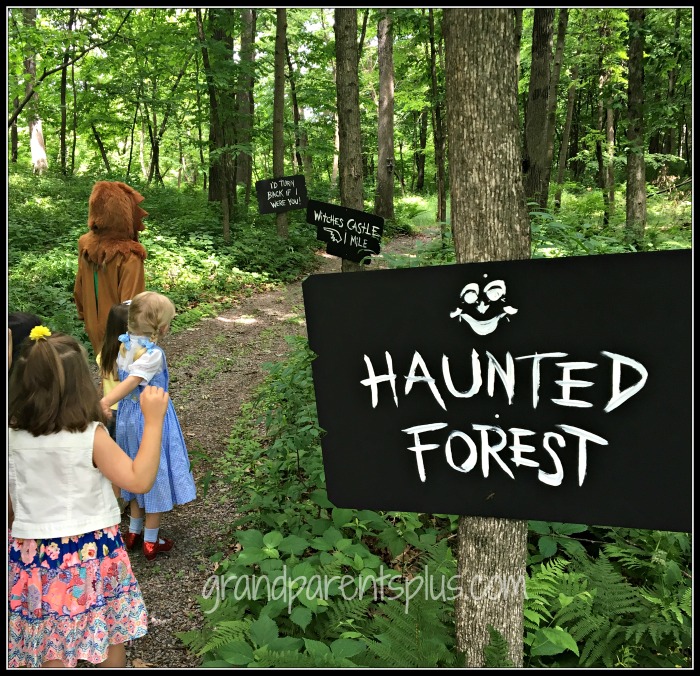
A wooded backyard makes a perfect spot for a walk through the Haunted Forest. Who knows what they’ll see? Signs warn about the “Haunted Forest”.

Wizard of Oz Party Ideas grandparentsplus.com

For the walk in the woods, a neighborhood friend poses as the Wicked Witch. Kids recognized her so they weren’t scared.

Game Ideas:

Check these sites out for lots of games:

DIY Party Mom

I hope these Wizard of Oz party ideas will help with the planning of your own child’s birthday party. Have fun! It is a fun birthday party to remember!

Well, “I’m off to see the Wizard, the wonderful Wizard of Oz!”

Enjoy!

Phyllis

Posted in Games, Misc., Uncategorized | Tagged , , , , , , | Leave a comment

Thanksgiving Devotional for Families

Five Grains of Corn

This true Thanksgiving story makes a great Thanksgiving Devotional for Families.

Thanksgiving Devotional for Families    www.grandparentsplus.com


In early New England at Thanksgiving time it was customary to place five grains of corn at every plate. It was a  reminder of those stern days in the first winter when the food of the Pilgrims was so depleted that only five grains of corn were rationed to each individual at a time. They wanted their children to remember the sacrifices,the sufferings, the hardships which made possible the settlement of a free people in a free land. They did not want their descendants to forget those days when only seven healthy colonists remained to nurse the sick, and nearly half their number lay in the “windswept grave yard on the hill.” The use of five grains of corn placed by each plate was a fitting reminder of a heroic past.

Place 5 grains of corn at each place-setting. Read the story above and have each person share five things they are thankful for this Thanksgiving. Perhaps there have been hardships this past year for your family, but remember God’s blessings through both the good and bad times.

After each person shares 5 blessings around the table, read the Thanksgiving Proclamation by George Washington

By the President of the United States of America, a Proclamation.

Whereas it is the duty of all Nations to acknowledge the providence of Almighty God, to obey his will, to be grateful for his benefits, and humbly to implore his protection and favor– and whereas both Houses of Congress have by their joint Committee requested me to recommend to the People of the United States a day of public thanksgiving and prayer to be observed by acknowledging with grateful hearts the many signal favors of Almighty God especially by affording them an opportunity peaceably to establish a form of government for their safety and happiness.

Now therefore I do recommend and assign Thursday the 26th day of November next to be devoted by the People of these States to the service of that great and glorious Being, who is the beneficent Author of all the good that was, that is, or that will be– That we may then all unite in rendering unto him our sincere and humble thanks–for his kind care and protection of the People of this Country previous to their becoming a Nation–for the signal and manifold mercies, and the favorable interpositions of his Providence which we experienced in the course and conclusion of the late war–for the great degree of tranquility, union, and plenty, which we have since enjoyed–for the peaceable and rational manner, in which we have been enabled to establish constitutions of government for our safety and happiness, and particularly the national One now lately instituted–for the civil and religious liberty with which we are blessed; and the means we have of acquiring and diffusing useful knowledge; and in general for all the great and various favors which he hath been pleased to confer upon us.

and also that we may then unite in most humbly offering our prayers and supplications to the great Lord and Ruler of Nations and beseech him to pardon our national and other transgressions– to enable us all, whether in public or private stations, to perform our several and relative duties properly and punctually–to render our national government a blessing to all the people, by constantly being a Government of wise, just, and constitutional laws, discreetly and faithfully executed and obeyed–to protect and guide all Sovereigns and Nations (especially such as have shewn kindness unto us) and to bless them with good government, peace, and concord–To promote the knowledge and practice of true religion and virtue, and the encrease of science among them and us–and generally to grant unto all Mankind such a degree of temporal prosperity as he alone knows to be best.

Given under my hand at the City of New York the third day of October in the year of our Lord 1789.

George Washington

(For small kids, simplify the words and explain what they mean)


Kids at school are reminded to be thankful for what we have, but who do we thank? The Bible says to thank the Lord God Almighty!

Great Bible verses to read:   (There are so many, but here’s a few…)

Have these each on a slip of paper at each place.  Go around the table and each person reads their verse.

Now, our God, we give you thanks, and praise your glorious name
Psalm 69:30

I will praise God’s name in song and glorify him with thanksgiving.
Psalm 95:2

Let us come before him with thanksgiving and extol him with music and song.
1 Chronicles 16:34

Give thanks to the Lord, for he is good; his love endures forever.
Psalm 9:1

 I will give thanks to you, Lord, with all my heart; I will tell of all your wonderful deeds.
Psalm 7:17

I will give thanks to the Lord because of his righteousness; I will sing the praises of the name of the Lord Most High.

Colossians 3:15

 Let the peace of Christ rule in your hearts, since as members of one body you were called to peace. And be thankful.

1 Corinthians 15:57

But thanks be to God! He gives us the victory through our Lord Jesus Christ.
Ephesians 5:20 always giving thanks to God the Father for everything, in the name of our Lord Jesus Christ
Psalm 100

Hope this gives you some ideas for your Thanksgiving Devotional time at your family table.

 Happy Thanksgiving!

Phyllis


Thanks to those who subscribe, follow on Pinterest or Bloglovin.


This post linked to these parties…..


Posted in Thanksgiving | Tagged , , , , , , , , , | 8 Comments

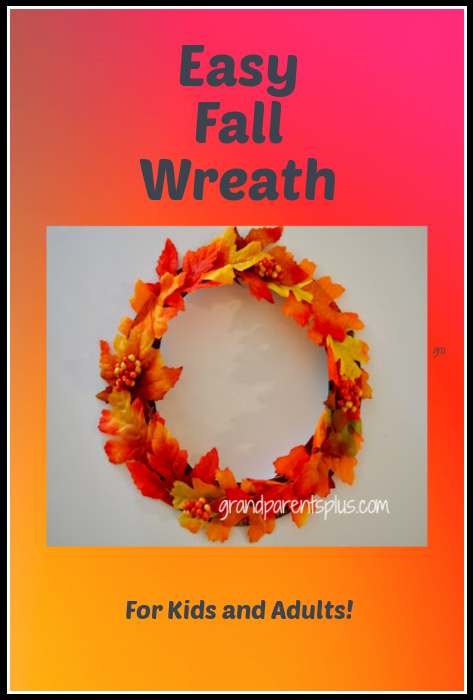
Easy Fall Wreath

Easy and Colorful Fall Wreath


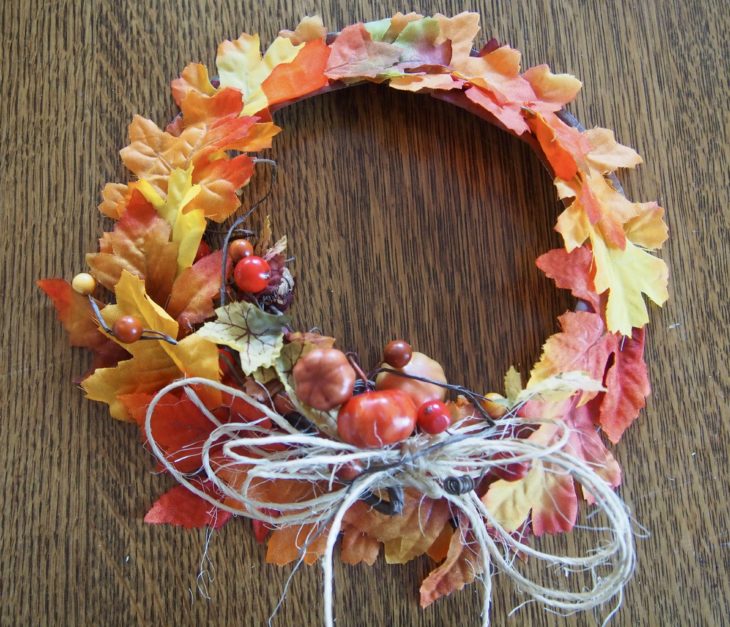
Whether you’re looking for a kid or adult craft, this one is easy for both! This wreath can be dressed up with raffia bow or left simple to surround pumpkins or candles.

First, cut out the center of a paper plate. Make sure it is a sturdy one; not flimsy! You want it to hold its shape so you can hang it!

Next spray paint the plate with a dark brown or black color. If you’re working with kids, they can use washable markers and color the edges. This hides any space that might be missed with the addition of the leaves. It helps to do both sides.

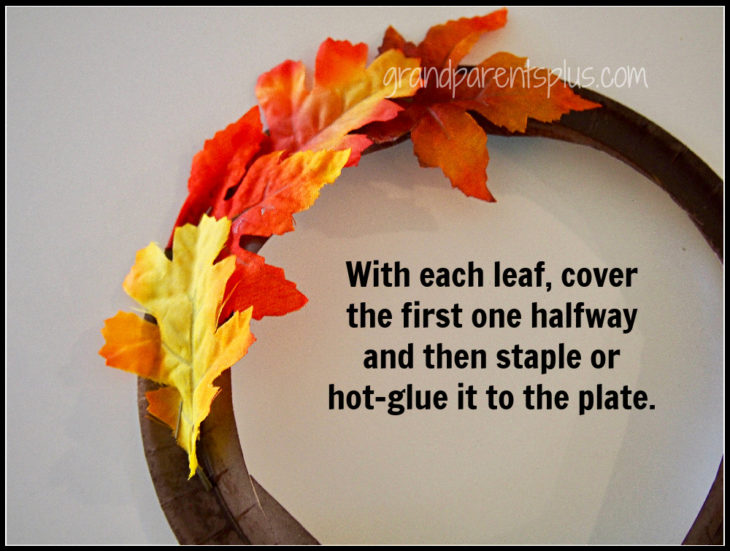
Then, start with the colorful leaves and either staple them on or hot glue them. Be sure to overlap half-way making sure there is good coverage with the leaves. When we did this with a group of elementary kids, they used the stapler as it was much easier and there was no danger with the hot glue!

Continue all the way around the plate. At the end, tuck in the last leaf at the starting point so it looks continuous all the way around. Final touch is to add a bow and a small fall pick.

Now, that’s easy!

You may have some artificial fall leaves already. If not, you can get 100’s through Amazon.

Enjoy and have fun!

Phyllis

Posted in Crafts, Halloween | Tagged , , , , , , , , , , | Leave a comment

Rhubarb Crisp – Quick and Easy!

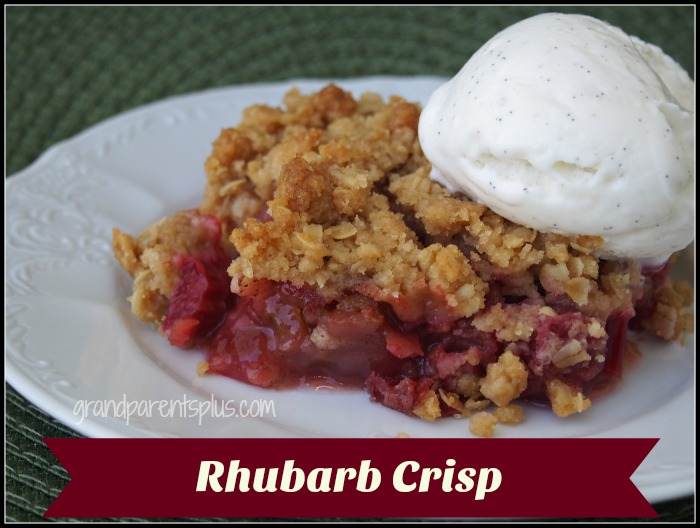
At the beginning of summer, I  look forward to making and especially eating a delicious rhubarb crisp dessert. I enjoy one with a nice crisp topping. Some rhubarb recipes have a soggy crust, but I prefer it crisp and crunchy! In this recipe, the bit of tang that the rhubarb gives is enhanced by the added cinnamon. The sweet, crispy, crust tops it off perfectly! Add whipped cream or ice cream and enjoy!

This recipe is one I have used for years. It’s a old family favorite. I hope you’ll try it! I think it will become a favorite of yours as well.

.

Rhubarb Crisp – Quick and Easy!

Ingredients

  • Topping:
  • 1 cup flour
  • 1/2 cup quick rolled oats
  • 1 cup brown sugar
  • 1/2 cup butter (1 stick)
  • Filling:
  • 4 cups of rhubarb (cut in small chunks)
  • 1 cup sugar
  • 1/4 cup flour
  • 1/2 tsp. cinnamon

Instructions

  1. Preheat over to 375 degrees.
  2. For the topping, combine the dry ingredients well.
  3. With a fork, stir in soft butter to make a crumbly mixture.
  4. Filling:
  5. Combine all the ingredients and mix well. Pour combined filling into a lightly greased 8x8 pan.
  6. Sprinkle the topping evenly over the filling.
  7. Bake uncovered for 35 minutes at 375 degrees. Topping should be a golden brown.
  8. Serve with ice cream or whipped cream.
Schema/Recipe SEO Data Markup by Yummly Rich Recipes

https://grandparentsplus.com/rhubarb-crisp-quick-and-easy/

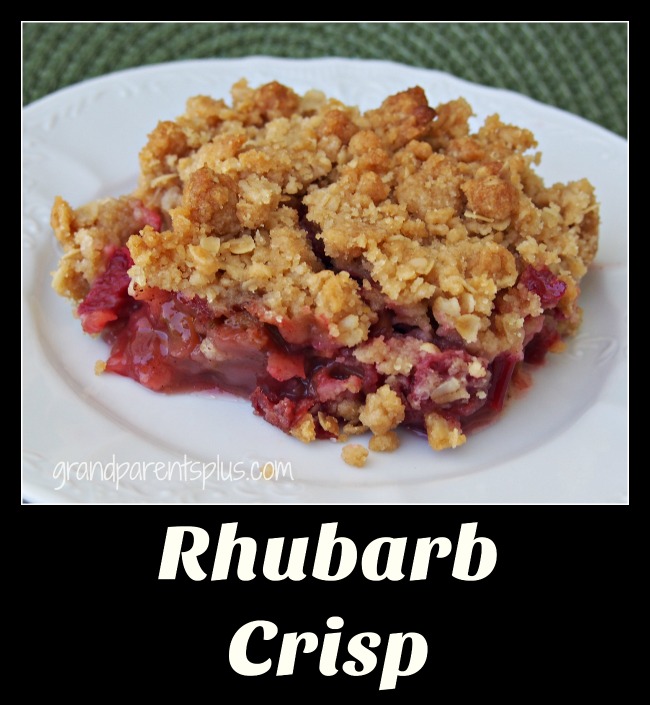
Enjoy your Rhubarb Crisp with ice cream or whipped cream! YUM!


Rhubarb Crisp grandparentsplus.com


I love this recipe!


Phyllis

Posted in Desserts, Recipes | Tagged , , , , , , , , | 1 Comment